Replies sorted oldest to newest

I'm told that to be sold in the U.S nowadays, a gauge must be within 2% accuracy or better. So any gauge you find at Kragens etc will be more accurate than the stocker. On the back of the block is an electric sender threaded 1/4 SAE pipe. At a hardware store, buy a 1/4" close- nipple and a 1/4" pipe tee, with some teflon pipe tape. Brass is better than iron. Thread the nipple into the block. Thread the tee fitting onto the nipple with one opening pointed up and the second to the side. Thread the electric sender into the side of the tee and the mechanical gauge on the top of the tee. Now your in-dash gauge will tell you the engine's running and the mechanical gauge will tell you how much pressure you have. Within a few minutes, you'll be able to get a rough calibration for driving. FWIW, almost all in-dash gauges read low- some about 50% of reality. There is no known fix for a stock gauge: it's a gauge-sender mismatch.
Sure, liquid filled gauges are nice but more expensive and not vital. My $12 undamped gauge from Kragens is now 18 years old riding back there on the block, and is still more accurate than the stock in-dash gauge....
Rule of thumb for Ford engines: if the gauge is accurate and reads lower than 10 psi at idle or lower than 30 psi at 3000 under load, drive directly to your friendly engine overhaul shop 'cause it needs expert attention! A strong motor will give around 20 psi at idle and 60-80 psi above 3000 under load. Note- these numbers are meaningless with a normally inaccurate stock gauge. Many stock gauges will not show above 40 psi when first fired up, even with a new engine!
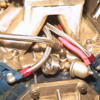
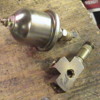
...Wanted Pictures? You got Pictures!! Jack was 'Dead-On! The original gauge reads 40 lbs. at first fire-up, while the Mechanical reads 80+ lbs. And the Original stays at 40 lbs. when Hot and at an Idle! Obviously I can't tell You what the Mechnical reads while driving. Since I needed a third port for the 'Oil By-Pass'; I took a vintage Bronz 'T' fitting and drilled and tapped the side for a 1/8 NPT-45 Degree Elbow, to mount the 'Back Mount' Gauge. Yes! What protruded into the Bore was reemed clear! Machinists can do that! The second picture shows the new sender for a red led Digital gauge, soon to be installed. Think that will be acurate? H*ll Yes!! In the second picture you also see another 'T' that I had laying around My shop, the 1/8 NPT already tapped in, and has a 1/4 NPT extension on it. If You want it, it's yours, or if you want a 'T' WITHOUT the 4th port, I have many of those, also. Just give me Your mailing address and I'll send Them right off to You! At MY expenss! I guess I'am just feeling like a 'Nice Guy', Today; and You live in The Great State of California. The Sender is NOT included. My Email: pantera1974@verizon.net ...

Attachments

Images (1)
  • sendr_001
For those that are interested, I thought I would close the loop on this thread I started, by showing what I did. Taking Jack's advice, I looked for an inexpensive gauge and found a Moroso analogue gauge at Summit (part# MOR-89611) for $35 including S&H. It measures upto 120 PSI. It's perfect in that it has nothing on the back of the guage but a 1/4" threaded input. I then bought a 1/4 - 3/8 adapter at Ace Hardwear, and screwed it in. Simple even for me. My Veglia gauge shows 45 - 50 PSI at startup, the Moroso shows 60+ PSI. But then once warmed up, there's really no predicitng what the Veglia gauge will show, usually something like 35 PSI.

Attachments

Images (1)
  • HPIM0241resize
Post
×
×
×
×
Link copied to your clipboard.
×