

YEAH! Small hands. Reminds me of the time I convinced the wife to reach through the quarter window space and put her thumb over #1 cylinder while I was preparing to turn the engine with the ratchet and explaining to her to let me know "when the air blows your thumb off". The last I saw her she was slamming the door from the garage to the utility room. Guess I should have been more (or less) descriptive. First and last time assist!
I did the top clamp from inside the cabin and the bottom clamp from underneath. Takes a while!
quote:Originally posted by Rocky:
...Hot water (to help stretch hose over the water pump inlet - it's bigger than the stainless tube)
...Manual Heater Cutoff for Track Events
.
Is there any reason the stainless tube could not be made the same size as the pump inlet and a larger diamater hose used?
are you still using the remote heater control valve? if so, is it before the new shutoffs so that it recircs when "off" even when shutoffs are closed?
That's how my valves and shut-offs are configured.
I was told that the recirc system wouldn't pass muster at a track event even though it would keep 90% + of the hot coolant out of the cockpit (my estimate).
Rocky
On hose sizing - a person could do that, but I never even considered changing the stainless tube.... That looks like it would be a lot of (relatively precise, skilled) work. I never thought the hose install would be as hard as it was.
I knew the hose would go on..... But it was tough to do.
Making Progress.....
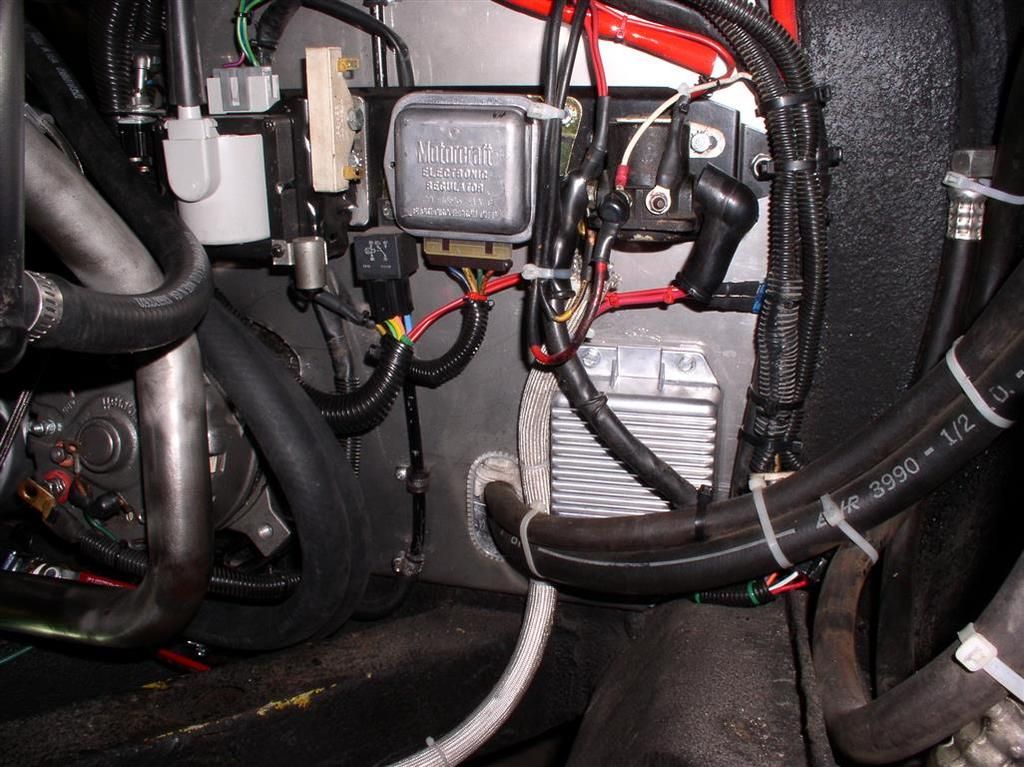
Bay Wiring Complete:
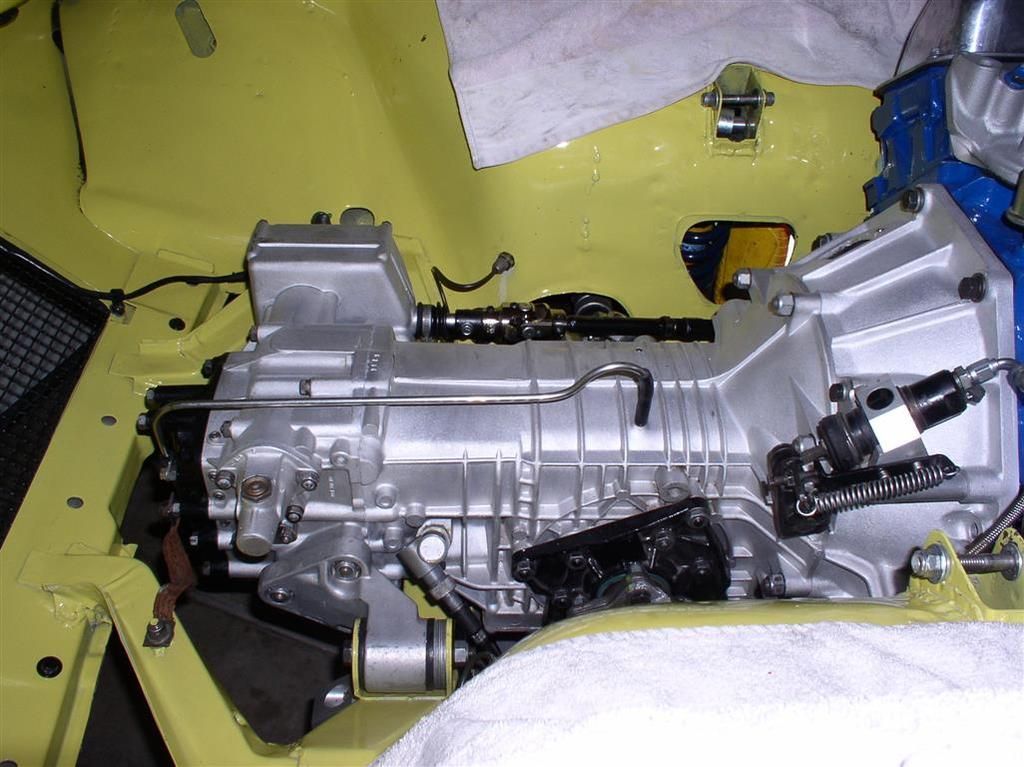
Flaming River Shifter U-Joints
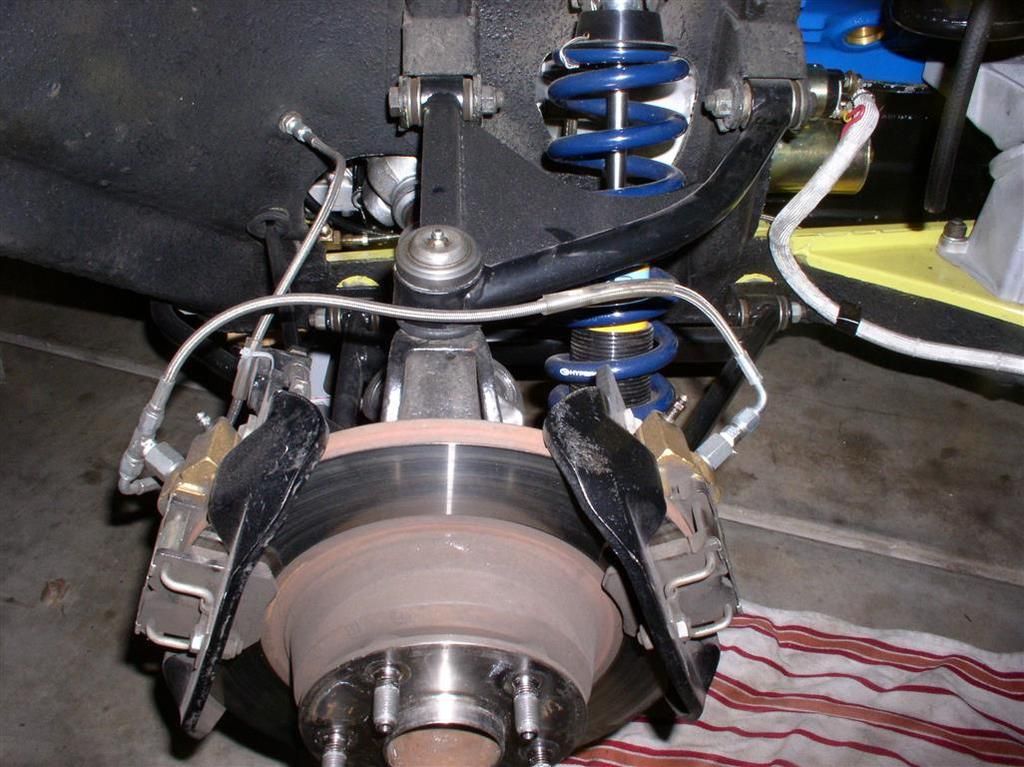
My Dual Stock Rear Calipers (Old School)
OK, Haters can hate, but I can lock up my rears if I want - I prevent this with proper settings on my proportioning valve.
I know I can get a lighter weight rear brakes setup, but I've got bigger fish to fry in the near term, plus this gives me an E-brake without a lot of screwing around.
Note the Remote Heater Valve (See POCA Jan 2016 Newsletter for fabrication instructions)
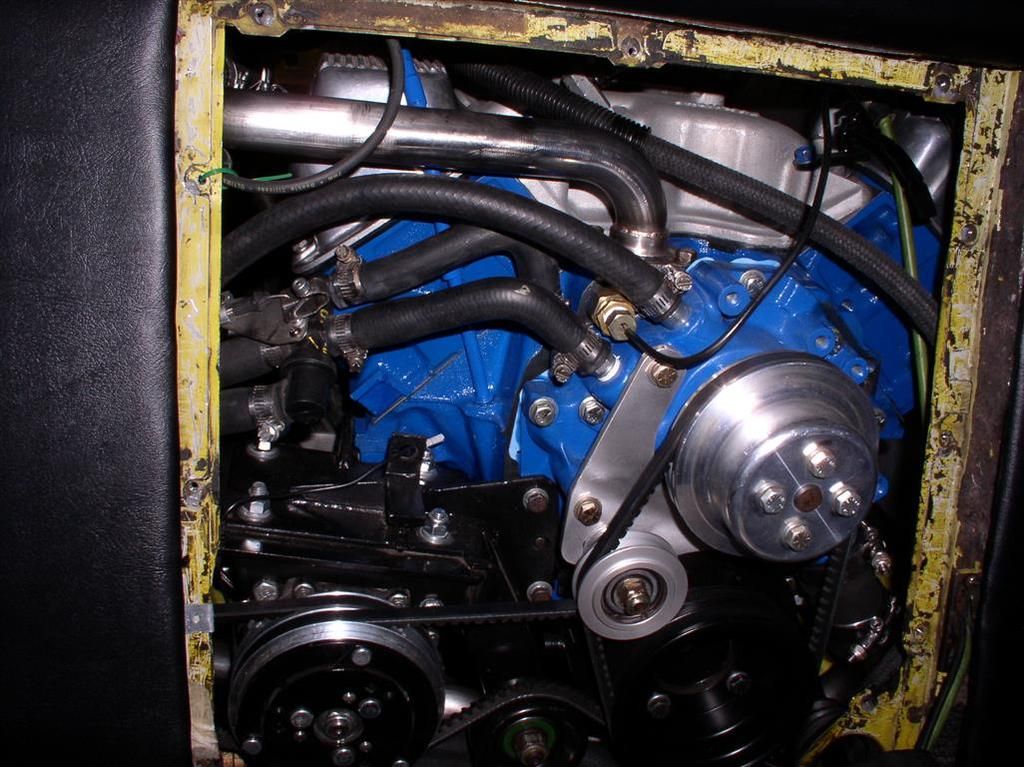
Carb, Oil& Dizzy...
Almost ready to start!
Bay Wiring Complete:

Flaming River Shifter U-Joints

My Dual Stock Rear Calipers (Old School)
OK, Haters can hate, but I can lock up my rears if I want - I prevent this with proper settings on my proportioning valve.
I know I can get a lighter weight rear brakes setup, but I've got bigger fish to fry in the near term, plus this gives me an E-brake without a lot of screwing around.

Note the Remote Heater Valve (See POCA Jan 2016 Newsletter for fabrication instructions)

Carb, Oil& Dizzy...
Almost ready to start!

All you are going to do is start a run on Pantera rear calipers with this one.
I intended to put front '67 Mustang calipers on additionally like you did but now this has me thinking.
Now exactly where am I going to get another rear set of calipers?
Dam you!
What struts are those, Aldens?
I intended to put front '67 Mustang calipers on additionally like you did but now this has me thinking.
Now exactly where am I going to get another rear set of calipers?
Dam you!
What struts are those, Aldens?
quote:Now exactly where am I going to get another rear set of calipers?
I'll bet all the vendors selling brake kits have a big pile of stock rear caliper sets. Guys that do them in the shop (Quella, Wilkensen, Byers) probably would love to get rid of them.
quote:What struts are those, Aldens?
Those are the Koni K30s and Hyperco springs. I got the set from Pantera Performance Center (Quella). It was completely set up - bolted right in.
quote:All you are going to do is start a run on Pantera rear calipers with this one.
What's old is new again. I believe this may have been one of the early brake upgrade mods popularized in the day. The availability of lightweight calipers made this trick go the way of the dinosaur.
Rocky
I noticed you have not hooked up the ignition resistor - just curious as what you have done?
JagCat -
So initially, when my ignition was set up, I reviewed George's Duraspark schematic, and saw that he uses the "official" Duraspark Coil (an oil-filled type), and an associated ballast resistor.
I set up my system initially with the ballast resistor but I decided to use the TFI (solid state) coil.
What I found was that at high RPMs, with the TFI coil, and ballast resistor, I would get an unexpected miss. It really disconcerting. I thought it was bad "lots of things" (wires, dist. cap, Duraspark module). What was funny was it would occur starting at high RPM, last for a while (until I stopped the car) and then start up and run fine, until the next time I got to high RPM.
I finally figured out that by removing the ballast resistor from of the circuit with the TFI coil, I solved the high RPM misfire problem. It seems to me it affects the charging current needed on the e-coils.
I just left the resistor in there, because I mounted it so nicely on that panel. The coil is bypassed by just shorting the two leads together, and tucking it into one of those harness sleeves.
Rocky
Rocky
"I'll bet all the vendors selling brake kits have a big pile of stock rear caliper sets. Guys that do them in the shop (Quella, Wilkensen, Byers) probably would love to get rid of them."
Every thing is good and fine until YOU want a set. Suddenly they become rare. SHEESH
Take my advice and post an ad here for them.
Every thing is good and fine until YOU want a set. Suddenly they become rare. SHEESH
Take my advice and post an ad here for them.
As it turns out, a couple of vendors REBUILD stock calipers for people that want their Pantera stock-looking (none are actually stock. of course). I know of one vendor that cannot keep stock rebuilt calipers on the shelf. So as you say Rocky- quadruple stock rear calipers are heavy but simple and it works. You can mod the design later.
I have backs that where rebuilt in 2000 and fronts too , back rotors. How much are they worth they have 60000. miles on them but look very good.
Rocky
Thank you for the quick reply for not using the ignition resistor. While I also used the Duraspark II module, George P's wiring diagram and TFI coil, I have not experienced the misfire; probably have not run the RPM's to the point of experiencing it. I'll watch for it.
Thank you
Thank you for the quick reply for not using the ignition resistor. While I also used the Duraspark II module, George P's wiring diagram and TFI coil, I have not experienced the misfire; probably have not run the RPM's to the point of experiencing it. I'll watch for it.
Thank you
I had no problems just motoring around town with the TFI coil and ballast resistor. I Think the solid-state coil has numerous advantages, that's why I went with it.
George and I had a (respectful) discussion about the Duraspark II wiring diagram and my associated modifications. George, rightly so, stated that if you monkey around with the proven design then "you pays your money and you takes your chances". I have to agree with him there.
regards
Rocky
George and I had a (respectful) discussion about the Duraspark II wiring diagram and my associated modifications. George, rightly so, stated that if you monkey around with the proven design then "you pays your money and you takes your chances". I have to agree with him there.
regards
Rocky
looking fantastic Rocky. Can't wait to hear the first fire report.
Rocky, what distributor are you using with this system?
Just a standard Duraspark (Ford Motorcraft) with the electronic pickup.
It's the same one that interfaces with the electronics box.
It was used on later model Ford cars and trucks (1975-1982 equipped with 351M, 400 or 460 V8).
Rocky
Check this thread, and search for Duraspark II
It's the same one that interfaces with the electronics box.
It was used on later model Ford cars and trucks (1975-1982 equipped with 351M, 400 or 460 V8).
Rocky
Check this thread, and search for Duraspark II
quote:Originally posted by Rocky:
Just a standard Duraspark (Ford Motorcraft) with the electronic pickup.
It's the same one that interfaces with the electronics box.
It was used on later model Ford cars and trucks (1975-1982 equipped with 351M, 400 or 460 V8).
Rocky
Check this thread, and search for Duraspark II
That is a small cap with what kind of spark plug terminals male or female?? Grey? That is Motorcraft brand?
Small cap, female terminals, grey cap...
Actually, the cap is a "Standard Motor Products" replacement cap.
Nothing fancy about it.
Rocky
Actually, the cap is a "Standard Motor Products" replacement cap.
Nothing fancy about it.
Rocky
It's Alive, Take II!
We fired it up tonight, it ran for a short while, but (like a moron), I had neglected to charge the battery!
Anyway - fired right up, and idled smoothly. An excellent sign.
More work tomorrow, I'll probably drive it!
WHOO HOO!
Rocky
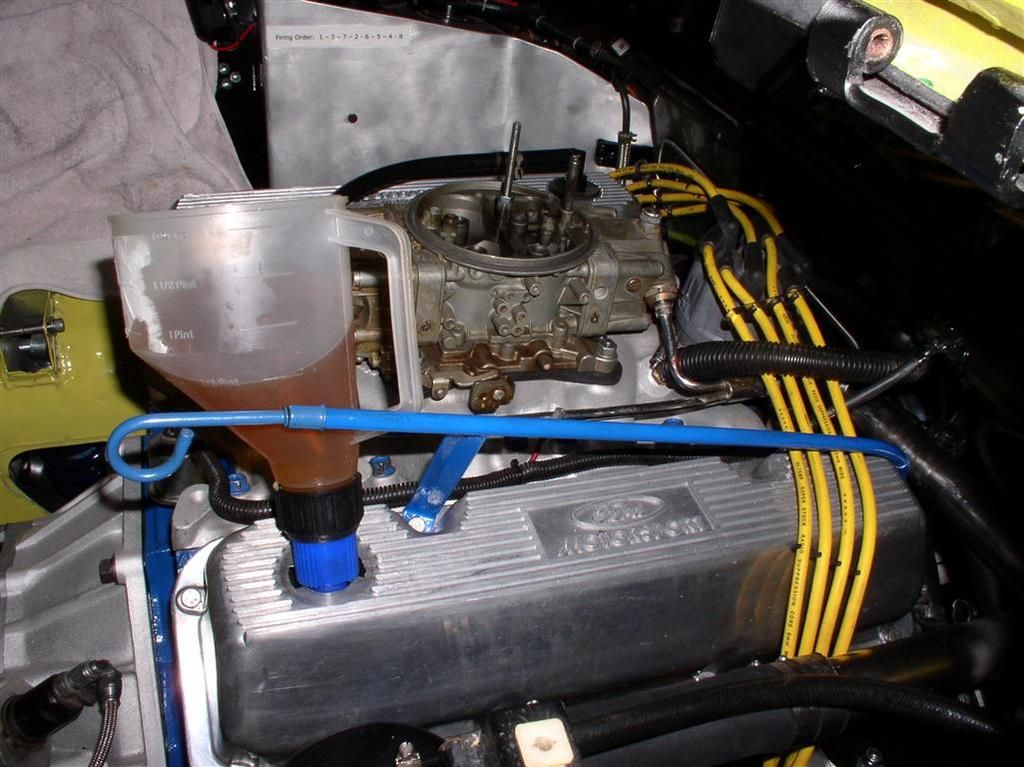
PS> Look at this cool accoutrement - a 351C "Pre-Oiler"... Just plug it into the distributor cavity, and twist it with your drill motor... VIOLA! Oil Pressure prior to start-up!
We fired it up tonight, it ran for a short while, but (like a moron), I had neglected to charge the battery!
Anyway - fired right up, and idled smoothly. An excellent sign.
More work tomorrow, I'll probably drive it!
WHOO HOO!
Rocky
PS> Look at this cool accoutrement - a 351C "Pre-Oiler"... Just plug it into the distributor cavity, and twist it with your drill motor... VIOLA! Oil Pressure prior to start-up!
Attachments
Images (1)
_(Medium)")
Add Reply
Sign In To Reply