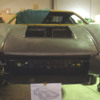
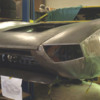
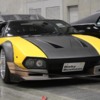
A little more progress.
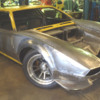
Front quarters & headlight surrounds being created.
There is still some work to do defining the correct line for the crease in the front corner of the fender.
As well as correct clearance around the hood & flares are yet to be created.
But you can sort of get an idea of its lines now.
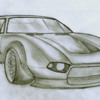
The spoiler will sweep around the bottom of the fender, but will still retain that undercut swept shark chin.
Its fairly close to my original sketch, so we are on target without any compromise.
It’s looking like a cross between a Pantera & a Mangusta, with a little of the GT40 fender bulge.
So much work to do…………….
Regards,
Tony
Tony that looks crazy!! Great work!
That really is pretty amazing work. I like what you have done with the fender "wheel bulge", very nice.
Wow, Tony! I just got back to this thread. Awesome work. I am totally impressed and love the concept. Looking forward to seeing it progress!
A little more panel work.
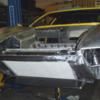
Panels surrounding right side headlight & across the underside of the hood.
The idea now is to create a grill recess & box in all four sides feeding into the radiator opening.
The radiator clamps up against a flange with a rubber seal.
So all air that enters from the front grill area has to go through the radiator core.
I’m hoping to pick up a little more cooling efficiency via the bodywork ducting to the radiator.
It all adds up.
The 427 is going to require more cooling capacity than the 351.
Regards,
Tony.
Attachments
Yes, Junichi Okada's Pantera was the inspiration. After I sketched it I posted it on my Facebook page & dedicated the idea to Junichi. He likes it too.
regards,
Tony.
regards,
Tony.
quote:Originally posted by garth66:
Your front end headlight concept looks very similar to Junichi Okada's awesome Pantera
Any more pictures of Okada's Pantera?
-Very nice work Tony.
Best,
K
Very impressive work Tony!
Johnny
Johnny
You can see more pictures of Junichi Okada's Pantera on his Facebook page.
Search his name & you will find him.
regards,
Tony.
Search his name & you will find him.
regards,
Tony.
I had looked on his FB page some time ago and unless I'm just not looking in the right place, there isnt much there. 3-4 whole car photos and a bunch of piece part photos sprinkled in with a large numebr of other pictures but not anything like a build log as near as I can tell.
I also looked on Team Pantera of Japan, lot's of good stuff there but only a couple photos Juin's car there too.
The best was the Youtube video. If especially interested in the rear diffuser, decklid, and front fender/headlight treatment. I have pinged the TP of Japan and him before but I dont speak Japanese and received no reply. If anyone has pictures of the above, posting or forwarding would be appreciayed.
http://www.youtube.com/watch?v=VzxOQ3bfdEY
Best,
K
I think you have to be friends with him on FB to see all his photo albums. The build pictures for his car is under an album 'My Detomaso Pantera'.
Amazing work Tony... Thanks for sharing!
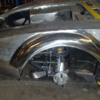
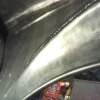
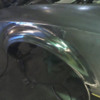
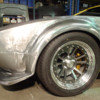
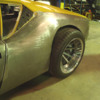
Front left flare made today.
It's about the same size as a GTS flare, but taller & more curved, as I have more wheel travel so the tyre has plenty of room.
(I have my front spring rates very soft at 225 lb so I do have a tiny bit more travel than most Pantera's).
So far the flare goes down to the body fender line crease.
Made from 1.2mm sheet with 12mm round bar forming the outer lip.
regards,
Tony.
Attachments
Gorgeous work!
Damn that's pretty. Pretty welds too. Nice and solid.
Too bad the original Vignale / Ghia craftsmen couldn't weld like that!
Beautiful work
Rocky
Beautiful work
Rocky
That is a very nice job. I wish I could do work that fine.
Thanks guys.
When John Gilbert does those welds he uses the Mig welder, along with an air gun.
So he spots the weld using reasonable amps to achieve good penetration.
In his other hand he has the air gun which he gives the weld a quick blast to cool it.
That stops the metal distorting from excess heat.
It’s a fairly rapid process & the results require minimal hammer work to correct.
When the panel work is finished this car is going to require next to no filler as he has achieved a very straight body with just the English wheel & hammer.
Looking forward to the new rear fenders being fitted so I can see the car sitting on its new wheels.
The rears are so massive its going to look like a "Hot Wheels" car.
Regards,
Tony.
Attachments
This is looking Wayyyyyyy cool.
Do you have a collection of pics to look at?
Do you have a collection of pics to look at?
If you go here John Gilbert has pictures on his Facebook page of a lot of the body work he has done on my Pantera.
https://www.facebook.com/media...5502897847903&type=1
He also has pictures mixed in there of my stuff like the wheels & the mechanical work, laser cut nose etc.
Also, If you start at the beginning of this thread you will see from the start with the nose being chopped off till current.
regards,
Tony.
Some more work this week.
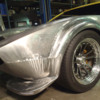
Front corner of spoiler made & blended in with the flare.
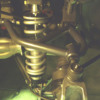
Has an indicator built into the lower corner of the spoiler, although the intention now is to reduce the height of that lip so it’s not so deep, as well as increase the radius on the top edge.
Again the car is sitting too high as there are a lot of components missing from the front of the car.
New front brakes are now installed
Regards,
Tony.
Attachments
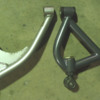
New top rear suspension arms have been fabricated.
Comparing the old with the new.
New arms are longer to stand the wheels more upright due to the negative camber change which occurs when lowering the car.
Also included is camber adjustment with a “quick turn” adjuster so camber can be fine tuned.
Regards,
Tony.
Comparing the old with the new.
New arms are longer to stand the wheels more upright due to the negative camber change which occurs when lowering the car.
Also included is camber adjustment with a “quick turn” adjuster so camber can be fine tuned.
Regards,
Tony.
Attachments
Great build!!!! Keep the information coming as you continue. Ton of work -- wow!!!!!
All the best,
Mark
All the best,
Mark
New left rear fender being fitted.
Lower section of the fender is still not attached & has not yet had the body line crease created.
Wheel arch is simply hacked out at the moment to get the wheel on.
At the moment I’m trying to get the ride height correct so we can make the wheel flare to suit.
A lot of material around the wheel arch will have to be removed as the flares will be quite large.
(This is the 345/35-19 Bridgestone tyre)
Regards,
Tony.
Attachments
That is one tough stance. Amazing work.
Hey Tony, great work. Hows the hood coming along?
Best,
K
Best,
K
Hood is half done.
Will finish the hood when the rear fenders are done.
Just want to see those rear wheels wrapped in clothing!
regards,
Tony.
Will finish the hood when the rear fenders are done.
Just want to see those rear wheels wrapped in clothing!
regards,
Tony.
Hi Tony.
Really like the Work you are doing on your car.
The weels you made what backspacing do they have?
P.S.
Thanks for the info about the page Tirerack.com
Kjeld.
Really like the Work you are doing on your car.
The weels you made what backspacing do they have?
P.S.
Thanks for the info about the page Tirerack.com
Kjeld.
Kjeld.
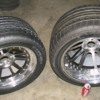
The front rims are centre offset, 17x9.5" with 4.75" backspace.
The rear rims are 5" backspace, 19x13" with 5" backspace.
The spokes in the rear rims started life as a 75 kg billet of 6061 T6 Aluminium, after machining they weighed 7 kg.
regards,
Tony.
The front rims are centre offset, 17x9.5" with 4.75" backspace.
The rear rims are 5" backspace, 19x13" with 5" backspace.
The spokes in the rear rims started life as a 75 kg billet of 6061 T6 Aluminium, after machining they weighed 7 kg.
regards,
Tony.
Tony,
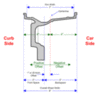
I'm a bit confused. A 9.5" wide rim with centre (zero) offset could not have 4.75" backspacing. A 9.5" rim with zero offset would have 5.25" backspacing. Conversely, a 9.5" wheel with 4.75" backspacing would have .50" negative offset.
As far as I know, all wheel manufacturers calculate offset and backspacing the same way as pictured in the diagram below.
Attachments
One tiny note on David Nunn's excellent drawing: not all wheels have the outboard 'bump' for wheel weights or whatever on the extreme edge of the rim, so technically, the backspace should go from the flat part of the wheel to axle flange rather than including the bumps. Sure, all Campys have them, but aftermarkets, steel etc vary all over the map as to the heights of bumps or whether they're there at all. Thats also why some people get 4-3/16" for 8" Campy backspace while others get 4". Just a thought for consistency.
quote:One tiny note on David Nunn's excellent drawing: not all wheels have the outboard 'bump' for wheel weights or whatever on the extreme edge of the rim, so technically, the backspace should go from the flat part of the wheel to axle flange rather than including the bumps. Sure, all Campys have them, but aftermarkets, steel etc vary all over the map as to the heights of bumps or whether they're there at all. Thats also why some people get 4-3/16" for 8" Campy backspace while others get 4". Just a thought for consistency.
Excellent point. My aftermarket rims don't have that extra lip. So instead of an extra 1/2 on each side like the drawing, mine have approximately 1/4 extra on each side. So my 9 inch rims measure 9.5 inches from the outside to the outside portion of the rim. They measure 9 inches where the tire seats.
My rear 12 inch rims measure 12.5 from the outside lip to the outside lip.
Add Reply
Sign In To Reply


