#2636

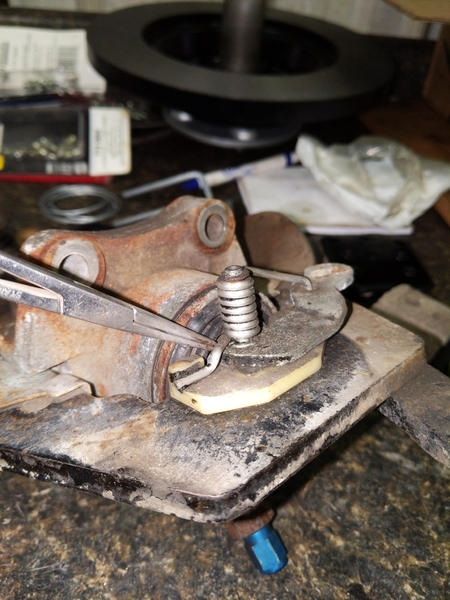
I am rebuilding OE rear calipers and wondered if the area in the picture is under pressure and a potential leak? (Parking brake pivot pin )  I have searched the forum and other sources but can't find much information

If so has anyone replaced the seals in this area? All the caliper parts check out well, and would like to avoid any avoidable surprises.  Thanks in advance. JerrySr

15567434173062179040675903700266

15567436323421493902987753525431

Attachments

Images (2)
  • 15567434173062179040675903700266
  • 15567436323421493902987753525431
Last edited by George P
Original Post

Replies sorted oldest to newest

Yes there is.

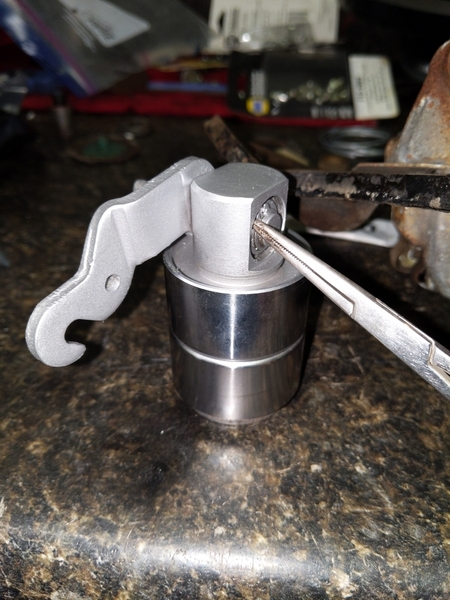
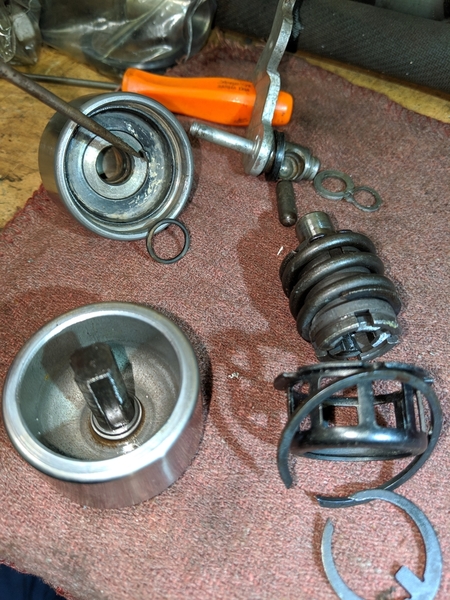
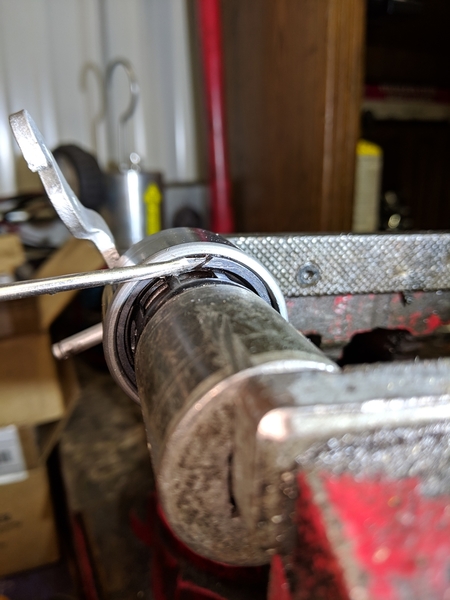
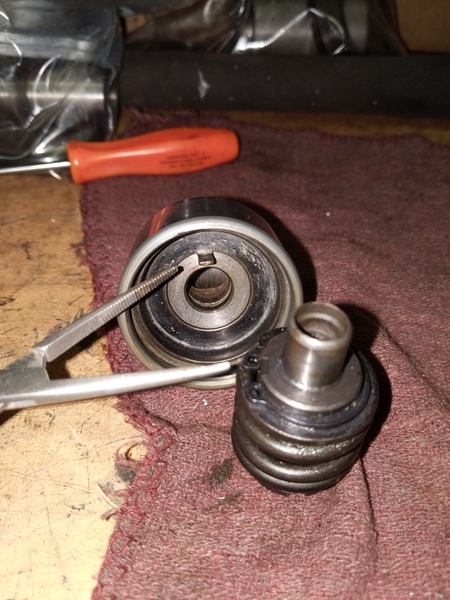
You will have to remove the e brake slack adjuster from the puck to access an o ring seal hidden inside. That takes using a socket or similar to compress the pressed steel 'cage' and release pressure on the retainer circlip. The bevels on the ends of the circlip are tough get a bite on to pry free. Two mini screwdrivers needed. One keeps the circlip from rotating, the other digs at the end of the clip.

Once you get the circlip out, DO NOT twist the adjuster to free it from the puck, pull it straight out or you will break an un-replaceable steel tang that is pressed into the puck.

After that, a little plunger will come out which will allow you to remove the actuating lever and related bits.

Good luck.

Last edited by larryw

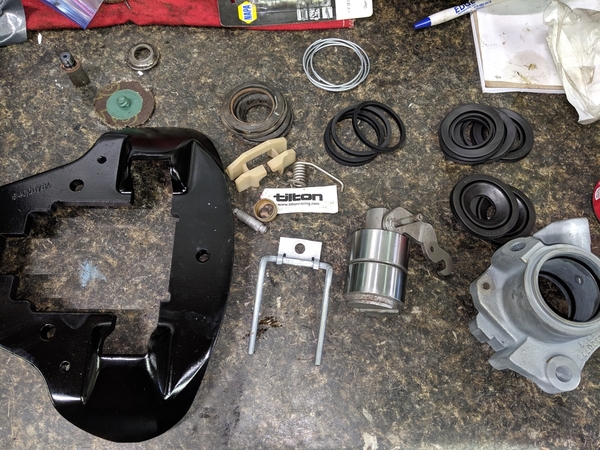
Not sure what brand kit I purchased (eBay) They rubber parts are good and fit well but the rings leave a lot to be desired. All but 1 original flat ring was reusable front and rear ( I like originals much better anyways)  In order to use the 1 ring from the kit I had to trim it down quite a bit ( ends overlapped) and add a little tension and I. Still not crazy about the fit. 

 I am not familiar with the size dash 013 or - 013.  I found them if they are  "O-Ring-Dash-013-EPDM-0-07".  For only a couple bucks I ordered them. 

If you see a request for a couple rear pistons from me, you'll know how assembly went. Lol. In for a penny, in for a pound 

IMG_20190501_150917

Attachments

Images (1)
  • IMG_20190501_150917

When I did mine a few months ago I noted that the front caliper attach bolts were short. Lacked thread engagement so I installed longer bolts.

Yes, the new rubber boot retaining rings lack spring tension. Probably Chineese mush metal so I reused the old ones. I carefully glued the boots in place before installing the retaining rings. Be careful of the nylon slide. They get brittle with time so I replaced them. 

Bleeding was a pain until I bought Motive Products power Bleeder. It made for a first round KO. It takes a high flow rate to purge trapped bubbles. The fluid can harm some paint so be careful. Get extra shims so you can center the caliper to discs. The alignment on mine was poor.

Thanks Larry.  The bullet missed me,. The O-ring  was shot!  Waiting on Orings.  I can see how the tab could snap off easily. 

 IMG_20190502_120047IMG_20190502_11371815568157980312794067484295263231

 I got there, don't know if I will get back thou lol  Pretty simple to take apart if corrosion isn't too bad and your gentle.  Hopefully this thread will help someone else and make it easier to locate the info.

JerrySr


Attachments

Images (3)
  • IMG_20190502_120047
  • IMG_20190502_113718
  • 15568157980312794067484295263231
Last edited by George P

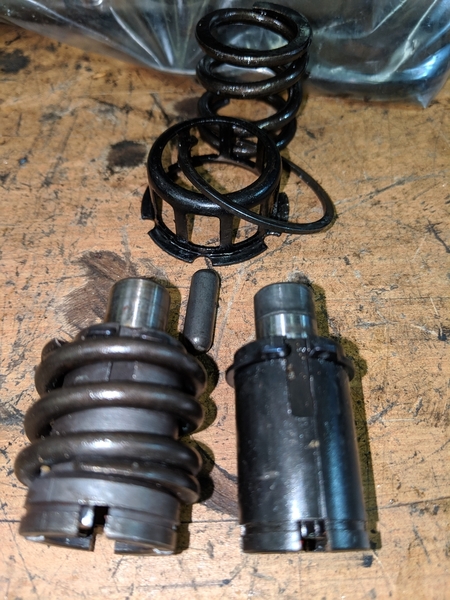
Interesting find, same car two different parking brake Pistons I would assume one is an older style old stock. In one model the parking brake piston spring is retained by the Piston head on one end and a circlip on the other the other style when you remove the first clip remove the cage the spring comes off.  Everything else is virtually identicalIMG_20190502_161352


Attachments

Images (1)
  • IMG_20190502_161352

I have found three variations of these. I believe yours are early Ford Pantera and the other is later; post Ford Pantera or sourced from one or another Peugeot as a replacement.

There is an intermediate version I have found in later Ford cars that uses a clip (clip and spring are not on adjuster in middle) to keep the slack adjuster from turning like the early, but is the same diameter as the late version that uses an internal tab to control the rotation.

If the sealing surface fails, like in photo two, that's it. I have not found replacements. Probably one of the EU guys would have better luck

slack adjusters

sealing surface

Attachments

Images (2)
  • slack adjusters
  • sealing surface
Last edited by George P

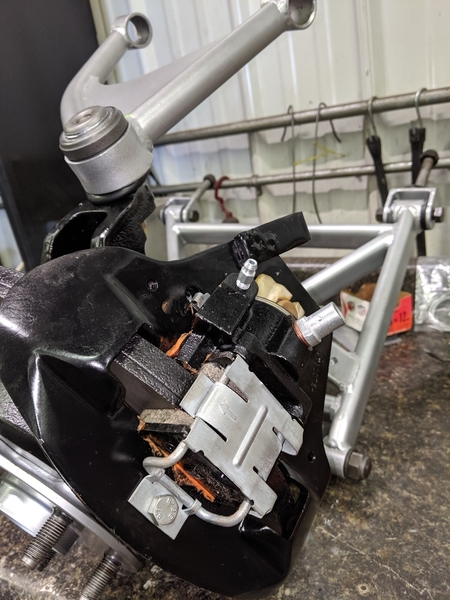
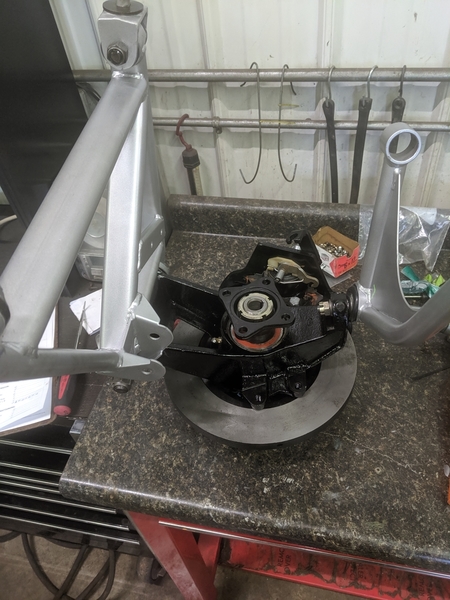
Brake Update;. After aquireing the correct Orings (thank you Larry). My brakes are completed (along with the upright bearings  bushings and all 4 corners suspension.  

All of your instructions were priceless. Especially concerning disassembly and not twisting the Piston mechanism due to the small tab, glueing the boots ( forgot what a pain they were) 

Thank you for all of your help. 

Now just waiting for the body to bolt them to.  

Jerry Sr

IMG_20190513_150849IMG_20190513_150628

Attachments

Images (2)
  • IMG_20190513_150849
  • IMG_20190513_150628
Last edited by George P

Add Reply

Post
×
×
×
×
Link copied to your clipboard.
×