Looks like other post on this is closed, and I am unable to update it!

So figured we need a new post....since I have been asked a couple of times recently for QA1 info on front shocks.....

Here is what I posted somewhere.....

Getting stock rubber bushing replacements for original shocks really isn't a starter unless you get a new modern version with rubber insulator that doesn't resemble chewing gum!

QA1 (Carerra)
The biggest issue with QA1 shocks is getting the "bolt adapters" machined up. Not real big....just that most don't have access to a lathe. I believe that the final dimension is 33mm wide.....so the combo of two adapters and the shock center ball must equal 33mm & 10mmm bolt hole.

BEWARE NOTE!!!: At some point VERY late in production, DeT changed the shock mounting dimensions, I believe to the same as Pantera...! Wider bushing and bigger bolt! This changed the chassis AND the lower A-arms!

Springs:
Front spring rate was tough to nail down, but the 275 seems good. The adjustable front valving is great, and also the only choice that I could see. The QA1 website should have dimensions etc.... but the Carerra part numbers will likely not swap directly over so you may need to do some detective work. A 250 may also be good with tightening up the valving (more hard on compression). (I had my stock front springs checked for spring rate and was told that they were 200#........but I question this......!)

Rear spring rate was 400# and seems good for the car. No worrying about railroad tracks and bridge abutments any longer!!!


REAR SHOCKS:
What I have on my car is the old Carrera chrome body shock, no valving
adjustable, 60% valving on compression, with 12"-400lb springs. (25lbs less
than the Pantera version of this same shock.) Carrera was bought out by QA1 a
few years back.....

This is a spherical ball end shock, and you will need to machine/cut some
spacers/adapters for the ball ends to fit in the chassis. I was (way back
when!) able to get these spacers from Carrera, but may not be available from
their new owner....QA1! (My shock bushings are 33mm wide as (most of) yours should be
too.)

I also bought chrome springs....but looking back would now recommend the powder
coated (silver) ones because I would repaint them yellow to match the stock
shocks (red paint markings on the coils). The original DeCarbon shocks were
a green metallic looking color....so I would gently bead blast the chrome shock
body, and paint it green....to "look more original". That is just me......

Here is the parts list for the QA1 "Streeters" rear shocks that I used
(www.qa1.net) Page 77 in their catalog. I found many of these parts available
on eBay, but you can probably get them all from a QA1 dealer.


Shock: #5566 (Streeter Chrome body shock)
Coil Over kit: CK1971C
Springs: 12CS400 (chrome) 12-400 (silver powdercoat)
Compression rubber bumper: BC01
Adjusting tool: T120W
Adapters: QA-SLV103 (3/8" inside diameter needs to be bored out to 10mm) Will
give 33mm width at shock mounts. NO LONGER AVAILABLE!!!!

***Guys have mentioned running an adjustable DR series shock out back, but say that the springs are too short, perhaps necessitating a 1" or so spacer?????


FRONT SHOCKS:
DR4855B QA1 Proma Star Shock (2) (Spherical ball ends) Adjustable valving. (GET THE HARDER BALL ENDS NOT THE NYLON ENCLOSED ONES!!!!! I had to replace all my nylon ball ends about a year or so down the road as they were coming apart!)

BC01 Rubber Bump Stop 1.5x3" (2) (I may have cut these in half so needed only one....)
T114W Spanner Wrench for adjusting (Of course it is different than the one for the chrome rear shocks....!!!)
10-275 10" silver painted spring- 275# (2) I recommend powder coated over chrome.

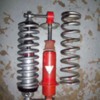
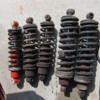
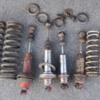
Picture shows new DR shock/spring next to aftermarket Koni with stock original spring.

This is what I know! Would love to see other experiences added to the post, with these shocks and other brands!!!

Steve

Attachments

Images (1)
  • 100_0392
Original Post

Replies sorted oldest to newest

OK, first of all, we donna do nuttin no half inch onna dease carz......so wrong forum for you!!! Smiler

There is little to gain by doing it.....and if you look at a Goose chassis you will be drilling FAR more than "just the shock mounts"......You really are talking a LOT of work to do this. Look at the front upper frame mounts if you don't believe me! In fact, I don't even know if you could drill out the front holes!!! Not sure a typical hand drill would fit in the trunk area to even make it possible.....then it would need to reach about 5-6" to boot! (That's how long the upper shock bolts are....front and rear!)

Out back would be possible, but would require drilling out the holes in the ladder bar, which are bushed........but just easier to stay with stock 10mm bolts!!!!! Unless you have a late car...

I would advise that before anyone starts cutting any metal to make the adapter bushings, that there is only one dimension that I trust on the drawing, and that is the diameter of the hole that the bushings fit into! .500"...... everything else should be confirmed for fit to your chassis! ie stock 33mm width........

If I come across my notes for the adapters I had cut up.....I will be certain to post!!!

Grazi!
Steve
LOL!!!! I agree!!

But, you are talking dimensions (and parts) for a different car.........! Totally different animals....

What fits the Pantera rarely fits the Goose unless you are talking pushbuttons! ....and I mean THE push button.....!!

This is one case of such not fitting......not even close!

Ciao!
Steve
PS: I tried 325's (still have them!) up front on my car and I swear the front end never dropped, even on bumps....almost like no suspension!!! 'twas most uncomfortable to ride in.......not recommended here.
Steve, for the Koni you show but don't mention, I have listed #82V1680-SA2 (frt) and #82V1685 (rear) with unknown spring strengths. Dunno what length spring is needed either. These are rebuildable and adjustable for rebound damping.

Pretty easy to check spring strengths at home even though I didn't do it in this case:
1- Put spring in hydraulic press with a bathroom scales underneath and a 2x4 on top of spring. Zero scales.
2- pump press so 2x4 compresses 1". Read bathroom scales= spring strength.
Jack,

Once we get moved south next year, I hope to have my press(es) in more accessible locations to be able to do such a measurement!!!

Those Koni numbers sound familiar! They were configured to reuse the stock springs!!! The silver spring in the pic is the stock (one of them) Goose spring.

The only bugger about the Koni's is that the used the same sh*tty gum rubber bushings which displace the rubber after only 5-6 months!!! Metal on metal shortly after that! AND, you can't get bushings easily.... I think Roger Brotton in the UK may have had something made up...... but it wasn't cheap!

Cheers!
Steve
Thank you for the valuable information!


Has anyone made their own bushings?

I am considering buying a mini-milling machine and some Delrin stock and see what happens.
Another option is a rubber bushing 'casting' kit from McMaster-Carr. They sell the rubber resin, you mix it together, pour it in a form and (supposedly) a rubber bushing is the result.

Thanks
Ryan
Sure have, Ryan! I made polyurethane bushings for all my a-arms, both swaybar center mounts and both ends of all my old Konis. New Konis use steel heim-joint ends. Also made 2 sets of seat-track rollers from nylon. Easy lathe jobs. None of this made the slightest increase in cabin noise or a harsher ride, incidently.

When you buy poly barstock, you'll find some variations in hardness/compliance but even the softest is too non-compliant to use as swaybar ends; there you need sphere-ball ends. Delrin/nylon is normally harder than polyurethane & is available glass-reinforced, which can chip in use as a suspension bushing.
Lee,

Not sure what is on 1046 there...spring colors and shock colors "are different" but not necessarily wrong...... your mileage may vary!!!

Here is apparently the only shot I have of the rear shocks that came on #878 from WAY back in 2005, first go around with Aussie 2V heads on Boss block... You can make out the brilliant yellow paint, but not the green. Green was more of a lime green metallic than blue.

I am thinking that somewhere.....I have shock pictures...but they may be hard copies from film....not digital! If I can come up with them I will scan and post!

The front springs look like what I had....but my shocks had been replaced with the period aftermarket KONI versions. (good shocks for the car!) See next post.
Steve

Attachments

Images (1)
  • enginstall
Picture of the gum rubber stock shock bushings.

Note displaced center sleeve! So bad that the bottom of the shock shows a flat spot where it was hitting the lower a-arm.

I don't know if this was an original replacement bushing that I had on the car for a short while or if it was an original.....was hard to tell the difference after only about 6-9 months!

QA1 ball style bushing on right...these tend to come apart, so get the metal version if you go this route!

Attachments

Images (1)
  • DSCN0613
A shot of the plastic QA1 end bushings that you do NOT want. These hammered out on my car after a few thousand (GREAT!!!) miles of driving!

Also shown are the custom bushings that you will need to have machined up to fit in the early Gooses. The later cars can have Pantera sized bushings.....

Get the "other style" that QA1 offers.

Steve

Attachments

Images (1)
  • DSCN1695
...Don't pass up the opportunity to Improve from a 12mm to a Larger 1/2" Bolt. Drilling? Ever hear of a 'Hand' Reamer. See Pic. These are Tapered to .500", the Shorter Ones are 6 Inches Long.
All Reamers with the 'Square' End Shank are Hand Reamers, the Square will fit into a 'Tap' Wrench. When I used them in the tight quarters of the Pantera, the Square Drive can be Driven with a 12 Point Socket on a Rachet, or a 12 Point Box-End Wrench. It does NOT take a Lot of effort, Nor Time, to cut through the Soft Steel of the Shock Mounts. I had a choice of 1/2 Inch Bolts, Stainless or Grade #8. I went with the Grade #8, Gold Anodized with Standard Fine Threads. I used Ny-Lock Nuts and also used Thick Stainless Washers Under ALL Bolt Heads and Nuts, to Protect the Sheetmetal Mounts from Galling, they are irreplaceable!!
Yes! Having access to a Lathe will finish the Job with Custom Machined Spacers.
Width? Temporarily Install Shock End In Mount with Cross-Bolt, Slide ALL the way to ONE Side, take the Measurement and Divide by Two, You have the Needed Width of the Spacers for THAT Mounting Point. The Others May be Slightly Different.
You'll be Glad You did the Improvement. This work was done on My Pantera, No reason this can't be done on a Mangusta.

One last thing...while you have the A arms off, drill and tap them 1/4"-28, in the Center of the Bushing Mounts*, and Install Zerk Fittings. AND when Installing the Bolts, Grease them Up well, before sliding them in place for the last time. Why? A Lot of reasons, keeps water OUT! Stops Squeaks and Affords a Smooth Action of the Arms. Also, Greatly Aids in Disassembly, Next Time. Tighten the Bolts as tight as needed, But still allows smooth and 'Easy' rotation of the A Arm, BEFORE the Springs are Installed Or Ball Joints are Connected.

...*That would put the Zerk Fitting in an Unaccusable SPOT?? Get the Zerks that are at 90 Degrees!


Good Luck with It!

Attachments

Images (1)
  • REAMERS
Last edited by marlinjack
All of what Marlin sez is great info!!! (Front A-arm lower bushings can definitely use grease fittings! Those front lower bushings appear more an afterthought....!)

Except for one thing..... The Goose isn't built like the Pantera....not even close.

Hand reaming the holes would involve reaming holes that are multiple inches long, thru the frame and thru other components like the cross braces and such.

The easiest of the mounts are the lower mounts which are simple sheet metal tabs on the a-arms.

Where the biggest challenge presents itself is the front upper mounts which are sleeve tubes welded into the chassis. If you don't get these straight, your task becomes more ugly....

It's hard enuf getting the existing bolts out....if stuck, so the greasing of the bolts is definitely in order!

IMHO, the 12mm bolt thing on these cars isn't "broken" and doesn't really need to be fixed or improved upon. If you're machining new bushings, to finish to a metric dimension isn't difficult at all, or to obtain a metric reamer these days isn't an issue. It may not be what is in the tool selection at the time, so some pre-planning may be needed.

But the shocks many times NEED to be replaced to operate the car safely on the roadways.... That is if you are actually driving this "401K plan" on the streets!!!

My car came with almost all of the original fasteners in place...... When possible, I put them all back from where they came..... With "very original" (unmodified) car prices hitting the moon....consider this sort of modification carefully. If you do go for it, Marlin's suggestions need to be considered for longevity!

Cheers!
Steve
The only way to quickly identify Koni vs Corte are the attachments Corte shocks has 2 half moons and the Koni have a split ring instead.

As Steve has said the bushings in my 38,000km - 25,000miles were split, cracked, flattened. Rebuilt Koni made a world's difference.

Attachments

Images (1)
  • IMG_1673c
... I understand the Purist wanting to maintain the Original Bolts, And Have All the Heads Pointing in the 'Correct' Direction, By the Book. I Installed My Bolts Obeying the Laws of Physics.

One thing I hadn't mentioned...If one goes to work on those 'Pantera' A Arm Bolt Holes, and find the pivot has been loose enough for the bolt to 'hammer' and wear the Bolt hole, 'Egg' Shaped; Then reaming the worn hole to the next larger size .500", using one of these reamers, has the benefit of Trueing up the hole fresh and round. If the Reach is 'Long', go in from both sides. As said, these reamers can be driven with a 12 Point socket, put it on an extension. That Is All.

Add Reply

Post
×
×
×
×
Link copied to your clipboard.
×