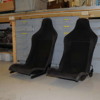
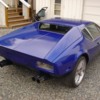
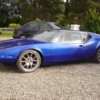
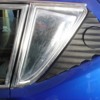
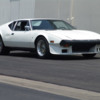
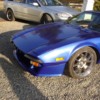
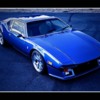
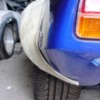
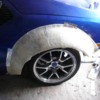
Thinking of posting up some photos of the things I will do on my car over the winter in this tread. Will after the trip to the DMV start with fixing the headliner, try out some Honda NSX seats I have and change the heavy US bumpers for some lighter shiny ones. As for the bumpers, it should make the cars handling a tad better to remove weight from the cars extreme ends with some "Superleggera" bumpers in aluminium.. Making up my own ones, but at the moment they are only done up roughly.

Attachments

Images (1)
  • DSC04061_(Medium)
Original Post

Replies sorted oldest to newest

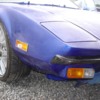
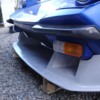
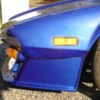
Made some changes to the air-dam to house the front indicators. Painted it a thin layer of black to see if I want to go further with the cars present "GTS" paint scheme. Will need to let it in for a few days I think. What do you think? Have it black, and paint the lower body black too, or go for an all blue color that I think is very nice?

Attachments

Images (1)
  • DSC04774_(Small)
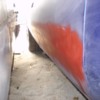
As the wheels was of, I got to take a closer look for the first time of the cars underside. Inside the wheelhousings it looked much better than hoped for, and extremely much better than expected for a car as old as this. Wery solid and sound for a untuched original car. Happy about that. Being that it have been used sparsely in San Diego since new might have something to do with that.

Facing front in the right rear wheelhousing:

Attachments

Images (1)
  • DSC04872_(Small)
As asked in the other tread about the wheels, they was redone by: http://www.weldcraftwheels.com/
James there is to this point in my moneyspending car-years one of the guys that have at every request from me gone to the greatest lenght to fulfill my wishes. So, I can easily recomend him to you allSmiler
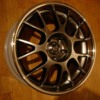
If I'm not recaling to much wrong, I payed like $600 to have the fronts done 1" narrower, and the rears 2" wider to 11". Chose to have this done since I like the look of the wheels wery much. The wheels are real Ford SVO-wheels. Not copys.

Here is one in "full figure".

Attachments

Images (1)
  • DSC04883_(Small)
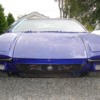
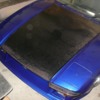
Since the summer has been great here in south of Norway, I havent done so much that I felt I needed an update here. Work done the last few weeks has been paint-stripping, and sanding, but today I came to the point that I put color on the front hatch and the engine lid. It will need to be rubbed and polished to look its best, but you get an idea of what it will look like.

Attachments

Images (1)
  • DSC05043-2
I have Elise seats installed in my GT5, the Lotus biscuit leather complimented the tan interior very well. They are reasonably comfortable on long drives, but non adjustable for rake. The drivers seat is adjustable front to back, the passenger side fixed. I had to make some mounting brackets etc. and spaced the front of the seat up to where it was most comfortable, which turned out to be where the seat back is in line with the rear bulkhead. I gained lots of cabin room and at 6' I have them one or two notches from the rearmost position.
Picked up the seats today. Tore out the old ones, and got the Elise seats in to the car on both sides. First of all, they was much better to sit in than I expected! I think they are better than the originals. Took a car-mag with me and sat there for about half an hour to REALLY sit in them before deciding on the rake I will have on them. On the driver side, I got my ass so much longer back so the spacer for the pedals I intended to use will not go into the car. As for headroom, I got allmost 1" more headroom. On the passengerside, the support for the shoulders interfere with the engine hump, and not going as far back as I hoped for.The seats back is 1/3" closer to the firewall, but since it has so much less padding I now allmost fits comfortable in the right seat. Before, I did'nt get my knee under the dash, and had a wery uncomfortable position. I'm 6'2", and 230+ and really needed the extra space I could get. So, to you that has a tight fit, the Elise seats is a great buy!!

PS: will post photos of the seat when I have the camera with me.
SO, it will be finished a bit later than first expected. The photo some posts earlier here was taken, and put here minutes after paint. After that, I go inside to sleep before going to work night this weekend, and when I come outside 5 hours after I find this: A dent/scratch running the whole lenght of the right door and back to the rear wheel.Hehind the door the metal is (was, as I have started to bang it out again) pushed in about 1". On the doors leading edge it is only a scratch growing into a apr. 1/2" deep dent. My neighbur had'nt seen it hit it, but there has been a delivery-van backing up in my driveway to do a turn. Did ruin my weekend for sure. BUT, it looked good for a couple of hours..

Attachments

Images (1)
  • DSC05243-2
I'm quite pleased with myself today, after I managed to get the bent steel much closer to its original shape than I expected. Using a heat-gun to soften the paint, and a hard rubber hammer to smack the car, it turned out cuite well. Behind the door I will need to fill in 2mm or less (about 1/12") before repainting, and the same on the door, exept for just in the middle where the dent went from over the doors bead (if that's what it is called) to under it. It is placed just over the doors internal strebghtening, whitc means MUCH MUCh more job to fix a 2" part that now will require about 3-4 mm (less than 1/6") of bondo on that short piece. That I can live with. So, a quick fix of paint tomorrow I hope, and so, block-sanding the clear. Back in buisnesSmiler

Attachments

Images (1)
  • DSC05311-2
Nice... really Nice,
Enjoy the build, it looks great... sorry about the idiot who damaged the new paint. The blue is a great color.
A good color is so hard to find, I went crazy finding the right yellow for mine. I wound up with 7 coats of "Smart" car and 4 coats of gold pearl 3 coats clear. Best of luck and again it looks great.

Joe 6656
quote:
Originally posted by ShotgunGrooms:
where did you get the carbon fiber exhaust cover/trim? what are your plans for the old exhaust body cutouts? maybe carbon fiber


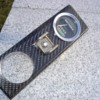
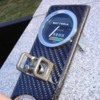
If you think about the panel around the dampers, I made it myself (a sandwich construction to be stiff) that bolts to the holes the original mesh used. The cutouts, I dont know about yet. Will need to think about that for a while.
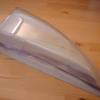
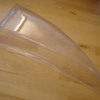
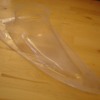
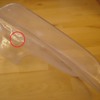
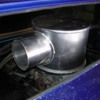
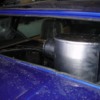
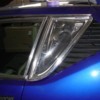
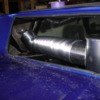
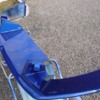
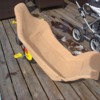
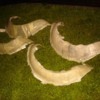
Started work on some side scoops. Plan not to loose all the visibility you do with the carbon type, so they will be made in lexan, and have attachment for a 4" hose to rout the air. Will have an opening of 2". This is just a test, and the plug will be made much nicer to get good looking parts. As you can see in the red sircle further down, all imperfections in the plug show after vacum is applied.

Attachments

Images (1)
  • DSC06020-2
quote:
Originally posted by garth66:
quote:
Started work on some side scoops.

How did you make those lexan side scoops. Beautiful work! Also, what are you pointing out with the red circle in the picture with the scoops together?


The imperfections I got since the plug isnt good enough yet.

Made in a vacum machine that heats the plastic, and pulls it over the plug.
Very nice work!
I have been wondering if one could do something similar with the dog hatch into the engine compartment. It would be pretty extreme to be able to see all the whirly bits going round. Guess there could be some issues of how dirty it would get from the motor, or of safety if a belt broke - not sure how strong lexan is (maybe some thicker stuff could be used), or if a fire started in the engine bay I guess the lexan would melt through pretty fast. But I am willing to chance it and it sure would be cool!!
Cheers, Tim.
Tim,

I have an old Hall Pantera catalog labeled “Catalog 2000” that offered a Clear Lexan dog house cover with the purchase their Gilmer Belt Drive. It was listed on page 73 of the catalog without a picture. I don’t know if they ever sold the dog house cover by itself, or if they still sell it, but it may be worth a phone call if you’re truly interested in it.
Last edited by garvino
quote:
Originally posted by lambolp400s:
Actually, I was thinking of making a few sets if some wants them, since making the plugs take too much time to just make one set for myself. Will definitely be cheaper than the ones you get from the known vendors.....


As far as I know, no vendor has ever offered anything like these. At least I have never seen them mentioned.

I was actually thinking more along the lines of the Lexan scoops like those that were used on the Cobra Daytonna Coupes but I like these better.

If you ever figure this out entirely and get them where they aren't flimsy and fragile, want to sell a few sets let me know.

These are reminiscent of the Ferrari F40 street car and to me are kind of "the Cat's meow".

You can always PM me here.


I'm wondering if you are going to need a third piece for inside of the scoop to reinforce it after you cut the slot for the air intake?


As far as the Gilmer drive and the lexan doghouse cover from Hall. A lot of the stuff like this that is in the color catalog were items that Gary used, was developing or had built into some of the "Hall Super Panteras".

Simpler pieces then this, although still in those catalogs are no longer sold by Hall since Gary's passing.

I guess that they just use up what is left in stock and then that's it.

You can inquire with them since there are some broken sets still kicking around in the back here and there but Tara needs to go an look to see what is there. Sometimes she is staring it in the face but she still needs to figure out exactly what the thing is and what it is for.

Good luck.
Last edited by panteradoug
quote:
I'm wondering if you are going to need a third piece for inside of the scoop to reinforce it after you cut the slot for the air intake?


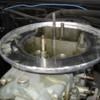
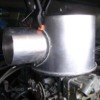
Most likely. I guess a thin ring of aluminium hidden to have something to fasten the clamp holding the hose will be needed.
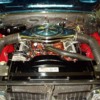
Now plug is ready, and in theory, the vacum-formed plastic should have the same finish as the plug. Lets cross some fingers and stuff...Smiler

Shitty pic taken with my mobil phone.

Attachments

Images (1)
  • Bilde102-2
Nice workmanship.

There is one small problem with your scoop though.

The factory scoops that stick up like bat ears do that for a reason. Although they look a little strange, the top of the scoop is all that sticks into the air stream because of the aerodynamics of the shape of the Pantera body.

If you isolate the air cleaner by ducting to your scoops you run the risk of running out of air for the carb at high speed.

The air flow over a certain speed becomes negative and sucks the air out UNLESS the bat ears are sticking up into the air stream. Your scoops don't.

They factory scoops look weird because that's what DT needed to do to make them work on the race cars. They are factory race parts and weren't done to make the car look prettier. Big Grin
How far out does those big ears stick out? A Swedish owner i talked to made his own, that reach a good 1,5" out. His is not ducted, but he said that at most speeds they worked (as in reaching into the air), and the reason he had for saying so was that they moved enough air to keep the lid over the engine almost dustfree compared to how much dust that used to be collected. I doubt I will run 170mph for hours..Smiler
quote:
Originally posted by RobertVegas:
I was thinking about putting vents on my car, but did not know about the "must be up" issue. What does everyone think of roof scoops to feed our motors if the side scoops don't seem to be perfectly effective?


I remember some one with a Pantera and a roof scoop. I think it was a Silver State racer and it was a Pontiac Fiero racing scoop. Looked pretty neat to me.

The side scoops are a high speed issue for a race car. Most guys who use them don't connect the ducts to the air cleaner. The issue is when you isolate the carb air intake to just the scoops and then go racing.

I don't even know if it really is a problem, just that you don't get any ram air effect into the scoop unless the ears reach up into the air stream.

I remember Gary Halls race car had just one scoop connected the the carb and the other just venting the engine compartment.
Well, i will have to try these first, since the vacum-machine at my school cant take any bigger pieces than these, and they have to be able to get of the mold.

Well, here they are after the plug was polished, and even though there is a inner and outher piece,and many compound curves, they don't obstruct the view more the I hoped for. So, if they happen to work too, I would be happySmiler

Attachments

Images (1)
  • DSC06079-2
For my purposes these scoops would be fantastic. You are not likely to find me cruising down the Mulsane straight at 200mph.

And I am not running a single Holley carb. I am running Weber 48 IDAs and they will eventually get switched over to the IRFI. It is not likely at all that the scoops in my cat would ever get plumbed directly to the induction.

I think the scoops look fantastic! These are much better then the Ferrari F40 plastic louvres. Big Grin If you ever get to the point of thinking of selling them, keep me in mind ok?

Incidentally, if you are interested in doing a little research on the subject I can tell you that there is already an air cleaner made for what you want to do.

It was standard equipment on the W30 Oldsmobile 442s with the ram air. 68-69 model years I believe. I don't have any pictures handy but I probably have them around somewhere if you can't find any, let me know and I'll look for them for you.
roll on floor

You guys are too much!

The information doesn't come from me. It comes from DT. I had a discussion about it with Gary Hall 20 some odd years ago.

...and it is about the air flow at "speed" meaning high speed. I guess over 150mph or so?

The air gets dead in that area and the discussion was about if there was a ram air effect to the scoops?

Now I already said that for my purposes that just about any scoop would be fine. In fact holding my hand out the window for me would probably work just as well as anything.

Scientifically speaking? Big Grin I wasn't around to do the testing but if you look at the factory racing scoops they do seem to have a point of interest about three inches out from the car and the point is close to the top of the roof. That location does seem to have an attitude of intent? Wink

Incidentally I'd hate to have been the guy running along side the car with the camera.

Big Grin


Ah Pantera guys...gotta' love 'em! roll on floor
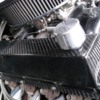
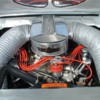
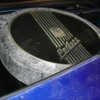
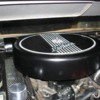
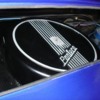
Refurbished the alu-cover. Painted it in the same satin black as the rest of the air-box, and grinded of the paint on top to show of the script. Since it looks quite good now (at least I think so) and next, I will bolt the 180's on it, I'm not sure I want to cover it at all, and just make the stock side covers look a bit nicer, and leave it like that.

Attachments

Images (1)
  • DSC06097-2
Have decided to work a bit more on the front air dam. Started with a piece ment to mimic the one of the BMW ProCar M1, but it would need GT4 fenders to not look to "heavy", so I cut it up, and made it both shorter, and narrower. Still, it differs from the normal no flares GT4 dam by reaching a bit further forward at the bottom. Thinks it looks just as agressive as I wanted, and have to say I'm pleased with the way it has turned out.

Attachments

Images (1)
  • DSC06267-2
Post
×
×
×
×
Link copied to your clipboard.
×