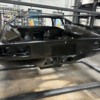
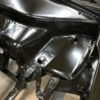
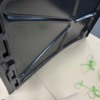
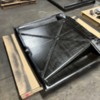
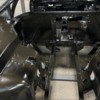
BEAUTIFUL WORK! You sir are a skilled craftsman!
Thank you Garth,
I am trying my best to preserve this Pantera but I am not a professional crafts man. Just a hobbyist that can hold a screwdriver without getting injured. Had a few rodeos in life with cars and motorcycles, many lessons learned, and the right tools acquired over the years. Here are some projects that I finished prior of the Pantera.
Attachments
Nice work. Love the H2 as well!
Are you using a spot welder for the welds? Welds look very clean.
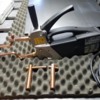
Here is the finished passenger side. Thanks to my little electric friend. The $1000.00 I never regret spending on a tool. It can do multi-layer up to 3mm, timed current or pulsing.
Attachments
@#4164 posted:Thank you Rene,
I appreciate the compliment. The interior wasn't exactly cheap but a Pantera is worth it.
Today I pre-fitted the passenger side rocker, again only held in place by sheet metal screws. I cannot ask for a better fit, especially from a handmade part. Gaps turned out really nice on both sides. Time to heat up the spot welder...
I did pretty much the same thing on mine a few years ago and it was finally finished a few weeks ago.

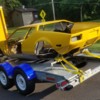
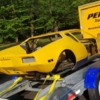
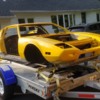
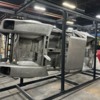
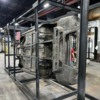
Today, 4164 was bolted onto its body cart, strapped onto a trailer and hauled across the state where it will receive its chemical dip over the next few weeks. I was on a six-month waiting list.
I have added a video link for the place which does the job. They finished another 1972 not too long ago.
Chemical Dipping a 1972 De Tomaso Pantera to remove all the paint and rust (youtube.com)
Attachments
Your car looks good enough to just put together and drive it!
Finally it is my place in line. This is one busy place.
Attachments
Nice looking stuff
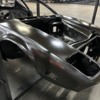
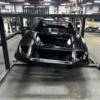
The time has come to put #4164 into E-coating (electrophoretic deposition). This will preserve the car especially in areas that are hollow and inaccessible. The chemical dip revealed only very minor rust areas and needed rework, which will be addressed when the car has returned home. Luckily no evidence of any accidents or panel replacements. A good feeling that there were no surprises waiting for me under that paint and the car has such excellent substance.
Attachments
Congratulations, That is terrific news! Very happy for you.
Don't we all wish they came that way from the factory!
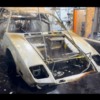
#4164 is back home after its 2 1/2-month journey from Pittsburgh to Indiana and back to Yardley, PA. I started to take a close look at what the acid had left me. And while rust free, there is now no hiding from reality. #4164 survived the treatment well. For a 52-year-old unrestored vehicle, not bad at all. Floors, front trunk, S - braces, frame rails, roof, all there and don't need to be touched. Some areas with pitting and material loss which needs addressing, but again, could be much worse. The leaded areas on the car are in really bad shape and it became clear why Panteras cracking in certain areas. The factory lead was found fatigued and had partially delaminated from the body. I found one thing that needed to be taken care of first. The rear crossmember had seen better times as on so many other Panteras. Crushed from using it as a jack point. Some really talented mechanic masked the damage up by welding a facia plate over it to hide it. Here are the pictures of the required repairs. Back to factory appearance using 16 gauge sheet metal, MIG & spot welder and original drain hole locations.
Attachments
nicely done!
After being done repairing the rear cross member, I took a closer look at my rear shock towers. Knowing this is a rust prone area on many Panteras, I don't want any surprises later on. Looking into the inside, material loss from corrosion is visible. It may not be much, but it made me drill some holes into the shock towers to measure some material thicknesses. I came to the conclusion that I am unwilling to take any risks and started cutting out the driver side first. I replaced the outside wall of the frame rail and spotwelded new material back in including corrosion protection, then made the replacement part, dimensionally and in appearance identical to the original with the addition of some drain holes. I almost fell off the chair when I was told those parts are $500 per side at Hall. It took a moment to make the driver side, it's my first but it perfectly fits and full 16-gauge material with full strength is back where it belongs. The passenger side will much faster. Material cost $30 for both sides from Lowes. Currently only tacked on, this is still work in progress and there will be additional posts along the way...
Attachments
Beautiful Work! Thanks for sharing, keep the pictures coming. Larry
What did you use to form the upright shape?
My car needs extensive rust repair. I wish i had your skills and or muster to tackle the project!
please keep us posted. It is inspirational to see these cars saved.
Thank you for your interest. The tools required are not very involved. You need a hammer and dolly kit, a brake that can handle up to 16 - gauge steel, real good welding equipment and a curve metal shear. Patience and expect to fail before you succeed. Practice on waste material and work with thin gauge metal or paper templates.
Here is the finished driver side shock tower. Completely welded in as factory. When painted, the repair should be invisible.
Attachments
Great work, keep it up and thanks for the posts!!
Today I was able to finish the passenger side rear shock tower. It is as good as new. I find it amazing as I am gaining more and more experience, how much faster I can do things. The driver side took me almost two days while this side was done under 8 hours including making the replacement part.
Attachments
Did you have to pump argon gas into the cavity to prevent the welding rod from shooting through and into the cavity?
i am about to have very similar work done to my car. Please keep the posts coming!!
Hi there,
These are MIG welds using C25 Argon-Co2 gas. It requires no purging to get full penetration. Important is that you are welding healthy material. I have decent welding equipment, you just set the wire size (I am using 0.023, 0.03, 0.035" depending on material thickness), metal type and material thickness and you get a base line. You tweak from there and will get a feel and hearing for a good weld after some time. Some welders are self-learning these days.
Good luck with your project.
Today I finished the driver side quarter window frame. The chemical treatment left nothing hidden. Strangely enough, nothing bad below. This may be the result of a clogged drain and trapped moisture. Here are before and after pictures. Everything test fitted with rubber and trim, including a drain hole as original.
Attachments
I visited Ron McCall the other week and picked my set of Group 4 flares. Ron acquired those from Patrick Hals who owned "Candy". It was the last set, and I consider myself lucky to own a piece of authentic Group 4 racing history. Today I took a break from the rust repairs started on the right rear with the group 4 conversion. The initial fitment of the flares went well. Will post more pictures as I fit the others and start cutting the fenders.
Attachments
Nice work and congrats on the wheels; although, I was hoping for a pic!
Are you going to use the riveted flare look, like they did on the third picture (on Candy)?
The fit of those flares looks really good in the first two pictures!
Rocky
Finally, I was able to finish the flares. My OCD took control of me, and I did not like the way they were laying on the fenders and quarter panels. After some massaging ![]() , they are fitting perfectly now, the flanges making now full contact with the metal and any stress was removed from the fiberglass to prevent cracking in the long run. I made sure that the material thickness is uniform on the flanges, and everything is marked for cutting. In the pictures you can see the original mounting pattern used on the " Candy Group 4", which I did not use.
, they are fitting perfectly now, the flanges making now full contact with the metal and any stress was removed from the fiberglass to prevent cracking in the long run. I made sure that the material thickness is uniform on the flanges, and everything is marked for cutting. In the pictures you can see the original mounting pattern used on the " Candy Group 4", which I did not use.
Attachments
That is very nice work, having done those flares on my car and knowing what a bugger they are to get right. Did you cut the underlying fender sheetmetal away? I actually left my rears full as I thought it would help with body stiffness in the ass end. I would get occasional rubbing on compression at high speed on bumps but minimal.
Hi Patt,
Everything is marked to remove the original metal all the way to the flanges. This will be the last thing I do before moving the car into paint, just in case I change my mind.
I think you have to cut the fronts or they will rub badly with a 10" rim - they will hit in the front corners. The backs you can probably get away with but you should really have the car sitting on the final wheel tire combo to determine your ride height, etc. I found that all out the hard way by doing that last. What wheel diameter are you planning to use?


