I'm finally going to have a weekend to install the carb and intake that I recently purchased off my fellow NH Pantera owner LarryW. Seeing as I've learned so much from this forum on my car, I want to share my experience to all with this project. Please feel free to throw in any tips you guys may have and hopefully I can get her running before Sunday night. I also finished my sway bar upgrade recently if anyone is interested, I can post the pics of that also.

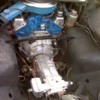
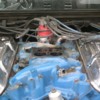
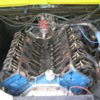
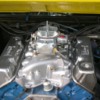
So here is what I'm starting with. Pure stock!

Attachments

Images (1)
  • IMG00029
Original Post

Replies sorted oldest to newest

You will probably have to remove the valve covers; good idea anyway to get a look at the springs, etc.

Stuff the ports with paper towels to keep debris from dropping in. Likewise cover the galley(shop rags work well)to keep trash from falling into oil return holes, etc.

You can leave the dizzy in place.

Clean all surfaces until clean. Razor blades, scotchbrite, solvent and elbow grease.

Do a dry fit when things are cleaned. Check gaps for uniformity. Note end rail gaps - you'll be filling this with silicone. Read on.

You may need an aftermarket carb-linkage adapter. Nothing you couldn't fab on your own. Pretty sure the vendors sell one ready-made.

Check for full throttle travel before putting the air cleaner assembly back on.

New air cleaner in the plan? Skip the fancy, oil type open-top foam cover; they do not agree well with flaming back fires.

Personally, I do not like the 'turkey-tray' OEM-style intake gasket. Others swear by them.
Both will work just fine, if installed correctly. Have you purchased gaskets yet?

Felpro 1228, their Printoseal line with a blue sealant circling the ports.

Permatex "Sensor-save Ultra Grey", item # 82194.

End-rail gaskets may be cork or rubber; whatever they are, throw them away. Use about a 1/4" bead of the Permatex RTV silicone applied to the block only. Also run the bead about 1/4" up the head surface. I take a sharp center punch and dimple the block end rails and the intake end rails; this gives the silicone some places to get a "bite" to hold better.

Observe proper torque pattern and settings. I like a three step process.

Give the silicone some time to set-up before engine start. I like overnight.

Go slow, keep things clean, think clearly. This is not a big-hassle job and can be successfully accomplished by most of us.

Get on the forum and hit us up for advice if you get in a jam before getting in a bigger jam. Wink

Larry

Attachments

Images (1)
  • DSC05661
Last edited by lf-tp2511
In regards to the turkey pan:

I respect the engineering team that designed the 351C tremendously, they designed an unbelievably bitchen motor. Bitchen in every way. I see no reason to second guess them and defeat the features they designed into the motor for a reason. I can point out a quote in print where a big name engine builder (Mario Rossi of Reed Cams) admitted using the turkey pan on his NASCAR motors to keep hot oil off the intake.

I think it is reasonable to recommend if your manifold is going to be heated by exhaust heat use the turkey pan. That's the way the engineers who designed the motor intended it to be. If there shall be no exhaust heat, the turkey pan isn't needed.
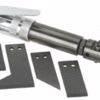
I would go to Harbor Freight and get there pnuematic gasket scraper, what a effort saver.


6 Piece Pneumatic Scraper Kit


Quickly remove gaskets, paint, rust, glue and other materials without damaging metal surfaces.


4 CFM @ 90 PSI
3500 blows per minute
Built-in regulator adjusts force of impact
Comes with five specialized blades
Handy carry case

Air inlet: 1/4"-18 NPT, Recommended hose: 3/8"; Overall dimensions: 7-7/8" L x 1" W x 1-7/8" H
Weight: 1.5 lbs.


ITEM 95826-1VGA

$19.99 Email link to a friend
Prices on our website may or may not be current prices in our stores

Attachments

Images (1)
  • scraper
quote:
I may be getting ahead of myself, but when applying the RTV, do I do both sides of the gaskets? For valley pan, intake and valve cover gaskets?

Thanks

I ONLY use RTV on the end rails; as described in my earlier posting.

Valley pan aka 'Turkey pan" - ask George.

This turkey pan issue, by the way, is one reason why I just avoid the durn thing. Metal to metal needs a gasket, right? That is why we have a gasket between the heads and the intake. With the metal 'turkey pan', you just add another layer of metal. Yes, it does have embossed ridges for sealing purposes. But, like you, I've always wondered if-where-why one needs to use a sealant for the metal-to-metal contact; top and bottom of turkey pan, just the bottom...???

Intake - using the Felpro # I listed, gasket as-is out of the package.

Valve cover - depends on type of gasket and your personal style. I use rubberized cork, dry both sides.

Larry
Well, no real problems to this point. Everything came apart easily and everything is very clean and almost new condition. I will be installing the gaskets and valley pan today and then starting the process of hooking everything back up.

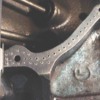
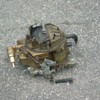
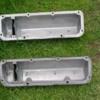
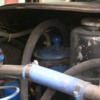
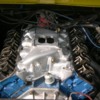
Here are some of the shots I took while I was removing the original set up.

Removed the bulkhead and engine cover to inspect the front of the motor. Not really needed for this project, but I haven't checked the belts and hoses since I bought her last September.

Attachments

Images (1)
  • DSCN2172
quote:
Can anyone tell me what this blue canister in the corner is for? Do I need it? One of the hoses isn't even connected to anything.

Thats the Charcoal canister, it is used take care of gasoline vapors, before they go into the atmosphere. Whatever your states laws are on epa regs will dictate if you need to keep it.
Other then that it is a boat anchor.
Jeff
George,

quote:
Could that be why once in a while if I stop quickly I'm getting a quick smell of gas? [quote]

Yes, it's possible that this is where the gas smell if coming from, but there are also other possibilities.

[QUOTE]If I remove it, what should I use for a vent for the fuel cell?


If you removed the carbon canister, you will need to run a vent line to an area that is away from any heat source and away from the cabin. A filter needs to be install at the far end of this line, as air is exchanged between the atmosphere and the fuel tank. When the car is parked, air moves out of the tank as the fuel warms and is drawn back into the tank as the fuel cools. When the car is driven, fuel is being removed from the tank (by the engine) and needs to be replaced with outside air. If the vent line becomes plugged (or is capped), a vacuum will occur when the engine is running and fuel will cease to flow to the carb. This could also collapse the fuel tank. This assumes that you are using a non vented fuel cap.

The carbon canister contains activated charcoal (probably dead after all these years) that is supposed to store the gas vapors until the engine is started. These stored vapors are then drawn into the air cleaner during engine run. I would hook this hose to the air cleaner (IMHO). There should be a fitting on the right side of your stock air cleaner to connect the hose from the carbon canister.

John
quote:
Originally posted by DW:
George (CfH)

Would you please clarify your comment for me? Are you saying that the turkey pan serves no purpose if you are using a stock or stock type intake manifold and are using a block off plate to cover the opening shown below?

Thanks,
Dennis


Covering that hole does not block exhaust heat from the intake manifold. My advice would be to continue using the "turkey pan" in that situation.
[QUOTE]Originally posted by GT5KR:
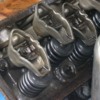
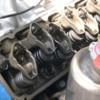
Looks like your oil deflector on the rockers are installed incorrectly, shouldn't the oil shield be on top deflecting oil from the pushrod?

I'm not sure. This was the first time I've taken the covers off. I'll look at the paperwork I got with the car to see if the previous owner had any head work done.
Found some info on the web...so you better turn them around.

The purpose of the rocker arm oil deflector is the following:

When oil is sent up the pushrods, it passes through the rocker arm and hits the oil deflector. The purporse of the deflector is to stop the stream of oil from jetting over the rocker arm and instead the oil is redirected to the rocker arm fulcrum, thereby lubricating it. Lack of lubrication causes premature wear of this powdered metal item.
Yes, you have to rotate the crank to have the cam in a certain position so there is no load on the lifter and spring. Back off all the bolts and rotate the deflectors around and torque the bolts down in sequence, I believe the torque is 20 ft lbs. I have scan the rebuild manual for the sequence. Hope this helps.

Attachments

Images (1)
  • scan0001
George,
You really don't need to bother with taking the load off of the rocker arm before moving the shield around.......

I don't know why it would make a difference other than unloading the lifter faster....have never seen a Ford document recommend this.

Just loosen, flip the deflector, and tighten to proper torque spec.

Steve
Post
×
×
×
×
Link copied to your clipboard.
×