
Has anyone installed leather (by themselves) on a dash, console, door panels, etc. that would be willing to share how they did it? What tools are necessary, and how long did it take to learn how to do it?

I've seen Johnny Woods stuff, and it is amazing. Just wondering if someone else has done it.
Last edited {1}
Original Post

Replies sorted oldest to newest

Yes. Me. You need to be able to sew. A regular Singer will handle it.
The dual pod dash is really difficult to do. The single pod although not childs play is easier.
The leather can be a PITA to make stick to things like the dash.
The heavy duty headliner adhesive works but the problem is the back of the leather is "hairy" in the sense that it is torn and sometimes if it is too hairy, you need to sand it.
Also when the leather is new, it is very pliable. This helps in some places because you have to stretch the crap out of the leather since it is so pliable. Because of this and it's stretch ability it can be difficult to make it stick to the compound angles and the crevices too.
Simplest thing to do is to buy the leather kit from a vender like Wilkinson or Hall then it is basically mounting it on the panels.
I went with leather on the headliner too.
It wouldn't hurt to have an industrial or commercial pneumatic stapler also.
I've noticed a lot of Panteras with "aftermarket" interiors no doubt from local upholsters and the details vary considerably.
Personally I think they added a lot of pleats that are unnecessary but it does add to the individuality that so many of these cars exhibit.
Leather is much easier to work with then vinyl but the answer to your question is you just need to do it, then you will be an expert for sure.
The leather skins are at least $150 each and roughly the size of a 4x8 sheet of plywood.
I believe that I used 4 skins without the seats which I bought from Hall already done.
You need the room of basically a two car garage to deal with the skins and assembling them on the interior components. That's not including the two car garage you need to work on the car with the doors wide open all the time.
Oh, I found that some of the spray glues are not compatible with the upholstery foams over time and the foam will disintegrate into a messy powder.
I just had to redo my console and arm rests as a result since I had used thin foam under them originally.
Doug,

Thank you for responding. What leather did you use? I was thinking of a fake suede leather (Alcantara) on some parts and real leather on others.

What style of stitching were you able to do? Besides a sewing machine, what other tools were helpful?

I have the original dual-pod dash but will be installing a fiberglass single-pod dash. The necessary tabs are already in place for the single-pod dash.

What kinds of spray-on glues did you use, and what would you avoid?

Corey
When you go to an automotive leather supplier, mostly it is going to be "Mercedes" leather they offer.
Really what you want, is a European automobile leather. You do not want North American leather, or furniture leather.
The difference is going to be the quality of the skin and the treatment they use on the leather.
Mercedes leather is superior to Rolls Royce leather which was a standard for many years.

The Mercedes leather is known to last 40 or 50 years with correct feeding of it while the others can be dried out in 7 or 8.

The North American leather is also full of barb wire scrapes in the skins. The Europeans take care of the cattle. They have few slashes.

Our cattle are basically for beef. The leather is secondary to the ranchers. They get paid by the pound of the animal, not the quality of the skins.

You can do whatever stitches the machine is capable of. Something on the order of 10 or 12 stitches per inch.

You do not want to go finer then that because it tends to weaken the leather and makes it tear much like a perforated postage stamp will.

You can get "heavy-duty" thread from a fabric shop. It's stronger and is what is used most often on furniture upholstery.

3m Super Headliner spray adhesive is what I used. Read the instructions. It works a lot like paper cement does.

You need a hand roller, a Formica (or plastic laminent) roller from Home Depot will do.

You need a high quality stapler. I use Porter Cable pneumatic tools and of course you need a compressor for it.

You need a heavy duty set shears like you can get in the Singer store. A nice heavy duty utility knife with changeable blades. We call them sheet rock knives but the correct term is utility knife.

You need white chalk to mark your cuts with but in a pinch you can use pieces of sheet rock. Don't use crayon or magic markers. They don't wash off easily. The chalk or sheet rock does.

Don't be too surprised if you have to pay $300 a skin either. The price goes up and down with the commodities market. There are some good suppliers in North Carolina that post of Ebay. Shop around. Sometimes there are deals.

Black is the easiest to match. Colors can be a problem. Red is the toughest to match since it fades the fastest.

Personally I wouldn't mess around with the "artificial leathers". In every case they are more per square foot (or yard) then real leathers are. One company that is near me here in Armonk NY, gets $50 per square foot.

I have it on my shift boot and it is already torn. Use leather if you can. The only material you can not kill is the vinyl from the cars of the 60s like what is in my Shelby. However even if you wanted to go that way, that material is very thick and difficult to work.
Last edited by panteradoug
No, I've done projects here and there over the years. A sewing machine is just another piece of equipment. I probably can drive anything. Big Grin

If you are starting from scratch I would recommend that you use the factory designs and take off the existing upholstery and use it as a pattern. That's what I did. Of course I used a lot thicker foam in it then the factory did.

Makes the cabin kind of a padded cell. Helps keep the screaming of the passengers quiet on the outside of the car so no one will notice.

Cutting out the patterns is easy. Practice with the machine some. Straight lines are pretty difficult to do at first, but if you get the feel of the machine and the material, it isn't really difficult.
Corey,

I did my Pantera (first ever retrim) with an old but very good quality Viking domestic sewing machine. I had to modify it in lots of ways to get it to do what I wanted it to. I struggled all the way though it because it did not have a "walking foot". For my second interior (the red and black one) I spent £500 on a used but proper "walking foot" industrial machine made by Phaff. This is the only piece of specialised equipment needed to do a retrim.

An industrial machine like the Phaff will give you good thread tension and a nice big stitch length. If you hold the seam up to the light you should be able to pull it hard and not see any light through it, this is thread tension.
It's essential that you use nylon bonded thread. I always use the thick stuff (20).

I agree with Doug, you can use the original vinyl seats as a pattern. I now make my own patterns but for a first attempt you can carefully dissect the original seat covers by cutting the stitches with a scalpel. This way you can learn how it's sewn together. You must then cut your new pieces 10% smaller than the old stretched pieces you are copying. This way you get a nice tight fit. Be careful not to cut the piping cord because you will probably be able to reuse this if it's plastic. If you find rolled paper, discard it and replace it with plastic.

I suggest you start with the easiest part and work your way though to the hardest part. I started with the arm rests, keep trying until you are happy with the results then move on to the bulk head panel or box at the rear of the console, then door cards, centre console, dash, and finally seats.
When you make the patterns for your single pod dash make sure you make it 1" shorter then the dash. This is just the right amount on tension. I dont join them in the same place as the factory.

I use heat resistant impact adhesive for almost everything because it will stay stuck for the life of the interior if done properly. I use spray adhesive also but only on the door cards and to adhere the foam to the dash top and centre console. I would not consider it for a head lining.

You will probably have to replace the foam in the seats. If it hasn't turned to dust by now it soon will. I do the opposite to Doug when it comes to foam, I use the absolute minimum.
Make sure you put a dab of super glue on every knot you tie off because nylon bonded thread knots undo them selves like magic. I tie off every single stitch, just going backwards and forwards at the end of the run is not acceptable. I use an office stapler to hold my parts together while I sew them. I use ordinary high quality house hold scissors, not made in China!

I would be happy to advise as you progress with your interior.

Johnny
I was watching a "virtual tour" of the new Ferrari factory.
Ferrari does everything they can on their cars.
They have their own foundry. They sew their own skins.
There is a scene in which they show the seamstresses stitching the leather.
You know, I would love to work for Ferrari doing virtually anything, but watching the skills of all of the workers(they really are artisans) the only thing I'd feel qualified to do is sweep the floor.
There are so many "little things" that to be really good you need to learn but it takes years.
Do the best you can now with the talent that you have, that's all you can do.
There will always be someone smarter, more talented, more dedicated, taller, and prettier, but here you can take satisfaction in having been able to have done it yourself, when the vast majority of the masses wouldn't even have a clue, or worse yet...give a dam. Wink
Johnny,

Thanks for your help, too. I don't have a sewing machine, so it looks like that's the one thing I need. I wasn't planning to rebuild my seats yet- I was just planning to cover an aftermarket dash, console, door cards, armrests, etc. I will take you up on your offer, but it might be over the course of a year or so.

Do you have any pictures of recovering armrests?

(BTW- my Pantera has your front valance replacement, but the previous owner installed it)

Doug,

I think I saw the same tour. It's in segments on Youtube, and I saw the interior people. It was fascinating. There's also one on the Lambo plant as well on Youtube. They are similar, but the documentary on the Ferrari plant seemed to emphasize quality. The Lambo plant documentary was "here's what it does, and here's where things are made..."
You can buy a walking foot as an accessory for a Singer or a Sears sewing machine. They are inexpensive. $20 or so.

There is little difference with the Singer industrial machine. Mostly it is for mass production and builds into a large table for things like slip covers and drapes.

You can get along with these standard machines for what you want to do.

If you are going to go into business to do this, that's a different story.

Yup. The Italian seamstresses are outrageous for sure. Working leather is hard work.
Doug,

The type of walking foot I mean is not an attachment it's a type of machine. The foot is in two parts, outer and inner. The walking foot pulls the material into the machine and is very nice to use because it copes with the difficult areas where the two pieces of piping intersect on the seat covers. Here's how it works:

http://www.youtube.com/watch?v=V-QjJgJKKVM

Those Ferrari interiors are fantastic and extremely consistent. The reason for this is because the patterns are perfect and all the pieces are cut out on a giant stamping machine so every seat has identical leather sections and the injection moulded foam is high density and perfectly matched to the covers.

Corey, Nice to hear you car has one of my valance panels. I will dig out some pictures of am arm rest when I get a minute.

Johnny
Doug,

You're right- I don't plan to do seats (at least not yet). I think many of the vendors can help with seats, and frankly, my '74 seats aren't terrible yet. Gotta get the car running and then we can work on other things.

Johnny,

I was thinking that I'd buy a used sewing machine locally for a decent price, use it, and sell it again. If I lost a little money, I'll still have saved a little and also learned something in the process.

Thanks, Corey
Okay Johnny and Doug,

Here's what I want to cover:


Here's what I want to recover:


I don't like the color of the leather- it's nearly skin tone in sunlight and it isn't in good shape.

1. Where do I get the leather/materials to start, and
2. Where do I start?
3. I'll need to get your contact info, Johnny, so that I can post stuff off this copyrighted board. It's my work.

I also have door panels and armrests to recover. The back firewall panel is in great shape, so I'll tackle that last.
Last edited by coreyprice
There are more then a few leather suppliers on line. Many sell on ebay. For the quantities that you need, that is where I would look.

You should be able to get top leather skins for $150 to $200 each. Shop around. Ask for samples.

Each skin will be different. No two will be exactly alike.

Well you don't start easy now do you?

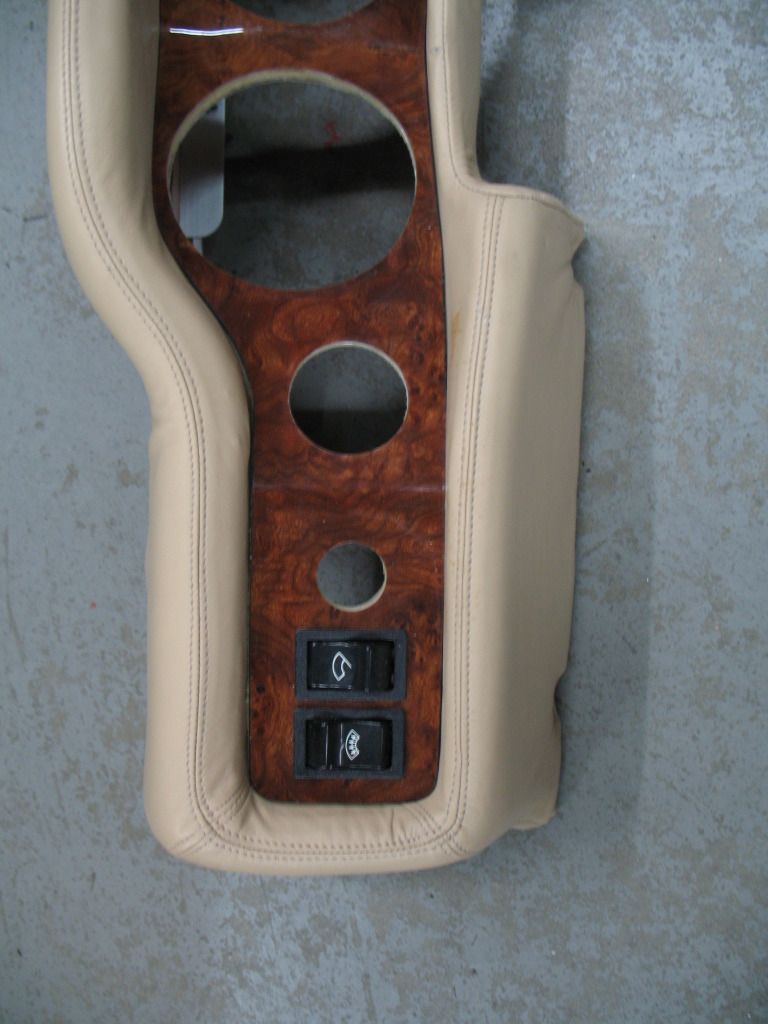
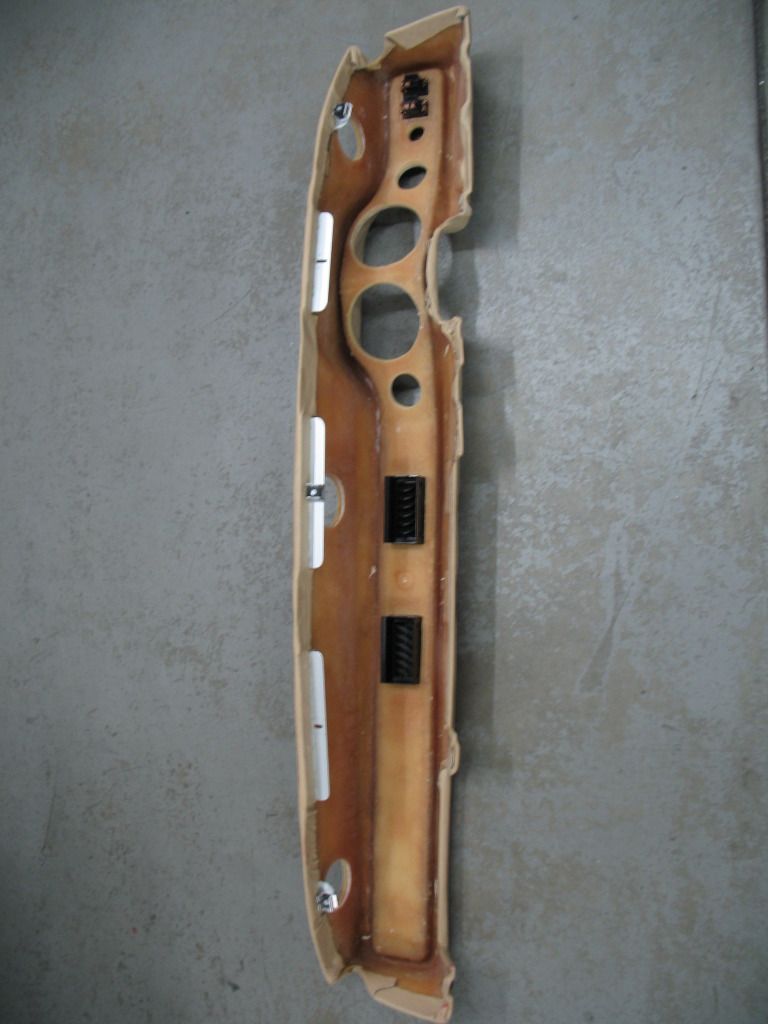
Of the two dashes available, the single pod is easier to do. You do not need the pleat in the cover, which is what you have.

You will have to sew two "ends" into it to wrap it around the corners at the doors. Those "joints" will wander since you have to approximate the location of them, then stretch the leather. If you cut the leather 1/2" shorter to stretch it, it might wind up needing to be stretched 3/4" of an inch. My joints there are off center because of that, but I'm ok with that. A customer might not be.

Look at your dash cover. See how the joints in the corners are off center? That's what I am talking about. They are next to impossible to center where aesthetically they should be. I've redone those several times. I can never get the leather stretched to have them fall perfectly in the center of those interior corners. Maybe Johnny has a trick for that? I don't.

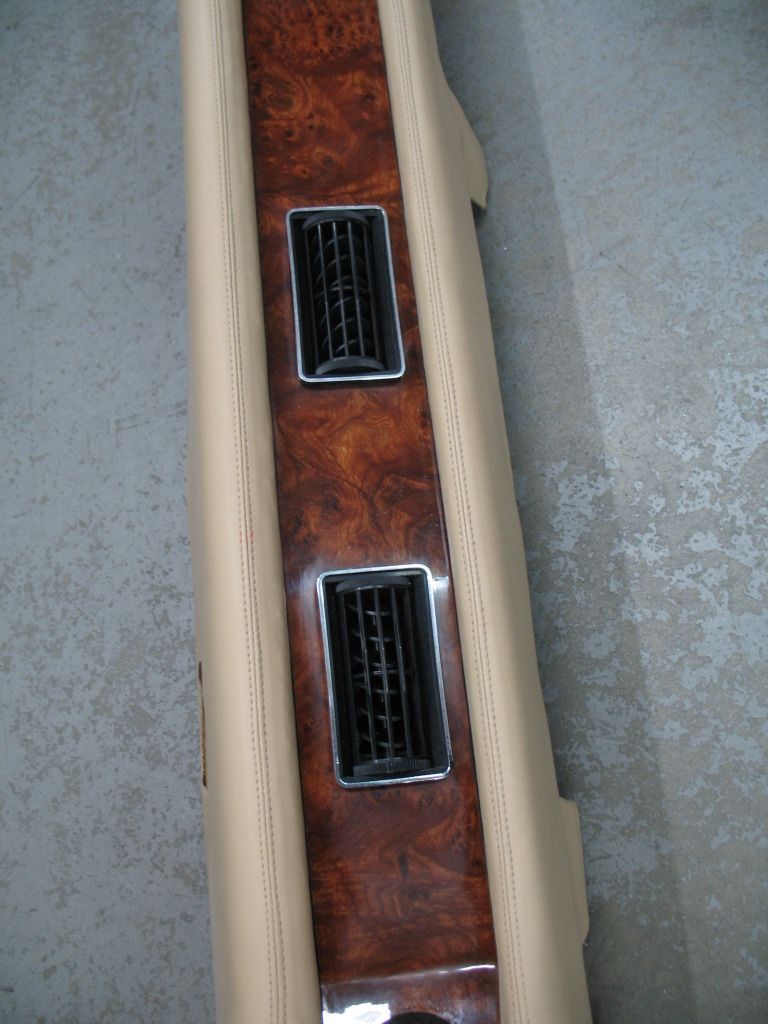
You can stretch and wrap the leather around the nosing down to the flat surface of the dash, gluing it in place on the dash. That intersection is a little tricky and if you use the burlwood inlay with the leather, it makes it easier because you remove the burlwood, then trim the leather to the 90 degree intersection, then glue the burlwood back on.

I didn't go that way. I leathered the front too. The leather new is quite soft and tough to cut perfectly clean at that joint, so I made a molding for it out of leather.

Well not really a molding but what is called piping. That is string with leather wrapped around it (glued to it). If you do it right it will actually wind up looking like a black rubber vacuum hose mad out of leather. Then you just glue it into the crevasse.

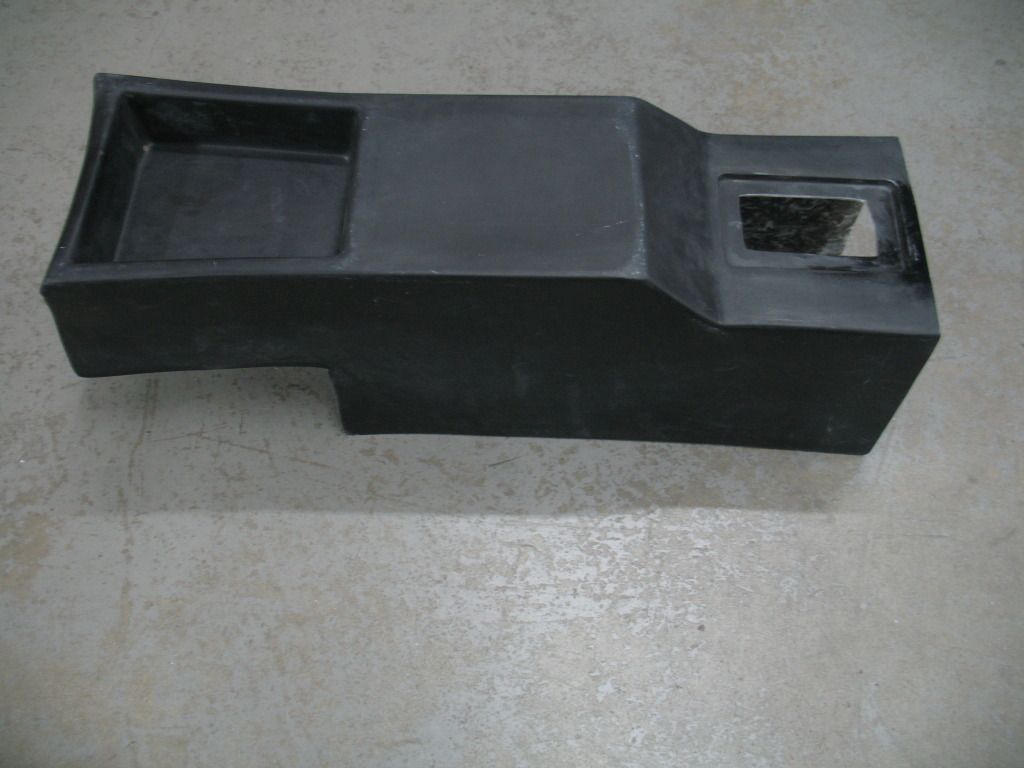
The console you need to cut patterns for because you need to make a seam along the edges. Most of the upholstery shops will make a pleat like you have on your existing dash, since it is tough to make a simple hem, fold them over and have the transparency of the leather show a uniform fold underneath it. I like to go that way, but it's tough to do.

The engine cover is complex. You have the bubble, you have the rolled edges, you have the big flat spots behind the seats. Those all need to be done seperately and attached with a combination of blind screws, glue, and staples. It's easier to show you then explain and it isn't easy to show you. Smiler

The door panels, if you follow the original design are really just slip covers and you need to understand how to hold the witness lines in place. Maybe Johnny has some pictures of how they get done. They are a lot like the seat covers in that you need to insert wire, provide attachment points in the fold of the leather for staples, hog rings or clamps of some kind.

You can do all of this, and actually have excellent results but this is at least a 3 credit course, maybe 4 or 5 with the labs?

Oh. find yourself a nice well lit area where you can set up an assembly table to lay out and cut the patterns and another next to it to set the machine on. Don't throw away the little pieces of leather that you trim off. You can use those to practice sewing on.

The hardest thing for me sewing initially was pulling a perfectly strait line. It's harder then it looks, and when you come to an intersection with three layers of leather folded over you will discover what the walking foot is for.

The leather is very soft new and unlike upholstery fabric which has a stiffness and makes it easy to feed into the machine, thus pulling a straight line easier.

You know you can buy a leather "kit" from Hall with this already done and all you need to do is install everything?

It isn't cheap but neither are all of your materials and your time, and your "do overs"?

You need to use the coverings you have as patterns. That is the simplest way for you to do this, otherwise you start to reinvent the wheel. No one has re patented that design yet either.

I upholstered the headliner too. In all I used four skins, with some left over, and I bought the seats from Hall already done in the "new style".

I had one of the seats appart and looking at how they were done, it isn't really difficult. The hog rings solved a lot of the issues for them and in the future when I need to redo them, I won't be afraid. "Into the valley of death marched...". Eeker

Anyway. Good luck.
Corey,

I agree with Doug, find some European leather. If you are not doing the seats yet you will probably only need two hides maybe one. I like Porsche leather. They have their own tannery and it's not expensive. I am sure Mercedes leather is just as good. I always use the smooth stuff. The heavily embossed finish is done to cover small imperfections in the hide and is cheaper for this reason. You need to find a supplier and get some colour samples sent to you. Also ask them for Alcantara samples.

I suggest you start with the easiest part like an arm rest and leave the dash until the end. Show me a pic of your existing leather on the arm rest. I always make new templates out of cardboard and then practice sewing it together. Dont expect to get it right the first time. It may takes several attempts. It's good practice for the rest of the interior.
Dont forget you need the thick (20) nylon bonded thread.
Have you bought a sewing machine yet?
There are two leathers that I can think of to avoid. North American leather, and furniture leather, which is mostly Italian.

Mercedes leather is the most common here in the US for car upholstery.

Johnny is absolutely right, leave the dash 'til last. It's a little tricky. The console isn't easy either. Looks simple but it isn't. You might want to consider making a console cover now. Mounting it. The do the upholstery on the entire thing.

Johnny. Maybe there is a market for you to do patterns for the car? I remember when I bought my first cargo van. There were pattern kits that were available to expedite paneling the interior. You had to figure out where to put the black light, and lava lamps yourself though? Roll Eyes
Post
×
×
×
×
Link copied to your clipboard.
×