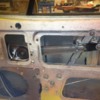
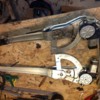
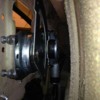
Hi, thought I would share a simple upgrade on the Window Regulators. I initially bought a set of used Motors to fit the OE Regulator but was not satisfied with the result. The sprocket on the ones I bought was 9 tooth and the original had only 6. So it made a bit of noise going up and down. After a bit of research I bought a new set of Regulators from a Ford Transit 2002 MK6 (price 56 GBP+shipping) They required a fairly simple modification 2-3 hours of work. Now the operation of the windows are real smooth and quiet ;-)

http://www.ebay.co.uk/itm/FORD...&hash=item417aa5869c

Attachments

Images (1)
  • IMG_4531_1
Original Post

Replies sorted oldest to newest

I like it. I did the "Taurus Motor" conversion. I actually used '98 Expidition motors. I wasn't happy with the the gear mesh either. The 9 tooth gear didn't work all that good in my opinion. I had some machining done to combine the old 6 tooth gear and the new motors. They work pretty good. Still I like this option. Can you post more photos of the mounting to the door? Did you have to make spacers to mount them to the door frame?

Steve
Hi Guys, the modifications I did was.

a) Drill out the four spot welds that attaches the Arm to the Assembly and rotate the arm a bit and re-weld it back on.
b) Give the Arm a slight S-bend to align it.
c) Cut off the length of the arm and weld on the end-piece of the old arm. Approximate center to center 325mm.
d) Cut off 2 6mm OE studs, drill 3 holes and bolt on 6mm bolts to form 3 new studs.
e) Drill 3 new holes in Door to match those new studs.
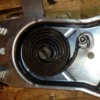
f) Re-use the old Spring (welded a 6mm Allen bolt on to form attachment for the spring)
g) Cut off OE Plug and crimp on two universal mail 6,3mm plugs.

The Ring Gear must be flush with the Console as shown on previous (2nd) Photo and the Arm Can be Welded on in a straight line (centered) to the Console. This to allow the Ring Gear to stay clear of the vertical Vent Window frame thats sticks about 8cm down into the Door when the Window is fully down. That way there will still be a few tooth left on the Ring to secure that Window is going fully up.
You can also see the Welding (back side) of the Allen bolt that holds the Spring tension.

Attachments

Images (1)
  • IMG_4511_1
Forgot to mention the Window sticks about 5mm up compared to the Outer Trim on the Door. I do not have the Interior done yet so not sure how much the Window sticks up compared to the Door Panel. I did not perform any mods to allow the Window to go any further down except I cut the holes larger on the Roller Assembly to allow the Window to sit as low as possible. The Roller Assembly is sitting on the bottom of the Door when Window is all the way down and I suppose I could grind a few mm of the Assembly and the Arm to allow it further down. Just wasn't bothered ;-)

Add Reply

Post
×
×
×
×
Link copied to your clipboard.
×