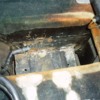
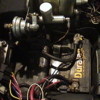
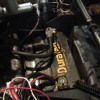
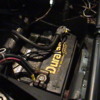
Hi, did a search, and worked it all out, but unsure how big I can make this.
I will do this at a friends shop with his hoist as the car is very low and hard to get under to take all measurements. I saw Joules5 post that says his battery box is 12 1/4 x 6 3/4 inch. is that the max size ? I will be hand fabricating this box and then dropping it in the freshly cut hole.I would rather make the hole as big as possible so I can work out the biggest battery i can buy, and have room for the cables. It will prob be more of an open box, than a sealed box. It will house s dry cell battery that is wrapped in a steel case, so there will be no spillage, and rocks should not hurt it !
may put a bettery switch in and some jump posts as well. not sure yet, but want to make the front boot look clean and empty, as that is the next step on the car and while it is at the trimmers the interior as well !
Thanks for any suggestions Smiler
Original Post

Replies sorted oldest to newest

I have always wondered the structural impact of doing so. The flat sheet of floor in the front is like a skin on a drum. With a big hole in it, it becomes a drum with a big hole in it. I decided not to do mine. I will also have my electric power steering pump right below.

I am even contemplating running some re-enforcement between the uprights right in that area. Looking at welding some light plates left and right and welding a piece of half tubing to the floor.
FWIW, you really don't need a battery 'box'. When I did our battery a decade or so ago, I made a crossmember of 2" aluminum angle, bolted between the front subframe rails and floor; the battery sits on top of it. No fumes or corrosive liquids can build up and the crossmember may even add some front stiffness. The battery is restrained by the firewall which is right at the back edge of whatever hole you cut. The front is bounded by the triangular rack mount- which incidently is only about 6-1/2" away so square batteries just won't fit, box or not. The left side of the battery is restrained by the steering shaft and clutch hard line. I added a rubber tie-down strap and a short piece of wooden 2x4 to restrain the battery from sliding the extra 2" towards the right side. No evidence of any battery motion in 30,000 miles.
A stock 'hot' battery cable reaches the area by rerouting it under the floor; a std ground cable now bolts to a rack-mount bolt. I added a sheet metal cover held on with 2 dzus fasteners. For dropped batteries, I recomment top-post units 'cause side-posts get very close to the rack mount or the firewall; dual-post batteries should leave the side-post block-off plugs in place for short-circuit protection. Rubber post covers add some extra upward protection if you routinely 'get air' or hit big bumps at speed.
And while you're doing all this, reroute the front brake connecting line from its stock position behind the battery to under the floor. When you do this, you may be surprised at the amount of corrosion on this vital line from being right next any battery leakage, protected only by a thin plastic sleeve- that's usually torn. Besides being safer, it also tidies up the front compartment.
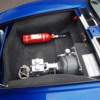
Consider an Odyssey battery. They use these in racing applications from what I understand. Battery is small as heck, packs a big punch, comes with a metal housing as well (see photo below on my black 5S). I have also seen batteries placed behind the rear wheel well if that may be an option for a real clean front trunk.

Attachments

Images (1)
  • IMG_9244Battery
Ok that sounds great. The plan was to make a box from steel angle, put a few gussets in it for rigidity and then lower it in the fresh hole I had cut. and screw / rivet / weld it to the floor. being fairly open the battery can breath, plus the leads can be pushed out the way for installation.
My trimmer wants to make a box to cover the brakes / clutch, as mine is all stock looking that may be an idea ?? but i am thinking it will look a bit bulky ?
Mine is dropped, the battery well uses 2 pieces of angle iron welded in place. I have rubberboots over the battery terminals to keep them from shorting out on anything. My optima fits rather nicely and does not move around. I can take some pics if you wish. If a small battery is what you are after I have seen the Dyna Batt and wish I had found it prior to buying my Optima. Here is a thread where it has been discussed before.
http://pantera.infopop.cc/eve/...160069415#6160069415
Jeff
Thanks, some dimensions would be great thanks.
I am not concerned for a small battery, my concern is getting a battery that will fit in the space that is there.
I read heaps of posts where people put small batteries in, and then I see some pics where there are normal size batteries in there ! I am on a limited time frame to do the job, I have to drive the car in, cut it up, make it , mount it and drive home the same night, so I want to prepare as much as possible first.
Thanks Smiler
Paul
Hey paul
my box is 7" x 16 1/2" with a droped trunk pan by 1" keeping this in mind the actual width of the batt. box is wider due to the angle of the rt. wheel well. i also welded the front side of the box to the steering rack support after bending the edge down. this will actually reinforce the support and trunk floor and take a huge battery. run your cable thru the rt side front panel at batt. level and you cant get much cleaner than that. i did move the clutch line. and i dont have power brakes but you will have to move that line also. will have so many pics of all the changes down the road. Larry
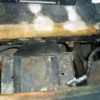
No effect at all. The steering rack bolts to a long triangular sheet metal part welded across the front trunk floor, and which probably stiffens the front clip. Thats the part that limits the size of the battery hole you can construct without cutting into and weakening the sheet metal rack mount. The rack is bolted to the front bottom side of the triangular sheet metal mount, some 6" away from the battery. The big water transfer tubes pass underneath the battery and its mount. Unbolting the rack drops the rack down & fwd, away from the dropped battery. Bump-steer alterations etc. are also unaffected.
You guys worry too much. The ss box that goes in the GT5 location I think is the way to go.
If your rack has been shimmed for bump steer correction you will find a tight fit on the right side rack retaining bracket. I had to modify mine and use a socket head bolt to fit it in and there is zero thousands clearance left.

Make sure that you use an external battery kill switch since there is no way that you can get in there in a hurry to disconnect the battery.

Just my very humble opinion. Big Grin
No. Not at all. It is just very tight in that one spot and I changed one hex head bolt to a socket head to make it easier to remove.

If your car does not have the shims for the bump steer correction like on the 74 and later cars then the clearance concern is reduced a lot.

Hey. I don't have the facilities of a NASCAR race shop here. If I can do it, anyone can. Wink
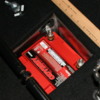
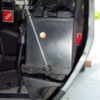
This is a 'Group 47' Battery. 880 CCA It weighs 40 lbs. and was dropped Aprox. 11.0" It sits exactly dead center in the trunk floor. It sits dead center between the Rack and Pinion Mounts. Yes, You can drop the Rack! Just use a foot long extension to reach the bolts. Remember retouque to 20 ft/lbs ABSOLUTE MAXIMUM!!! You don,t want to have to get behind the sheetmetal to relpace the 'Brazed' Nuts. About the Box and Hole cutting! You DONNOT cut a Hole!! You 'Slice' a near 'X' and then bend the sides Down 90 Degrees. This maintains some structural integtity and gives You a mounting point to attach Your Box! I made My own with a piece of sheet metal I purchased at Orchard Supply. Cut-out (Machinist Shears), Bend It (angle Iron and 'C' Clamps) allowing Extra for bent tabs that I torch Soldered. Leave 3/16" hole in bottom for unseen spills, add a rubber mat. Tabs were designed in for drilling and riveting. I used Stainless Steel 'Pop' Rivets, added some Sheet Stainless to Reinforce and close up small gaps There are some 25-30 Stainless Rivets That is a Lot of Holding Power. All seams are sealed with Rubber Putty. Hold-Down is a Bar of Stainless Bolted over the Top-Center(Not seen in Pics). The rubber sheet on sides are to keep side terminal + from grounding; along with a plug. Note position of Clutch line, support cross bar, 'Grounding' Cut-Off Switch. The Box is Painted 'Trunk GreyMetal', Inside and Out. Nothing has crac`ked shifted or rusted in many yrears of existence. Jack up the nose and get under with a WorkLight and Measure. The Back wall of this Box shares The Front BulkHead of the central FootWell! INSIDE Specs: 7-3/4" Wide, 10-3/8" Long, 8.0" Deep. All Tabs are 1.0" Wide, and OverLap. And Don't forget "loose Wires Cause Fires!"...

Attachments

Images (1)
  • Dropped_Battery_001
Last edited by marlinjack
Post
×
×
×
×
Link copied to your clipboard.
×