
Okay, so who wants to talk me out of trying to do this messy, upside down job?

If a 'real' mechanic is a 10, I'm a 3, maybe a 4. With that in mind,

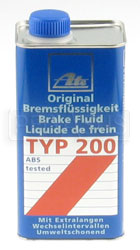
my clutch master is slowly dissolving itself amid ever murkier fluid in the reservoir. It has been bled a couple times, must be leaking internally a little since the level has dropped. Fluid is very dark again, so I got a new master from our sponsor here, ready to tackle it IF it's not beyond an at-home DIYer.

Also, any instructions out there? Or just take off the nuts, secured from the backside, remove the line and then refill? Help appreciated.
Original Post

Replies sorted oldest to newest

The biggest challenge will be disconnecting and reconnecting the pushrod from the linkage. Unless you have freakishly small and nimble hands, do what I found to be a big help. Get a 2" hole saw and cut an access hole in the side of the pedal box where you can get at the pin from the front trunk area. Then, replace the stock pin and c-clips with a pin or cut down bolt that can accept a cotter pin. Fab a small piece of sheet metal to cover the hole.
That's a really good idea. Yet, as a potential option...

I have the world's longest pair of needle nose pliers, purchased to replace a cotter pin inaccessible unless you were on the assembly line BUILDING a Ferrari 512TR and in charge of installing the front trunk strut.

After that, if said strut failed, you either sold the car or purchased the aforementioned needle nose pliers. They are conservatively 28 feet long, but I might exaggerate.

I will do what I can to fenagle access with the needle nose, but if that fails, my hole saw will be spinning! Thanks for the tip.

How difficult is it to re-fill the cylinder and all that?
IF you need to cut the hole, my recommendation is to purchase your cover first, then cut the appropriate sized hole...

Standard hardware store plug for counter/sink faucet (1.5" diameter)


Dome plugs - various sizes up to 2" dia.
http://www.capsnplugs.com/prod...eplugsdopseries.aspx


Flush style plugs - available up to 4" dia.
http://www.capsnplugs.com/prod...shstylesiseries.aspx


Recessed style plugs - available 2.5"-3" dia.
http://www.capsnplugs.com/prod...edstylesiseries.aspx


Multi-Purpose plugs - similar to std hardware store plumbing plugs.
http://www.capsnplugs.com/prod...ultipurposeplug.aspx


And the Motiv-Bleeder ROCKS!!! Easiest fluid flush/change I've ever done on the brakes - so easy I did it myself on ALL my cars! I used ATE Super Blue brake fluid so it's easy to see when all the old fluid has been flushed and only new (blue) fluid is coming through. Next year, I'll use the ATE Type 200 Amber fluid (same characteristics as Super Blue) when I do the fluid flush so I can easily see when all the old fluid has been replaced by new.

I was able to stuff my 210#, 6'-2" frame upside down in the drivers footwell and deal with the linkage and stuff without any extra holes. I think I had the drivers seat out. That helped.

What you will find handy is a u-joint socket on a long extension to hold the master cylinder nut heads under the dash while an assistant does the turning part from the front trunk.

A little tape wrapped around the socket u-joint will help hold the desired angle and make it less floppy.
Okay, I did it. No holes were drilled, but let me tell you, I thought about it. Honestly - overall the big access hole probably would save some time. Yet there are complications...

The bolt heads are pinched against the dust boot on the push rod, making ANY tool a pain in the pasta to deal with. Those Italians.

This is NOT a one man job either, though for 4 hours it was. I musta gotten in and out of the car 874 times (whose counting?) to attach/reattach a wrench or wedge SOMETHING to keep it from turning. I mean, 'wow'.

Finally got my son to help me out and that was the turning point. Got the old one out by myself, but the new one would NOT go in w/o an extra set of hands.

Mine had clearly been leaking awhile. My carpet had some stains, as did the kick panel next to the gas pedal (right under the clutch master).

This was an evil job. Got a question though - -

The junction between the reservoir and the metal housing had on the new one had the most minor seepage. Is this normal 'til they 'seat'? Or... well, I don't even want to THINK about the 'or' right now.

Drove the car home, ran awesome, clutch shifted well, and I'm drinking a beer, so all is well.

Tell me what you think of the seepage and I'll deal with it later.
quote:
Originally posted by OSOFAST:
Harbor Frieght cheap combination wrench....and a good bench or handheld grinder. Wala. Speciality tool!


HA! My cheap thinking entirely!

I actually was on their website (a good one too) last night and found a thin set of large mm wrenches. Couldn't believe it.

I plan to head there today, wearing a mask in case Jeff Udelson is prowling in the parking lot.
quote:
Originally posted by garth66:
Congrats on the fix Hudson! What was the blue thread sealer you used? I'd like to know for future reference.


Finally! I can quit talking to myself!

It is 'blue' thread sealer from Permatex. They make a 'red' that requires a special method to remove; the blue only hand tools. I was really kinda surprised it worked.
Post
×
×
×
×
Link copied to your clipboard.
×