
I need some ingenuity. What should have taken 2 hours for a master/slave swap, turned into me getting stuck because the slave cylinder appears to be fused with the bracket due to my guess of rust. It would be easy to break it off if you could actually get a wrench on it, but the cylinder in there doesn't have the notches like the long throw I purchased. So I WD-40'd it and put some a sliver of wood at the end and pounded it gently a few times and nothing. I even hooked it back up with the c-clip/snap rings still removed to see if the pressure from engaging the clutch would break it loose but no go. Am I missing some there here? The only things that appear to hold the cylinder in place are the two snap rings and the bolt with the cotter pin. Is this thing basically just stuck and I need to put more pressure to break it loose from the rust?
Original Post

Replies sorted oldest to newest

Thanks you guys for the replies, I finally got it out after giving it a few nice hard taps and wd-40'd it enough so that after I pulled the boot back far enough I could tap it back out the top of the bracket. I then sanded out the rust on the inside of the bracket. The slave might have been an aftermarket unit as it has a "cnc" marking on the boot. But it doesn't appear to be a long throw.

So now I'm onto the master and low and behold I get it out and the stud that screws into the pedal assembly is a lot shorter on this CNC master unit than the stock looking piece I pulled out. It never ends ugh! I will post a picture in a bit showing the difference. Do you guys know what the deal with that is? Talk about a frustrating night. Getting it out was no walk in the park either when you are 6'3. You need a midget to get any sort of an arm/wrench on those bolts/nuts.
The CNC Master's pushrod was a lot shorter than the stock piece. So I ended up picking up an M8 steel hex coupling nut and an M8 x 30mm set screw and another stud that is a little longer just in case I have the wrong length extension.

My first inclination was that since the CNC master has a bigger bore and requires less motion when used along with the long throw slave cylinder, the shorter length was related to reducing the amount of pedal travel. But even with the pedal buried against the floor, the stud from the master does not have enough length to thread onto the pedal assembly bracket. So hopefully with this extension I can adjust the clutch pedal to where I want it.

Is this normal with these units? I take it this wasn't designed to replace a factory unit but was the closest match. No way for me to know as I obtained to CNC mater not installed when I purchased the car.

Just to recap, I am replacing what appears to be the stock master clutch cylinder and an older cnc slave cylinder with a CNC Master 3/4 bore and a MAP Enterprises Stainless Long Throw slave cylinder in case anyone was lost.
Hustler,
If your car doesn't have the clutch effort reduction mechanism like on the later cars, you have the same problem as me. I got a CNC master that came with two rods and I thought 'Okay, I'll just change to the longer rod so it has the same reach as my stock unit' which ofcourse didn't work.

I ended up using the rod from my old clutch master to get length right and enough thread for adjustment but I ended up never installing it because I just rebuilt my old unit in the mean time. Go figure Smiler


Last edited by liv1s
BTW.... A tip a friend of mine gave me about installing a CNC clutch master: Cut a minimum amount of material on the hard line to install the new fittings by using a dremel to trim off just the original flare. There is minimum slack on the hard line and your line will be too short for the new clutch master if you are not mindful of that. Good Luck
Thanks for the reply LIV1S. I ended up not cutting any of the line because it was REALLY tight already and even after I got it threaded onto the 90 degree elbow I bought, it took a little bit of wrenching the cnc unit to the pedal assembly bracket before it pulled the line taut. I forgot to take a picture of how it ended up, but looks clean.

LIV1S, I had the same problem, think that was the issue as I have a 72 Pre-L. The extension coupler/stud only cost me 2 dollars at a local fittings retailer, just took me some time to make sure I was doing the right thing and not missing something. It makes sense now if the later cars have some other mechanism to lengthen the adjustment.

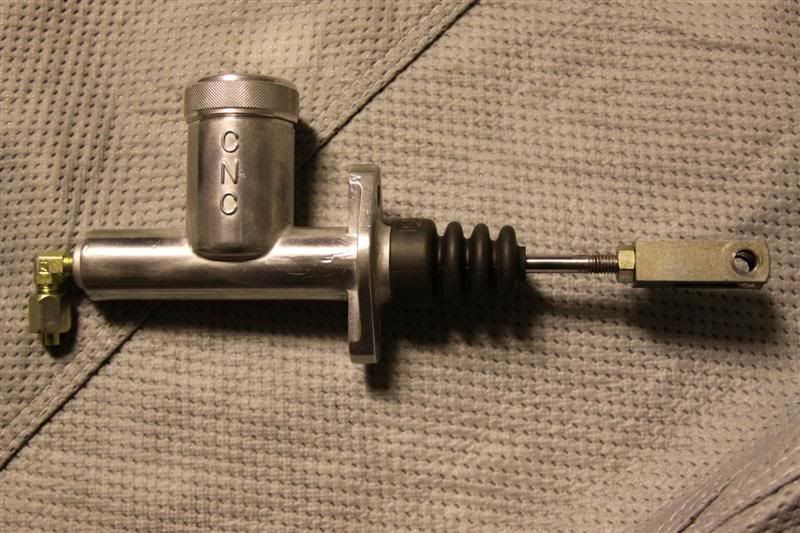
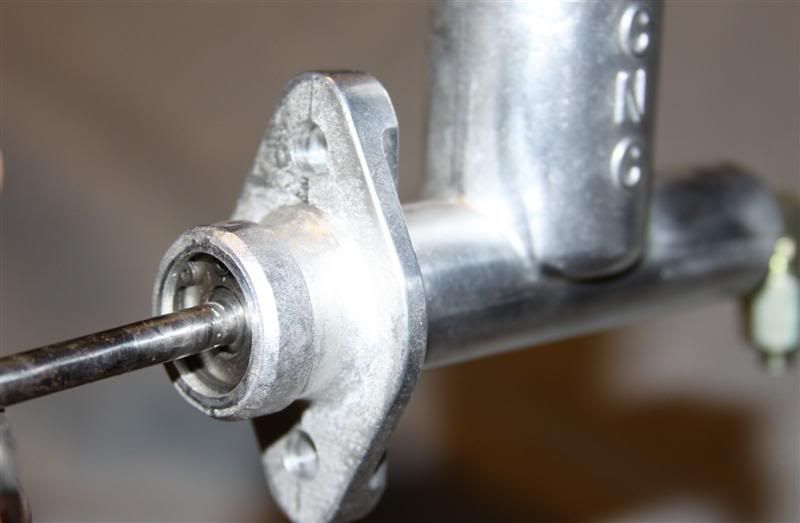
Here is a shot showing what I started with. Clearly the pushrod stud was a lot shorter than the stock unit. I probably could have swapped them, but honestly the hex nut coupler and stud method worked well because it made it easier to connect to the piece on the pedal with my finger. As you guys know, there is no room to get your hand up in there and no real room for an open head wrench to turn it, so you have to use your finger to hand tighten.


This shows the 90 degree 1/8" pipe fitting to flare that came with the CNC unit next to the stock flared line/fitting. Not sure how that was ever going to work without an adapter. The picture helped me at the hardware store though to find the 90 degree 1/8" to 5/16" female flare
that did connect to the stock line.


I didn't bench bleed the master, just filled up the master and had my girlfriend pump the clutch slowly initially and then rapidly to get the bubbles out while I kept filling the master and checking the slave to make sure the drain hose on the bleeder was still on and not spraying the passenger side head. Holds pressure and has good pedal movement. Flushed the old fluid out with some leftover Prestone DOT3, then filled it up with Penske DOT3 behind it. I left the stop screw on the slave at the same point, the only thing I might change is the dust boot is extremely squished in the disengaged position which I'm sure will make it wear down quicker, so I will try to pull that further down the pushrod on the slave to give it a more relaxed position.
Last edited by hustler
quote:
As you guys know, there is no room to get your hand up in there and no real room for an open head wrench to turn it, so you have to use your finger to hand tighten.


I couple of my friends cut a hole 2 inch access hole on the side of the box then build a cover so you can't see it. It made installing or adjusting a new clutch master easy. I've never done it to mine though (stubborn I guess).

By the way, looks like were missing the tube sleeve and tube nut that goes with that 90 fitting. Mine came with them as part of the kit so all you had do was cut the old flare, slide the nut, the sleeve, then re-flare the tube.

Congratulations though. It's always fun when it's done Smiler

Aloha
Is the CNC Master Cylinder a pantera specific piece or does it work in other applications? I could see the rest of the reflaring kit making sense if its meant to be universal. If this was specific for a Pantera someone should seriously just do the homework and get the right fitting to work with a stock line like I did. The part was $1.24 at True Value.

It's definitely nice to have it back on the road and shifting is very smooth especially after changing the fluid in the ZF last summer.
Post
×
×
×
×
Link copied to your clipboard.
×