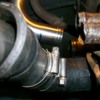
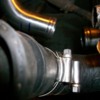
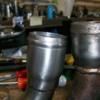
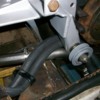
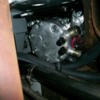
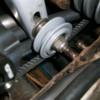
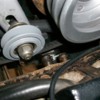
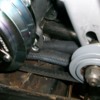
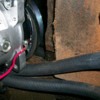
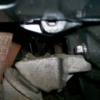
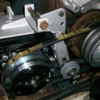
Here I think I optimized the top hose on the water pump...but suffered at the bottom....
OK! Backup to HEATER HOSE!
I fast forwarded a bit to AC pump fitment and put my heater hoses in place. I used straight hose as I couldn't initially find the long hose with a molded 90 degree at the end.....and found that when I routed my hoses with a nice bend radius back to the oil pan then to the left to the frame clamp that things went bad quickly! I started with this:
I fast forwarded a bit to AC pump fitment and put my heater hoses in place. I used straight hose as I couldn't initially find the long hose with a molded 90 degree at the end.....and found that when I routed my hoses with a nice bend radius back to the oil pan then to the left to the frame clamp that things went bad quickly! I started with this:
Attachments
When I tried to get my shiny new SD7 AC compressor in here....there was "no more room at the inn"!!!!
So I had located a DAYCO #80406 hose which has a 90 molded into one end...4" of hose on the short side and 48" on the long end. The hoses I took out were 44 on the long end, so these will work great! 5/8" diameter hose.
DAYCO #80406 about $12-13 from RockAuto.com
So I had located a DAYCO #80406 hose which has a 90 molded into one end...4" of hose on the short side and 48" on the long end. The hoses I took out were 44 on the long end, so these will work great! 5/8" diameter hose.
DAYCO #80406 about $12-13 from RockAuto.com
Attachments
So, I don't have the hoses in my grubby fingers yet....so experimented with what I had.
I took the straight hose off and just laid it in place where the originals came out. They need to go up against the lower tank tube, they will lie down on the chassis (smooth any welding boogers with a file!!!!), they need to fit into the clamp....and head for the firewall where they will go UP and OVER the ALTERNATOR. ...and you thought we were all done with this one....not so fast.....I'm not even done with that.....
This was a "see how the AC Pump fits.... exercise today.
Here is a shot of the hose interference when run over the top of the lower tank tube.... It looks worse from the front!
You also get a partial view of the little "L" bracket I made to hold the lower tank tube in position.
Attachments
Steve,
A lot of us are using a shorter #63812 90 degree hoses and then having that connect to the heater shut off valves. They are then accessible between the chassis rails for summer or winter operation.
Julian
A lot of us are using a shorter #63812 90 degree hoses and then having that connect to the heater shut off valves. They are then accessible between the chassis rails for summer or winter operation.
Julian
I thought about that as an option too! There are shorty "straight" pieces of tubing for splicing such a thing also! I found on the O'Reily Auto Parts website for a couple of bucks each....
Haven't had time to think about shut off's yet....."cuz I fixed mine" and it should work.....right?
S
Haven't had time to think about shut off's yet....."cuz I fixed mine" and it should work.....right?
S
Next 4 posts are of pump in place showing where water hoses will need to run and what to watch out for....namely that pesky AC idler pulley! If you put an oversize pulley in here...watch out you don't push it all the way down into the heater hose!!!
First pic
First pic
Attachments
Once I was done.....it all fit!
PLEASE NOTE: BELT IS WAY TOO BIG, so don't use this number to go buy a belt....shouldn't have put that in the pic! This was just to rough test fit the alignment and fitment of all the other stuff!
There is still much to do yet....like a Chinese jig saw puzzle or building an engine....you don't put the pistons in then try and put them on the rods....or put in the crank.....!
I need to take this all apart and install gaskets, and all the water hoses!
Assembly is something like this:
1) install all large water pipes & hoses & unions
2) install heater hoses
If you are working with a hoist, then perhaps reverse 1 & 2!!
3) install AC pump bracket
4) install pulleys
5) install AC pump and belts
5A) Place alternator into position in bracket
6) make top engine heater hose connections (don't trim until alternator is placed!
7) Adjust alternator belt and tighten everything down.
8) Beer, bandaids, and pain killers!
9) Place holder for the stuff I forgot........
Attachments
Steve,
Do yourself a HUGE favor and throw that Ac belt tensioner away and replace it with the unit from IPSCO. You will thank me every time you need to replace the belt. Makes the job dramatically easier and less frustrating.
Also, Weld the bottom alternator nut to the bracket . ( use an all-metal lock nut and not a nylock)
Ron
Ron,
Great affirmation on both actions you suggested!!! They are on my list!
Great affirmation on both actions you suggested!!! They are on my list!
quote:Originally posted by Mangusta:
Haven't had time to think about shut off's yet....."cuz I fixed mine" and it should work.....right?
Did you take the heater valve apart and replace all the internal seals? Even then they tend to bypass a little so you have coolant continuously circulating through the heater and combating the A/C in summer.
Julian
Add Reply
Sign In To Reply


