All,

New 1974 car to us, been sittin' for a couple of years with minimal use. Pump was replaced but few miles since. No more than about 10-12K. I want to refit the heater hoses and such. Keeping this out of the engine "fluids" section cuz we can just talk rubber parts replacements. She's been a bad car so far....hopefully can resolve her issues and change her name to Susan soon!*(days of our lives ref...) Smiler

Radiator replaced/rebuilt by Hall by second to last owner...again 10-12K on it, 10 years back. Front Pipes look to have been repainted at that time also.

If you know me, you know I tell good-n-long stories and type the same....so bear with me.....!

To get this all started, ...started last week when wife and I tried to bring the car home from our shop about 53 miles away. (for the first time out since rebuilding the brakes after purchasing the car) We made it a mile or so....belt had been squealing on and off....hoped for more off....until finally heard a little "thump" near my elbow and I watched my AMP gauge register a large discharge....."Crap...blew a belt"..... So back to the shop....but not before the car started to overheat.....that last 1/4 mile had pucker factor on high......!!!!

Cooled it down, called a local member about what tank is what.....of course my shop manual is at home....and I'm not! Filled up with water and put it away in the shop.

Retrieved car with trailer last Sat. No incidents to report until after about an hour of sitting in the driveway, wife called me (I was returning trailer) to tell me that the emergency lights were flashing! CRAP! Blew the E-flasher switch.....and I wasn't even near the car. Advised to use "toothpick fix"...only to hear "we have no toothpicks!" Ugh. I have some in the truck.... She tried taping it etc....didn't work. Tooth pick worked, popped out later..... still in driveway.
I will admit that I touched the switch when I was in the car the couple nights before, in the shop, before I started it....and it took a couple of stabs with the finger before they shut off. I guess the heat from the sun took care of it......
Will need to look at switch yet......not now.
Have spent the last couple of days reading stickies, looking for this and that in the car, but can't find out some important bits.
Ordered two new belts, one for spare. Don't make Greenstripe belts small enuf.... Frowner (needed 11AV1030 or 40 but all the parts store had was longer..or way shorter..and their belt stretcher was broken...)
Pulleys are all in alignment, alternator turns over well, water pump not funky. Probably neglect led to this failure. Gatorback belts should be here by weeks end. Ordered two.

I have determined that the heater water shut off valve is stuck. Needs the Mike Daily overhaul! On the list... (Thanks to Mike for this info!!!) He spec'd 5/8" ID hoses for replacement! Mine in car are 3/4")

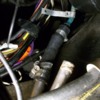
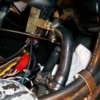
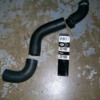
I want to replace most if not all of the rubber heater hoses. Most of the large 1-3/8 hoses appear to be Greenstripe already except for the one hose piece connecting the lower pipe to the pump inlet pipe. Looks like 1.5" hose smashed down to fit 1-3/8 pipe!!! What's up with that!? Deal with that later too....I have more greenstripe hose to use....left over from Goose adventures!

So the heater hoses look to be Motorcraft brand hose, but with a 092793 date stamped into them... I see notes in the owner records about replacing heater hoses, but now wonder "which heater hoses"? The ones up at the console? or the engine hoses????? 1993 is ......24 years back...... Still nice and supple, BUT if you pinch them, you can hear cracking....from whatever is coating the hoses internally....sounds like time for new clean hose!

BUT.....what size hose do I need? I appear to have 5/8" hose in some places and 3/4" in others!?? I checked the hose tubes coming up out of the console and found that they measured just larger than 11/16" (18mm) but not yet a full 3/4" but the heater valve fittings and the heater core fitting look to be more like 5/8".

At the lower section of the engine the pipes would/could/should be the same 11/16-ish (18mm) as observed in the cabin...but the engine water pump fitting is certainly 5/8".....not so sure about the vertical block fitting! I hope it is 5/8".

OK, pause for some math.... 18mm=.710" 3/4=.750" or a mere spark plug gap .040" larger...to squish down to 18mm BUT .125" (1/8") to squash down to 5/8=.625" which is .085" smaller than 18mm....so need to stretch the 5/8" a tad over 1/16" (.625") to fit the 18mm parts.

So far I have the following fittings:
Two engine- 5/8" hopefully on both
Four heater pipe tubes- 18mm
Water valve-one connection- .600" (unknown size in orig post)
Heater core end- one connection- .625" (unknown size in orig post)

*** 2-4 fittings unknown- Expansion tank to radiator????
I have no idea how this hose gets to the front or back.....all one long piece of hose, or more intermediate metal piping and two pieces of hose????? Size of ends?

I'm thinking better to stretch a little bit than it is to try and crush a hose to get smaller......

Anyone have a heater valve and or heater core fitting handy to check sizes? (edit 9/21 OK, did this today....recorded above.)

I haven't popped my system open yet to drain it.....keep in mind that wife has never ridden in car yet....so as soon as belts arrive, I would like to take her for a good spin!!!! She needs to get her "zoom zoom" on......then she'll be happy for a while.......while I dismantle the entire car....!

Has anyone used the whiz bang blue "5/8" ID SILICONE 4-PLY HIGH-TEMP MIL-SPEC COOLANT HEATER HOSE PUROSIL SAE J20 R1" hose in their cars? This crap is expensive (About $40 for 12'shipped) but looks like it would handle bends well just no sharp burs on your pipes or fittings!!!! Sand them down.....if in doubt! Would probably outlast me....!

Years ago, one could purchase the cast iron water pump rotor with the solid vanes ala Boss 302 and such. Has anyone seen where these are available anywhere?
I also used to see round discs that one could DIY this same effect by pop riveting the disc to the rear of the steel vanes of a standard rotor... anyone seen these? Would be easy enuf to fab....next time the water pump goes out! I was gonna take it out thinking that the timing chain surely needs to be replaced...but with less than 2 degrees of crank movement, me thinks that someone put in a dual roller chain somewhere along the way!!!! Now no reason to disturb it!

Ok, enuf for now! Will post other issues in other posts....
Thank-you for reading along!
Steve
Last edited {1}
Original Post

Replies sorted oldest to newest

OK, a good day in the garage!

Spent mostly upside down under the dash getting the heater core switch out!!! I can't believe they really need a 23mm nut on that flare fitting......

My valve was locked up solid. In removing hoses I got some amount of water out...disconnected the hoses at the engine and water pump.

Discovered that the fitting into the block is pretty ugly. Gonna see if I can get a new one and somehow get it into the block....providing I can get the old one out! There is nothing but rust holding a new hose onto the hose bib!

Used paper towels to sop up fluids...tried shop vac on the heater hoses.....not sure if it worked properly....acting like hoses are plugged!.....need to search for shut off valves!!!!

Left hose connection under dash looks reasonable. Right connection that goes up to heater valve looks ugly..... about 50% eaten away. Could benefit from new end.....probably need to trim off some of the scarfy section and double hose clamp it!

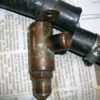
Heater valve was locked up. Was able to get it apart using article on Pantera Place. Messed up and didn't mark the parts as specified....but this thing either goes together with the passage 180 degrees out.....or partially open at full open or partially closed at closed.

I'm voting for partially open at full open....the copper hose into the heater core isn't all that large.......and I know that we want the valve to shut off the water since it shares the same spot as the evaporator for the AC....so if the valve was open, it would be working against the AC!!


Here is a question for the experts! When the heater hoses are shut off with valves, the Clevelands and Windsors tend to capture water in the water pump and start to cavitate! ...leading to overheating!

How does this setup in the Pantera allow for "some" water flow thru the system to remove the air bubbles!????

In Ford cars, there is an "H" in the hoses just prior to the shut off valve in front of the heater core. Sometimes there is an 1/8" hole in the valve to allow some water to circulate.

This valve does have a tiny slot in it....but when fully closed, this slot looks to be covered....but I did not reconnect to the cable yet to see just how much "on" or "off" I get.


Any ideas????

Steve
OK, here is a new question.

We know that water pumps' external hose connections all suck....they don't pump outwards...... The block mating castings/holes are for "pumping water into the block". Our radiator supplies water to the pump via suction caused by the pump and that water is then forced into the block casting.

Same for the heater core! Water is sucked into the water pump from the core....and the core is supplied via the block fitting near the alternator adjusting bracket's anchor bolt.

I cannot for the life of me find any complete drawings of the heater core circuit to be certain that the circuit is properly hosed...

My water pump hose (main suction for core) connects to the left under car pipe, which connects to the copper (open) line to the heater core.

The block fitting (supply of hot water to core) goes up the right under floor pipe to the water valve and then into the heater core.

Can anyone confirm that this is connected properly? Thanks!!!

OK, off to the parts store in the morning for a new o-ring for the water valve, and a couple of small hoses to reconnect the heater core to the under car pipes.

I would love to put shut-off valves up behind the console face....but I can't see where anyone could get to them easily...those black side panels seal access up too well!!!

Cheers!
Steve
Thanks for sharing the detail writeup of your work.


quote:
Originally posted by Mangusta:...
Here is a question for the experts! When the heater hoses are shut off with valves, the Clevelands and Windsors tend to capture water in the water pump and start to cavitate! ...leading to overheating!

How does this setup in the Pantera allow for "some" water flow thru the system to remove the air bubbles!????

....


I thought that was the function of the skirted thermostat and "restrictor", to allow a large flow through the block when cold and thermostat "closed"?


IF
you are really determined to remove as much air from the coolant as possible, then making a revision to the coolant system might be your answer
the first is as built
the second is converting to true swirl and pressure tank design
third and forth replaces the in cabin heater shutoff with an "H" type heater valve that provides recirculation

Attachments

Images (1)
  • pantera_cooling_4_versions
OK, I guess I was too vanilla in my question.

How does the 351C get rid of bubbles in the water pump? I know Bosswrench preaches that certain pumps must be drilled for this or that...and that some are better dealing with cavitation than others....and that if you disconnect your heater on a stock pump, that you should loop the block outlet to the pump inlet to cure this condition.

SO, when you shut the water valve OR turn off the inline valves you installed.....how does the stock pump deal with air bubbles and potential cavitation issue????


As for the rest of the system.....all I can say is one pile of poo at a time please! Smiler Smiler Smiler

I can deal with the main cooling system later....I don't think it is broken.....at least too badly..... I like the thought behind turning the pressure tank into a swirl...and feeding into the overflow tank, like a more modern system. BUT, not today.

Right now, I want to get the heater system sorted out.....everyone seems to just gloss over it......it is simple....until it dorks up!...... or you close your water valves and then next thing you have is "Old Faithful" out of every orifice in your engine compartment! Don't ask how I know about this......! Smiler

Off for hoses and an o-ring!
Thanks all!
Steve
Steve, constant, persistent bleeding from the top of the radiator is my current recourse. I've tried all the trick jack-up-one-end of the car methods, and IMHO, NOTHING works as well as simply bleeding a refilled radiator over the course of several days. I do use a special plastic filler funnel made by Lisle that literally clamps onto the surge tank neck and holds 1/2 gallon of water for the initial fill & start-up.

I once replaced our rad, filled it, got a massive air lock in the pump when the engine was started, so I bled it twice more that day. Next day, I bled it again (more air) & we left for 'Vegas. That night after an uneventful 450-mile drive at highway speeds, I found yet MORE air so I bled it a third time in the hotel parking lot. Checking a 4th time before we left 'Vegas to come home, I finally found no air.

I believe 'some' air is partially soluble in tap water; think of burping a water bed- the same phenomenon shows up over months as micro-bubbles of air slowly condense into bigger ones that can cause trouble with marginal cooling systems.
OK, back on track here....heater hoses.....

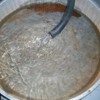
I call this my "Oh am I glad that I got this out of my system...." ....or "I can't believe there was this much sh*t in there..." or "Not exactly panning for gold...but it felt a lot like it!"

I rehab'd my heater water valve with the Napa O-ring suggested in the article on Pantara place about rebuilding said valve.

I deviated on the hose thing...... 18mm is only .060 larger than a 5/8" hose....and the 5/8" hose will stretch if warmed up a bit and lubed with either some silicone grease (ONLY IF YOUR HOSE BARBS ARE STILL GOOD!!!) or water if the barbs are not so good.....

I have one kinda good and one that isn't there any more.

I bought a single NAPA 9808 hose, about $13 and made the two hoses for under the heater out of it.

I cut the 90 degree portion about 1-1/2" off of the short side to attach to the heater valve (which is undersized at .600"...) and then cut the length as needed to hit the LH heater pipe.

The remaining straight piece of hose is a trim to fit the RH heater pipe to the belled section of the heater core sticking out of the LH side of the heater box. Belled section is 5/8" and is about 2" long, then reduces to about 3/8" and goes up and right turns into the heater box.

So, fast forward to today.... when I was removing the old hose sections, I found LOTS of chunk-o-rust in them....making me question to things...1) previous maintenance by owners, 2) what is still in the various parts of the heater system, and 3) I know, I said two....how can I clean this out!!?

Today, I hooked up a garden hose to one of those universal "engine flush" "T" fittings that was in one of the water hoses from the engine. I plugged the other portion of that hose, and also the end of the other hose. (One hose to water pump...one hose to block.) I left them connected to the under car tubes....in hopes of flushing out the tubes AND perhaps some of the garp that may have reached the heater core...fingers crossed.

I pressurized the whole affair by carefully turning the water on....keep in mind that some community water systems can have some SERIOUS PSI pressures.....and the LAST THING I WANT is to blow the snot out of the heater core!

So, water turned on.....I get a dribble of crap out of the other hose...dark black water....ugh. But a dribble...some coughs and spits...then nothing much but the hose started to swell...not good. Water off.

I had a second one of those water flush parts (actually an unused complete set that I found somewhere) that gave me the female to female adapter to fit my garden hose to this mess, and another "T" fitting.

I reversed the garden hose to the other hose, plugged/unplugged the two hoses accordingly and proceeded to push water back into the system via the hose that was previously was the drain.

More dribble, coughing, spitting, dark garpy water and chunks...big chunks...then the flow became less than a dribble and the hoses started swelling.

Water off..release pressure, mop up mess on floor, swap hoses again....and again and again and again... Occasionally I could hear water gurgling in different sections below the console..... At one point when there was still little flow, I squeezed the rubber hose right where it attaches to the under car tube...and I felt LOTS of crunching...but I heard stuff moving....well it plugged up the "T" now. Removed the "T" hit the pressure again and started squeezing....got LOTS of crap!!!! Yea!.....

Proceed to swap pressured water back and forth several times more until water was running clean into my drain pan!

I double checked how much flow my hose was putting out for opening the on/off valve on the house for about a third of a turn....well it wasn't much flow. SO...I upped it to about a turn and a half to two turns....and got a good flow, but not full blast....about what I would expect out of a heater hose...good solid flow.

Ran this level of water back and forth a few times and got more garp, but it cleaned up quickly!

Below is a pic of my results....clean water! Clean water in pan and clean coming out of hose!
Will post more pic's of results....
S

Attachments

Images (1)
  • 101_7412_(Large)
SO, all of this mess got me thinking.....Hate when I do this....

1) I wish I had flushed the tubes out while I had the connections under the dash open. I had tried to blow water thru previously...but heater valve was still stuck in place...probably closed.... AND, I'm fuzzy on what I did exactly but the results were NOT what I expected....

2) I wish I had flushed out the heater core while it was disconnected.....

3) Is there good way to roto-rooter the tubes under the car..... Seems like there is large pulley in the way and a harmonic balancer that would hinder this from being easy....! What is....

4) NOW, I believe that A) the engine is full of crap, and likely the radiator is also!!!!

IN light of #4, I can see justification for putting one of those see thru inline filters that guys have put in the larger 1-3/8" hose that feeds the radiator (thermostat outlet pipe?) to keep crap from the radiator! I think that pipe goes over to the pressure tank first...then to the radiator...

AND......I would love to know if the same company makes a similar device for 5/8" hoses??????????

If anyone knows, please chime in here!

OK, and a picture of heater valve marked to show full open and full closed for my reference when upside down working on this crazy....

More to follow...

S

Attachments

Images (1)
  • 101_7402_(Large)
Last one for tonite....

RH hose in place, Water Valve in place.

I had to be careful of the wire end of the control cable. It liked to get hung up on the top of the LH hose! I did not add the bent wire end...it was there already...just had to bend it out of the way slightly.

Getting to that top fitting on the water valve was a beeeyatch!!!! Hex on the valve body is 19mm (3/4") but the hex on the nut was 15/16" ish!!! Talk about 10lbs of wrenches on a 5lb nut!!!

Hopefully this job will last the lifetime of this ownership!!!

S Smiler

Attachments

Images (1)
  • 101_7409_(Large)
DIN 1 is the size of the opening needed BUT because of the angle, the DEPTH is critical. At best you are going to get the lower corner to hit the floor.

Simply put, two items can not occupy the same space at the same time.

The wiring harness is now stiff and does not like to relocate itself easily and of course you have the plumbing in there to deal with.

Use a hair drier to loosen up the harness wires before you try to move them.

I constantly have issues with wires disconnecting themselves from the switches in the console and grounding themselves out.

I definitely can now identify the smell of a Lucas wiring harness shorting out and a Detomaso one. Either one turns my stomach.

Every time I think it is "corrected" and ready to go, I get another one shorting. Jon Haas doesn't want to talk to me about this any more.

I won't even let the car sit over night with the electrical system "ON". I have a battery kill switch.

It's not the harness itself, it is the connections to the switches.

Others don't necessarily know what I am talking about because if there is an issue, they just take it to "the guy" to fix.

No such thing here...Doogala fix.
PD,

I have a radio that is 5-3/4 inches long on one corner measurement and 6+ on the other....guess who goes "down"! Thankfully the radio is properly oriented such that I can read the face plate right side up.....

What is concerning...is the install manual saying don't install more than a 60 degree down angle (at a normal plane...!) so mounting it sideways may REALLY mess up the CD player!

NB:Test sideways radio operation...use Celine Dion disc to test....not CW or RnR discs....!

I have stared at that mass of wiring behind the panel.....and it scares me too! Just the numbers of wires.....and the way that they are or are not restrained! I need to tie up the radiator fan wires....they just sort of hang on their way to the switch.....seems very odd. But then, I think I had odd people working on this car in the past....so all bets are off!!!

I'll clean it up.......tie it up.....make it mine!

S
quote:
Originally posted by Mangusta:
PD,


I have stared at that mass of wiring behind the panel.....and it scares me too!

I'll clean it up.......tie it up.....make it mine!

S


Soon you will get good enough to distinguish the different smells of the different color wires shorting. That's good. Saves diagnostic time.

I think a radio WITHOUT a cd player is smaller?

You know these techno gizmos have just taken their tolls in so many ways over the years?
quote:
Originally posted by Mangusta:
SO, all of this mess got me thinking.....Hate when I do this....

1) I wish I had flushed the tubes out while I had the connections under the dash open. I had tried to blow water thru previously...but heater valve was still stuck in place...probably closed.... AND, I'm fuzzy on what I did exactly but the results were NOT what I expected....

2) I wish I had flushed out the heater core while it was disconnected.....

3) Is there good way to roto-rooter the tubes under the car..... Seems like there is large pulley in the way and a harmonic balancer that would hinder this from being easy....! What is....

4) NOW, I believe that A) the engine is full of crap, and likely the radiator is also!!!!

IN light of #4, I can see justification for putting one of those see thru inline filters that guys have put in the larger 1-3/8" hose that feeds the radiator (thermostat outlet pipe?) to keep crap from the radiator! I think that pipe goes over to the pressure tank first...then to the radiator...

AND......I would love to know if the same company makes a similar device for 5/8" hoses??????????

If anyone knows, please chime in here!

OK, and a picture of heater valve marked to show full open and full closed for my reference when upside down working on this crazy....

More to follow...

S


If you have access to a lift or otherwise enjoy working under you car on jack stands, I used this gizmo to backflush the cooling system and heater core. To powerflush the engine, remove the thermostat first. You should chemically flush the system first after draining the old coolant.

Attachments

Images (1)
  • image
Last few days have been spent pulling metal tubes and sorta cleaning some stuff up....messing other stuff up....(tried to put in new rear deck shocks....and decklid hinge mount took a dump on me....already been fixed once.....lost some paint....)

But, some good too!

Had the radiator checked for leaks and the metal surrounds re-attached. Unit is a Hall "45 degree" unit. It also had unique front stainless tubes installed so that you need NO rubber 90's!!!

I suspected there were some tubes leaking but the core that I could see via the inlet/outlet ports looked good, very few big chunks of garp!

But, radiator guy sez that the tubes were good, but he increased my flow by about 30% by cleaning out the tubes!!! Apparently there wasn't large stuff...but there was small stuff circulating about...!!!

When I pulled the temp sensor switches off of the unit, one of the fiber gaskets tore....so spent some time cruising the internet today to find some 2mm thick copper versions. Had to buy 25 from Grainger....but was still cheaper than buying 3 off of eBay! IN case anyone needs a couple....!!!

Also ordered a 5/8" in-line filter from Northern Supply to try out. Not sure how it will do....more on that later....

Picked up 10' of 5/8" heater hose from the local AP store

Ordered a 3' length of Gates Green Stripe in 1-3/8" ID off of eBay to make tube connectors.

Found a few more nice metric hose clamps in the stuff from the previous owner AND, some 1-1/2" super duper hose for the connection from the under car tube to the water pump inlet.

More.....

Attachments

Images (1)
  • 101_7420_(Large)
Cleaned a lot of loose refuse from the top of the engine near the water pipe/t-stat housing.

Also removed the block drain plugs from either side of the block and actually got some clean water out of them! ...and some not so clean....

Will flush more of this out tomorrow or Friday.

What my BIG job was.....was to make up my mind on the block heater hose connection.....it was crappy at best.....

Attachments

Images (1)
  • 101_7423_(Medium)
Soooo, I pulled the pulleys off the water pump and crank....and then pulled the water pump off.....

Got a new aluminum one from Rock Auto.com for a closeout price, along with a few other parts that were being closed out! T-stat housing gaskets, exhaust gaskets, timing cover gasket sets, water pump gaskets, full gasket set, oil pan gaskets, and a few other pieces that could come in handy along the way! Belts.....

Cleaned the garp up a bit more so that I could decide.....if I wanted to tackle this.....

So I removed the T-stat pipe while I thought about it some more.....

Then tested the brass thingy as an insert for a vice grips to hold against so that tube doesn't collapse while trying to remove it.....

Hosed area down with PB Blaster to influence some of the rusty bond....while I procrastinated longer.....

Attachments

Images (1)
  • 101_7425_(Medium)
OK, short story is that I won.....without needing to pull the engine out! It was not easy.....pardon me for not taking any pictures of the process.....

......but after chiselling with various chisels, and punches....getting the grinder out to be able to sharpen a punch to a pin prick....and more hammering and sucking left over water out with the shop vac...and THEN punching the remains into the water jacket...ooooohhh nooooo! Wasn't into taking pictures......

.....so time passed, I used my magnet on a stick to try and find the missing piece of the insert..... Finally after shining my flashlite in the hole....I determined that the cavity beneath the t-stat was part of this passageway!

Got a trusty piece of clothes hanger out and manged to locate the little piece of tin....and pushed it back into the hole area......and chiselled on it some more....trying to collapse it and either cut it in half or bend it in half.....

Finally, a thought hit me..... why don't I try to drag it into the area below the t-stat where the cavity gets bigger! Good idea!!! Was able to then retrieve it with the MOS (magnet on stick)!!!

Cleaned up the hole in the cast iron where chisels left marks and dragged the MOS around a bit to clean out more metal stuff....

Slathered the new metal insert (C5AZ-8555-A 5/8" by 2.5" long cut to length) with a little blue silicone and started digging for a big hammer.... Got the tube started carefully and then started wanging away! Stopped to put in my brass insert deal and continued to wail away......as much as you can in 5-6" of space!!!

Remember...window is just above you....!!!

I had a mark on the tube and it went in nice and smooth, actually fairly easily all considered....pushed it in about another 1/8" and decided to leave it there!!!

Taa daa!!!

Attachments

Images (1)
  • 101_7432_(Medium)
Nice Work!

Sounds like fun.

PS> I believe there is typically a little P-Clamp that holds the dipstick against the block. It goes into the threaded hole in the head to the left of your new tube.

At least mine has one.

It is the thing that makes your valve covers much more difficult to remove with the engine in the car.

Rocky
Glad that went well!!!! I managed not to break anything else.....!

Tomorrow or Friday will clean up the timing cover plate a bit, degrease the water pump and harmonic balancer pulleys and bolts etc and anything else while I have the parts washer open.....

While I had some time....procrastinating about busting off this fitting......I tried something that I had noticed on Thomas T's post somewhere else on this forum.

He posted a pic of his EFI engine and I noticed that his GT5 engine used the stock Ford alternator bracket and adjuster to retain the alternator!

Since I had all of this apart... AND because I had a spare set of factory brackets on a spare engine......I decided to check it out!

So, in the pic below, you will see Ford factory 1970 bracket, spacer, bolt, 1973 adjuster arm (from the Pantera!) and the "normal belt" 10AV1040 size. The alternator is WAY out on the adjuster....so a stock belt (for a Mustang) is probably like an 10/11AV1030 or 1020 and would bring the alternator closer to the center of the opening.

I tried my cover and it seemed to fit without any clunking...... or scraping. I wasn't out to prove anything....just show that it would appear that normal Ford parts could be used in the case if you didn't want to use the DeTomaso crazy bracket to mount your alternator.

Now, this alternator is a late model R3(?) version with the built in regulator. As fitted, the wiring would not be able to plug into this as the opening faces the timing chain area of the block! BUTTTT, I think that if I were to re-clock the rear of the alternator about 120 degrees, life would be grand!!! And there isn't any reason that rotating the rear of this alternator shouldn't be possible from what I can tell! For all I know....someone already did that to make it work in this car/config....!

Anyway.....I think it looks like a potentially good fit!!!

Attachments

Images (1)
  • 101_7430_(Medium)
One more pic of three things......that were buggers!

1) Bottom left corner..... SQUARE headed block plug! From my experience, these NEVER come lose with a) open end wrench, b) closed box wrench, or c) 12 point sockets...... they all round off the corners! Today was NO different!

So, do I have a set of the sockets for the square headed fastners???? Why yes I do! Is it in your tool box? Why no it isn't! Please tell, where is it? In my other tool box down at my other shop some 53 miles south!

(I have never had one of these sockets in my regular box.....somewhere I bought one of those 69 piece socket sets with a mixture of SAE, metric, 6 point, 12 point...3/8, 1/4, 1/2" sizes....BUT it has 4 or 5 square nut sockets!!! .....and they sit there in my other roll around....so many miles away..... so OF COURSE, NOW is when I need one.)

But wait! My son's tool box is sitting off to the side of the garage.... He's getting ready to move out.....again......soon.....at least I hope soon.....I digress..... and I know that he got all sorts of sockets in the deal!!! So sure enuf, still in the plastic bags....I find the square drive sockets!!! SWWWWWEEEETTT!

Nice and easy does it.....and I was able to get both of the block drain plugs out of the block! And they can even be reused!!!!

Ok..
2) The fragment of the old heater hose connection that got pushed down into the block. That was not fun.....

3) The 160 degree t-stat that is NOT the proper T-stat for a Cleveland!!! It's going to get a proper one and a 190 temp! No messing around here!!!

Out for now!
Ciao!
Steve

Attachments

Images (1)
  • 101_7433_(Medium)
Rocky,

THANKS!!! That is good to know! The clamp thing is one of the many details that get slaughtered when you buy a car that has been driven and worked on by many mechanics!

The stock dipstick tubes in Mustangs etc also use that little clamp thing and the same hole! I think the alternator pivot bolt holds it in place as well! The clamp was normally spot welded in place.....not sure about Pantera version!

I'm still looking to see if this car got a set of closed chamber heads or not. One of the heads has a threaded insert in a rear hole that is not used on the front or rear of our cars....but may have been used on a regular car! So no matter how you mount that head on a Pantera, no reason to have put a thread insert in place!!???? Was this head on a "normal car" at one point in it's life?????

Fun stuff to try and figure out!

Next time I find a clamp in a junk yard that is loose from the dipstick, I may re-purpose it!!!

Cheers!
Steve
Alrighty! Been cleaning and digging and looking for stuff......

Ordered a new set of stainless pipes to replace the "reasonable condition" steel pipes that I removed from everywhere. The large pipes were all in great condition except for a couple of spots near the hose clamp retainer bumps where there was some rust thru.....

I've been able to experiment with most of the pipes and can post this next few posts with pic's of issues.

I have not established exact lengths for the rubber "unions" which will join all the steel sections together.....will update....

This is the sort of project where you put EVERYTHING in the car loose....then adjust...then tighten hose clamps!!!!

Keep in mind that this is a 74 car, and that the 71's (at least) have some differences like the heater hoses running up on the top of the shifter hump...and the AC hoses are in the rocker panel..... On the 74, the AC lines are on top of the shifter hump and heater lines run up the inside of the shifter hump!

Good:

My car came with a Hall 45 degree radiator and two stainless attaching tubes.
Sent radiator out to be checked, and have the outer tin shields soldered back on....a couple of the seams had popped loose on the tin. Came back with a good report....was perhaps 30% plugged but no reports of leaks and a roto-rooter job on the tubes was all good. Shop straightened out the tins and soldered them gooder than new!

So, since the two front tubes were on the car...they "should" go back on..... Murphy's law may dictate otherwise!

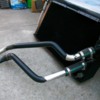
Long under car pipe replacements are most straight forward. You will need a cut off wheel or an air saw to cut the one remaining long tube so that you can get it out!

Note that the long tube is about 1" or so longer than the two piece tubes, but once union is installed comes out about the same. The new tubes equal the length of the original two pieces of tube.

I removed all of the rubber tube insulators since I purchased new ones..... Only perhaps 2 of the 8 were really funky....rest were good...

I found it best to put the long tube in the front section and the shorter ones in the rear.
This will put the "union" in the rear section.

Doing it with the union in the front was going to be difficult when using GreenStrip hose as the tubes get VERY close to the floor pan and might even rub. There was also one of those clamps for the brake line and a coolant bleed line right in the area also......looking to mess stuff up.... SOOO, I chose to put the long sections up front.

If you have a spray bottle of dish soap and water handy, it will make installation of the new hoses into the new rubber insulators! Hose them down and spray some more when things do not move.

I determined that 1" of hose PAST the hose clamp retainer bump is minimum to put a clamp on properly. SO, I marked all of the tubes with a 1" mark, a 1.5" mark, and a 2" mark to use as references when putting this all back together!

At the engine end, I stuck the tubes out just far enough to use the 1" mark that I made. It's tight up there.....so this can be adjusted longer as needed but no less than the 1" mark plus a 1/4" or so.

Lower pressure tank pipe: There is no longer a support welded onto the new pipe. I made one up out of some metal I had hanging around and fashioned an inverted "L", drilled and filed an oblong hole in it, and twisted it to have the proper angle so that I could retain it with a hose clamp to the tube...

This pipe also fit fairly well both on the tank end and the under car tube end. Now, I was supposed to get a metal 90 piece to make the bend at the UCT (under car tube), but it is on back order, so used a rubber 90 for now. I think trying to get the 90 and two short pieces of GreenStripe in there is going to be a mouthful!!!!! But the rubber 90 fit well.

Less Good
Pump to UCT This new piece is a bugger to fit properly. The tube is short on both ends about 3/8" from the original. While not measuring shorter in the straight section, it seems like it is too short. I either need to bend the hose connector at the pump (1-3/4" hose isn't gonna give much!) or at the UCT.... Will post some pics of the mismatch.

One kind soul told me that he stretched this tube about 1-1/4" and it fit better. Sounds like a plan....!

Thermostat Pipe This is a nice looking piece....but stops there. The original pipe bends around the front of the engine at about an 88 degree angle and runs parallel to the valve cover to the pressure tank top fitting.

The new one is bent with more of a 90 degree angle and therefore when mounted up, it is off about 3/4" pointing to the wheel well...and it also angles up about 3/4". Off on two planes....

If I had a tubing bender handy, I'd have both of those issues corrected with one bend... I still may cut it and correct it......as the tube to the lower tank connection is fine and I don't want to start stressing the tank welds or the t-stat area welds by putting pressure on the tubes by bending the hoses to fit.

PLUS, I wanted to put an inline filter in that top rubber union as it is the longest piece of rubber in the works....but I would like to NOT stress the plastic filter by trying to get short pieces of rubber hose to fit.

Call me picky. Yes I am. I got that by being raised by a tool and die machinist who cuts metal down to .000x dimensions....and an electronics training regimen that counts signals in 10 to the -9 decimal places.....

And since I'm on my soap wrapper....if I am buying new parts....I expect them to fit. But this isn't Lincoln Mercury any more....!

I want to drive this car further than the Cars n Coffee events on Saturday/Sunday mornings....and I already spent enuf time on the side of the road with my Goose fixing "inherited issues" that I don't want to induce any new issues with the Pantera by putting parts in "because I paid good money for them!"

I'll put old parts back in where they merit it!

OK, here's my one attachment allotment for this email! Misalignment of top t-stat tubing. I have another shot showing the vertical issue, but not going to post it....be assured it exists!

Don't touch that dial!
Steve
Attachments

Images (1)
  • 101_7449_(Large)
Last edited by mangusta
OK! Backup to HEATER HOSE!

I fast forwarded a bit to AC pump fitment and put my heater hoses in place. I used straight hose as I couldn't initially find the long hose with a molded 90 degree at the end.....and found that when I routed my hoses with a nice bend radius back to the oil pan then to the left to the frame clamp that things went bad quickly! I started with this:

Attachments

Images (1)
  • 101_7467_(Large)
Last edited by mangusta
When I tried to get my shiny new SD7 AC compressor in here....there was "no more room at the inn"!!!!

So I had located a DAYCO #80406 hose which has a 90 molded into one end...4" of hose on the short side and 48" on the long end. The hoses I took out were 44 on the long end, so these will work great! 5/8" diameter hose.

DAYCO #80406 about $12-13 from RockAuto.com

Attachments

Images (1)
  • Dayco80406Hose
So, I don't have the hoses in my grubby fingers yet....so experimented with what I had.
I took the straight hose off and just laid it in place where the originals came out. They need to go up against the lower tank tube, they will lie down on the chassis (smooth any welding boogers with a file!!!!), they need to fit into the clamp....and head for the firewall where they will go UP and OVER the ALTERNATOR. ...and you thought we were all done with this one....not so fast.....I'm not even done with that.....

This was a "see how the AC Pump fits.... exercise today.

Here is a shot of the hose interference when run over the top of the lower tank tube.... It looks worse from the front!

You also get a partial view of the little "L" bracket I made to hold the lower tank tube in position.

Attachments

Images (1)
  • 101_7470_(Large)
Once I was done.....it all fit!

PLEASE NOTE: BELT IS WAY TOO BIG, so don't use this number to go buy a belt....shouldn't have put that in the pic! This was just to rough test fit the alignment and fitment of all the other stuff!

There is still much to do yet....like a Chinese jig saw puzzle or building an engine....you don't put the pistons in then try and put them on the rods....or put in the crank.....!

I need to take this all apart and install gaskets, and all the water hoses!

Assembly is something like this:
1) install all large water pipes & hoses & unions
2) install heater hoses

If you are working with a hoist, then perhaps reverse 1 & 2!!

3) install AC pump bracket
4) install pulleys
5) install AC pump and belts
5A) Place alternator into position in bracket
6) make top engine heater hose connections (don't trim until alternator is placed!
7) Adjust alternator belt and tighten everything down.
8) Beer, bandaids, and pain killers!

9) Place holder for the stuff I forgot........

Attachments

Images (1)
  • 101_7475_(Large)
Steve,
Do yourself a HUGE favor and throw that Ac belt tensioner away and replace it with the unit from IPSCO. You will thank me every time you need to replace the belt. Makes the job dramatically easier and less frustrating.
Also, Weld the bottom alternator nut to the bracket . ( use an all-metal lock nut and not a nylock)

Ron
quote:
Originally posted by Mangusta:
Haven't had time to think about shut off's yet....."cuz I fixed mine" and it should work.....right?


Did you take the heater valve apart and replace all the internal seals? Even then they tend to bypass a little so you have coolant continuously circulating through the heater and combating the A/C in summer.

Julian
Anyone have a picture of the IPSCO belt tensioner?

Another helpful suggestion is to make the inner tensioner nut from a threaded rectangular block of steel. That way is rides up and down in the guide, but doesn't require two wrenches to tighten it...

Therefore you only need 3 hands, instead of 4-5 to adjust the tension on the belt.

Rocky
Joules,

Yes, there was only one o-ring in the stock valve that I found.

There is a TINY orifice to allow water to circulate...but it's like a .030" slot.....and it barely shows when fully closed. I had to readjust to get it to show when fully closed, as I still believe that you need some flow in the heater hoses to prevent cavitation....but I haven't had time to sit and stare at the water passages in the block and water pump....to figure this out.

I had a BAD experience with the 302 in the GOose because a previous mechanic hosed up the hoses for the heater.....! Bad thing happened when the water valves were closed.....

I don't care to have the same happen here!

In fact, I may just put an "H" in the two main hoses just to prevent this from occurring. Use 1/2" thru T's with a 1/4" or 3/8" down leg and connect the two with a short piece of hose.

This way, when the valve is completely clogged up with crap..... Smiler the water can still circulate and get air bubbles out of the water pump.

Ford used this sort of feature in their heater hoses up past the 429's and 460's and on.....

That's my thoughts for now on it.....
Steve
I enjoyed and appreciate you posting your work and progress.


I have noticed an apprehension about the water pump being “dead headed”. While I only know what I have read here, the Cleveland has an unique cooling arrangement that is described by George in the 7th post in this discussion
http://pantera.infopop.cc/eve/...50045562/m/346105744

I am not familiar with the front of the block (and hopefully some one that is chimes in), BUT I think the passages that allow this “controlled” recirculation can be blocked by improper gasket or the actual water casing not specific for Cleveland.

BTW, thanks for mentioning about special sockets for square plugs...I got a set of 8 point on the way!
quote:
Originally posted by Mangusta:
Joules,

Yes, there was only one o-ring in the stock valve that I found.

There is a TINY orifice to allow water to circulate...but it's like a .030" slot.....and it barely shows when fully closed. I had to readjust to get it to show when fully closed, as I still believe that you need some flow in the heater hoses to prevent cavitation....but I haven't had time to sit and stare at the water passages in the block and water pump....to figure this out.

I had a BAD experience with the 302 in the GOose because a previous mechanic hosed up the hoses for the heater.....! Bad thing happened when the water valves were closed.....

I don't care to have the same happen here!

In fact, I may just put an "H" in the two main hoses just to prevent this from occurring. Use 1/2" thru T's with a 1/4" or 3/8" down leg and connect the two with a short piece of hose.

This way, when the valve is completely clogged up with crap..... Smiler the water can still circulate and get air bubbles out of the water pump.

Ford used this sort of feature in their heater hoses up past the 429's and 460's and on.....

That's my thoughts for now on it.....
Steve


Here's a 4-port heater valve that Sacramento member installed in his Pantera that's pretty nice. It puts the heater valve on the engine bay and is trimmed(controlled) by a potentiometer installed in the dash. You can control how much hot water flows to the heater core while the rest feeds back to the engine.

Attachments

Images (1)
  • image
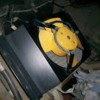
BUTTTTTT, grape pickin' didn't last all day, so when I got home I did need to do something on the car....so I cleaned up my condenser fan out back! I spun it the other day....and didn't like what I heard....so pulled the fan out, disassembled it, cleaned everything up, oiled the bronze bushing, and put it all back together again!

Sealed bearing sounds like it could use replacing, can hear the balls moving around....so used some 3in1 oil and hit the bronze bushing on one end and tried to work some into the sealed bearing on the other end.....

I will be replacing at least the one line from the pump to the condenser and the drier unit. SOon! ...after hoses....and pipes!

Here is end result. Cleaned up nice enuf!!!
Steve

Attachments

Images (1)
  • 101_7492_(Large)
quote:
Originally posted by Mangusta:
When I tried to get my shiny new SD7 AC compressor in here....there was "no more room at the inn"!!!!

So I had located a DAYCO #80406 hose which has a 90 molded into one end...4" of hose on the short side and 48" on the long end. The hoses I took out were 44 on the long end, so these will work great! 5/8" diameter hose.

DAYCO #80406 about $12-13 from RockAuto.com


For the European people, I use alway's
Gates 2392

Simon
OK, back to Erica! She needs to cool the cabin now also....and part of my (growing!) list of things to do....is look at the screen in the AC evaporator!

Just to clarify "where" this little screen is...

It is behind the hose connection at the evaporator expansion valve. You do not take the expansion valve loose, but you do need to remove the HOSE from the expansion valve!

I am reposting Larry's excellent picture of the screen at issue and it's orientation in the valve!

More to follow...

Attachments

Images (1)
  • expansionvalveLF
SO, I climbed in there today, removed the glove box (who puts nuts on a glove box that spin while you are trying to get the bolts out?????) and pulled off all of the gooey tape substance that was covering the connection.

The connector in question faces rearwards in the cabin with a 90 on the hose to make the corner....

Using a 3/4" wrench on the hose fitting, and a 14mm on the expansion valve, I carefully moved the nut (NOT THE VALVE!) and it popped loose, released a small amount of pressure, and spun off easily.

Looking into the valve, at first I thought that I didn't have a screen in it!!! BUT if you REALLY get your face down in there with a bright lite, you can see the screen outer edge....and in the middle of mine was a black mess!

I had a small dental pic of sorts and used it to wiggle the screen out of it's bore.

Soaked it in paint thinner and washed it with a small acid brush. Stuff wasn't coming out of the center so I used a toothpick to convince stuff out.... What a tangle of stuff! Metal chips, fuzz of some sort, and lots of tiny black stuff.

Check out pic!

So, all nice and clean. Pushed it back in place with the metal end of the brush and carefully tightened the fitting.....! Now, how to flush the evaporator out????

Attachments

Images (1)
  • 101_7533_(Medium)
So, that's what I did this afternoon. Earlier in the day, I was thinking about the IPSCO nifty idler setup and I came up with a flaw that was rather niggly......

While this moveable standoff is GREAT for simple adjustments, if one was ever to need a new bearing or pulley, you would need to remove the center retaining bolt.....at which time you would hear a little "klunk"....or not.....which is that moderately priced little piece falling somewhere in the bowels of your car!!!!

The original standoff, while difficult to adjust, didn't have this problem of losing the rear fastener when changing bearings as all that biz took place out front!

After thinking about it a while.....there were two ways of fixing this....
1) Have IPSCO make up a new threaded block with metric threads to match the original, machine out the standoff, and get a new metric bolt. But this still didn't completely solve the issue unless you used the original standoff...
OR
2) Do something similar, inspired by what I found on Ford 8.8 rearends, used to retain the nuts for the disc brake backing plates while installing. They had a "no-rotate" tab on them for assembly (or disassembly!) that is pretty slick! No wrenches needed!

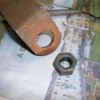
So, I found a piece of scrap steel (Old generic muffler shop muffler hanger) with a nice big hole in it. Like this.....

Attachments

Images (1)
  • 101_7527_(Medium)
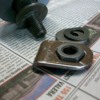
...then spent about 20 minutes with a large rat tail file, and a smaller round file, and an air cut-off wheel, and came up with this! Width is same as large washer, just under 1.2" and will move up and down the U-channel just fine with no issues.

It needs to be welded yet. I am waiting for delivery of a proper lock nut to weld on rear of AC bracket for alternator mount making that bolt a "one wrench thing" also!

I cannot use a nylock here as welding will destroy the integrity of the lock function! So I ordered a "flange lock nut" in a 7/16-20 thread (fine) to fit the bolt that I found in my car, from Fastenal.

Once the nut comes in, will weld up both at the same time! In the mean time I have LOTS of other stuff to do....and since I am waiting on parts and materials for other stuff higher on my list (chronological order....) doing this was no hit to my schedule!!! Just a freebie fix!

I also ordered a new bolt to hold the expansion tank in place. One stud had busted off in the past, and was replaced with a 4+ inch socket head screw with a 1"+ stack of washers on it!!! I now have a nice shiny supply of 1/4" x 1" washers to use! New hex head metric hardware will be mo better!

Just a note....the M6x1.5 nylocks used on the expansion tank studs are no longer available at normal outlets! In fact, I couldn't find ANY M6x1.5 bolts in the Fastenal catalog.....like they were wiped off the face of the earth...! All appears to be M6x1.0....

Not a big deal, just something that I noticed....

Parts are now soaking in Evapo-Rust solution to get the steel nice and clean for welding!

Cheers!
Steve

Attachments

Images (1)
  • 101_7528_(Medium)
quote:
Originally posted by Mangusta:
So, that's what I did this afternoon. Earlier in the day, I was thinking about the IPSCO nifty idler setup and I came up with a flaw that was rather niggly......

While this moveable standoff is GREAT for simple adjustments, if one was ever to need a new bearing or pulley, you would need to remove the center retaining bolt.....at which time you would hear a little "klunk"....or not.....which is that moderately priced little piece falling somewhere in the bowels of your car!!!!


There is no danger of any other part of the assembly falling out except for the threaded block, if you don't have your finger holding it and/or a shop rag bellow to catch it if it falls. The rest is assembled on the through-bolt and come out together as soon as the last thread on the bolt disengage from the block. Just don't drop 'em

Attachments

Images (1)
  • image
Agreed. When you remove the bearing/pulley assy , you simply hold the block with your finger and thread a second 7/16 bolt into the block to hold it in place while you replace the bearing/pulley. I have personally never had to replace a bearing (They use high quality modern sealed bearings instead of the 45 yr old original design) but have had to remove them to make the belt change easier. Takes seconds for one person rather than minutes with two for the stock arrangement.

Ron
Guys,

You are correct....IF you remember to try and get fingers behind the bracket....but it's tight in there with a stock pump...perhaps a little bit of room with a rotary. "Tricky!"

I was thinking more of the next mechanic down the road, not knowing what was going on.....

Here is my "other" suggested fix that I didn't put in my note! Like I said....I was thinkin'!

Take said block, drill for a through bolt, weld bolt to block. Now you have a "stud", secured by the block, which can be dealt with from the front for repair or removal.

There are many ways to skin a cat.......

I read something somewhere that said that most engineering projects take at least three cycles thru the development process to get things proper. So what would Rev C look like?

Ciao!
Steve
Instead of a stud, how about a carriage bolt. They make them in Grade 8. I thought about this but I would still need the standoff from IPSCO. As you said, there's more than one way to skin a cat.

You can't really worry about how a mechanic down the road deals with it. That's being nice but if you try to improve everything to make it easier on the next guy, your car will be a forever project. You do it to make it easier on yourself or find out how others did it. We love to share here. It's a learning experience for all of us. If you're worried about dropping and loosing a nut or bolt, stick a shop rag under your work to catch it.

Attachments

Images (1)
  • image
Re: Flushing Evaporator. I use two ~ 4ft long rubber hoses that I press on over the inlet and outlet of the evaporator. The length is so as that the opposite end of the hose extends out the the passenger door. I pour lacquer thinner in one end while having the other hose dumping into a pail. Using your air compressor, apply a small amount of pressure to the hose that you filled with some lacquer thinner and it will flow through the coils and evacuate quite nicely. I perform the task several times until the effluent is clear. It works very well and is very satisfying as you will see the initial dump to be quite discolored.
OK!

Since that rear evap connector is a real bugger to get at.....can I introduce the cleaner (bought a can of the "stuff"...) thru the hose back at the compressor and drain out the fitting with the expansion valve on it??? (into a bucket)

Along with that....is the expansion valve open at rest or closed (at room temp)????

Trying to cut down on wrenching in places that are not made for wrenches! Smiler
Steve
Steve,

We normally use an air pressure syphon can filled with solvent and reverse flush from the low pressure compressor hose all the way through the system and out the high pressure, so you should be good doing it any points between. And yes the less points you break the seal on the flare fittings the better.

You'll have to replace the dryer, but they are pretty inexpensive.
OK, dug my welder out for some simultaneous metal melting projects...two of which are here!

My self captivated nut solution for the idler pulley and stanchion. Now one wrench service from the front to loosen the stanchion.

One or two....for replacing the pulley....depending on how tight the stanchion is!

Second job...next post.

Attachments

Images (1)
  • 101_7581_(Medium)
I was told that this fix was in a POCA tech tip from way back! One wrench alternator bolt!

Welded on a "flanged lock nut" to the rear of the alternator pivot bracket. Pardon my globby welding.....all three projects netted perhaps at most, 1.5 linear inches of welding.....barely got warmed up....after being VERY rusty...!

Now to add a little bit of paint and job is done. Onwards!!!

Steve

Attachments

Images (1)
  • 101_7583_(Medium)
One more project also underway...coolant pipes, or modification of same "to fit" properly.

"S" tube from under car pipe to water pump has me miffed.....SO, I cut it in half and took it and some scrap thick wall stainless pipe down to TechShop in SJ where I used their lathe to take about .010" out of the ID of the thick wall pipe.

In this first trial, I have extended the length of the pipe by 1.5". A pipe from another vendor was about 1.375" longer and appears to work better, but I can go short easy....longer is messier!

Once I get the length dialed in, to keep the pipe off of the parking brake linkage and the connections to pump inlet and tubing outlet as straight as possible, then I will take this out to have it TIG'd back together. My TIG skills stink....or are basically non-existant at this time..... Not enuf time behind the wand!

(Ignore piece on RH side in pic...that is a scrap piece that sorta looks like what is still sticking in a hose at the water pump....too lazy to pull it out! Piece in the top middle is a "spare"....which I can modify to play with length)

I also had one of my 180 degree Robert Shaw thermostats modified by Marlin, and it looks fantastic! Much better than stock. Great job!

Someone mentioned that I could get all wrapped up in making the car better for the next guy.....I'm concerned that the next guy may be me!!!! Smiler Smiler Smiler BTDT!!!!

Steve

Attachments

Images (1)
  • 101_7586_(Medium)
Good day in the garage!

Got my three part tube TIG'd up down the street and it's going to work very nicely!

Re-mounted radiator....paused....removed fans and swapped them L to R where they should have been.....duh! Makes wiring work more neatly!

Started test fitting tubes and hose junctions!!! I can see light at the end of this tunnel....no...wait....just my drop light shining in between suspension parts....!

I hope to get down to having 3-4-or 5-6" long junction pieces. Can't double clamp many of them due to close radius's....so will make sure that I have at least 1" of hose past the hose retainer bump and one good clamp.

Found one original piece of Green Stripe that was starting to crack. I guess to be about 7-10 years old! If I can document all of the junction lengths, in 10 years or so, I will gladly replace them at that time...providing I have a danged lift by then!!!! Garage floor is good for back support, but killer on the abs!!! Smiler Smiler

Attachments

Images (1)
  • 101_7587_(Medium)
Progress!

Installed the above pipe, and all the rest of the "coupler" hoses and pipes that I could. Still waiting for a different T-stat pipe...should be here tonite.....

Bought a new hose to cut a piece from to connect my lower hose to the lower pressure tank fitting. Picture shows cut up....used the middle section.

Attachments

Images (1)
  • 101_7599_(Medium)
Next was the heater hoses! These were the previously mentioned Dayco hoses with pre-formed 90's on the ends! Made it MUCH easier to deal with. Trying to get straight hoses on there would have been near impossible to get the bends to fit without collapsing.

NB: Order more hoses before Dayco discontinues the buggers!

The reinforced area with the two tie wraps and the layer of (1-3/8"!!!) hose is to protect the underside of the heater hoses from the frame seam which is "sorta" beat down and smoothed....at the factory..... This is to reassure myself that I won't need one of the new hoses I order any time soon!!!

Attachments

Images (1)
  • 101_7601_(Medium)
Once I had the hoses in at the under floor pipes, I had to test fit the main compressor/alternator bracket and clearance.

I pushed the heater hoses back out of the way, ran them up and around the opening, reststrained them very lightly to the coil etc bracket and ran them to the block and the water pump.

Mounted up the pulleys (finally!).....

Attachments

Images (1)
  • 101_7600_(Medium)
When test fitting the alternator bracket, I decided to modify the lower mount for the idler pulley a little bit. The lower edge was pushing on the heater hose closest to the firewall, so I marked and cut the thing off...cleaned up edges and painted.

Now there is about 1/8" before the hoses touch! No appreciable decrease in bracket capabilities!

Steve

Attachments

Images (1)
  • 101_7602_(Medium)
To come.....mounting the AC pump....and first blood!!!

Update: Picture shows washers that I made to take up space on pump ears to the adapting bracket. Had about .018" of clearance and I wasn't sure that I wanted to distort the mounting ears that much....so made up these washers out of some beer caps I found! .012" thick.....so only .006" to "squish" things!!!

Caution....when playing with very thin sheet metal pieces that you just cut out....mind your fingers!

Then the AC belt was still too big.....UGH! Using IPSCO adapter. New one should show up today! (11/10) Ordered belt size 11AV865....not many that are smaller!!

Steve

Attachments

Images (1)
  • 101_7604_(Medium)
Last edited by mangusta
PanTTera...
I see that it offers an 11% increase in pump speed...... I found one of the larger aluminum crank pulleys in the stuff that came with the car....but not messing with belts at this time....already can't find what fits right for the AC! Couldn't find the larger alt pulley that I wanted....and had to custom machine the stock one I did find! Trying to stay out of rabbit holes.......! Smiler

This pump has two more impeller vanes than normal....about a 20-30% increase in pumping power..... Smiler Wink

Less weight?

LIV1S: The small 90 degree pipe is on back order..... The "other" 90 degree pipe is the T-stat pipe...more like an 88 degree pipe (which it should!)....and it just showed up at my door about 2 hours ago!

Gonna forgo test fitting it tonite....will wait until tomorrow!!!

Ciao!
Steve
Two new muffler tailpipe hangers mounted up today!

Had two new AC lines fab'd up and installed them!

Need to find a shop that can crimp a new connection on my pump Suction line "in the car"......otherwise will find myself tearing the rest of the car apart to get the one connection off of the danged evaporator.... Frowner Frowner Frowner

Gonna go mount my new T-stat pipe from Wilkinson! It fits! WAY too shiny however.....for this car!!!! Smiler

This pipe has proper bend to bring it around more parallel with valve cover...to fit better to the pressure tank! Finally!

Ciao!
Steve

Attachments

Images (1)
  • 101_7605_(Medium)
Last edited by mangusta
...already had it in place! Thanks!

Just picked up some pieces to make a nice heater hose filter too! Hose shop had a bunch of brass and some sexy stainless filters with a gasket rated up to 212F, which should be plenty for the heater circuit. Figured after all of this turmoil with my plugged tubes/hoses, it's the least I should do!

Top components in pic are from local hose shop.

Lower piece is filter from online hardware company. To make this work in car, still need pieces from top line of parts! Need left and right hose fittings, and second piece from right.

Buying lower piece, which has a long cone fine filter in it, AND the three other pieces, pretty much doubles the cost of just doing it with the hardware pieces. Sure the screen filter is a little more coarse, but it will keep the intended large bits from getting into the heater core!

Don't touch that dial!
Steve

Attachments

Images (1)
  • 101_7607_(Medium)
Last edited by mangusta
OK, it's been almost a month since I posted last!!! Have been a very busy beaver......

First most....Thank-you to all of you that offered advice and encouragement along the way!!!!


Report card:
-New stainless tubing bits and rubber splices are installed.
-New water pump
-Heater hoses run and filter installed and restrained. Water valve cleaned out...core flushed.
-Wiring is all sorted out and retained safely!
-New AC pump is in. Needs to get one line a new fitting on the end......to be continued!
-Headers and exhaust pipes are now ceramic coated and installed! (Should have done this right away when I started!) One pipe contacts axle at full suspension rise...but it did that before... Frowner
-New battery is installed.....
-Wiring tested with amp meter before connecting battery....found out that my e-flasher switch is still bad!!! Imagine that....I didn't work on it yet.....! Sure looked funky on the digital volt meter! Jammed a hammered out piece of tie wrap in the switch....OK fixed. Now no current draw!!!!
-Installed new motor mount rubber biscuits....to try and lift engine just a tad to increase header clearance on LH side to engine chassis stand-off. I think you'd need a set of feeler gauges to see if it did much....!!! But it did...just a lot of work with headers in place! Should have done this while headers were getting coated!!! Duh!
-Dorked up left rear deck hinge area by trying to replace deck shocks with new. New ones had more pressure than the same old rear ones....and the sheet metal where the hinge attaches started giving away! Evidence of prior repair..and rust..... Fix is gonna be ugly....just have to accept that some repaint will be likely!!!! Ugh! Will work on this once car is back down on terra-firma!!!

Vacuumed up the excess baking soda in the front boot carpeting from the battery explosion. Came out fairly well all considering! Used a tooth brush to gently persuade the stuff out....

Got the hose out and filled up the cooling system...vented the radiator a couple of times.....T-stat has a vent hole drilled in it....so system self bled while I dorked with some stuff.....

Connected the battery, put the floor jack under the rear right upright to keep the axle from spinning on the exhaust pipe....topped off the water one more time, and ready to try starting!

Pumped the carb....turned key...more pumping...more key....more pumping.....more key...did I fry something????..then a slight hint of ignition!!! ....more pumping....more key and she lives!!!!!

Needed to "run in" the ceramic coating in two stages. 5 minutes...cool down....then 10 minutes.....cool down. Done.

Pipes are getting hot that need to get hot....no deep percolating heard in engine....temp up at 190 (180 t-stat)....but water looks like baby poo!!! Everything in system is new except block....so this is coming from engine.....
Turned the idle up just a tad....

Proceeded to put wheels back on car with new 3/4" lug nuts. The 13/16" ones were too tight for my comfort..socket to wheel clearance is the issue.

Set the car back down with wood blocks under wheels...for now. Still have RH fender shield off....in case I need to get in there....but seems good.

Tomorrow: warm it up a tad and dump water from system. Cold outside.....need warm parts to work on....! Smiler Refill....run some more....see how it looks!!!! Dump again if necessary...... Eventually will dump and refill with some coolant.....

Need to put new seal on engine cover and then can seal that up, perhaps even put firewall cover back in place! What a concept!!!

Will Erica's name be changed to Susan soon? Stay tuned!!!

Again, thanks for the help with all!
Ciao!
Steve

Attachments

Images (1)
  • 101_7619_(Medium)
Coated exhaust and muffler. Polishing chrome tips out was a bit of a bugger. Polish on, polish off.....more polish on and on and on!

If you are going to buy new headers and exhaust, get them with the ceramic coating already on them! You will pay more but be a happier camper from the get go!!! Once that cheap ass back paint burns off.....you gots nuttin'! My $.03.....

Steve

Attachments

Images (1)
  • 101_7620_(Medium)
Steve,

quote:
...but water looks like baby poo!!!


With repeated normal heating and cooling cycles of the coolant, sediment will accumulate in the bottom of the overflow tank. Periodic cleaning / flushing of this sediment should be a maintenance item.

Cleaning can be done by removing the small overflow hose from the top of the swirl tank and extending it into a bucket. Add water (via a garden hose) and continue until discharged water runs clear.

Or, remove the overflow tank from the car and clean.

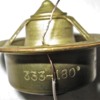
quote:
..T-stat has a vent hole drilled in it...


I believe that the 330 series T'stat has an air bleed vent in it already. I know that the 333 series did. See pic below.

John

Attachments

Images (1)
  • T-Stat_Air_Bleed
John,

I guess that makes me the "maintenance man"!!! Smiler

I thought that hole in my Robert Shaw T-stat was (previous) owner modified!!!! It looked sorta DIY vs a production thing..... OK then! Good to know that others are benefiting from this mod without even knowing perhaps!

Well, I gotta say that it works!!!! I filled the coolant system in about 5 minutes....bled it out a couple of times via the front vent on the radiator....fired it up and added very little water after that!!!! PLUS I had the front of the car ever so slightly higher than the (edit!) rear of the car, which is totally backwards from recommended procedure (of course there weren't vented t-stats when that was written!!!!) and all seemed well!

After running the header break in procedure of 5 minutes/cool/10 minutes/cool, the pressure tank was down about an inch give or take an inch.....and water was circulating well!

I cleaned the tanks out when I was doing all the pipes and hoses.....so all good there.

What I think I will do, is warm it up just a bit, then dump via the large tubes up front.....

Hmmmm do I take a shower now, then another iron oxide bath...and another shower?????

Cheers!
Steve
Last edited by mangusta
Steve,

You is da (maintenance) man !!!

Given your description of the coolant's "color", you most likely have fine sediment in the engine block that will slowly "reveal" itself over time, and finally settle in the bottom of the overflow tank.

Question: If you have "...the front of the car ever so slightly higher than the front of the car...", how does that work?? Big Grin LOL

John
Steve, if you must, pulling the whole dashboard out to access the AC evaporator takes only an hour or so (4 screws, tach & glove box removal). Reinstalling takes a day or so.... I've had ours out twice. There's a How-To article in the POCA Archives.

If you're gonna use r-134a freon, you should R & R the evaporator valve under the dash near the glove box (accessible). The OEM valve is calibrated for R-12 so freon flow is less, and usually has a small cone-screen inside the 'to' line leg of the valve, that is plugged solid with rubber flakes & mung but is cleanable once hooked out. Most guys leave it out to increase r-134a flow a bit more. New valves don't come with the screen.

You should also R&R the dryer can in back regardless of which freon you select, as age & flow reduces the dessicant pellets to an awful looking black sludge. And finally, many owners add a compressor overpressure safety shut-off switch. Ours blew an A/C line outside of Bakersfield that oiled down the inside of the windshield at 90 mph & sounded like a rifle shot....
Jack,

Not looking to R&R evap at this time....just need to get one hose end replaced (hopefully in car!!) and THEN I can suck down system and see if I need to R&R evap....!

Using R12.

Did the Valve screen thing.....posted elsewhere....???? Found some chips and dust...

New dryer is waiting for new connector....not installing it until system is "closed" again!

Pressure switch: Have port....no switch at the moment.
Cheers!
Steve
quote:
Originally posted by Mangusta:
Jack,

Not looking to R&R evap at this time....just need to get one hose end replaced (hopefully in car!!) and THEN I can suck down system and see if I need to R&R evap....!

Using R12.

Did the Valve screen thing.....posted elsewhere....???? Found some chips and dust...

New dryer is waiting for new connector....not installing it until system is "closed" again!

Pressure switch: Have port....no switch at the moment.
Cheers!
Steve


Hey Steve,

If you still don't have a/c hoses made, I can bring my crimping tool to the Super Bowl party in January(?) and we can make them then. You just need your hoses cut to length and the ends you need crimped on. The tool doesn't get used otherwise. I'm still on the fence about converting mine or staying with R12. I have two cans of R12 on my shelf just in case.

Bayani
Update time.....lots going on....

Thanks to Bayani, the remaining AC line has a new "tubo" (O-ring) type connector on it and is connected up.

Futszed around with loose connections on drier unit...left them loose..duh! One slow leak on new hose going to condenser. Eventually got vacuum to hold overnite!

Charged system only to find out that the expansion valve isn't working right!

NOTE: System will take about 3-1/2 to 4lbs of R12. No where is this stated in any Ford documentation for the Pantera, NOR in any TSB's.

Ordered two new ones, should be here tomorrow. Why two? They are so steenking cheap....$12 or so....

Moral of this story? If your AC system hasn't been used in 20 years or so, REPLACE ALL THE CHEAP PARTS WHILE IT IS APART!!! What are the cheap parts? Drier unit and expansion valve are main two cheapo items. If your system has O-rings you may consider doing all of them also.

Next on list, is the "easy" hoses....which is 1)hose from pump to rear of car, connection at top of condenser, and 2) the other is the short hose from drier to condenser lower connection.

Next job is dumping water one final time out of cooling system and refilling with antifreeze mixture.

If I can keep the engine cool and the passengers cool, I can put a bow on this job!

Then on to pesky decklid hinge.....gack!!!

OH, and double check relays for fans....seems like TSB's say that both fans should be on by operating temps.....but I have only one at about 190ish (idling while charging AC.) Not sure when this car is set up to have second fan come on. Will rig up some jumpers to test relays.....and mirrors so I can work upside down...!!!!
Ciao!
Steve
Erica is still being Erica.....true to her namesake.......

I now have joined the ranks of the "just wanted to change the expansion valve.....and CRACKED THE DAMNED EVAP TUBE" crowd!!!! AAAAHHHGGGG!!!!

Will it ever end....so close, but no Emmy!!! Smiler

The above statement sez it all.....working to get that danged connector loose on the evap valve and trying to get a 1" wrench on that fitting was the demise.... I was carefully wiggling to get some wrench in place and the tube moved a bit....a bit toooo easily!

I thought, OK, hopefully I just bent the tube a bit....it's supposed to be thin material.... Well it is thin material and as I didn't want to believe.....the tube cracked..... Vacuum and pressure testing revealed the bad news.

No where in any documentation that I read, did it mention that that little round end piece on the AC housing came off! (It has the flapper in it to divert air....cable operated from the dash.) Would maybe have helped me....but too late now.....in the notes!!!!

I have been doing this ENTIRE job bass ackwards..... Instead of starting with the heater stuff, I should have jumped right to the EVAP and AC stuff...... that way, I wouldn't have had to waste so much time with the heater core clean out etc, in the event that this unit got busted....

Lesson learned is a repeat.... "replace all the cheap stuff while you are in there"! Drier is a given, Expansion Valve is the crap shoot. BUT on a car whose A/C hadn't been operative in perhaps two decades, I should have known better....but then I'm not a heavy AC mechanic either! I was hoping for the best.....got the worst!!!

I've heard good about Wilkinson's "improved alloy" unit, but not as it directly fits into a later car. (1974) The last thing I want, is to have to change connectors on anything.....! Or the heater valve.....again....! Smiler

Murphy's law sort of dictated that this would happen. I just filled the car with a 50/50 mix of coolant.....now I need to drain it out again, and drain the heater tubes to avoid getting coolant all over the carpets.

I've been using Dailey's (PanteraPlace) Evap' removal procedure as guidance, but it is penned for an early car, early dash. Nothing really applies exactly the same. But I have clues from this site, like "six bolts/fasteners" hold the dash in place....got them.....but getting the lower instrument cluster out of the way is not covered......sooooo, I'm drudging thru it, taking notes and will try and put together an updated procedure when I'm done.

SO, while I have the dash off, I will get at the pesky emergency flasher button with a new one, AND fix the wiper switch (what for???) as the switch puked it's contents all over the floor when I pulled it out.....

Erica strikes again!!! Smiler

Found a mystery under dash switch that switches nothing.......perhaps an old antenna? Can probably remove it or find some other reason to leave it.....

Next on the job, is dropping the steering column, and getting the speedo/tach units pulled, wires documented.....and hopefully lift the upper dash section out tomorrow! Supposed to rain buckets here, all day Monday, so good time to work on this job.

This job's uglier than a huge sale on a hot day at Walmart.....!!! Smiler

Cheers!!!
Steve
OK, upper dash section is finally out!

Jack, I think it takes an hour just to get that stupid excuse for a glove box out!!! Who designed that fastening system? What a joke!!!

I'd go search the POCA archives, but the article is probably written for an early car, and from what I have seen trying to use Dailey's procedure against a later car, is fairly useless, more like a suggestion! Smiler

What was previously reported as 6 screws or fasteners to retain a late dash is incorrect. It is actually 8. Two on each end of dash (one is hidden by the A-pillar molding) but you need to take the A-pillar moldings off, which is four tiny #1 Phillips head screws....to I guess technically we're up to 16 now.

Then there is getting the front lower console section ("flare" as some call it) loose and moved back....out of the way.... which requires the console rear section to be lifted out of the way (that is two screws at the bottom front edge, and 4 bolts holding the shifter plate in place...) now we're up to 22 fasteners. A couple of misc screws on the bottom of the flare section need to be removed, and the 4 screws retaining the dash courtesy lights need to be pulled to get the wiring disconnected so you can lift the dash out neatly.

Then let's not forget the 4 thumb nuts that hold the tach and speedo in place....Of course my car is missing one of these thumb style and they substituted and actual 7 or 8mm nut....sheesh...that was a beeeeeeeyattccchhhhh to get out of there.

So, I've lost track of the fastener count at this point....heading past 30.... Have them all "punched" into a piece of cardboard along with wiring notes (colors) and such for easier reassembly! HAH!!! Nothing easy about this....only after about the 3rd time..... CHECK ALL YOUR DASH LIGHTBULBS NOW!!!!

You really need baby arms and fingers with Conan's strength in the fingers to get some of this stuff loose! I am truly surprised that I didn't a) scratch the heck out of my arms drawing lots of blood, or b) dislodge or break something very expensive and fragile behind the dash.....but then I need to put it all back in yet!!! ....AND I'm not done with pulling the EVAP box yet.....PLENTY of time to go further down the rabbit hole...!

OH, the drawings show one piece gauge retainers for the thumb nuts to work against to hold these two large units in place. They lie!!! There are four small clampy pieces that you need to finagle back into place and then find the studs.....and then find the studs again with lock nuts....and again with the knurled finger nuts....and again and again when you drop said nuts.....and again....for good measure! Wink

I WAS pleasantly surprised to see large connectors on the wiring for the two large gauges and the emergency flasher wiring. There are a few more of these scattered about also....

I found a jumper on what appears to be the wiring for the GEN lamp...which is missing.....and am presuming that this is due to the one wire (actually 4 wires) alternator conversion no longer needing the lamp function. Look at ammeter you dummy! The idiot light isn't working! Get it...idiot light...dummy idiot light? OK, it's late..... Smiler

Looks like I could use a "foam seal kit" for the evap housing..... Any comments on the quality of the offerings by vendors????

OK, fingers are bleeding from typing....surprised they have any skin on them from today's adventure!

Tomorrow: Drain the fresh antifreeze out of the system, disconnect heater lines and blow coolant out.... remove AC lines....and hopefully get EVAP housing on the work bench!!! No more busted parts please.

Ciao!!!
Steve
Last edited by mangusta
Steve,
Did you install heater shut off valves in the engine compartment? If so then you don't need to drain the whole system. Just close the valves and disconnect hoses from heater side and drain. Good luck, been there, done that.
What are you using as a replacement evap/heater core? I have installed units from three different vendors and had to modify the cutouts in the box as the tube locations did not line up. Don't try to bend the tubes to fit the box or you will be right back where you started.
All the vendor supplied coils I have installed have been built to use the H block style expansion valve as opposed to the angled valve. I do not know if they offer the original style connections. The block style uses different hose connections also.
I would also suggest upgrading the squirrel cage fans to a higher capacity as the stock unit does not move a lot of air. I got mine from Hall years ago, don't know if they still have them or not.

Forest
If by the "foam seal kit" you mean the two 4" square foam rings that go between the backside of the dash and the heater box outlets to seal hot or cold air coming out, I made mine from 1" thick foam. There are lots of places that sell foam sheets; get foam that is rot-resistant or you may be doing this again, when you're even less flexible than you are now! Cut foam more-or-less to size with scissors &/or an electric turkey-trimmer knife. Try not to be too critical of the outrageously poor fit between the heater box outlets & the dash face holes; misalignments of around 1" are common but not easily corrected.

You're right- the '71-'72 dash & console is quite different than the later ones; your '74 has a fresh air valve, a flexible supply hose & valving that's missing on earlier cars. That's all the stuff behind the glove box; early-car owners have nothing behind the glove box but also no fresh air source, except for VERY early cars that DID have a different type of fresh air source. Welcome to Italian Engineering!

The late steel heater core/evaporator box is also very different, as are the two paper defroster flex hoses. Maybe you should document the differences w/photos & send it to me as a Tech Newsletter article, as a public service?

The only problem I had on early dash R & Rs was inserting the two illuminated rocker switches; the switches go in from the front but the bulb & socket clips-on the switch body and will not fit thru the dash hole. So they must be clipped on after the switch is in place. Which even for long arms & fingers, is near-impossible, at least the first time around (maybe the 4th, too).

Interesting note: the washer switch is powered from the wiper switch via a spade-lug & a short wire. There are three choices of lug on the wiper switch to choose from and two will not work correctly. This is not shown on the schematic. Good luck.
OK, today was "look! Shiny rock!!" day in the garage.... Was supposed to be getting the AC box out of the car...but got side tracked on the lighter revamp (see other post), and a problem that I mentioned in my very first post on this thread!

The Emergency Flasher Switch....it puked it's function on the first day I parked it in the driveway.

Well, being the ever so "how does it work" kinda guy.....and thinking "well, you can't dork it up much worse than it already is, I took the switch apart! With a couple of small screwdrivers, I was able to eventually get the 6 small tabs finagled (that's a word?) out of the slots they were stuck in....and the thing popped apart! Pretty simple device. One moving part and one stationary...and one piece to hold the two pieces together....oh, and a spring!

The stationary piece has a metal arm with a pin in it. The pin is supposed to ride in the recess of the plastic casting which is on the push button section of this thing. It is one of those maze type deals where when you push the button in, the pin is supposed to catch and hold the button section from popping out. Push the button again, and the pin is guided to another path in the casting and then allows the button to pop out. Push and repeat......in, out, in, way out....

I'd always heard about this little "pathway" in the button section getting mucked up and damaged. Well, mine was not damaged! There appeared to be just enuf play in the arm with the pin....to allow the pin to jump out of the groove it was supposed to stay in!

I put a little bend in the metal arm, to force the pin further in towards the center of the assembly. Gotta be careful as I think this is a cast piece of metal....has that look about it...and it won't take much...but apparently a little is OK!

Check out picture....sorry for the blurry.... fought with my auto focus and this was best I could get of this channel for the pin to ride in.

Steve

Attachments

Images (1)
  • 101_7847_(Medium)
Here is a shot of the metal piece with the pin in it that I bent ever so slightly. You can see the spring also.

Snapped it all back together, put the wires back in place, plugged it in to the dash wiring harness pushed button to release it...and voila!!! Blinking lights!!!!

One good thing out of this (I keep saying this with this car....!!!!) is that the yellow wire spade connection, which is apparently the main power in or out or something important, was found off of the spade connection once I got the dash out! Very loose when I plugged it on! I tried to pinch the curled section of the female clip to be more tight on the male spade...and promptly broke both of the crimps off! No pliers required! Broke them by finger power! Needless to say, it would seem that this connector had some heat on it to cause this metal to crystallize!

I put another connector on the wire....and we're all set!

HERE IS ONE THING I LEARNED while working on this dash about this switch. OK two things...four things....

1) This switch is the one with the resistor on the back! If anyone is looking to buy one....

2) This switch will NOT come out of the dash without pulling all of the wire connections off. Or at least half of them. The wires are about 6 inches long, and terminate in a HUGE red connector. Even IF you could get the front portion of the switch and wires out of the dash, this large red connector is NOT coming out. Forgettabout it!!!

This of course means that you have been able to get your hand up in the dash to get the large plastic retaining nut loose....

To me, there is no physical way possible to put this switch back in the dash, without removing the dash!

To pull the switch, you loosen the nut. The nut is too small to fit over the spade connectors around the perimeter of the back of the switch. So you muscle it out...knocking off all of the wire connections, which is gonna be TOUGH cuz there are 7 wires +1 wire in the middle, that are really really tight connections!

When the switch finally comes thru the hole, the plastic nut and the thin lock washer of sorts, fall down the rear of the dash most likely if you are fortunate, and all of the 8 wires scatter....and retreat into the dash.

That was the easy part!

Now how to get it all back in place?! Put the new or repaired switch into the hole, round up the thin washer and the plastic nut, and work to get them back up inside the dash and onto the rear of the switch. Watch out for cramps in your fingers and forearm, lower back, neck... from being in very odd contortions to get at the rear of the switch.

Now once the switch is tight, you can begin to guess which of 8 wires you are holding in your fingers and which connector you are putting it back on! Seriously! You cannot physically see the wires any longer, nor can you see where you are putting them.

I guess if you have removed your steering column, you might be able to see.....but I doubt it......

So, now is when you go grab the .38 revolver and unload it into the driver's floor pan!!!!!!

Once you calm yourself with 3 or 4 beers and a half a pack of cigarettes, begin procedure to remove the dash pad/top..........32 fasteners later.....ba dump bump!!!!

3) the red lens does NOT come off of this particular push button to allow changing the bulb. When it burns out, replace the switch.

4) the front bezel of this switch does NOT unscrew to allow you to drop the switch out the back and down and out.......ever.

I am not sure where I read about #3 and #4, but certainly it was copied from another car shop manual and used for filler in the Pantera manual.....!!!!! OK, it was perhaps true for the EARLY cars....but I have no idea when this new style switch (with the resistor on the rear) was implemented....nor do I know if there were multiple versions of early switches.....

I do think these later switches ended up in BMW's of some sort...... There is an SAE 72 number on the bezel indicating part was intended/designed/approved for 1972 vehicles of some sort....

SOOOOO while I had the dash out.....I put my newly repaired switch back in the hole, tightened the big plastic nut, verified that the switch was oriented properly and not at an annoying angle, and then plugged all the wires back onto the rear of the switch. Wow, that was easy!!!!

Where was I......oh, yah....evaporator housing...... Started draining the freshly installed antifreeze mixture out of the system so that I can disconnect the heater lines without dumping 2 gallons of coolant all over the carpet! I'm not a hose squeezer......sounds like a good way to damage new hoses.....but I know it can be done with the right tools.

Onwards!
Steve

Attachments

Images (1)
  • 101_7843_(Medium)
The 1970's BMW 2002 uses the same switch as the our cars

SAE QC 72 DKS (late) PN 61 31 1 356 193 - 8 pin with resistor.

The model I was looking at ar a local Cars and Coffee had one hanging out as he had the center console out. I found out BMW uses a cylinder plug on the wire harness to connect the switch. I have yet to find a source for the plug though. Check out the picture. It would have made servicing the switch on our cars a lot simpler. You still would have to reach behind the dash to loosen/remove the nut so you can pull the switch out though.

Attachments

Images (1)
  • image
Those e-switches are used by a whole bunch of European cars- I once wrote an article around adapting a visually identical one salvaged from a '72 Alfa. Then one of the vendors called to mention that he had brand new repros on the shelf for less than $50.... Not all the used ones found in wrecking yards have the same wire orientation, either. You'll have to check continuity on each of the 8 lugs to find out where your wires should connect.

And as for disassembling, there are two different switches used as OEM on Panteras, and far from being 'early' or 'late', they seem to have been used by batch. The plastic body swells over the decades from internal spring pressure, which allows the spring-arm-with-pin to pop out of the cam-groove in the inner body. Besides the one shown in Steve's post, there's a second that's held together by a small flat steel frame with only 3 tabs to bend. Possibly easiest fix is removing the switch, squeezing the body and trying the switch to see if the pin is in the groove, then wrapping the body with a small worm-drive hose clamp- not too tight or you seize the switch action.

Not fixing it and jamming the button in with a toothpick redneck-style also works, with a caution: pushing the button in too far disconnects the tail lights & stoplights on your car. Not to worry: there are plenty of police who will point this out to you, along with a fix-it-ticket...
quote:
Not fixing it and jamming the button in with a toothpick redneck-style also works, with a caution: pushing the button in too far disconnects the tail lights & stoplights on your car.

Not true!!!! The only exterior lights that are effected by a faulty hazard warning switch are the turn signals. The tail lights and the brake lights are completely independent of the hazard warning switch.

John
THREE NUTS!!!!

FINALLY! NO shiny nut stuff going on today!
The AC box is out and on the work bench!

Contrary to all doc's on the subject of removing this assembly, there may have been 4 nuts involved in the design of this affair....but there are only THREE nuts holding it in the car!!!

I am SO glad I used a tiny amount of silicon grease on those heater hose fittings on the heater core.....I was able to pop the hoses loose and get them off fairly easily.

Labeled middle control cable and made a diagram of fan switch wiring for reassembly. Covered ends of AC hoses with plastic bags and taped securely. Laid a towel over the lower console flare piece and carefully pulled the unit out!

New parts on order...... time to clean up stuff and wait!

Ciao!
Steve
Update!

New evap core is finally in place in the tin, and in the car! Working to get external AC connections made!

All I can say about this job is that nothing fits like it did before. Nothing. Hoses that I cut for the heater section now are 1/4-3/8" too short. AC hoses don't fit quite right. I did have to bend the new evap connections just a tad to get clearance of the fresh air section of the late style box! No way around it. It was either bend the tube or no fresh air control!

The one thing that did still fit is the condensate drain hose.

It should be noted that the later style air box, has a one piece bottom section, no seams, with a half to 3/4" of depth to collect water in! One fellow member was relaying stories of his wife's feet getting wet every time he turned a corner...... I am presuming that the early boxes may have a seam that leaks at low levels of water??????

While the new evap core fit in the box physically, the dimensions of the mounting brackets (end brackets) changed slightly more narrow, and the core itself moved to the rear of the box by 1/8-1/4"! This makes putting those pointy little screws back in place a risky task!!! No less than 8 screws needed to be "de-pointed" and made smooth. I also installed washers to take up a little more space! The new core is aluminum, so won't take much to drill into it!!!!!!!

I had to relocate one of the two mounting screws for the core, and make a new hole for the tube that the temp sensor probe fits into. The stock hole didn't align with the new core at all. Had to drill both the case and the core end to accommodate the brass tube insertion to the area where the two rows of fins meet.....anywhere else, you'd be buying a new core once again!!!!

I'll throw up a couple of pictures....of the work.....

First, what got me into all of this mess! The crack...or cracks!!! Both sides of the "Y" look cracked.....
Ciao!
Steve

Attachments

Images (1)
  • 101_7895_(Medium)
IF I had known that this fresh air inlet/flapper piece on the RH side of the fan assy was supposed to, or actually DID come off.....I perhaps might maybe possibly wouldn't have cracked the fitting. Never know now....

BUT THIS PIECE COMES OFF!!!!! On mine, I found one teeeny tiny Phillips screw that was locking the unit in place. After that, there are three Phillips head screws that you just need to loosen a turn or so. Then the unit rotates CCW about a half inch or so and it drops off! So simple......no one mentions it....because no one has written the procedure to pull this type of evap case out of their car yet!

S

Attachments

Images (1)
  • 101_7840_(Medium)
Lots going on this side!

Clearance for large AC hose was a bugger once you moved the tube to clear the fresh air inlet piece. Expansion valve will go back on... Temp probe will go in hole...wiring for switch...wiring for control switch..... Other side (heater) is much less going on...

Enuf for now! Work will progress more today!
Steve

Attachments

Images (1)
  • 101_7981_(Medium)
OK, that hurt!!! Had to take a couple of days off to let my lower back settle down!!!! Finally back in action today......

Filled cooling system up with water....tomorrow will fire car up and pressurize cooling system to check for leaks at shut off valve.

If that goes good, then can work on filling AC system!

IF that all goes good, then can work on putting the danged dash back in!!! ...and the console....and the seats....and the engine cover and all that...!!! WOW! I may find a car under all of that stuff!

Cleaned my fuses today..... was getting some erratic operation of headlamps and other such stuff....some was due to unplugged connector for turn signal switch! (headlamps popped up when I connected battery and turned on ignition key......WAIT! I never touched the headlamp switch!!!! Surprise!)

Once I figured out that the connector was yet undone....resolved that and normal operation continued....except hi beams were very dim...and one low beam was off....then on...? (What?)

Looked at fuses and some were a bit fuzzy. Cleaned everything up with brass brush. Now I get nice bright lights, strong horn...OK, medium horn....meep meep.... and MY HEATER FAN WORKS!!!!

BUT Lo position is not a positive experience each time. You have to futz with the rocker switch to get things working and then it may stay on or not. High position works fine.

OK TWO QUESTIONS related to all of this......

1) Has anyone ever rebuilt a FAN rocker switch? or at least taken it apart in a non-destructive manner? How'd ya do it?

2) Where is the horn relay? I think there is one mentioned.......in the schematics..... 74 car. Reason I ask is that I want to put a set of late model Crown Vic FIAM horns up front. Meep meeep doesn't get it around here in traffic! You need the "WHAT IN THE HELL ARE YOU THINKING!!!!!????" sort of report from your horns! Plus I think only one is working....! I think the horns would need to operate off of a relay....

The air horns in the Mangusta were fantastic (once properly lubed)!!! I thought Panteras got them also...perhaps that was only early cars??

No smoke from anything today......life is good!

Ciao!
Steve
2) Where is the horn relay? I think there is one mentioned.......in the schematics..... 74 car. Reason I ask is that I want to put a set of late model Crown Vic FIAM horns up front. Meep meeep doesn't get it around here in traffic! You need the "WHAT IN THE HELL ARE YOU THINKING!!!!!????" sort of report from your horns! Plus I think only one is working....! I think the horns would need to operate off of a relay....

The air horns in the Mangusta were fantastic (once properly lubed)!!! I thought Panteras got them also...perhaps that was only early cars??

No smoke from anything today......life is good!

Ciao!
Steve[/QUOTE]

From what I know all Pantera's have original airhorns, also the later build , GT5,GT5-S and Si .

Simon
OK, good! Relay: yes. Air horns: maybe.....probably not.

Seems to me that after I discovered my barely working air horns in the Goose front wheel well, that other Pantera owners piped up that they also had them....

We determined that almost the exact same air horns are still being sold by local AP stores as well as online!

Not sure which way I will go yet.......too early to make decisions so crucial... Smiler

I do need to venture out and see if I can dig up a "thumb nut" for the back of one of my large gauges. Car came to me with only three instead of 4. Something else....but cannot recall what was on the "list" to take to the electronics junk store! Excuse me, recycling store.....!

Thanks!!!
Steve
Garth,

That is a great write up!

I can only hope that I have good internals left to work with....but I don't think so.

LOW position gets no "super duper" feels good sensation when you move the switch....sort of vague...if you jiggle and joggle it...then it may come on. HI works just fine.

I'll look thru more boxes of old stuff to see what I can find for old switches! Sounds like possibility could be high that I have some spare bits about!!!

Thanks again!
Steve
Well, Erica lives true to her namesake.......

I fired the car up today, to heat up the system to see if my new heater core and associated connections are sound.

Nope!!! As soon as water started circulating, I could hear water....probably air bubbles then water... but never the less....a mess ensued!

Shut the car off and grabbed the 19mm wrenches to tighten the connector on the heater shut off valve..... No sooner had I given the wrench another couple of flats towards tight, and I see the monkey flyin heater tube pop out of the monkey flyin attaching nut.......!!!!!!!

After I jumped to grab containers to catch the freshly filled engine's water which was now gushing into the cabin.....and dumped them into an antifreeze jug for safe keeping...AND sopped up some out of the carpet and backing...... I removed the nut and found the flared aluminum end of the heater tube cleanly cut off and sitting in the nut......

SO, time to pull the heater box out once again and see if I can get a new flare put on the end of the tube..... Just can't get flare tools at the tube while it is in the car and in the box........

Crap!
Steve

PS Flying monkey thing is reference to Samuel L Jackson in FX's cleaned up version of "Snakes on a Plane"...... Got my own plane of snakes here and her name is Erica!!!!

PSS: Added picture of old and new fittings. Can anyone see a problem? Same mistake is also propagated to the AC side on the expansion valve fitting.....need to contact the manufacturer!

Attachments

Images (1)
  • 101_7983_(Medium)
Steve,

It looks to me like they used a compression nut in place of the 45° flare nut. Something to be aware of that I found when I swapped my L model heater control valve for an electronic version is that the fitting is not a standard 3/8" SAE flare with 18TPI threads. It is actually a 3/8" BPPT, British Parallel Pipe Thread, that is 19TPI. It's hard to tell but a thread gauge tells the story. You can't find that flare nut at your local ACE Hardware. I ended up using the original flare nut on the heater core and made a fitting to match on the lathe. Then I relocated the control valve to the engine compartment. Good luck.

Steve
6512
Steve,

EDIT: I looked some more into this thread type, and it is a British Standard Pipe Parallel ie straight. (or Tapered if called for.) SO BSPP in what I could find.....probably other acronyms just like for NPT!!!

BUTTTTT, trying to find a tubing nut in BSPP format is proving to be difficult!

I was also trying to find an adapter to go Female BSPP to Male NPTS (straight threads) but no go! Other way around.....no prob. This way supplier could put NPTS nuts on the heater core and use regular shut off valves from US. OR use the adapter and fit to the original heater valve! Which is what I would love to do.

Just like the Italians to use a British water valve on an Italian car sold in the US......(and elsewhere!)

That explains why the danged nut didn't thread onto the valve just quite as nice as it should have for being new parts!!!! I thought I had some aluminum in the threads from previous fitting....and worked on those threads for quite a while with a thread file....cleaning them up!

Hmmmm, don't have 19TPI on my thread gauge either.

Just like Rosanne Rosannadana used to say.....
"It's Always something!"

Thanks for the great info!!!!!
Steve
Last edited by mangusta
...Here's the solution that worked for Me, when I Installed a New P.S. pump on a GMC Truck, and the Hose Fitting was Different from the (Removable) Adaptor, on the Original (Old) Pump.

I turned the Two Pieces with the 'Ends' I need to work, on the Lathe to Mate with a .002" Press fit, degreased with Acetone, smeared a thin film of Locktite RED on the opposing surfaces and pressed the Two Parts together on a Hydraulic press. BOOM! An Adaptor. It works, No Leaks!
Be sure to cap the Flare so as to Not Damage it, in the Press.

If this procedure can hold the pressure of a P.S. Pump, it can certainly hold the Pressure of a AC Pump.

Steve, If You do not have access to a Lathe, send Me the Parts with a Clear Blueprint of what You need, and I will Machine, and assemble them for You. At No cost to You, for the 'Cause'.
Marlin,

This is EXACTLY what I am going to need to do.

The evap core will get an NPS flare nut on it...
Then I found a BPSS female to NPT male AND
a NPT female to NPS flare male. Whew need to cool off....all that sex talk!!! Smiler

At the same time need to look more closely at the connection on the AC side. I think that ALSO is likely a damned compression fitting also, and after a few hundred heating and cooling cycles could simply cut right thru that connection as well. If it is a proper nut I will be pleasantly surprised!

Thanks for the offer! I do have a 6" South Bend but it is in bits in my new shop waiting for a bench, power, and reassembly!

In the mean time a have a small lathe that will do the trick for doing exactly what you suggest, although I may solder it.....

Did the same on a PS fitting on a 67 390 Fairlane. Hoses were unobtanium and priced to the moon. Did find an old NOS hose that was mismarked and had the wrong something or other to work for me (probably a 66 hose) but did take two adapters and made one!

I was hoping that a BPSS flare fitting could be located.....but found absolutely nothing on the internet!!!! That would have been too easy.
Would have fed the info back to the vender!

If the vendor does nothing but put a proper flare nut (NPS) on this fitting, we could still properly substitute new US made valves that have the same sort of design.....threaded flare connection and hose..... Whether the rotational control would be retained....different issue.

At the worst, ya cross thread the hell out of the nut and it would hold.....ugh!

Would have fed the info back to the vender!

We'll see how this job works....may not want to get into the adapter business........! Not $$ heavy!

Bad news is that I can't do this job in the car.....
Right now I'm just resting my back after putzing it up real good just putting the box back in the car.......need to work back up to bustin' the evap box back out of the car!!! May be tomorrow.......then take the whole thing apart again.

....find a removable steering wheel fitting could help too!

Stupid $2 part derails a $1000+ job.....

My "lathe" for this job! It's not the size, it's how ya use it!!! Smiler

Ciao!
Steve

Attachments

Images (1)
  • unimatlathe1
Unfortunately, this is on a NEW core from vendor....of aluminum.......

I'll try and get the adapter as short as I can get it.....and then shorten the heater tube by some unknown amount....and get the valve back in it's approximate stock location! Lower by a 1/4" wouldn't hurt....easier to get hose on then!

I am of the nature to have my copper core fixed and reinstall....except that while moving it around in the garage the other day, I think I cracked one of the heater tubes! (It already had the AC side broken......!) Can't win here...!

Steve
At this point, reusing the original may be an out to a solution as well.

We'll see once I get it all back on the bench and laid out. Will depend on how much of the new/old tubing can be stretched and still keep the valve close to the original location so that the hose isn't up against the blower and the cable at some obtuse angle to activate the thing!

Thanks all!!!

Steve
quote:
Did the same on a PS fitting on a 67 390 Fairlane. Hoses were unobtanium and priced to the moon. Did find an old NOS hose that was mismarked and had the wrong something or other to work for me (probably a 66 hose) but did take two adapters and made one!

I was hoping that a BPSS flare fitting could be located.....but found absolutely nothing on the internet!!!! That would have been too easy.
Would have fed the info back to the vender!

An excellent local source for AC fittings and/or custom hoses with the fittings you need is Sease's Auto Services & Repair on N. 4th Street in San Jose. I had them fab up some new hoses for my AC system.
OK, Erica has been on "time out" for being such a Beyonce..... I need a sanity check here cuz I'm going a tad crazy....can't afford to lose more hair!

Whut I done so far....

Repaired Evap/Heater core is back in car, holding 28+ inches of vacuum for several days while I have been trying to get heater core to work.....

Today determined that core has no obstructions, valve is adjusted for full flow capacity (about a 3/8" passage), and my home brew heater line filter is not plugged up already.......

I need a sanity check here......

Heater core is connected as follows....(similar to other post two up the list)....

The open line on the core is connected directly to the back to the pump which should be "sucking" water from the core..... (Left hand tube)

Valved side of core goes back via RH tube and hits my filter and is then connected to the block outlet. This is the pressure side...

Water pump "pumps water" into the block, from radiator, which is heated, then is pumped out the block fitting and forward to the heater valve...into the core...and back out...returning to the water pump. It should be as simple as that.

Pressure side of core is valved connection, suction side is the open connection.

But for me....no love. The two metal hoses up at where they come out of the tunnel are barely warm.....engine is warm enuf to turn both fans on......

I had flushed these lines several times, although had lots of crap in them......seemed clean.

SO, is this something unique to our cars, that the core needs to be bled????? Air bubble issues?????

I would think that with a suction on one side, and pressure on the other, that water would displace air and these lines should be cooking in no time......

What stupid simple thing am I missing?????

Cheers!
Steve
Steve I don't know if this is of any help but I got irritated with the fluctuating temperature outlet of my heater when I had it on during cold summer nights etc. Suddenly it was 40°C in the cockpit and 2 minutes later 18°C all depending on engine rpm and available flow for the heater core.

So I installed a dedicated heater pump like we know from all modern cars and it is switched via a micro switch on the cable/valve assembly so when the temp selector on the dash is all the way left the power to the pump is cut and the pump stops. It works quite nice so now we are able to control the temp in the cockpit much better.
BTW the temporary cable tie is now replaced with a proper clamp.

Attachments

Images (1)
  • IMG_8435
David, yes certainly. That pump sit on many cars. The one I used is a Bosch 0392020073 and it is used in Audi, VW, Ford, Porsche, Mercedes etc. The studs were not the same size as my hoses but I used some step down (or step up) straight connectors. But it all depends obviously. I wired it via a relay and took the ground for the relay coil and wired it via a small/micro switch that I attached were the cable from the lever connects to the water valve. It was a bit tricky to get that to sit correctly so it cuts out exactly when the valve is also shut. But I managed eventually. Unfortunately I didn't take any photos of that.
AHAH!!!!

Hope you're all full of deviled eggs, sugary eggs, and yellow chicks and bunnies!!!

Stupid simplicity strikes again!!!!!

What is R & L at the front of the tunnel....is NOT R & L at the rear of the tunnel!!!

The two metal tubes start out side by side, then go top to bottom down the side of the tunnel and exit crossed!!! My bad! No drawing from how I started....!

Today, I took all of the heater hoses off at the rear of the tunnel and confirmed no crap blocking flow. Got a little....but not very much. Flushed the core with water....got flow!

SO, filled it all back up again, fired it up....and the "non valved" hose/tube at the heater core was starting to heat up first!!! Wrongo! Hoses are crossed!

Now I need to let the thing cool down so I don't scald myself when I attempt to make hoses fit which have been beautifully trimmed and manicured, dressed, sent to prom.....but the wrong prom!

It's always something....! DeT strikes again!

Ciao!
Steve
WE HAVE COOL!!!!!

System had been holding since way back at about 26-27" of vacuum while I fought with the heater hoses. Fired the pump back up and sucked the system down to 28-29", about a half hour or so just for kicks.

Attached the Freon tank, purged the line, and proceeded to fill with gas....up to the point where the car needed to be running to get any more gas in the car. Sun is down, about 63-65 degrees in the garage...so not enuf to warm the tank!

Eventually pumped enuf Freon to get the pressures to around 155/9 and a register temp of about 40 degrees! YAY!!! With fan on high, that should freeze the wife out quite nicely!!!!

Tomorrow, once all cools down, will try and get the charging hoses off without taking a damned oil bath again! Hazards of old threaded R12 connections! Will need to get sneaky rabbit on the things......

THEN, apply AC goopy tape to all of the metal bits and holes in the housing....get the RH duct put back in place, & control cable attached.

Once done with that, we can finally direct our attention back to getting the upper dash cover back in place...... More Rubieo Goldbergio going on with the wiper switch lamp install, big gauge retainer hardware....spaces that don't like big hands..... Smiler

BUT we are once again moving in the proper direction!!!!

Cheers!
Steve
OK, lot going on in the last 10 days!

Just finished installing the dash today,....or at least about 99% of it. Still need to snap the vents in place, the side panels, and rear section of the console!

One issue I did run into, was one of the connections for the ignition switch wiring to the dash wiring. One of the wires had apparently heated up pretty good....and pretty much roasted the brass connector such that the little screws appeared rusty and were in no form going to unscrew as intended.

After cutting the connector apart, I was able to get the switch side of the wire loose. After that I busted the other screw off...and had to get out the Dremel cutoff wheel with a micro thin wheel on it and cut down the side of the brass piece until it loosened up and fell off.

The burned portions of the wires were cleaned up using a small stainless parts brush, heat shrink added where needed, and wires were tinned. Turns out that the chassis wiring bits had already been tinned! (THANK-YOU!!!) Some pretty big wires are doubled up on this deal! Much bigger than the switch wire on the other side of it!!! Again, various bits of heat shrink AND a new piece of splice connector block....and I can continue with the dash installation!

Not sure where I found this stuff, (first guess might be a Fiat 850 spider) but it is the same named maker as was found on the one I took out!!! MAMUT Spacing is a tad different.....but the rest works just fine!

Getting this wiring back up into the dash from whence it came is a bit of a chore!!!!! If you are doing this job, take a picture of how this wiring all fits up in the dash when you drop the column down to get at the gauges etc!!! You will be glad you did!

Once that was all back and in, I was able to confirm that the new LEDs I put in all the gauges worked! Can actually see the danged things now!

I've also been working on cleaning up a set of seat tracks, so I can pull my Recarros and install a nice set of Vette seats that came with the car. But that's another post to come.

Have also been busy working on moving to new location. So busy with picking out cabinets, wood flooring, counter tops, moving stuff, cleaning up house so we can move in....clean up old house so we can move out..... 35 years of squirreling parts away in my garage and sheds is not gonna be easy......not looking forward to this all......!!!!!!

SO, I need to get this garage queen back on the road!

Tomorrow is a PCNC tour of Brizio's shop as well as another car collection owner near by! Time to take a break.....! If we get home early enuf, need to bust out the MIG welder to weld up a seat track hole that had been mercilessly hogged out for some unknown reason.... AND I need to weld the lower brace for the RH rear wheel well back in place. Hope to not screw that up OR the paint too badly. Since this is a 74, it should have the lower section painted black...which it isn't at the moment....but I want it to be such....and hopefully this area to be welded will be in the black area.....! Need to figure out how it fits in there and how to weld it....!

...then put the engine cover back on, the final console pieces and side covers up front, and I can put firewall cover back in the car too!

Only been WAY TOO LONG on this project....!

Cheers !!!
Steve

Attachments

Images (1)
  • 101_8188_(Medium)
OK, a quick peek at DIY derusting last seat track bottom.....!

Reverse Electrolysis in action!

$5 Home Depot bucket- a splurge!
$4 piece of 6ft 3/8" rebar
$1 for two alligator clips and a red bootie
scrap copper wire and wire nuts I had in the cabinet for more years than I care to think about....
$4 for Arm and Hammer "washing soda" Makes the magic happen in the water...2lb box will last a long time!!! 1TBSP per gallon of H2O.
AND an old Dell DC voltage laptop computer power supply that was scrap. You can also use a car battery charger too.

Bucket is too short to do entire track so had to flip it over once. Not a biggie. This was a first run at trying this method out. But I can do all sorts of stuff like calipers etc. You can get creative with nylon tubs etc but principle is still the same. Internet sez that apparently some folks have used a swimming pool to derust a car chassis or body....hope they weren't renting!!!

The rust wipes off pretty much, but in the really pitted areas where the zinc is gone, you will need to hit it with Scotch Brite pads or a small brass or stainless parts brush and then wipe it down clean, even wash with soap, then paint to preserve.

Oh, and use in a well ventilated area! Gas given off is hydrogen! No boom in the garage please!!!!!

Cheers!
Steve

Attachments

Images (1)
  • 101_8190_(Medium)
Sure!

Here's a before.....pretty scarfy on the bottom side!

The top slide pieces had a little bit and ya can either let the bucket do the heavy lifting, then drop them in the Evap-O-Rust to do the fine work, or just the latter.

The last piece I did, after letting it sit for 12-16 hours or so looked good. Again, stainless brush work gets the typical black film off and any scruffy pieces left on....so you can either continue to bucket it....or coat with some Rust-Oleum and call it ready to install! Just don't paint where the rollers ride or where the two pieces slide together!

Cheers!
steve

Attachments

Images (1)
  • 101_8180_(Medium)
OK, here is an after picture of one of the other lower seat mounts which was equally as grungy as the one above.

I welded up the three leaf clover hole in the one above, ground and filed it round and level again, hit it with some high temp silver/grey Rustoleum rattle can paint to protect it further.

If doing this, just be sure to keep paint off of the surface on the upper piece slides against the lower piece (put some synthetic grease there!) and also keep paint out of there the rollers roll. Everywhere else should be covered! They won't be shiny zinc plated.....but they won't be ugly and rusty!

Presently going to run the stock OEM rollers...have been told this is a bad idea.....but they are all still round! Well seats aren't going in just yet, so will need to source some eventually. Hopefully the old ones will allow us to try out the ('Vette) seats and see if we like them!

Update on the dash!

Reassembly of the interior is almost complete! Have everything installed except for the front lower RH tunnel cover. Going to leave this off until I know that nothing is leaking!!! Those panels are a PITA to install...! Seems like they are a mighty tight fit what with carpet seams everywhere!

Also need to put the seat belt bar back in place.

I worked on getting the RH lower wheelhouse cover mount fixed up too! Looks like it was spot welded in place originally, but both of those have torn out and left tiny holes. Not optimum for trying to re-spot weld them OR MIG weld them back into place!

I used my Roper punch to put a good hole in the horizontal seam that is inside the wheel well, and drilled out the lower hole so that a sheet metal screw fits thru it. Then used self tapping screws into the bracket to secure the piece to the horizontal seam and the lower rocker panel seam. If this doesn't hold it well enuf, will need to resort to more violent means of keeping the bracket in place!

Need to de-slime the cover a bit....not sure what got on it, but looks oily......then I can install it and FINALLY put the rear wheel back on! ....set it down off the blocks.....AND GO FOR A RIDE!!!!

We'll see.....other project involves carpet, padding, nailing strips....and a dumpster.....and same dumpster and a small truck full of floor tiles......ugh!

What did I get myself into........this time baaaaby?

Cheers all!
Steve

Picture guide...
Top rail, RH hole was the three leaf clover hole...welded up and hand finished back down, plus paint....

Middle rail is last one out of the bucket. Probably spent more time in there than the others......have only cleaned it with small stainless brush.

Bottom rail was bucketed, AND dipped in Evap-O-Rust for a final treatment. I think this one was pretty bad, as it didn't clean up as well as the others. But it is WAY better than when I started!

Attachments

Images (1)
  • 101_8206_(Medium)
RH Lower Wheel Well mounting bracket which I spoke of above.....shown in approximate position as mounted on car.

Have cleaned rust off of it with brush, and coated with primer and paint. Ready to go back on car as soon as I get some spare time to advance this project forward!

Almost to the end of this saga. Get ready for next bag of snakes!!! Smiler
Cheers!
Steve

Attachments

Images (1)
  • 101_8203_(Medium)
These tracks are something that the entire assembly should all be stainless.

To me, it seems that no matter what you do has little long term effect.

Switch to the bronze rollers. At least those won't freeze to the tracks.

If I had it to do again, I'd consider ceramic coating the tracks. It may not be 100% effective over 20 years but it sure won't hurt.

You just don't want to do these things over and over again.
Steve, that photo looks like an aft rear fender brace and isn't on earlier Panteras. Which reminds me- I tack-welded or brazed the right side brace for that car to the fender when Howard Renshaw owned it. I'd stored it for a while as part of a surprise birthday present by Howard's wife. Boy, that's been awhile- think it was 1985 or so. Those seat rails are about what you'd expect from light galvanized steel on a car stored in a car-port near the water (Sac'to River Delta area) for 20 years. You've done well on what I remember as an exceptionally clean '74 before carport storage. Hope your new place has a garage!

Add Reply

Post
×
×
×
×
Link copied to your clipboard.
×