Replies sorted oldest to newest

Get a replacement gasket that has just the slots (they look kinda like hooks) on the ends instead of being complete holes for those 2. It's way easier if you do NOT take out all bolts at the same time. Leave at least one end in at all times, loose is OK but not out. 2 ends are easier still if possible. Once you take out all your bolts in between the 2 end ones (having loosened the end ones), your old gasket may slip out easily from the top (if it also had those end hooks). If it does not, then remove one end bolt, pull the gasket up and out of that end, and rethread that bolt. Then do the same on the other end. Drop in your new gasket from the top, and put in your new bolts. It probably is labeled for one side to go out or to the headers, and of course make sure it lines up correctly with the ports first. You'll find most bolts are probably easiest from the top, but there will be 2 or 3 that are easier from the bottom. A little antiseize is recommended on all those bolts, I'm sure. You can apply to your 2 end bolts as you do them in the midst of all the above. Also, a gasket with some metal mesh in it will probably hold up best (note you can get solid copper for a bit more money that's probably practically permanent, though mine didn't have the "hooks"). And true "header" gaskets are apparently thicker than "exhaust manifold" gaskets and I've heard stay sealed better, though I've had successes and failures with both. Good luck, hope this helps.
Kermit,

Its easiest to work on the headers from the wheel well, so remove the rear tire.

If you're going to apply anti-seize compound on the threads, be aware there is a specific high temp anti-seize that uses moly, its a dark gray color, whereas other anti-seize compounds are silver or copper colored.

If you have problems with the header bolts getting loose, I'll share my fix. First, acquire the best gaskets you can find, studs to replace the header bolts and all metal lock nuts known as flex-top lock nuts. Second remove all the header bolts, clean/chase the threads of the header bolt bosses with the proper SAE type tap, then clean the bosses with something like brake parts or electric parts cleaner in an aerosol can (dries leaving no residue). Wear a face shield when doing this, because when you spray that aerosol propelled cleaner into that hole, it WILL splash righ back in your face.

Screw in the studs with a dab of high temp thread locking compound applied to the threads. I buy the stuff from McMaster Carr, part number 7604A56. Give this stuff at least 24 hours to set up. Finally install the gaskets, headers & cinch down the lock nuts. This assembly will not loosen.

cowboy from hell
Last edited by George P
quote:
You'll find most bolts are probably easiest from the top, but there will be 2 or 3 that are easier from the bottom.


When I replaced my header gasket on the driver's side, I found that removing the oil filter provided easier access to the bolts I had to access from below. Just remember to spin the filter back on when you finish tightening all the header bolts. I was in a hurry to finish up my project because we had dinner plans, so I buttoned everything up, forgot to put the oil filter back on, then fired her up. I hopped out of the car to check for any leaks and immediately noticed the loud ticking sound and looked in the engine compartment to see oil being furiously pumped onto my headers. I immediately shut it down. Now I had a river of oil running down the driveway. What a mess to clean up, both the driveway and the engine compartment and headers. Oh well, I guess it was time for an oil change anyway.

Cheers!
Garth
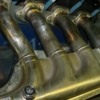
During restoration of the headers I had difficulty in removing the bolts not only due to the rust but also the flanges were twisted and not planar to the head. The flanges "sprung" after I got the last few bolts out. So even if I replaced the gaskets I wasn't sure that the force was sufficient to maintain a seal around each port. I used a torch to heat each header tube and gently bent the flange (using a rod in the port)into position and a gasket as a reference, then verifying on the head. I used a straight edge to verify flatness as well. This system worked well, no leaks since. I also chased the threads and use anti-seize as the others did. Note, since I had the headers off I added O2 sensor ports for the future. The finish is nickel plating.

Attachments

Images (1)
  • exhaust1
Last edited by jon3613
Post
×
×
×
×
Link copied to your clipboard.
×