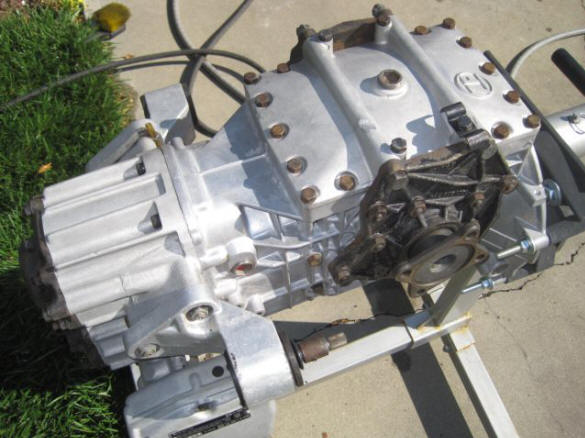
Thought on safety wiring the gearbox. I have the gearbox out but living in perth Australia no one knows how to do. Including me. Is it a must do?? And can a backyard mechanic do it. Any help appreciated
Replies sorted oldest to newest
It can be done by a home mechanic; some old threads on the subject if you search, here's one;
Safety Wiring the ZF
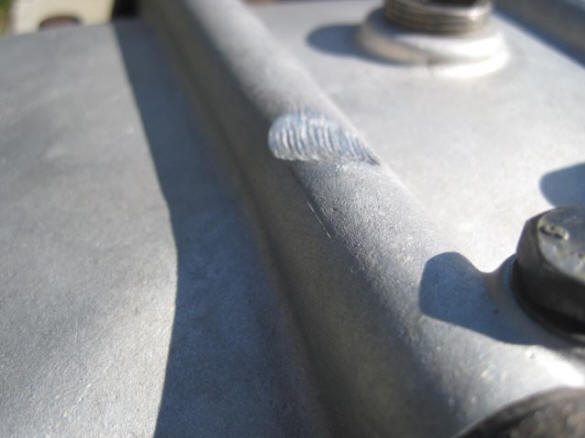
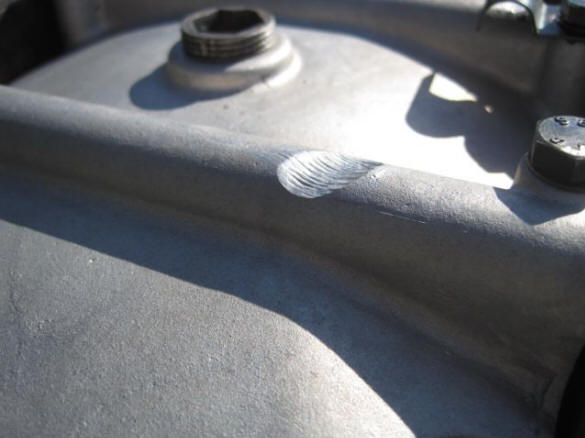
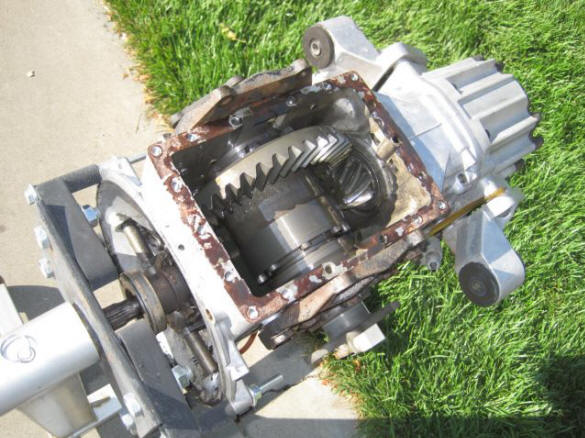
I found that one of the parking brake cables had worn or dented the case considerably over the prior 39 years! Not sure if this is cause for concern. I expect that if the cable wears through the case here, it will leak - and I wouldn't want that to happen while blasting down the highway. That would be very expensive! I might have this welded up at a later date a as a precaution, but so far I haven't gotten to it in years.
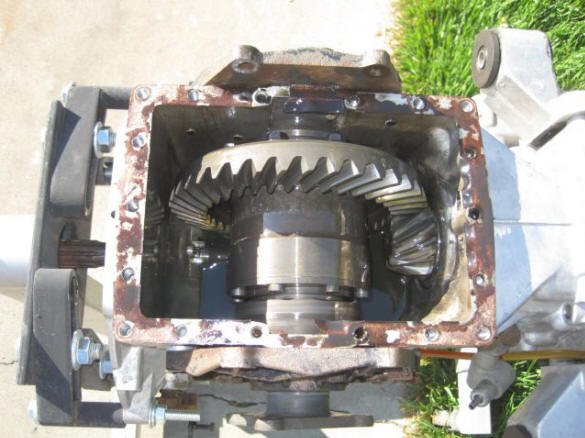
I was pleased to see that all the original ring gear bolts were tight and secure.
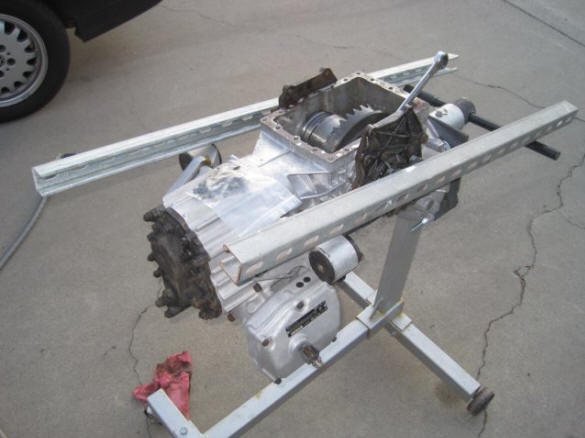
I used these pieces of steel track to lock against the half-shaft bolts in the axle flanges to keep the ring gear from turning while I broke the bolts free.
If I recall correclty, I purchased ARP "Rover K Series Flywheel Bolts" to safety wire my ring gear. They came in a package of 8, so I had to purchase 2 additional bolts. I think Rocky on this board posted the info; search for his thread.
- Part#: 206-2803 (10 pcs total) for Rover "K" Series Flywheels
- M12AM.826-1F / M10 X 1.0 12PT FLYWHEEL BOLTS
- I also picked up some stainless steel safety wire
I think the following image is Rocky's. I forgot to take a pic of my package.
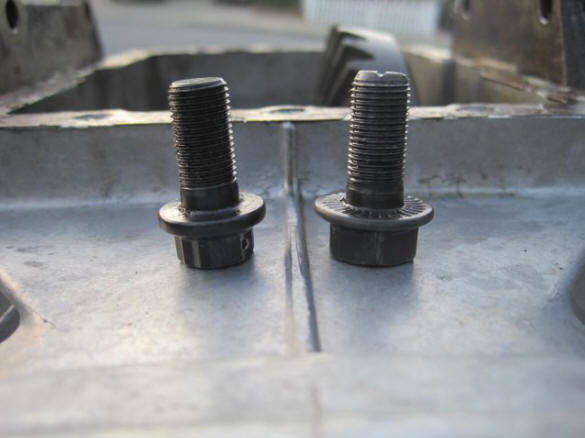
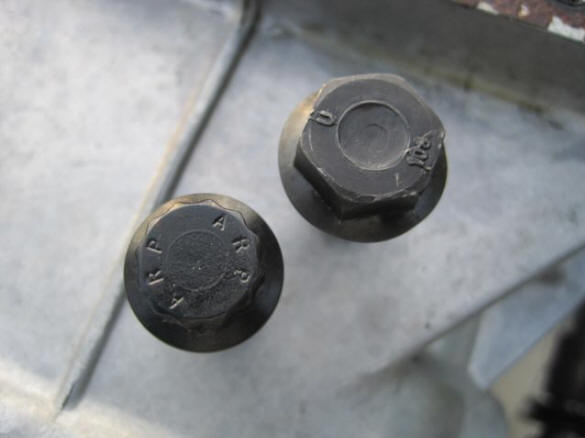
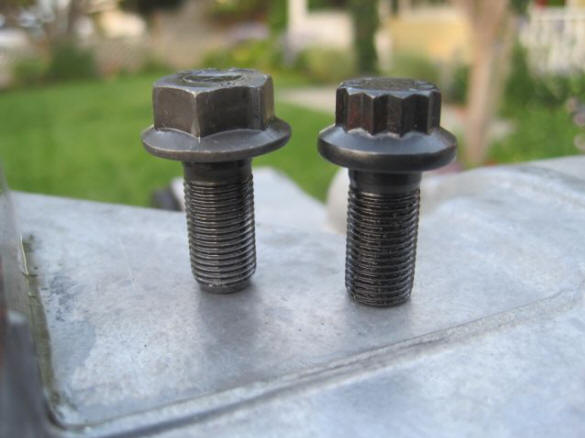
New ARP bolt compared to the original bolt (ARP bolt on left). Note that the ARP bolts are NOT pre-drilled for safety wire. I drilled them myself, and let me tell you... they are HARD! I broke 3 bits in the process.
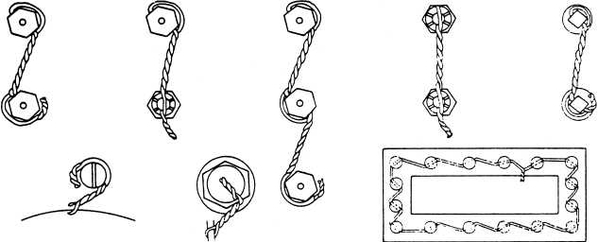
These are the proper techniques for safety wiring a bolt.
Following is a pic (not mine) of how to properly safety wire your ring gear bolts (on the left). I couldn't take a good pic of the safety wire on my own ring gear because I didn't remove it from the case; I merely rotated the ring gear so 2 bolts were at the top (bottom technically) and did it from the opening while the ring gear remained in the case.
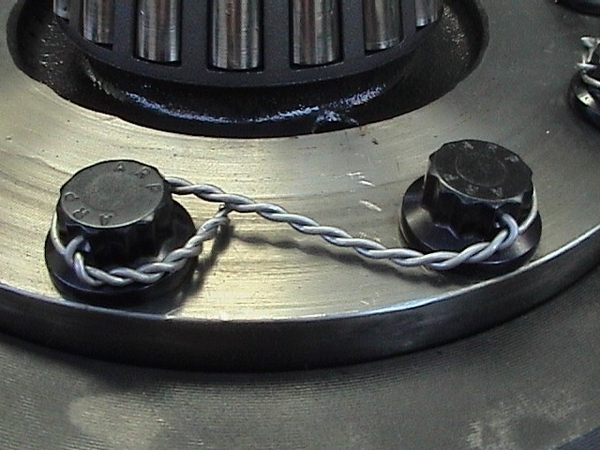
I believe the above image may also be Rocky's.
Misadventure in the ZF
When using a ratcheting box wrench to rapidly tighten the ring gear bolts - do not stand on the opposite side of the case when tightening the bolts (towards you). Also, do not drink a beer with dinner before going back out to the garage to do this (probably the best advice).
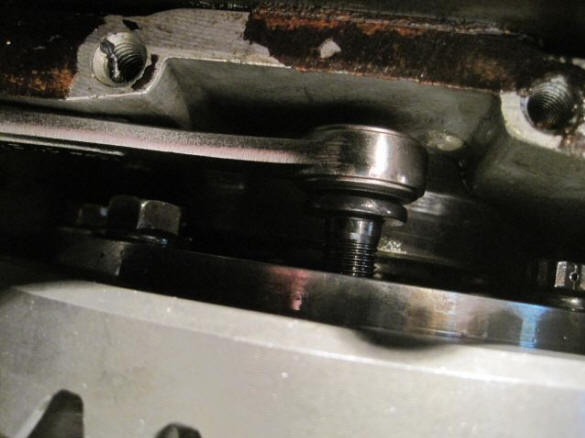
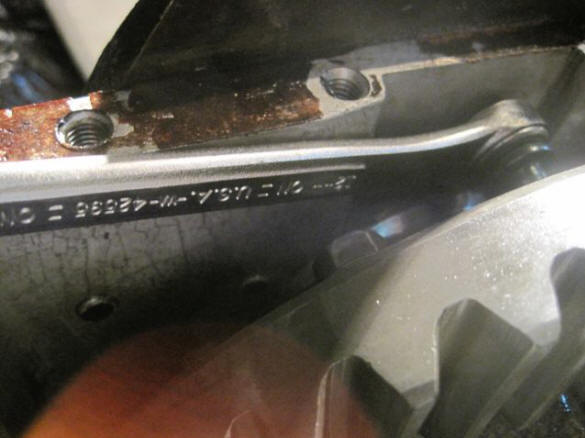
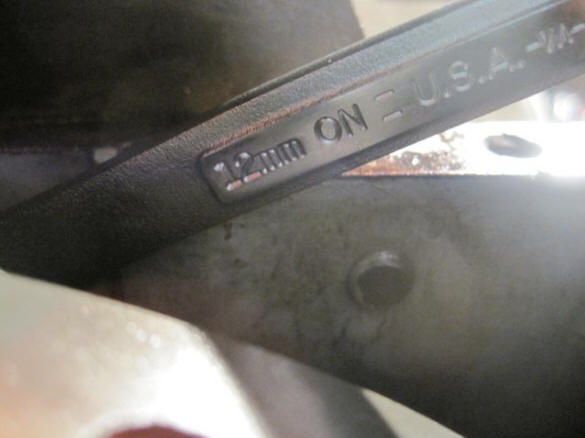
These particular box wrenches are not reversible. Rather, they need to be removed and flipped over to reverse direction. I was careful that the 'on' side of the wrench was facing me and quickly 'tightened' the ring gear bolt. Unfortunately, since I was standing on the opposite side of the transaxle, I actually loosened the bolt that was previously finger-tight and backed it and the non-reversing ratcheting box wrench into the wall of the ZF case! No room to remove the wrench or bolt. I had hoped I could tighten the bolt back into the ring gear, but was able to get even a half turn of the bolt in the tightening direction because the case interferes with the wrench. Damn! What do do?!
And again, unable to pull the wrench and bolt out as it's too damn tight in there! After some frustration, a few choice words, and resisting the urge to break out a BFH to force the wrench and bolt out (it was close - only needed the case to deflect about 20 thou by my estimation - but decided that could prove to be a VERY expensive mistake), I broke out a Dremel tool with a small cutoff wheel and proceeded to cut the wrench in half to release the ratcheting/locking mechanism so I could spin the bolt back into the ring gear with my fingers and remove the box head of the wrench that had captured the head of the bolt. I then thoroughly flushed the case and I'm good to go, sans one 12mm ratcheting box wrench. FWIW - Craftsman no longer makes these wrenches - I imagine others have run into this situation and they have been deemed defective, or problematic at a minimum.
I made a tool to torque the bolts to spec - I'll have to take a picture of it and post later.
Soaking the ZF gaskets in water overnight (2 nights actually!) before use - tip from Hall Pantera.
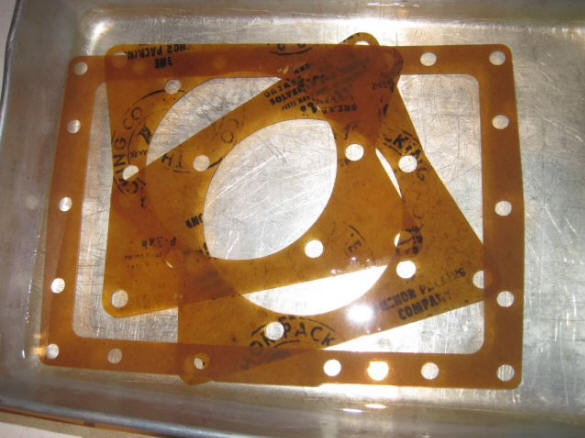
If I were to do this again, I think I'd use Yamabond or some other gasket maker/sealer in a tube to seal the ZF as I do find gear oil weeping through the paper gaskets.
Attachments
...The wire Must to be Absolutely TIGHT. The 'Pigtails' are to be Bent-Back in-half, so the Next person does Not cut their fingers. It's the Correct Way and keeps the Pigtail from Unwinding under pressure.
NO less than 6-Turns/Windings on the Pigtail. On Aircraft, the Wire NEVER goes OVER the Bolt Head. If the Part is 'Bumped' during Installation, it Can Cut the Wire. The Stainless Steel wire, must be of a Diameter to fill at Least 70% of the Drill Hole. I have done these, where It could Only be Accomplished by Reaching Way-in with Two 'Needle-Nose' Pliers, one in each hand. Again the Wire Must be Tight!
MJ
I use these when safety wiring things on my racing kart.
It makes twisting the wire fun.
https://www.harborfreight.com/...ng-pliers-45340.html
Also available in a 9in version.
https://www.harborfreight.com/...ng-pliers-45341.html
It looks like Amazon.au has them. Search for "safety wire pliers".
Garth, I have safety wired aircraft stuff and inspected others work for over 35 years. Excellently done my friend. You'd be surprised how many don't understand the concept of "righty tighty lefty loosey.
I once saw turbine engine hot section case bolts beautifully done but all backwards. I had the guy do it over and again he did a great job but again backwards. I ask WTF ? He said he did as I instructed by twisting the wire the other way. Third time he nailed it after I showed him what the the concept was.
Last, nothing hurts more than ramming safety wire under a fingernail so always tuck the pigtail.
Notes to supplement Garth's post- The usual Pantera parts vendors supply a reasonably priced kit of pre-drilled bolts and a few feet of 0.032" stainless steel aircraft safety wire. Real safety wire is sometimes available at your local airport. It takes real safety-wire cutting pliers to get those nice neat twists. Be careful- safety wire is aircraft-grade and other sizes exist; for instance, safety shear wire can be broken with your bare hands and is NOT recommended for this use.
* Many early ZFs were safety wired from the factory, but they used oversized wire that discolors and looks like farmer's fence wire. U.S. Speed shops sell a 100-ft spool of 0.032" aircraft-grade-316-stainless wire, quite reasonably.
* One of the main problems stems from OEM ring gear bolts from ZF being hardened all the way through, causing the bolts and heads to be a bit brittle and very hard to drill. Aftermarket bolts are SAE gr-8 spec and are pre-drilled. I do not recommend trying to drill ZF bolts.
* A crows-foot socket on a torque wrench is most often used on ring gear bolts. It looks like a 1" long open-end-wrench adapted to a ratchet driver. Not all aftermarket ring gear bolts are the same head size so have the bolts you will be using in-hand before searching out the crows-foot socket you need, or buy a full set of sockets. A rag jammed in between the ring & pinion gear mesh will hold the parts while torquing and not mark gear teeth. No elaborate jigs needed.
* Yes- you MUST remove the ZF from a Pantera to do all this! It weighs 155 U.S. pounds; act accordingly. Mangustas can be done in place. The side-plate bolts, once torqued down add a calculated pre-load to the ring & pinion gears. Using non-stock ZF side gaskets or changing the side-shaft shimming during seal or bearing replacement, will change this preload. Upon assembly this may cause differential-howl, either when accelerating or during slow-down- or both. Then you get to pull the box again and redo the job. Real ZF gaskets are available from Pantera vendors. I personally do not trust E-Bay gaskets.
* GT-40 crew chief Carroll Smith says to cut the extra lengths of twisted wire ends off your safety-wired parts and pick up the scraps. Those pieces have been known to puncture tires and people, and they last forever! Bend the remaining twisted ends down out of range of your fingers as they are VERY sharp and will draw significant blood, which as Mr Smith said is a poor lubricant & corrodes aluminum....


