
Winter is approaching, and in order not to get bored, I started pulling the enginecompartment apart on my Pantera, for later to pull the engine and gearbox.

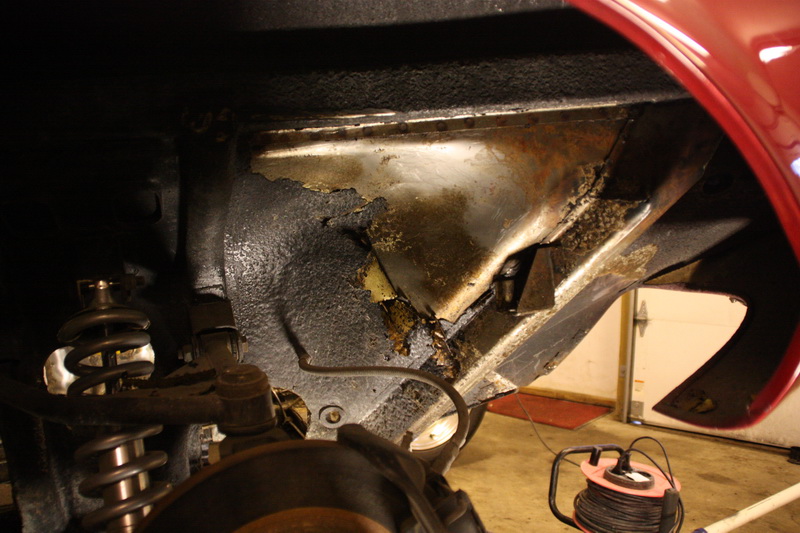
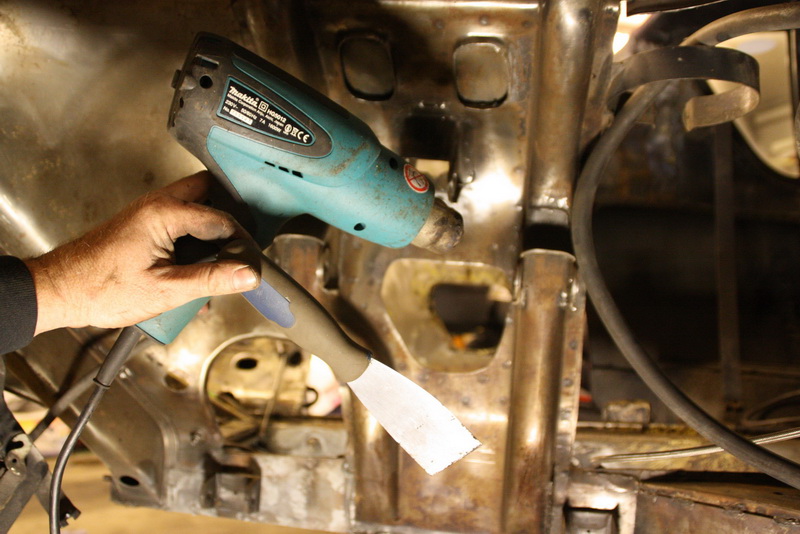
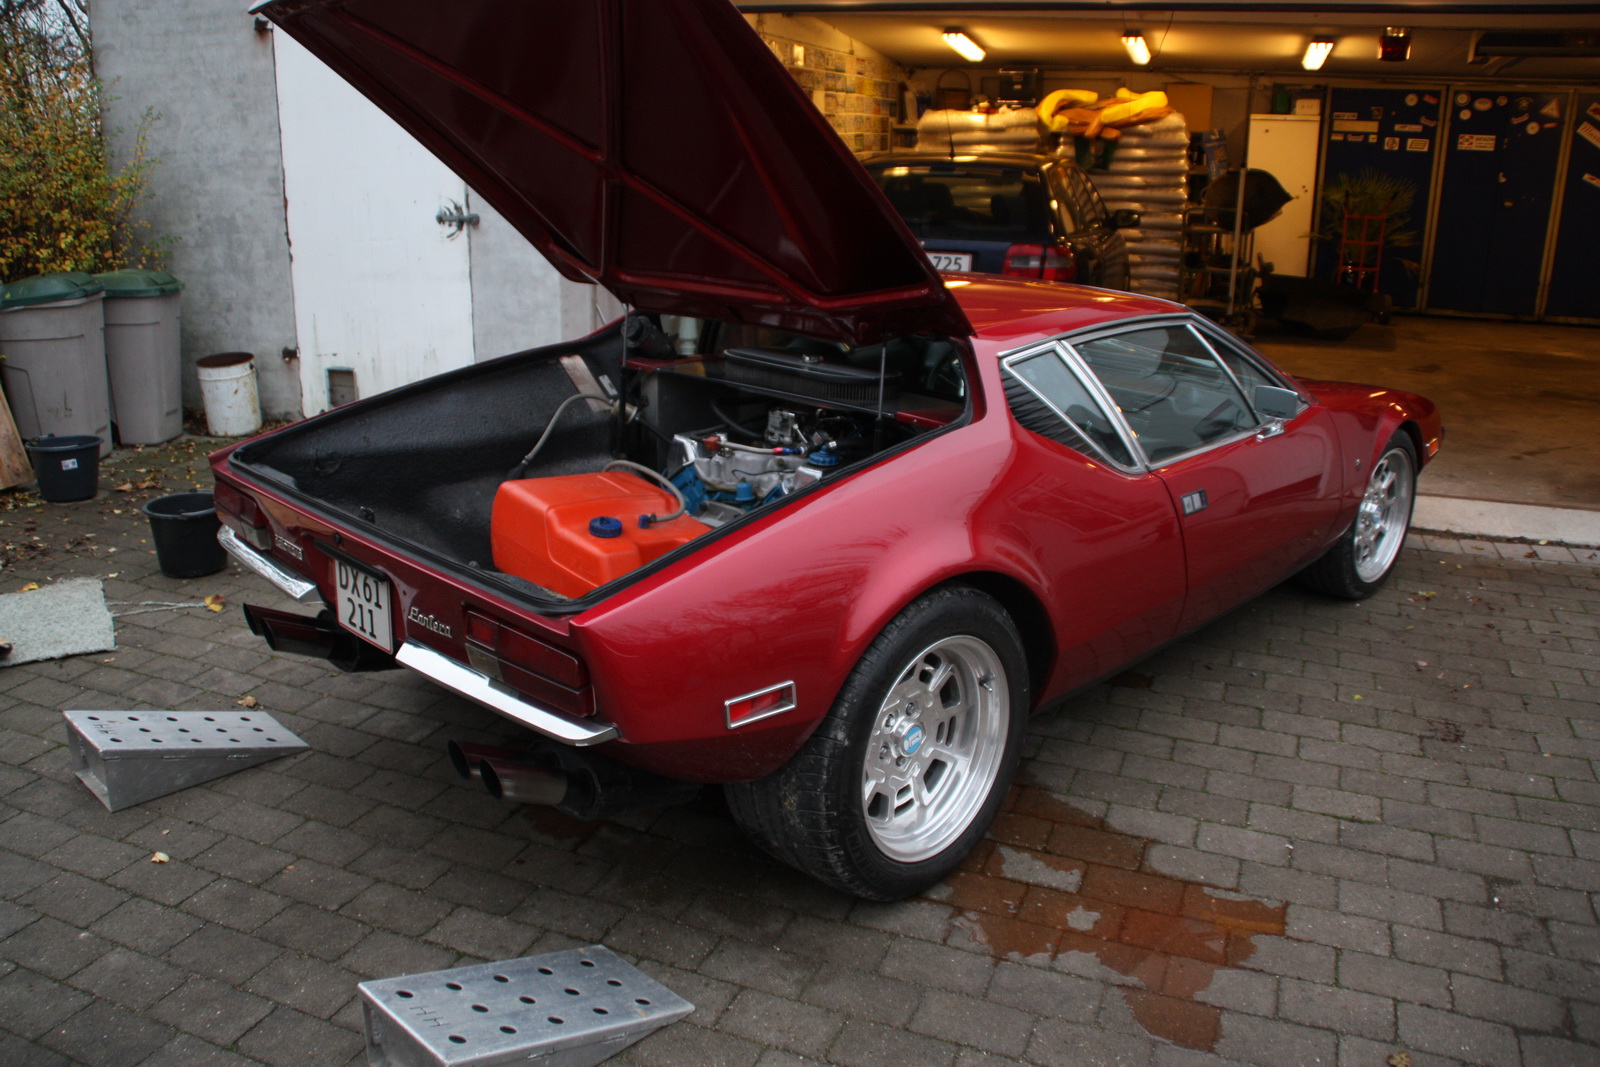
The last miles I drove in the car, there was blue smoke comming out of the right side of the exhaust. And an oil consumption of approximately ½ liters per 100 km also told me that something was wrong! So I have to take a look at this problem.

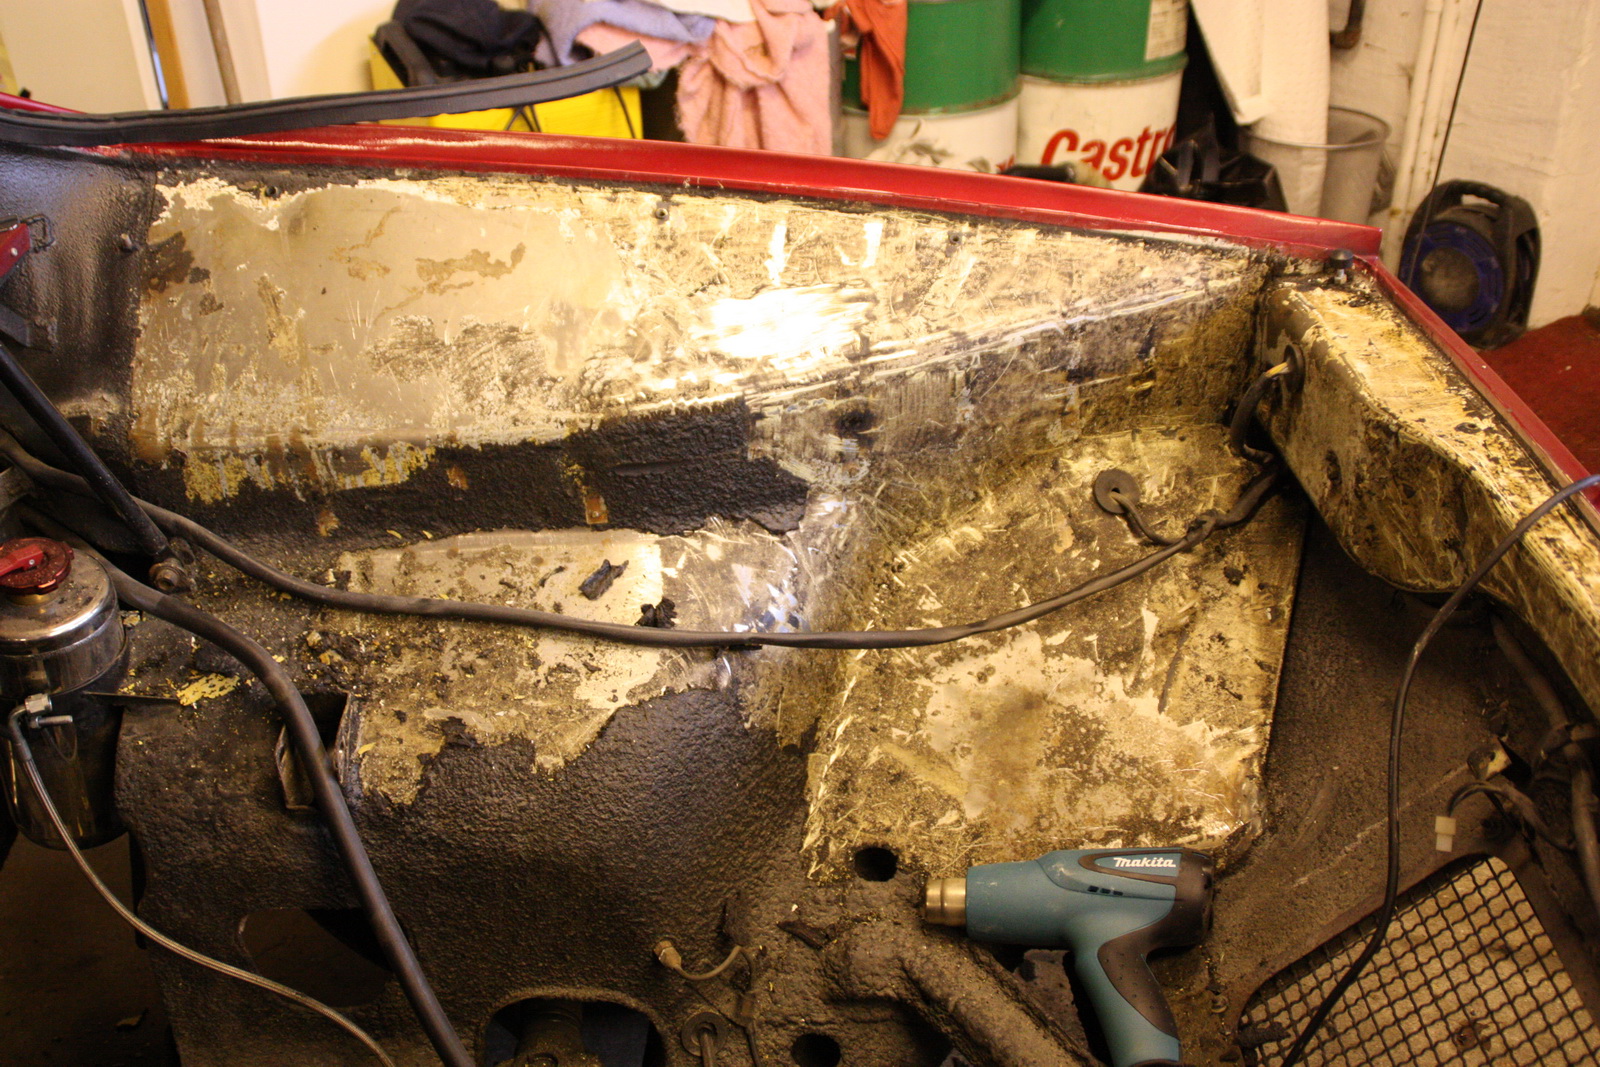
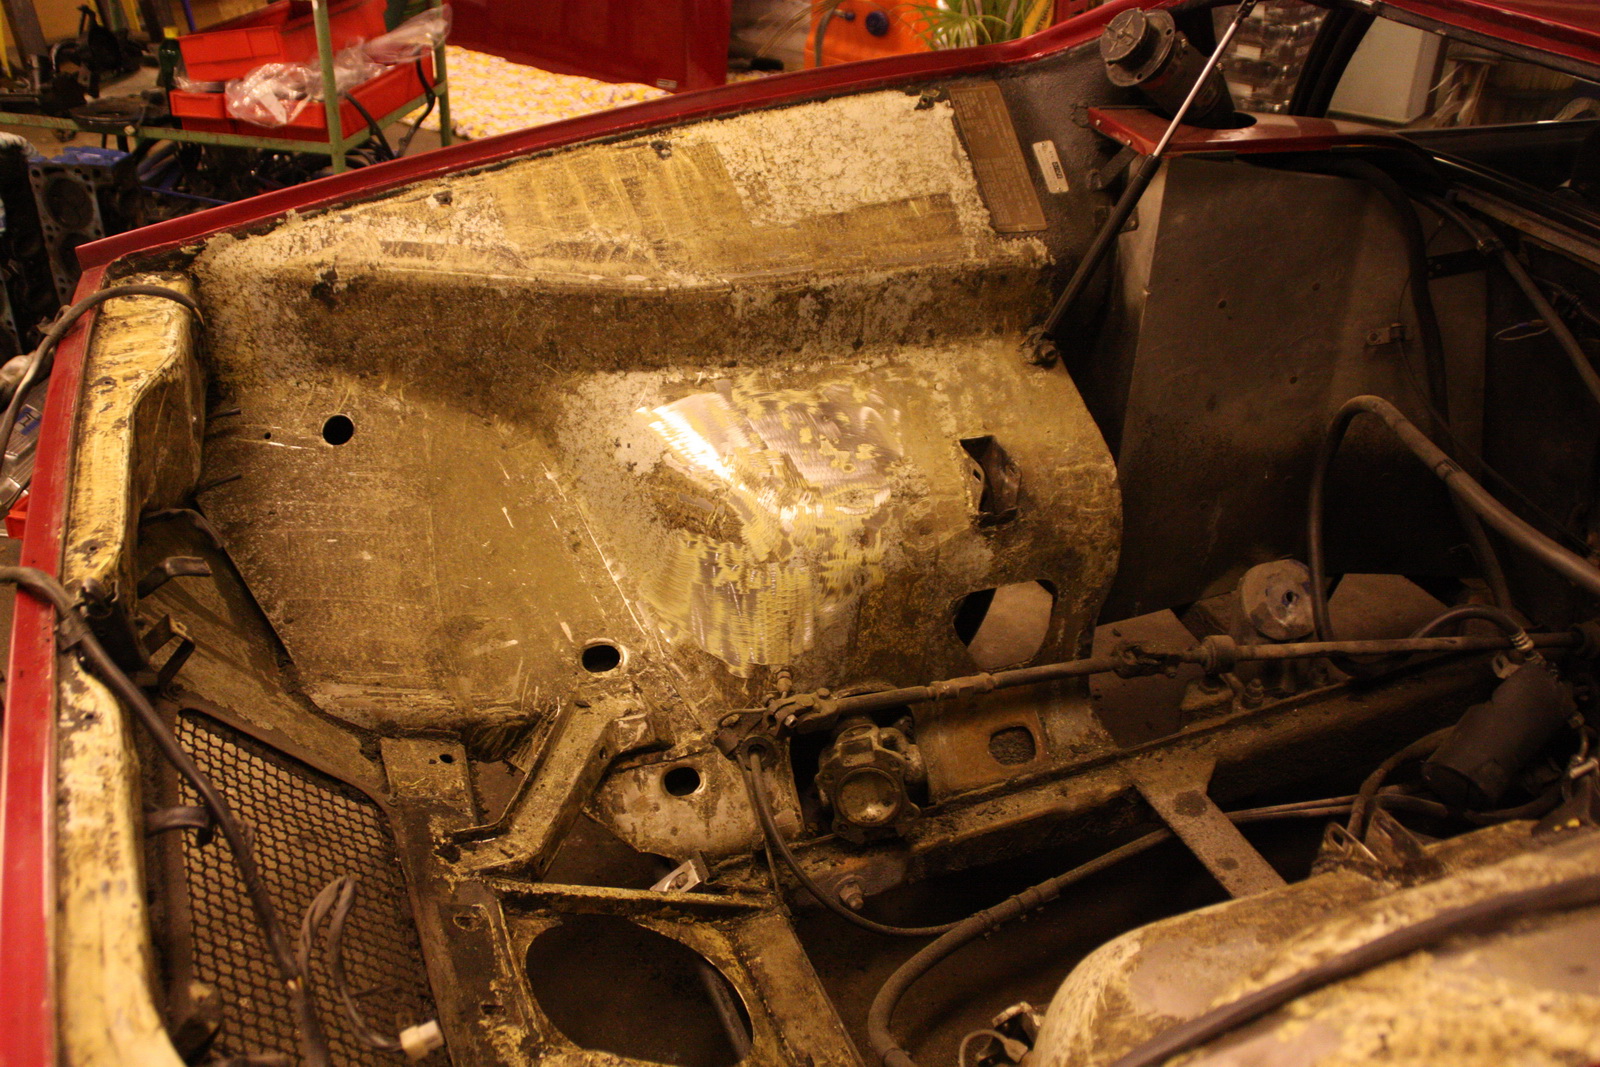
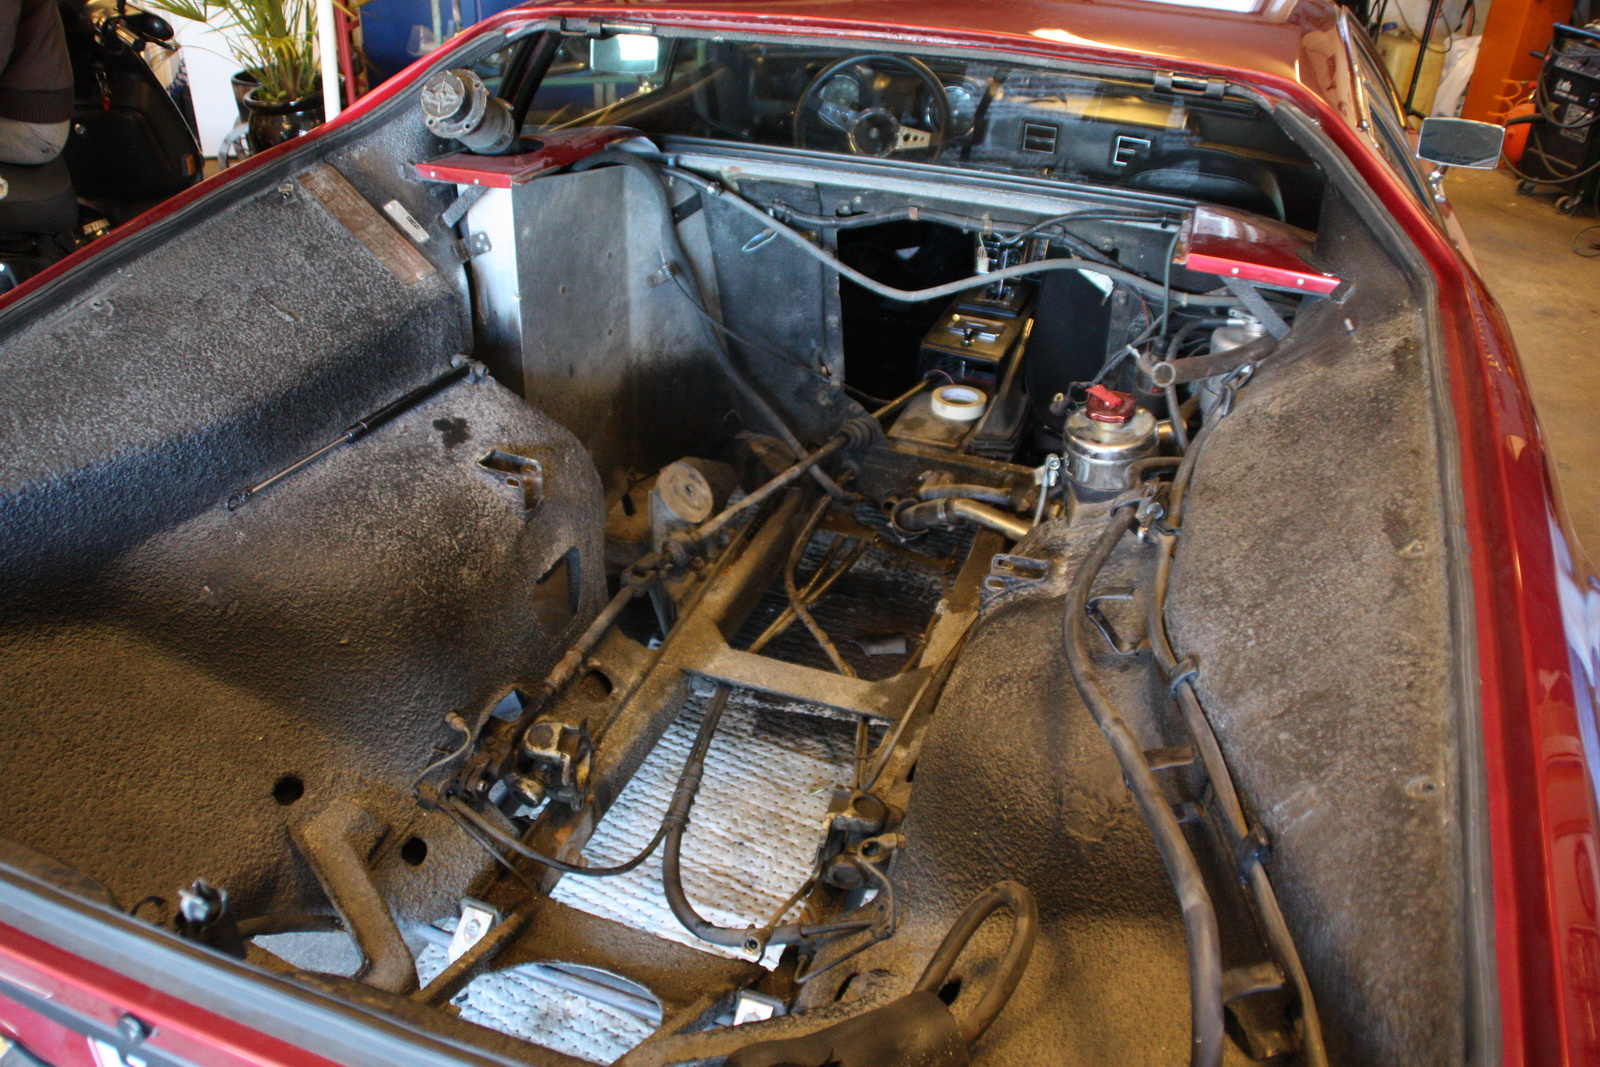
And when the engine and gearbox out, I also have to remove the gas tank and get it cleaned inside, as I had alot of "gunk" floating around.

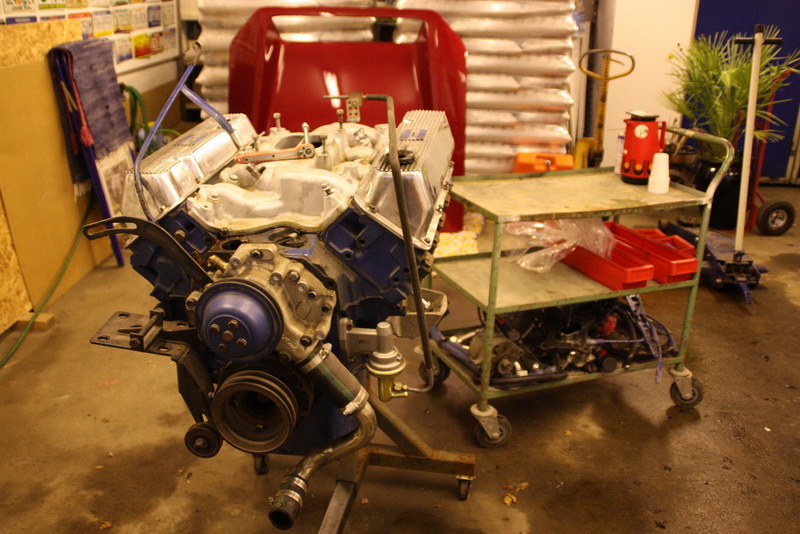
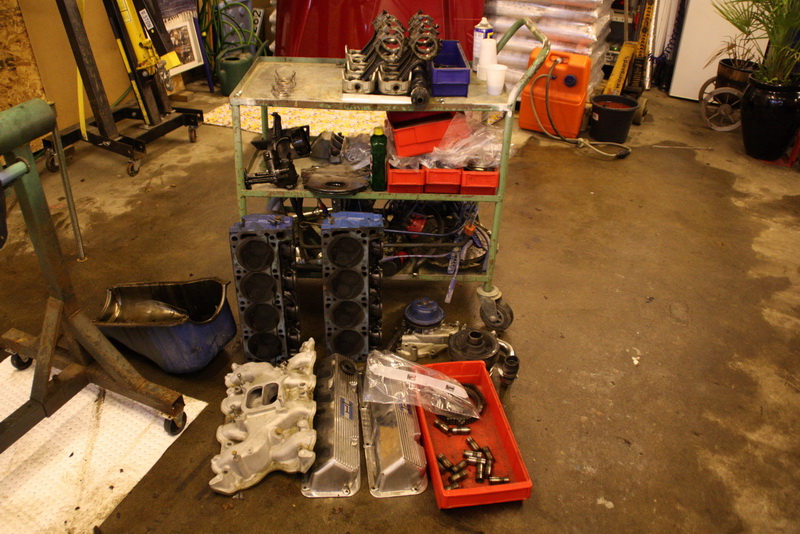
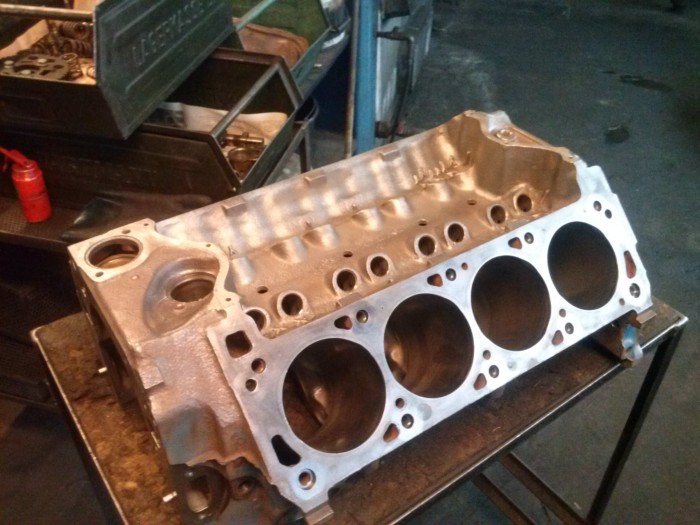
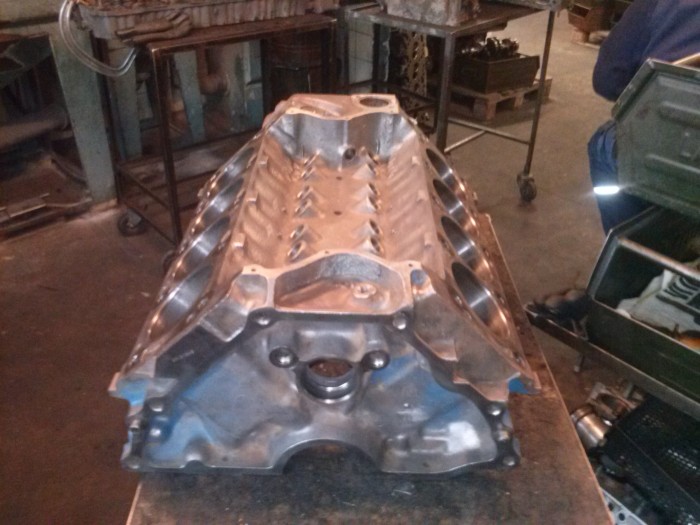
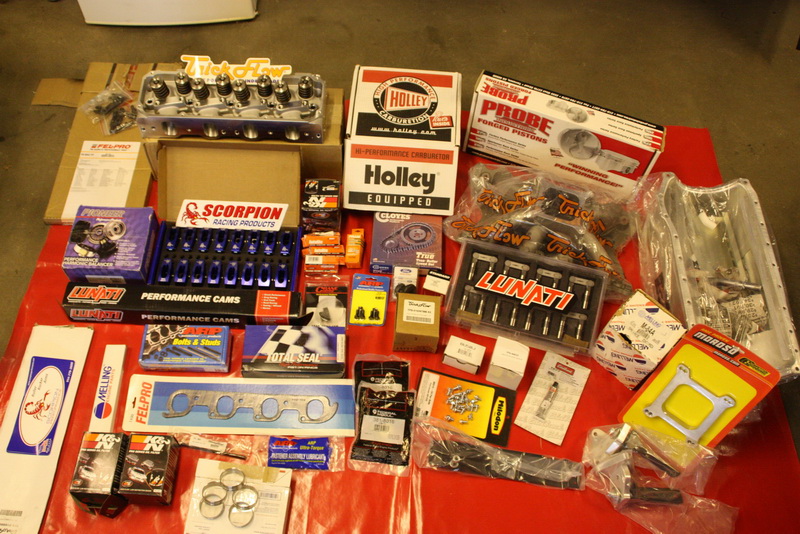
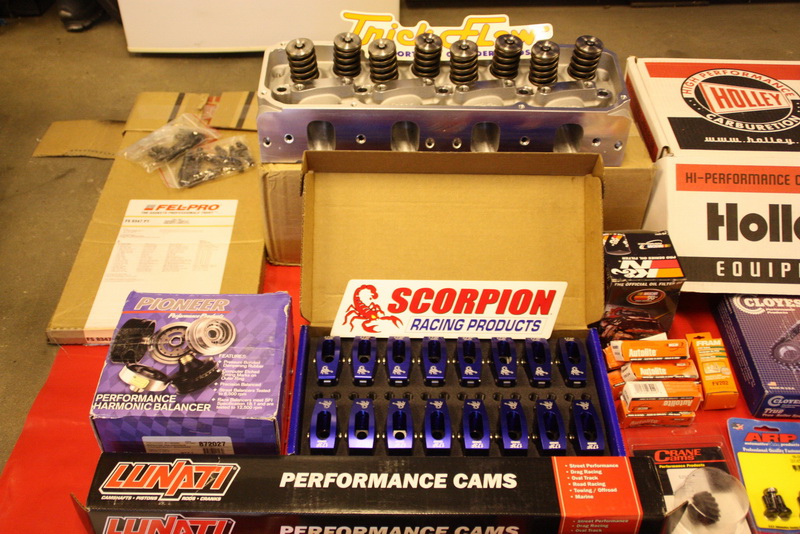
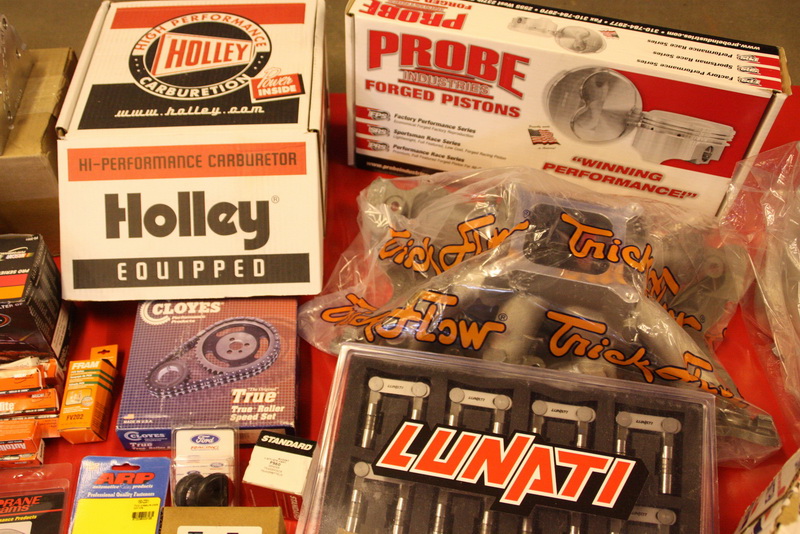
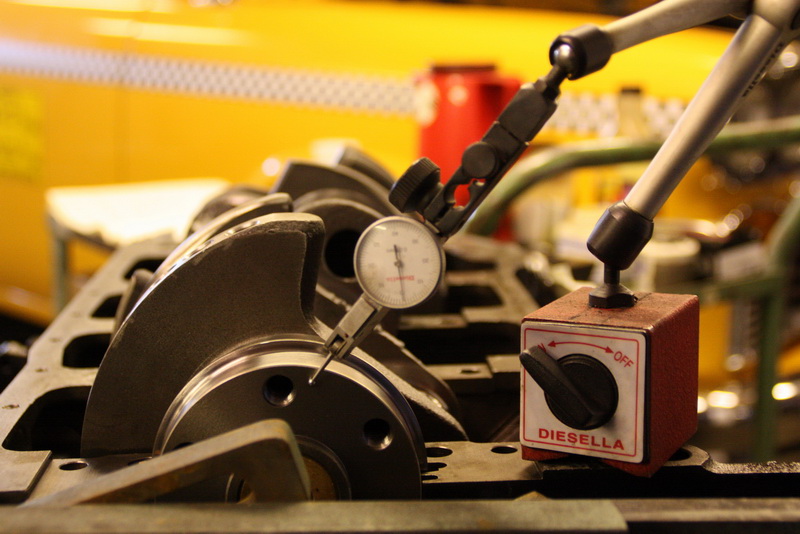
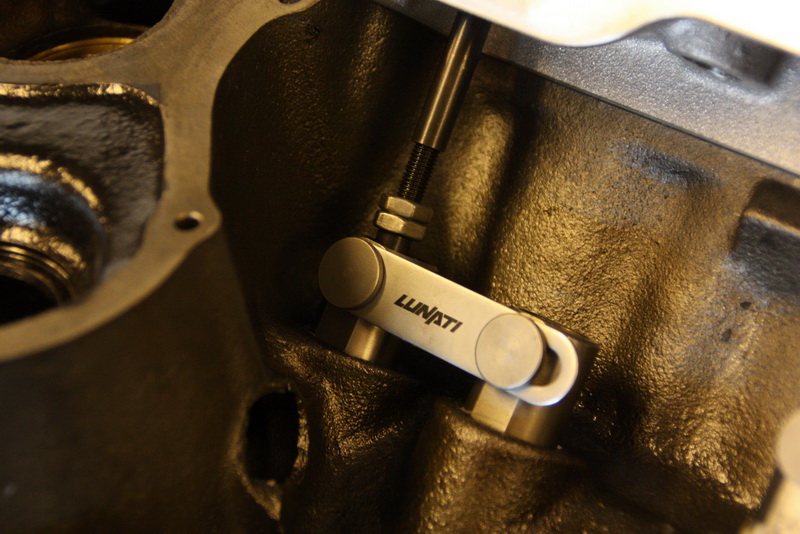
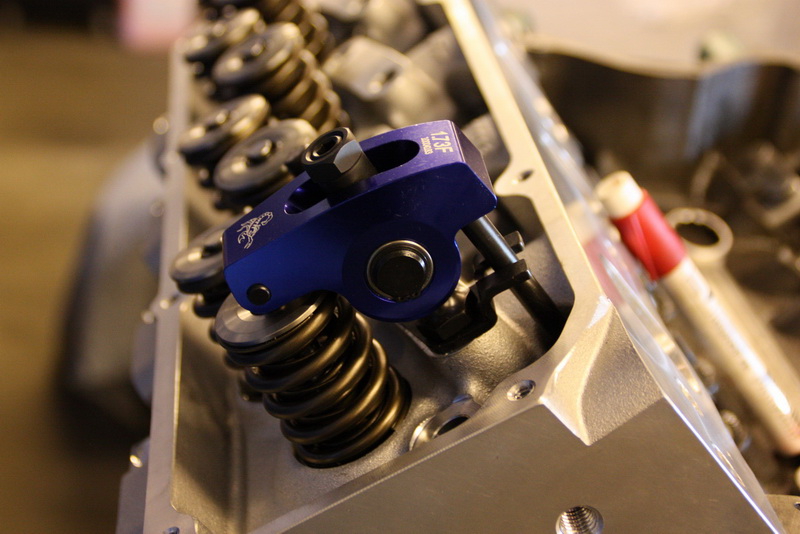
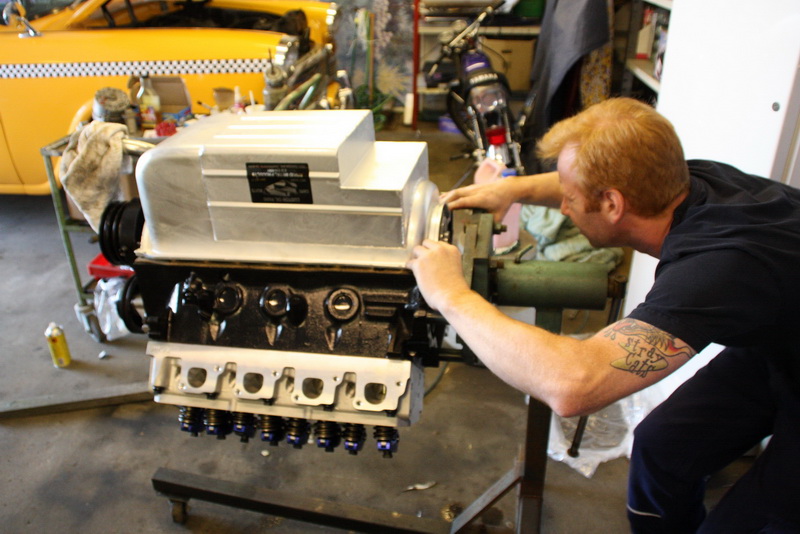
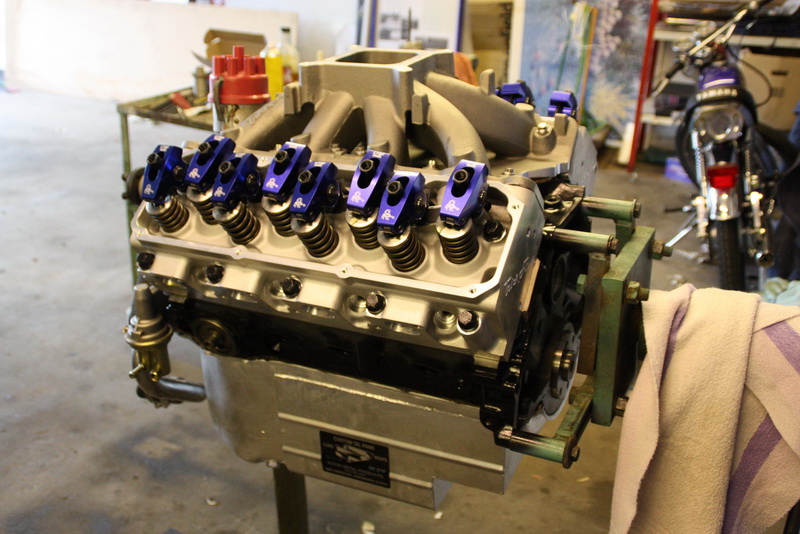
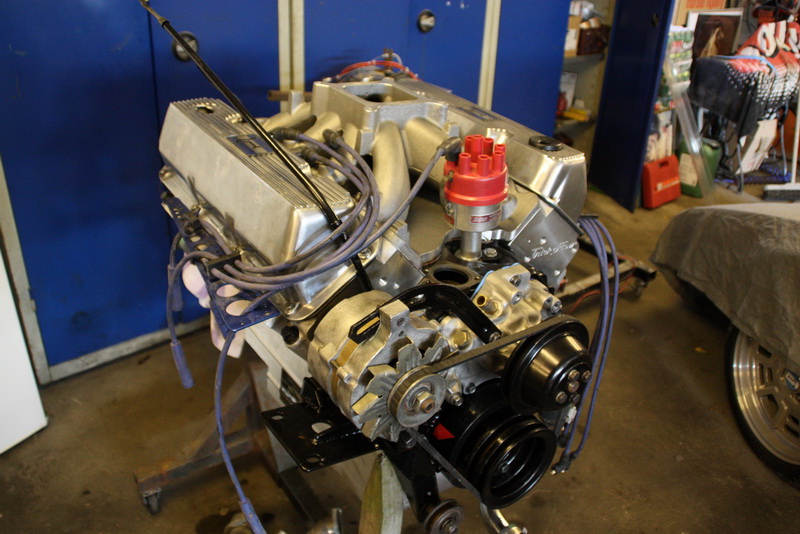
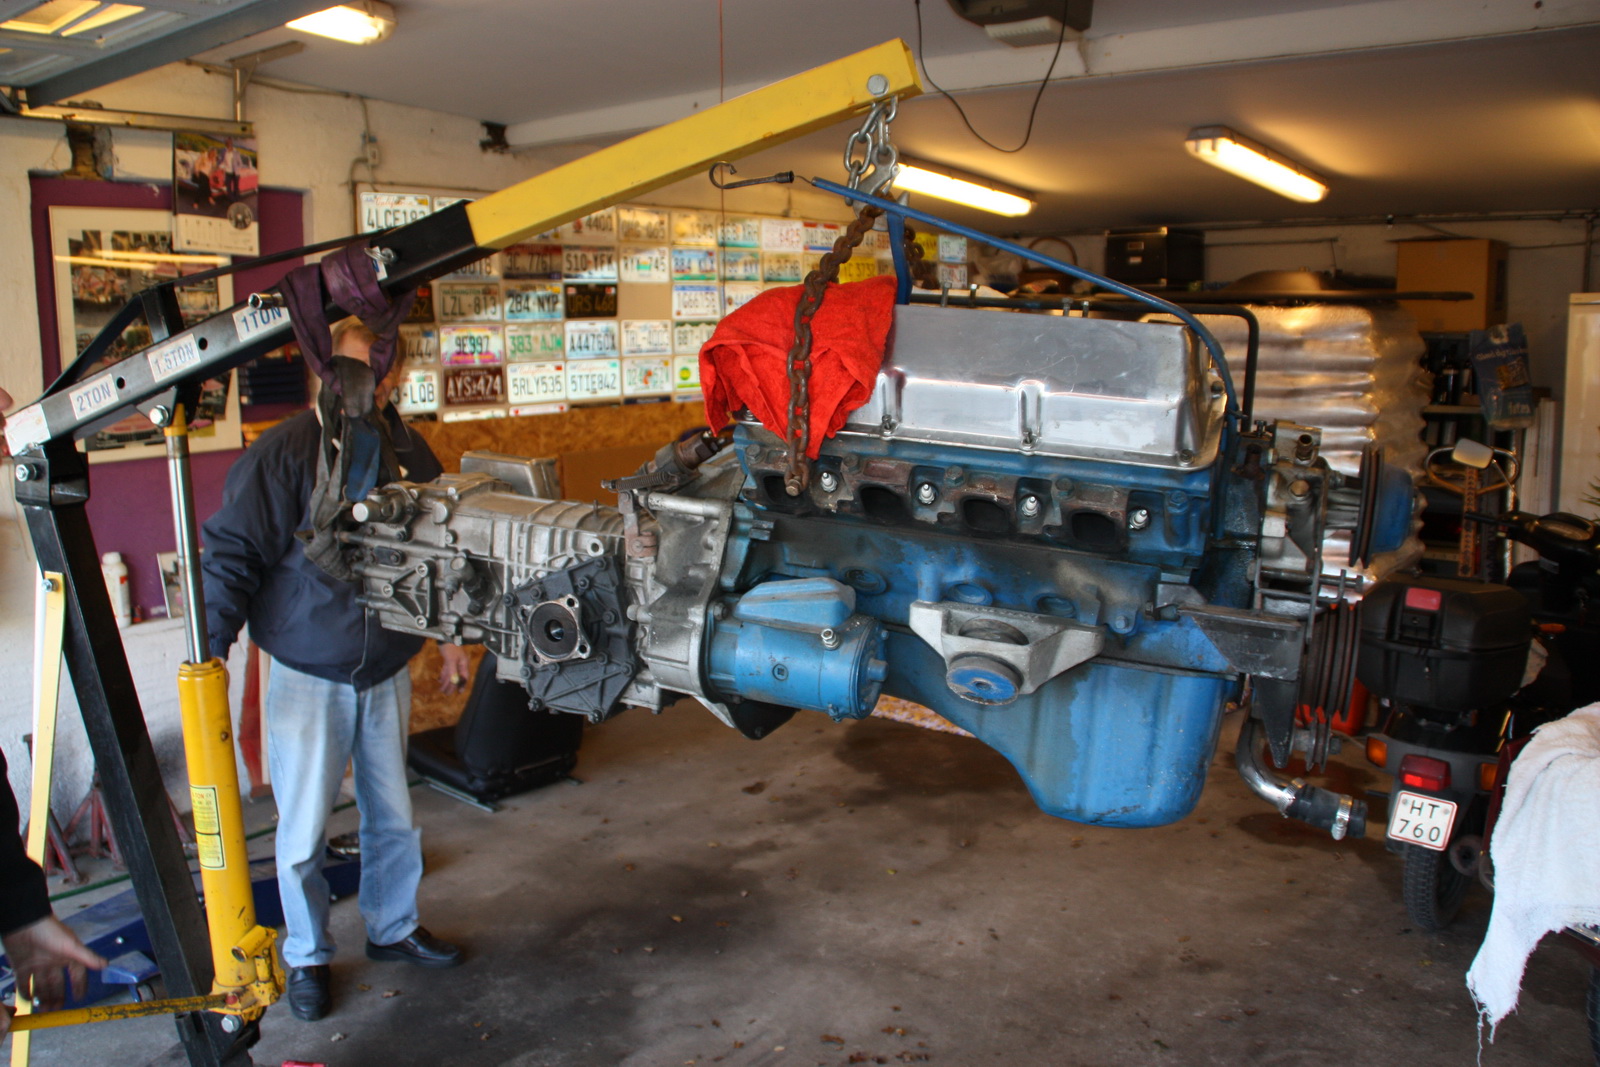
A..... Now that the engine is out, I might as well see if I can find a little more POWER before putting it back in the car.

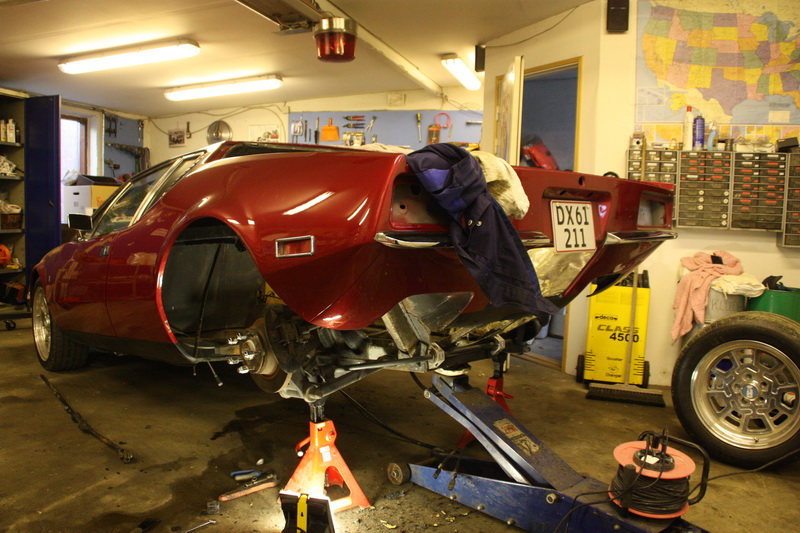
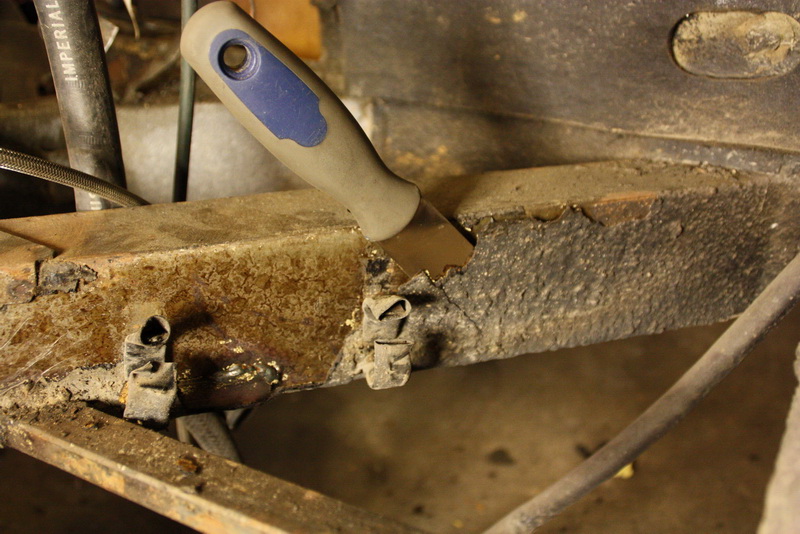
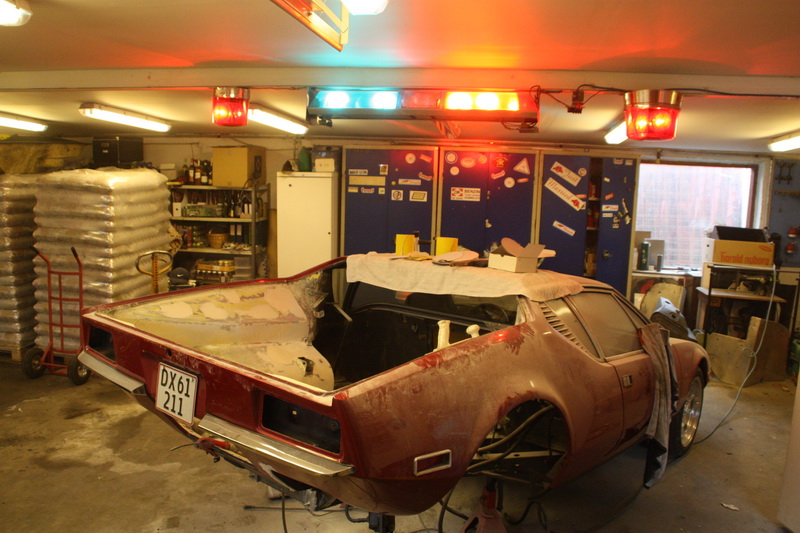
So out the nice garage it goes, and over in my other garage, where it's a little bit more messy.


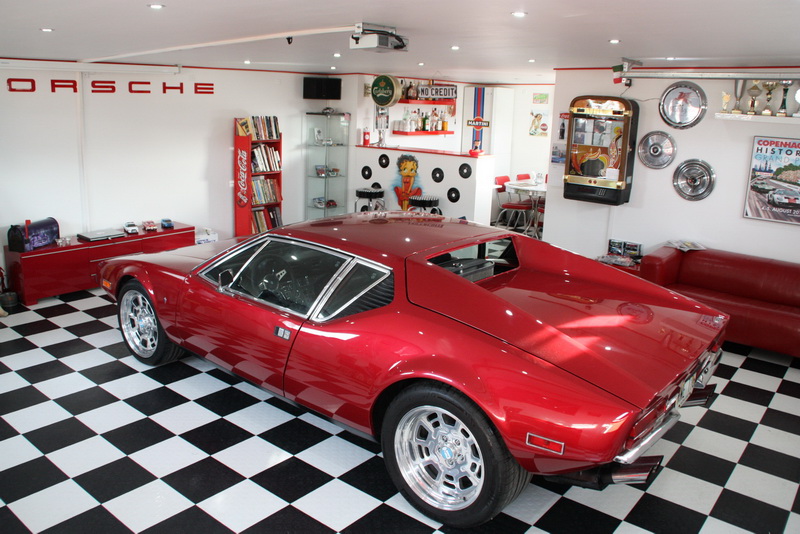
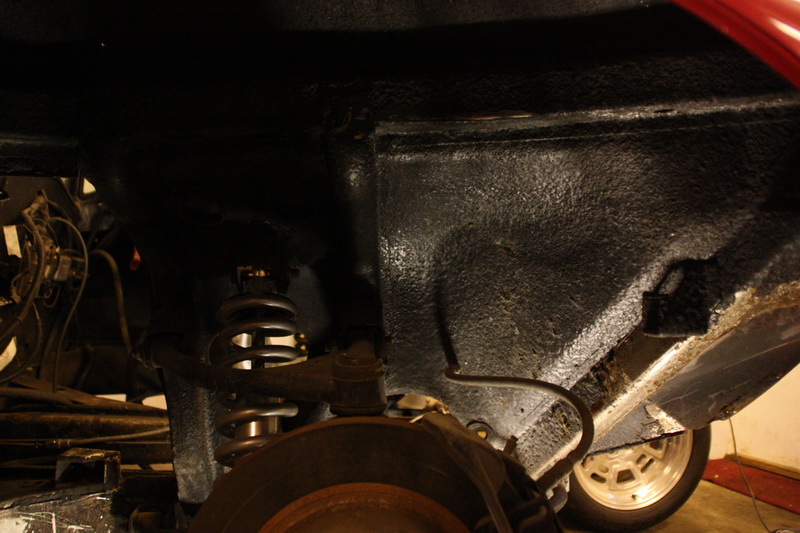
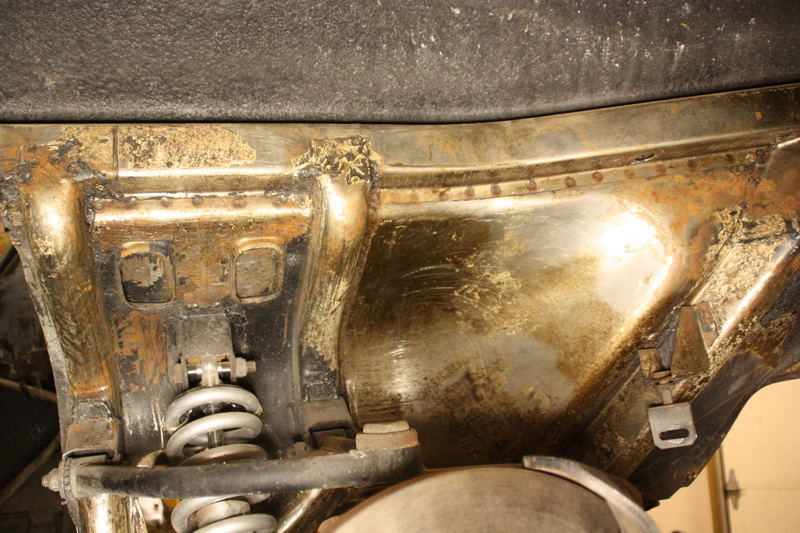
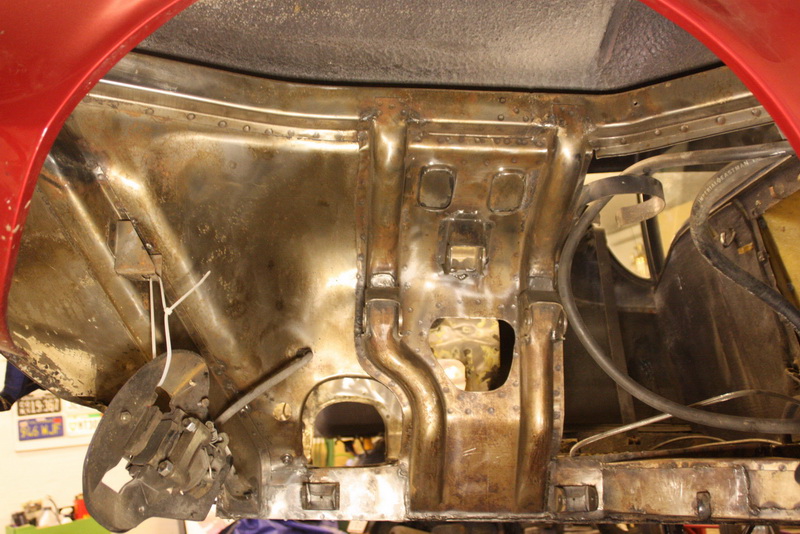
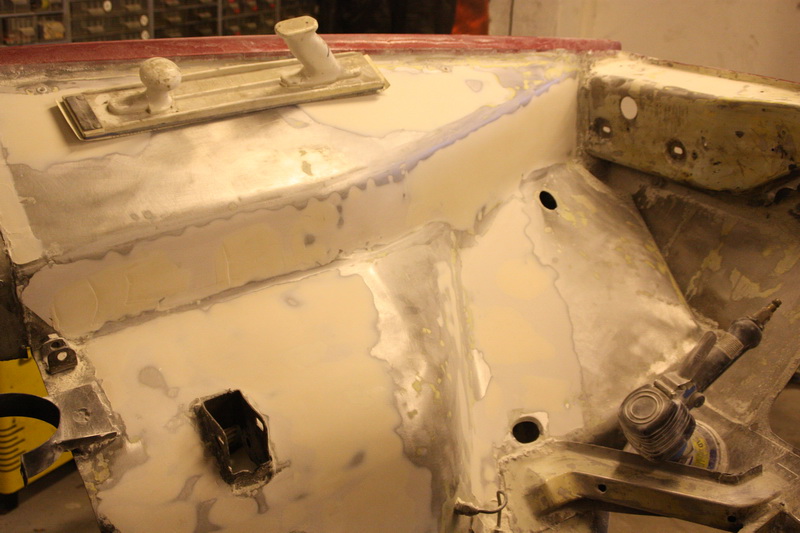
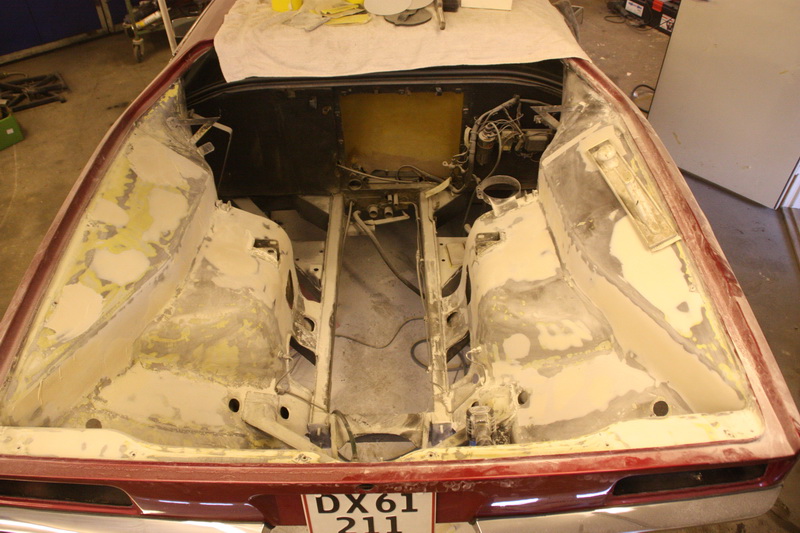
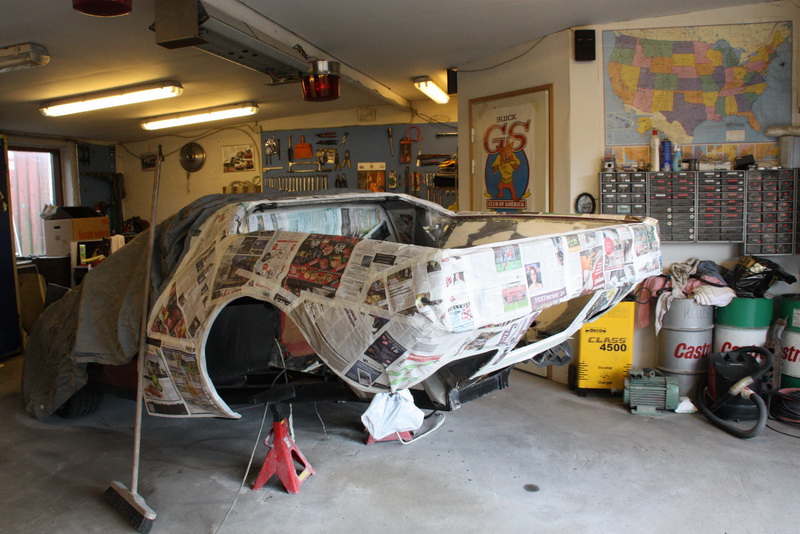
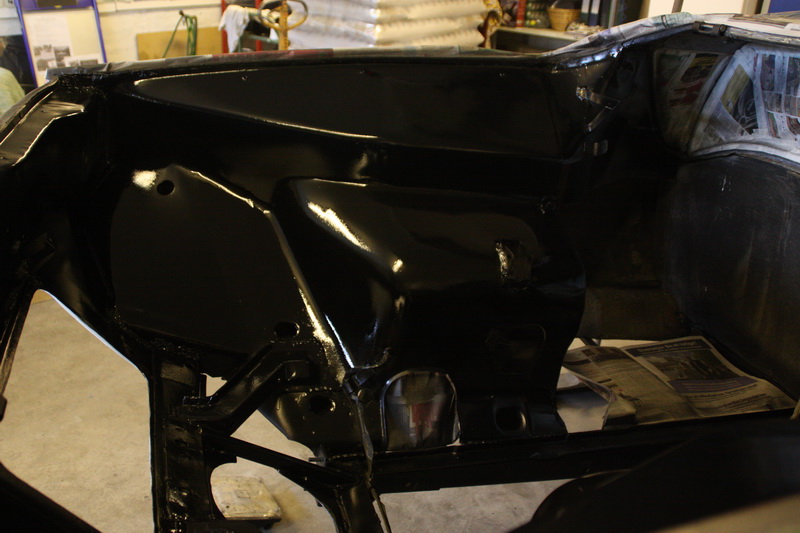
how it looks now - Next spring it would hopefully look a Little better


Draining the coolant - No, it's not rusty Water, but Caterpillar Red antifreeze
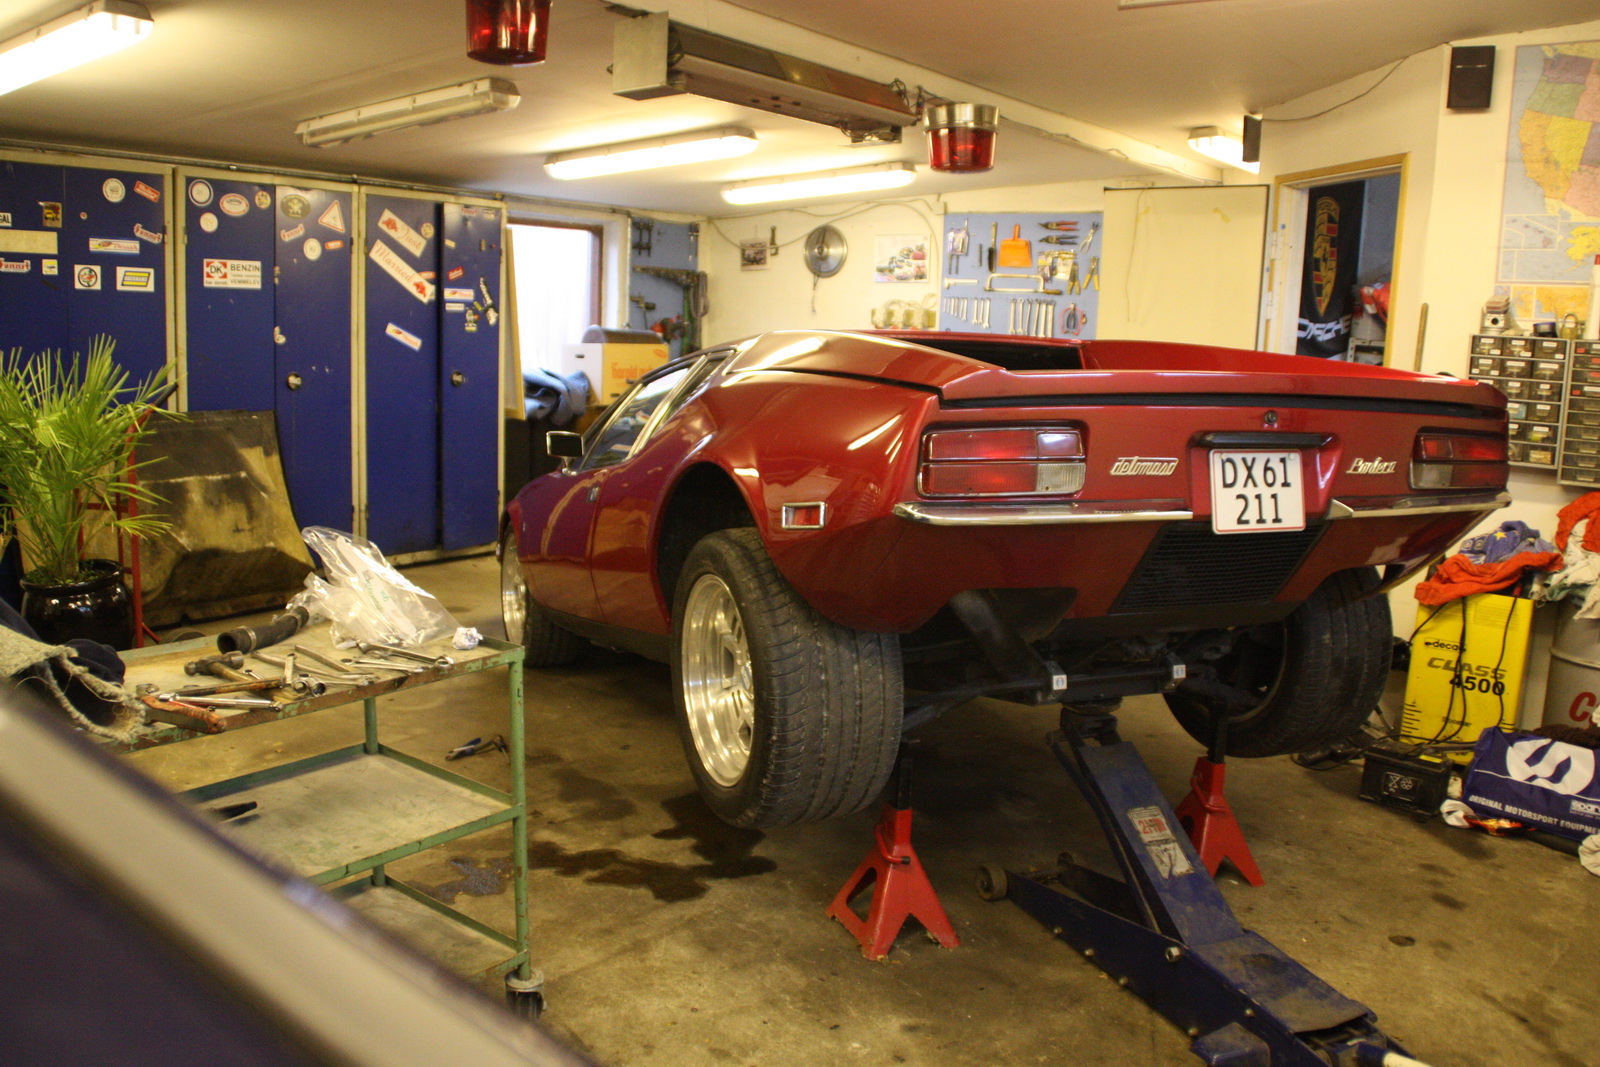

Ass up - Face Down.


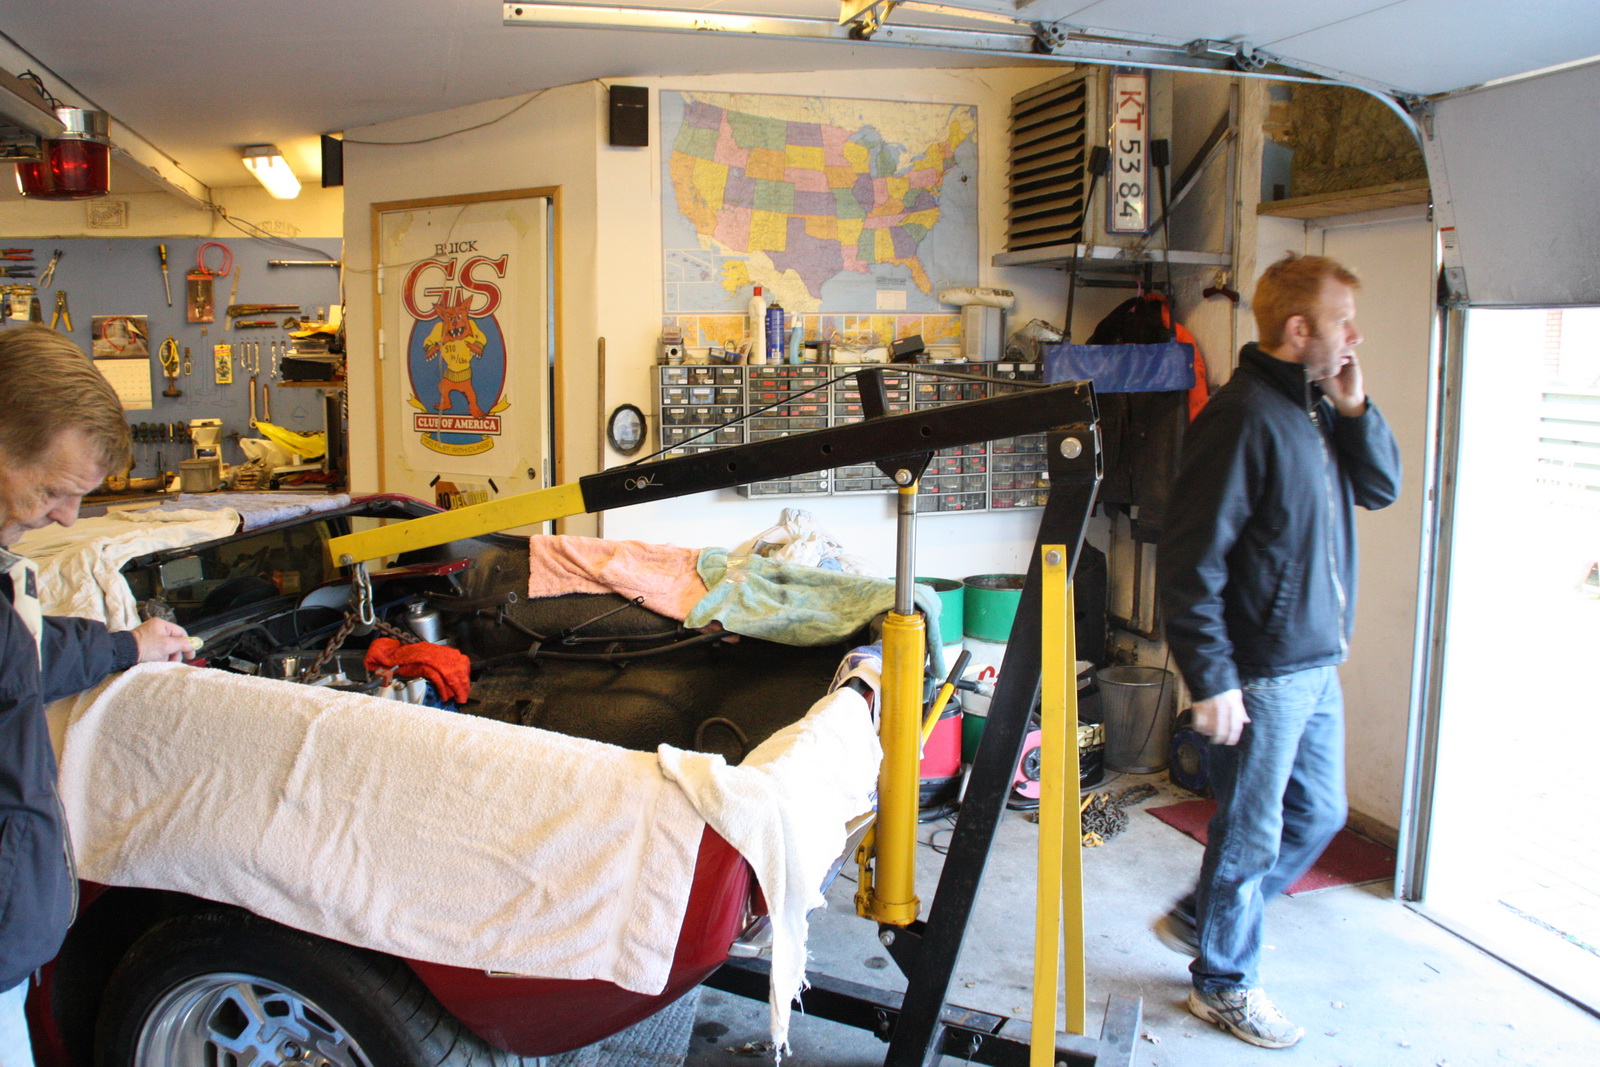
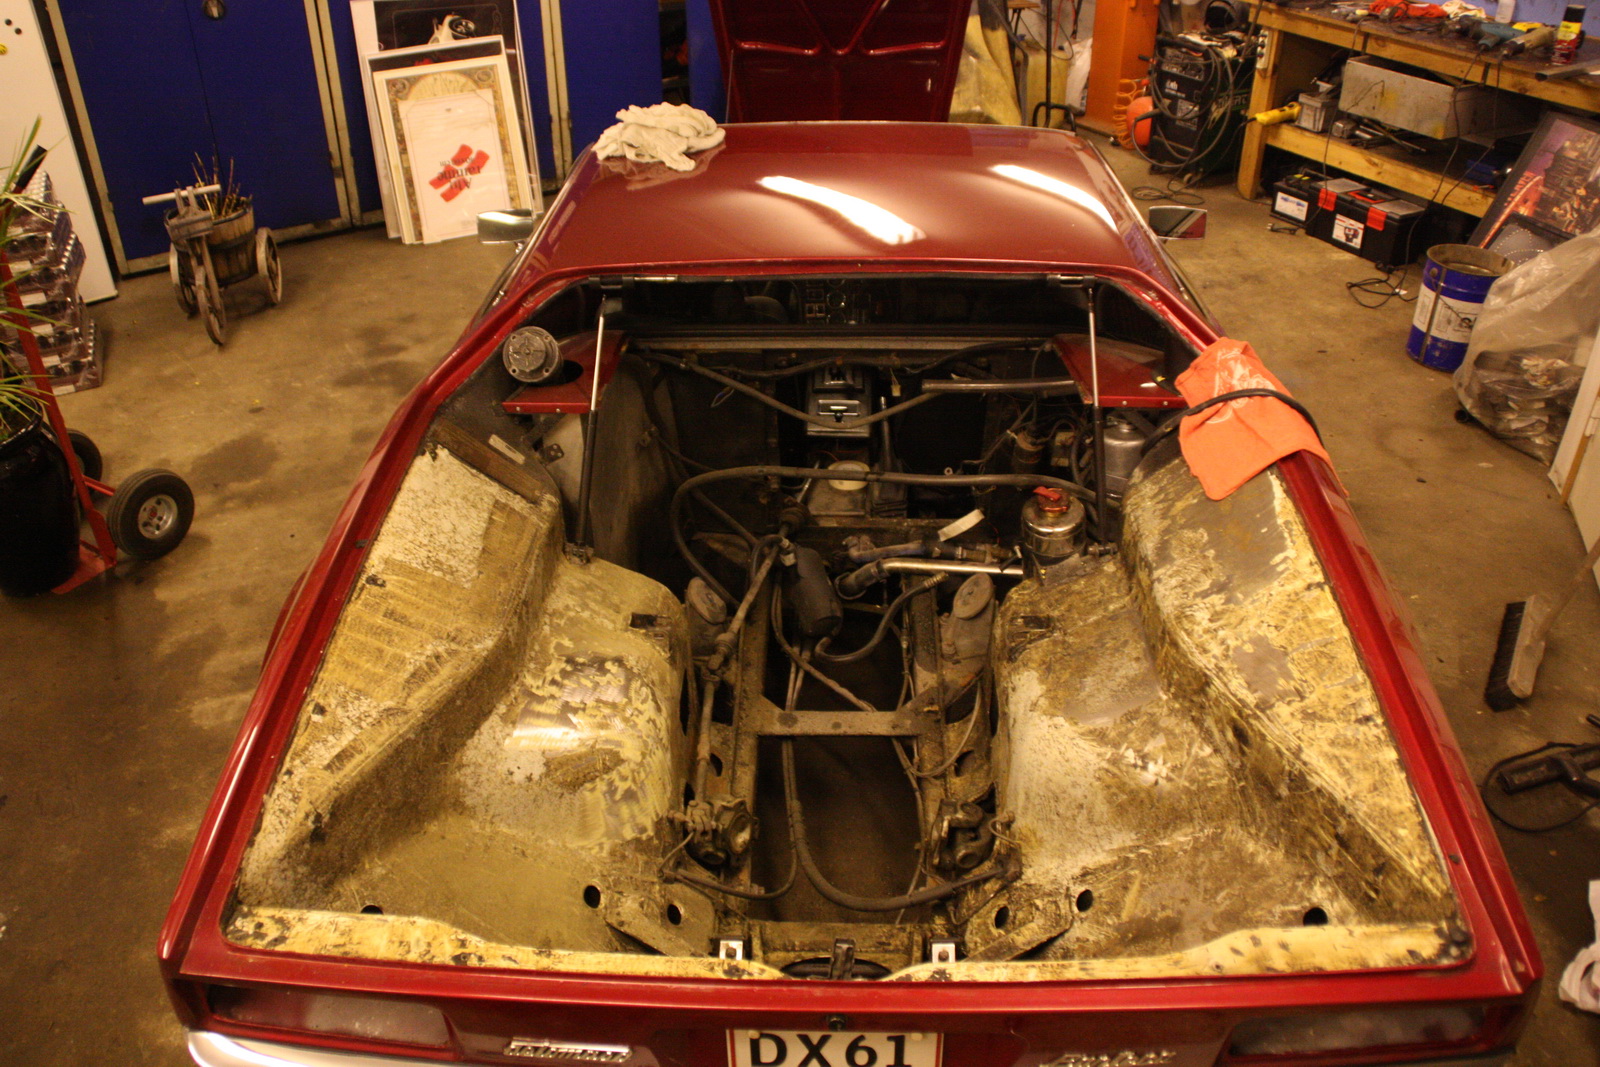
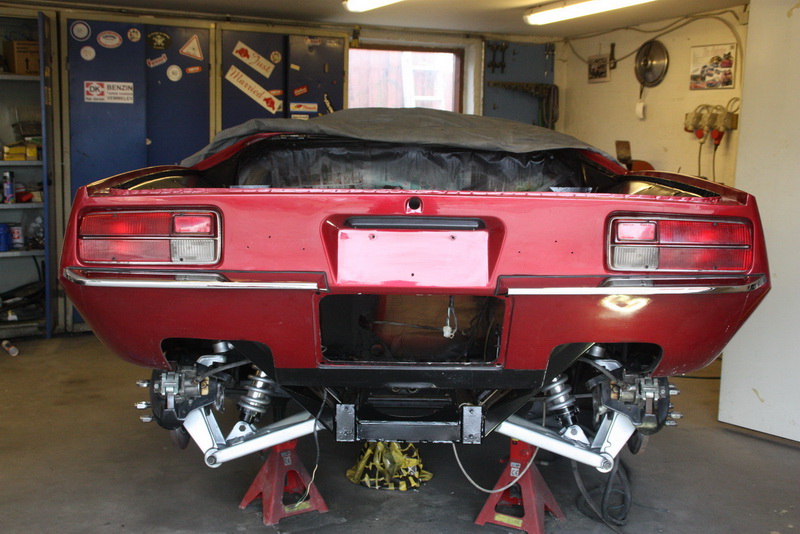
Decklid removed - Now we're ready to pull the engine


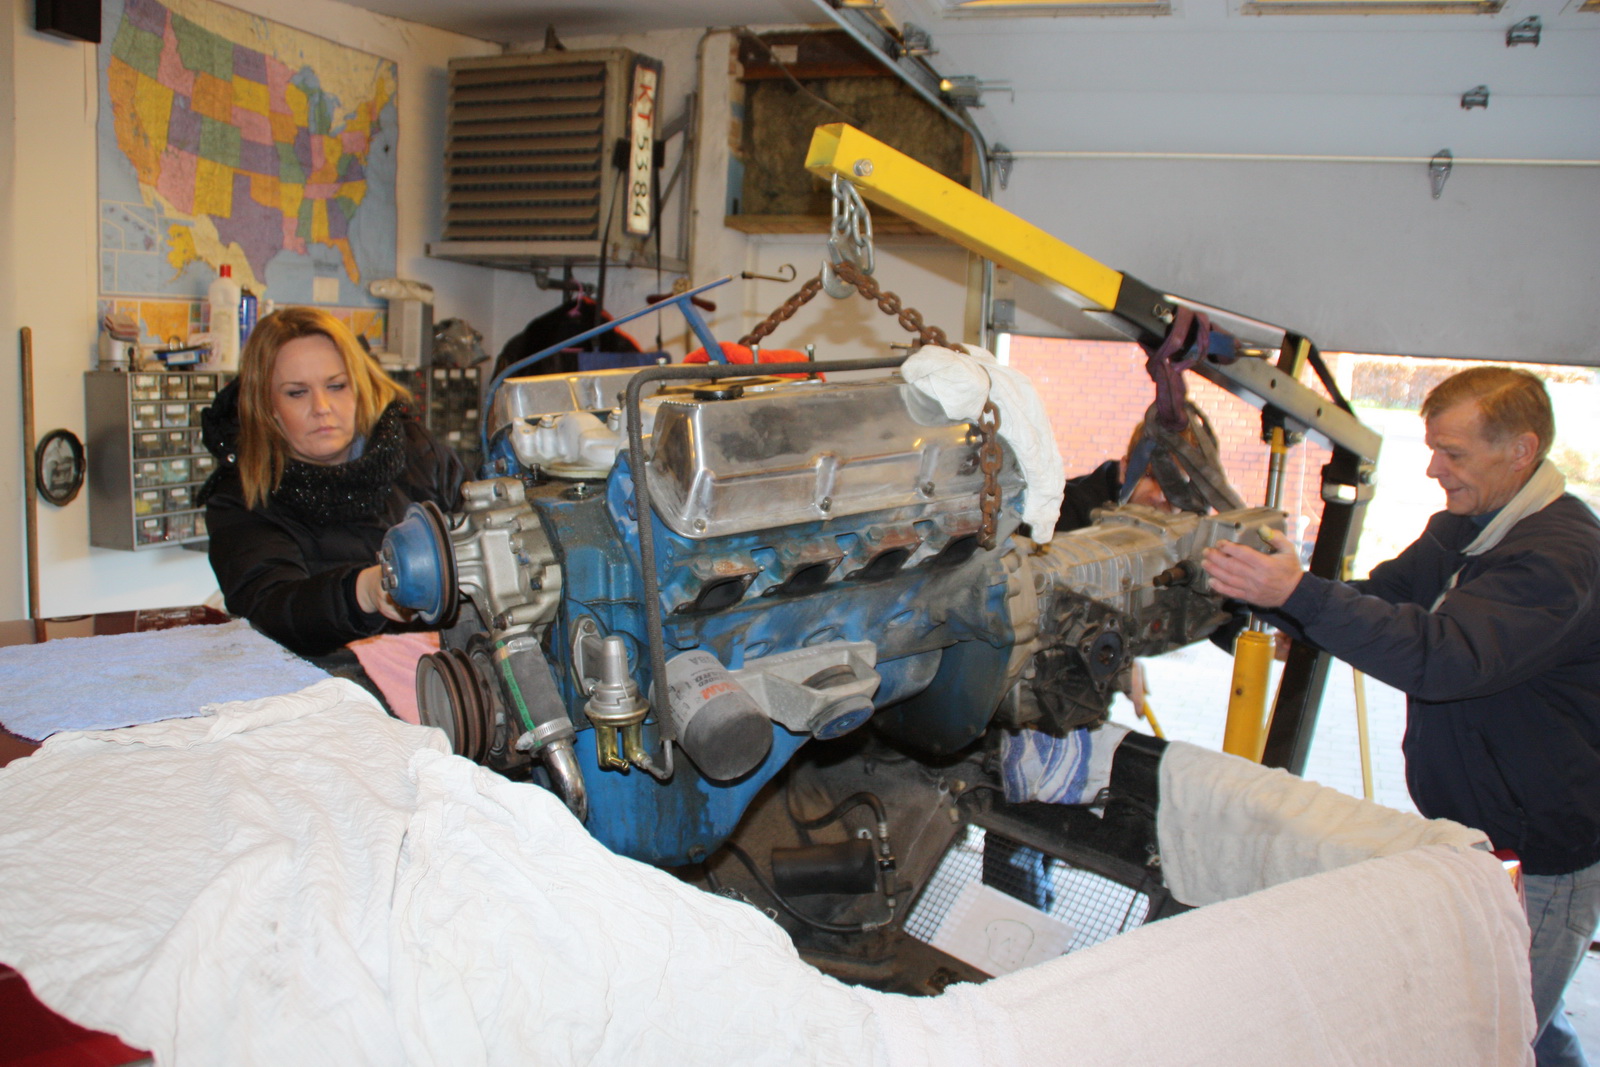
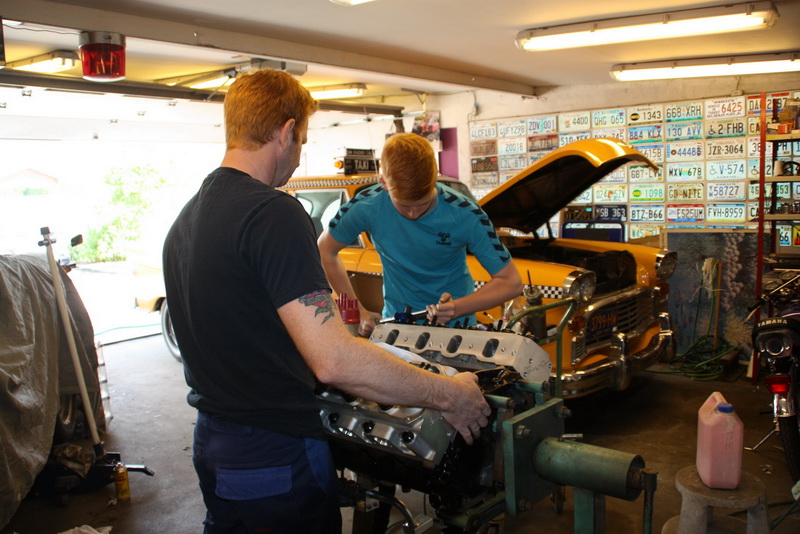
And here we goes. My wife, my oldest son and my father where great helpers.


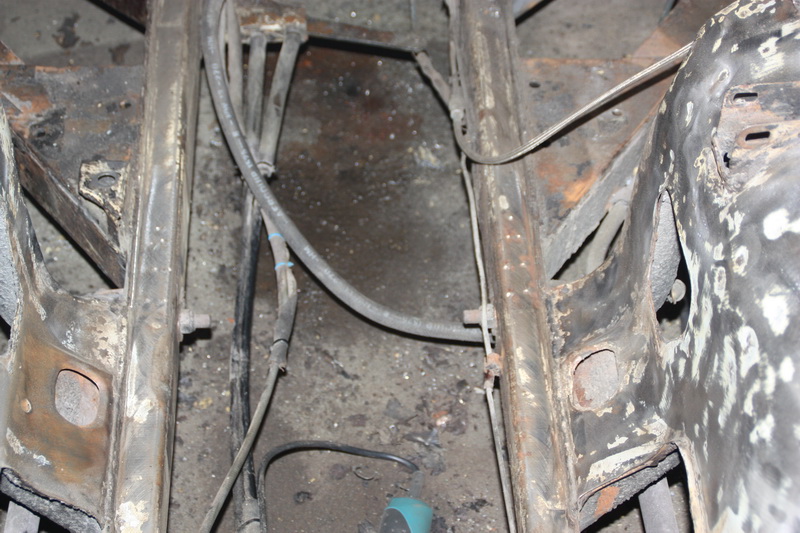
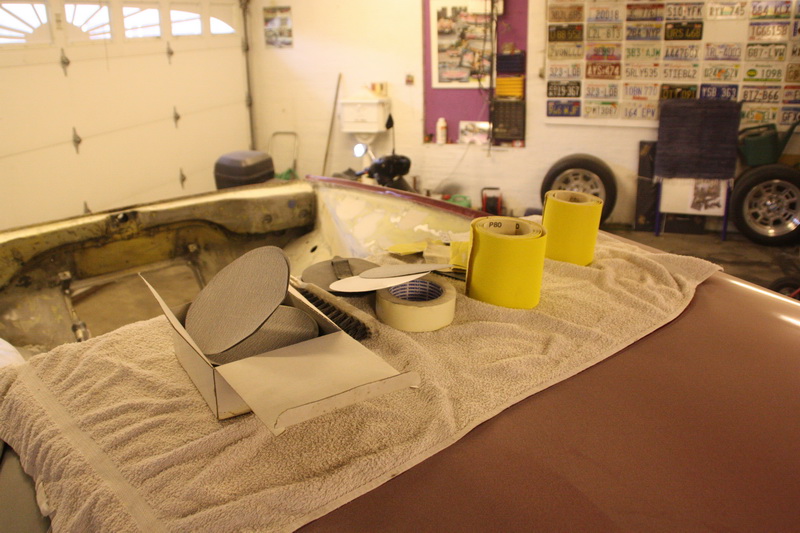
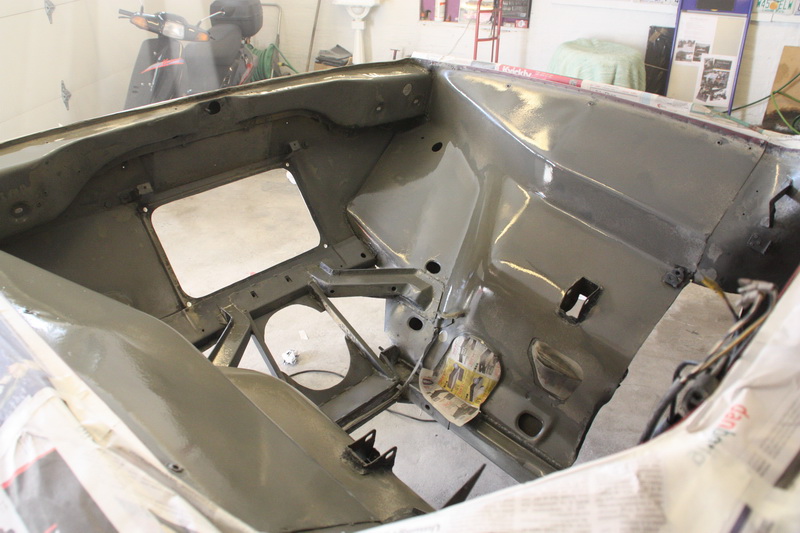
This will take some time to freshen up - But Winter is long here in Denmark, so I think I have plenty of time

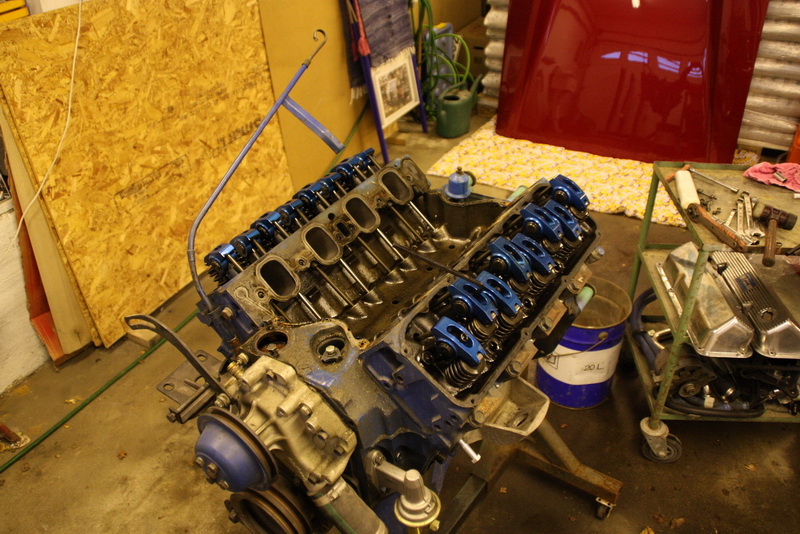
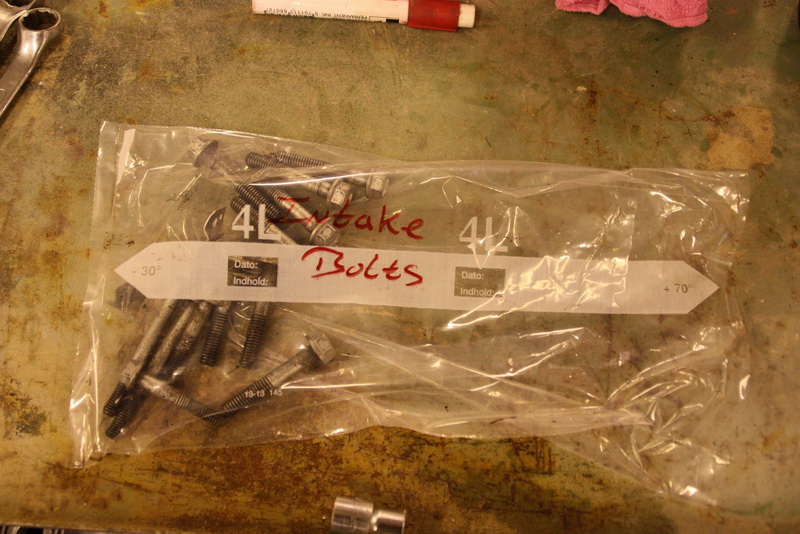
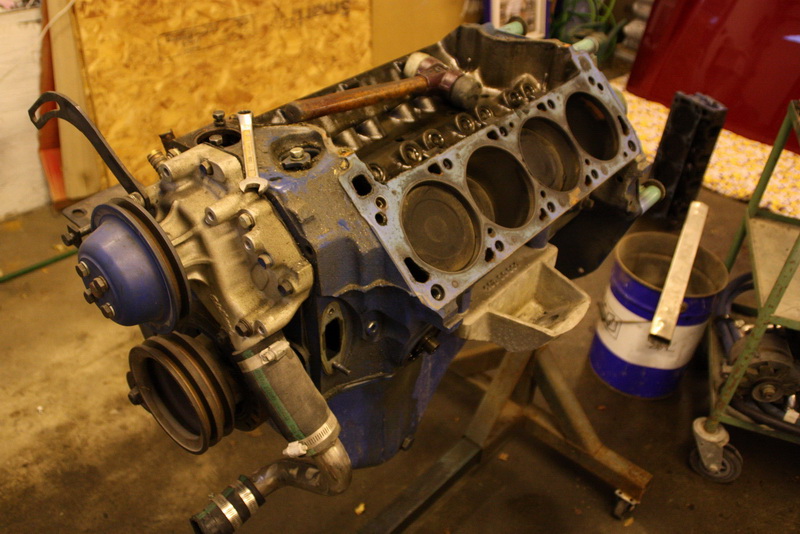
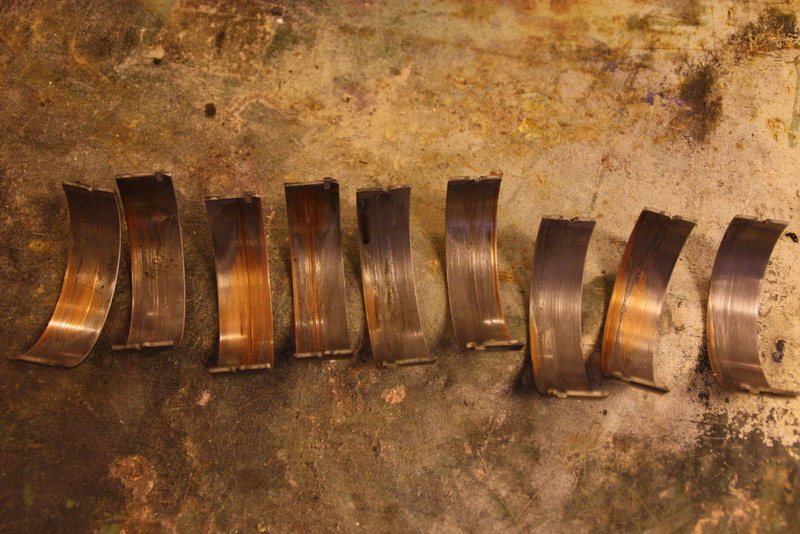
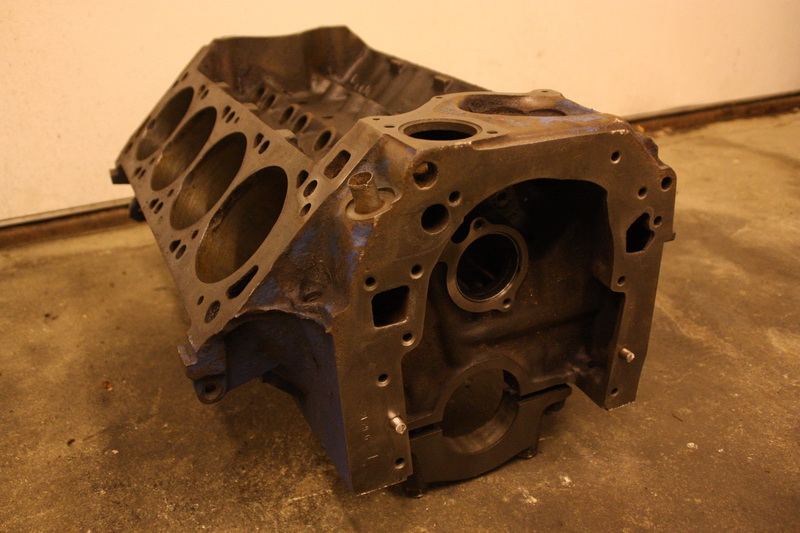
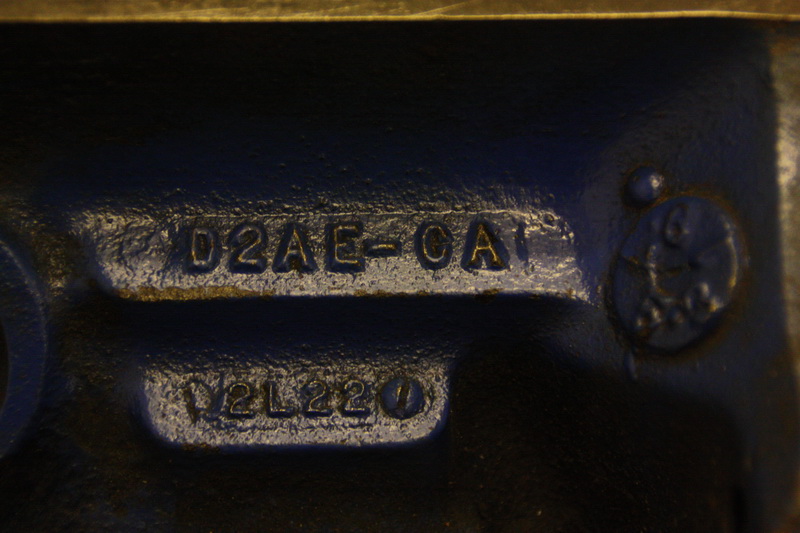
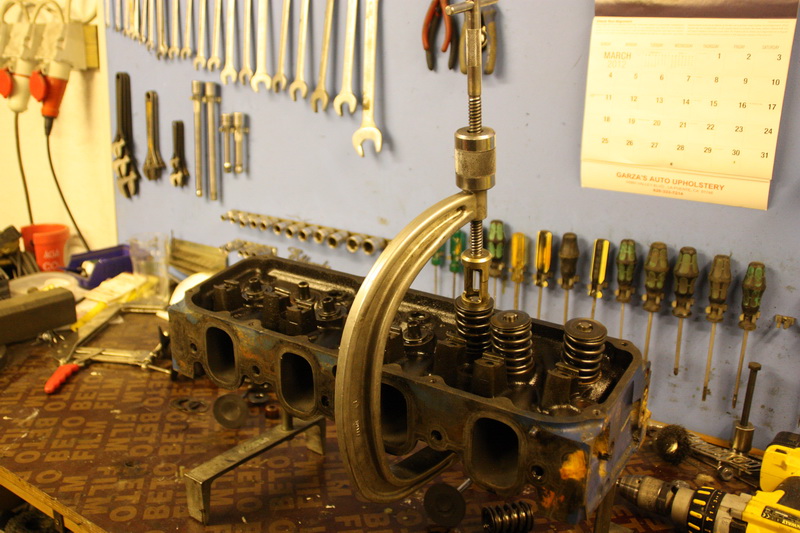
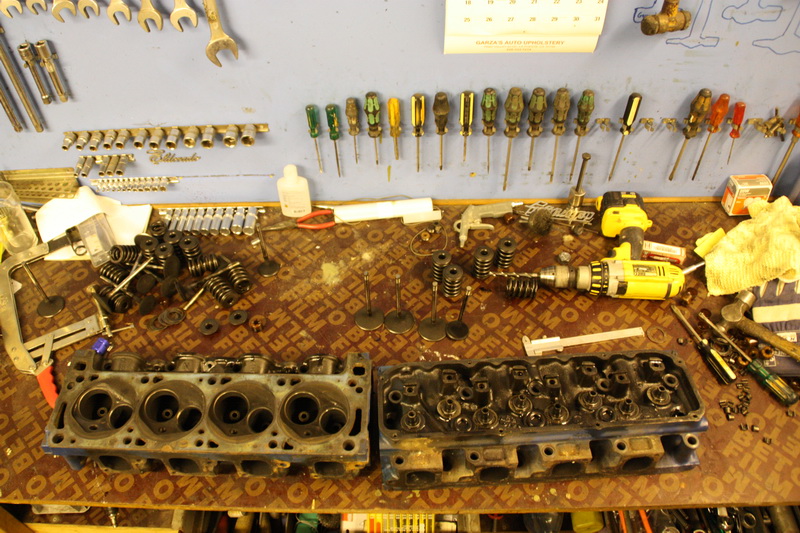
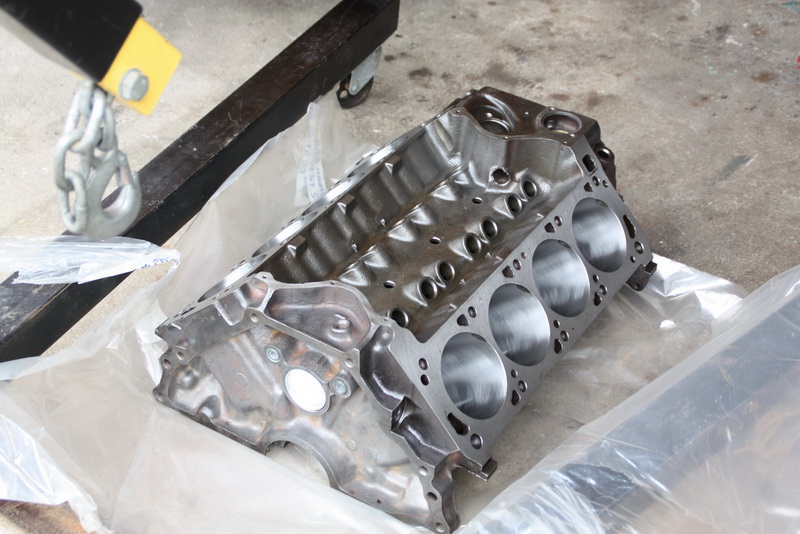
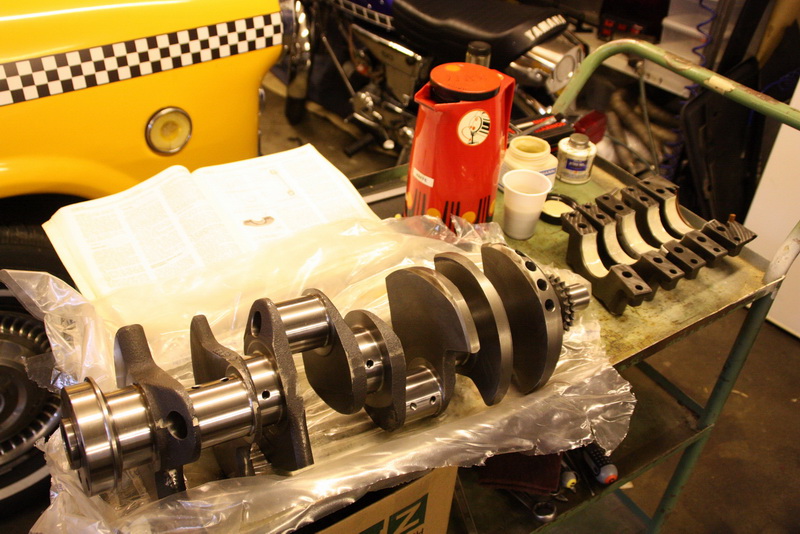
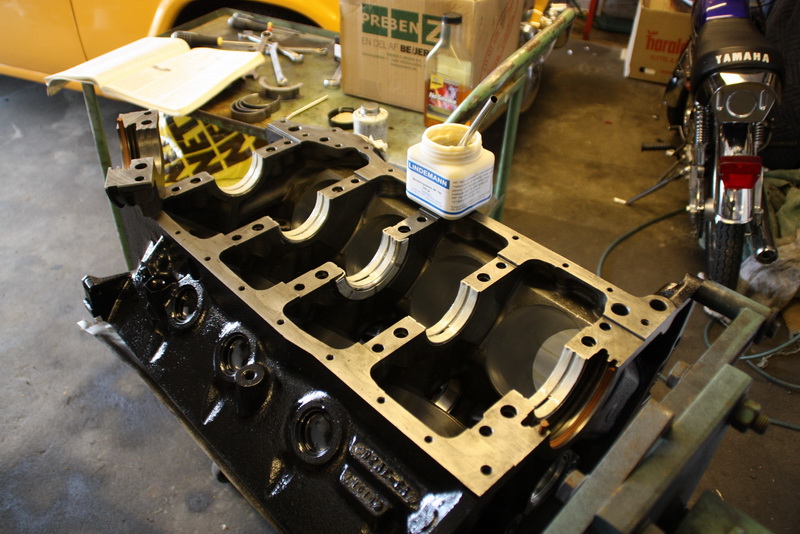
Today it's time for me to take the motor apart, and see how bad it looks inside, and then take a decition what to do. Rebuild, or just purchase a new crate engine for it ? Let's see........
Original Post

Replies sorted oldest to newest

Wow, Hein. You are certainly NOT in a position to envy anyone's garage. Yours looks awesome.

It looks like you and your friends made quick work of pulling the engine. Are you going to remove all the engine bay undercoating while in there? It's an awful job, but once done, cleaning the dirt and dust is so much easier when the surface is paint or other hard surface. I did my white Pantera in paint and regretted it when I saw how tough the epoxy bed-liner coatings are. They keep the look of the factory undercoat but not the soft gooeyness of it. While at it, consider re-routing the A/C lines under the fender. Oh, and it's a good time to pull the fuel tank and have it inspected/cleaned and maybe sealed since it is an engine-out job too. And then add a stainless firewall cover… and… How long are your winters again? Big Grin

Good luck and have fun!

Mark
Last edited by markcharlton
I agree with Mark here: you should address the fuel tank. There are several points of weakness with the stock tank: rust corrosion, the old fuel sock sloshing around, the banjo fitting ...

I addressed mine a few years back and was very happy with the end result. The project is chronicled (with pictures) at this link.

Best of luck with the engine rebuild! Just remember to make sure she goes FASTER with the new powerplant!!!
quote:
Originally posted by Mark Charlton:
Wow, Hein. You are certainly NOT in a position to envy anyone's garage. Yours looks awesome.

It looks like you and your friends made quick work of pulling the engine. Are you going to remove all the engine bay undercoating while in there? It's an awful job, but once done, cleaning the dirt and dust is so much easier when the surface is paint or other hard surface. I did my white Pantera in paint and regretted it when I saw how tough the epoxy bed-liner coatings are. They keep the look of the factory undercoat but not the soft gooeyness of it. While at it, consider re-routing the A/C lines under the fender. Oh, and it's a good time to pull the fuel tank and have it inspected/cleaned and maybe sealed since it is an engine-out job too. And then add a stainless firewall cover… and… How long are your winters again? Big Grin

Good luck and have fun!

Mark


Mark, I will have the gastank removed and cleaned out. I had major problem all summer with all kinds of things floating around Down there !!
The A/C will not be installed Again, as it never get's that hot here in DK anyway. So it will be put away on a shelf.
I will for sure get the undercoating removed, and have it all painted. But You're right...... It's a pain in the bu** to remove !!!!! Think it's a job for my oldest son *LOL*


quote:
Originally posted by EA #3528:
I agree with Mark here: you should address the fuel tank. There are several points of weakness with the stock tank: rust corrosion, the old fuel sock sloshing around, the banjo fitting ...

I addressed mine a few years back and was very happy with the end result. The project is chronicled (with pictures) at this link.

Best of luck with the engine rebuild! Just remember to make sure she goes FASTER with the new powerplant!!!


Yeah, it WILL go faster with the new powerplant, what ever I decide to do with it. Still don't know if I will go for a new crateengine or rebuild my own.
Thank You for the link to Your project
So, got the engine pulled apart. Not good news... Think I have to buy a crate engine, or at least a better block to start with, and then do it all by my self.
The block is allready bored .040, so think I will use it for 8 bottles of good wine......


Installed i the enginestand, and with fresh coffee made by my wife, I'm ready to pull it apart !


So far so good - Not looking that bad. Those are good parts.


Everything will be put in plasticbags and marked, so I can put it back together Again


With the heads off the block, it's now exciting to see how the cylinders are looking. The heads are nice D0AE N (Close Chamber), so they are not bad. And they are even installed with stelite seats, stailess valves and bronze silicon guides.


There's alot of things in an engine, huh' ?


No good !!!!!! And my crankshaft is ofcause no good either ! Did anyone say "Stroker Kit" ??? ;-)

So now I have to find me a better block, so I can get started rebuilding a new better POWERFULL engine for next season.
Your pictures are very interesting. So it looks like yoiu have some bearing and crank issues, possibly caused by oil starvation?

Due to the overbore, and the scorpion lifters, obviously someone reworked your engine in the not too distant past?

How many miles were on the engine since the rebuild?

What oiling mods were done? The Moroso restrictors in the lifter oil feeds and the cam bearings? Were the lifter bores bushed?

Both of your crate engines talk about "oiling updates", but they don't really say what they were.. You might want to be sure in that area.

Just a comment - buying a crate engine will definately put you way ahead (schedule-wise) on your project - remember, you only have until late June - mid-July until the snow melts!

Rocky
@Rocky

The engine where rebuild back in 1990, according til PIM where I bought the car.
It's only driven 2000 miles since, where I have driven the 1200 of them since I got it in april this year.

Beside the oilconsumption, I had a ticking when I rev. the engine over some time. Driving 100 mph for a couple of minutes, left me with that ticking. Sounded like it was from the lifters.

No oil mods is done to the engine. And the lifterbores are not bushed.

The crate engine is the way to go, I think. Talked to Kristian yesterday about it (Push1267). He have a stroked Windsor in his, and I like the idea of a Windsor in mine too, as they are much easier to get parts for etc. - But I still don't know for sure.
A couple of suggestions, Heine: first, cut the under-engine crossmember and e-brake bracket off the frame, and make them removeable. This will then allow oil pan access on your new engine while its still installed, and its simple to do with the engine out. DeTomaso did this as-stock in later cars.

Next, buy an Aviaid full-baffled oil pan. Aviaid makes them for both 351-C and 351W blocks (as well as Mangusta small-blocks). This will keep your replacement bearings and crank looking like new for years. A street Pantera can corner hard enough to slosh oil away from the oil pump pickup and starve the bearings, resulting in exactly what you found with your OEM crank.

Now, you've got a good foundation for whatever other engine mods you like, and your wife can keep her hands clean!
I'd stay with the Cleveland architecture also.

CHI is a better way to go than Edelbrock on heads. Anything Edelbrock is always suspect to me.

Make sure if you use a Ford block to do the oiling modifications. Both links are vague on that.

If you go for a stroker, may as well use a forged crank rather than just a cast one.

You NEED the Aviad pan BUT considering the low mileage on the engine, that damage could be caused by LACK OF USE.

When the engine sits for long periods, make sure it is super primed before it starts. You will develope surface rust on the internal components and cylinder bores and unfortunately the oil will be needed to wash away as much as possible.

The main bearings show signs of rust contamination into them and that is because the engine sat maybe for years without running it.

Change the oil as much as you can to reduce the issue.

If you go with a Ford block, might want to consider a block from AusFordParts.

You could also have your block sleeved to bring it to standard bore. Many of the FE builders are now doing that with those blocks since even a .030 over bore makes them overheat terribly and difficult to start hot.

The Cleveland really has those tendencies also more so than the Windsor engines do, although my 302 does show signs of that when it is very hot here and it is .030 over with a 3.40 crank.
Thank You all for all the comments, suggestions and ideas - That really helps me alot !

Sounds like I have to be sure that the Cleveland have oil mods done to it. I will try'n figure out what exactly it requires.
And ofcause upgrade to the oilbaffle tray, to keep the oil where it belongs ;-)

As PanteraDoug mention, it's probably because it's haven't been driven much the past 25 years, that the bearings etc. are gone.

I have found a block here in Denmark, that have 50000 miles to it, and have never been bored. That's a good block for me to start with. I will go and see it this weekend.

What are the CHI heads You're talking about Doug ?? Are those the "3V" aluminum heads ?

Sounds like I have to cut that crossmember too - Any Pictures of how it was done by the factory ? Would like to make it factory correct, if possible.

Thank You, Guys ! I appreciate Your answers !!
quote:
Originally posted by danishcarnut:
Thank You all for all the comments, suggestions and ideas - That really helps me alot !

Sounds like I have to be sure that the Cleveland have oil mods done to it. I will try'n figure out what exactly it requires.
And ofcause upgrade to the oilbaffle tray, to keep the oil where it belongs ;-)

As PanteraDoug mention, it's probably because it's haven't been driven much the past 25 years, that the bearings etc. are gone.

I have found a block here in Denmark, that have 50000 miles to it, and have never been bored. That's a good block for me to start with. I will go and see it this weekend.

What are the CHI heads You're talking about Doug ?? Are those the "3V" aluminum heads ?
Are they better than the stock Closed Chamber heads ?

Sounds like I have to cut that crossmember too - Any Pictures of how it was done by the factory ? Would like to make it factory correct, if possible.

Thank You, Guys ! I appreciate Your answers !!
Now that the engine and trans is out of the car, it would be pretty dumb not to freshen up the enginecompartment. So I started removing the factory "undercoating" - What a job......


Also have to remove the gastank etc.
There is still alot of Work left, before I can paint it. But the Winter is looooong here in Denmark, so I'm sure that I can make it in time for spring.
The pickup truck spray on liner is a good idea. It wasn't around when I did mine so I just scrapped off (like you are) the factory undercoat and used 3m "rocker shoots".

As far as heads go, I personally swear by my A3 Ford Motorsport heads. They are kind of a favorite of Dan Jones as well.

You might want to read George's Sticky #3, in the Engines section about heads.

The CHI 3v heads are liked by many.

I personally do not believe in Edelbrock products at all. I do know a lot of people are using the RPM Edelbrock version of their heads right out of the box and like them.

I think it is more a thing of convenience more than anything with them though.

A 50,000 mile standard bore D2AE-CA 4 bolt block would be nice to work with.

You need to restrict the oil to the lifter gallery, left side and the cam bearings. You really should do the valve lifter restrictor bushings too.

A stroker is nice but you really don't need to go crazy. Even a 377 is nice. It will make the heads work better. Sharper quicker response to the throttle.

I'm an old timer I suppose and I like the "rev-ability" of the stock 3.50" stroke. To me that's what a small block is all about.

Others like the big hump of a 400 something cubic inch engine.

I personally would have to be judicious about applying the throttle to one of those because I would likely break the ZF.

It really is at it's limit at 550foot-pounds of torque. Not to mention the clutch.

With my little 357, I can womp on it all I want and the ZF is like a Timex. "It takes a licking and keeps on ticking!" Google John Cameron Swazey. It will explain that comment to you younger guys. Wink
Heine, in the photos I noticed your chassis has the early single-point ZF mount in back. If you're going to upgrade to more power & torque, I suggest adding aftermarket-conversion ZF frame mounts that attach- not to the back of the ZF but to a pair of arms at the sides of the transmission case. These steel frame extensions were welded in place in later models and attached via a pair of cast-aluminum arms with rubber isolators built in. I've also seen some frame extensions that were locally fabricated, as well as a few that used salvaged extensions from wrecks or burned-out cars. The later system gives a 4-point mount (with the stock engine mounts) and better braces the powertrain. Plus original single-point rear mounts are getting harder to find in good useable condition after 43 years!
@Doug:

Keep the input comming. This is exactly what I was hoping for.
I too like when the engine revs like a racecar, so keepeing the stock 3,5" crank in it, might be the best ?


@Bosswrench:
I've rerad about those transmounts before. I know a place here in Denmark, where there is 5 Pantera's parked side by side. Sounds like I will have to go there and look at how I can upgrade it.

Looks like I will be pretty busy this Winter !!!
quote:
Originally posted by danishcarnut:
@Doug:

Keep the input comming. This is exactly what I was hoping for.
I too like when the engine revs like a racecar, so keepeing the stock 3,5" crank in it, might be the best ?


!


That is my preference. The longer the stroke the less it is going to accelerate the rpm's.

With a 3.5" stroke or LESS there is less reciprocating mass to accelerate.

The same goes for hydraulic lifters or roller lifter cam shafts.

You can get 500hp and 500 ft-lbs of torque out of a 357 without much problem.

It all depends on how you want the engine to be.

You certainly will get other opinions on this but to me a healthy pumped up 351 is what the original concept of the car was all about.

The car breaks traction and goes sideways now. A stroker will just make the circle complete. It's not going to go any faster because you cannot get the additional torque down onto the pavement.
quote:
I've rerad about those transmounts before. I know a place here in Denmark, where there is 5 Pantera's parked side by side. Sounds like I will have to go there and look at how I can upgrade it.


Jep - just let us know when you turn up. We have all evolutions of the early pantera chassis represented :-) - including my car which has IPSCOs aftermarket version of the ZF sidemount kit.
quote:
Originally posted by Push1267:
Jep - just let us know when you turn up. We have all evolutions of the early pantera chassis represented :-) - including my car which has IPSCOs aftermarket version of the ZF sidemount kit.


Haha - Yeah, we will have to find a date, so I can swing by and have some coffee and kick some tires. I'll get in touch with You, Kristian
Update on my Enginebay project and Engine rebuild

Still scraping, grinding etc. - That Black stuff is a real pain in the butt !!!

Also removed the crossmember, and will replace it with a removeable ditto


Started to remove all the Black stuff in the rear wheelwells to, as it allready was started to scale.


Not pretty, but keeps the rust away...


And here we go.....


Unbelieveable... Hard to see that the car is over 40 years old !


My "new" block. A 4 bolt main D2AE-CA in Std. bore. It will recieve a 393 or 393 Stroker kit, when I firgure out what exactly I wanna use. I'm in contact with Mike Drew about this.


Funny thing is that the casting date is dec. 22 - 1972
The day of my 2 years birthday....
More Pantera update

Got my engine boiled and cleaned - Looks like it is right out of the castingcore now


While the engine is at the machineshop, I continued scraping the undercoating off the car. Figured out that the more than 40 year factory undercoating is a rust trap !! Many Places it doesn't even stick to the frame. Some Places it is beginning to scale, so the Water can be trapped underneith it. So it's a good thing to remove it, and start all over before it's to late.


It doesn't stick to the frame at all.


Meet my two new friends. We have spend MANY hours together now, and we're not quite done with eachother yet.


Absolutely no rust, but I'm sure that it was only a matter of time, before it would have started.

quote:
I needed a third friend when those two had a heated aurgument! some how I tried to roast the back of my hand so a welding glove for the scraper hand

That happened to me more times than I care to recall when I was scraping the undercoating out of my engine compartment. Be careful here you swing/point that heat gun while scraping! Eeker
Nice work. I was just catching up and notice this remark:


quote:
Originally posted by danishcarnut:
Noticed that You plugged the hole for the oilpressure switch ? Any special reason for doing that ?


I think he relocated the oil pressure sending unit to the port next to the fuel pump. I did the same thing to mine for a cleaner look.
quote:
Aha - But that's very close to the oil pump, of cause, and the pressure will maybe be higher there? Isn't it better to have it in the rear of the engine ?

Maybe. Pressure is pressure and if you take readings off the FRONT of the engine, they will be 10-15 psi higher than from the rear, and not relate to what most of us get for oil pressure.

Note also that stock gauge readings are ALWAYS wrong- usually low- due to a mismatch between the Italian gauge and the U.S. sender. I use my console gauge to tell if there's ANY oil pressure; I have a mechanical gauge permanently mounted on a tee fitting in back along with the sender when I want to know how much pressure I have with 2% accuracy.
It wouldn't be a bad idea to reinstate the Ford "idiot" light on a small led on the dash.

It will turn on when there is less than 10psi in the system.

Racers use "idiot" lights all of the time since it's difficult to focus your eyes even momentarily on a gauge when you are at triple digits.

Some use a big red light mounted to the steering column that flashes at the driver. I'm sure that in some cases that's not even enough.

Maybe a monkey that comes out of the glove box and slaps the driver into consciousnesses? Big Grin
quote:
Originally posted by Bosswrench:
quote:
Aha - But that's very close to the oil pump, of cause, and the pressure will maybe be higher there? Isn't it better to have it in the rear of the engine ?

Maybe. Pressure is pressure and if you take readings off the FRONT of the engine, they will be 10-15 psi higher than from the rear, and not relate to what most of us get for oil pressure.

Note also that stock gauge readings are ALWAYS wrong- usually low- due to a mismatch between the Italian gauge and the U.S. sender. I use my console gauge to tell if there's ANY oil pressure; I have a mechanical gauge permanently mounted on a tee fitting in back along with the sender when I want to know how much pressure I have with 2% accuracy.


yes... but at what pressure are you gonna pull the engine and have a rebuild ??? Knowing=measuring is knowledge but when to decide something ? OK, we don't speak of adding oil, change visco etc...what pressure is alarming ? Wink
posted January 17, 2014 10:15 AM
quote:

yes... but at what pressure are you gonna pull the engine and have a rebuild ??? Knowing= measuring is knowledge but when to decide something ? OK, we don't speak of adding oil, change visco etc...what pressure is alarming ? Wink


Qualifiers: taking pressure from the back end of the engine using a calibrated gauge, below 10 psi hot at idle usually means a rebuild is in your near future. Pressures ABOVE 100 psi (cold) usually means you got sales-talked into some sort of 'special' oil pump that wastes horsepower and rapidly wears distributor drive gears- again pointing to at least a partial refurbishment soon.

This side of LeMans, a std plain-vanilla 351-C oil pump in a nice tight engine will give 15-25 psi (hot) at idle and 70 psi (hot) at 2500 rpms. For decades trouble-free, if you pair the pump with a fully baffled 10-qt oil pan. I personally like Aviaid's pan. Most engine overhaul shops in the U.S will no longer warranty a Pantera engine with a stock pan.
With a stock pump pressure shouldn't drop below 15psi at idle. You don't need 100 psi at idle.

I like the high volume pump as a compromise. Mine gives me 80 psi cold and will drop to about 45 to 50 hot.

The old racers adage about pressure is that all you need at idle is 10 psi and 10 psi per 1,000 rpm. That would translate to 70 psi at 7,000 rpm.

An extra capacity pan like the Aviad is an excellent idea. It is not difficult to out drive the ability of the stock pan capacity in a Pantera. In fact it is pretty common.

It is a high performance vehicle. You need at least a high performance oil pan.
Nice info about oilpressure. This is one of my biggest concerns when builing my engine. Don't want my new bearings and crank to look like the parts that I got in hand, when pulling the engine apart !!

Still thinking about what parts I will use for my new build. But so far my list is like this:

D2AE-CA 4 bolt main block
Scat 408 stroker crank
Probe forged dished pistons 0.020" (9.8:1 @ 64cc )
Clevite 77 bearings
Scat I beam rods
D0AE-N Closed chamber 4V heads (62.8cc)
Manley Stainless valves
Scorpio roller rockers
Crane Guideplates and studs

Lunati roller cam kit ‪#‎20320712K‬
RPM Range: 2600 - 6600
Lift with 1.6 Rocker: .611"/.611"
Duration @ .050": 231/239
Advertised Duration: 282/290
112/106: 110/106

Lunati Roller lifters (In Kit)

Holley Ultra Double Pumper Carburetor 0-76750BK
Performer RPM Air Gap, Dual Plane or Weiand X-CELerator, Single Plane (Don't know what would be best ?)
Mallory Unilite ignition
Aviaid Oil Pan

Do You Guys think it will Work ?

Pulled my heads apart, and delivered them to the engine shop. They are not bad, but will be recieve new bronze bushings and stainless steel valves


Also bought a new suspension kit from Maserati Source, so I started to take it all apart. The Rotors, hubs, bearings and balljoint is brandnew, so no need to replace that. But the bushings are dry and worn out.


A Little tap with this fork and a hammer does the trick


Ready for some hard Work removing the bushings. And then it's off to the blaster.

Next step is a treatment with KBS Coating in the rear Wheel wells.

That should protect me from rust in a long time, I hope !
With the suspension control arms taken out, do you spot any axial "misalignment" in between the two bushing "tubes" of each individual A-arm?

Took mine apart a while back, and was baffled by the way mine were "aligned"... I did expect the both tubes to be perfectly in line with each other Confused

An impression:
I would hope some one here would have the drawing dimensions for suspension components

Counting pixels, i show both ends are about 4 degrees

are you showing both sides of the car the same?

I have found some frame dimensions (not the best nor clearest) that might help by giving the spacing between the two frame brackets

Attachments

Images (1)
  • Upr_Frnt_A
Nice information, JFB !

I'm started sanding the engine compartment. All the spotwelds have to be invisible. So bondo and sandingpaper is now my new friends


And ofcause my 17" sanding board


With Dire Straits on the stereo and the lightbars turned on, it's not that big a deal to sand.

My handbrake cables where strating to crack. The cable is working fine, but to avoid Water etc. to enter, I had to figure out how to repair it.


So solution was to fix it with Flexible insulating sleeves. Now they will last for many years, I hope...
Some updates on my engine/enginebay tune-up

Masking the Whole car up - With the cheapest I could find - Old newspapers. Works fine Big Grin


And then it's time for Etch Primer


After the primer, I spray on the Black filler


Sanding the filler is next, and then a coat of semigloss Black paint.

And with that done, I can start reassembling the rearend. New bushings etc. ofcause...


Reinstalling the gastank - Painted with POR-15


Transmission steamcleaned and painted with some special aluminum paint. Only sprayed on a VERY thin coat of paint.

Thanks Guys !

A Little update on the engine rebuild

Build Sheet:

4-bolt main block – 0.020″
408 Scat Stroker kit…
Probe dished pistons
Scat I beam rods
Lunati hyd. roller cam #20320712
Lunati hyd. roller lifters
Scorpion 7/16″ roller rockers
TFS Powerport 225 CNC ported heads, 60cc Chambers
TFS Trackheat Intake 3000-6800 rpm
Mallory Unilite
Melling blueprinted oilpump
Holley 750 Ultra DP
Cloyes Double Rollerchain
Pioneer Balancer
Tim Meyer “Restrictor” cambearings
Aviaid 9qt. oilpan
Wilkingson headers

Expected output: 550-575 HP and 650-700 NM


Engine bored .020 over and decked.


Care package from Summit Racing - GOOD STUFF !


Installing the Spiral Locks in the pistons from Probe. What a pain in the butt ! But I got good at it....


Fresh balanced 408 Stroker from Scat.


Ready to put in the crank. Pre Lubrication is the keyword here !


Rubber seal mounted as it should be. Many does this wrong ! Rememeber to put some gasketsealer at the ends of the seal.


Trying the endplay of the crank before putting on the maincaps. And after installing then, try Again.


Adjustable pushrod, so I can fugure out the correct lenght to use. I figured out that 8.1" would be the right lenght to use, instead of the stock 8.4"


Testfit....


Looks right on target. Rolls over the middle of the valvestem

Add Reply

Post
×
×
×
×
Link copied to your clipboard.
×