Hi all,

I'm building a new trunk insert THAT WILL NOT RUB THE PAINT on finished engine compartment cars. It has raised fastener areas that set on the pad and has totally been re-designed making sure it will not touch anywhere inside. The AC condenser area is larger for better air flow and to use a larger condenser and fan system. The spare tire cavity will be eliminated and the new design will be symmetrical side to side. The floor has two separate hidden compartments about 5'' thick---one for a tool kit (which will fit the factory tool pouch) and another for rags, polish, detail items and/or self preservations needs. (beer, pistola or a small P90 size PSD) The floor is flat when the doors are down and everything under is out of site leaving enough storage for an overnight bag, folding chairs, small cooler, wife or friend stuff.

I have wanted to do this for many years but now have a real need for several in-house car under construction. The first design will be made to fit 9000 serial number cars and up so if you have a late model hand-built wheelhouse car and would like a trunk that will not rub damage your engine compartment, please drop me a note. Sorry---not finished yet so I do not have the costs yet.

The first early production car version (1971 through vin 8999) should be available late Winter-early Spring.

Thanks

Kirk
Last edited {1}
Original Post

Replies sorted oldest to newest

I have noticed that the electrical connections at the top of my a/c receiver/dryer get bent because they rub on the back of the tub. I would recommend adding a bit of extra clearance there.

How much heavier is your new tub compared to factory? Will it have a cover?

It would be great if you could post some photos once the project progresses sufficiently.
Great Minds thinking alike (:>)

Pics will be on the way after Christmas---maybe new year. This one's built from scratch shape fitted to the wheel wells. The false bottom was created primarily structure to hold the flat bottom and keep some of the travailing goodies hidden. I personally hate to have detail cleaning stuff in plain view.

The biggest problem was building the master with all of the various intersecting shapes that need to keep molding drafts and still maintain enough space in-between the shape to laminate the part once the mold is made---this is a real pain to construct with the proper clearance and shape strength to hold some weight but still keep it light so you won't need Conan and the Hulk follow just to remove it.
[QUOTE]Originally posted by Peter H:
I have noticed that the electrical connections at the top of my a/c receiver/dryer get bent because they rub on the back of the tub. I would recommend adding a bit of extra clearance there.

No worries Peter---they're built in and it should be lighter and will be much stronger.
Maybe they can be made like a transformer? You know? The toys. You fold it into a little square to ship it and reverse the process when you receive it. Big Grin

I have 180 degree headers from Hall and have reworked my tray to fit over the headers.

There are a few spots where the tray can be deeper but the reality is that I'm not going to carry a new puppy home in it unless I want to kill it horribly, or need more space for the frozen meats or produce, so I just leave the tray alone and look at it and think, wow, it's really kinda cool how the humps are in it to clear the headers.

Even though the humps aren't perfectly symmetrical, the headers aren't either (or even close) but hey, I'm an artist. I march to a different drum. Bug off man. Cool

I prefer to tell people that's how the car came from the factory and tell them that it's an Italian car. Then they understand, shake their heads, shrug their shoulders, mumble something like crazy Italians and shuffle away.

Exactly. Roll Eyes
Last edited by panteradoug
[QUOTE]Originally posted by Bosswrench:
Kirk, how are these gigantic packages to be shipped?

Option one; I plan on having orders sent to event locations where many car congregate like Reno where you can pickup the insert.

Option two; Boxed and shipped by truck to the customer---more money but if you do not attend organized events, this may be the only way to get one.

Option three; Suggestions?
Drive your car in. Install it. Drive the car home.
10 hours for me each way. No biggie.

I knew someone once that drove from Grosse Point Shores, MI, to Sparta, NJ in 8 hours in a '74 white Pantera straight across Rt80. We figured he had to AVERAGE over 100mph to get there and he stopped a few times for the necessities.

Will is gonna point out it is one of those white Pantera cars. Something very supernatural about those things? Wink
Last edited by panteradoug
Carbon fiber cloth is stiffer and stronger than fiberglas, so you need less of it to make up a fabrication thats tough enough to do the job. Same with kevlar cloth. The resins contribute virtually nothing to weight- either gain or loss. But often carbon-fiber is used along with stronger resins like epoxies etc, to gain even more strength and stiffness than with the usual polyester resins. Late Pantera tubs ('76-up) seem lighter and more flexible than early ones but they're so bulky, I never weighed either one. Finally, hand-lay-ups always weigh a little more than those that are professionally vacuum-bagged 'cause we add too much resin. But that extra weight is far better than a molding that's too 'dry' of resin and cracks easily.
The new trunk insert prototype is coming along good---I'll post some pictures of the master model soon. Several design improvements have been added. This new trunk insert will be able to have a clear front panel (toward the engine) and/or a clear bottom by order. That will give you a good view of the engine and trans without removing the liner but will keep most of the side wheel-wells covered. You will also be able to have (by order) the lower hidden bottom tool area removed and/or the back compartment designed for polishing supplies and detail goodies removed (one or the other or both sections). This creates a shallow flat bottom insert in case additional clearance is needed do to a frame stiffener kit, a larger trans-axle or other items mounted by the gearbox. More updates to come.
The new master trunk insert build up is complete. Next is the tooling/mold building procedure. I am posting pictures that show the construction of the master insert construction. I used several types of wood, sheet metal, several types of foam and 5 different fillers and top coats.

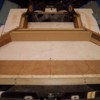
The first shot is the very beginning of the construction. You are looking into the engine compartment from the back of the car forward. The clamps pictured are located at the camber bar location. This is the insert floor and the start of the false bottom as you'll see in later shots.

Attachments

Images (1)
  • 100_0596
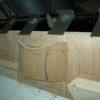
This next shot shows the early build-up of the AC hump in the back of the insert. The hump is larger than original because it is made to fit a new condenser fan shroud I am building which user a much larger fan and condenser. The air dispersal shape dumps the air down and out each side in an effort not to re-use heated are that passes through the condenser during cooling.

Attachments

Images (1)
  • Picture_2309
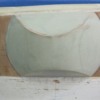
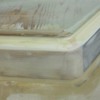
Here is a view of the insert from the side showing the early shape radius building. There was 65 feet or inner and outer edges that needed to be radius work and there was 12 different radius sizes used to finish all of the edges and shapes. You get an idea of the dropped bottom shape and size from this view.

Attachments

Images (1)
  • Picture_2307_(5)
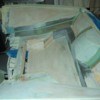
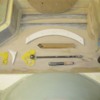
Here are some of the tools and patterns built to construct the master plug. All of the inner radius work required four different bearing sizes to smooth in the fillers needed to create a part that could be later built using composite materials. You must build every surface with a draft so the parts can be removed from the mold after it's laid up. There are many intersecting angels in the plug all requiring a molding draft.

Attachments

Images (1)
  • Picture_23122_(11)
Post
×
×
×
×
Link copied to your clipboard.
×