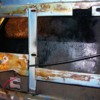
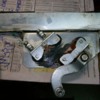
Have I ever mentioned how BIG of a PITA getting the door window is getting it out of a Goose???????

You can get the window regulator out by putting the window down almost to the bottom of it's travel....just to the point where you can get the bolt off of the power regulator to the chrome "S" bracket swivelly thing that bolts to the actual window.

I took it out the hard way once, tried putting it back in the hardway twice, two flavors...once with electric motor removed, and finally put the motor back in and got the entire power regulator back in REAL EASY cheesy!!!

Trick is having the window down to take that bolt out, then push the window all the way back up, tape it in place with some masking tape, and then you have lots of room to work with!

Make a drawing of the window motor wiring (three wires typically) and note colors and where they are connected. Digital pictures work great too!!!! This will help prevent "oops, crap, and oh sh*t" from happening!

Why was I doing this? I was tired of my old tired window track felts flapping in the breeze as the wife and I rolled down the road!

I also took this opportunity to remove the felt insulation from the outside of the door panel, and coated it all (most that wasn't coated already) with Eastwood's Rust preventative stuff....the black stuff. (also available in silver.

OK back to windows.....I did this job on left door a couple of years back and I was able to get the window out, not easily, but it did come out. Not so lucky this time!!!!! I didn't want to take the entire window frame out of the door....which would have made it much easier, but wasn't going there.....door frame fits fine to the body!

In the end, I just left the window in place, and worked around it. YES, PITA for sure!

The replacement "U" shaped felt runner material for the channels is slightly smaller than stock. What I found was almost a perfect fit, was the same stuff for a 67-68 Mustang. HOWEVER......you cannot buy the stuff in bulk.....so would need to order something like 4 to 6 kits to get enough long pieces (if they were even long enough......) to do the job.

I talked to one of the big Mustang repop vendors at Laguna Seca when I ran into him there....and he said that he gets his "kits" precut and packaged from offshore.....bummer!

I would have ordered a couple hundred feet.....cuz I think Panteras would use the same stuff......

Anyway, used the stuff from Pantera vender, cleaned the channels with acetone, which seemed to take old glue/silicon/whatever off very nicely as long as it wasn't too thick!

Couldn't lay hands on my "yellow death" adhesive tube, so used some black automotive silicon that I did have, laid a thin layer on the bottom of the channel and worked the prefit pieces into the channels and rubbed/rolled them in place with skinny finger and a screen door tool....

Readjusting the window track to my liking was a two day adventure.....but got it to where it now runs up and down much more smoothly!

Also got into the door latch and oiled or greased up the various pivot points for the interior door lock the exterior push button and now things work smoothly there as well!

My plastic water barrier was some thin plastic that I put in before but I had some thicker plastic available so made a new one and put it all back together tonight!

Finished the job off with new exterior door frame rubber trim (the stuff that sits in the top of the frame and contacts the body when you shut the door.

Will need to see how well everything seals up when we go for a ride next!!! But at least stuff won't be flapping in my peripheral vision and bugging the hell out of me!

Will post pictures later of some of the job....

Cheers!
Steve

Attachments

Images (1)
  • 101_5646_(Medium)
Last edited {1}
Original Post

Replies sorted oldest to newest

Hi Steve, I have just done this job with my Goose as part of its body/interior restoration. We had the door frame out so made it easier to get the bailey channel in. The channel that I found fitted perfectly was the same as fits my Testarossa. The channel stays in the frame without any glue etc as it should. The quarter window is also held in place by bailey channel on the front and bottom surfaces and previously was covered in black mastic. I had some trouble fitting one of the exterior door frame rubbers as when the frames were re chromed there was a little web type build up of chrome in the corner which did not allow the seal to fit right. Some detail work with the dremmel soon got it correct. Just about to get the car back on the road so will post a few shots. Mike
...you can check on common 9/16" window channel, I think I may have bought mine from Steele Rubber products. The original looks just a bit smaller, but probably because it shrank (!) and the common American stuff is fine. Check the glass width, etc, but not hard to find.
One thing I could not find was a new replacement for the guide wheels, mine were not so round...Anybody find a new replacement ?

Attachments

Images (1)
  • roller_
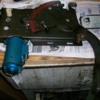
Here is a shot of the window regulator going back in on the LH side! RH side looks the same if you use a mirror....!

If you carefully unhook the pull wire that goes from the door handle to the latch, from it's hanger seen in the LH side of the picture, it will give you a little more room to work with.

Remember to hook the rod back up onto the hanger!

Also, watch so that you don't lose the little piece of rubber that keeps the rod from rubbing on the vertical door frame part! (See above photo....better view.) You may want to put a little dab of silicone in there to keep it from getting knocked off while futzing around here! I found mine on the floor a couple of times!

Door panel and rod pretty much keep it in place once everything is back inside the door!

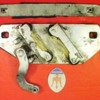
One thing I did find out about these door latches and handle mechanisms, is that the door handle post thing, is not the same as a Fiat 124 exactly! It will not bolt in and the 124 has the feature where if you pull up on the lever, it will lock the door. Whatever version was used in the Goose is one way only movement! Down, but not up!

There is a slight difference to the door latch, but it is very minor and has to do with the locking of the mechanism. But if you ever find yourself looking for a door latch, check out 72 and earlier Fiat 124 models and perhaps more.

Measure your bolt spacing for the mounting bolts, vertically, and match them up at the Fiat place or junkyard! Newer ones have a much different dimension (larger) vertically, and a white-ish plastic striker piece vs plain steel.

The chrome door closing guide and rubber positioning piece towards the bottom of the door are standard Fiat parts if you are ever looking for good used or new parts!

Attachments

Images (1)
  • DSCN2691_(Medium)
Lee,

Since these window regulator drive pieces are Ducellier, a French manufacturer.....can we presume that somewhere out there are more parts for these cars????

I think some Maseratis possibly got the emergency crank up/down mechanisms for when the rubber coupler broke down..... (Thing behind the black plug in your door panel! Allows you to turn your window up and down, (although rather slowly) by pushing it in and cranking with a screwdriver etc.)

Something like this!

Just wondering if any Euro brethren may have seen something like this in a Peugeot sports sedan or so......

Cheers!
Steve

Attachments

Images (1)
  • dce2_12
Steve, great find with the rollers etc. Just a note of warning re the sound deadening insulation used originally in the Mangusta as I think it may contain some asbestos. Looking at the stuff we removed from 1302 it does have that particular "asbestos" look. In particular we wet the product before touching it and were very careful to keep disturbance to a minimum. Mike

Mike, sounds like progress, glad you revived this old thread, lots of good info here! I assume you removed the cat whiskers already....if not, iirc, at least the outer one will get in the way.  If the whiskers are removed, I imagine there COULD be some contact between one of the window frame channels and the head of a screws that secures that exterior sill trim...there are several screws and they all stick up a bit.  It probably depends on where the screws are located exactly, and by how much they're protruding.  By the looks of the holes on my trim, DeTomaso/Ghia didn't use any drill templates to make it a consistent operation!  Good luck, I'll keep thinking, this is a best guess for now...

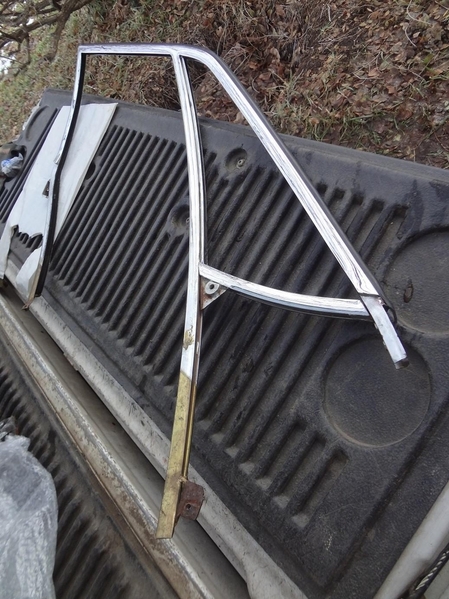
Should be held on by small flatheads that are totally buried in the base of the whisker - - definitely don't want them sticking up to where they could touch glass.  So one set of screws (4-5?) holds the whisker on.  A few more hidden underneath must be removed to take the sill trim off, including one located at the VERY front of trim piece.  I don't think you can get to that front one without taking the wing window out.  So it's a puzzle box for sure....

Add Reply

Post
×
×
×
×
Link copied to your clipboard.
×