Instead of a stud, how about a carriage bolt. They make them in Grade 8. I thought about this but I would still need the standoff from IPSCO. As you said, there's more than one way to skin a cat.
You can't really worry about how a mechanic down the road deals with it. That's being nice but if you try to improve everything to make it easier on the next guy, your car will be a forever project. You do it to make it easier on yourself or find out how others did it. We love to share here. It's a learning experience for all of us. If you're worried about dropping and loosing a nut or bolt, stick a shop rag under your work to catch it.
Re: Flushing Evaporator. I use two ~ 4ft long rubber hoses that I press on over the inlet and outlet of the evaporator. The length is so as that the opposite end of the hose extends out the the passenger door. I pour lacquer thinner in one end while having the other hose dumping into a pail. Using your air compressor, apply a small amount of pressure to the hose that you filled with some lacquer thinner and it will flow through the coils and evacuate quite nicely. I perform the task several times until the effluent is clear. It works very well and is very satisfying as you will see the initial dump to be quite discolored.
OK!
Since that rear evap connector is a real bugger to get at.....can I introduce the cleaner (bought a can of the "stuff"...) thru the hose back at the compressor and drain out the fitting with the expansion valve on it??? (into a bucket)
Along with that....is the expansion valve open at rest or closed (at room temp)????
Trying to cut down on wrenching in places that are not made for wrenches!
Steve
Steve,
We normally use an air pressure syphon can filled with solvent and reverse flush from the low pressure compressor hose all the way through the system and out the high pressure, so you should be good doing it any points between. And yes the less points you break the seal on the flare fittings the better.
You'll have to replace the dryer, but they are pretty inexpensive.
Julian,
THanks!!! Great info!
Have new drier...so all good!
Need to make one new hose from Comp back to Cond.
Not a big deal.
Cheers!
Steve
THanks!!! Great info!
Have new drier...so all good!
Need to make one new hose from Comp back to Cond.
Not a big deal.
Cheers!
Steve
OK, dug my welder out for some simultaneous metal melting projects...two of which are here!
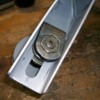
My self captivated nut solution for the idler pulley and stanchion. Now one wrench service from the front to loosen the stanchion.
One or two....for replacing the pulley....depending on how tight the stanchion is!
Second job...next post.
My self captivated nut solution for the idler pulley and stanchion. Now one wrench service from the front to loosen the stanchion.
One or two....for replacing the pulley....depending on how tight the stanchion is!
Second job...next post.
Attachments
I was told that this fix was in a POCA tech tip from way back! One wrench alternator bolt!
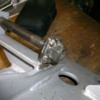
Welded on a "flanged lock nut" to the rear of the alternator pivot bracket. Pardon my globby welding.....all three projects netted perhaps at most, 1.5 linear inches of welding.....barely got warmed up....after being VERY rusty...!
Now to add a little bit of paint and job is done. Onwards!!!
Steve
Welded on a "flanged lock nut" to the rear of the alternator pivot bracket. Pardon my globby welding.....all three projects netted perhaps at most, 1.5 linear inches of welding.....barely got warmed up....after being VERY rusty...!
Now to add a little bit of paint and job is done. Onwards!!!
Steve
Attachments
One more project also underway...coolant pipes, or modification of same "to fit" properly.
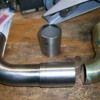
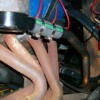
"S" tube from under car pipe to water pump has me miffed.....SO, I cut it in half and took it and some scrap thick wall stainless pipe down to TechShop in SJ where I used their lathe to take about .010" out of the ID of the thick wall pipe.
In this first trial, I have extended the length of the pipe by 1.5". A pipe from another vendor was about 1.375" longer and appears to work better, but I can go short easy....longer is messier!
Once I get the length dialed in, to keep the pipe off of the parking brake linkage and the connections to pump inlet and tubing outlet as straight as possible, then I will take this out to have it TIG'd back together. My TIG skills stink....or are basically non-existant at this time..... Not enuf time behind the wand!
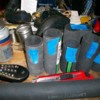
(Ignore piece on RH side in pic...that is a scrap piece that sorta looks like what is still sticking in a hose at the water pump....too lazy to pull it out! Piece in the top middle is a "spare"....which I can modify to play with length)
I also had one of my 180 degree Robert Shaw thermostats modified by Marlin, and it looks fantastic! Much better than stock. Great job!
Someone mentioned that I could get all wrapped up in making the car better for the next guy.....I'm concerned that the next guy may be me!!!!

 BTDT!!!!
Steve
"S" tube from under car pipe to water pump has me miffed.....SO, I cut it in half and took it and some scrap thick wall stainless pipe down to TechShop in SJ where I used their lathe to take about .010" out of the ID of the thick wall pipe.
In this first trial, I have extended the length of the pipe by 1.5". A pipe from another vendor was about 1.375" longer and appears to work better, but I can go short easy....longer is messier!
Once I get the length dialed in, to keep the pipe off of the parking brake linkage and the connections to pump inlet and tubing outlet as straight as possible, then I will take this out to have it TIG'd back together. My TIG skills stink....or are basically non-existant at this time..... Not enuf time behind the wand!
(Ignore piece on RH side in pic...that is a scrap piece that sorta looks like what is still sticking in a hose at the water pump....too lazy to pull it out! Piece in the top middle is a "spare"....which I can modify to play with length)
I also had one of my 180 degree Robert Shaw thermostats modified by Marlin, and it looks fantastic! Much better than stock. Great job!
Someone mentioned that I could get all wrapped up in making the car better for the next guy.....I'm concerned that the next guy may be me!!!!
Steve
Attachments
Good day in the garage!
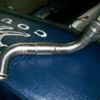
Got my three part tube TIG'd up down the street and it's going to work very nicely!
Re-mounted radiator....paused....removed fans and swapped them L to R where they should have been.....duh! Makes wiring work more neatly!
Started test fitting tubes and hose junctions!!! I can see light at the end of this tunnel....no...wait....just my drop light shining in between suspension parts....!
I hope to get down to having 3-4-or 5-6" long junction pieces. Can't double clamp many of them due to close radius's....so will make sure that I have at least 1" of hose past the hose retainer bump and one good clamp.
Found one original piece of Green Stripe that was starting to crack. I guess to be about 7-10 years old! If I can document all of the junction lengths, in 10 years or so, I will gladly replace them at that time...providing I have a danged lift by then!!!! Garage floor is good for back support, but killer on the abs!!!
Attachments
Progress!
Installed the above pipe, and all the rest of the "coupler" hoses and pipes that I could. Still waiting for a different T-stat pipe...should be here tonite.....
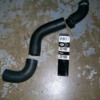
Bought a new hose to cut a piece from to connect my lower hose to the lower pressure tank fitting. Picture shows cut up....used the middle section.
Attachments
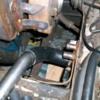
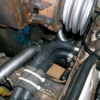
Upper end of the pressure tank lower pipe.
Note: I had to flip the two hose clamps around so that the nuts faced downwards on the outside of the hose, so that I could access it while the overflow tank is installed!!! Found this out when I installed the overflow tank!
Note: I had to flip the two hose clamps around so that the nuts faced downwards on the outside of the hose, so that I could access it while the overflow tank is installed!!! Found this out when I installed the overflow tank!
Attachments
Next was the heater hoses! These were the previously mentioned Dayco hoses with pre-formed 90's on the ends! Made it MUCH easier to deal with. Trying to get straight hoses on there would have been near impossible to get the bends to fit without collapsing.
NB: Order more hoses before Dayco discontinues the buggers!
The reinforced area with the two tie wraps and the layer of (1-3/8"!!!) hose is to protect the underside of the heater hoses from the frame seam which is "sorta" beat down and smoothed....at the factory..... This is to reassure myself that I won't need one of the new hoses I order any time soon!!!
Attachments
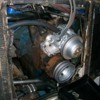
Once I had the hoses in at the under floor pipes, I had to test fit the main compressor/alternator bracket and clearance.
I pushed the heater hoses back out of the way, ran them up and around the opening, reststrained them very lightly to the coil etc bracket and ran them to the block and the water pump.
Mounted up the pulleys (finally!).....
I pushed the heater hoses back out of the way, ran them up and around the opening, reststrained them very lightly to the coil etc bracket and ran them to the block and the water pump.
Mounted up the pulleys (finally!).....
Attachments
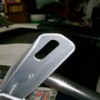
When test fitting the alternator bracket, I decided to modify the lower mount for the idler pulley a little bit. The lower edge was pushing on the heater hose closest to the firewall, so I marked and cut the thing off...cleaned up edges and painted.
Now there is about 1/8" before the hoses touch! No appreciable decrease in bracket capabilities!
Steve
Now there is about 1/8" before the hoses touch! No appreciable decrease in bracket capabilities!
Steve
Attachments
To come.....mounting the AC pump....and first blood!!!
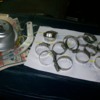
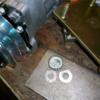
Update: Picture shows washers that I made to take up space on pump ears to the adapting bracket. Had about .018" of clearance and I wasn't sure that I wanted to distort the mounting ears that much....so made up these washers out of some beer caps I found! .012" thick.....so only .006" to "squish" things!!!
Caution....when playing with very thin sheet metal pieces that you just cut out....mind your fingers!
Then the AC belt was still too big.....UGH! Using IPSCO adapter. New one should show up today! (11/10) Ordered belt size 11AV865....not many that are smaller!!
Steve
Attachments
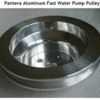
At this point Steve, I highly recommend adding one of SACC's fast water pump pulleys.........
http://www.saccrestorations.ne...t-water-pump-pulley/
http://www.saccrestorations.ne...t-water-pump-pulley/
Attachments
quote:Originally posted by Mangusta:
90 degree end (lower) of the pressure tank bottom pipe.
This is where the 90 degree pipe is supposed to be fitted. Did you use it somewhere else?
Add Reply
Sign In To Reply


