Steve,
Did you install heater shut off valves in the engine compartment? If so then you don't need to drain the whole system. Just close the valves and disconnect hoses from heater side and drain. Good luck, been there, done that.
What are you using as a replacement evap/heater core? I have installed units from three different vendors and had to modify the cutouts in the box as the tube locations did not line up. Don't try to bend the tubes to fit the box or you will be right back where you started.
All the vendor supplied coils I have installed have been built to use the H block style expansion valve as opposed to the angled valve. I do not know if they offer the original style connections. The block style uses different hose connections also.
I would also suggest upgrading the squirrel cage fans to a higher capacity as the stock unit does not move a lot of air. I got mine from Hall years ago, don't know if they still have them or not.
Forest
If by the "foam seal kit" you mean the two 4" square foam rings that go between the backside of the dash and the heater box outlets to seal hot or cold air coming out, I made mine from 1" thick foam. There are lots of places that sell foam sheets; get foam that is rot-resistant or you may be doing this again, when you're even less flexible than you are now! Cut foam more-or-less to size with scissors &/or an electric turkey-trimmer knife. Try not to be too critical of the outrageously poor fit between the heater box outlets & the dash face holes; misalignments of around 1" are common but not easily corrected.
You're right- the '71-'72 dash & console is quite different than the later ones; your '74 has a fresh air valve, a flexible supply hose & valving that's missing on earlier cars. That's all the stuff behind the glove box; early-car owners have nothing behind the glove box but also no fresh air source, except for VERY early cars that DID have a different type of fresh air source. Welcome to Italian Engineering!
The late steel heater core/evaporator box is also very different, as are the two paper defroster flex hoses. Maybe you should document the differences w/photos & send it to me as a Tech Newsletter article, as a public service?
The only problem I had on early dash R & Rs was inserting the two illuminated rocker switches; the switches go in from the front but the bulb & socket clips-on the switch body and will not fit thru the dash hole. So they must be clipped on after the switch is in place. Which even for long arms & fingers, is near-impossible, at least the first time around (maybe the 4th, too).
Interesting note: the washer switch is powered from the wiper switch via a spade-lug & a short wire. There are three choices of lug on the wiper switch to choose from and two will not work correctly. This is not shown on the schematic. Good luck.
OK, today was "look! Shiny rock!!" day in the garage.... Was supposed to be getting the AC box out of the car...but got side tracked on the lighter revamp (see other post), and a problem that I mentioned in my very first post on this thread!
The Emergency Flasher Switch....it puked it's function on the first day I parked it in the driveway.
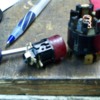
Well, being the ever so "how does it work" kinda guy.....and thinking "well, you can't dork it up much worse than it already is, I took the switch apart! With a couple of small screwdrivers, I was able to eventually get the 6 small tabs finagled (that's a word?) out of the slots they were stuck in....and the thing popped apart! Pretty simple device. One moving part and one stationary...and one piece to hold the two pieces together....oh, and a spring!
The stationary piece has a metal arm with a pin in it. The pin is supposed to ride in the recess of the plastic casting which is on the push button section of this thing. It is one of those maze type deals where when you push the button in, the pin is supposed to catch and hold the button section from popping out. Push the button again, and the pin is guided to another path in the casting and then allows the button to pop out. Push and repeat......in, out, in, way out....
I'd always heard about this little "pathway" in the button section getting mucked up and damaged. Well, mine was not damaged! There appeared to be just enuf play in the arm with the pin....to allow the pin to jump out of the groove it was supposed to stay in!
I put a little bend in the metal arm, to force the pin further in towards the center of the assembly. Gotta be careful as I think this is a cast piece of metal....has that look about it...and it won't take much...but apparently a little is OK!
Check out picture....sorry for the blurry.... fought with my auto focus and this was best I could get of this channel for the pin to ride in.
Steve
Attachments
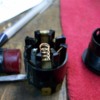
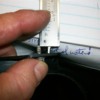
Here is a shot of the metal piece with the pin in it that I bent ever so slightly. You can see the spring also.
Snapped it all back together, put the wires back in place, plugged it in to the dash wiring harness pushed button to release it...and voila!!! Blinking lights!!!!
One good thing out of this (I keep saying this with this car....!!!!) is that the yellow wire spade connection, which is apparently the main power in or out or something important, was found off of the spade connection once I got the dash out! Very loose when I plugged it on! I tried to pinch the curled section of the female clip to be more tight on the male spade...and promptly broke both of the crimps off! No pliers required! Broke them by finger power! Needless to say, it would seem that this connector had some heat on it to cause this metal to crystallize!
I put another connector on the wire....and we're all set!
HERE IS ONE THING I LEARNED while working on this dash about this switch. OK two things...four things....
1) This switch is the one with the resistor on the back! If anyone is looking to buy one....
2) This switch will NOT come out of the dash without pulling all of the wire connections off. Or at least half of them. The wires are about 6 inches long, and terminate in a HUGE red connector. Even IF you could get the front portion of the switch and wires out of the dash, this large red connector is NOT coming out. Forgettabout it!!!
This of course means that you have been able to get your hand up in the dash to get the large plastic retaining nut loose....
To me, there is no physical way possible to put this switch back in the dash, without removing the dash!
To pull the switch, you loosen the nut. The nut is too small to fit over the spade connectors around the perimeter of the back of the switch. So you muscle it out...knocking off all of the wire connections, which is gonna be TOUGH cuz there are 7 wires +1 wire in the middle, that are really really tight connections!
When the switch finally comes thru the hole, the plastic nut and the thin lock washer of sorts, fall down the rear of the dash most likely if you are fortunate, and all of the 8 wires scatter....and retreat into the dash.
That was the easy part!
Now how to get it all back in place?! Put the new or repaired switch into the hole, round up the thin washer and the plastic nut, and work to get them back up inside the dash and onto the rear of the switch. Watch out for cramps in your fingers and forearm, lower back, neck... from being in very odd contortions to get at the rear of the switch.
Now once the switch is tight, you can begin to guess which of 8 wires you are holding in your fingers and which connector you are putting it back on! Seriously! You cannot physically see the wires any longer, nor can you see where you are putting them.
I guess if you have removed your steering column, you might be able to see.....but I doubt it......
So, now is when you go grab the .38 revolver and unload it into the driver's floor pan!!!!!!
Once you calm yourself with 3 or 4 beers and a half a pack of cigarettes, begin procedure to remove the dash pad/top..........32 fasteners later.....ba dump bump!!!!
3) the red lens does NOT come off of this particular push button to allow changing the bulb. When it burns out, replace the switch.
4) the front bezel of this switch does NOT unscrew to allow you to drop the switch out the back and down and out.......ever.
I am not sure where I read about #3 and #4, but certainly it was copied from another car shop manual and used for filler in the Pantera manual.....!!!!! OK, it was perhaps true for the EARLY cars....but I have no idea when this new style switch (with the resistor on the rear) was implemented....nor do I know if there were multiple versions of early switches.....
I do think these later switches ended up in BMW's of some sort...... There is an SAE 72 number on the bezel indicating part was intended/designed/approved for 1972 vehicles of some sort....
SOOOOO while I had the dash out.....I put my newly repaired switch back in the hole, tightened the big plastic nut, verified that the switch was oriented properly and not at an annoying angle, and then plugged all the wires back onto the rear of the switch. Wow, that was easy!!!!
Where was I......oh, yah....evaporator housing...... Started draining the freshly installed antifreeze mixture out of the system so that I can disconnect the heater lines without dumping 2 gallons of coolant all over the carpet! I'm not a hose squeezer......sounds like a good way to damage new hoses.....but I know it can be done with the right tools.
Onwards!
Steve
Attachments
The 1970's BMW 2002 uses the same switch as the our cars
SAE QC 72 DKS (late) PN 61 31 1 356 193 - 8 pin with resistor.
The model I was looking at ar a local Cars and Coffee had one hanging out as he had the center console out. I found out BMW uses a cylinder plug on the wire harness to connect the switch. I have yet to find a source for the plug though. Check out the picture. It would have made servicing the switch on our cars a lot simpler. You still would have to reach behind the dash to loosen/remove the nut so you can pull the switch out though.
Attachments
Those e-switches are used by a whole bunch of European cars- I once wrote an article around adapting a visually identical one salvaged from a '72 Alfa. Then one of the vendors called to mention that he had brand new repros on the shelf for less than $50.... Not all the used ones found in wrecking yards have the same wire orientation, either. You'll have to check continuity on each of the 8 lugs to find out where your wires should connect.
And as for disassembling, there are two different switches used as OEM on Panteras, and far from being 'early' or 'late', they seem to have been used by batch. The plastic body swells over the decades from internal spring pressure, which allows the spring-arm-with-pin to pop out of the cam-groove in the inner body. Besides the one shown in Steve's post, there's a second that's held together by a small flat steel frame with only 3 tabs to bend. Possibly easiest fix is removing the switch, squeezing the body and trying the switch to see if the pin is in the groove, then wrapping the body with a small worm-drive hose clamp- not too tight or you seize the switch action.
Not fixing it and jamming the button in with a toothpick redneck-style also works, with a caution: pushing the button in too far disconnects the tail lights & stoplights on your car. Not to worry: there are plenty of police who will point this out to you, along with a fix-it-ticket...
quote:Not fixing it and jamming the button in with a toothpick redneck-style also works, with a caution: pushing the button in too far disconnects the tail lights & stoplights on your car.
Not true!!!! The only exterior lights that are effected by a faulty hazard warning switch are the turn signals. The tail lights and the brake lights are completely independent of the hazard warning switch.
John
THREE NUTS!!!!
FINALLY! NO shiny nut stuff going on today!
The AC box is out and on the work bench!
Contrary to all doc's on the subject of removing this assembly, there may have been 4 nuts involved in the design of this affair....but there are only THREE nuts holding it in the car!!!
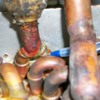
I am SO glad I used a tiny amount of silicon grease on those heater hose fittings on the heater core.....I was able to pop the hoses loose and get them off fairly easily.
Labeled middle control cable and made a diagram of fan switch wiring for reassembly. Covered ends of AC hoses with plastic bags and taped securely. Laid a towel over the lower console flare piece and carefully pulled the unit out!
New parts on order...... time to clean up stuff and wait!
Ciao!
Steve
Update!
New evap core is finally in place in the tin, and in the car! Working to get external AC connections made!
All I can say about this job is that nothing fits like it did before. Nothing. Hoses that I cut for the heater section now are 1/4-3/8" too short. AC hoses don't fit quite right. I did have to bend the new evap connections just a tad to get clearance of the fresh air section of the late style box! No way around it. It was either bend the tube or no fresh air control!
The one thing that did still fit is the condensate drain hose.
It should be noted that the later style air box, has a one piece bottom section, no seams, with a half to 3/4" of depth to collect water in! One fellow member was relaying stories of his wife's feet getting wet every time he turned a corner...... I am presuming that the early boxes may have a seam that leaks at low levels of water??????
While the new evap core fit in the box physically, the dimensions of the mounting brackets (end brackets) changed slightly more narrow, and the core itself moved to the rear of the box by 1/8-1/4"! This makes putting those pointy little screws back in place a risky task!!! No less than 8 screws needed to be "de-pointed" and made smooth. I also installed washers to take up a little more space! The new core is aluminum, so won't take much to drill into it!!!!!!!
I had to relocate one of the two mounting screws for the core, and make a new hole for the tube that the temp sensor probe fits into. The stock hole didn't align with the new core at all. Had to drill both the case and the core end to accommodate the brass tube insertion to the area where the two rows of fins meet.....anywhere else, you'd be buying a new core once again!!!!
I'll throw up a couple of pictures....of the work.....
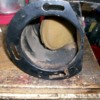
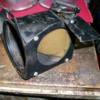
First, what got me into all of this mess! The crack...or cracks!!! Both sides of the "Y" look cracked.....
Ciao!
Steve
Attachments
IF I had known that this fresh air inlet/flapper piece on the RH side of the fan assy was supposed to, or actually DID come off.....I perhaps might maybe possibly wouldn't have cracked the fitting. Never know now....
BUT THIS PIECE COMES OFF!!!!! On mine, I found one teeeny tiny Phillips screw that was locking the unit in place. After that, there are three Phillips head screws that you just need to loosen a turn or so. Then the unit rotates CCW about a half inch or so and it drops off! So simple......no one mentions it....because no one has written the procedure to pull this type of evap case out of their car yet!
S
Attachments
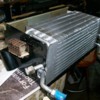
New evap/heater core unit in box first time....
That coil in the perforated little cage is the resistor that steps down your voltage to the fan motor when you select "LOW" on your fan switch.
New 3 speed replacement fan motor configurations will do away with this part. Not needed.
S
That coil in the perforated little cage is the resistor that steps down your voltage to the fan motor when you select "LOW" on your fan switch.
New 3 speed replacement fan motor configurations will do away with this part. Not needed.
S
Attachments
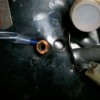
Had to relocate this hole to new spot! This is copper tube end...which the temp probe is inserted into. Tube is about 3-4" long. Carefully used a screwdriver inserted into this hole to "part" the fins to allow this piece and the probe to go in.....
Such trickery!
Such trickery!
Attachments
Lots going on this side!
Clearance for large AC hose was a bugger once you moved the tube to clear the fresh air inlet piece. Expansion valve will go back on... Temp probe will go in hole...wiring for switch...wiring for control switch..... Other side (heater) is much less going on...
Enuf for now! Work will progress more today!
Steve
Attachments
OK, that hurt!!! Had to take a couple of days off to let my lower back settle down!!!! Finally back in action today......
Filled cooling system up with water....tomorrow will fire car up and pressurize cooling system to check for leaks at shut off valve.
If that goes good, then can work on filling AC system!
IF that all goes good, then can work on putting the danged dash back in!!! ...and the console....and the seats....and the engine cover and all that...!!! WOW! I may find a car under all of that stuff!
Cleaned my fuses today..... was getting some erratic operation of headlamps and other such stuff....some was due to unplugged connector for turn signal switch! (headlamps popped up when I connected battery and turned on ignition key......WAIT! I never touched the headlamp switch!!!! Surprise!)
Once I figured out that the connector was yet undone....resolved that and normal operation continued....except hi beams were very dim...and one low beam was off....then on...? (What?)
Looked at fuses and some were a bit fuzzy. Cleaned everything up with brass brush. Now I get nice bright lights, strong horn...OK, medium horn....meep meep.... and MY HEATER FAN WORKS!!!!
BUT Lo position is not a positive experience each time. You have to futz with the rocker switch to get things working and then it may stay on or not. High position works fine.
OK TWO QUESTIONS related to all of this......
1) Has anyone ever rebuilt a FAN rocker switch? or at least taken it apart in a non-destructive manner? How'd ya do it?
2) Where is the horn relay? I think there is one mentioned.......in the schematics..... 74 car. Reason I ask is that I want to put a set of late model Crown Vic FIAM horns up front. Meep meeep doesn't get it around here in traffic! You need the "WHAT IN THE HELL ARE YOU THINKING!!!!!????" sort of report from your horns! Plus I think only one is working....! I think the horns would need to operate off of a relay....
The air horns in the Mangusta were fantastic (once properly lubed)!!! I thought Panteras got them also...perhaps that was only early cars??
No smoke from anything today......life is good!
Ciao!
Steve
2) Where is the horn relay? I think there is one mentioned.......in the schematics..... 74 car. Reason I ask is that I want to put a set of late model Crown Vic FIAM horns up front. Meep meeep doesn't get it around here in traffic! You need the "WHAT IN THE HELL ARE YOU THINKING!!!!!????" sort of report from your horns! Plus I think only one is working....! I think the horns would need to operate off of a relay....
The air horns in the Mangusta were fantastic (once properly lubed)!!! I thought Panteras got them also...perhaps that was only early cars??
No smoke from anything today......life is good!
Ciao!
Steve[/QUOTE]
From what I know all Pantera's have original airhorns, also the later build , GT5,GT5-S and Si .
Simon
quote:Where is the horn relay?
Steve,
The horn relay is located behind the door (door #1 !!!) on driver's side kick panel (fender well). Horns are mechanical, not air.
John
OK, good! Relay: yes. Air horns: maybe.....probably not.
Seems to me that after I discovered my barely working air horns in the Goose front wheel well, that other Pantera owners piped up that they also had them....
We determined that almost the exact same air horns are still being sold by local AP stores as well as online!
Not sure which way I will go yet.......too early to make decisions so crucial...
I do need to venture out and see if I can dig up a "thumb nut" for the back of one of my large gauges. Car came to me with only three instead of 4. Something else....but cannot recall what was on the "list" to take to the electronics junk store! Excuse me, recycling store.....!
Thanks!!!
Steve
quote:1) Has anyone ever rebuilt a FAN rocker switch? or at least taken it apart in a non-destructive manner? How'd ya do it?
Here you go! John Taphorn can chime in with more details if necessary.
http://www.spacecitypanteras.c...nfo/switch%20repair/
Add Reply
Sign In To Reply


