Hi,
The problem started with my headlamp beams too high to pass technical control. Looking closely, my Longchamp has 2 types of headlamps : LH side has a R2 lamp type and RH side a H4 type. It's like the car has been repaired in the past with uncorrect part. The body has no shade of repair, so may be just one headlamp was broken and replaced
I managed to get a pair of H4 headlamps on ebay.de from a Granada Mark 1 (I checked prior that they definitely come from a MK1 or Consul of these years, the Mark 2 doesn't work , size is slightly different and rear case is different).
I have a doubt now on what are the RH and LH parts. References I can read on glasses are :
Installed on my car,
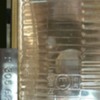
RH (H4lamp ) : BOSCH H4 - Halogen 61 R20 , small No on lower RH corner : 1 305 620 182
LH (R2 lamp) : BOSCH E1 - 14518 R1 , small No on lower RH corner : 2 305 620 001
Now the parts I got , both H4 lamps: BOSCH H4 - Halogen
one is 61R20, small No on lower RH corner : 1 305 620 182
the other is 60 R20 , small No on lower RH corner : 1 305 620 181
There is also a yellow sticker on rear case. One I can read is 0301 014 110 - 75 GG 13005 CA. The other is worn , I cannot read properly
Those figures are for LH drive car, I guess they may be different for RH drive.
Anyone can tell me the readings on his headlamps?
Original Post


