Rob,
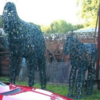
What is the story with the horseshoe sculptures? I love found-object welded works.
Larry
OzGT5 (Guest)
I searched Oz for a decent Testa and couldnt find one so I went to UK and bought it. That sculpture is in a small town called Heydon in Norfolk. Apparently after the Crusades, my family owned a castle near there and this village supported the castle.
Those sculptures are outside the local blacksmith shop in the village. Look great don't they?
Those sculptures are outside the local blacksmith shop in the village. Look great don't they?
OzGT5 (Guest)
Did you look thru the technical pages Larry.
There's a bit of info there on how to fix these Italian beasts as well.
They are prone to all sorts of issues, but it's been fun learning how to fix them.
And now I start all over again with the elder cousin!! Glutten for punishment I think.
There's a bit of info there on how to fix these Italian beasts as well.
They are prone to all sorts of issues, but it's been fun learning how to fix them.
And now I start all over again with the elder cousin!! Glutten for punishment I think.
OzGT5 (Guest)
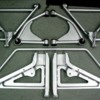
Here's my renovated suspension components all ready to go back together.
Attachments
OzGT5 (Guest)
And a couple of issues I discovered along the way.
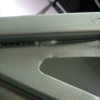
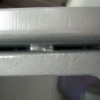
The lower front control arm has been pressed and assembled from two components. It's then been welded together but the seams between the pressing can catch and hold a lot of road debris, which stays wet and can cause cancer in these areas.
If you ever strip these down, pay particular attention to these areas. Get them really clean, sandblast, scratch, do whatever, but get the crud out of these seams. Then treat them with a rust converter product like ferrite tannate solution before you paint them.
I'm actually going to use a grey coloured mastic filler over the paint and carefully apply it OVER these gaps to stop the crap getting in there in the future.
Attachments
OzGT5 (Guest)
I scratched it out as best as I could, even getting a box cutter blade down in there. Then I heated them in the oven for an hour to ensure that any residual moisture had been dried up.
Once that was done, I treated all of these seam gaps with the rust converter.
Once that was done, I treated all of these seam gaps with the rust converter.
Attachments
OzGT5 (Guest)
Another spot is under the edges where the ball join mounts.
Attachments
OzGT5 (Guest)
And into this gap also:
Attachments
OzGT5 (Guest)
Yes John, you can see them in the first image above where I have all the bits laid out on the ground.
They don't show in that pic as they are on the underside of the a-arms. I was just curious if you had them.
I see that you have a nice ding in the rear lower a-arm. I have a similar one on one of mine. It was probably from some tire jockey in the early days.
I also went through the same scraping and cleaning on my front lower a-arms. That area trapped a lot of dirt and gravel.
John
I see that you have a nice ding in the rear lower a-arm. I have a similar one on one of mine. It was probably from some tire jockey in the early days.
I also went through the same scraping and cleaning on my front lower a-arms. That area trapped a lot of dirt and gravel.
John
OzGT5 (Guest)
Sorry John, you were refering to the brace not just the mount.
Yes, mine have the brace exactly as you have pictured, and damn hard to clean and paint behind it I found.
Yes, mine have the brace exactly as you have pictured, and damn hard to clean and paint behind it I found.
OzGT5 (Guest)
I wrote to Precision Performance yesterday and had a reply straight back from Bob.
Most interesting, quoted below for the information of anyone looking for axles.
"We have been doing this since 1977. These other people keep trying to change whet has always worked. The axels we make press into your bearings like they are suppose to. They never did from the Factory or from all the others made. I guess they never figured it out.
So here you go 1.575 +.0008-0 That means 2000 press on to the bearing, any more and its to big to press apart later.
If you get this kind from any one else you still get them from me as I'm the manufacturer of almost all parts made.
Pantera by Wilkinson has them made in China and they are too small and spin."
Looking at their website, (http://precisionproformance.com/sc2014.htm) they say that the axles are 4340 billet steel, and can be supplied as stand alone axles @$375 USD per axle or complete kits with bearings, spacer and nuts @ $475 USD per axle.
Has anybody here used or have experience with the precision performance axles. All the answers appear to be right, but I'd like some feedback before I drop $1100 Ozzies in the hole!
I have used them on customer's cars. They are very nice.
Ron
Ron
OzGT5 (Guest)
I had a reply from Steve Wilkinson today. As you guys said, he was in Italy at the factory.
"LET TALK ABOUT YOUR AXLE PROBLEM! FIRST OFF LET ME STRAIGHTEN THINGS OUT ON DETOMASO MAKING THE AXLES THE WRONG SIZE. ALL THE AXLES THAT CAME IN THE PANTERA WERE THE RIGHT SIZE. FORD MADE A RUN OF AXLES IN 1972 THAT WERE UNDER SIZE BY .002. THEY WERE STILL OK TO RUN BUT YOU HAD TO INCREASE TORQUE ON THE NUT TO 420 LBS. WE STILL USE THE TORQUE OF 420 LBS ON THE NEW AXLES TODAY. YES, YOU SHOULD USE NEW AXLES THE DOUBLE BEARING AND A SHORT SPACER. THERE IS NO MOD. THAT HAS TO BE DONE TO INSTALL THE DOUBLE BEARING."
So still no confirmation of the finished sizing of a Wilkinson axle but I've replied and asked again as the last thing I want to do is have a set of axles sent to the other side of the World only to find that they are either undersized to fit the bearing correctly, or worse, have some taper to them.
This research takes such a long time. Poor old car is missing out on a run of Autumn 27 - 30 degree glorious days. Bugger!
Still haven't recieved my front upper control arms from Johnny Wood either. He posted them ages ago, bloody volcanoes!
OzGT5 (Guest)
My Percision Proformance axles arrived today. They look pretty darn nice. Looks like the rebuild can commence now. My repaired shcokers also arrived back from Aldans.
What a great bunch of guys. They found that two shockers had issues which thye felt related to manufacturing, so they replaced them. The other two had worn (actually bent) shafts in them so they fully rebuilt them with all new parts internally, charged me $100 and sent them back again. Fantastic service and highly recomended.
Question: What would cause three shocker shafts to become bent?
quote:What would cause three shocker shafts to become bent?
Hard contact with curbs, trees, rocks.....???
Or terrible manufacturer quality control?
Larry
What about using tired or too weak rated springs so they are allowed to bottom out?
What spring rates are you using?
Aldan's are 'Hot Rod' shocks and IMO not really meant for anything much more than your local cruise in.
Julian
What spring rates are you using?
Aldan's are 'Hot Rod' shocks and IMO not really meant for anything much more than your local cruise in.
Julian
OzGT5 (Guest)
I rolled the old shocker shafts on a laminated board and the bend is just discernable.
The car originally had 350 / 550 springs when the shockers were fitted, but were changed in 2007 to 400 / 650 springs. Maybe the original springs bottomed out sometime?
Aldan have set up the replacement/rebuilt shcoks to an 'S' sprecification. This is a road/rally spec with much firmer valving than previously.
Hopefully these will be better and I might gain a better opinion than Julian's. I'll let you all know.
OzGT5 (Guest)
Hi guys, I've put the front end back together with Johnny's arms and it all looks great.
Went to make a start on the rear end tonight and noticed the MIN THICK 17.5 on the rear rotors.
Mine appear to be in nice conditon, virtually no scoring at all, and measure up to 17.82mm.
Can anybody tell me what the thickness is for a new set of rear rotors? This axle replacement is quite a big job, and I don't want to have to do it again if I find out that I'm really close to min thickness on the rotors with barely one skim left in them.
My fronts measure up 20.38mm but I can
t see any MIN THICK writing on the fronts so I'm not sure what's good and what's bad for the front.
So I've put the rear on hold until I sort out the thickness issue. Besides, it's too cold in the shed these last few nights anyway.
Stock rear rotors are a 0.81" rotor thus implying they would be 20.6mm new.
It sounds like yours have been resurfaced at some point.
Julian
It sounds like yours have been resurfaced at some point.
Julian
OzGT5 (Guest)
Wow, maybe even a couple of times Julian. Looks like I better find some new ones.
Any idea about the front?
Any idea about the front?
quote:Any idea about the front?
My stock DT fronts say minimum of 19mm.
Larry
OzGT5 (Guest)
Thanks Larry. Mine are vented at the front, but even so, when down to 20.38, seems like both ends are well down.
Now the fun begins, to see if I can find rotors in Oz.
Now the fun begins, to see if I can find rotors in Oz.
OzGT5 (Guest)
Just going through the workshp manual, which is all in imperial for some reason, and there are a number of sums written there for New and Refinished sizes.
Front - new 51/64" refinished 43/64"
Rear - new 47/64" refinished 39/64"
Hard for me to understand this so using the old grey matter calculator i thought I'd run a mathmatecal equasion over this to convert back to metric.
As an inch = 25.4mm I did the following:
25.4 divided by 64 multiplied by 51 gave me 20.24mm
Similar calculations gave me the following:
Front new 20.24mm refurbished 17.06mm
Rear new 18.65mm refurbished 15.48mm
Now someone please check the figures because this doesn't make much sense.
The rear solid rotors on my car certainly say Min thickness 17.5mm yet here's the factory manual telling me that 15.48 is the min.
Interesting also to see that Larry runs a stock DT fonts that say 19mm on them and here's the manual saying 17.06 min on the front.
Nothing is ever easy is it?
I'm trying to sort this out for two reasons.
1. The rear axle job is so intensive, I don't want to do it again in a year because my rotrs are down.
2. Rotors and pads are common wear items that must be available down here. They are probably shared with some other car and available from EBC dealer locally. I just need to go to EBC with the right dimensions and have them match up a set of rotors for me.
quote:see if I can find rotors in Oz.
I replaced all four rotors last winter. The 65-66 mustang rotors are a perfect .81 thickness but vented match except for slight diameter differences.
Go here for a starting point:
http://www.poca.com/index.php/...ery/?g2_itemId=20370
Larry
OzGT5 (Guest)
That's great Larry. Vented rears as well. Excellent.
The 121.61053 says that it is a C-Tek standard rotor.
The 120.61053 says that it is a Premium Rotor - Preferred. I take it that they are better in some way?
You used a front Mustang rotor on the rear and found it to work just fine?
So both numbers are from the FRONT of a Mustang?
Measuring my rotors, the height of the hat from face of disc to mounting surface on the front are 36mm yet the rears are 40mm. This 4mm variation seems a lot and I would have thought that it pushed the centre line of the rotor back 4mm in towards the centre of the car?
Your Mustang rotors (as above) show a height of 58.6mm and a Nom thickness of 21mm, therefore giving a 'hat' height of 37.6mm.
1.6mm higher than stock fronts and 2.4mm lower than stock rears.
quote:That's great Larry. Vented rears as well. Excellent.
Indeed
The 121.61053 says that it is a C-Tek standard rotor.
The 120.61053 says that it is a Premium Rotor - Preferred. I take it that they are better in some way?
.........As noted in the text, the company stated difference is said to be a better casting and a black paint 'e' coating. In my case, they both were the same higher grade casting, just one had the 'e' coating.
You used a front Mustang rotor on the rear and found it to work just fine?
.........Yes. Read the text with the photos closely. There is a diameter difference. It will result in some unswept pad on the rear. In practice, this is not really a problem. If it concerns you, take them to a machinist and have them turn them down to match the OEM diameter.
So both numbers are from the FRONT of a Mustang?
..........Yes, but again, read text closely. Due to continuing difference in suppliers, make SURE the #'s currently match to just the rotor, not the one-piece hub and rotor unit.
Measuring my rotors, the height of the hat from face of disc to mounting surface on the front are 36mm yet the rears are 40mm. This 4mm variation seems a lot and I would have thought that it pushed the centre line of the rotor back 4mm in towards the centre of the car?
.............I found the height of the new rotors to match the old rotors. They created no change in rotor position as far as centering in the calipers.
I was able to knock out the metric studs and drive them into the new rotors.
A very basic upgrade procedure with only minor issues.
Larry
Out of curiosity I went and looked at my old rotors (found them in a corner of the shed!) they indeed say min 19mm front and both were 19.8mm. The rears say min 17.5 and they were 17.8mm, so I guess they really can go out to trash next week.
When I upgraded rotors and brakes I used two piece rotors and hats and moved the hats outboard to make for easy disassembly next time.
Julian
When I upgraded rotors and brakes I used two piece rotors and hats and moved the hats outboard to make for easy disassembly next time.
Julian
OzGT5 (Guest)
Well what a day it was.
After measuring, procrastinating, and then measuring some more, I took off to visit head office of RDA which is Rotors and Drums Australia, our biggest supplier and also a subsiduary of EBC (UK and USA)
The only DeTomaso listings were for a 1990 Pantera with huge discs, or discs for a Longchamp!
So then I followed Larry's advise and asked about 65/66 Mustangs. Every early Mustang in the catalog were hub mount style rotors with the wheel bearings integral in the rotor, like on a trailer. There were no floating discs listed for any Mustangs.
The guy at RDA suggested that www.brakewarehouse.com are probably manufacturing a hub system to adapt to a floating style rotor. That's why theu offer the various styles of rotor to fit the Mustangs. Unfortunately, not having too many Mustangs, this isn't an option here.
Rotors are too damn heavy to ship so I'm going to have to continue the hunt down here for a suitable product.
So.......still at the drawing board!
I wouldn't use RDA, havent had a good pair of discs yet, they always seem to warp.
Try DBA better grade of iron.
Try DBA better grade of iron.
Julian can you post the part numbers on the rotors and hats you purchased and what supplier they are from? Thanks.
Robert,
I'm not surprised your Mustang search turned up one piece castings. They are the most common now.
BUT, the original Ford pieces were two piece units. Press out the studs, and presto, separate rotors.
So instead of new pieces, NOS pieces should also work. If you can find them....
Larry
I'm not surprised your Mustang search turned up one piece castings. They are the most common now.
BUT, the original Ford pieces were two piece units. Press out the studs, and presto, separate rotors.
So instead of new pieces, NOS pieces should also work. If you can find them....
Larry
OzGT5 (Guest)
Problem down here is that we didn't have a plethora of Mustangs. We have a few now that they are old enough to be eligible for import, but certainly nowhere likely to have new old stock, or actually any stock at all.
I'll have to see if any other blokes come through with details of their brakes, ie: rotor diameter and thickness and top hat thickness and if they changed calipers to suit.
Given some more info, I'm sure I can find something suitable down here. Given my wheel size I'd like to have larger brakes under her anyway. I already have one Italian that doesn't stop, so it would be good to be able to slow this one down in half the distance it takes to stop the Testarossa......or better!
OzGT5 (Guest)
Not being able to locate a suitable replacement rotor for the car, I've decided to put it back together with the current rotors. Then I can take some accurate measurements of the caliper centred position, with and without pads in place, and then I can ascertain exactly what will fit onto the car.
For those Aussies out there, keep an eye on this thread for locally available parts when I can locate suitable rotors.
For those Aussies out there, keep an eye on this thread for locally available parts when I can locate suitable rotors.
OzGT5 (Guest)
Work sucks! Keeps me away from the car.
Thanks to Australia still celebrating the Queens birthday, it's a long weekend here so we got a bit done on the car. Even the wife got into it, parked herself on the carpet in front of the pot belly stove and scraped 35 years of sludge from the half shafts and got them all ready to repaint.
Thanks to Australia still celebrating the Queens birthday, it's a long weekend here so we got a bit done on the car. Even the wife got into it, parked herself on the carpet in front of the pot belly stove and scraped 35 years of sludge from the half shafts and got them all ready to repaint.
Attachments
OzGT5 (Guest)
A few more pictures of the rest of the suspension nearly ready to go back into the rear, and the front finished tonight.
Attachments
OzGT5 (Guest)
Front
Attachments
OzGT5 (Guest)
More:
Attachments
OzGT5 (Guest)
And finally tonight I also had a chance to get the other muffler wired down and a coat of ceramic primer onto it.


