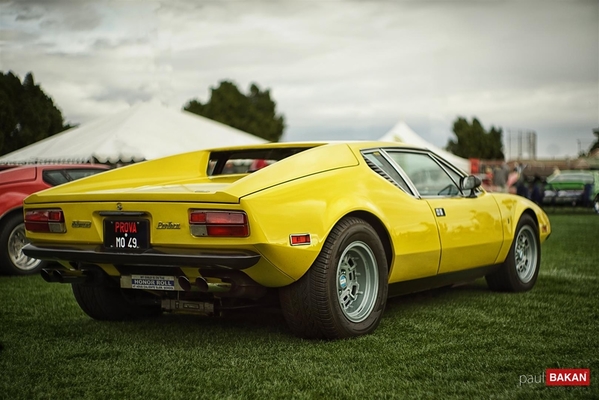
Shakedown cruise today - getting ready for a trip to Monterey.
Riding with the Cobras... unfortunately, the number of Panteras in Tucson is dwindling!
Should be a good trip up Mount Lemmon - I'll post up pictures.
I am very happy with my new motor from SRE Motorsports.... there are two more SRE Engines in the Cobras here....
Rocky
Here's the pictures - link to the "Events Photos" Forum...
Shakedown Cruise with the Cobras.
Attachments
quote:Originally posted by PanteraDoug:
Look at the headers from Pantera Pro-formance. They reduced the collector to 3" for clearance to get it through the suspension BUT it's a real collector and ANYTHING helps. The primaries on their GTS headers are also 2".
I dig up this subject.
You say the collector of Proformance headers is 3" but on their site they write 2 1/2" ??????
Beyond this question, do you think these headers are the best for a street engine of about 450 HP?
quote:Originally posted by René #4406:quote:Originally posted by PanteraDoug:
Look at the headers from Pantera Pro-formance. They reduced the collector to 3" for clearance to get it through the suspension BUT it's a real collector and ANYTHING helps. The primaries on their GTS headers are also 2".
I dig up this subject.
You say the collector of Proformance headers is 3" but on their site they write 2 1/2" ??????
Beyond this question, do you think these headers are the best for a street engine of about 450 HP?
I would go with what the website says, but I would think that the exhaust pipe is 2-1/2" and the collector 3"?
I wouldn't know which headers are the best. I've got Hall's 180's.
Pat Michal has dyno numbers on his. As I recall, they were impressive numbers.
From what I can tell, they are very high quality and very well engineered.
Hi Rene -
My headers started life as "Hall Big Bore" headers. They have 1 7/8" primary tubing, but we cut out the (crappy) "merge", installed a much improved stainless band clamp between the headers and tailpipes, and then upgraded the stock tailpipes to 2 1/2" all the way back to the stock Ansa cans.
Even with these mods, I might suggest there may be better header / muffler solutions that could provide increased performance.
(Rumor has it that / I have heard anecdotally) the Hall headers are a boat design. The best thing about them is the clearance of the engine bay and suspension with no, or minimal mods to the stock tailpipes and mufflers.
There are no "collectors" per say - only the 4 tubes coming together at the same spot. I am convinced there is more horsepower in my engine wanting to get out, stifled by my exhaust configuration....
That being said - "better is the enemy of good enough" - I'm not in the market at this time for a new exhaust (in both Euros, or time).
Here's a link to the exhaust portion of my thread...
5357 Exhaust Upgrade
Here's a picture of the "merge" and the flange from the Hall Setup... that HAD to go...
Attachments
I watched and read a little (it's hard for me to read in English) the 43 pages of your topic, you did a very great job.
I also think to modify/improve the exhaust of mine with a pipe exhaust as big as possible according to the suspensions and I'll perhaps make the mufflers myself but I am not able to manufacture the headers and wish to buy the "best" possible without going up to 180 ° which modify too much the original aspect and prevent to use the rear trunk.
Thank you for the compliments. I appreciate it.
My headers were chosen for fit and compatibility over ultimate performance. We all make trade-offs.
I, too, would be interested in learning the BEST "through the suspension" header, tailpipe, and muffler combination.
Who knows, I might be tempted to upgrade!
Regards -
Rocky
From what he explained to me, they are all engineered together.
I had asked him about the obvious "pinch" in the pipe as it routes through the suspension. He said the dyno showed no loss of power and is necessary to clear the axles and suspension.
Got a small new project completed today - seat belt holder-uppers! My wife will greatly appreciate this one - it always took about 5 minutes of fumbling for passengers to fasten their seat belts.
Anyway - I started by ordering 2 Ford "Buckle Sleeve - Black 12"" from LMC Truck for $13.90 plus $8.75 shipping. These are Part No. 48-2334-BL. Then I set them on my bench for 3 months. This is an important part of the process.
Finally I got motivated, and trimmed the tops to clear the upper half of the buckle assembly, and shortened the tubes, and cut a notch so that the installation would force the belt to stand up straight between my Corvette C-4 seats and the center console.
I am very happy with how it worked out. Labor was easy, and the plastic holders were very reasonable.
Rocky
PS> The last picture is added as a special bonus for two of my friends. They will recognize the connection! Thanks to you both for your hospitality!
Attachments
just amazing well done you.
I like the end results.
However I am having trouble visulizing the installation. Did you cut the "loop" completely off?
I am thinking this would be the solution I need for the TR6
No - I kept the bottom loop, which is attached (from the factory) to a steel (powdercoated, or painted) bracket.
At the bottom end (where the belt bolts to the floorpan), I had to cut the sleeve (slightly) so the painted bracket can sit flat on the floor, and the seat belt webbing is rotated so the belt is oriented straight up. The rest of the plastic bracket rests on the carpet, and forces the seat belt to stand up vertically.
It will be obvious once you get your hands on one and look at it in the car.
Pictures 4 & 5 (counting from the top) try and illustrate it.
Rocky
Thanks for the compliments.
Nice job. Always great to do something that simplifies owning and driving these machines.
Group 4 Tail Lights getting prepped for install.
I am using the Pantera Electronics light modules, so the surface of the buckets doesn't have to be "ultra reflective". The insides were much shinier when I got them, but they got a light "soda blast" to provide a clean surface for the finish.
The Jon Haas (P-E) setup runs the wires through each of the bucket light sockets, so in this case, they are not required. I expect to do some work to seal off the insides as I run the wires through the back of the buckets. Probably use heat shrink, or some other technique.
I am pretty excited about this upgrade. It should be a pretty easy swap. I have some matching connectors to the stock harness coming from Jon, so once I get the buckets wired up, and the light assemblies installed in the buckets, the swap from the US lights, to the Group 4 configuration should be a snap.
Fingers crossed!
Rocky


