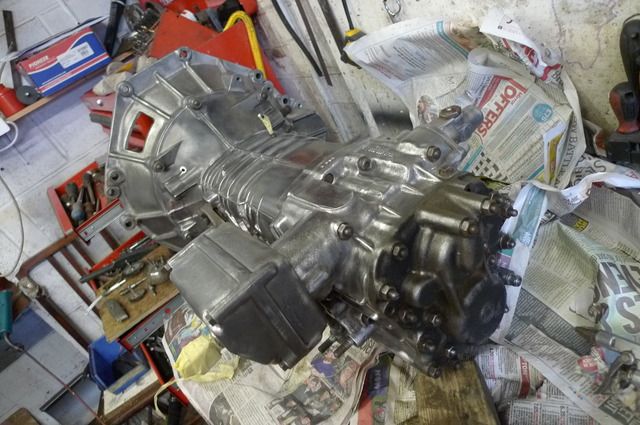
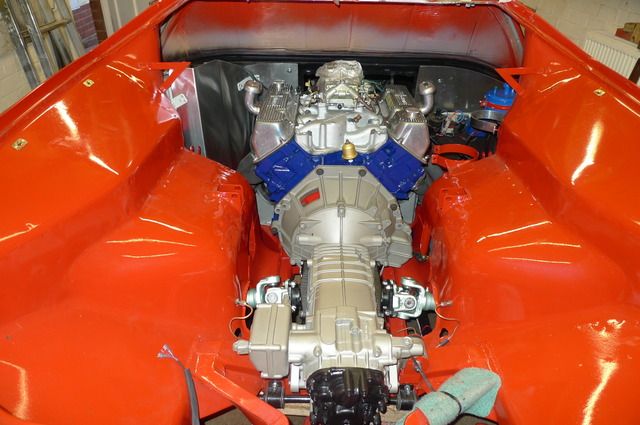
Having seen the car Mr Foose has made I noticed that he had painted the ZF Transaxle Grey.

I would like to copy his example but must say that it must get a bit more than warm when in use so is it some special paint the man has used.
Sometimes these things look good in the showroom and a dogs breakfast after a bit of use, any help there please.
Last edited {1}
Original Post

Replies sorted oldest to newest

Pete, don't know if this will help. Off of Amazon.


Technical Details


Brand
Eastwood

Item Weight
1 pounds

Product Dimensions
2.6 x 2.7 x 7.8 inches

Manufacturer Part Number
10036Z


Additional Information


ASIN
B001E6JMOE

Customer Reviews

Be the first to review this item

0 out of 5 stars

Best Sellers Rank
#929,712 in Automotive (See top 100)
#1,411 in Home Improvement > Painting Supplies & Wall Treatments > Paint Sprayers
#9,945 in Home Improvement > Painting Supplies & Wall Treatments > Paint, Stain & Solvents


Shipping Weight
1 pounds (View shipping rates and policies)

Date First Available
November 11, 2010


Warranty & Support

Warranty, Parts:PartsWarranty, Labor:Full Manufacturer's Warranty - Sold by Authorized Reseller
quote:
Originally posted by RiverRat:
Pete, don't know if this will help. Off of Amazon.


Technical Details


Brand
Eastwood

Item Weight
1 pounds

Product Dimensions
2.6 x 2.7 x 7.8 inches

Manufacturer Part Number
10036Z


Additional Information


ASIN
B001E6JMOE

Customer Reviews

Be the first to review this item

0 out of 5 stars

Best Sellers Rank
#929,712 in Automotive (See top 100)
#1,411 in Home Improvement > Painting Supplies & Wall Treatments > Paint Sprayers
#9,945 in Home Improvement > Painting Supplies & Wall Treatments > Paint, Stain & Solvents


Shipping Weight
1 pounds (View shipping rates and policies)

Date First Available
November 11, 2010


Warranty & Support

Warranty, Parts:PartsWarranty, Labor:Full Manufacturer's Warranty - Sold by Authorized Reseller


Thank you for that, I can get the detail grey from a firm called Frost here in England, isn't the Net amazing.
Rocky, I did go into the media blast route, but the company that did it couldn't guarantee that it wouldn't invade the inside of the Box, so that was a no no, a new box just isn't an option for me.
Bosswrench, the paint is OK to 150F, but here in England we don't get the extreme temperatures that you do, there hangs a blessing in Both directions, I would swap you winters but not the summers!!
Peter, just to clarify; Paul used the Eastwood Detail Gray that comes in a can, not the aerosol spray version. His advice was to apply three light coats, thinned 10% with lacquer thinner. Allow 15 minutes between
coats and let it cure for a couple of days before handling. Also, don't forget to mask off all
rubber seals (input shaft and output flanges). I hope this helps.
quote:
Originally posted by David_Nunn:
Peter, just to clarify; Paul used the Eastwood Detail Gray that comes in a can, not the aerosol spray version. His advice was to apply three light coats, thinned 10% with lacquer thinner. Allow 15 minutes between
coats and let it cure for a couple of days before handling. Also, don't forget to mask off all
rubber seals (input shaft and output flanges). I hope this helps.


Yes David that does help a lot, I have ordered a quart that IS in a can so I can now instruct my pals at the paint shop just how it was done, again brilliant information thank you.
POW! My stamp of approval!

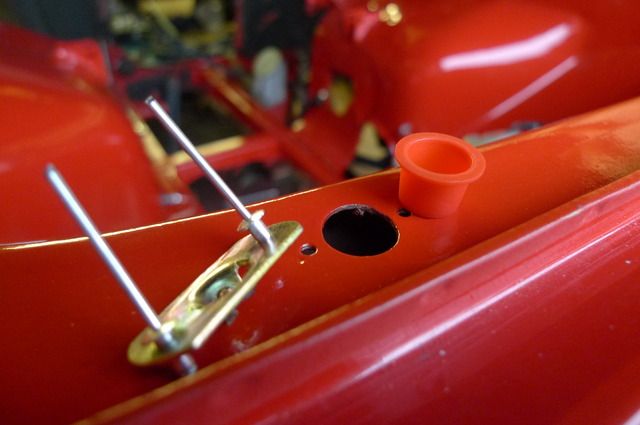
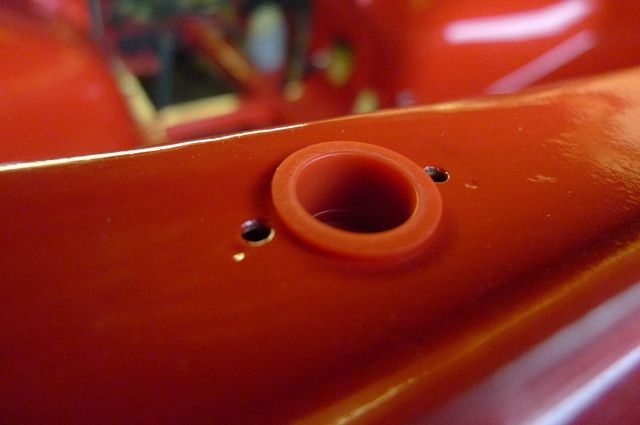
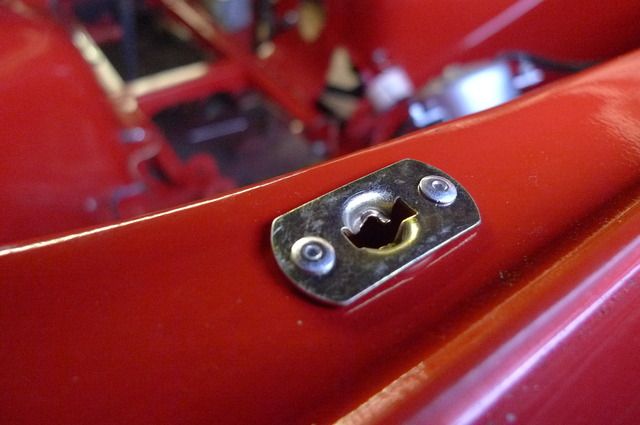
I went another way with attaching the plates back though. I used aluminum nut certs installed into the body and then 6-32 stainless button head screws.

They look like pop-rivets if you don't look closely or if you forgot your reading glasses and they remove really easily that way.

The old guys will never focus enough to see the differences. Wink
Last edited by panteradoug
quote:
I went another way with attaching the plates back though. I used aluminum nut certs installed into the body and then 6-32 stainless button head screws.

They look like pop-rivets if you don't look closely or if you forgot your reading glasses and the remove really easily that way.

How about a couple of nice close-up pictures... Thanks!
quote:
Originally posted by Peter Fenlon:
Hello Doug,

is that what we call rivnuts? I have borrowed a tool and fitted some in other places on the car.

They are a smart idea, and easy to fit, I have to add that I am still unsure how they work!


Riv-nuts are the same thing, different brand.

They are essentially internally threaded pop rivets installed the same way. Then you just thread the screw into it.

You will need to enlarge the pop rivet holes to fit the riv-nut od.

They are relatively simple to do.

You really need to look twice to see they are not pop-rivets. Put a little dab of anti-seize compound on the threads with maybe a little drop of 3 in 1 oil. It is two dissimilar metals, aluminum/ss so you don't want them to react together.

If you use those plasic-plugs you can compress the lip a little tighter with the screws rather than the pop-rivets.

My car didn't have them. Probably a 74 model addition.

Attachments

Images (1)
  • 2016-05-23_16.45.41
Last edited by panteradoug
quote:
Originally posted by Peter Fenlon:
Thats a nice job Doug, and looks smart.


Thank you. I just like the idea of not having to drill out the rivets any more and I always like the prospect of not having corrosion on the bolts.

The original hole sizes varied slightly from plate to plate. I think you will need to enlarge some of the holes in the plates to get the bolts through.

Just be careful and you can get them all nice and snug.

The original pop-rivets were metric and a little smaller than our standard 1/8" SAE size.

Add Reply

Post
×
×
×
×
Link copied to your clipboard.
×