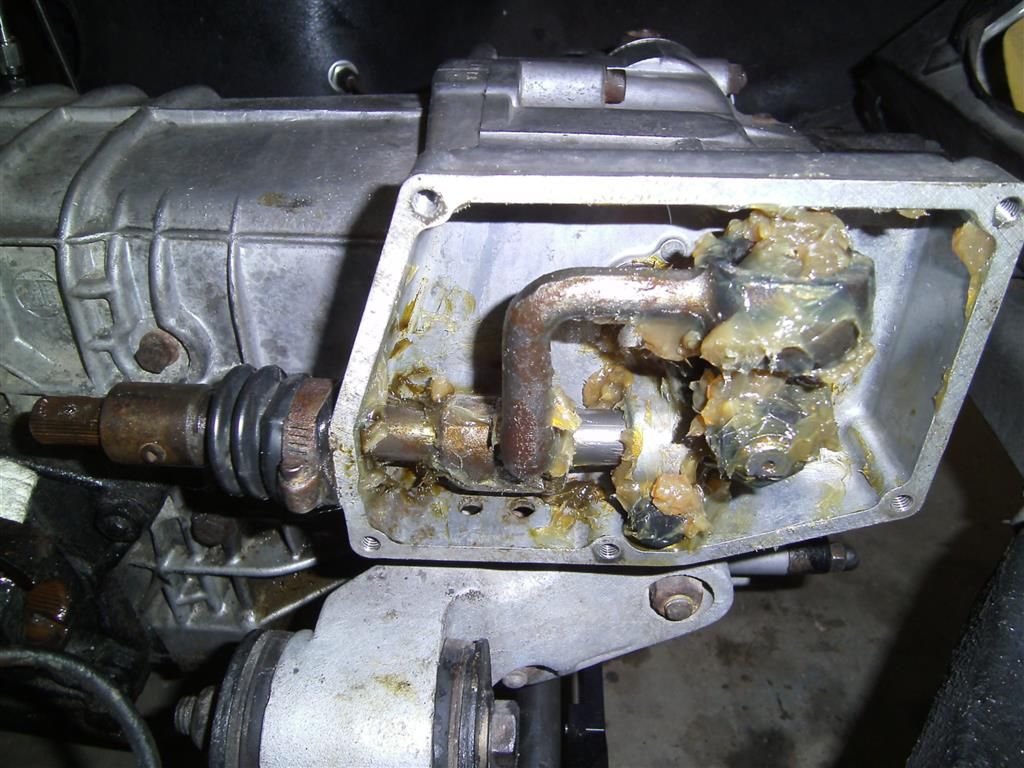
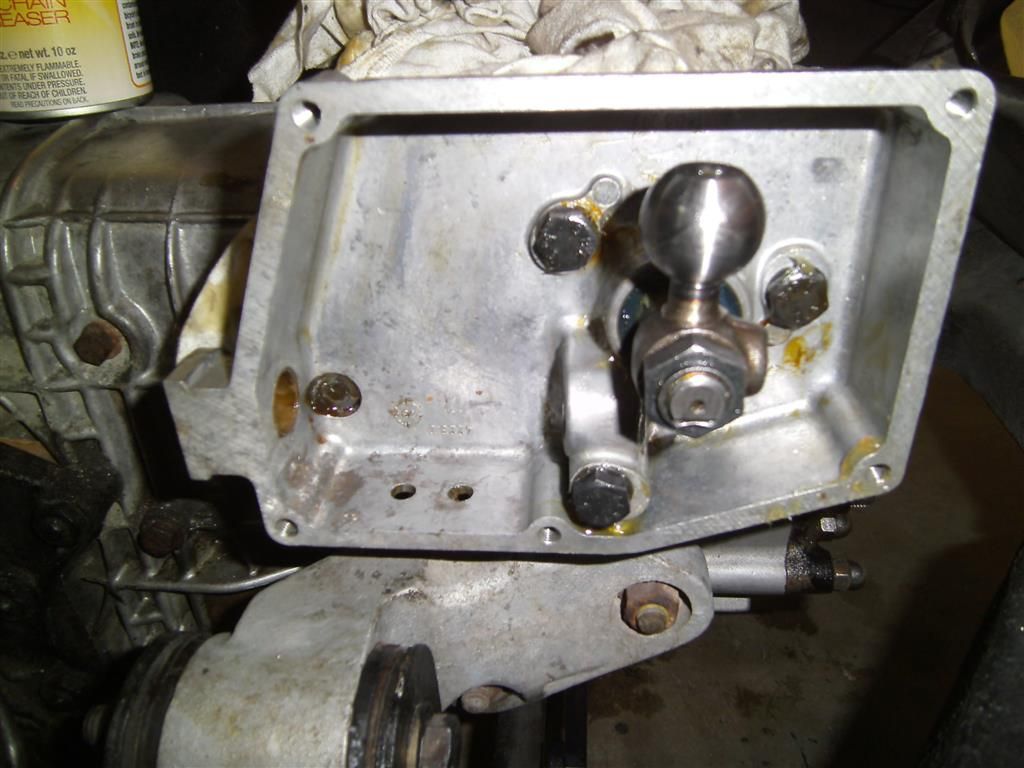
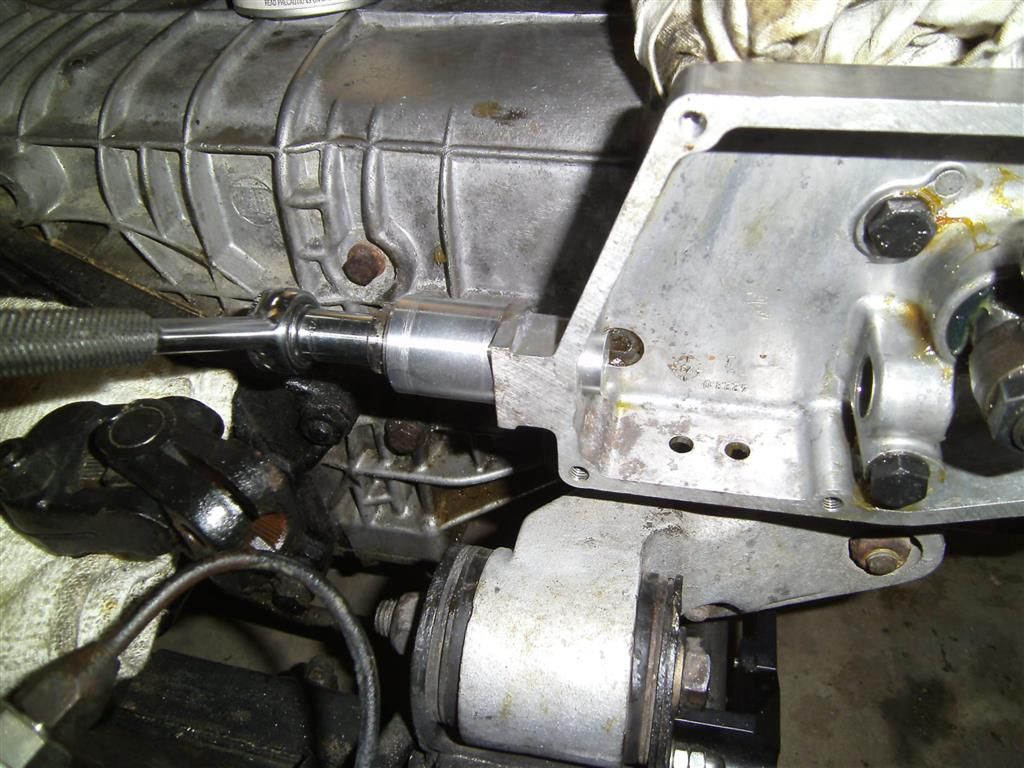
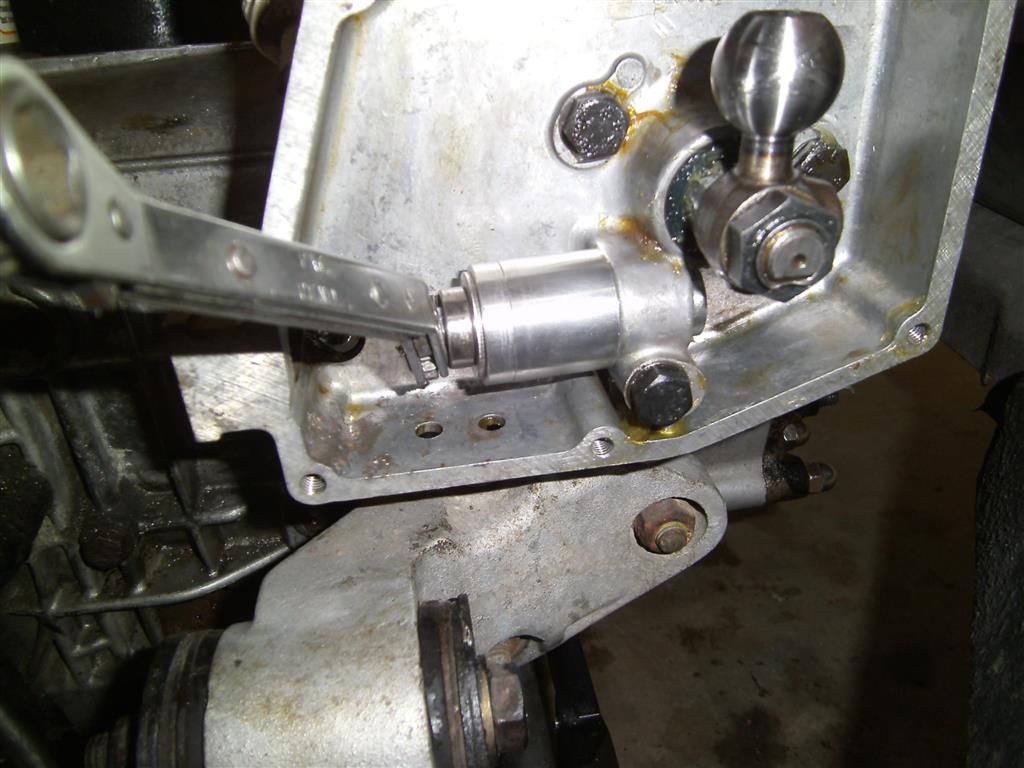
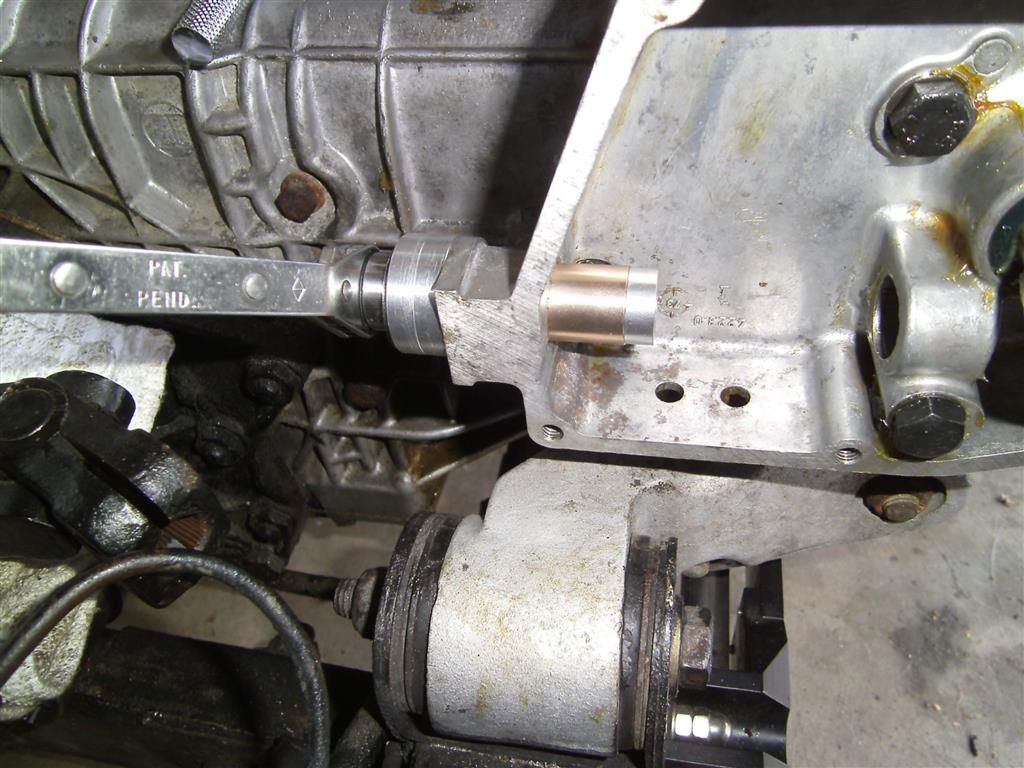
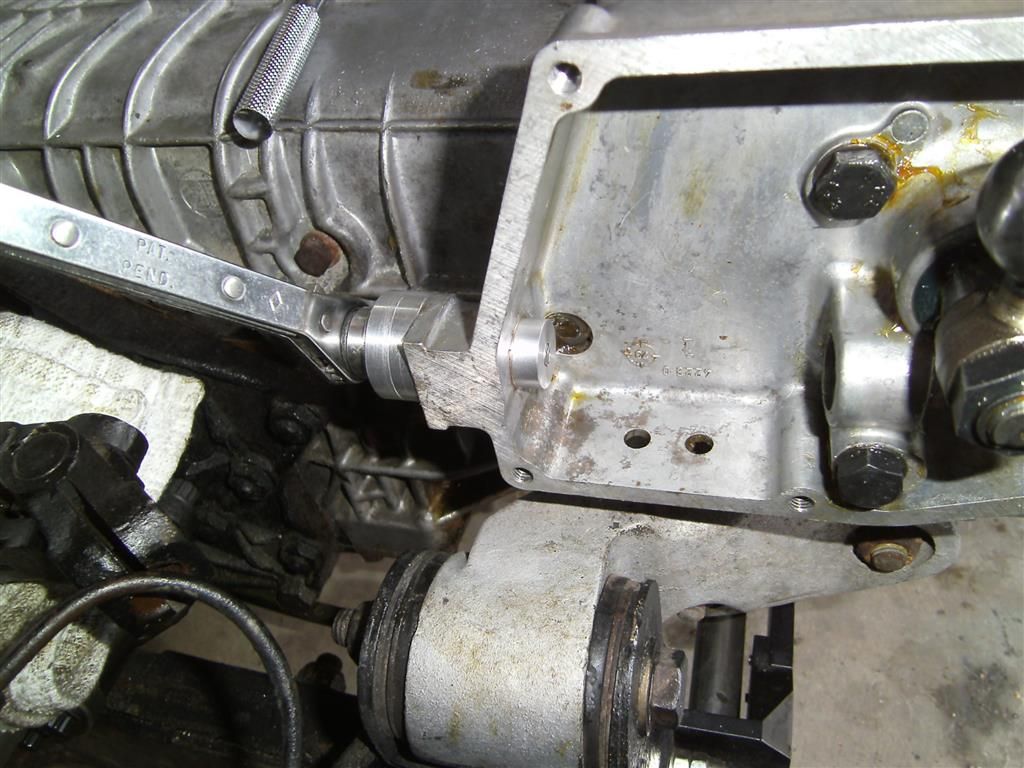
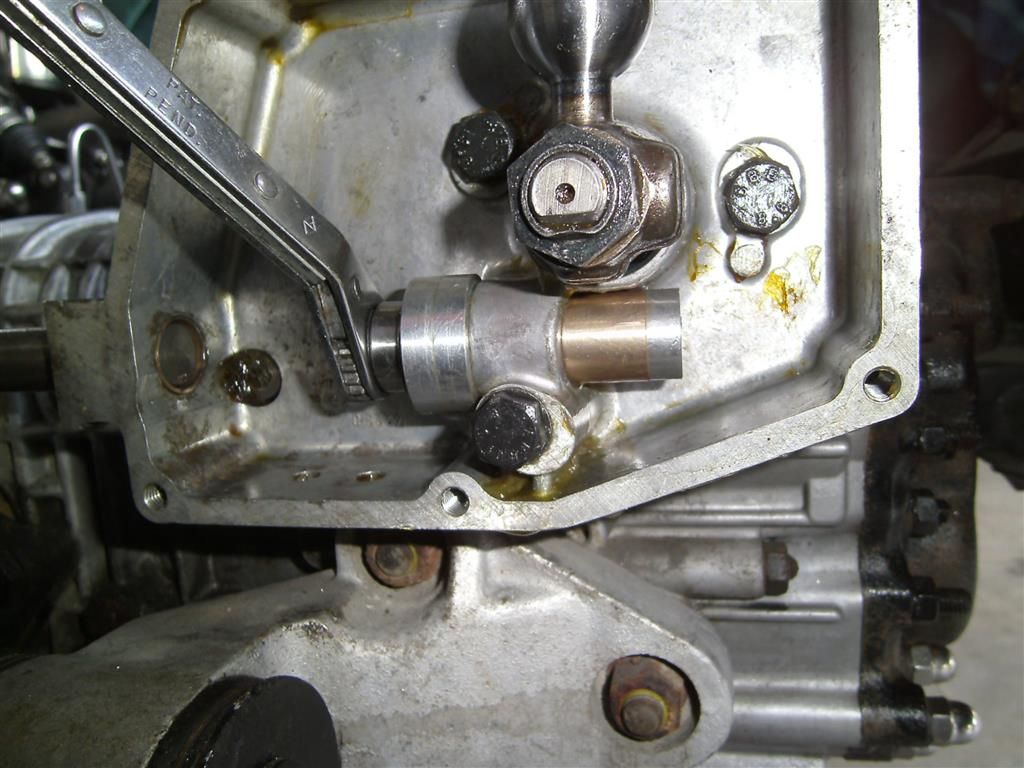
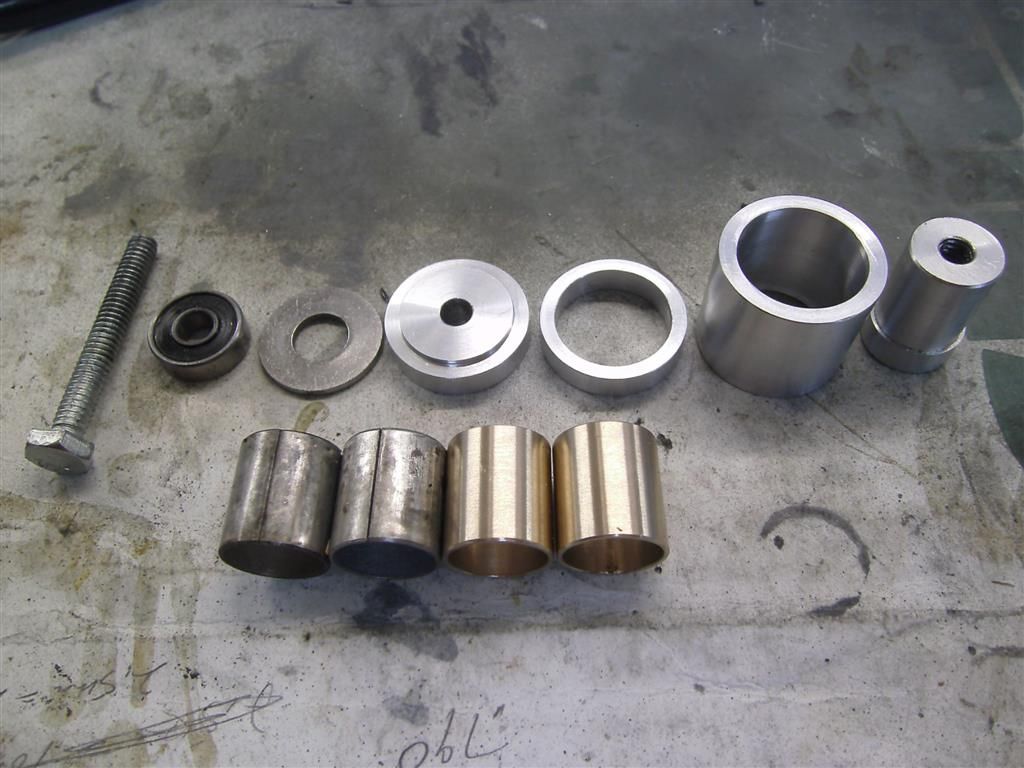
Recently I've been working on improving the shifting in my car. First I machined a bronze bushing for my billet trunion. Next I found a lot of slop at the shift rod in the shift selector housing. I searched the forum but could only find one reference to this problem seen here. I decided to see what I could do about it so I made a press/puller to remove and install the bushings and also made new bronze bushings.

Most of my issue was with getting into reverse. I checked the angle of the shifter in reverse without the gate and then machined the outboard edge of the reverse slot in the gate to match the angle. The end result is my car now shifts like a new 40 year old car. I'm very happy with the results.


]


Original Post

Replies sorted oldest to newest

Your puller/installer looks GREAT!

How tight did you go back with clearance between bushing and slide rod?

Were the original bushings those plastic lined steel split sleeves (DU bearings I believe)

did you use a try bar to verify both are in alignment (or even ream to size once installed?)

that is something I'll verify is adressed when I send mine out

Inspiring work
I checked for play at the shifter and there doesn't appear to be any side to side. There is some play between the shift rod and shift housing in the consol. Not sure if there are bushings there or not. Maybe I'll pull the consol and have a look. Regardless the shifting is 100% better with what I've done so far.

Steve
The ID of the bushings was a bit of trial and error. The shaft is 0.625" so I started at a bushing ID of 0.628" and took 0.001" off at a time until I could get the shaft to go through both bushings and I liked the fit. Final deminison was 0.631" ID. With the press/puller tool it was easy to install and remove them.

The original bushings are magnetic. I'm not sure if they had a coating on them at one time or not. My new ones are much better and should last for a long time.

Steve
quote:
Originally posted by T.Solo:
The ID of the bushings was a bit of trial and error. The shaft is 0.625" so I started at a bushing ID of 0.628" and took 0.001" off at a time until I could get the shaft to go through both bushings and I liked the fit. Final deminison was 0.631" ID. With the press/puller tool it was easy to install and remove them.

The original bushings are magnetic. I'm not sure if they had a coating on them at one time or not. My new ones are much better and should last for a long time.

Steve
HEY Steve!!!....I believe I spotted your DeTomaso Pantera on friday 11/29/04 on Main St in Orangevale at approximately 4:15 pm!!!

I was in Orangevale to look at ( did buy) a 1973 Jensen Healey.

COULDN'T BELIEVE I spotted a DeTomaso Pantera!!!

GREAT machine work!!!...Mark
quote:
Originally posted by T.Solo:
Guilty as charged! That's my neighborhood. I was headed to the gas station to fill it up before putting it away for the day. Small world. Too bad you couldn't flag me down.

Steve
If you saw me approaching your DeTomaso Pantera, being that I'm 6'3" & 220lbs, you probably would have thought it was a "Car Jacking"!!!...did you have your 9mm, Locked & Loaded???!!

I live in Silicone Valley ( Cupertino) so let's just say that "Orangevale" is a little "country" if you know what I mean!!!...Mark

The 1973 Jensen Healey was a "FIND"!!!...43,000.00 original miles, rust free, straight frame, un-hit body, meticulous documentation & paper work...could NOT give the owner the $100 bills FAST ENOUGH!!!...WAS SMILING the whole way home towing the car!!!...Mark
Add Reply

Post
×
×
×
×
Link copied to your clipboard.
×