All,

New 1974 car to us, been sittin' for a couple of years with minimal use. Pump was replaced but few miles since. No more than about 10-12K. I want to refit the heater hoses and such. Keeping this out of the engine "fluids" section cuz we can just talk rubber parts replacements. She's been a bad car so far....hopefully can resolve her issues and change her name to Susan soon!*(days of our lives ref...) Smiler

Radiator replaced/rebuilt by Hall by second to last owner...again 10-12K on it, 10 years back. Front Pipes look to have been repainted at that time also.

If you know me, you know I tell good-n-long stories and type the same....so bear with me.....!

To get this all started, ...started last week when wife and I tried to bring the car home from our shop about 53 miles away. (for the first time out since rebuilding the brakes after purchasing the car) We made it a mile or so....belt had been squealing on and off....hoped for more off....until finally heard a little "thump" near my elbow and I watched my AMP gauge register a large discharge....."Crap...blew a belt"..... So back to the shop....but not before the car started to overheat.....that last 1/4 mile had pucker factor on high......!!!!

Cooled it down, called a local member about what tank is what.....of course my shop manual is at home....and I'm not! Filled up with water and put it away in the shop.

Retrieved car with trailer last Sat. No incidents to report until after about an hour of sitting in the driveway, wife called me (I was returning trailer) to tell me that the emergency lights were flashing! CRAP! Blew the E-flasher switch.....and I wasn't even near the car. Advised to use "toothpick fix"...only to hear "we have no toothpicks!" Ugh. I have some in the truck.... She tried taping it etc....didn't work. Tooth pick worked, popped out later..... still in driveway.
I will admit that I touched the switch when I was in the car the couple nights before, in the shop, before I started it....and it took a couple of stabs with the finger before they shut off. I guess the heat from the sun took care of it......
Will need to look at switch yet......not now.
Have spent the last couple of days reading stickies, looking for this and that in the car, but can't find out some important bits.
Ordered two new belts, one for spare. Don't make Greenstripe belts small enuf.... Frowner (needed 11AV1030 or 40 but all the parts store had was longer..or way shorter..and their belt stretcher was broken...)
Pulleys are all in alignment, alternator turns over well, water pump not funky. Probably neglect led to this failure. Gatorback belts should be here by weeks end. Ordered two.

I have determined that the heater water shut off valve is stuck. Needs the Mike Daily overhaul! On the list... (Thanks to Mike for this info!!!) He spec'd 5/8" ID hoses for replacement! Mine in car are 3/4")

I want to replace most if not all of the rubber heater hoses. Most of the large 1-3/8 hoses appear to be Greenstripe already except for the one hose piece connecting the lower pipe to the pump inlet pipe. Looks like 1.5" hose smashed down to fit 1-3/8 pipe!!! What's up with that!? Deal with that later too....I have more greenstripe hose to use....left over from Goose adventures!

So the heater hoses look to be Motorcraft brand hose, but with a 092793 date stamped into them... I see notes in the owner records about replacing heater hoses, but now wonder "which heater hoses"? The ones up at the console? or the engine hoses????? 1993 is ......24 years back...... Still nice and supple, BUT if you pinch them, you can hear cracking....from whatever is coating the hoses internally....sounds like time for new clean hose!

BUT.....what size hose do I need? I appear to have 5/8" hose in some places and 3/4" in others!?? I checked the hose tubes coming up out of the console and found that they measured just larger than 11/16" (18mm) but not yet a full 3/4" but the heater valve fittings and the heater core fitting look to be more like 5/8".

At the lower section of the engine the pipes would/could/should be the same 11/16-ish (18mm) as observed in the cabin...but the engine water pump fitting is certainly 5/8".....not so sure about the vertical block fitting! I hope it is 5/8".

OK, pause for some math.... 18mm=.710" 3/4=.750" or a mere spark plug gap .040" larger...to squish down to 18mm BUT .125" (1/8") to squash down to 5/8=.625" which is .085" smaller than 18mm....so need to stretch the 5/8" a tad over 1/16" (.625") to fit the 18mm parts.

So far I have the following fittings:
Two engine- 5/8" hopefully on both
Four heater pipe tubes- 18mm
Water valve-one connection- .600" (unknown size in orig post)
Heater core end- one connection- .625" (unknown size in orig post)

*** 2-4 fittings unknown- Expansion tank to radiator????
I have no idea how this hose gets to the front or back.....all one long piece of hose, or more intermediate metal piping and two pieces of hose????? Size of ends?

I'm thinking better to stretch a little bit than it is to try and crush a hose to get smaller......

Anyone have a heater valve and or heater core fitting handy to check sizes? (edit 9/21 OK, did this today....recorded above.)

I haven't popped my system open yet to drain it.....keep in mind that wife has never ridden in car yet....so as soon as belts arrive, I would like to take her for a good spin!!!! She needs to get her "zoom zoom" on......then she'll be happy for a while.......while I dismantle the entire car....!

Has anyone used the whiz bang blue "5/8" ID SILICONE 4-PLY HIGH-TEMP MIL-SPEC COOLANT HEATER HOSE PUROSIL SAE J20 R1" hose in their cars? This crap is expensive (About $40 for 12'shipped) but looks like it would handle bends well just no sharp burs on your pipes or fittings!!!! Sand them down.....if in doubt! Would probably outlast me....!

Years ago, one could purchase the cast iron water pump rotor with the solid vanes ala Boss 302 and such. Has anyone seen where these are available anywhere?
I also used to see round discs that one could DIY this same effect by pop riveting the disc to the rear of the steel vanes of a standard rotor... anyone seen these? Would be easy enuf to fab....next time the water pump goes out! I was gonna take it out thinking that the timing chain surely needs to be replaced...but with less than 2 degrees of crank movement, me thinks that someone put in a dual roller chain somewhere along the way!!!! Now no reason to disturb it!

Ok, enuf for now! Will post other issues in other posts....
Thank-you for reading along!
Steve
Last edited {1}
Original Post

Replies sorted oldest to newest

OK, a good day in the garage!

Spent mostly upside down under the dash getting the heater core switch out!!! I can't believe they really need a 23mm nut on that flare fitting......

My valve was locked up solid. In removing hoses I got some amount of water out...disconnected the hoses at the engine and water pump.

Discovered that the fitting into the block is pretty ugly. Gonna see if I can get a new one and somehow get it into the block....providing I can get the old one out! There is nothing but rust holding a new hose onto the hose bib!

Used paper towels to sop up fluids...tried shop vac on the heater hoses.....not sure if it worked properly....acting like hoses are plugged!.....need to search for shut off valves!!!!

Left hose connection under dash looks reasonable. Right connection that goes up to heater valve looks ugly..... about 50% eaten away. Could benefit from new end.....probably need to trim off some of the scarfy section and double hose clamp it!

Heater valve was locked up. Was able to get it apart using article on Pantera Place. Messed up and didn't mark the parts as specified....but this thing either goes together with the passage 180 degrees out.....or partially open at full open or partially closed at closed.

I'm voting for partially open at full open....the copper hose into the heater core isn't all that large.......and I know that we want the valve to shut off the water since it shares the same spot as the evaporator for the AC....so if the valve was open, it would be working against the AC!!


Here is a question for the experts! When the heater hoses are shut off with valves, the Clevelands and Windsors tend to capture water in the water pump and start to cavitate! ...leading to overheating!

How does this setup in the Pantera allow for "some" water flow thru the system to remove the air bubbles!????

In Ford cars, there is an "H" in the hoses just prior to the shut off valve in front of the heater core. Sometimes there is an 1/8" hole in the valve to allow some water to circulate.

This valve does have a tiny slot in it....but when fully closed, this slot looks to be covered....but I did not reconnect to the cable yet to see just how much "on" or "off" I get.


Any ideas????

Steve
OK, here is a new question.

We know that water pumps' external hose connections all suck....they don't pump outwards...... The block mating castings/holes are for "pumping water into the block". Our radiator supplies water to the pump via suction caused by the pump and that water is then forced into the block casting.

Same for the heater core! Water is sucked into the water pump from the core....and the core is supplied via the block fitting near the alternator adjusting bracket's anchor bolt.

I cannot for the life of me find any complete drawings of the heater core circuit to be certain that the circuit is properly hosed...

My water pump hose (main suction for core) connects to the left under car pipe, which connects to the copper (open) line to the heater core.

The block fitting (supply of hot water to core) goes up the right under floor pipe to the water valve and then into the heater core.

Can anyone confirm that this is connected properly? Thanks!!!

OK, off to the parts store in the morning for a new o-ring for the water valve, and a couple of small hoses to reconnect the heater core to the under car pipes.

I would love to put shut-off valves up behind the console face....but I can't see where anyone could get to them easily...those black side panels seal access up too well!!!

Cheers!
Steve
Thanks for sharing the detail writeup of your work.


quote:
Originally posted by Mangusta:...
Here is a question for the experts! When the heater hoses are shut off with valves, the Clevelands and Windsors tend to capture water in the water pump and start to cavitate! ...leading to overheating!

How does this setup in the Pantera allow for "some" water flow thru the system to remove the air bubbles!????

....


I thought that was the function of the skirted thermostat and "restrictor", to allow a large flow through the block when cold and thermostat "closed"?


IF
you are really determined to remove as much air from the coolant as possible, then making a revision to the coolant system might be your answer
the first is as built
the second is converting to true swirl and pressure tank design
third and forth replaces the in cabin heater shutoff with an "H" type heater valve that provides recirculation

Attachments

Images (1)
  • pantera_cooling_4_versions
OK, I guess I was too vanilla in my question.

How does the 351C get rid of bubbles in the water pump? I know Bosswrench preaches that certain pumps must be drilled for this or that...and that some are better dealing with cavitation than others....and that if you disconnect your heater on a stock pump, that you should loop the block outlet to the pump inlet to cure this condition.

SO, when you shut the water valve OR turn off the inline valves you installed.....how does the stock pump deal with air bubbles and potential cavitation issue????


As for the rest of the system.....all I can say is one pile of poo at a time please! Smiler Smiler Smiler

I can deal with the main cooling system later....I don't think it is broken.....at least too badly..... I like the thought behind turning the pressure tank into a swirl...and feeding into the overflow tank, like a more modern system. BUT, not today.

Right now, I want to get the heater system sorted out.....everyone seems to just gloss over it......it is simple....until it dorks up!...... or you close your water valves and then next thing you have is "Old Faithful" out of every orifice in your engine compartment! Don't ask how I know about this......! Smiler

Off for hoses and an o-ring!
Thanks all!
Steve
Steve, constant, persistent bleeding from the top of the radiator is my current recourse. I've tried all the trick jack-up-one-end of the car methods, and IMHO, NOTHING works as well as simply bleeding a refilled radiator over the course of several days. I do use a special plastic filler funnel made by Lisle that literally clamps onto the surge tank neck and holds 1/2 gallon of water for the initial fill & start-up.

I once replaced our rad, filled it, got a massive air lock in the pump when the engine was started, so I bled it twice more that day. Next day, I bled it again (more air) & we left for 'Vegas. That night after an uneventful 450-mile drive at highway speeds, I found yet MORE air so I bled it a third time in the hotel parking lot. Checking a 4th time before we left 'Vegas to come home, I finally found no air.

I believe 'some' air is partially soluble in tap water; think of burping a water bed- the same phenomenon shows up over months as micro-bubbles of air slowly condense into bigger ones that can cause trouble with marginal cooling systems.
OK, back on track here....heater hoses.....

I call this my "Oh am I glad that I got this out of my system...." ....or "I can't believe there was this much sh*t in there..." or "Not exactly panning for gold...but it felt a lot like it!"

I rehab'd my heater water valve with the Napa O-ring suggested in the article on Pantara place about rebuilding said valve.

I deviated on the hose thing...... 18mm is only .060 larger than a 5/8" hose....and the 5/8" hose will stretch if warmed up a bit and lubed with either some silicone grease (ONLY IF YOUR HOSE BARBS ARE STILL GOOD!!!) or water if the barbs are not so good.....

I have one kinda good and one that isn't there any more.

I bought a single NAPA 9808 hose, about $13 and made the two hoses for under the heater out of it.

I cut the 90 degree portion about 1-1/2" off of the short side to attach to the heater valve (which is undersized at .600"...) and then cut the length as needed to hit the LH heater pipe.

The remaining straight piece of hose is a trim to fit the RH heater pipe to the belled section of the heater core sticking out of the LH side of the heater box. Belled section is 5/8" and is about 2" long, then reduces to about 3/8" and goes up and right turns into the heater box.

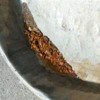
So, fast forward to today.... when I was removing the old hose sections, I found LOTS of chunk-o-rust in them....making me question to things...1) previous maintenance by owners, 2) what is still in the various parts of the heater system, and 3) I know, I said two....how can I clean this out!!?

Today, I hooked up a garden hose to one of those universal "engine flush" "T" fittings that was in one of the water hoses from the engine. I plugged the other portion of that hose, and also the end of the other hose. (One hose to water pump...one hose to block.) I left them connected to the under car tubes....in hopes of flushing out the tubes AND perhaps some of the garp that may have reached the heater core...fingers crossed.

I pressurized the whole affair by carefully turning the water on....keep in mind that some community water systems can have some SERIOUS PSI pressures.....and the LAST THING I WANT is to blow the snot out of the heater core!

So, water turned on.....I get a dribble of crap out of the other hose...dark black water....ugh. But a dribble...some coughs and spits...then nothing much but the hose started to swell...not good. Water off.

I had a second one of those water flush parts (actually an unused complete set that I found somewhere) that gave me the female to female adapter to fit my garden hose to this mess, and another "T" fitting.

I reversed the garden hose to the other hose, plugged/unplugged the two hoses accordingly and proceeded to push water back into the system via the hose that was previously was the drain.

More dribble, coughing, spitting, dark garpy water and chunks...big chunks...then the flow became less than a dribble and the hoses started swelling.

Water off..release pressure, mop up mess on floor, swap hoses again....and again and again and again... Occasionally I could hear water gurgling in different sections below the console..... At one point when there was still little flow, I squeezed the rubber hose right where it attaches to the under car tube...and I felt LOTS of crunching...but I heard stuff moving....well it plugged up the "T" now. Removed the "T" hit the pressure again and started squeezing....got LOTS of crap!!!! Yea!.....

Proceed to swap pressured water back and forth several times more until water was running clean into my drain pan!

I double checked how much flow my hose was putting out for opening the on/off valve on the house for about a third of a turn....well it wasn't much flow. SO...I upped it to about a turn and a half to two turns....and got a good flow, but not full blast....about what I would expect out of a heater hose...good solid flow.

Ran this level of water back and forth a few times and got more garp, but it cleaned up quickly!

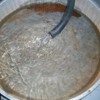
Below is a pic of my results....clean water! Clean water in pan and clean coming out of hose!
Will post more pic's of results....
S

Attachments

Images (1)
  • 101_7412_(Large)
SO, all of this mess got me thinking.....Hate when I do this....

1) I wish I had flushed the tubes out while I had the connections under the dash open. I had tried to blow water thru previously...but heater valve was still stuck in place...probably closed.... AND, I'm fuzzy on what I did exactly but the results were NOT what I expected....

2) I wish I had flushed out the heater core while it was disconnected.....

3) Is there good way to roto-rooter the tubes under the car..... Seems like there is large pulley in the way and a harmonic balancer that would hinder this from being easy....! What is....

4) NOW, I believe that A) the engine is full of crap, and likely the radiator is also!!!!

IN light of #4, I can see justification for putting one of those see thru inline filters that guys have put in the larger 1-3/8" hose that feeds the radiator (thermostat outlet pipe?) to keep crap from the radiator! I think that pipe goes over to the pressure tank first...then to the radiator...

AND......I would love to know if the same company makes a similar device for 5/8" hoses??????????

If anyone knows, please chime in here!

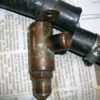
OK, and a picture of heater valve marked to show full open and full closed for my reference when upside down working on this crazy....

More to follow...

S

Attachments

Images (1)
  • 101_7402_(Large)
Last one for tonite....

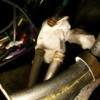
RH hose in place, Water Valve in place.

I had to be careful of the wire end of the control cable. It liked to get hung up on the top of the LH hose! I did not add the bent wire end...it was there already...just had to bend it out of the way slightly.

Getting to that top fitting on the water valve was a beeeyatch!!!! Hex on the valve body is 19mm (3/4") but the hex on the nut was 15/16" ish!!! Talk about 10lbs of wrenches on a 5lb nut!!!

Hopefully this job will last the lifetime of this ownership!!!

S Smiler

Attachments

Images (1)
  • 101_7409_(Large)
DIN 1 is the size of the opening needed BUT because of the angle, the DEPTH is critical. At best you are going to get the lower corner to hit the floor.

Simply put, two items can not occupy the same space at the same time.

The wiring harness is now stiff and does not like to relocate itself easily and of course you have the plumbing in there to deal with.

Use a hair drier to loosen up the harness wires before you try to move them.

I constantly have issues with wires disconnecting themselves from the switches in the console and grounding themselves out.

I definitely can now identify the smell of a Lucas wiring harness shorting out and a Detomaso one. Either one turns my stomach.

Every time I think it is "corrected" and ready to go, I get another one shorting. Jon Haas doesn't want to talk to me about this any more.

I won't even let the car sit over night with the electrical system "ON". I have a battery kill switch.

It's not the harness itself, it is the connections to the switches.

Others don't necessarily know what I am talking about because if there is an issue, they just take it to "the guy" to fix.

No such thing here...Doogala fix.
PD,

I have a radio that is 5-3/4 inches long on one corner measurement and 6+ on the other....guess who goes "down"! Thankfully the radio is properly oriented such that I can read the face plate right side up.....

What is concerning...is the install manual saying don't install more than a 60 degree down angle (at a normal plane...!) so mounting it sideways may REALLY mess up the CD player!

NB:Test sideways radio operation...use Celine Dion disc to test....not CW or RnR discs....!

I have stared at that mass of wiring behind the panel.....and it scares me too! Just the numbers of wires.....and the way that they are or are not restrained! I need to tie up the radiator fan wires....they just sort of hang on their way to the switch.....seems very odd. But then, I think I had odd people working on this car in the past....so all bets are off!!!

I'll clean it up.......tie it up.....make it mine!

S
quote:
Originally posted by Mangusta:
PD,


I have stared at that mass of wiring behind the panel.....and it scares me too!

I'll clean it up.......tie it up.....make it mine!

S


Soon you will get good enough to distinguish the different smells of the different color wires shorting. That's good. Saves diagnostic time.

I think a radio WITHOUT a cd player is smaller?

You know these techno gizmos have just taken their tolls in so many ways over the years?

Add Reply

Post
×
×
×
×
Link copied to your clipboard.
×