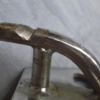
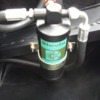
Pic 41. The screw shaft is machine pinched after assembly. I ground this down to remove the shaft.
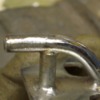
Pic 42. I then welded up the damage with the MIG.
Attachments
Pic 43. I turned down the weld on the lathe.
Attachments
Pic 44. I then drilled the shaft for a roll pin and stainless washer. When the weight of the car is on the jack the pressure is in the other direction not against the roll pin. I had the shaft plated.
Attachments
Pic 45. Looks better!
Attachments
Pic 46. The carpet that covers the petrol tank has a vinyl piece sewn around the filler cap. I cut and bound new carpets but didn't even attempt to sew this round piece because my sewing machine does not have a giant throat depth so I would have to roll up the carpet to reach in far enough and would end up with a big mess just like original!
Attachments
Pic 47. I decided it would be better to make the surroundout of steel and cover it in vinyl. I made a jig to beat the steel over so that it would be a press fit over the filler cap surround.
Attachments
Pic 48. Steel bezel beaten to the correct shape.
Attachments
Pic 49. Vinyl glued to steel.
Attachments
Pic 50. Vinyl glued to carpet.
Attachments
Pic 51. Finished carpet. Will be held in place with velcro.
Attachments
Pic 52. The original FIM Bologna expansion tank cap was long gone. I found this rust one on ebay and had it re-plated.
Attachments
Pic 53. I took the guts out of a modern generic radiator cap and transferred them into the old FIM cap.
Attachments
Pic 54. I had to make a tool to re-clinch the brass bit.
Attachments
Pic 55. Punch used to re-clinch.
Attachments
Pic 56. I turned a new rivet on the lathe out of copper.
Attachments
Pic 57. Expensive radiator cap!
Attachments
Pic 58. I found it very hard to find an exact copy of the original induction pipes. I bought this type and removed the white binding from the outside. It looked much better and didn't fall apart.
Attachments
Pic 59. I do this to all the cars. De Tomaso sun visors always flop down. The chrome pin spins in the plastic housing so tightening the screw makes no difference. I drill through the shaft (1.6mm) and tap a nail in with lock-tight.
Attachments
Pic 60. I made these knobs on the lathe out of ally and painted them to replace missing ones. One for the seat and the other for the heater flap.
Attachments
Pic 61. I added an extra bulb to the indicator lamp. This will be used as a "side light" for UK regulations.I also added a little chrome tape to brighten it up a bit.
Attachments
Pic 62. Engine covers. I removed the ribs and repainted them. I also welded up some rub damage on the aluminium.
Attachments
Pic 63. This car had slop in the steering. Most of it was in the Rose/Heim joints that screw into the end of the steering rack. Unfortunately this size does not exist any more - M12x1.0 M12x1.25 no problem, but not M12x1.0 I looked and looked but found nothing. I also looked into the old Renault racks that donated it but they never had the Rose/Heim joint as far as I can tell.
I had no choice but to press the bearing out and find another. This was not straight forward because the Rose/Heim joint body formed the outer casing of the bearing so it self-destructed when I pressed it out and left two ribs that prevented me from pressing a new bearing in.
I had no choice but to press the bearing out and find another. This was not straight forward because the Rose/Heim joint body formed the outer casing of the bearing so it self-destructed when I pressed it out and left two ribs that prevented me from pressing a new bearing in.
Attachments
Pic 64. New bearing bought form Mcgill Motorsports.
Attachments
Pic 65. I managed to mount the housing in the chuck and turn off the ribs and machine it to the right size for the new bearing.
Attachments
Pic 66. New bearing pressed in. The internal size and width of the bearing was identical to the original so the miss alignment spacers fitted perfectly.
Attachments
Pic 67. How the hell does everyone else install Rose/Heim joint boots? I made a tool with hooks!
Attachments
fantastic work Johnny. you are one creative bastard.
need the rest of the pics when u get a chance.
cheers cj
need the rest of the pics when u get a chance.
cheers cj
Pic 68. Bonnet latch wear.
Attachments
Pic 69. Welded up.
Attachments
Pic 70. I referred to Jonathan Roots car to find out what the original stickers look like. This is Jons AC dryer with barely legible paper sticker.
Attachments
Pic 71. I had it recreated by my friend with a sign shop. It says "Diavia" "Auto air conditioners. Diavia SPA, Molinella, Bo, Italy. I Googled this but they are long gone. It was hard to tell the exact colour of the original sticker so I guessed. The gold could in fact be white? I intend to have some more of these stickers printed and sell them on ebay.
Attachments
This should sit lower with the bracket half covering the sticker.
Attachments
Pic 72. Vitaloni Californian mirrors are still my favourite but look very cheap these days. I am sure they must be having them made in China? The plastic used to have a nice mottled satin finish now they look shiny and cheap so I had to paint them.
Attachments
Pic 73. Painted mirrors.
Attachments
Pic 74. I made a wedge for the passenger side as this is a LHD car. Without this you cant get enough adjustment.
Attachments
Pic 75. Wedge & bracket mounted on door.
Attachments
Pic 76. Cutting and binding carpets takes time.
Attachments
Pic 77. I had the air cleaner housing powder coated in a finish very close to crackle black.
Attachments
Pic 78. I made some stainless straps to clamp the induction pipes to the housing. Originally they had none but it looks unfinished without.
Attachments
Add Reply
Sign In To Reply


