

sorry for the dumb question, but I need to learn.
where are you plumbing the "overflow" tank for water pump suction?
does the heater supply and return connect to the water pump discharge and suction?
JF -
My water pump (a Stewart Racing EMP-16143) has two fittings on the pump body. One of these goes to the bottom of the surge/overflow tank. You can see it in the pictures of the tank a few pages back (on page 3).
The heater (heat source) goes to the discharge fitting on the block and the return goes to the second water pump suction fitting on the pump body.
The valve allows circulation from the block back to the pump when the heater valve is closed. It's actually a pretty slick design.
Rocky
Detonator -
The wiring looks good because of all the new sheathing around it. Honestly, while I don't mind doing electrical work, it takes me a LONG time to do it, because I always get myself confused....
It takes me a lot longer than it should - maybe I don't do it enough!
Continuing to make progress, albeit slowly -
Both headers are on. All wiring and electrical checks complete. All plumbing on top of the engine is done.
E-Brake is hooked up (pretty cool, note the removable bracket again) - the E-Brake mechanism required some more jockeying of the water tubes.... Heading back out to do the final adjustment and to tie the cables up and out of the way....
Next the speedo cable....
Rocky
Attachments
Images (1)
_(Medium)")
Hey Rocky...I just saw your post some pages ago about putting the timing marks on the flywheel at the access cover. Brilliant...I think I'll use that :-)
quote:Brilliant...I think I'll use that :-)
Rob -
I wish I could claim credit for even some of these ideas and the execution on my car, but they are really Wade's (Mark IV / 4280). He is the "Leonardo da Vinci" on this project, while I am the apprentice.
But his ideas, recommendations and his execution has really been top notch. The main reason I wanted to do this thread is to showcase many of his ideas that we have implemented.
Wade has got a lot of experience with Fords, Mustangs, carburetors, and he has his own Pantera. I appreciate his suggestions of how to improve my car - everything we have done has been top-notch.
The last item to getting on the road is getting the headers and the tailpipes aligned and bolted up. Hopefully, we can start the car in less than a week.
Rocky
Heater Valve Installed!
I ran Aeroquip Teflon Hose (Stainless Steel Sheathed) from my heater control lever back into the engine bay. We ran some soft stainless steel wire from the existing Heater Lever to the engine bay mounted heater valve.
Wade fabbed up this cool heater control mechanism.
Here's pictures of the valve on the bench, and installed.
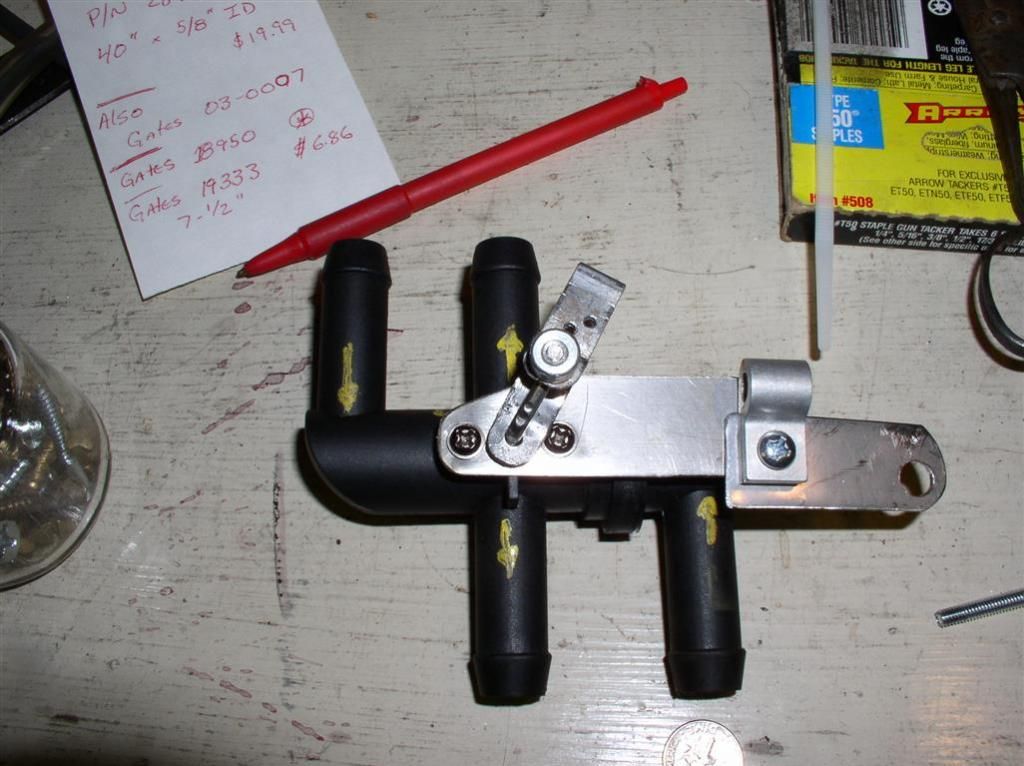
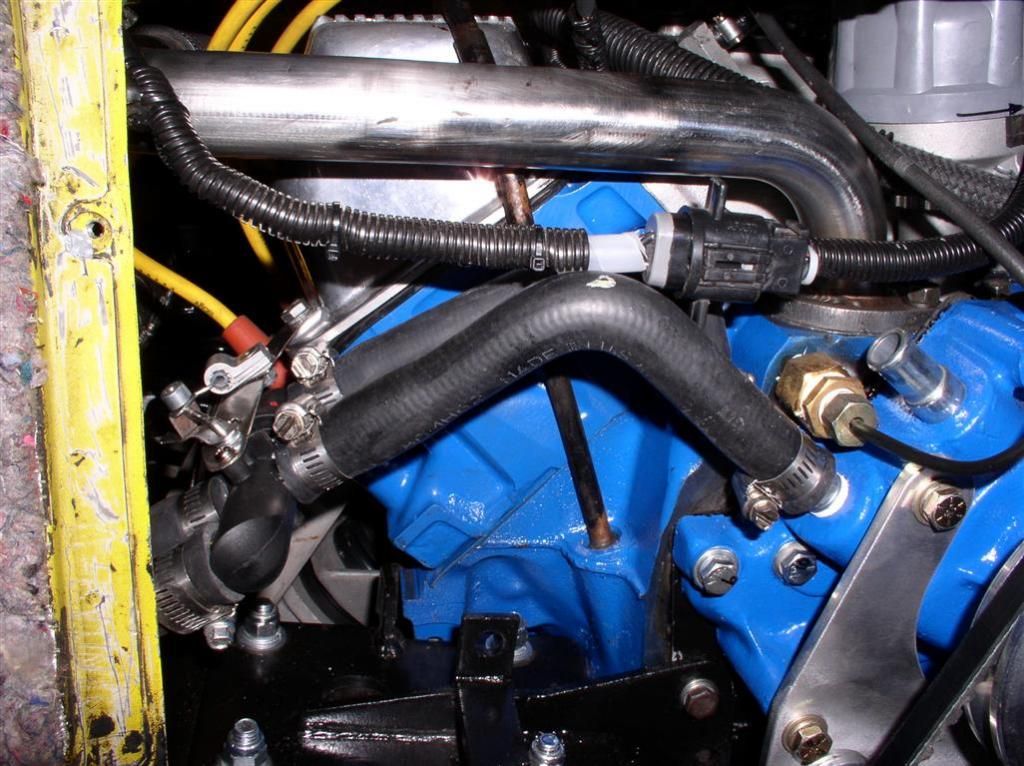
The hoses keep the assembly located, but I added a small tab to the valve cover bolt to add an extra layer of security.
I can't wait for winter!
Rocky
Wow, very nice work Rocky! Thanks for sharing.
quote:Hey Rocky...I just saw your post some pages ago about putting the timing marks on the flywheel at the access cover. Brilliant...I think I'll use that :-)
Brilliant indeed. Pure genius. Why didn't I think of that?! It'll save me removing cover plate a few times. Thanks
Car to Wade's for Exhaust Work!
Here we go for the final phase.... (Hopefully)
Tailpipe Alignment....
Passenger Side Exhaust Tubing Fab.... (It's tight in there!)
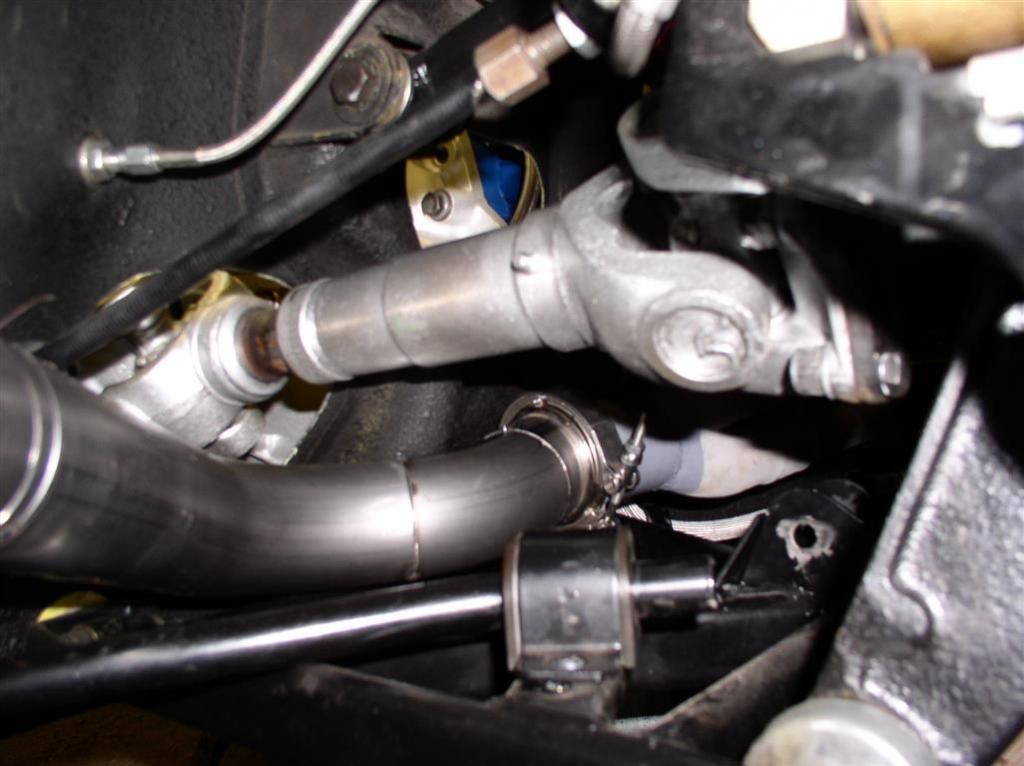
Getting very close!
Rocky
Here we go for the final phase.... (Hopefully)


Tailpipe Alignment....

Passenger Side Exhaust Tubing Fab.... (It's tight in there!)


Getting very close!
Rocky
looks good. I like the ansas with the 2.5 inch pipe.
")
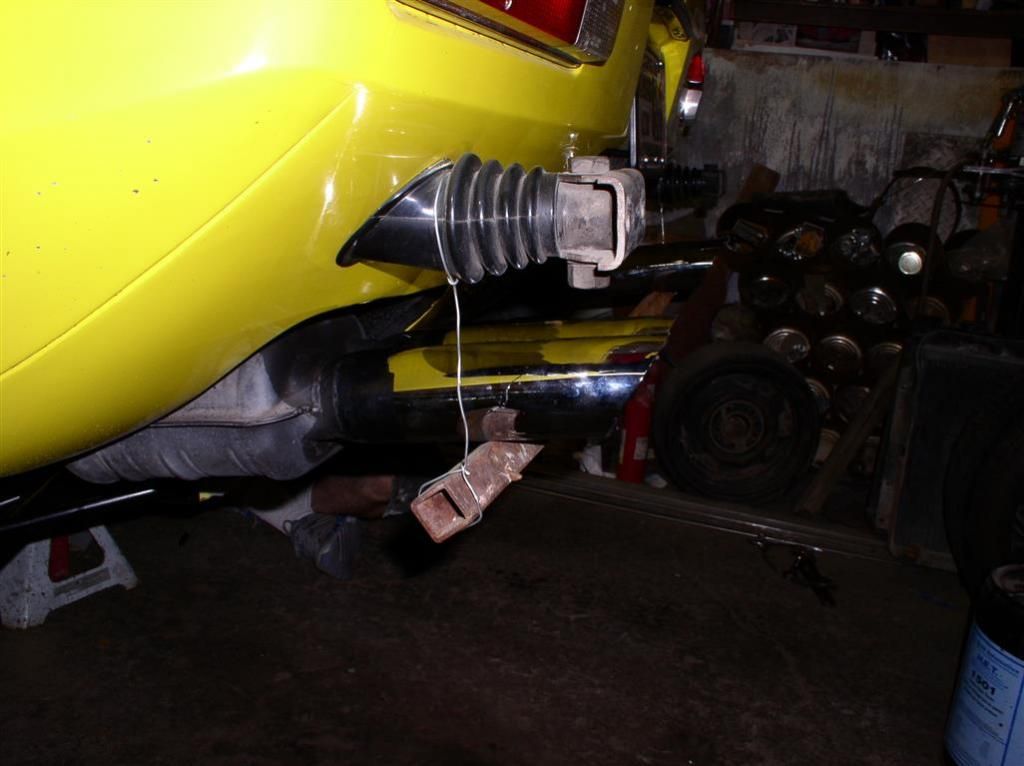
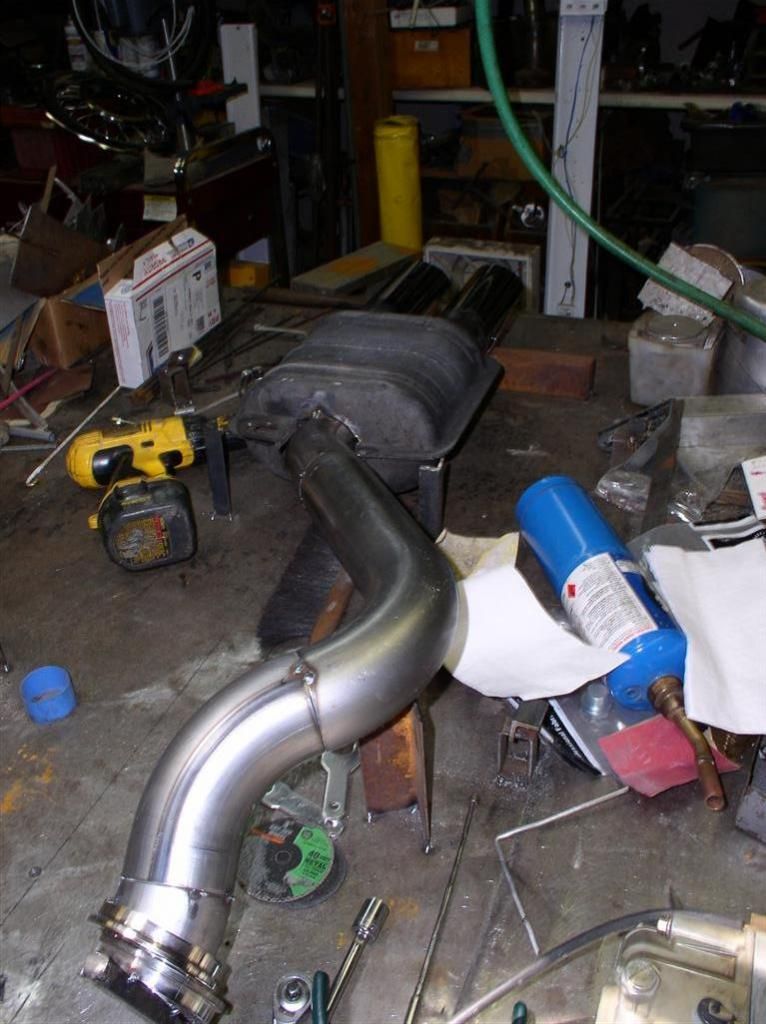
Exhaust Complete!
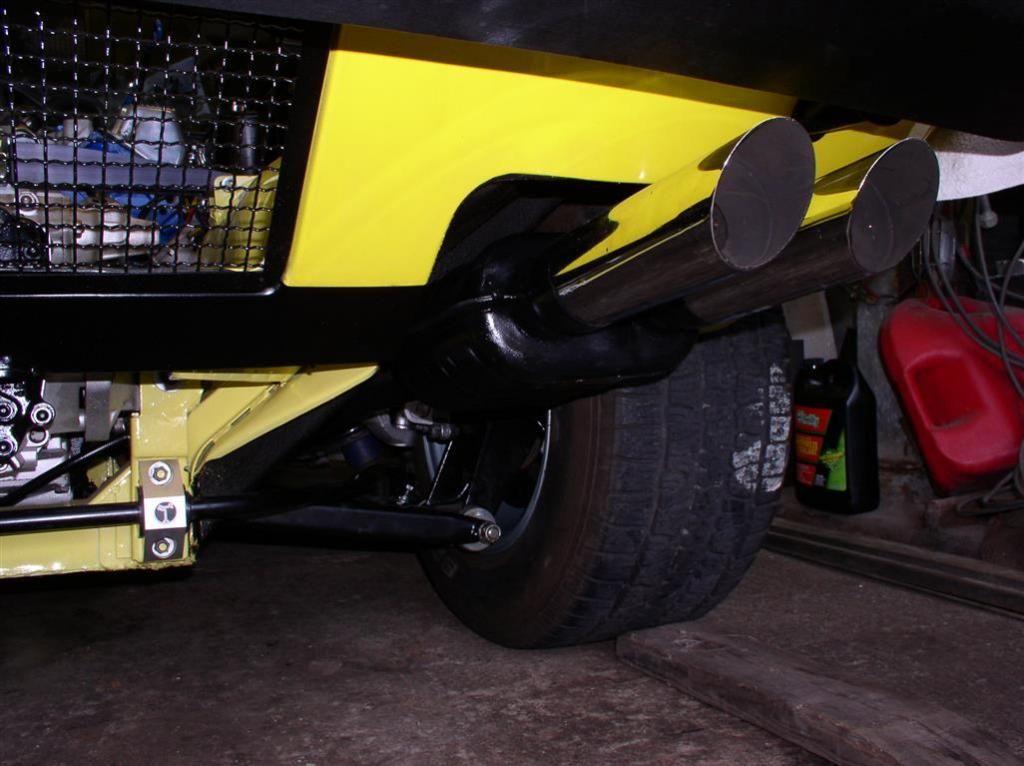
Wade hand-fabbed a set of ANSA (-1) Tailpipes to mate to my "Huge Bore" 2-1/2" header collectors, and to the stock ANSA Mufflers.
It was actually pretty tricky to get them to fit, because of the tight clearances between the halfshaft and the lower A-Arm. We cycled the suspension (a bunch) to verify clearance.
The only (minor) issue is the e-brake Cable, on the passenger side, it wants to lay on the tube. I believe we can solve that with a bit of cable adjustment.
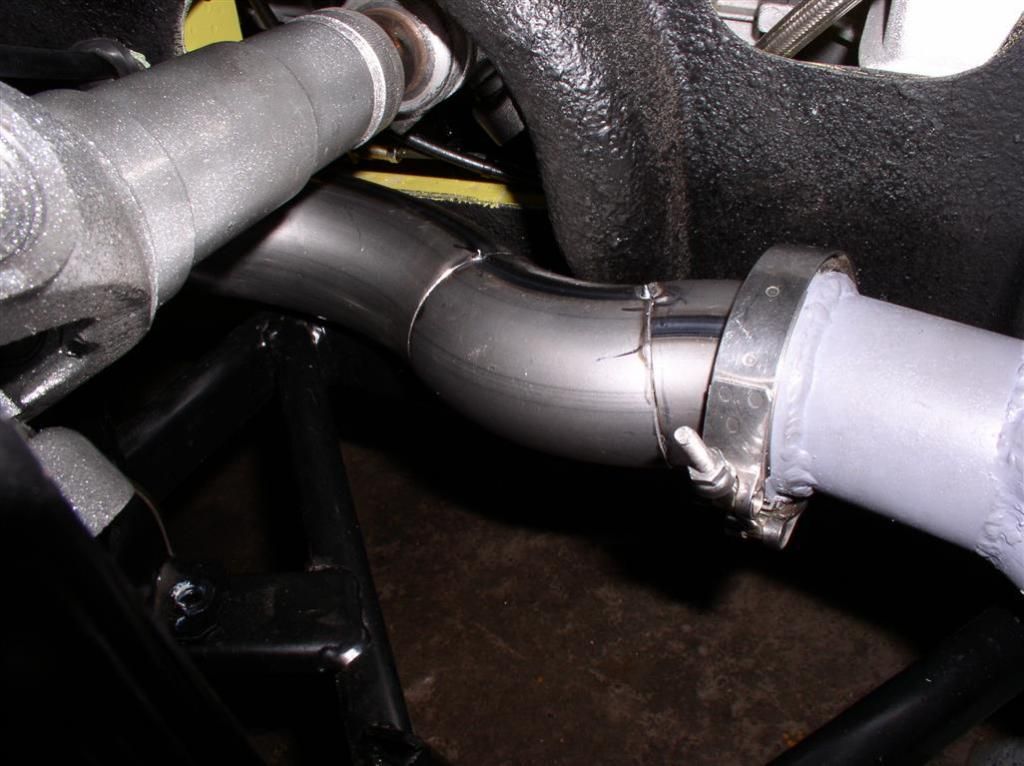
Other upgrades that come with the (-1) ANSA tails include the flanges for band-clamps between the collectors and tails, and O2 sensor bungs installed about 4" forward of the mufflers.
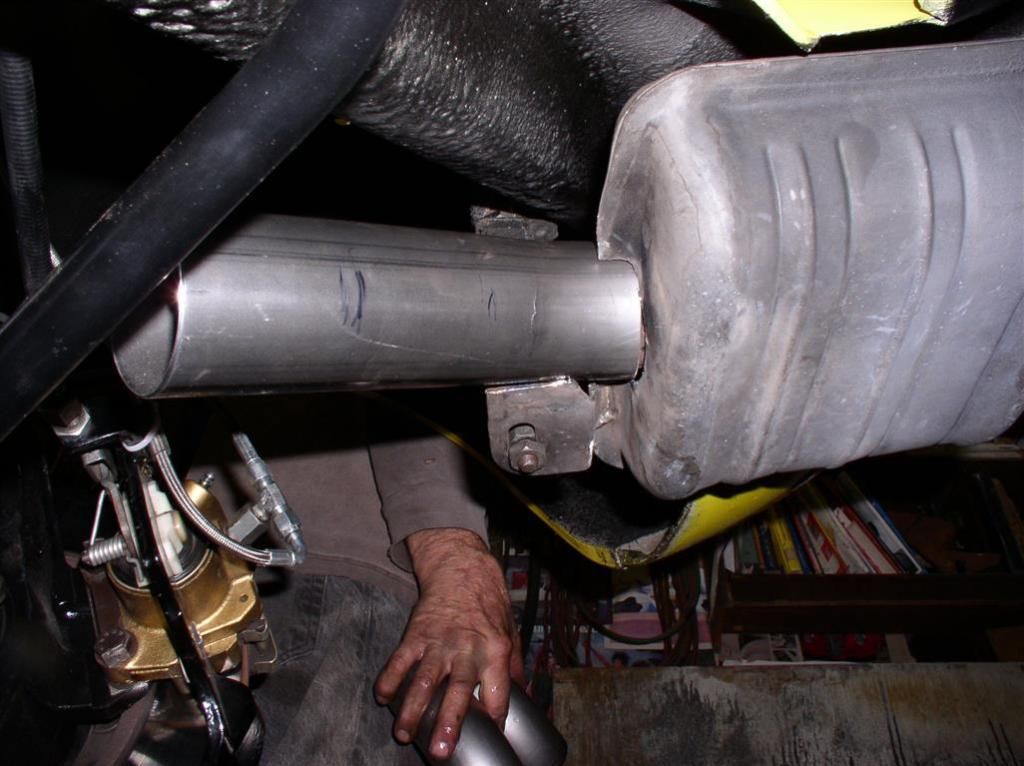
Construction Details
Wade started with three "standard" 2-1/2" U-Bends (8" Center to center) - Here's a picture of (half of) one of them...
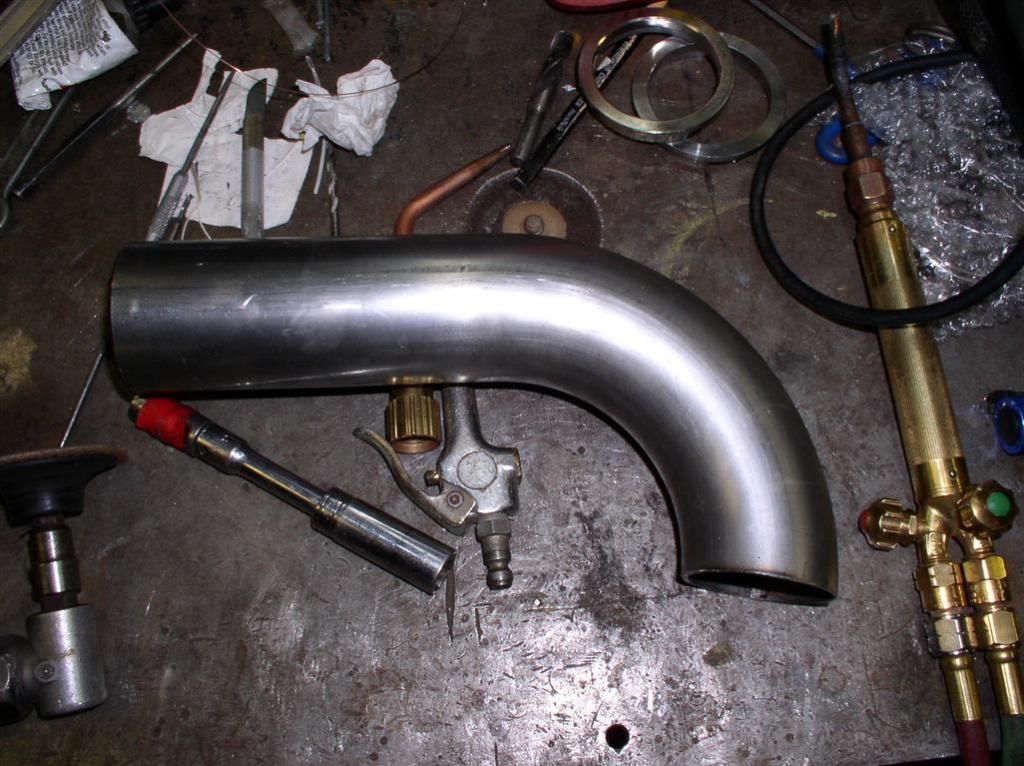
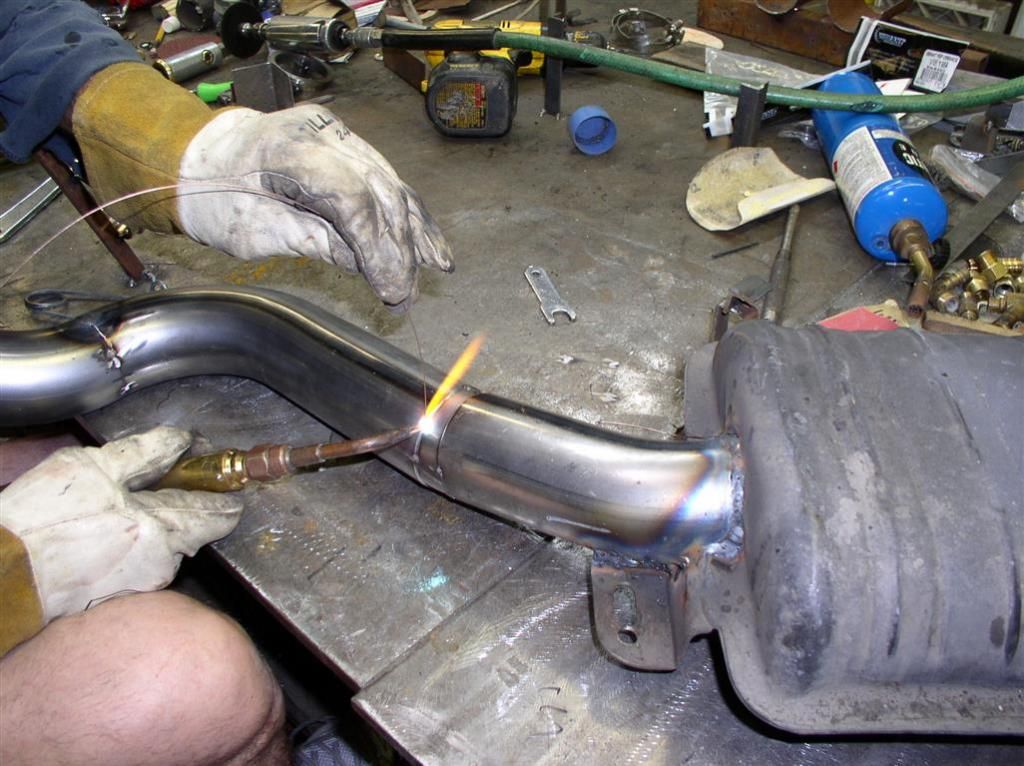
He carefully cut sections at the appropriate points in the bends to create the tails. Quick tack welds held the parts in place for fitting, and then it was gas-welded to complete.
I was very amazed that all except 1 joint were done with straight cuts (a chop saw) across the U-pipe. This caused all the sections to sit flush for welding.
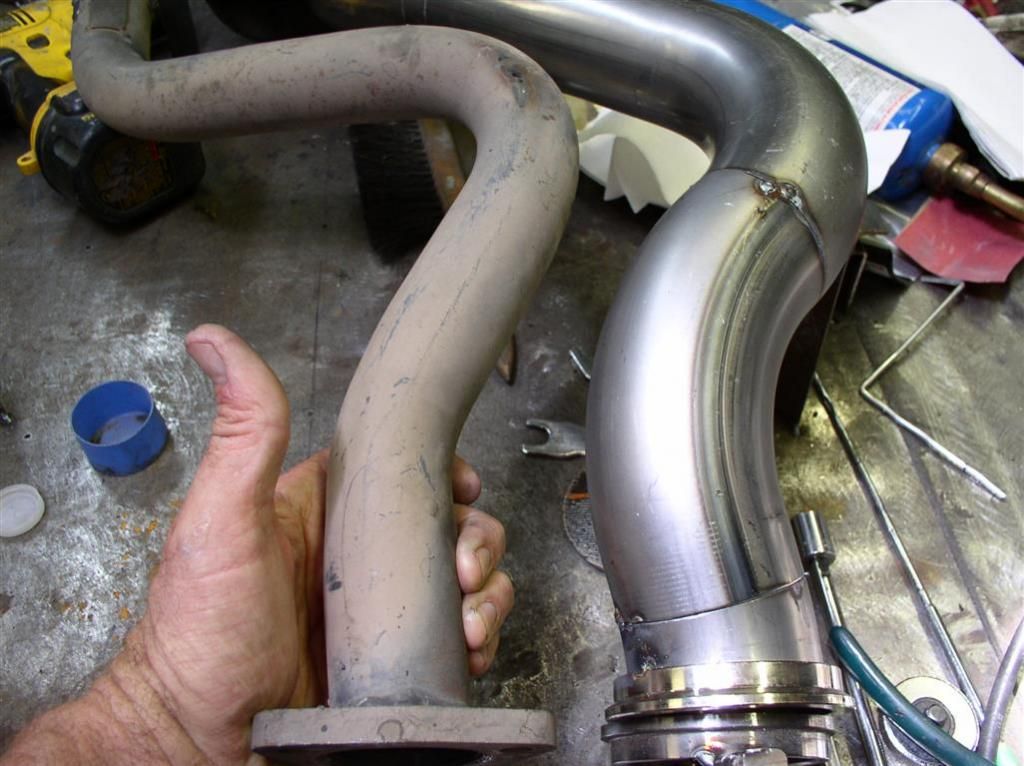
I will let the pictures tell the tale. But first, a picture of the original ANSA tag on the stock tailpipe....

I wish I took a picture of the finished product after welding and painting... They look spectacular. And fit just as good as they look!
Rocky
Wade hand-fabbed a set of ANSA (-1) Tailpipes to mate to my "Huge Bore" 2-1/2" header collectors, and to the stock ANSA Mufflers.
It was actually pretty tricky to get them to fit, because of the tight clearances between the halfshaft and the lower A-Arm. We cycled the suspension (a bunch) to verify clearance.
The only (minor) issue is the e-brake Cable, on the passenger side, it wants to lay on the tube. I believe we can solve that with a bit of cable adjustment.
Other upgrades that come with the (-1) ANSA tails include the flanges for band-clamps between the collectors and tails, and O2 sensor bungs installed about 4" forward of the mufflers.
Construction Details
Wade started with three "standard" 2-1/2" U-Bends (8" Center to center) - Here's a picture of (half of) one of them...

He carefully cut sections at the appropriate points in the bends to create the tails. Quick tack welds held the parts in place for fitting, and then it was gas-welded to complete.
I was very amazed that all except 1 joint were done with straight cuts (a chop saw) across the U-pipe. This caused all the sections to sit flush for welding.
I will let the pictures tell the tale. But first, a picture of the original ANSA tag on the stock tailpipe....


I wish I took a picture of the finished product after welding and painting... They look spectacular. And fit just as good as they look!
Rocky
This thread has some good pictures of my "Huge Bore" Headers - these are "Big Bore" headers modified for a 2-1/2" collectors, and a Band-clamp flange on the end of each of the collectors.
Note: "Huge Bore" headers are a trademark of W-Wadeco Header Corporation, of Tucson, AZ
I thought it would be good to link this into the thread.
If you have Hall Big Bores, and you have the opportunity to look inside of your collectors, check them out. At least in two examples, it looks like there could be some (a significant?) amount of restrictions to flow at the collector end.
Header Color Question Thread
Rocky
Where can I find a distrubutor/dealer for the W-Wadeco "Huge Bore" headers?
Are the O2 bungs for current setup or for future plans?
Are the O2 bungs for current setup or for future plans?
JF -
The O2 bungs are for the break-in, Wade has a dual sensor / monitor system we will be using for the initial run.
In the near term I will probably plug them, but my goal is to find a O2 Monitor system to run in my car.
Who knows what the future may hold for the fuel/air system - but it's always good to have options....
Rocky
Tailpipe comparison photo
Attachments
Images (1)

Beautiful!

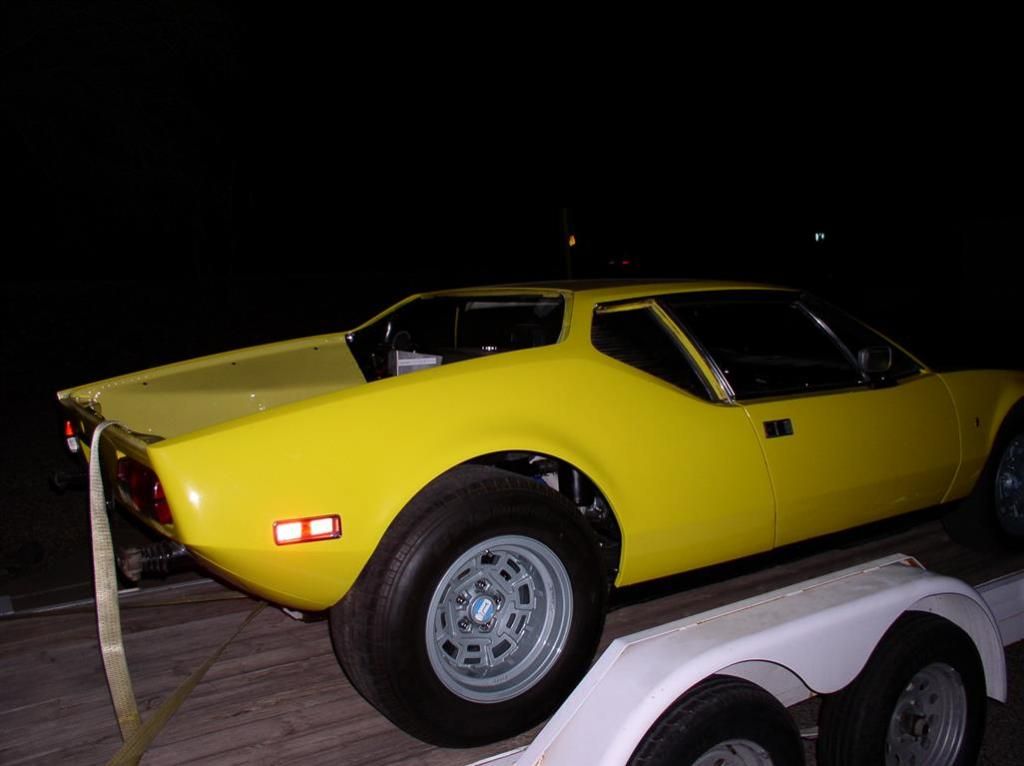
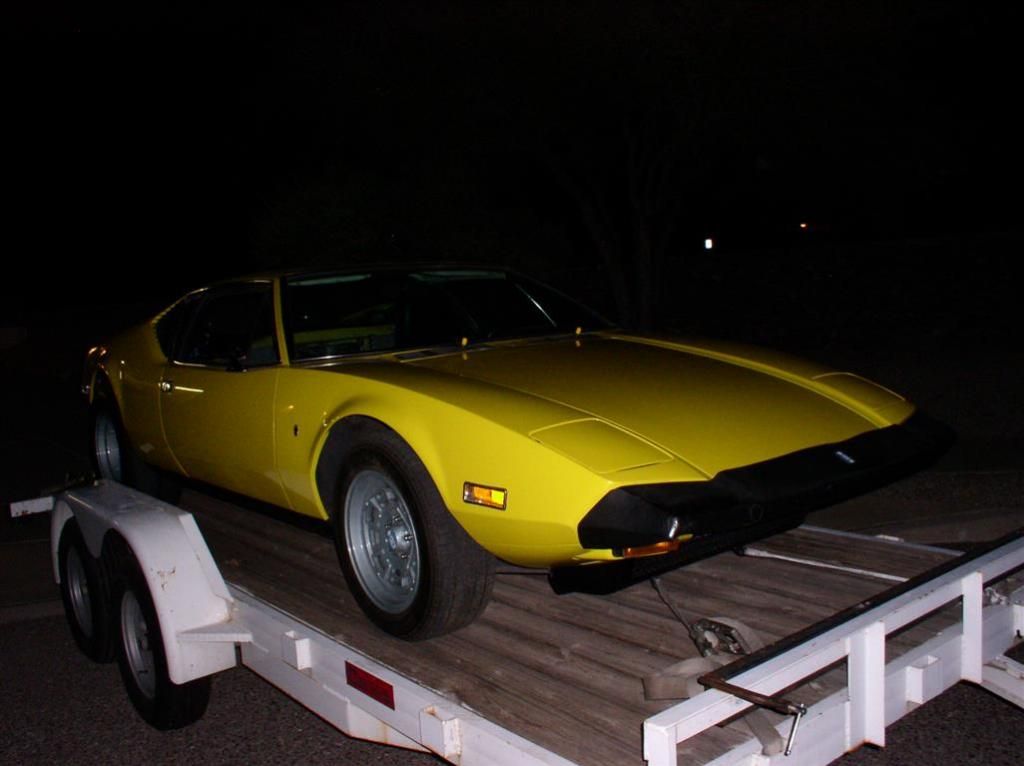
It's Alive...It's ALIVE!!!!
Wade, Spike and I fired up my car this afternoon. It was awesome. Now I have to figure out how to compress a 30 MByte IPhone video file to something I can post here...
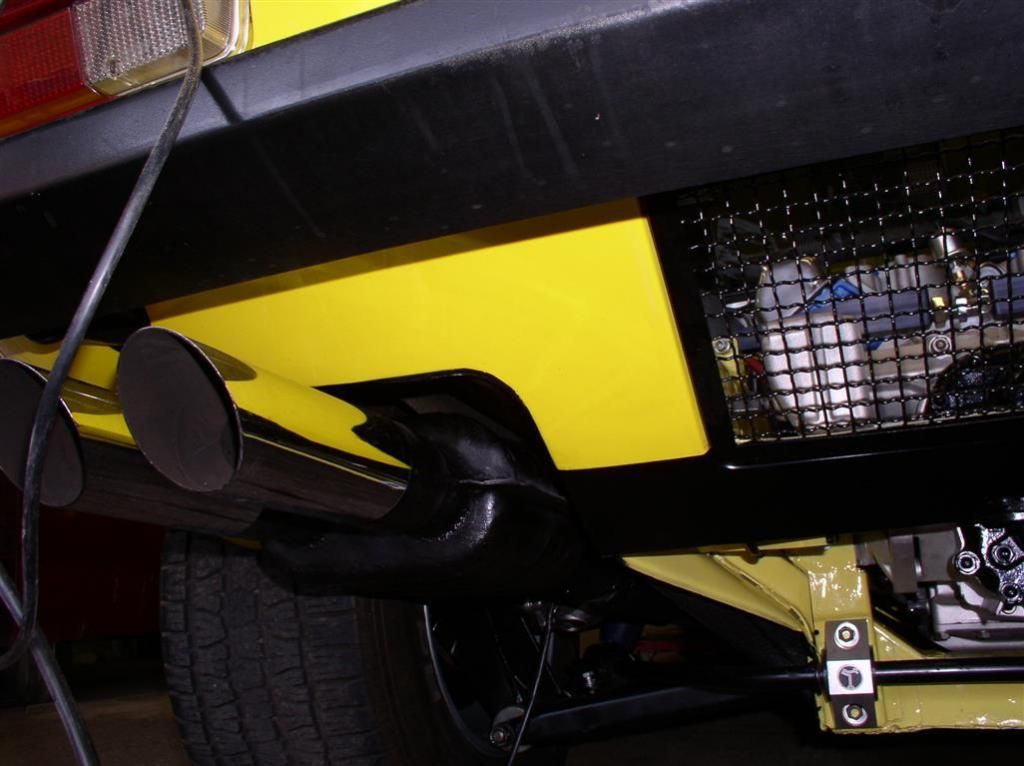
Anyway - here's pictures of the new tails mounted up....
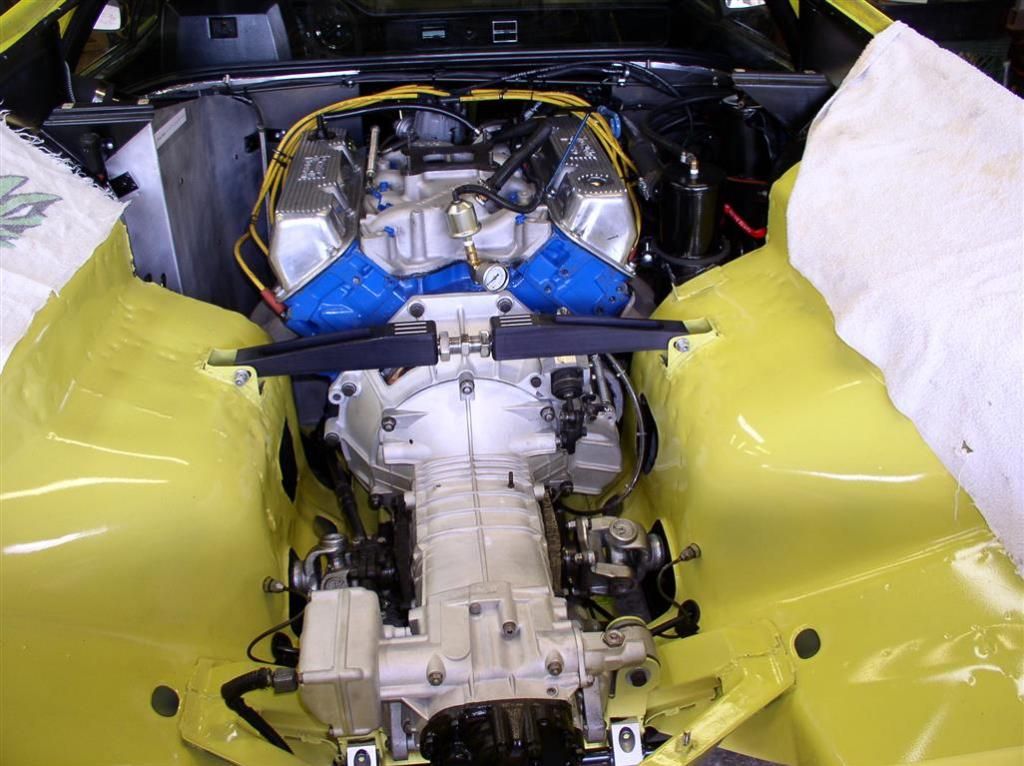
The beautiful engine bay...
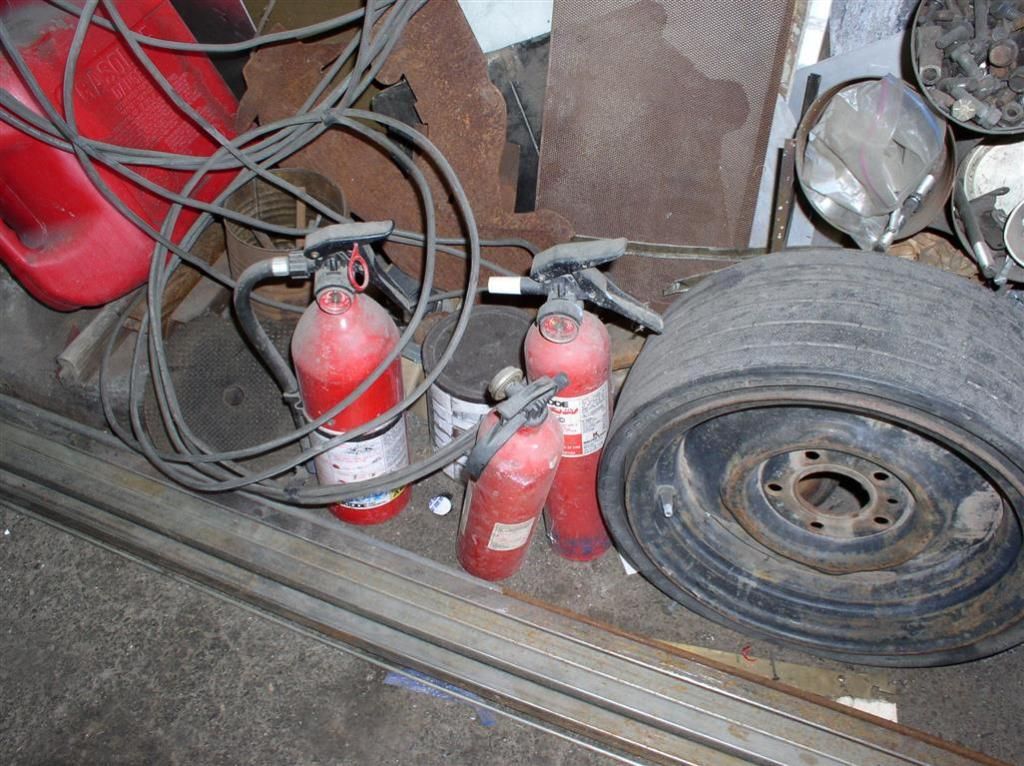
... and of course... Safety First!!
We got through the initial startup, and the infant set up issues, including.....
Smoky Startup
Flooding / Stuck Floats on both bowls (was bad / old O-Rings in the Float Adjustment Mechanism)
Initial Timing Adjust
Scary Noise at higher RPM (was actually the AC Compressor running unexpectedly)
Top End Inspection
Minor Leaks in the Cooling System
Full Diagnostic Check and Idle Adjust
Timing Refinement Adjustment
Back-Patting on a job well done.
The car sounds awesome. I can't wait to drive it home!
Thanks, Wade!
Rocky
Wade, Spike and I fired up my car this afternoon. It was awesome. Now I have to figure out how to compress a 30 MByte IPhone video file to something I can post here...
Anyway - here's pictures of the new tails mounted up....


The beautiful engine bay...

... and of course... Safety First!!

We got through the initial startup, and the infant set up issues, including.....
The car sounds awesome. I can't wait to drive it home!
Thanks, Wade!
Rocky
Let's Try This for A Video Link....
WOW!
(next- a burn out video)
(next- a burn out video)
Add Reply
Sign In To Reply