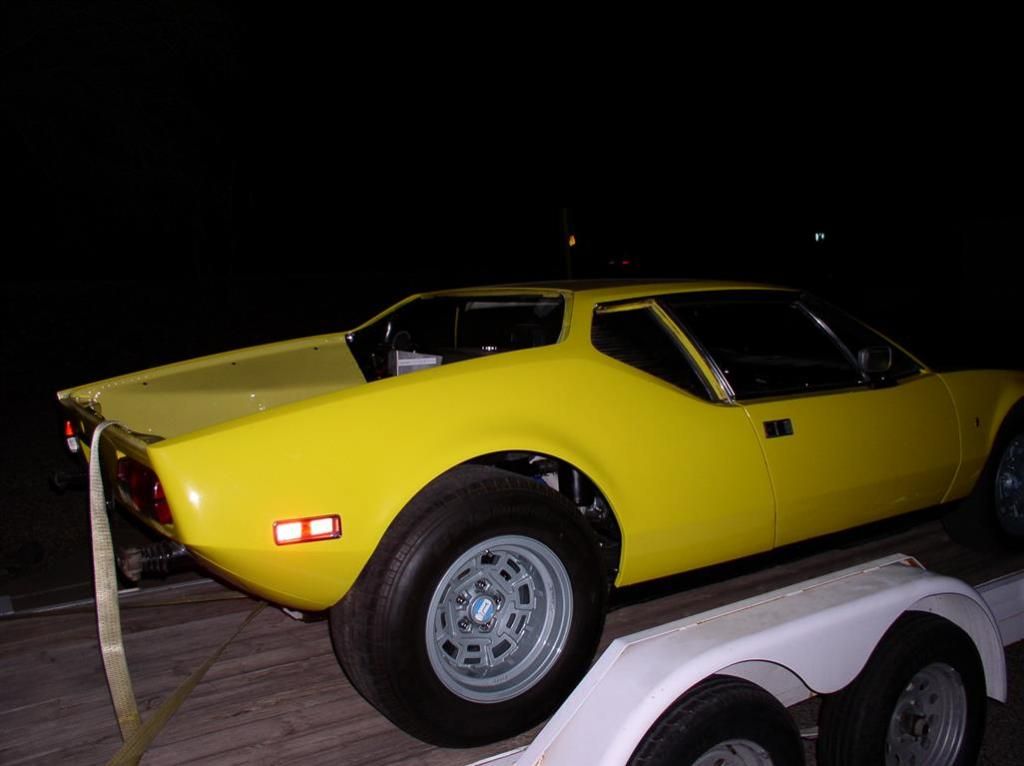
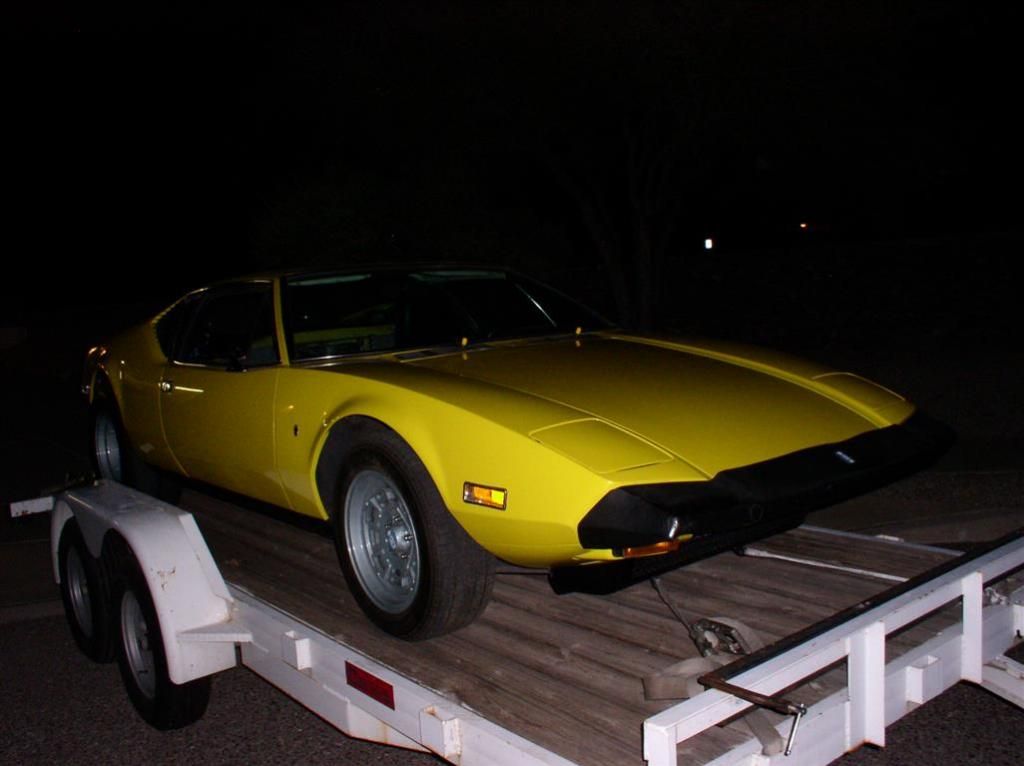
sorry for the dumb question, but I need to learn.
where are you plumbing the "overflow" tank for water pump suction?
does the heater supply and return connect to the water pump discharge and suction?
JF -
My water pump (a Stewart Racing EMP-16143) has two fittings on the pump body. One of these goes to the bottom of the surge/overflow tank. You can see it in the pictures of the tank a few pages back (on page 3).
The heater (heat source) goes to the discharge fitting on the block and the return goes to the second water pump suction fitting on the pump body.
The valve allows circulation from the block back to the pump when the heater valve is closed. It's actually a pretty slick design.
Rocky
Detonator -
The wiring looks good because of all the new sheathing around it. Honestly, while I don't mind doing electrical work, it takes me a LONG time to do it, because I always get myself confused....
It takes me a lot longer than it should - maybe I don't do it enough!
Continuing to make progress, albeit slowly -
Both headers are on. All wiring and electrical checks complete. All plumbing on top of the engine is done.
E-Brake is hooked up (pretty cool, note the removable bracket again) - the E-Brake mechanism required some more jockeying of the water tubes.... Heading back out to do the final adjustment and to tie the cables up and out of the way....
Next the speedo cable....
Rocky
Attachments
Hey Rocky...I just saw your post some pages ago about putting the timing marks on the flywheel at the access cover. Brilliant...I think I'll use that :-)
quote:Brilliant...I think I'll use that :-)
Rob -
I wish I could claim credit for even some of these ideas and the execution on my car, but they are really Wade's (Mark IV / 4280). He is the "Leonardo da Vinci" on this project, while I am the apprentice.
But his ideas, recommendations and his execution has really been top notch. The main reason I wanted to do this thread is to showcase many of his ideas that we have implemented.
Wade has got a lot of experience with Fords, Mustangs, carburetors, and he has his own Pantera. I appreciate his suggestions of how to improve my car - everything we have done has been top-notch.
The last item to getting on the road is getting the headers and the tailpipes aligned and bolted up. Hopefully, we can start the car in less than a week.
Rocky
Heater Valve Installed!
I ran Aeroquip Teflon Hose (Stainless Steel Sheathed) from my heater control lever back into the engine bay. We ran some soft stainless steel wire from the existing Heater Lever to the engine bay mounted heater valve.
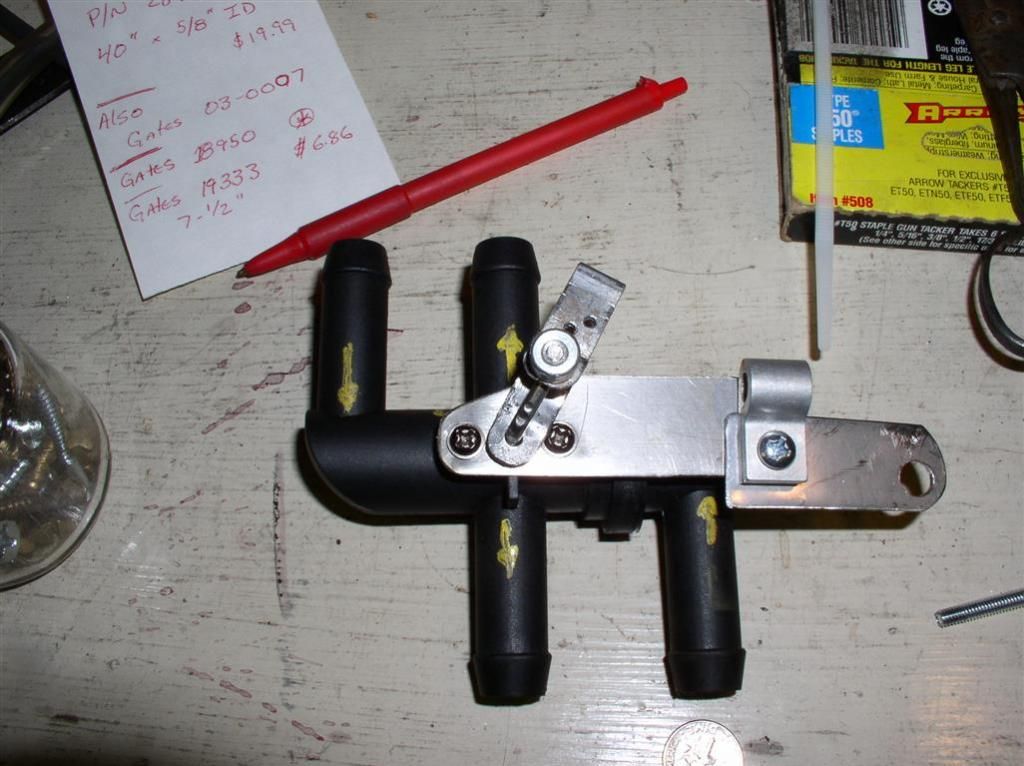
Wade fabbed up this cool heater control mechanism.
Here's pictures of the valve on the bench, and installed.
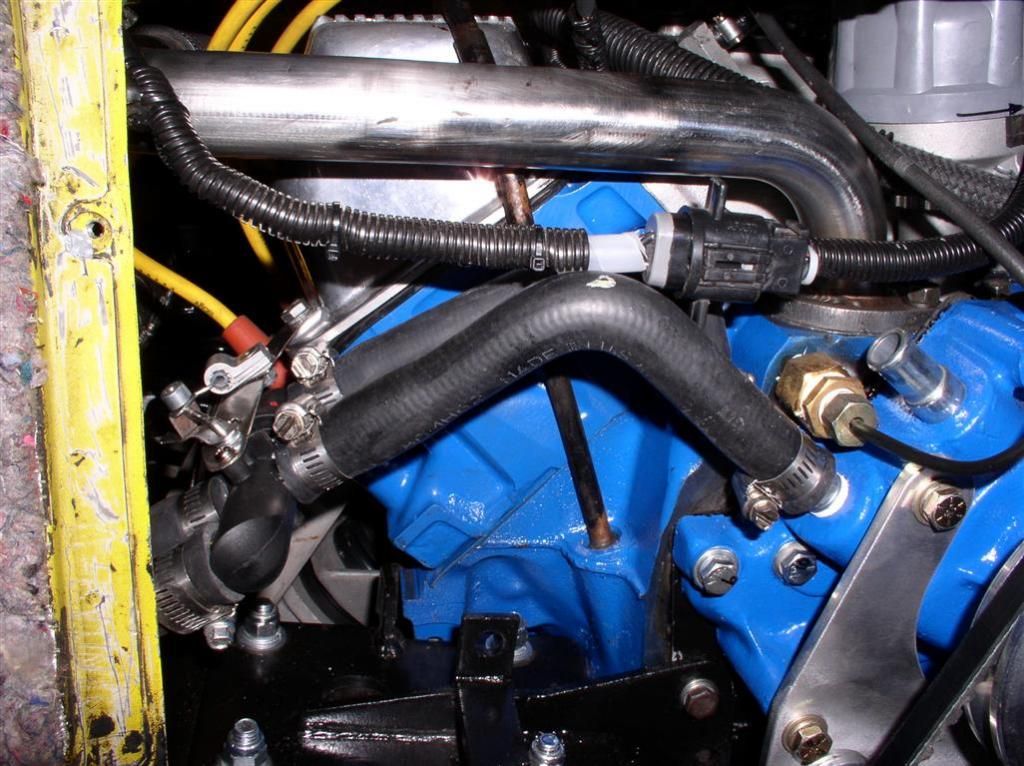
The hoses keep the assembly located, but I added a small tab to the valve cover bolt to add an extra layer of security.
I can't wait for winter!
Rocky
I ran Aeroquip Teflon Hose (Stainless Steel Sheathed) from my heater control lever back into the engine bay. We ran some soft stainless steel wire from the existing Heater Lever to the engine bay mounted heater valve.
Wade fabbed up this cool heater control mechanism.
Here's pictures of the valve on the bench, and installed.


The hoses keep the assembly located, but I added a small tab to the valve cover bolt to add an extra layer of security.
I can't wait for winter!
Rocky
Wow, very nice work Rocky! Thanks for sharing.
quote:Hey Rocky...I just saw your post some pages ago about putting the timing marks on the flywheel at the access cover. Brilliant...I think I'll use that :-)
Brilliant indeed. Pure genius. Why didn't I think of that?! It'll save me removing cover plate a few times. Thanks
looks good. I like the ansas with the 2.5 inch pipe.
Exhaust Complete!
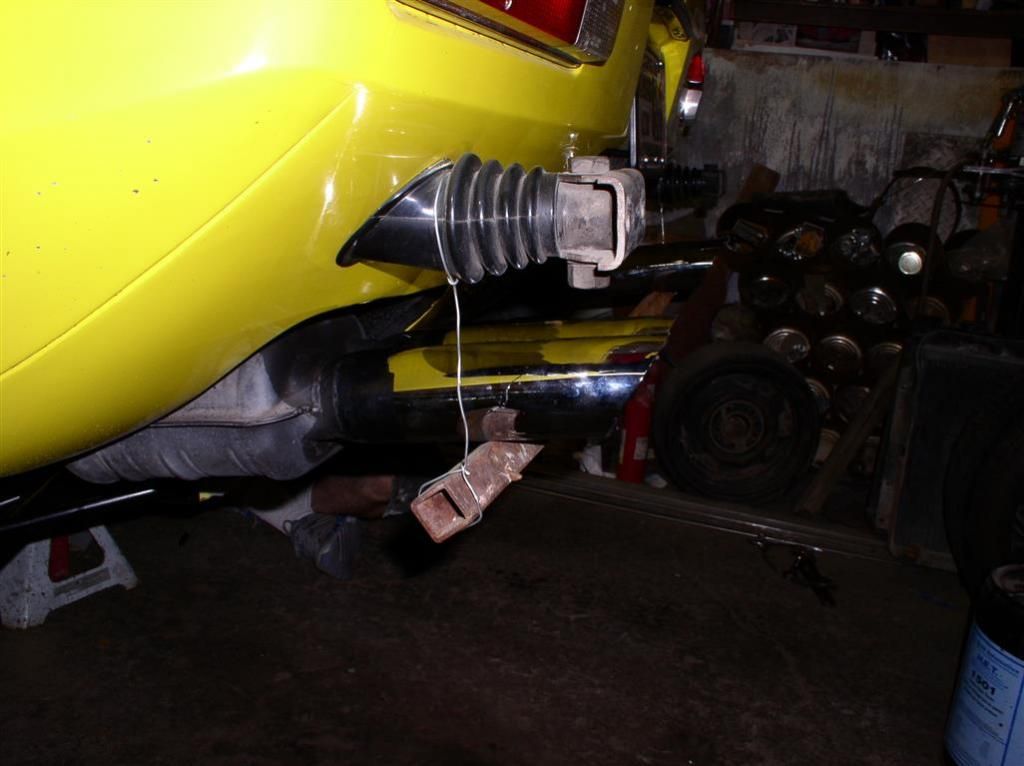
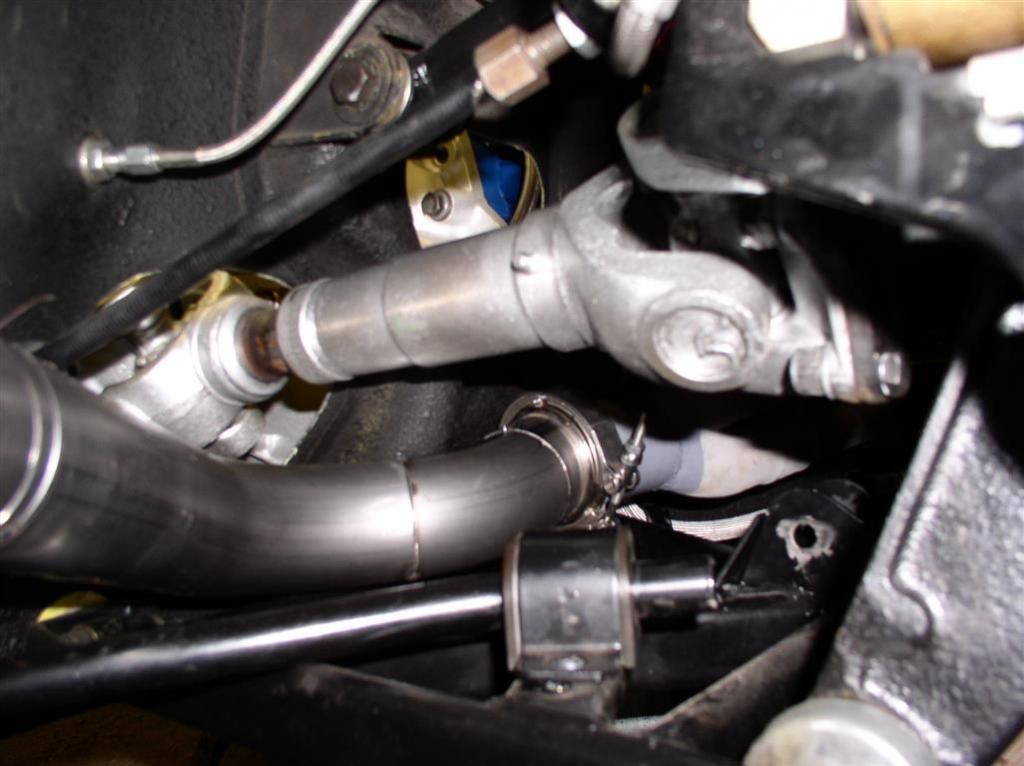
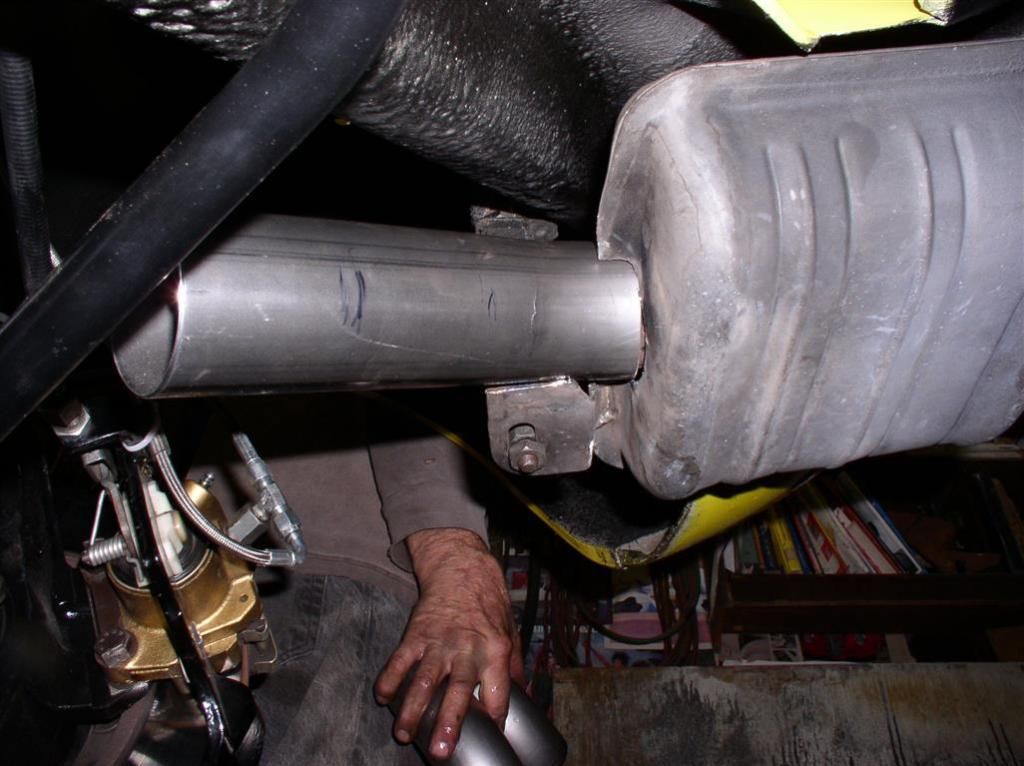
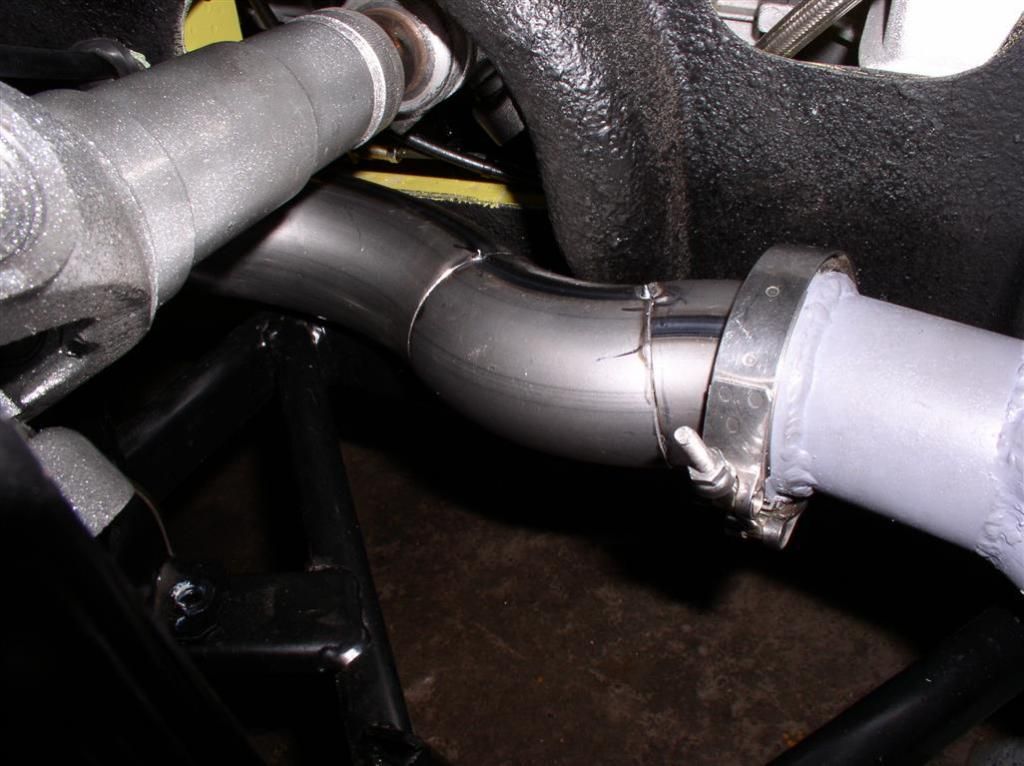
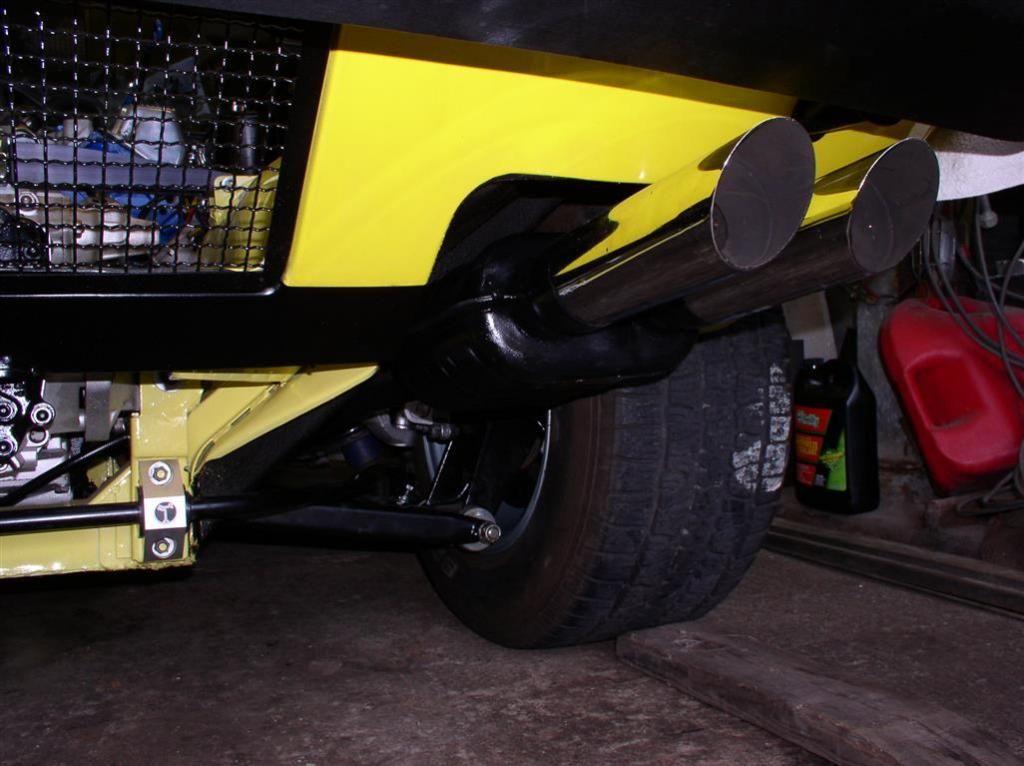
Wade hand-fabbed a set of ANSA (-1) Tailpipes to mate to my "Huge Bore" 2-1/2" header collectors, and to the stock ANSA Mufflers.
It was actually pretty tricky to get them to fit, because of the tight clearances between the halfshaft and the lower A-Arm. We cycled the suspension (a bunch) to verify clearance.
The only (minor) issue is the e-brake Cable, on the passenger side, it wants to lay on the tube. I believe we can solve that with a bit of cable adjustment.
Other upgrades that come with the (-1) ANSA tails include the flanges for band-clamps between the collectors and tails, and O2 sensor bungs installed about 4" forward of the mufflers.
Construction Details
Wade started with three "standard" 2-1/2" U-Bends (8" Center to center) - Here's a picture of (half of) one of them...
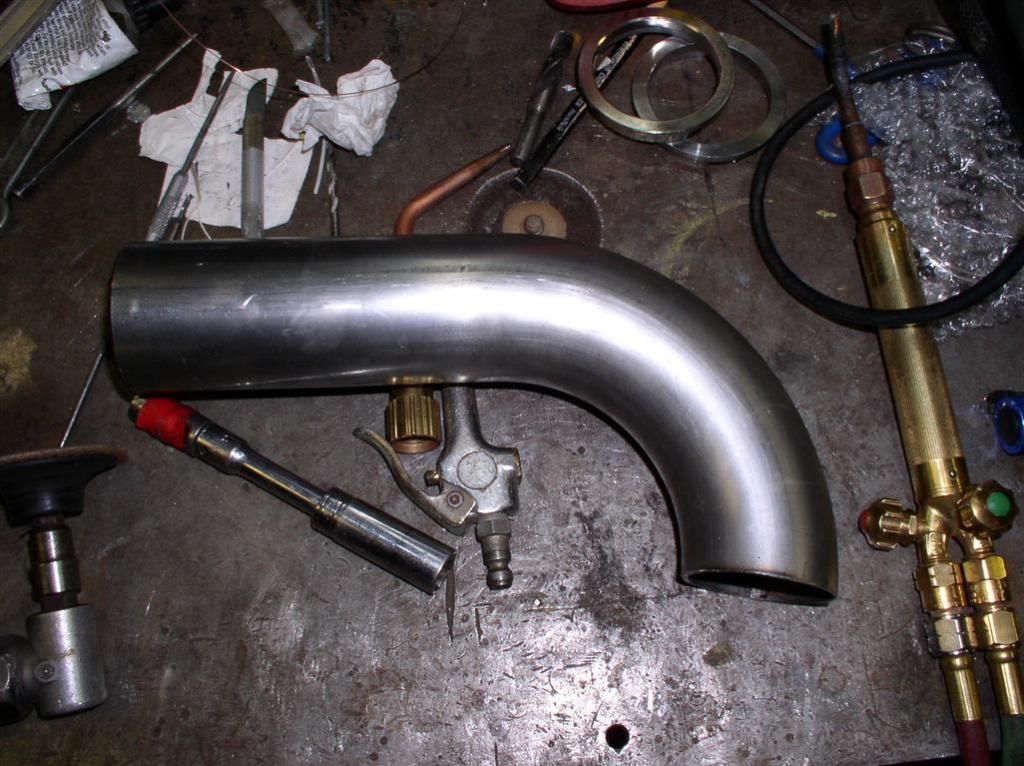
He carefully cut sections at the appropriate points in the bends to create the tails. Quick tack welds held the parts in place for fitting, and then it was gas-welded to complete.
I was very amazed that all except 1 joint were done with straight cuts (a chop saw) across the U-pipe. This caused all the sections to sit flush for welding.
I will let the pictures tell the tale. But first, a picture of the original ANSA tag on the stock tailpipe....
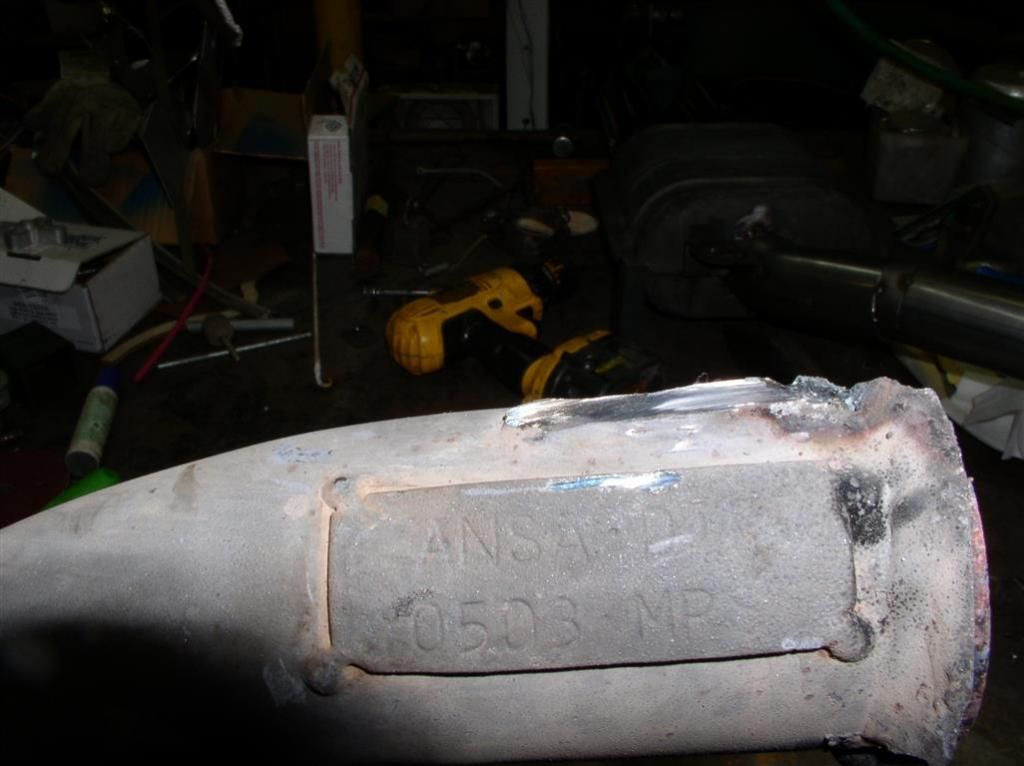
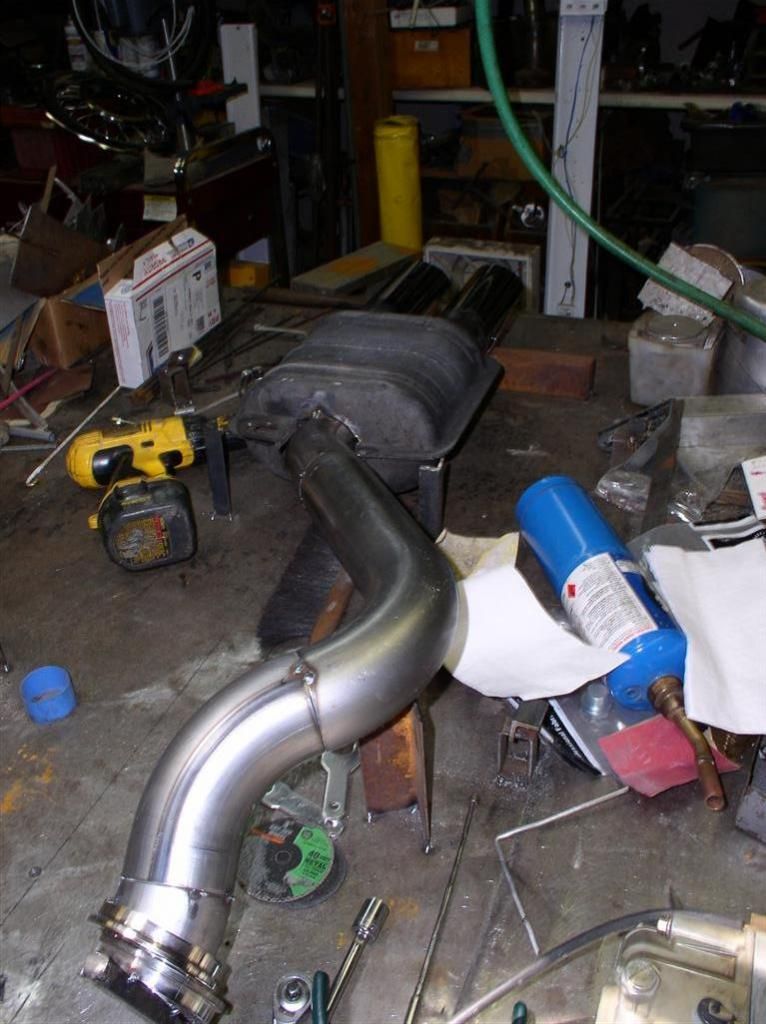
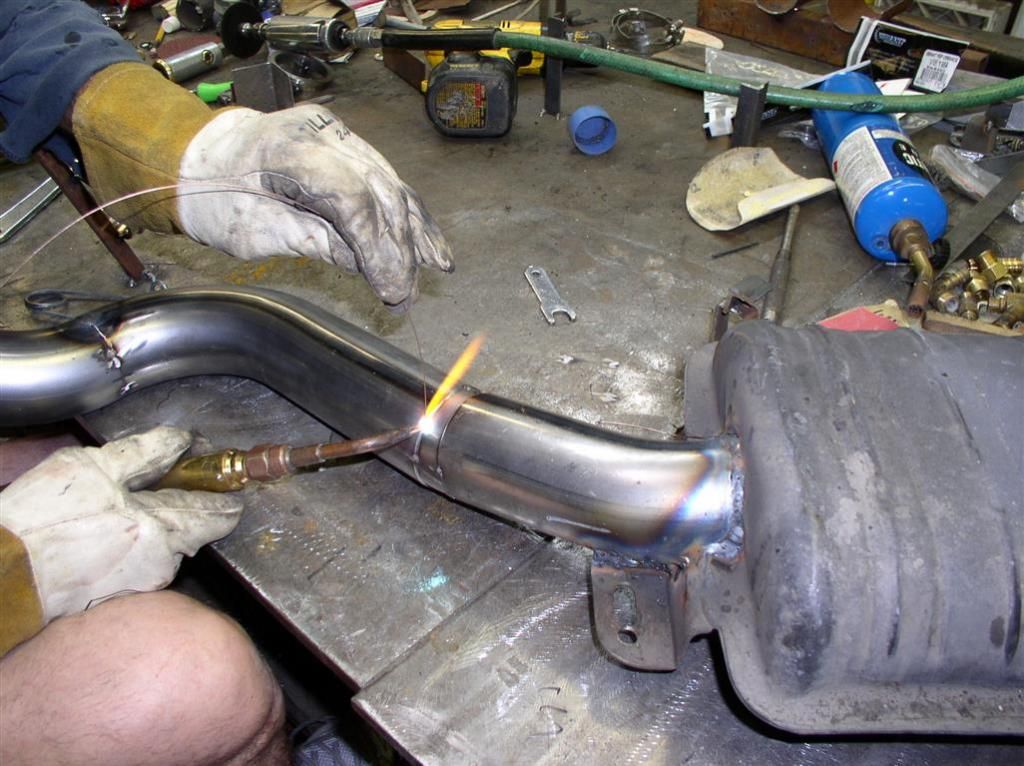
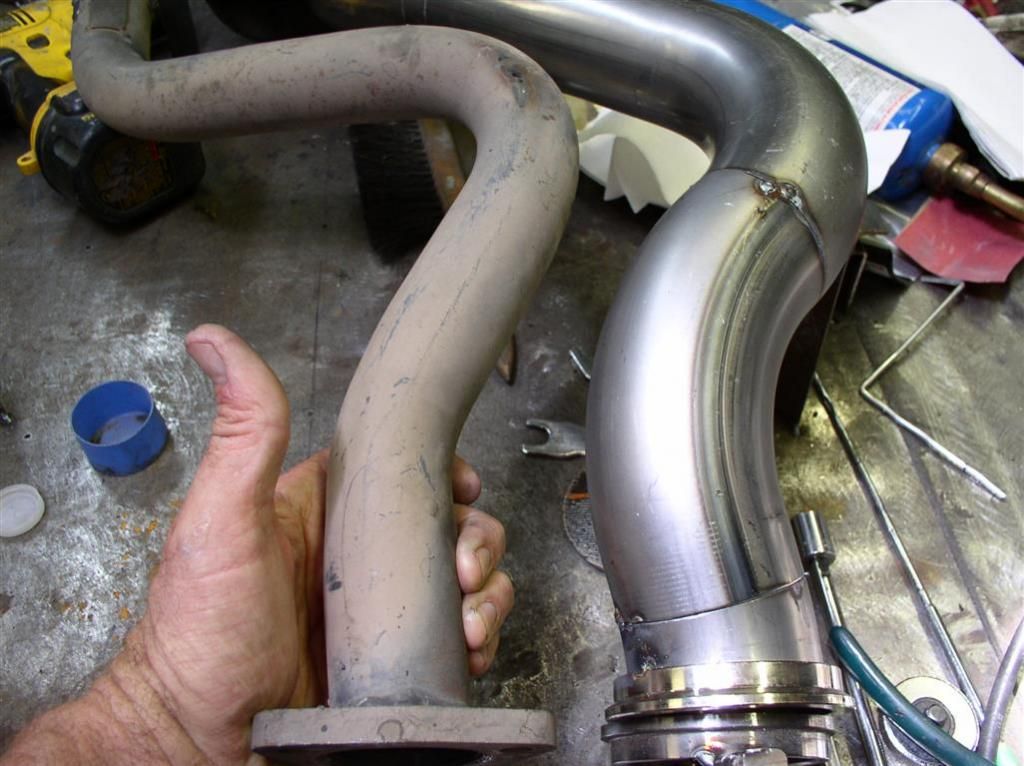
I wish I took a picture of the finished product after welding and painting... They look spectacular. And fit just as good as they look!
Rocky
Wade hand-fabbed a set of ANSA (-1) Tailpipes to mate to my "Huge Bore" 2-1/2" header collectors, and to the stock ANSA Mufflers.
It was actually pretty tricky to get them to fit, because of the tight clearances between the halfshaft and the lower A-Arm. We cycled the suspension (a bunch) to verify clearance.
The only (minor) issue is the e-brake Cable, on the passenger side, it wants to lay on the tube. I believe we can solve that with a bit of cable adjustment.
Other upgrades that come with the (-1) ANSA tails include the flanges for band-clamps between the collectors and tails, and O2 sensor bungs installed about 4" forward of the mufflers.
Construction Details
Wade started with three "standard" 2-1/2" U-Bends (8" Center to center) - Here's a picture of (half of) one of them...

He carefully cut sections at the appropriate points in the bends to create the tails. Quick tack welds held the parts in place for fitting, and then it was gas-welded to complete.
I was very amazed that all except 1 joint were done with straight cuts (a chop saw) across the U-pipe. This caused all the sections to sit flush for welding.
I will let the pictures tell the tale. But first, a picture of the original ANSA tag on the stock tailpipe....


I wish I took a picture of the finished product after welding and painting... They look spectacular. And fit just as good as they look!
Rocky
This thread has some good pictures of my "Huge Bore" Headers - these are "Big Bore" headers modified for a 2-1/2" collectors, and a Band-clamp flange on the end of each of the collectors.
Note: "Huge Bore" headers are a trademark of W-Wadeco Header Corporation, of Tucson, AZ
I thought it would be good to link this into the thread.
If you have Hall Big Bores, and you have the opportunity to look inside of your collectors, check them out. At least in two examples, it looks like there could be some (a significant?) amount of restrictions to flow at the collector end.
Header Color Question Thread
Rocky
Where can I find a distrubutor/dealer for the W-Wadeco "Huge Bore" headers?
Are the O2 bungs for current setup or for future plans?
Are the O2 bungs for current setup or for future plans?
JF -
The O2 bungs are for the break-in, Wade has a dual sensor / monitor system we will be using for the initial run.
In the near term I will probably plug them, but my goal is to find a O2 Monitor system to run in my car.
Who knows what the future may hold for the fuel/air system - but it's always good to have options....
Rocky
Tailpipe comparison photo
Attachments
Beautiful!

It's Alive...It's ALIVE!!!!
Wade, Spike and I fired up my car this afternoon. It was awesome. Now I have to figure out how to compress a 30 MByte IPhone video file to something I can post here...
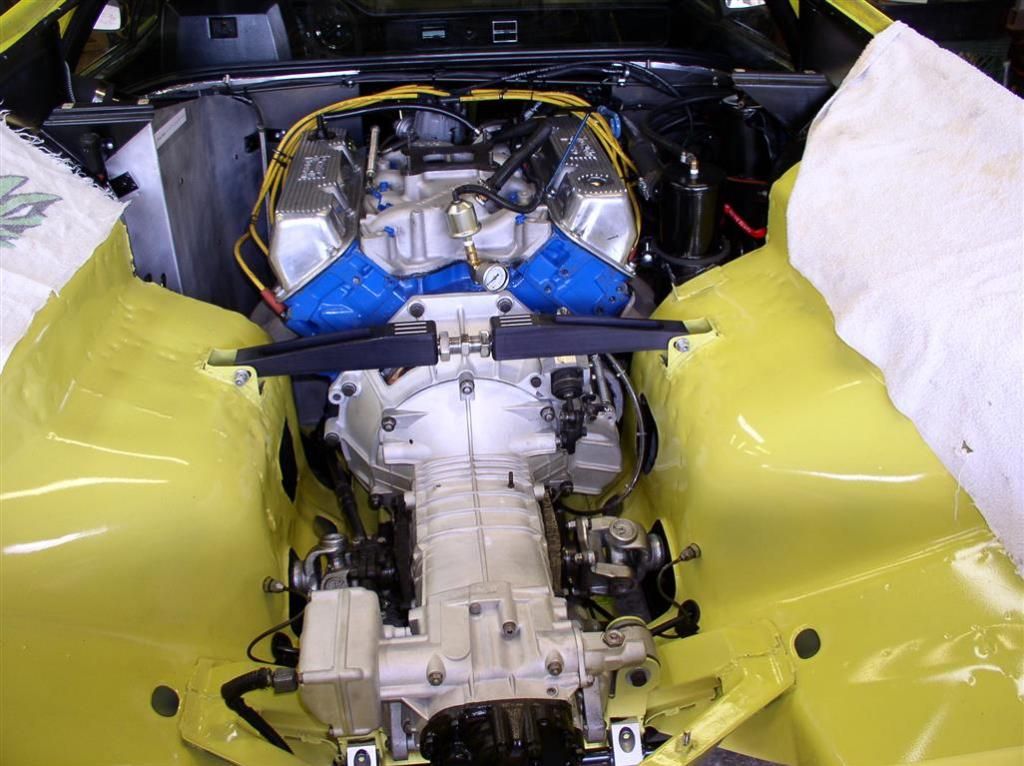
Anyway - here's pictures of the new tails mounted up....
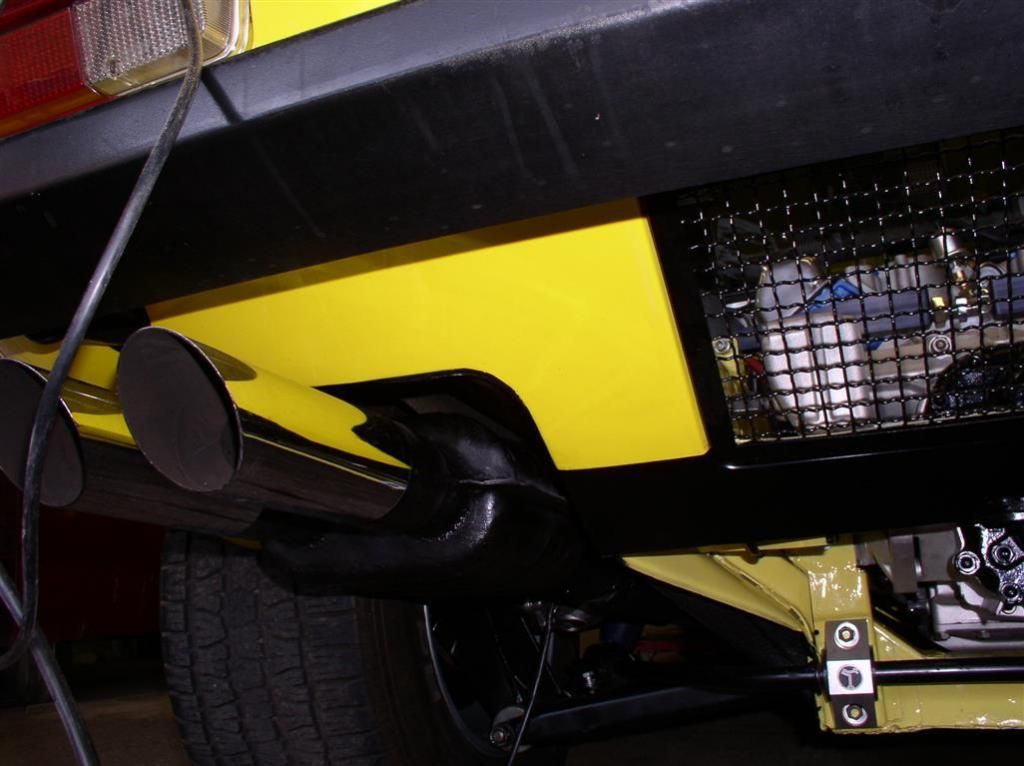
The beautiful engine bay...
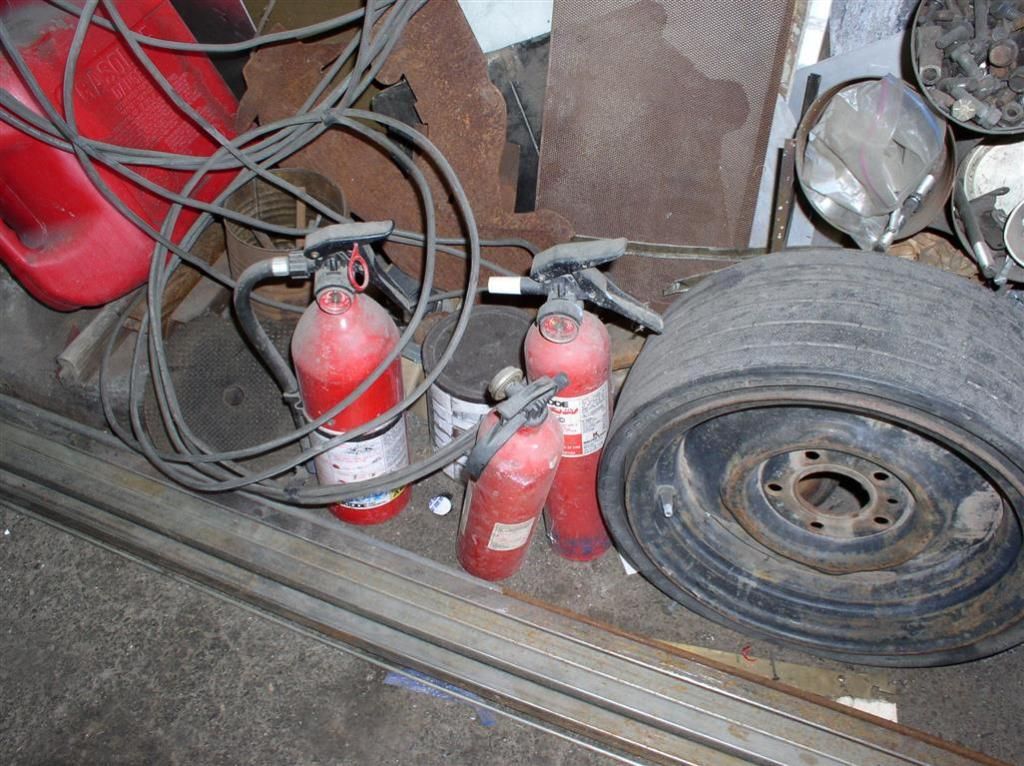
... and of course... Safety First!!
We got through the initial startup, and the infant set up issues, including.....
Smoky Startup
Flooding / Stuck Floats on both bowls (was bad / old O-Rings in the Float Adjustment Mechanism)
Initial Timing Adjust
Scary Noise at higher RPM (was actually the AC Compressor running unexpectedly)
Top End Inspection
Minor Leaks in the Cooling System
Full Diagnostic Check and Idle Adjust
Timing Refinement Adjustment
Back-Patting on a job well done.
The car sounds awesome. I can't wait to drive it home!
Thanks, Wade!
Rocky
Wade, Spike and I fired up my car this afternoon. It was awesome. Now I have to figure out how to compress a 30 MByte IPhone video file to something I can post here...
Anyway - here's pictures of the new tails mounted up....


The beautiful engine bay...

... and of course... Safety First!!

We got through the initial startup, and the infant set up issues, including.....
The car sounds awesome. I can't wait to drive it home!
Thanks, Wade!
Rocky
Let's Try This for A Video Link....
WOW!
(next- a burn out video)
(next- a burn out video)
WELL DONE!!

John

John
Thanks for the congratulations, all!
The car is home from Wade's shop, and peacefully resting in my garage.
No incidents on the ~7 mile trip home. The car ran great - Centerforce Clutch was smooth, steady temps, oil pressure good, and the engine sound was consistent.
The tuning of my new "4 Corner Idle" carb (List 4609 Holley, 735 CFM) seems almost dialed in. The car is very well mannered in the low speed driving I have done, even idled right up my steep driveway with no issues.
Lot's more to do, but I am back on the road!
Whoo Hoo!
Rocky
Congratulations Rocky..!!! Exciting times....
Thanks Joe, Rob, John, Garth et. al. -
I appreciate the appreciation and the views...
I took the car to the machine shop that did the engine. The intent was to get a quick assessment of the filter and the oil from the first 10 minutes of the break-in (but mostly to show off the car).
Clean bill of health from the filter inspectors!
Here's a couple of little finish-out projects that were done:
Picture showing the perfect balance in the Overflow Tank (the fluid level in the plastic tank is about 3/4") - very soon the external overflow will be removed, and after a few little squirts, the cooling level has found it's equilibrium.
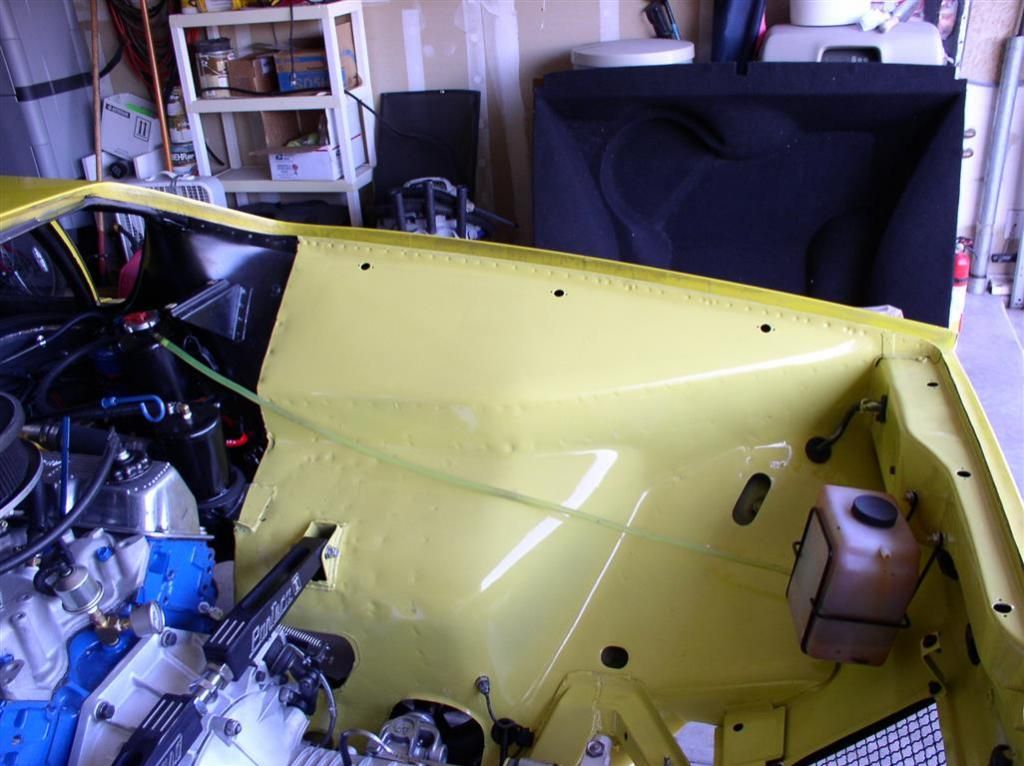
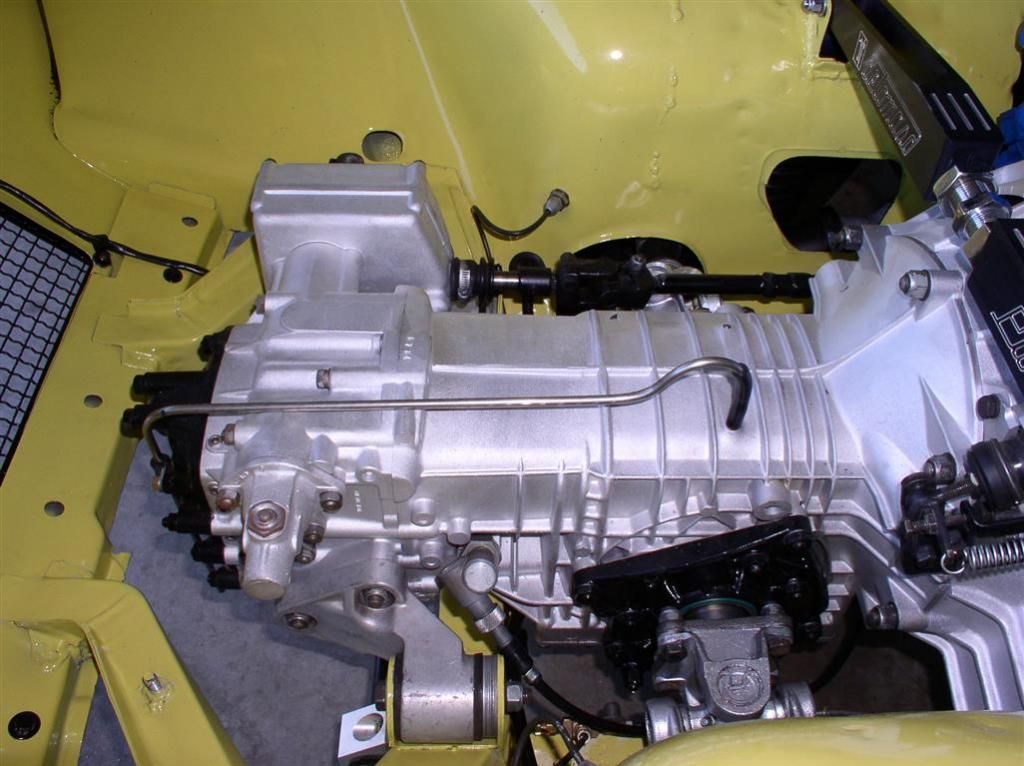
Here is my spectacularly bent ZF Vent Tube. That Wade - when he does anything, it's first class!
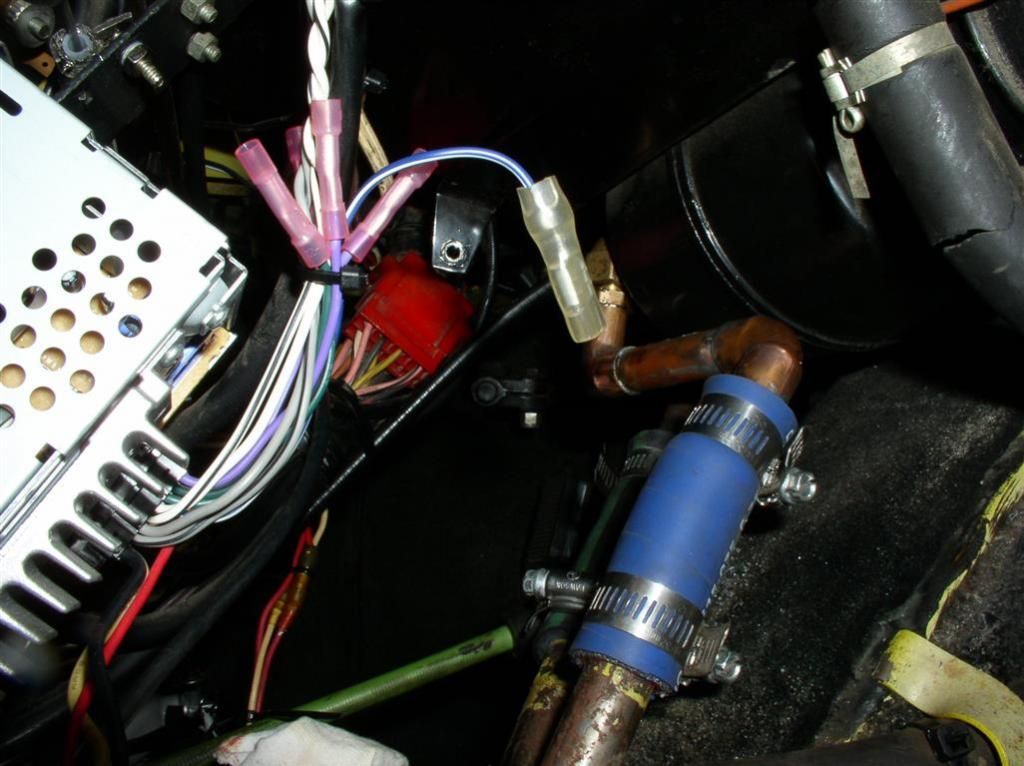
Finally, a quick picture of my "cockpit rubber hose eliminator". By moving the heater valve into the engine bay, and replacing the valve with a standard fitting, appropriate nipples and elbows, my car now uses the minimum amount of hose in the cockpit, and the short piece required is just a straight shot. Much cheaper than buying one of those preformed 90 deg. rubber elbows!
I know, I have a crack in my AC Drain Hose... Luckily for me, I don't have to worry about that for a while!
Rocky
I appreciate the appreciation and the views...
I took the car to the machine shop that did the engine. The intent was to get a quick assessment of the filter and the oil from the first 10 minutes of the break-in (but mostly to show off the car).
Clean bill of health from the filter inspectors!
Here's a couple of little finish-out projects that were done:
Picture showing the perfect balance in the Overflow Tank (the fluid level in the plastic tank is about 3/4") - very soon the external overflow will be removed, and after a few little squirts, the cooling level has found it's equilibrium.

Here is my spectacularly bent ZF Vent Tube. That Wade - when he does anything, it's first class!

Finally, a quick picture of my "cockpit rubber hose eliminator". By moving the heater valve into the engine bay, and replacing the valve with a standard fitting, appropriate nipples and elbows, my car now uses the minimum amount of hose in the cockpit, and the short piece required is just a straight shot. Much cheaper than buying one of those preformed 90 deg. rubber elbows!
I know, I have a crack in my AC Drain Hose... Luckily for me, I don't have to worry about that for a while!

Rocky
quote:PSSS> Garth - good to hear you engine is going back in.. Did you do anything other than fix the bent pushrods/rockers?
Hey Rocky,
Congrats on firing up your engine. Can't wait for your driving impressions and more video.
I had to do the following work to mine after suffering a broken valve spring:
- Ported heads, AGAIN - supplier shop did a very poor job
- Surfaced the heads to assure a flat surface to mate to the block
- Replaced valve springs with new dual springs - so long Beehive springs!
- Cleaned up and smoothed the valve witness marks from piston
- New 3-angle valve job
- New Scorpion roller rockers - replaced under warranty due to contact with purshrods
- New rings
- Re-honed block due to scuffing on a couple cylinders
- Polished crank because some metal bits from the breaking valve spring and subsequent rocker damage washed down into the pan and got picked up by the oil pump
I'll hopefully have the engine reassembled by the end of this week, then all that remains is to drop it back in!
Nice job Rocky.
Garth next time I am there I want to see the Runner not just the Stang.
Garth next time I am there I want to see the Runner not just the Stang.
Thanks, guys,,,
Garth, not to make light of a bad situation, but "The Second Time is the Charm"!
At least dropping your newly rebuilt engine into your clean, and freshened up engine bay should go really smoothly. You've had practice, and you should not encounter any surprises, that's what added a bunch of unexpected time to my build:
- Rust in the Upright
- Worn Bushing in the Upright Alignment Shaft
- Rotted Cooling Tanks
Engine Impressions:
I am still working on a off-idle "stumble" that I've been having, so I'm not really at the point to declare victory. I have changed the accelerator pump cam position (a white cam, 19 CC per squirt), but only made the problem worse when I went from Position 2 to Position 1.
Once I get the motor above 1500 RPM or so, it pulls well, I am happy with the performance in lower and mid range. I have not revved it above 3000 rpm yet, I am just taking things slowly.
I do have good vacuum (about 14") / good brakes (one of my key criteria) and a good idle quality - it's not too extreme.
More info to follow, but I have driven it every day, and it seems like we have put everything together right. That's a big relief!
See below for info on the Cam Data.
Rocky
It didn't sink-in until now, but you're driving the car?
OK ... dammit ... this is over-due ... congratulations!
You've done well.
I wanna see it someday.
OK ... dammit ... this is over-due ... congratulations!
You've done well.
I wanna see it someday.
Thanks, George!
I am sure you will - I look forward to a trip to the West Coast someday.
I wanted to post up my Cam Specs and Flow Data - I will post the theoretical (Dyno2000) HP & Torque.
The Cam came from one of George's recommendation (Sticky #3). I think the sticky that I pulled this recommendation from was modified (I can't find it anymore).
Custom Ground Hydraulic Roller Tappet Camshaft
Camshaft Spec:
Grinder: Bullet Racing Cams of Olive Branch, Mississippi
Telephone (662) 893-5670
Engine: Ford 351 Cleveland, 4V cylinder heads
Hydraulic roller tappet camshaft
----------------------------------
Intake Lobe: #HR275/3533 (CRA)
Intake lobe mathematic centerline = 112° ATDC
Exhaust Lobe: # HR287/353 (CRA)
Exhaust lobe mathematic centerline = 116° BTDC
114° lobe separation angle (camshaft degrees)
---------------------------------
Exhaust valve opening = 79.5° BBDC
Intake valve opening = 25.5° BTDC
53° overlap
Exhaust valve closing = 27.5° ATDC
Intake valve closing = 69.5° ABDC
---------------------------------
275° advertised intake lobe duration
220° intake lobe duration at 0.050"
Intake lobe hydraulic intensity = 55
0.611" theoretical intake valve lift (1.73 rocker ratio)
---------------------------------
287° advertised exhaust lobe duration
230° exhaust lobe duration at 0.050"
Exhaust lobe hydraulic intensity = 57
0.610" theoretical exhaust valve lift (1.73 rocker ratio)
---------------------------------
Here's my Flow Data - measured. My heads were ported by a 351C Master Builder.
Attachments
Nice....
More work this weekend -
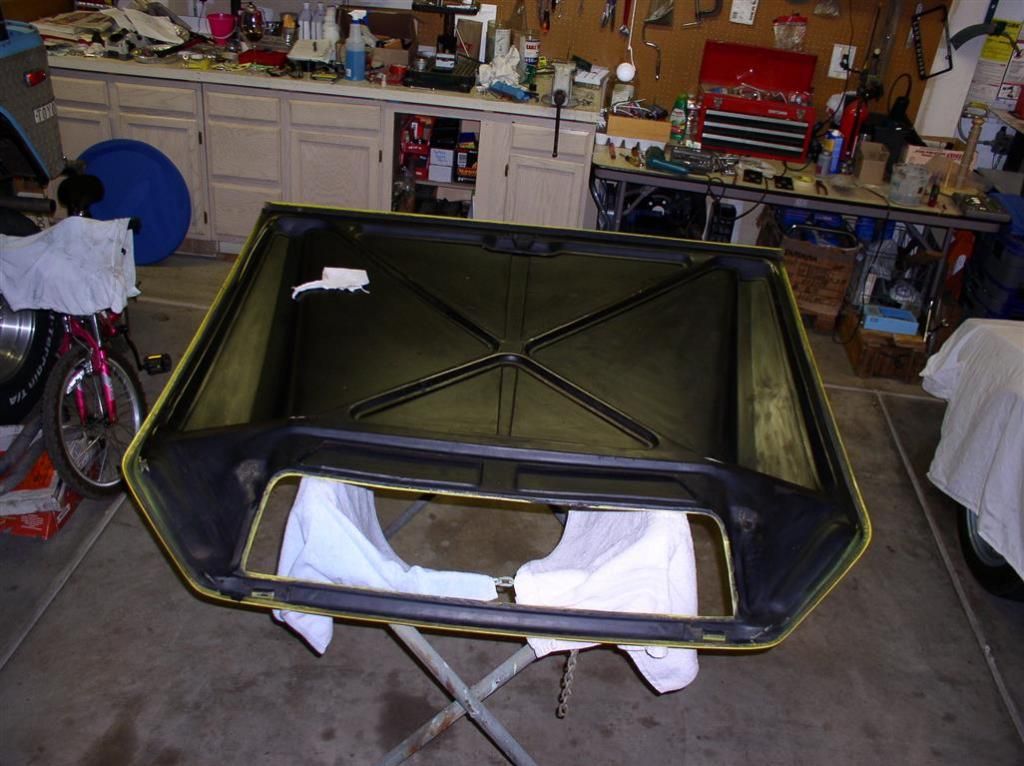
Sanding on the decklid - the inside is ready for paint (satin black).
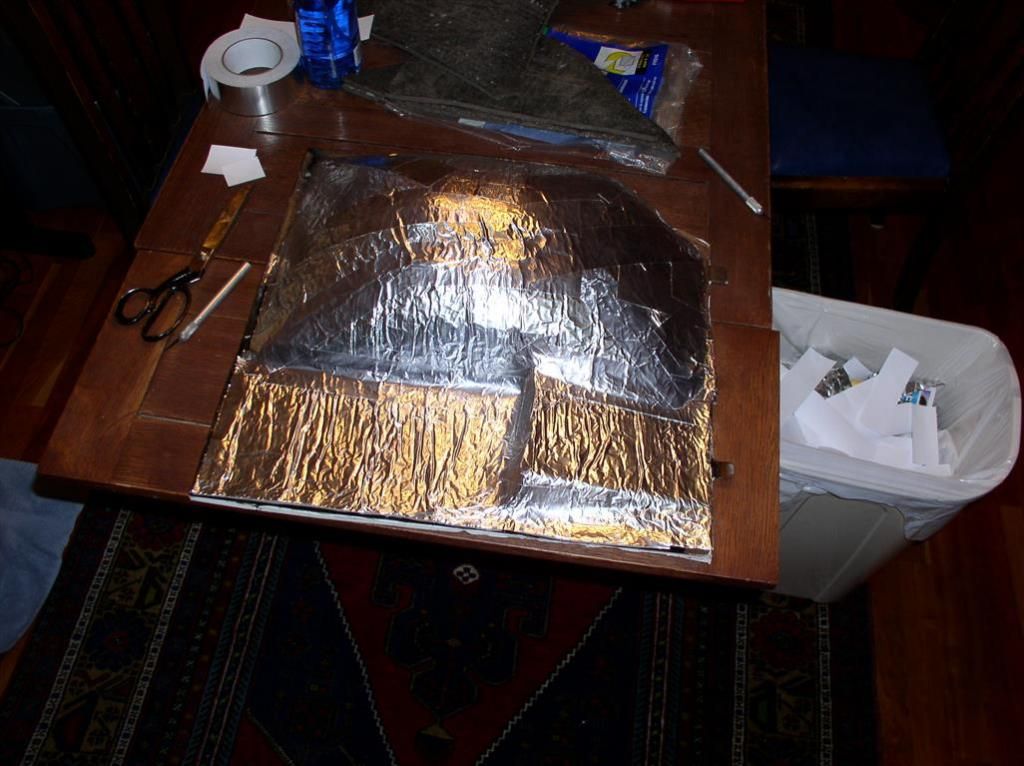
Insulation of the bulkhead cover....
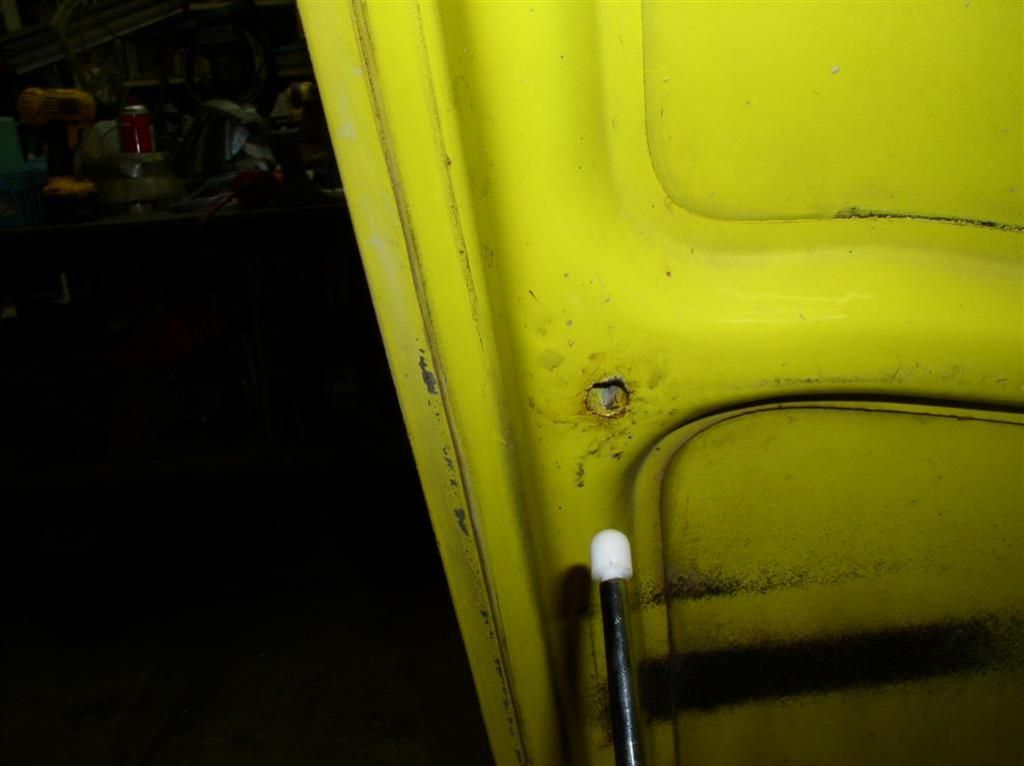
The very cool new "hood support button" - custom machined from Delrin.... This update includes rebrazing of the support rod, and paint of the mounting point.
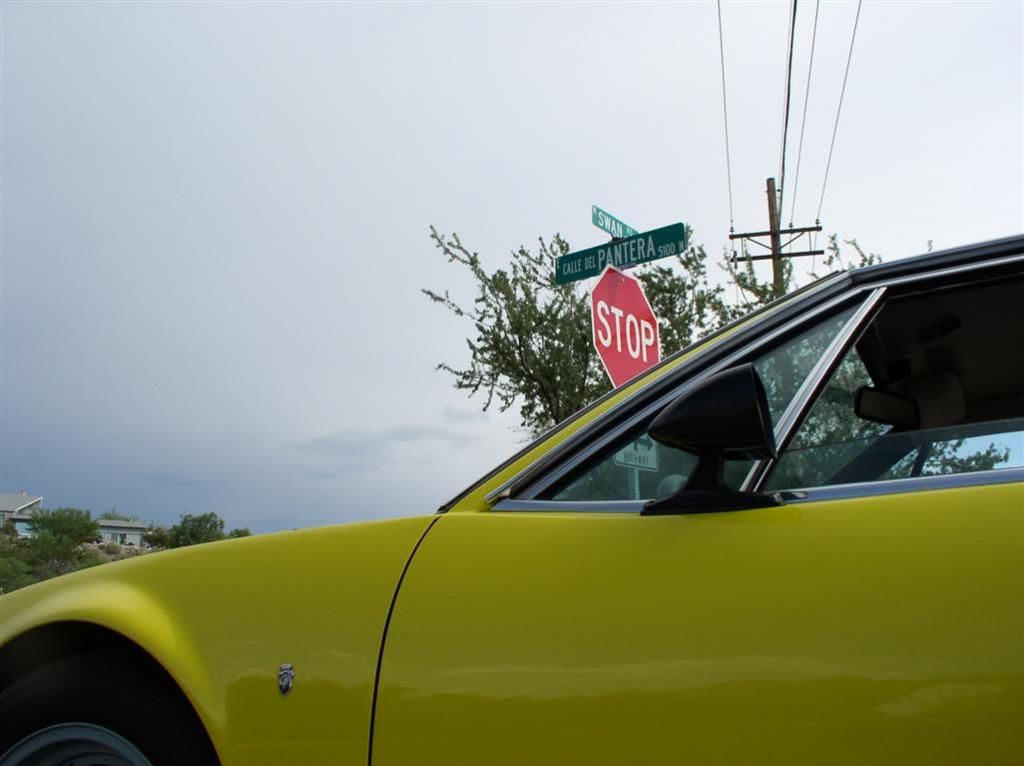
Finally - a picture of the car in front of the "Calle De Pantera" sign - I put about 125 mi on the car today..
Anyway - Wade spent much of his weekend working on my carburetor. We did a pretty extensive test session with my original 4150 series carb. While we made a big improvement in the "off-idle stumble", performance between 1500 - 3000 RPM was not what was expected.
So as a test program, Wade fabbed up the components (throttle linkage) to connect up his 700 CFM Holley / Braswell carb as a temporary evaluation system. This carb has 4-Corner Idle, and is a Double Pumper (Progressive Mechanical Secondaries).
The car ran great with the new carb. It significantly boosted the mid-range "oomph", yet maintained the reasonable idle operations.
More troubleshoot is needed on my existing carb, but it's really good to experience the potential in my engine.
This week should entail a lot of masking, and a quick couple of coats of paint to the inside of the decklid.
More pix and info to follow.
Rocky
Sanding on the decklid - the inside is ready for paint (satin black).

Insulation of the bulkhead cover....

The very cool new "hood support button" - custom machined from Delrin.... This update includes rebrazing of the support rod, and paint of the mounting point.

Finally - a picture of the car in front of the "Calle De Pantera" sign - I put about 125 mi on the car today..

Anyway - Wade spent much of his weekend working on my carburetor. We did a pretty extensive test session with my original 4150 series carb. While we made a big improvement in the "off-idle stumble", performance between 1500 - 3000 RPM was not what was expected.
So as a test program, Wade fabbed up the components (throttle linkage) to connect up his 700 CFM Holley / Braswell carb as a temporary evaluation system. This carb has 4-Corner Idle, and is a Double Pumper (Progressive Mechanical Secondaries).
The car ran great with the new carb. It significantly boosted the mid-range "oomph", yet maintained the reasonable idle operations.
More troubleshoot is needed on my existing carb, but it's really good to experience the potential in my engine.
This week should entail a lot of masking, and a quick couple of coats of paint to the inside of the decklid.
More pix and info to follow.
Rocky
More excitement...
Getting ready to put the decklid on... Got all the hardware painted and ready.
Check this out.... It hasn't been on the car for months...
Had a neat experience... A random car pulled up in front of my house, a kid got out... "Sir, Sir, can I see your car? Is that a Pantera? WOW!"
We had a nice visit, and he also knew of Wade's Brown and Orange Pantera (He told me there was another one in town). He plans to bring his Dad, and join us at the August Pantera Dinner this Sunday.
The kid was pumped up about seeing the car... He even took a video of the engine running.
Just when I was beginning to lose faith in the youth of today....
Attachments
Great work and congrats!! Time for a party!!
John

John

congrats!
rock and roll!
rock and roll!
To close out this thread -
I took some pictures today up on top of Mount Lemmon in Tucson, AZ (Elevation 7800'). I thought that the pictures turned out great!
Slideshow - Pantera #5357 on Mount Lemmon
(I know, I have to do something about those rear tires!!!)
Rocky
I took some pictures today up on top of Mount Lemmon in Tucson, AZ (Elevation 7800'). I thought that the pictures turned out great!
Slideshow - Pantera #5357 on Mount Lemmon
(I know, I have to do something about those rear tires!!!)
Rocky
Beautiful! Great to have her back on the road. But you know you can't get safe speed rated rubber for your 10" Campys anymore, but I'm happy to help you out by taking those rear wheels off your hands so you can get some properly sized wheels and tires. 
Enjoy!
Enjoy!
Great job! I'm getting ready to put Zonkey back together and painting the ZF trans is one of my tasks. It looks like you painted yours. What paint and prep did you do? Any disassembly?
Garth -
I can't find tires for the back wheels AT ALL... Even so, I think I'll hold onto the wheels, maybe I'll turn then into Air Hose reels... Thanks for the offer, though!
Richard -
Thanks for the compliments. Here's what I did on my ZF, but I had my case bead blasted. I also did the safety wire thing (it was a good decision). Scroll down a post or two to see what I did....
5357 ZF Case Treatment.
Add Reply
Sign In To Reply


