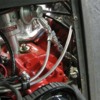
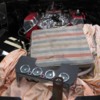
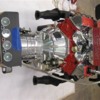
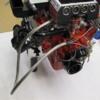
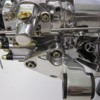
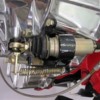
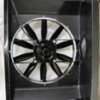
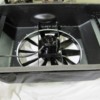
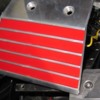
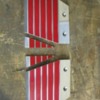
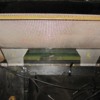
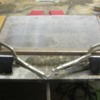
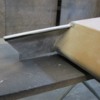
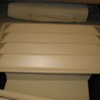
Here it is freshly sanded and ready for DP-90 epoxy primer. I do not use filler on bare metal any longer---always over epoxy which eliminates any rust devolving and bubbling the filler.
Here it is with 2 coats of Rust Defender primer. Bottom coat is baby poop yellow and the top coat is primer gray. This way when you do the initial blocking with 240, you know when you need to slow down as you cut/sand into the yellow coat. Next is a black color coat and 400 wet---ready to seal with DP, base-coat with DBU black and clear with 2021 PPG. Sounds easy but not so much painting inside the compartment up-side-down.
Attachments
I am not worthy!
GREAT WORK!!!
GREAT WORK!!!
How many hours in that engine compartment refinish?
quote:Originally posted by larryw:
How many hours in that engine compartment refinish?
several weeks Larry. The biggest problem was trying to make it side-to-side symmetrical. The car varies so much detail shapes of equal proportions were tough. The stitch welds had to be ground and some of the sheet metal needed to be persuaded. Here is a shot of the inner fender ground and DP-90d ready for the filler.
Attachments
Here's a better shot in primer---you can see the challenge. One of the more difficult areas was the taillight panel and AC shroud mounting surface. To mount the new shroud to the existing straps, I had to raise the left side by 7/8" and build a mounting bar to keep the upper shroud visually straight with the top of the inner taillight mount panel. Sound simple---not so much.
Attachments
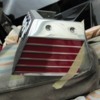
This area was tough to match side to side. Later I removed the dryer mount studs and installed it into the right rear wheel well after the new rear condenser shroud and side cover panels were built. The condenser mount tab in the picture was at the right location---the other was very low. Frankly I surprised the condenser mounted without fracturing from the twist stress---good thing the shroud was plastic instead of tin.
Attachments
Here it is with blocking black color ready to be sanded. Remember the body paint was original which made this work much more difficult to do---always keeping the outside protected. It's like trying to build a house from the top down outside in.
Attachments
quote:Originally posted by TomCat:
I am not worthy!
GREAT WORK!!!
Thanks Tom? 2 great stories--one about the F-14 shot. I was driving east to west in June through Colorado or Utah and crested a hill on the expressway to see an aircraft sitting in what appeared to be a field. As I got closer I could clearly see it was a F-14 so being a big war-bird fan I quickly grabbed the off rap and chased down the big old girl. Sure enough it was sitting in a small park alone, engines pulled for all to see. Interesting the caps were off the holes and you could crawl into the after burner holes.
Second is about the "I am not worthy!" I have a good friend who has a somewhat famous rocker background and he is a Pantera owner from 1972---with his original car. He and one of the other band members had to introduce either Aerosmith or Tyler (can't remember exactly) at a function---maybe was their Hall of Fame induction. Back stage right before they walked out to do the introduction, Craig said we have to drop to our knees after the intro and say "we're not worthy". It was the funniest part of the night.
Wayne and I had dinner with him Saturday before Wayne left---lots of laughs!
Thank you for the nice complement.
Kirk
Here are a couple of details showing the new twin cap tank. There is a pressure cap which fill the system and the main storage overflow cap which keeps the system full. This eliminates the two tank requirement and is a bolt-in to the overflow location so you can remove the wheel-well mounting bracket and add a shield to mirror the gas tank shield and keep the header heat off the fire-wall electrics.
Attachments
This is how it the other end or the gauge cluster lines look as it connects to the engine. Various lines going to oil pressure, fuel pressure, vacuum, water temp and electric. The wiring hanging on the air-pump belt ultimately plugged into the wiring that fed through a grommet-ed hole just above the shifter rod and connected to several locations in the dash.
Attachments
The gauge cluster can be removed and located as far back as picture shows---rear of the trans axle. If you are working the engine, this gives you great info at your fingertips and a great back-up if the power fails to the main gauge console.
Attachments
This shows the new wire looms and changed the color to black. This shot also shows the inner air box with the vapor seal flapper valve vacuum control pod on top. At the back of the box, you can see the stainless fitting the a bit of the tube which feeds the break booster up front.
Attachments
Wayne has original paint on his car. I had to repair some door dings and of coarse the front spoiler was damaged---fortunately blending the paint from the damaged area into the original color was successful.
We sanded the entire car with 600, 1200, and 2000 grit in sequence. Once sanded, the buffing started and rubbing out 25 year old paint is not easy but was well worth the effort. The improvement was amazing--clarity improved 10 fold just by getting rid of the orange peal.
Here it is sanded---first stage 600 wet work.
Attachments
Here's a fender after some of the buffing. You can not really tell in pictures about paint so those of you who see the car in 3-D will be able to look and see the original paint sanded and buffed. Wayne and I were both very pleased.
Attachments
Here is the last airbrush work I did from the era. This was an add I painted poster size and the car was placed into the background---cut and paint tec. unlike today where you can just plug in any item conceivable. You can barely see the Pantera GT5-S in the stars on the left---maybe I can manipulate the brightness using today's technology. MANY YEARS AGO.
Attachments
I would have never guessed that Wayne's GT5-S had the orginal paint. Once again, your work is very impressive.
let me bow to you in all humility!
Not my style but what a craftmanship !!
Not my style but what a craftmanship !!
Thanks for all the kind comments.
Wayne
Wayne
I second the thank you.
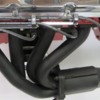
Here is a shot of Wayne's exhaust. The muffler catalytic converters were black porcelain finished and the tips were kept black. I did my best to talk him into going totally black with everything---even wheels.
Here is a shot of Wayne's exhaust. The muffler catalytic converters were black porcelain finished and the tips were kept black. I did my best to talk him into going totally black with everything---even wheels.
Attachments
Here is a lid detail. I quad pined the corners so the lid re-indexes on the box without issue. Allen bolts were used with small turned aluminum sleeves as the contact material inside the air-box lineup holes. The bolt heads were tapered for easy indexing. Now for tapering the head---put the thread into a cordless drill and use a 6" grinder with a DA pad and 240 grit paper. Spin the drill into the spinning grinder at the right angle---there it is.
Attachments
Here is a shot of the right rear AC shroud cover shield. It covers up the condenser hoses that lay along the rear valance. Short link-up hoses from the condenser that connect the dryer and compressor were needed because the new box hid the connections on the condenser.
Attachments
Here is a shot of the connection hoses. I know---not so interesting stuff although it may help a reader with a similar issue. Make everything first and fit your hoses after. You can see the shroud cover mount bar towards the top center. Allot of reflections in this pictures---only two hoses---not seven.
Attachments
Emissions of the day required air to be pumped into the cats. The engine started with airflow into each header for about the first 5 minutes and then diverted to the down stream location pictures. You need to divert the air or the cats will get to hot and could melt.
Attachments
Here's a shot of the light-up cat which served as the header collector. They could be bolted on directly a header flange in case of future replacement needs.
One thing about the emission system exhaust---It tested out as the best flowing mufflers out of the 6 sets tested and the cat headers lost only 2 hp over an open Headman set. The overall emission tested exhaust had less then a pound of back pressure at wide open throttle making it very efficient for the time. Back in 1984, the system took a great deal of time and $$$$ to develop with most of the testing done at the Bendix lab in Troy, Mi. All of the parts that hours of testing devolved were later manufactured in house and instaled on every AmeriSport car. Many direct import cars aslo used this system including all of the Shelby Panteras. The fixtures for the headers, mufflers, and other emission related parts are still packed away for thar California customer that may need a system to keep their car.
The complete AmeriSport emission system had no negative effect on the overall performance of the engines we built during the 80s production and Wayne's car is running proof for those who may get a ride.
Attachments
This pile of headers and mufflers were tested several years ago. You can see the various types we ran on the dyno combining every muffler on every header. (I modified the various muffler and collector flanges for the bolt-up combos) The engine was a 30 over standard crank Cleavland with cast quench heads and a Parker Funnel Web making an average HP of 488.
Attachments
Last 20 pictures. Most of the remaining shots are details on specific designs that were fabricated.
The airbox profile seen below created one of the OOOOPS fixed after the box was finished. The mistake was caused primarily do to the fact that the engine compartment was finished before the box was built. What happens is you have to handle everything with built around the finish work with new born tenderness. In the process of building the box and gauge cluster, the 2 were always assembled when the box was instaled and removed the several hundred times during it's construction.
What happened was the cluster would not install with the box on do to the window angle. The fix was to trim the correct angle onto the cluster mounting flaps. It was not a big issue but frankly when I discovered during the last part of the final assembly, the gut wrenching feeling hits and I just wanted to get out my wet glove fan and slap my self silly for missing the obvious.
Here are the results.
Attachments
The original design for the cluster window cover panels were mounted to the firewall. This was later changed and the trim covers were mounted directly to each corresponding cold air side cover. The gap between the gauge cluster and trim panel had to also be increased for install clearance---second oops.
Attachments
quote:Originally posted by Kirk Evans: Many direct import cars also used this system including all of the Shelby Panteras.
Shelby Panteras? What Shelby Panteras? At the risk of some thread drift, Kirk, do-tell please.
Best,
Kelly
Kelly,
Shelby bought 3 GT5-S Panteras directly from the factory (sans drivetrains) and put Chrysler engines with turbos in them as prototypes for possible importation. Those were the only ones he did, and as far as I know are not official Shelby vehicles, just ones he had his hand in. There is documentation that links these specific cars to Shelby (and it may come with the cars).
Michael
Michael and Kelly,
Actually he had at lease 6 total that I know of. The first was a red GTS ( think it was a GTS--long time ago) which later (85-86) did get a twin turbo Chrysler. I did the original EPA-DOT on the that car in 84 or 85. The next 2 or 3 were S bodies only, that came through the AmeriSport assembly program. The last 2 or 3 were complete and he kept on all white one. All of the cars came directly to my shop except the first GTS which was shipped in for homologation work. The direct imports (complete cars) also came in to the AmeriSport shop---1 or 2 received Cleveland---the Windsors were pulled. The last white Windsor powered car ended up in California in 87 and got a Chrysler Turbo engine some time later---I believe it got the GTS turbo engine. In the S catorgory, I think he had 2 bodies and 3 cars.
Based on my conversations with Mr. Shelby, there was never a serious investigation to bring in the cars with Chrysler engines. The Turbo car was a for fun beast---very fast---only one was built.
There are pictures of the remaining white S still fitted with all of the original AmeriSport white-white monochrome treatment of the day---wing, scoops, bumpers, wheels, trim. The deck got the twin-turbo biggie-shorty scoop installed.
Back to Wayne's GT5-S
Here's a view of a cover plate installed. You can see the engine screen reinforcement welded along the top lip of the extension. This helped keep the cover extension stiff and also was used as a guide for the hidden engine screen fastener-less locking system.
Attachments
Here is a view of the slip-lock made for the front of the screen. The screen slides along the top of the air-box with a strip of loop Velcro attached on the underside to protect the polished top. It slides into the side cover window shields that were added to the covers and the tapered locks hold the screen from any up-down-right-left movement----no rattling to boot. Then you twist the 2 original factory fasteners in the back and the screen is held tight---ready to go.
Attachments
AdvenDriver (Guest)
I cannot believe that WPL resides within about 50 miles of me!
This car seems to belong in a MUSEUM, but maybe WPL feels such
a car must be driven. A Master Piece either way, a Master Piece...
This car seems to belong in a MUSEUM, but maybe WPL feels such
a car must be driven. A Master Piece either way, a Master Piece...
Here's another view of the screen cover finished and in place. The Dzus type factory fasteners were kept for their familiar look. One of the biggest tricks was to figure out how to make the screen install repetitively without scratching anything and it seems to be working well so far.
Attachments
Kirk, once again, amazing work. I don't expect to do anything like this to my car, but I can't quit reading your updates! Really great work.
Two points, sort of off topic -
1. Not certain, but I think one of the 'Shelby' Panteras ending up in New Hampshire with Pat Mical. He mentioned it years ago; I may call him for an update on that.
2. Yesterday I was looking at another car (a 993tt Porsche) that HAD been in my town (Montgomery AL) but was owned for years by a guy in... Perrysburg OH. Just noticed that on your posts and thought it was an odd coincidence.
Okay, back to our regularly schedule programming.
Yes Pat has one of the white with pearl (blue or red were the first 2) bodies Mr. Shelby purchased and sold. The cars came into my shop for enine/trans assembly, homologation, and were sold through the AmeriSport dieler network.
My earler post explaning the fastener-less screeen mount did not read correctly---it was to early. Should say
The locks or tapered catches caught the inside lips of the extensions to hold down the screen with out any visible fasteners.
My earler post explaning the fastener-less screeen mount did not read correctly---it was to early. Should say
The locks or tapered catches caught the inside lips of the extensions to hold down the screen with out any visible fasteners.
This will be the last pictures of the build.
The shot below shows the opening for the in coming engine air from the side scoop that replaced the original windows ducting the outside air through the side covers into the engine air box. The slots are for the catch lips to mount the scoops.
The shot below shows the opening for the in coming engine air from the side scoop that replaced the original windows ducting the outside air through the side covers into the engine air box. The slots are for the catch lips to mount the scoops.
Attachments
Here it is with the louvers mounted. Wayne's louvers are removable from the outside. They are held in with 2 pins mounted in the top of the louver that line-up with corresponding holes in the cover housing and there's one allen head bolt in the bottom of the louver that can be removed from the outside. This gives you fast access to the duct work and also makes cleaning the louvers much eraser.
Attachments
Here's a shot of the rear AC screen replacement louver that is mounted in the back of the car to cover the condenser. This particular part I designed and started making in 1982. It is currently still out of production but I'm hoping to bring it back and there may even be a new version with larger louvers on the horizon.
Attachments
Wayne kept his original radiator and front mount fans. The fan blades were larger on late model cars but came without any shrouding. This makes the efficiency less than half when you are trying to force air through any heat exchanger. We added tightly fitted and much wider fan shrouds that significantly improved the air flow through the radiator helping to keep the engine temp correct.
Attachments
Thank you all for looking and again for all the kind words. This was a difficult build but I'm please with the final results.
In the future there will be a couple of other builds posted. One is an on going crash repair and restoration for Howard Renshaw and the other started out as parts and pieces so the body reconstruction photographs are somewhat freighting.
A friend recently asked why I continue to work in the automobile industry----here's one big reason---he 8 and loves cars.
Thanks again.
Kirk Evans --- AmeriSport ---
Attachments
Awesome thread! Thank you for sharing the pictures and progress, fantastic craftsmanship shown here.
Wayne has decided to sell his car featured in this thread. It would take over 100,000.00 to build a Pantera like this not including the car and in this case, Wayne's car was incredibly clean when I started the build. If a potential buyer finds this thread and would like to contact me directly, please feel free to call 419-874-0505 or email at kre@adelphia.net
Thank you
Kirk Evans --- AmeriSport ---
Thank you
Kirk Evans --- AmeriSport ---
> In the S catorgory, I think he had 2 bodies and 3 cars.
One of the locals (St. Louis, MO) has a black 1986 GT5-S Pantera (# 9426) that he
describes as 1 of 5 Shelby/Carlini cars imported by Chrysler. Last I heard it
has a 392C. I lost touch with the owner and am not sure if he still resides
here or not.
Dan Jones
One of the locals (St. Louis, MO) has a black 1986 GT5-S Pantera (# 9426) that he
describes as 1 of 5 Shelby/Carlini cars imported by Chrysler. Last I heard it
has a 392C. I lost touch with the owner and am not sure if he still resides
here or not.
Dan Jones
Dan,
Hank ordered 2 S cars--one car and one body and his son ordered one car which ended up being the last Cleavland powered Pantera build by the factory. We did all of these cars except on of Shelby's S cars. All of the cars came through the AmeriSport shop and I did the epa-dot work on his GTS which is the car original ended up with the turbo Chrysler---Can't remember the details any more---this was 85-87 and I had my hands full with trying to make AmeriSport work.
One thing and it came from the man him self---there was never a Chrysler powered Pantera Shelby program ever seriously considered. That was a roomer mill chit-chat project project and will say it again---that turbo car was a beast---but could never be a street driven on any regular basis. I had allot of turbo idle surge at idle.
Great memories!
Maybe I should post some of the "Dinner with Detomaso" discussions we had in the day. Talk about personal intimidation at 30-31---years of work wiped out if I said something wrong to Mr. D.---or so I thought as a young man---great times good and bad.
Well, well, well. Sadly, I've not had the opportunity to stay current with this forum due to family issues. But I just finished reading all 18 pages of this thread and studying the photos. Most impressive, Kirk, but I'm not at all surprised.
Having known you now for close to 30 years, and seeing examples of your design and fab work in many different Pantera's, you never cease to amaze me, my friend. I can still distinctly recall following the build of "The Black Car" eons ago, with the all-aluminum Donovan engine. After we trailered it to Vegas for the National Convention and you finally unloaded it, there was a crowd around that car for the ENTIRE weekend. Owners were amazed at the unique design of your components, as well as the overall build quality. That was a great weekend...and our non-stop drive back in the red car still brings back fond memories.
Although I'm not familiar with the vehicle in this thread, the parts featured further showcase your creative originality and attention to detail. To all the other forum members, I hope you will have the opportunity to see this vehicle, or at least some of the unique parts from it. Only then, will you fully appreciate the quality of this work.
After nearly 35 years of owning my '74, it has finally gone on to another owner - and I know "me mate" Gary will take good care of it. Fortunatley, I have many photographs to reminisce over. All the best, Kirk. Take care.
Pete
Simply stunning work!
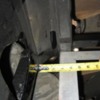
I just found a series of measurement pictures in the folder of the red car that were actually Wayne's black GT5-S. I was able to check the new wheel well construction side to side measuring Wayne's car which was in the shop at the same time. Here is one of many measurements photographed for comparison.
Attachments
Add Reply
Sign In To Reply


