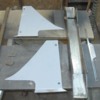
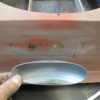
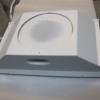
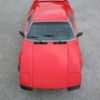
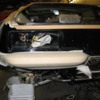
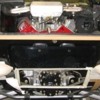
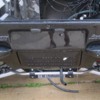
Here a shot of the side covers, camber bar cover and a small filler piece used to cover under the latch---ready to finish prime and paint.
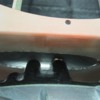
How about this hick-up---The transaxle move back slightly after the real-deal engine was installed and just touched the new shroud---bummer! So I had to figure out transaxle clearance and this was the fix. I cut the end off a 2" 180 deg. U-bend, found the correct location of the clearance needed and installed the tube section.
Attachments
Beautiful work Kirk!
I really like this thread.......
Mark
I really like this thread.......
Mark
This is just beyond an immaculate build. Great work Kirk. Half the time I don't even know what I'm looking at, but it is always gorgeous!
quote:Originally posted by DeMopuar:
Beautiful work Kirk!
I really like this thread.......
Mark
Thank you Mark. I appreciate the support.
If any one reading this thread have any questions, ideas, likes, don't likes, suggestions, or even the "what were you thinking" opinion, please, please, please post your thoughts.
Attachments
quote:Originally posted by A Hudson:
This is just beyond an immaculate build. Great work Kirk. Half the time I don't even know what I'm looking at, but it is always gorgeous!
Thank you---If you're curious or do not recognize something, please ask and I'd be happy to explain better. Sometimes I look at the pictures and don't know what it is---and I built the stuff so no worries.
quote:Beautiful work Kirk!
I really like this thread.......
Amen brother!!!
Top notch work Kirk! Can't wait to see pics of Howard's car soon.
Cheers!
Garth
OzGT5 (Guest)
Hey Kirk, are those bumpers on the black car like mine?
Robert,
They are similar but S fronts are body specific. Yours are fitted to the early fenders like the picture below. The rears are also different--the inboard surface is fitted to the AC opening hole and are designed to go better with the front splits.
They are similar but S fronts are body specific. Yours are fitted to the early fenders like the picture below. The rears are also different--the inboard surface is fitted to the AC opening hole and are designed to go better with the front splits.
Attachments
Here are the bumpers painted and installed just after a bath.
On occasion the Pantera can act like the Wicked Witch of the West---but I have never yet seen one melt so yes I do hose beat them with the water when needed.
On occasion the Pantera can act like the Wicked Witch of the West---but I have never yet seen one melt so yes I do hose beat them with the water when needed.
Attachments
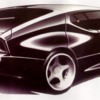
How about this bumper for what I had hoped would the 1991-92 Pantera. Another trip down memory lane. This 3-D master model still sets in the corner of my shop waiting for the right customer.
Maybe you'll read this and call----Of coarse I'd like be become a Ninja to---probably won't happen.
Maybe you'll read this and call----Of coarse I'd like be become a Ninja to---probably won't happen.
Attachments
This was the first late model engine compartment I finished---done allot of early ones. The undercoating was extremely thick---thicker than even the 72 cars. Here's a shot of the stripping process. I use aircraft stripper---many coats and lots of scraping. This is a job Americans will not do so I have to pull out my Italian passport when the stripper flies.
Attachments
Add Reply
Sign In To Reply


