It’s coming together! Are you seeing the light at the end of the tunnel?
PS… From what I am seeing in the pictures, it looks like very nice work!
Congrats!


It’s coming together! Are you seeing the light at the end of the tunnel?
PS… From what I am seeing in the pictures, it looks like very nice work!
Congrats!
jfb,
If you're in the area again, you're welcome to stop in. I'm in Greensboro.
Congratulations on all the progress! Looks great!
Just gettin caught up JFB…. Long journey, for sure, but she’s lookin awesome man!!😎👍
As for "seeing the light at the end of the tunnel" ie, getting 5177 back, I still have a bad feeling !
Slow progress is exactly right though. I AM keeping this post as up to date as things happen.
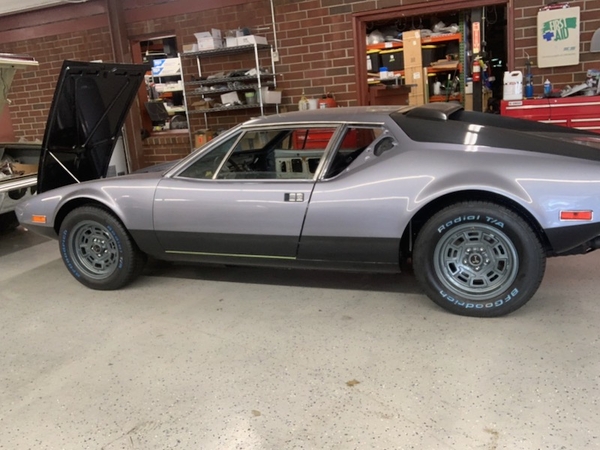
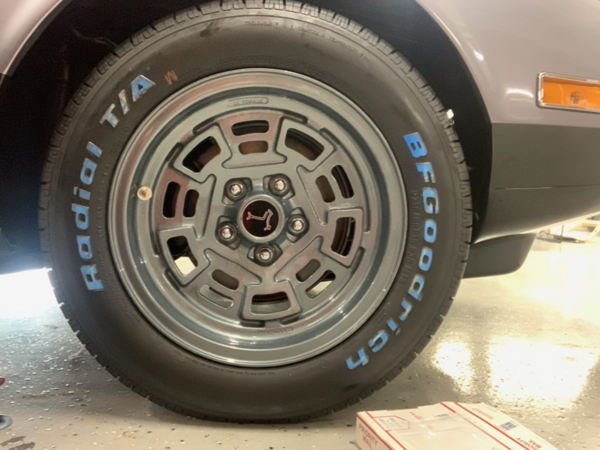
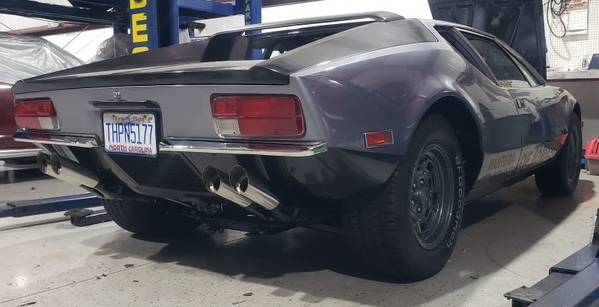
Today, pic with the refurbed wheels and BFGoodriches on.
AC installed and checking with vacuum.
there was a "problem" getting original type air filter on. . . interferance with new distrubutor, but that was resolved.
EDIT....
Anyone make their own center caps? If so diameter (& thichness) would be appreciated.
I am thinking about a polished (chrome) with just the “cattle brand” engraved.
Joe…
I have an old brass one on my display shelf.
Just grabbed a dial caliper…
dia. => 2.336” -> 59.3 mm (60 mm?)
thick. => .044” -> 1.17 mm (1 mm?)
My stock wheels are in a storage unit, so I couldn’t test fit the emblem…
(Someone will correct me if this medallion isn’t sized for wheels…)

Ps. Car is looking good! Coming together!
Looks Great!!!
Would you recommend the shop? Asking because I have a half finished car.
Thanks, Mike
what is your budget? I am embarrassed ti even mention what this has cost (and it is not finished AND I am supposedly being given special considerationI would ) The Owner seems to be a Great Guy, very knowledgable, and I thinks His initial intentions to "help" me were good, but his buisness has changed (gotten bigger). I think the work is concourse quaility. Dealing with the several "project mangers" has been EXTREMELY stressfull.
I don't think (and been told) their normal customers don't have specifiec way they want the car to be.
This is as much as I want published
I would highly recomend visiting his shop (https://klassicrides.com/) and asked to see 5177. the Owner is Billy and my current project manager is Rob (never met him)
Hey Joe - keep it going- you are so close !
Had the same wilkinson 2 inch header interference issue myself but chose to carefully ball paen the new Stainless heat shield on the fuel tank as the solution. It seemed to work and did not compromise the pipes. I had a 2 1/2 inch big bore header set previously installed which had some serious tap dancing on the pipes to be made to fit so this is a common issue.
Just aa question - did you replace the AC piping and do you have advice on that ? Did you refurb or replace the under dash fan unit ? The TX valve ? Still got to do this and all advice welcome.
Perc
My "instructions" were to replace AC with modern unit and controls. I can't recall but something like a Gen II unit was suppose to be a near drop in. The First project manager had other ideals and he purchased a Gen I unit, disassembled, threw away the controls and fitted the core, evaperator and fan on exisiting box (plus a LOT of labor charges) He planned to use heater slide lever with long cable to an engine location heater valve.
Our disagreements lead to owner assign new project manager and He was not going to use the long cable so I DON"T know how controls will work. actually HVAC work is big thing NOW and thus holding off on dash till finished.
The shop frabricated their own hoses and manifold for rotary compressor. New condensor, dyrier and fan but I've not been informed on any brand used,
due to disagreement with second project manager, 5177 was moved to the recently acquired facuiliy. Last week's head butt was over the differance between the rear trunk insert "fitting" over new coponents versus my instructions to modify trunk to allow condensor air flow access engine area. Luckily I talked to Owner and He agreed and though mod was being done and assrued me it would.
Hopefully next update will have HVAC completed and interior going in.
I hate hearing stories like this. It’s your Pantera. You tell them what you want done and they should do it; period, end of story. They are allowed to have their own ideas but if you don’t fully embrace them, they should drop it in a big hurry.
Did they at least know enough to re-route the A/C hoses through the passenger side wheel well? Did they move the drier to the wheel well too?
A few of us, here, have installed Restomod Air heater / AC units. They make a few that are more compact than the Vintage Air units, thus easier to install. That being said, this is not a trivial installation. It’s easier in a late dash Pantera than an early dash car.
Hey Joe
Was it recommended to replace your condenser unit ? Mine looks to be in OK condition and the fan works but I have not pressure tested it yet. I have a new dryer and Sandken rotary compressor already fitted.
The under dash fan unit sounds remarkably similar to a bucket of bolts being poured down a washboard so I have a new one ready to go in , but I wasn't intending to replace the under dash evaporator unit.
Is that the restomod unit you were discussing ?
Any comments on the current recommend TX valve optimal replacement type that they have fitted to 5177 ?
Thanks
Perc
I can't answer . . . those questions are beyond the tech knowledge of the project manager. asking fixed or varible orifice got me silence over the phone. If I get back to shop and have some time with techs, I hope to get answers then.
during a "heart to heart" with Owner a few months back, he stated few clients have knowlede of their car and the others just wanted X brand car. so this why I can't get alone with project managers
Thanks Joe
Yes - when you are shelling out hard earned readies you expect the people involved to know the detail of their craft backwards.
If you hear anything more it would be of great interest.
I can see another (3rd??) full dash removal coming soon for 6997 - my favourite thing ......!!! ![]()
Cheers and hang in there
Perc
There has been no "looking ahead". the hold up on working for the last few weeks has been acquiring the metal stamps to make a replacement YIN tag for the dash! They are ready to install dash, except for that tag.
way back (years ago) I posted the way I wanted paint and the graphics.
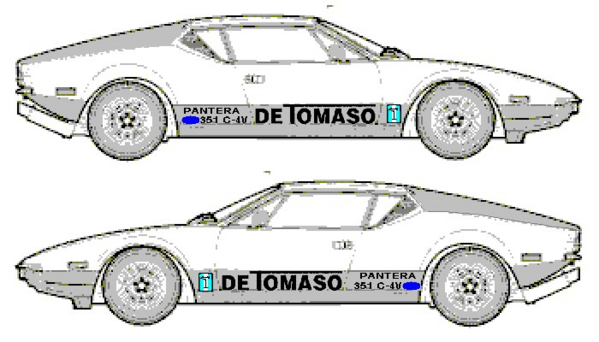
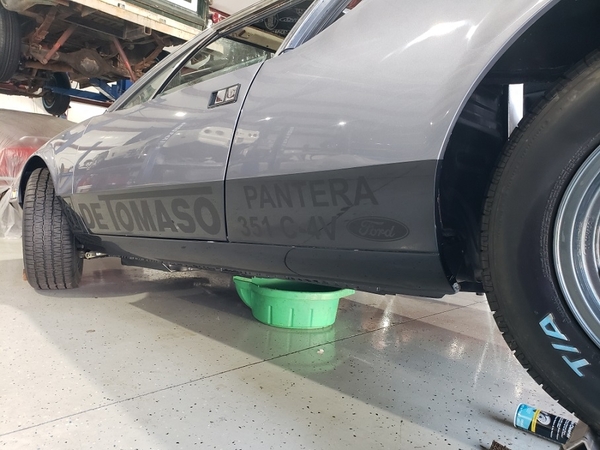
the Owner suggested "ghosting", AND I liked the ideal. Here is a couple pics I got today.
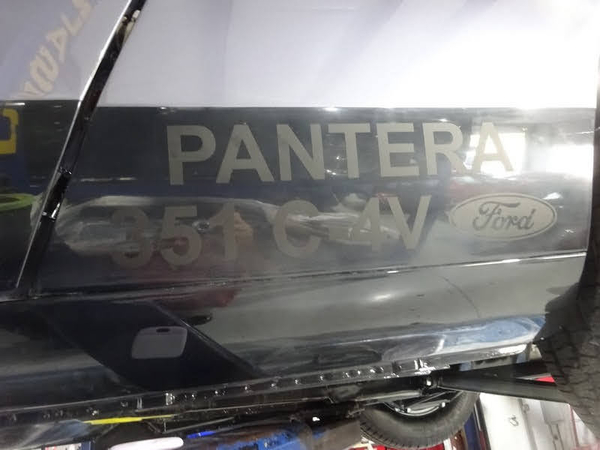


The "ghosting" look good, to me anyway.
Looks good, Joe!
The only thing that can be leaking where the drain pan is cooling tubes. That’s not any kind of technical challenge to solve. Very minor problem, as you know.
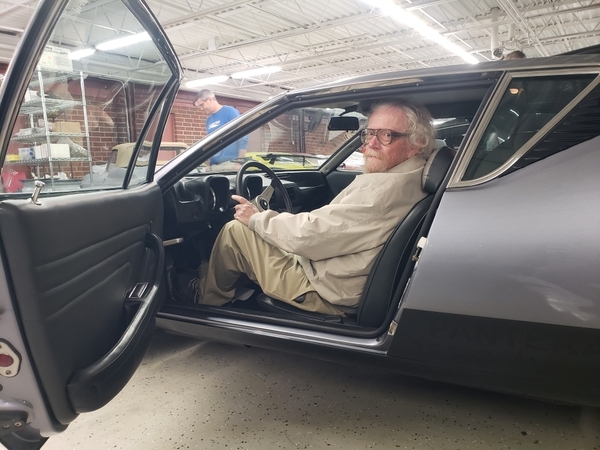
I want to see pictures of the car with you driving, with your curly hair and Glock (holstered, of course!)
Only sorry to see you’ve cut back on your instrumentation!
😎😀
Chuck
as for the MAYBE leakes . . . I requested those gates shrink fits instead of clamps. sure hope it is not those! Another possibility is the heater control valve. there was a butting of heads with the first manager and they are now having to make changes.
Funny you mentioned hair. for the past decades, I've just got a #2 buzz cut (better with hard hat and latter just less effort). But for the past few months I have decided to just let it grow, trouble is, no longer red.
GLOCK! HLL NO. I aint no gangster. Italian Berettas, old school metal frames.
I did not replace the instrument Christmas tree. But I have request a couple of gauge redundant & diverse idiot lights (coolant temp and oil pressure). I think the Holley Sniper EFI display will have those indications also. I sort of wished I request adding clock (but wrist watch will have to do for now}
I hope they have not lost that ebony shifter knob.
Your car looks great !!!
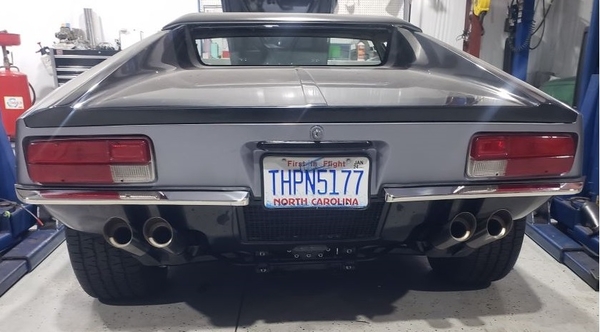
What exhaust system did you go with?
Thanks.
many years back, a Wilkerson SS system was listed here for less than an hour as I snatched it. https://pantera.infopop.cc/top...768#1598208419926768
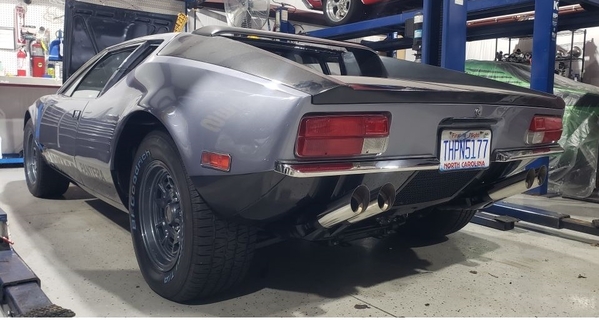
It was for an "L" as the mufflers and tips seemed to hang low. So while I got a "deal" originally, it had to be made to fit better. At that time I was not thinking about going with the small SS bumperretttes
the header tubes were left as is, just a little hammer work for clearing motor mounts
I visited the shop when they first cranked and one could talk while it was idling. I am hoping it will be relatively quite
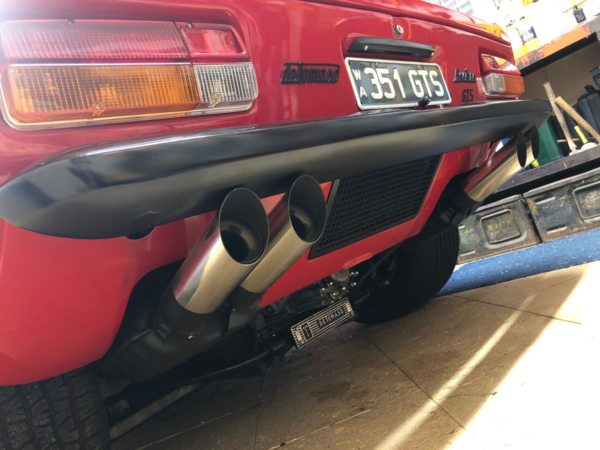
I thought I recognized those tail pipes. Those SS headers and mufflers are on two of my cars. I think their sound is approiate for Panteras. The tail pipes were re-angled for both of my cars because they have small chrome bumpers. It looks like they put a little more angle on yours, more like a 71, and it looks good.
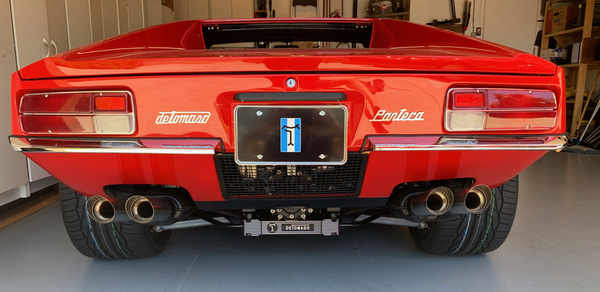
Here is a photo of original exhaust on a 71 Pushbutton.
I should also mention that your exhaust system is high performance with large diameter tubing and improved baffling throughout the system.


What diameter is the Wilkinson exhaust pipe?
How does this system compare to a factory GTS system?
Thanks in Advance
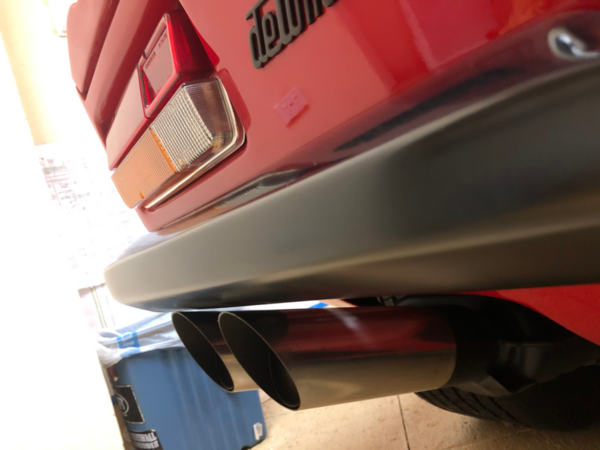
They did a nice job fitting those mufflers on your car. Looks great.
Looks really good, Joe!
What’s left to do on your car Joe? When do you expect to take delivery?
For the last YEAR, it has been two weeks from ready to deliver!
Asking for a punch list gets a silence over the phone.
my punch list of things I believe.
install interior trim / carpet. I was told by unreliable source the dash was now in, been two weeks and no photo to prove. the two pod dash will have old covering. there will be mod to move wiper & washer toggles to the gauge section.
mount the two chrome mustang type mirrors. These were purchased a couple years back.
mount the front spoiler.
the gills and side glass
last invoice had note to purchase another master cylinder, havent heard anything about that.
I requested trunk liner to be mod'ed to provide AC condensor to vent to rear window opening. Owner actually agreed with this about month ago, but has not been mentioned.
the muffler and exhaust tips were also my request and again the Owner agreed it would be worth the effort (for looks) Invoice and pic thursday show that is DONE.
I was hoping to have made the Long Island Pantera Club's exibition at Norfolk Navy yard but gave up on that happening.
a couple months back, the Owner and I talked about getting me back to shop "two weeks" before they trailer it back. But no mention since. Also have not come up with a good way to do so. He jokingly offerd to fly his new plane and pick me up (I didn't fair well when I had to fly comercial so I wouldn't want to try small plane). Four years ago, when this started, my plan was to hitch a ride to pick it up and take off on trip through Smokey Mts and "Tail of the Dragon"
doesn't seem to be a lot to do, but when you wait to you are installing to order needed pieces, no telling how long.
I've been think about a new post / article "How a professional restoration made me hate the day I bought a Pantera". I can only hope the realiblity and driveabilty will be as good as claimed (can't use promised)
another concern is getting the take off / spare parts back.
I just now took a quick outside measurement of the tailpipe near the exhaust can and it is about 2.5".
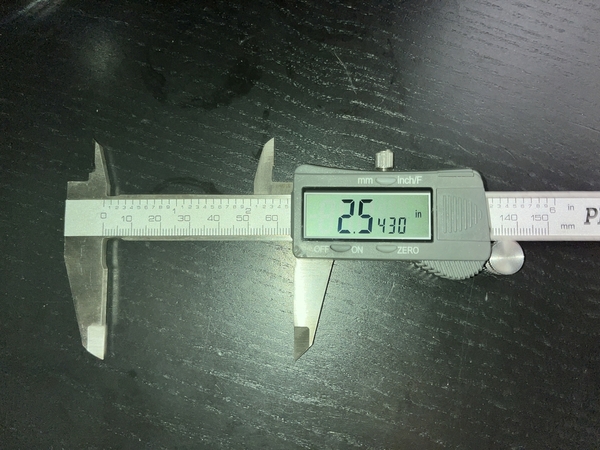

Also, Wilkinson calls it his version of the factory GTS exhaust system. It is full stainless and has a ball connector where the header and tailpipe meet making adjustment of the can/tips painless. I don't know what a factory GTS muffler sounds like but these are on the loud side.
The ball connector is a most excellent upgrade.
I have factory GTS mufflers with steel GTS headers from Dennis. I have always thought and been told that my car has a very good sound, but it is not loud.
Larry
So far, the only “color” on 5177 is the Koni’s (orange) and the block & air cleaner (blue). My instruction book actually called for those to be shades of grey, but I let that slip by.
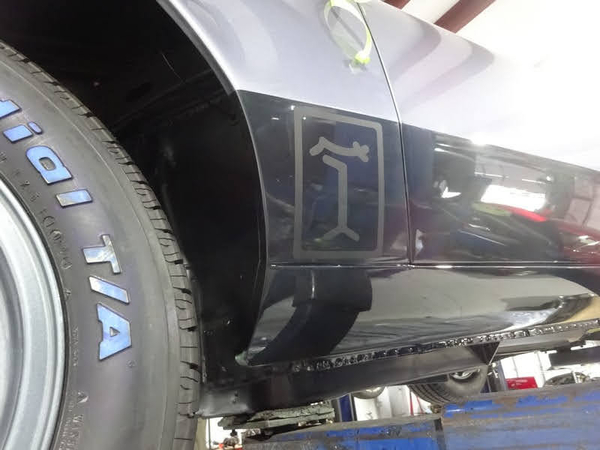
I have the blue / white deTomaso flag for the front grill, but thinking, is there the rectangular badge to fit that bezel with just the branding iron on black. I have seen several branding irons, but would prefer the badge & bezel.
Previous post, I was asking about the wheel centers and surprisingly the Shop found some black w branding iron!
@stevebuchanan posted:I just now took a quick outside measurement of the tailpipe near the exhaust can and it is about 2.5".
Thanks Steve. I have the Pantera Performance mufflers on one car and the GTS exhaust on my other car. They both sound nice but the Pantera Performance mufflers are loud. I don’t know how much the different engines are affecting the volume.
Supposedly the shop puts MILES on the car before delivering. they have a dyno "treadmill"" also use to check things, so the sales pitch is the car will be able to make trips .
I use to take TOTD before it became named. my short cut coming from TN back home.
Hey Joe I have the Wilkinson GTS mufflers.
You cant talk next to the car rear when its idling but they are not bad inside the car. No issue when driving - great sound.
The Wilkinson GTS rear pipe measured in at 2.5 inches diameter and the header offtakes at 2 inches diameter.
The eyeball joint between the headers and exhaust assembly is a fantastic addition. My car previously had a full 2.5 inch header collector and a modified rear exhaust set up on a fixed flange. It was pretty well impossible to get the twin exhausts straight and level and miss all of the suspension interference and rub points. Consequently I had two or three suspension rub holes in the old exhaust when it was pulled . With this setup you can get it pretty well spot on and clear everything using the standard mounts.
Looking at the suspension clearances it is close to the maximum possible without getting contact when the suspension moves.
Just be aware when you start it up for the first time half the paint will burn off the exhaust collector painted end pipe ( which also looks like stainless underneath ) making one heck of a lot of smoke ! The shop should do it outside !
In my view a good performing high quality product that fits really well. You don't get to say that too often.
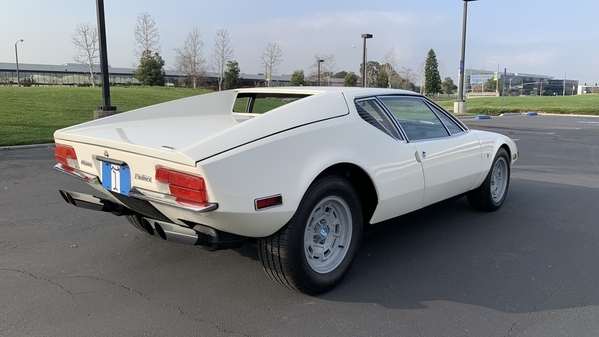
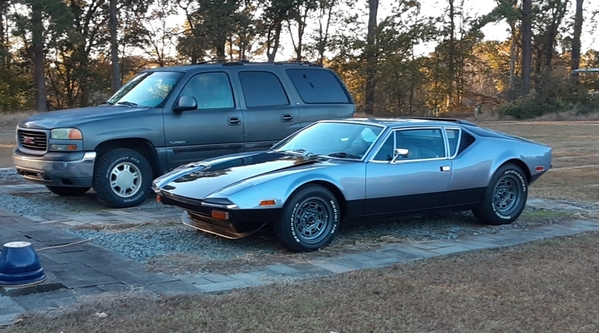
the "Ghost Cat" getting some Sun !

wouldn't let me put all pics in first post


Looks great!
Ron
I like the way you finished your wheels. I’ve seen lots of people try a darker finish and it rarely looks right IMO. The color of the car has a lot to do with it too. That color wouldn’t work on a red car. Might work on a yellow car. Regardless, you nailed it !
Hey John, glad to see your car coming to fruition!
@davidnunn posted:I like the way you finished your wheels. !
THANKS. . . I actually had nothing to do with the selection. the story I was told, that is the color Ferrari uses. when I first saw them, I was mad, BUT felt it was not worth repainting. Then when placed on the car I too liked it. thinking the argent silver would be to bright.
they found IT !

text today 5177 was moved to upholstry shop !!!
Given the seats and panels were already done, headliner and carpet should be their main work. Hope all that Dynamat doesn't become problem.
OH.... and seat belts.
Hi Joe
You might want to overlay the Dynamat with some Dynaliner under the carpet- the black HD foam with the adhesive backing. They offer a 3mm and 6mm thickness. The 3mm moulds easily to the floor shape. Provides a bit of underlay springiness to the carpet and stops some of the transmission from the Panteras patented Seating Heat Integration Tunnel ( you can do the initials )
Just a thought.
My dad and I are glad your ebony shift knob turned up!
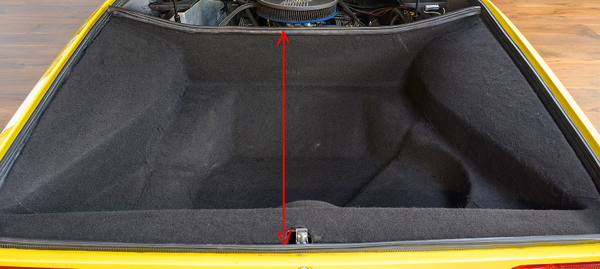
The tub looks stock to me. If it was shortened you would see patched fiberglass at the bottom and back of the tub on the side that faces the engine. Your dimensions look similar to mine.
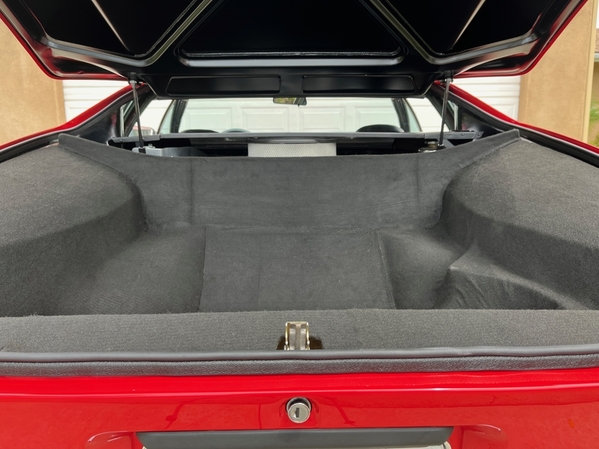

the pic i used is NOT mine, just used to show dimension asked.
I have no recent pic of mine. they say they see no mod, but they just asked.
Not any issue, more just "like" to know
Got it. The rough dimension you are seeking is about 38".
Shop said car was "almost" finished and I visited to see what they were calling ready. disappointing .
question . . should the turn signal switch "lock" in direction or do you need to hold? didn't recall the horn is on end of turn signal.
with proper adjusted shift linkage should you be able to "palm" the knob into gears? right now Tech was saying forceful shifting was correct (wonder what he is using to compare as this was their first Pantera)
Gosh, I hope bending legs and twisting to get in gets better with practice.
even ny size 9 walking shoes are struggling to get on the correct pedal,


I am sure that others will respond as well, I have an earlier car and have had a few others as well, turn signal should lock and self cancel at least on my cars it always did, all my cars you never had to force the shifter but everyone definition can be different, for the car I just finished I had RBT do the trans and you can shift it with 2 fingers. I wear a size 12 shoe and I make them work as far as getting in and out its a young persons game but when you have the opportunity to drive one or own one you fit into it. ACS
Hi John
A couple of simple checks on the stiff gear shift issue. It should be easier.
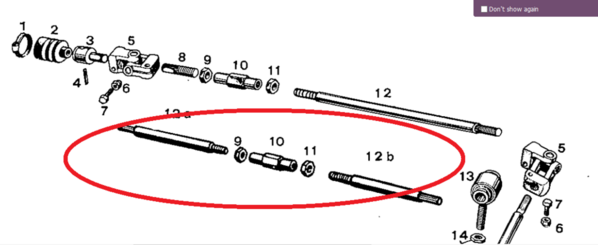
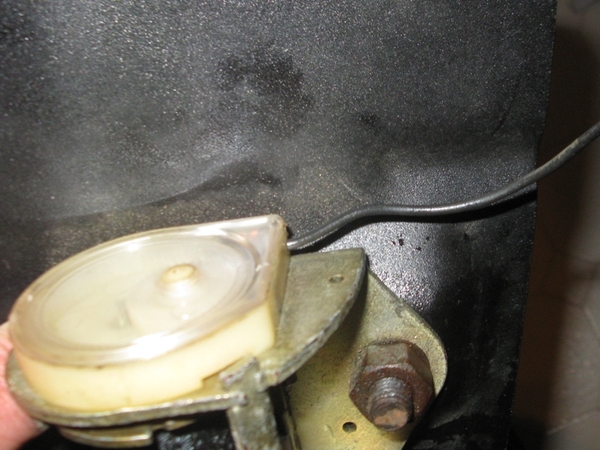
Check the gear shift trunnion mount on the left hand side of the engine near the fuel tank. Was this renewed and is it aligned ? The later trunnions have a PTFE center which slides on the shifter shaft better than the earlier brass stock ones .Make sure the shaft is moving easily and clearing the corner of the engine block in all positions.
Did the shop disassemble the gear stick mount and clean and lube the ball mount at the base of the shifter mechanism in the center console ? That can get stiff when it has not been used. Also check the shifter gearstick shaft and make sure it is not too grooved from the gate - they can break off it it gets too deep especially with a firm shift .
Does the firewall boot look like it is at mid rest point in neutral ? That can make the shift feel firm on either the forward or rear shifter positions on the shift as it gets overly compressed and stretched if its not centralised.
Also check if the ZF gearbox shift shaft receiver box on the top LHS of the gearbox has been cleaned internally and regreased. Old grease can certainly gum it up on the shaft and make things feel real stiff.
How was the shift into reverse? That is usually the most difficult to get working properly. DId it grate going in ?
It is a minor adjustment to resolve the turn signal hold down issue. The turn signal cam needs to be leveled. Your shop needs to pull the steering wheel hub and move it on the splines so that the cam is mostly level. They need to start with good wheel alignment and a level steering wheel.
Our ZF transaxles take some effort to shift, and they are not a quick shifting transmissions. More so with the original -1 on early Panteras. Our ZF's are harder to shift when cold. Maybe try it again when the transaxle itself is hot to the touch after driving for 20 minutes or so.
The pedal box is very constricted. I drive my Panteras with my shoes off at this time. Some of us have sawed off the lower right corner of the brake pedal at an angle so that their shoe on the gas pedal does not collide with the brake. The brake pedal can be shifted left by 1/2" away from the gas pedal and I began working on such today. By Friday I can let you how much it helps. Kirk Evans sells parts for the pedal box to make this happen. You have to pull the pedal box to install the modification. It shifts both pedals (clutch and brake) to the left by 1/2"
in response, I have been extremely disappointed in the documentation ie know what was actually done, however the shift linkage was supposed to be all new ujoints and trunion. I brougth my "take offs" back and there was aziplock bag of little ujoints! what ever Vendor they used should give me a kickback!
while all gears including reverse just didn't feel right but first was the hardest. I even had to roll from stop in second a couple times in my 20 minute drive
I don't suspect any wrong with actual trans axle as I recall going though the gears by hand when out.
from earlier query about trunk tub, I didn't use a tape , but mine has definally been shorten. provides a real good veiw of block annd bell housing! I don't have pic
It should not be difficult to get into first if the whole set up is adjusted properly in my opinion.
There are some excellent articles prepared by others on this site on the process of adjustment of the shift linkage to get both the shift lever and the gearbox properly centered and aligned. If a mechanic has not come across one of these rear gearbox linkages before they may have struggled to get it correct without some of the wisdom contained in the advice on this site.
Further the 3d printable centering tool also published here was a big help to me in getting the gearshift at rest alignment correct. There is a point where you may want to get it home and do some adjustments yourself.
The help and assistance accessible through this site is second to none. Be sure if you have any issues there is a depth of past knowledge accessible and many ready to assist.
@Percy posted:....There is a point where you may want to get it home and do some adjustments yourself.The help and assistance accessible through this site is second to none. Be sure if you have any issues there is a depth of past knowledge accessible and many ready to assist.
I have PAST that point. (even though my mechanical abilities have drindel a lot in the past years)
Over the years i have forwarded the "manager" information and not sure it gets past to techs. last night I found an oild email with info from servide manual, TSBs, and comments from here on just this and forward to "mamanger" owner and all the common adresses for shop!
All I can see is the handle of the Glock....? 17C or 18C?
5177 is back home!
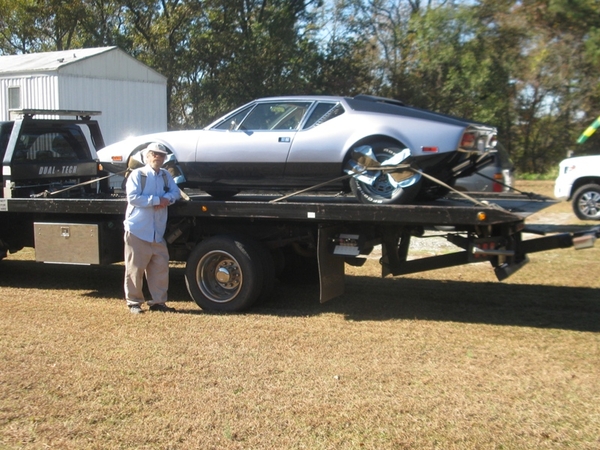
HOWEVER....
my bad luck seems to contine. about 3 miles from home and the roll back had to come pick it up. coolant tube hose blew off. at least they were able to make repairs.
BUT .. .
still more things not right. I started some, but a big problem with charging will need more than what I am able
tonight on battery charger and mybe car show tommow
another question.
was the shoulder belt seperate, fitting into a hole the the lap buckle?
I currently don't have shoulder and the lap retractors not working, that plastic string looks out of place. oh, to remove the lap retractor i though the seats were going to removed)
oh well. pays your money, takes your chances


Regarding the belt.. mine (5357) has the two piece units…. A retractable lap belt, and a fixed shoulder belt that has to be connected before you plug in the lap belt…
yours may be the same…
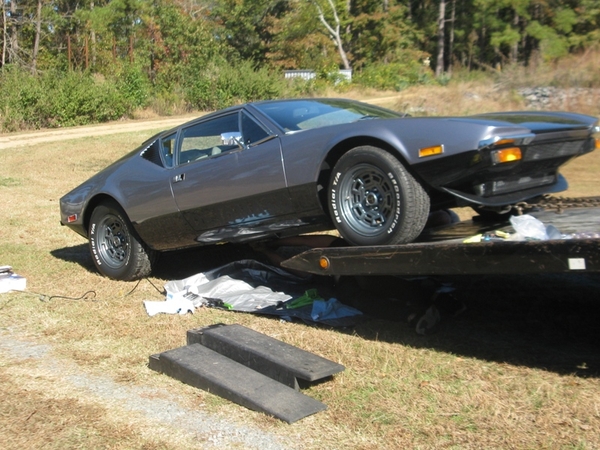
I started to back out with the problems, but I went to Cotton Festival Car Show.
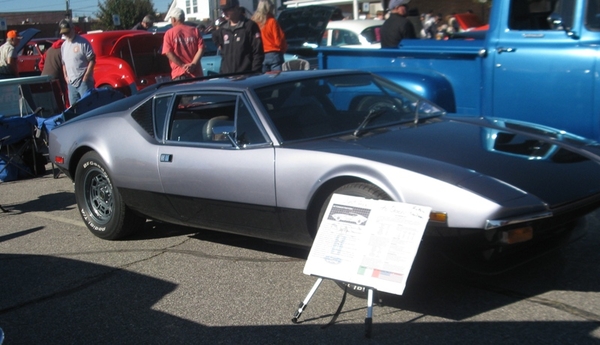

actually had a good time talking and showing features of 5177. definately got the attention from visitors, but the "judges" just walked by!
several questioning why I painted the deloren!

Joe - Glad you made it to the show! Car looks great!
I was at a show in Tucson, and they parked me next to the DeLauren dude! The guy was insufferable! I had to move my car over with the other Panteras!
Chuck
Another possible Pantera quirk I forgot.
when you turn key to crank, and it fails to crack, do yo have to turn key all the way back to locked steering before able for second try to crank?
sorry about not getting some glamour shots, but the problems have me over whelmed. ------------
earlier I asked about rear tube lenght . . . well mine had been cut. actually worked goog for car show, leaving in and still seeing motor and tran. (also having a gravel drive is going to be a challange for dust)
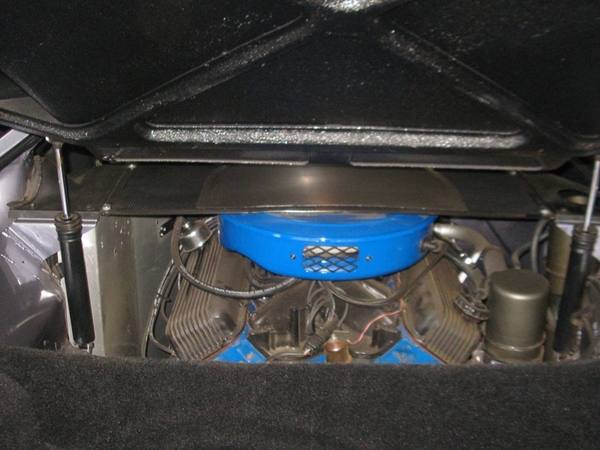
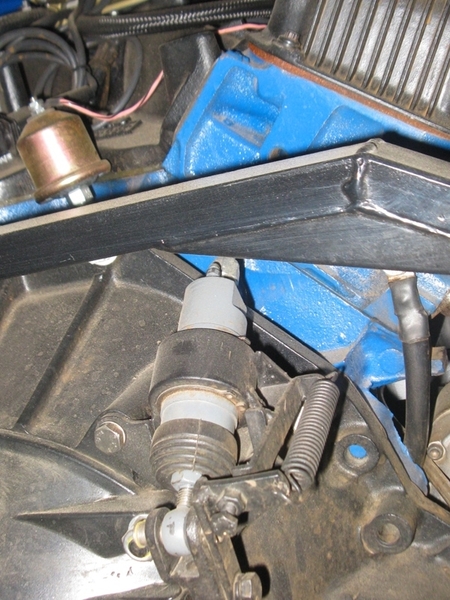
can any one tell if this is a long throw slave? I actually have too much clutch travel (if throw out is set right)


Joe- looks like a stock standard unit to me .
surprising, comparing TR6 clutch where I go to the carpet and with what seems like less than an inch up the clutch is ingaging. But the Pantera has to come what feels like inches almost at top, before engaging.
trying to control the realy hard to hold clutch and the super easy reving throttle has lead to some interesting rolls from stopped.
after a few minutes driving with a lot of shifting both legs are cramping up, one for the workout and the other for isometric
If the clutch doesn't start to engage until the clutch pedal is near the top of its travel, try increasing the free play at the slave cylinder.
Aluminum slave cylinder = long throw
Iron slave cylinder = standard throw
John
Need to check your adjustments per the Technical Information manual. Do you have the pedal effort reduction kit?
i have that linkage. when i can get assistane i will measure the full clutch clearane & throwout clearane at full engage. feel like the thowout is clear.
clutct functions, just wasted travel. I had a quick thought of adjustable pedal stop. But that would be out of the effective travel for the effort reduction, so fine tuning the slave sometime.
9 is left handed.
continuing with a shifter question. when shifter is center of 2/3 and fixing to wedge down to tighten jam nuts. How much side to side free play is expected or too much? I am going about 1/3 to the 4/5 slot back to the 2/3 slot.
Joe, FWIW, my stick in neutral is ever so slightly left of center of the 2/3 slot. Last time I had to do the jam nut thing it took several tries even with 2 people, but I never wedged the stick. Just tightening the nuts tends to "change things" from what you intended, but wedging should help considerably. And we both have fresh rebuilds by Ron McCall, so I assume should be similar, and I'm pretty well adjusted within the shift gate at the moment. If I need to come down to help, I don't mind, just can't tomorrow/Wed. That said, I assume a lot of that could depend on all the linkage geometry and orientation. You have my cell in the NC thread if needed. By the way, your car looks amazing, I should have come to the Cotton Festival, but the Norfolk event showed me I need to address a couple of things, which I started today. (Hint: Keep an eye on your header bolts with your new rebuild, they will need some tightening pretty soon, also snug up intake bolts).
I been thinking, I wish someone with "OK" or good shifting could let shop try. Even let me try, maybe I have lost a lost of desterity
Do you know if the detent in your cabin shifter box is intact?
It centers the shifter in the 2-3 gate.
If the turnbuckle is loosened, you should be able to feel it settle in. If you use wedges to center the shifter, try and be sure you're in the detent.
The transmission also has detents. Again, with the turnbuckle loosened, you should be able to manually get it to settle into its 2-3 detent.
Now tighten the turnbuckle. Both the cabin shifter box and the transmission should now settled into the same detent position and not resisting each other.
To center the shifter fore and aft, loosen the shift shaft U-joint pinch bolt at the transmission. It must be loose enough to slide back and forth on the splines.
Manually position the stub sticking out of the transmission to its center position. You'll feel where it wants to settle in. Slide the u-joint on the splines to center the shifter and tighten the pinch bolt.
In fact, tighten all the shift shaft u-joint pinch bolts as tight as you can. Every problem I've had with shifter adjustment has been the u-joints slipping on the splines.
Good advice - makes sense…. It might be fun to use the detent I removed, and readjust my linkage!
Thanks!
Also make sure none of the u-joints are coming in contact with body as you shift through all the gears.
hearing how i was not happy, the Owner and Main Tech flew over this AM.
the master tech and I discussed all the instructions on how to adjust. as found trans detent was up in 2nd. ajusting to bring two detents together, holding in 2/3 center to loosely jam nuts. To me it was such a GREAT improvent. as I sat going through 1 thru 5 smoothly. Tech and owner had to agree it was better. the tedius came setting jam nuts. first try 1 thru 5, but no revered, second try reverse but no 4 & 5. sever trys got a good compromise to get all gears (not perfection, but very drivable.
ALL linkage was new bought assembled. (I might even have a new shifter)
So I can now drive 5177. It just makes me nervous (and scared), after driving pick up, this thing is QUICK.