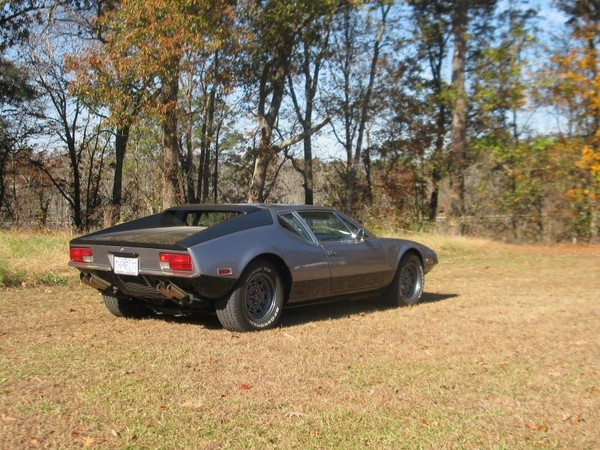
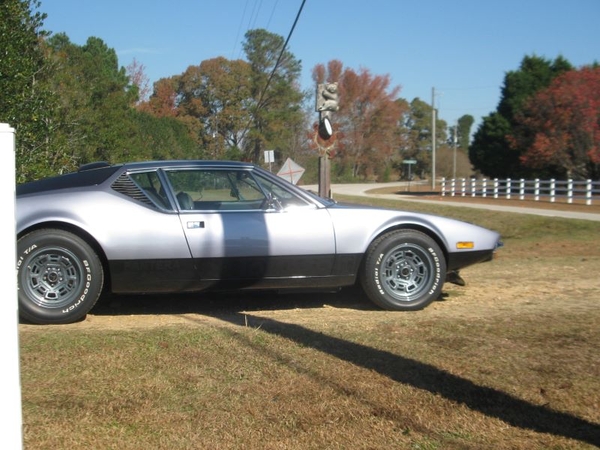
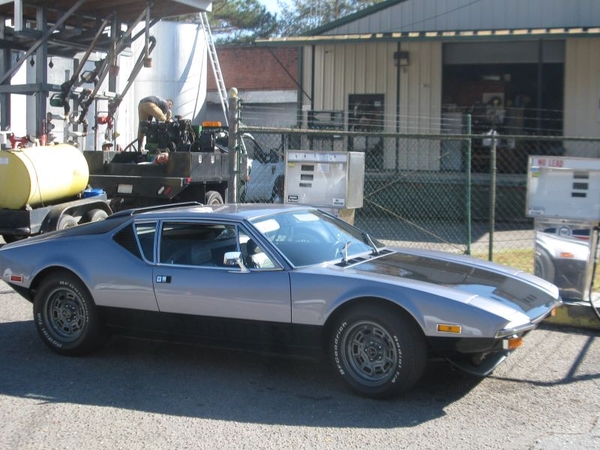
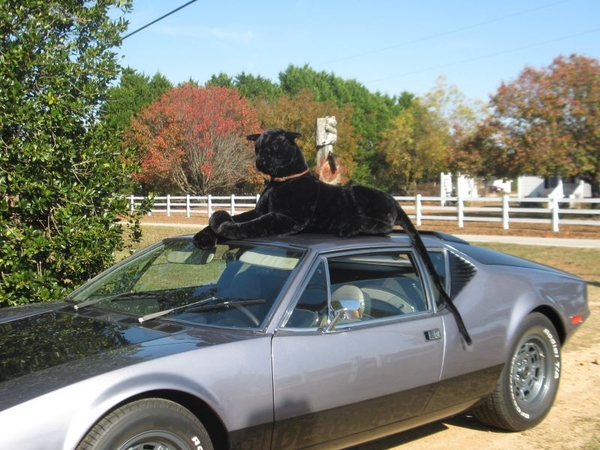
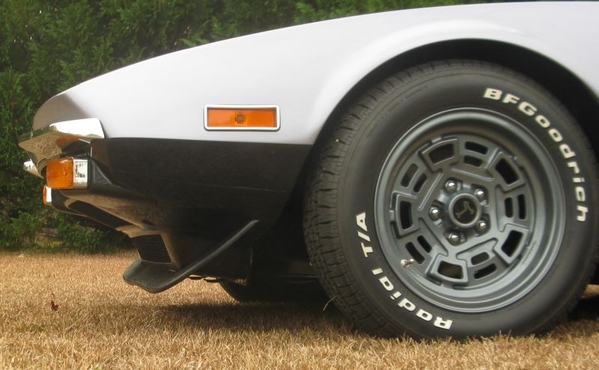
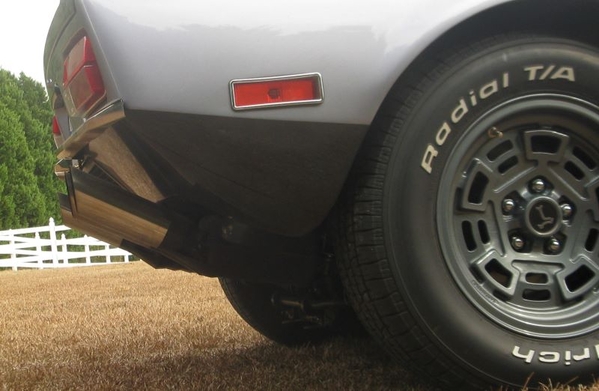
I would like to take some detail pics and try doing vids, BUT the temptation to just DRIVE overcomes.

5177 is now stored in a different building rather than the shed it stayed in 20+ years.    I added a centering line and delineators to help keep me straight.

open the rollup and fire it up, walk the exit to ensure it is clear

back off the concrete pad and into the yard.   did show, but I have to angle due to transition and spoiler draggging.

down the long dusty path to the paved road.

head into town and first fill up of 91 non-alcohol.

went for about an hour just cruising the back roads.   the engine seems to like ~2200 rpms, giving me ~55 mph in fifth.   I found listen to the tone makes an excellent "cruise control".  Having to down shift as approach a stop is a little strange, but not engine braking but just keeping rpms up without just coasting.

Pulled back onto the dusty drive.  I got the Panther mascot, but no "Farrah Fawcett"

can't wait for tomorrow's excursion.   Would like to drive to diner, but between the altornator might not keep up with headlights and more so my night vision I won't try

Attachments

Images (6)
  • blobid0
  • blobid1
  • blobid4
  • blobid3
  • blobid5
  • blobid2
Last edited by jfb05177
Original Post

Replies sorted oldest to newest

trying to figure out how to take and edit vid.    don't know why out of focus.

cold start   https://youtu.be/mMZrxXaltxY

I discovered a driving idiosyncrasy I don't recall hearing before.

when I released the clutch, the toe of my shoe was "grabbed"

does my steering knuckle look like it is the the right place.   This is a new piece.  any comment about brake pedal.

Attachments

Images (1)
  • blobid0
Last edited by jfb05177

500 miles today!   no trips just loops around neighborhood.

the plan is, make notes of what needs to be changed, then back to shop after first of the year.

i am having dexterity problems and finding first is a challange for me.   i took a cabinet hinge and made a reverse lockout.   WHAT a differance to be able to push to left and pull down.  I now don't have to hold clutch down at stop light.

THANKS to ebay's "barbaram442"  i now have a working lap and a set of 72 shoulder belts.   i used a7/16-20 x 1" bolt for anchoring shoulder belt.

those belts are a pain.   lap belt "locks" and keeps tighting and can't pull out till full retract.   the shoulder has to be hooked in lap before buckling

Attachments

Images (1)
  • blobid0

Hey John!  Glad you got your car back.  !  Is is overheating?  The air deflectors made a difference with the stock radiator at road speeds.  I struggled with overheat problems for 10 years before we figured that the orifice under the thermostate was too big and never would stop off the bypass.   I see your brake pedal and I cut the bottom corner off mine and it cost nothing and makes a huge difference when driving!

Attachments

Images (1)
  • DSC00756: cut brake pedal

Thanks for the "experiances" lessons learned !

the driving tecnique and muscle memory going from one car to another got me.   I hopped in the TR6 to run to town for gas (and keep battery up) and almost wrecked aproaching stop sign,   all THREE pedals responded different.

as for brake pedal, the fact that it was lower than throttle.   (opposite on TR6).    I think I have a tecnique that will work good as I continue to use it,   that is keep the right heel on floor and "turn" foot from throttle to the lower brake, using between toes and ball.

sort of same thing with clutch, keep the heel on floor (inline with clutch) then raise slightly to use between toes and ball, instead of arch.  

both of those have me thinking about a "heel rest".    shaped something like wall mounted bottle opener!

I have not removed tube to even look at the AC condensor and its sealing for air flow.    (I had wanted the "L" trunk profile made like earlier car for more air exit flow, but didn't want to delay in driving)

"I" think the side shields are needed but didn't want to be more "picky" for taking care of any items noted during my driving.

With the car moving, I did have one segment where I "thought" the radiator temp was not dropping and the fans stayed on.   that was based on battery voltage stayed low at speed.    I have three points in coolant system for measuring temp.   the Holley Sniper sensor and display are at the block position, the console gauge and its sensor in the water pump inlet (radiator return) and the idiot light switch in swirl tank (can't recall its setting) and the coolant fan swith in the radiator exit upper side tank (i also don't know its setting but think I reqest about 160"

Most times at road speed sniper temp is 185 to 190 with console gauge abot 170 (just right of 160 mark).   I have very little time in stop and go traffic, temps do go up.   have not been there to see if temps level out above 200F.   (currently running 7psi cap (on pump suction).   Shutting down HOT after slow roll down drive, there has not had gurggling as coolant temp rises during heat soak.

another question. . .

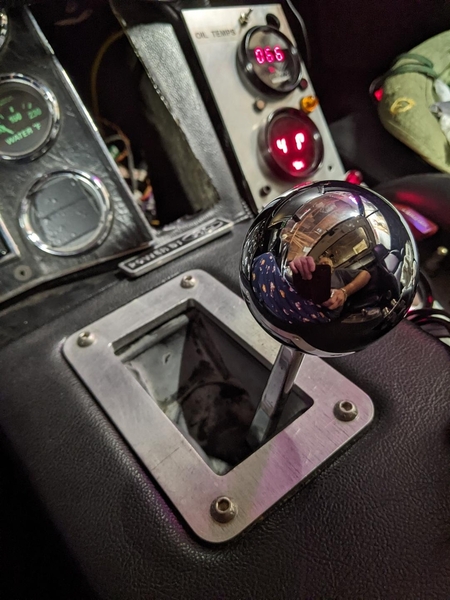
When tighten shift linkage lock nuts, holding Gate in center L/R in 2 / 3 path is done, BUT how do one hold the trans shifter shaft?    ( In my long ago thinking bouts, I drew up a radial fine adjustment "clutch")

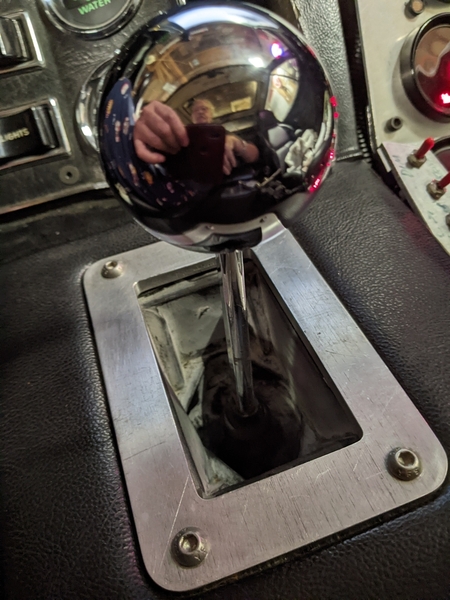
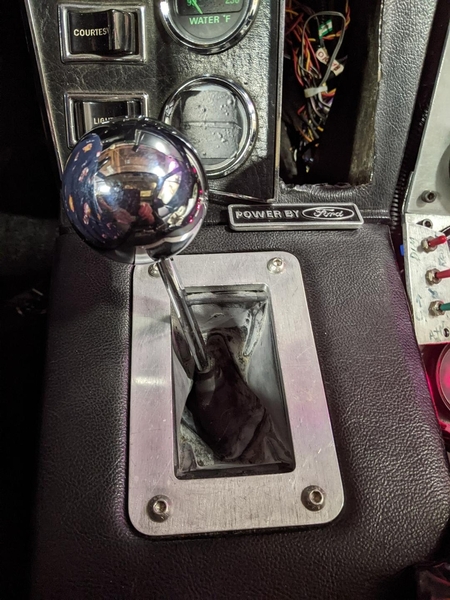
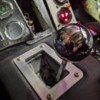
question . . . can the shifter's gated plate be removed, or does it hold something together?

after last week's adjustment of the turn buckle, the as left was not really that good, but all gears could be selected.   after hour drive, i am not able to select fourth and fifth takes about as much force as i want to use.  definately feel the shifter and gear box detents are not aligned.   not sure if the "new" linkage has hysteresis/clearance issue.

thinking if i loosen / remove gate i can ignore the shifter detent and at least drive some more.

another question. . .

When tighten shift linkage turnbuckle lock nuts, holding Gate in center L/R in 2 / 3 path is done, BUT how does one hold the gearbox shifter shaft?

do the lock nuts need to be gorilla tight or just good enough

Attachments

Images (1)
  • blobid0
Last edited by jfb05177

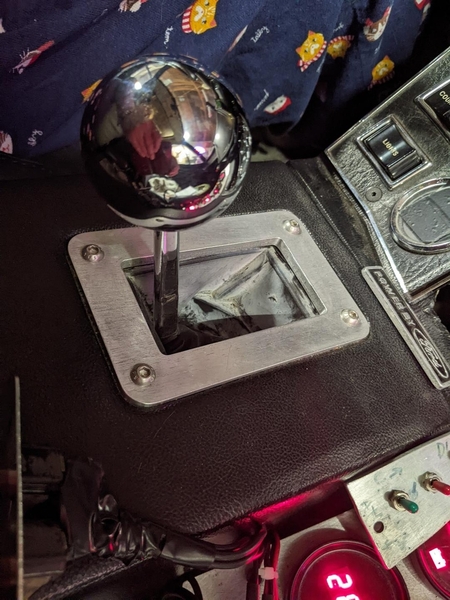
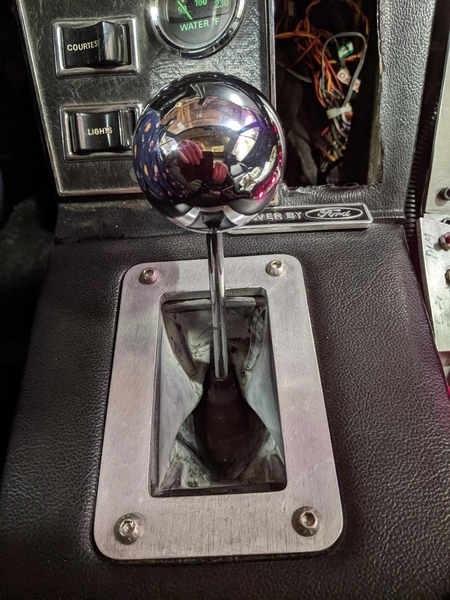
PXL_20231125_223630108.MPthumbnail [26)...Yes!! Remove the 'Finger' Plate. I removed my plate, sold it, and replaced it with a new plate I machined with a Clearance Opening, For unobstructed Shifting. Now! Remove parts 26 the Detent and 25 Detent spring. Put a good size 'Glob' of grease down the hole and place one or two Quarters (coins) on top of the grease. Then replace the Cap 24 and clip 23, back-on. Reuse the Rubber seal when You have a 'Cleared' Plate to go back on. Leave the Detent and Spring Out!!
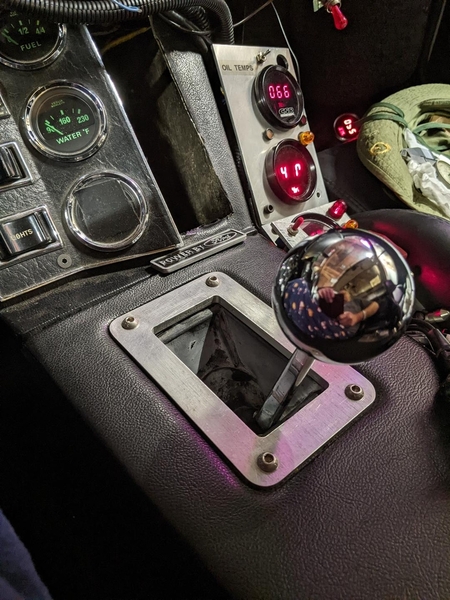
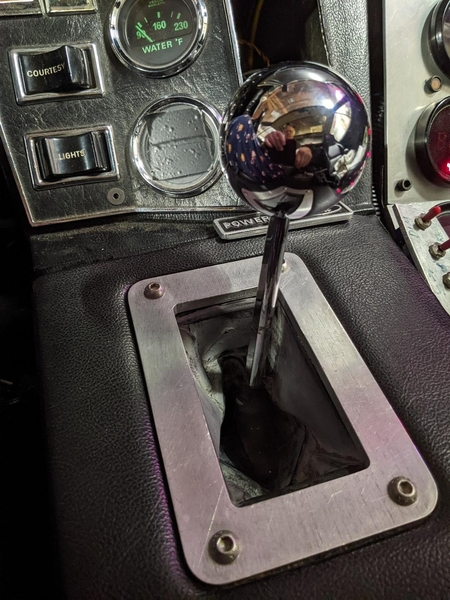
The Quarters press the grease down, by Gravity. With every shift, the Sliding Rod is Automatically Lubricated! You do not need the Detent here! The Shifts will be More Accurately Defined by the 'Better' Detent, back in the ZF Transaxle....as Both of these detents have, all along, been 'Fighting' each other for a true alignment! Plus! You were insisting the 'Shifter ROD' Coordinate with-in the alignment of the FINGERS!

Good Luck with It!!

MJ

P.S. Do Not Re-Install the Spring over the Quarter(s), as it would squeeze ALL of the Grease out in a Little Time. You just need the weight of the Coin(s).

Attachments

Images (2)
  • PXL_20231125_223630108.MP
  • thumbnail (26)
Last edited by marlinjack

I never needed the fingers. Just get in the way. If one needs 'fingers' to find the Gears...You Have:

1. Not driven a Stick shift since you were 15.

2. Do not know where the gear is.

3. Have Not Practiced 'Shifting' Enough.

Clutch ALL THE WAY TO THE FLOOR!

The first 2 photos were 'In Neutral'. 1st Gear, Is In 'Your Pocket'. Reverse is 'Left and Up'.

Other photos Reverse, 1, 2, 3, 4, 5 In That Order. reverse1 st gear2nd gear3rd gear4th gearkat 5th fifth gearThe Plate Opening is 2.100" Wide X 3.860" Long.
Attachments

Images (6)
  • reverse
  • 1 st gear
  • 2nd gear
  • 3rd gear
  • 4th gear
  • kat 5th fifth gear
Last edited by marlinjack

...Remove the Plate! Go Drive! And Practice-Practice-Practice!!!

Most important is that Neutral is STRAIGHT UP and CENTERED, If it is NOT, then Make it So, AFTER you have removed the forward detent!! If the Detent in the ZF does NOT Hold the shifter Upright, the Spring is Broken in the ZF. If the Shifter is held up, but is Not Straight Vertical, the Shifter Linkage is NOT adjusted Properly.

ALL Gear Shifts Have to Pass Through Neutral, First! Look at the Pictures from Straight up Neutral, HELD Straight-Up AND CENTERED, by the Spring Loaded DETENT IN THE ZF! NOT the forward detent under the shifter.  2nd Gear is a Simple Straight FORWARD. 3rd Gear is Straight BACK! 1st...4th...and 5th Gears are ALL in 'Their' CORNERS! When (I) 'Come Out' of a Gear...the First thing I 'Feel' For, is the Neutral Position. I give it a short wiggle Sideways, to be sure I have found it. 'Slamming' Gears...'Speed Shifting'?? NOT in My Kat!! I give the Syncros All the Time They Need to 'Kiss and Make-Up'.

Last...If the 'Fingers' were so Accurate and Helpful, ask why some owners have found it necessary to File the Sides for Clearance??  Because, in my view, it is near impossible to get a Perfect Alignment of all entities. If The Measurements on the Plate I posted were cut any Smaller, the Shifter 'Rod' would Hit and Vibrate against the Edges, and the Gears would never become FULLY Engaged. The photos show a Proper Clearance. Now, Get Rid of The 'Fingered' Plate and that Useless, Forward Detent!!! ALL Detention is IN the ZF!! The Improvement You Experience will Make the 2 Hours of Work, all worth It! You have My Personal Guarantee!!

Look at the Shifter in 2nd Gear...Straight-Up and Straight Forward!! The Fingers, will Not 'Allow' this, AND all other Positions.

MJ

Last edited by marlinjack

My brake pedal is also higher than the accelerator. This is why cutting the corner off the bottom right of the brake pedal helps get your foot off the gas and ON the brake.  I actually think I would prefer the gas pedal to be higher though.

cut brake pedal

There is a restrictor bracket on the accelerator pedal shaft. I am not sure why it is needed but if you remove it you can readjust the gas pedal to be higher.

Clipping the corner on the brake does help for foot room. I did that to mine also.

the weather was suppose to be rainy, but just cloudy and misty.   I thought that would be good lighting to take some pics.   (then took an hour drive!)

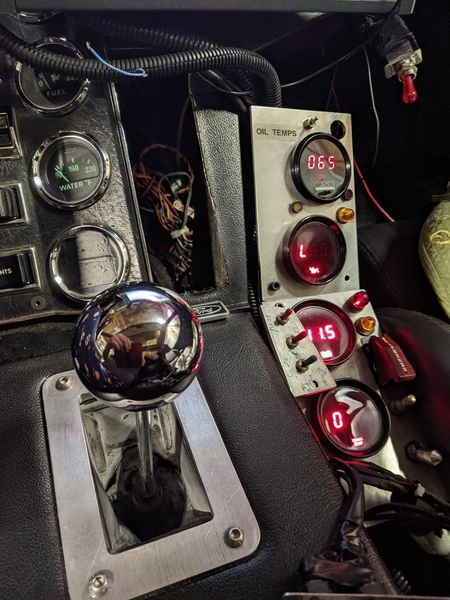
the dash was original covering, but from another since mine got "lost".   the rocker wiper & washer switches were move to gauge console.   the emergancy flasher switch moved to the dash illumination rehost position.  the light between speedo & tach is now a two color LED that provides warning of "low oil press" as blue and "high coolant temp" as red.   the small display on right for the Holley Sniper fuel injetion.   the left is Garmin 55.  steering wheel is Nardi that was when I got car.   the heat / ac controls, the lower lever is conected to double swith, center off, left turns on AC compressor and right opens heater solinoid  valve

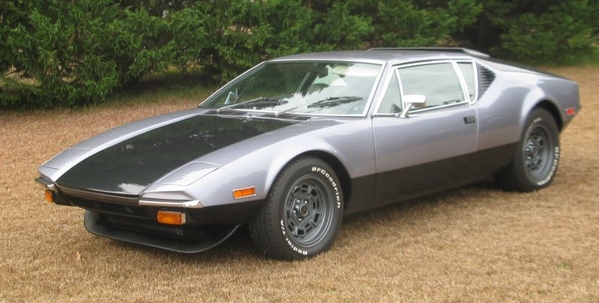
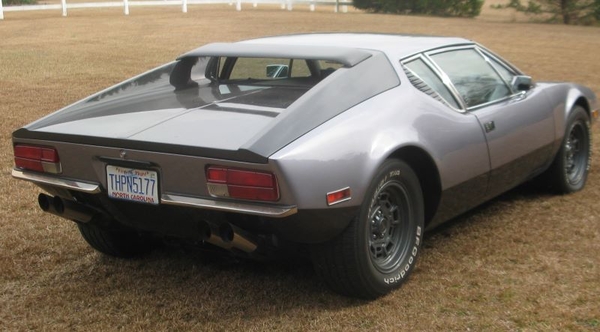
side / front / rear views

corner views

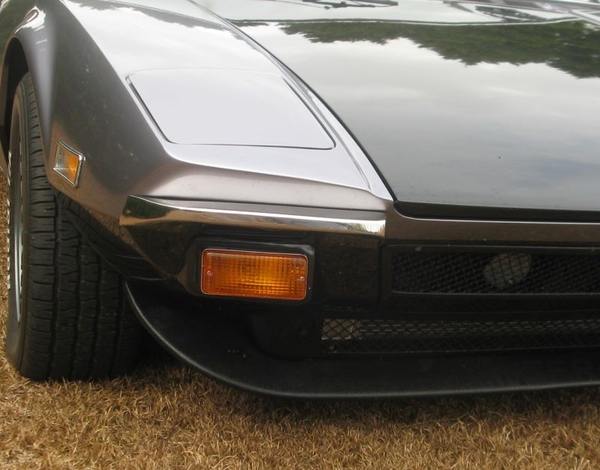
some of the details i wanted

replace the "L" bumpers with bright bumperettes and the alignment of those with the hood gap, 

another the fitment and angle of the front spoiler.

(i am thinking . . . putting a wood "skid" under the recovery hooks, 1/2 X 3" oak)  ???

AND the exhaust tips !

the tire lettering , the valve stems and center logo all were indexed.

a challange was my desire to have an original air filter housing fit under the engine screen and not tilted.  my fiberglass tube had been shorten (for as purchase turbo installation).   But it gives a good view of engine.

my center engine screen had a little rust on the end strips so They got a New one from one of the vendors.   I don't know which one.   Does this look like something that maybe came on an earlier car.   that is the solid section is just tack welded to the screen !   looks cheap to me, (but it sure wasn't).   the gloss paint has dust stuck to it.

Attachments

Images (14)
  • blobid1
  • blobid1
  • blobid2
  • blobid0
  • blobid2
  • blobid0
  • blobid5
  • blobid8
  • blobid6
  • blobid4
  • blobid7
  • blobid3
  • blobid9
  • blobid10
Last edited by jfb05177

delemma ? question . . .

I have a tire (right/front) with a slow leak, less than 2 psi day.

given I am "aware" now, would you top off pressure daily and drive.   (or bite the bullet and take tire to a shop while car is in the shed). 

drive now and let restoration shop correct when car goes back in Jan/Feb.   (or just let car stay garage till then )

spent long time, from different angles and don't see any thing in thread and the nut for valve stem is tight.

I can't see the details of the transition from screen to solid, however from what I do see, that is made the way one on 5177.

My comment about dust is my path is very dusty and a gently spray of water did not rinse my screen and I was making excuse why mine was not clean.  proably static or maybe residue vapor from new engine.   thinking I will need a "mop" to wash it.

any ideal on a torque value for the valve stems.   I noticed at autozone, the package stated about 30 to 40.   where I think I only went to 15 INCH*lbs.

edit  . . . thoughts on wheel valve stem torque.   the instructions gave tighten value with no air pressure in tire.   I'm thinking air pressure would compress the rubber seal more and thus the stem nut would loosen, so maybe lower torque is expected and should be used?

Last edited by jfb05177

Your fill plug is still good as is.  You can make it nicer by removing the sensor and installing a recessed hex plug.  If you want a new fill plug it is best to go to a Pantera vendor.  
Here is an example hex plug for $4 that could fill the hole where the sensor is.  I am not sure about the size you need but here is 3/8".  You might need smaller.  If you go this route be sure to put sealant on the plug threads.

https://www.autozone.com/fitti...BwE&gclsrc=aw.ds

Last edited by stevebuchanan

Add Reply

Post
×
×
×
×
Link copied to your clipboard.
×