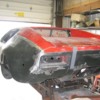
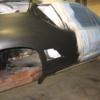
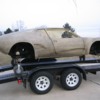
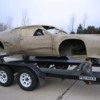
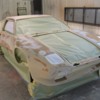
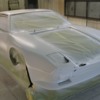
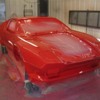
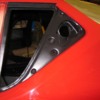
Left side view with all of the panels in position. The quarter and taillight panel still needed some straitening but the deck gap fit was correct and ready to be detailed.
Kirk – that's pure automotive sculpture, you are indeed a sheet metal artist – well rescued, it shows what can be done, if you have the talent! 
Your an Artist Kirk
Absolutely incredible ! What talent and skill ! Thanks for documenting and sharing Kirk.
OK...gotta jump on the band wagon. 
Very impressive resurrection Kirk! Really fantastic metal work...!
BTW....don't think for a minute the process steps are boring. They eye candy is great, but the steps/details are the critical process to get there.
Very impressive resurrection Kirk! Really fantastic metal work...!
BTW....don't think for a minute the process steps are boring. They eye candy is great, but the steps/details are the critical process to get there.
quote:Thought I would post a shot of the finished car just before the transport picked it up. The rebuild shots can be a bit boring but critical to proving the car was rebuilt with the proper care and detail.
I agree with Rob.
I am one of those that LOVES to see ALL of the build pictures.
Very impreeive job Kirk.
I am one of those that LOVES to see ALL of the build pictures.
Very impreeive job Kirk.
Speechless, as I would have thought that car was a goner!!
I'm sure I'm like most people on the board when I say I didn't know you could do this Kirk!!! It's great to see what is possible when it really looked like the car was gone. Bravo indeed!!!!
Mark
Mark
It really came out fantastic. It is somewhat comforting to know that all things are not necessarily lost.
Personally though from previous experience I am always concerned about the new longevity of the sheetmetal on cars like this.
I personally have seen very short life cycles on the sheetmetal that has been heated, shrunk and pounded out?
That metal doesn't seem to have great longevity once put back into service?
I noticed the primer that was mentioned and it definitely will be on my list for next time. Sure hope it does the trick?
Thank you for the photographic journey. I really enjoyed it a lot.
Thank you all for the kind words and support.
Working bent sheet metal properly takes patients and a light hand with the hammer. Also if you are shrinking with what I call "big heat" or a torch, that will suck the life right out of the tin. I use a shrink disk which heats the top surface on the sheet metal to pull it back. It's a slow process. Second when you are growing a low area or dent, the metal grows to the hammer so you start dolling around the outside of the low spot and hammer O-SO-LIGHTLY working you way into the center. This takes time and often a re-shrink using the disk. If you follow this method, the metal will be fine and have a long the happy new life cycle until the next crash.
Here is a view of the shell being moved to my paint booth area. It's in Rust Defender polyester primer and is ready to be blocked. I layer the car with 2 colors of material so you can clearly see the surface changes during blocking. Sometimes I use tint to change the layer colors and sometimes I use an actual color change---beige to gray---so on. This was a layer color change. Polyester is much harder to sand than urethane primer but it will not shrink in time and holds the top coat polish from shrinking much better---from what I have seen over many years of painting.
I painted my first full vehicle in high school---1974---it was a van in lacquer with multy-colored custom paint including my first attempt at mural painting---a vision to some---nightmare to others.
quote:Originally posted by PanteraDoug:
I personally have seen very short life cycles on the sheetmetal that has been heated, shrunk and pounded out?
That metal doesn't seem to have great longevity once put back into service?
I noticed the primer that was mentioned and it definitely will be on my list for next time. Sure hope it does the trick?

Working bent sheet metal properly takes patients and a light hand with the hammer. Also if you are shrinking with what I call "big heat" or a torch, that will suck the life right out of the tin. I use a shrink disk which heats the top surface on the sheet metal to pull it back. It's a slow process. Second when you are growing a low area or dent, the metal grows to the hammer so you start dolling around the outside of the low spot and hammer O-SO-LIGHTLY working you way into the center. This takes time and often a re-shrink using the disk. If you follow this method, the metal will be fine and have a long the happy new life cycle until the next crash.
Here is a view of the shell being moved to my paint booth area. It's in Rust Defender polyester primer and is ready to be blocked. I layer the car with 2 colors of material so you can clearly see the surface changes during blocking. Sometimes I use tint to change the layer colors and sometimes I use an actual color change---beige to gray---so on. This was a layer color change. Polyester is much harder to sand than urethane primer but it will not shrink in time and holds the top coat polish from shrinking much better---from what I have seen over many years of painting.
I painted my first full vehicle in high school---1974---it was a van in lacquer with multy-colored custom paint including my first attempt at mural painting---a vision to some---nightmare to others.
Attachments
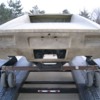
Another view shows our modular caster wheel system. All of the cross bars slip into sleeves that lock down using simple 3/8 nuts welded to the sleeves and bolts tightened onto the crass bar. The caster lock on the same way I have many sizes of casters---some for a rough surface (pictured), smooth caster for the floor, and large wheel/tire combo for the rear if you need to move the entire frame fixture to another location.
The body has also been guide coated which is the darker shades you see on the top beige color primer.
The body has also been guide coated which is the darker shades you see on the top beige color primer.
Attachments
Kirk,
Pure artistic genius. Before and after photos alone always raise questions as to how a car was fixed, but your details of the steps involved demonstrate a true passion for perfection.
Julian
Pure artistic genius. Before and after photos alone always raise questions as to how a car was fixed, but your details of the steps involved demonstrate a true passion for perfection.
Julian
WOW. Great to know what can be done and who can do it.
You Kirk can do it. Well done and thanks for the insight.
You Kirk can do it. Well done and thanks for the insight.
Great job Kirk! Every time you show us photos of your work the attention to detail always stands out! Thanks for sharing and please keep posting photos!
Thank you all once again for your kind words. There are many very talented hobbyist and professionals on the forum and I'm happy to among such a great group.
Next shot is the car blocked. I start with 180 dry---re-guide coat with 500% thinned color and wet block with 320---re-guide coat and finish wet sand with 500. The 180/240 dry block cut the surface straight but you have to be very careful on the next 2 steps making sure all of the dry sanded surface get re-sanded with the finer paper or your color will print scratches.
I have spent a lot of time in the booth---way back in my very early days the local dealerships would bring me their hard to match metallics for color blending---helped pay for my first Pantera.
Attachments
Just a mostly hidden detail after the finish sanding and buffing was completed. We step sand the clear starting with 500 to 600, moving on to 1200 and finishing with 2000. If some of the coarser scratches get missed, the area is re-sanded with 2500 during the final buff---lots of work.
Attachments
Add Reply
Sign In To Reply


