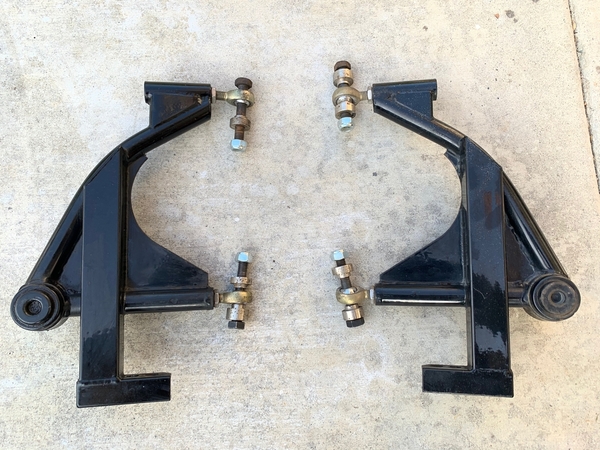
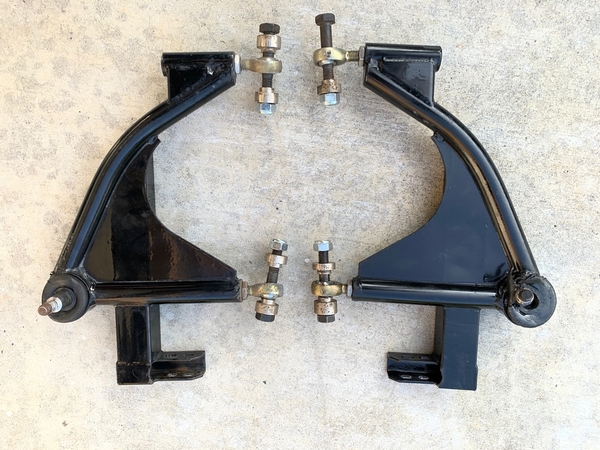
Rebuilding my rear suspension and looking for both lower control arms in nice shape, as mine are pretty dinged up. Want to get everything powdercoated, so need nice ones.

Also open to suggestions on if new ones make more sense, as I am running wider 335's in the back. Do I really need rear adj upper control arms? 

Original Post

Replies sorted oldest to newest

I believe it would affect toe. I have negative camber, and toe out, and all the lower shims are out. If I push the top of the A arm out to achieve excessive positive camber, then I could add shims back in to get neutral camber or slight negative. This would tilt the arm inwards to eliminate the toe out, and achieve a slight toe in if desired.

Somebody needs to make a batch of adjustable uppers, or some that are just 3/8" longer. I would bet a lot of Panteras need this.

Last edited by rrs1

Here is a surplus pair of upper rear adjustable a-arms that are gathering dust in my garage.  They have an extra mount point for a road racing sway that could be cut off or left as is.   The heim joints are in good shape,  You are welcome to try them out and see if they work as planned.  If you want to keep them we can work out a deal.

1 [1)2 [1)

Attachments

Images (2)
  • 1 (1)
  • 2 (1)
rrs1 posted:

Somebody needs to make a batch of adjustable uppers, or some that are just 3/8" longer. I would bet a lot of Panteras need this.

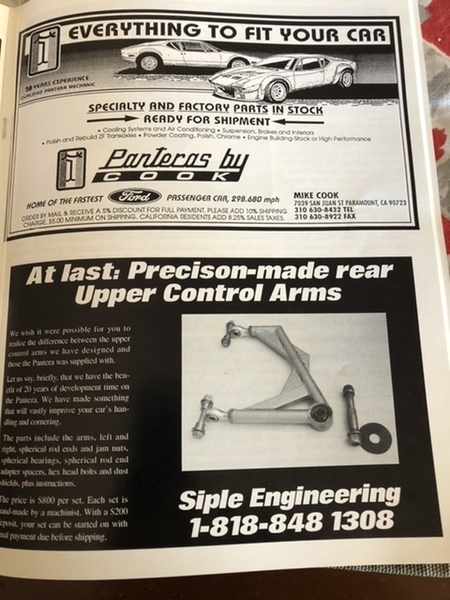
The Pantera vendors sell both extended a-arms and adjustable a-arms, some adjust at the chassis mounting point others at the outer side and use a rod end in place of the ball joint. I have the latter on both my cars.

For reference, below are what I have for uppers (Larry Stock part) with camber adjustment at the ball end. The upper a-arms don't benefit from a mounting side adjustment capability for toe as the upper joint is a degree of freedom, although you could force rear caster slightly with those if desired.

Adjustable A-arms

Attachments

Images (1)
  • Adjustable A-arms

Does anyone here remember the arguments, twenty years ago, between Dennis Quella and Ted Mitchell over rear, upper control arm design? Ted maintained that the correct location for heim joints was on the inboard side. That way, the heim joints were in double shear not single shear and toe was then adjustable as well as camber. Dennis' response was by showing multiple photos of Indy Car upper control arms that were similar to his outboard heim joint design. In Dennis' defense, I'm not aware of a single failure of one of his rear upper control arms. 

For those people interested in Ron Siple's rear, upper control arms, his e-mail address is: rasiple@aol.com. I have them on my Pantera and I believe George has them too. They're a bit more expensive than others but I can assure you, they're a work of art!   

Last edited by davidnunn

I’m don’t prefer one design over the other but just to be more accurate the design with the spherical rod ends on the inside has the rod end bolts in double shear not single shear. The design with the spherical rod end at the upright is single shear. Double shear is always preferable. Single shear or double shear is really referring to the way the through bolt is supported. Single shear rod end design is commonly seen as outboard joints. Designed correctly and sized correctly they are perfectly acceptable. The load on the rod end is the same  mounted either way as long as the fastener used in the single shear arrangement is correct for the job. One penalty for using rod ends with the fastener in single shear is that they are usually oversized to accommodate a fastener big enough to handle the load. My race cars typically used rod ends held between two tabs (bolt in double shear) for the inside points and a combo of single and double shear bolted rod end and spherical bearing inserts outboard. We never had a rod end or spherical bearing or suspension failure.

One penalty for in board rod ends is the potentially for a harsher ride. For my P-car I would choose the design with the outboard spherical bearing.

There are many grades and types of rod ends. The high quality ones can handle substantial loads if used properly. A friend of mine worked for a group that prepared Porsche 962s for US racing. From the factory the 962s came with sheet aluminum front bulkheads and tiny rod ends mounted with bolts in double shear. 8mm units. They would replace the bulkheads with machined aluminum ones and increase the size of the rod ends in some cases. Not that the factory design wasn’t strong enough but they were after better reliability. Their cars won many IMSA races and championships. 

Mike

Many Panteras have excess rear camber. This is usually caused by flex in the rear monococque chassis, occasionally including broken spot-welds. My '72 was no exception; I fixed it completely by throwing away the stock bridge-style upper bay-brace and used a straight adjustable Hall bay-brace. The important feature of the Hall bar is, the ends protrude well inside the brace mounts. Since the mounts are actually weldments attached to the upper rear shocks and upper subframe on the other side of the inner fender panels, getting the brace-bar ends further inside the weldments, the bar once installed does NOT move under cornering forces. The thin, flimsy mount-tabs are then used only to retain the bay brace in the weldments, not attempt to absorb cornering forces. To make matters worse, the tab holes are oversized and slotted!

The mechanics of using Hall's adjustable brace bar is to jack up the rear until both rear wheels are off the ground. Install the bar and tighten the central clevis 'firmly'. Lower the car and see where your camber is now. If its still way-negative, take no more than a half-turn more preload in the clevis and tighten the lock-nuts. Do NOT add too much preload to start with. Drive the car for a hundred miles or two, then check your camber again. If it's still excessive, jack it up again and tighten the clevis another half-turn or so, retighten the lock-nuts and drive it some more. I realize this does not read like a recipe for exactly how much pre-load you need at each point in time. Sorry- that's not how things work.

What we're trying to do is slowly tease the whole spot-welded rear body/chassis back into proper alignment a bit at a time. Trying to adjust it all out at once will almost guarantee that a fender panel or even the roof will buckle, forcing some seriou$$ bodywork to correct. Be patient. Over a 6 week period, I was able to force my chassis back from over -2 degrees negative camber to + 1 degree positive, without any panel buckling.

The camber bar clevis adjustment will force the body/chassis into new positions, then it will slowly relax into the new position with little bar preload remaining. That's when you realize that 'things' back there are in fact moving to new locations. Note this will NOT happen with a stock bay-brace or one of the pretty aluminum adjustable bars with short ends that do not fit snugly into the stock weldments. The mount tabs will instead distort and most of the bar preload will be wasted. Can't predict what the result might be.

Did I mention my wife and I both regularly drove our car for decades in autocross, open-track and often as a daily driver on bumpy local streets after my 'adjustment?' I've owned it since 1980 and it's NEVER been babied. But with that preloaded adjustable bay-brace, rear wheel alignment is still within factory spec after almost 30 years, and the body is still straight. I use stock a-arms front & back, upper & lower, with poly bushings and ball joints.  Expensive rear tire wear (10" Campys in back) is near-even side-to-side. I am not a magician; It CAN be done if you take the mod' slow 'n easy! Worked for me in the previous century. Good luck.


Chuck sorry did not get the detail..

.  ..the mounts are actually weldments attached to the upper rear shocks and upper subframe on the other side of the inner fender panels, getting the brace-bar ends further inside the weldments ....

I need some help on this one please.

can you do a picture (one side) of this set up, as it appears I can do that welding/mechanics myself. As I do not want to change the upper/lower control etc... The rear is good per measurment, just missing left 0.5 deg/app 1mm to add. Toe is +/-0  now, I can add .5 mm on lower control arm rear, think for now no need.
BUT a stiffer rear is something to consider..

Sorry for my NON knowledge on this subject matter..Tx..

MatG

Mat, the extra length needed is on both ends of the brace-bar, not on the upper frame brackets. The black steel Hall brace-bar actually inserts so far into the top bar brackets that the bar end nearly touches the shock eye on the other side. If you are a good welder with a TIG, you could add an inch or so of material to any adjustable bar; the clevis is needed to apply preload, so added extensions are useless on an unaltered stock bar.  This goes for both the early stock straight bar or the later stock arched bar.

There are photos on the DeTomaso Forum (NOT this Forum) that show the installation of a late model Ford Coyote engine in a Pantera. This 4-cam engine has such wide cylinder heads, many owners have cut most of the leading edge of the inner fender away for head clearance, and the cutaways clearly show what the shock/brace-bar weldment looks like.

Early/pushbutton cars had a straight non-adjustable bar while later cars all had an arched non-adjustable bar for more bellhousing clearance. I suppose one could upgrade the stock bar (either type) by cutting it in the middle, welding in a steel slug that was threaded SAE left-hand on one side and right-hand on the other and adding a clevis (available from Pantera Parts Connection in Nevada, USA). To fully replicate Hall's commercial bar, you'd also need to weld in an extension at the correct angle for each end so it slid into the stock square pockets in the inner fenders. LOTS of (oxyacetylene) welding required. There was a recent post on one of the Forums that included a photo of  exactly this mod.

Hall's all-steel bar is heavier than stock so I tried to reduce  the wt while adding a clevis adjustment. I made my own adjustable bar from a commercial clevis and a piece of thick-wall 2" OD aluminum water pipe, pounded square on each end to fit the fender pockets. But even using a hollow aluminum bar TIG-welded as needed, fabricating my own jam-nuts of 7075 aluminum, cutting the clevis-hex down to the next smaller wrench size and gun-drilling a 1/2" ID hole in the threaded steel clevis shaft, my assembly was still 1.1 lbs heavier than a non-adjustable stock bar. Required a TIG welder, left and right-hand taps and dies, a lathe and 2 weeks of garage work. Depends on what you want, I guess. Good luck.

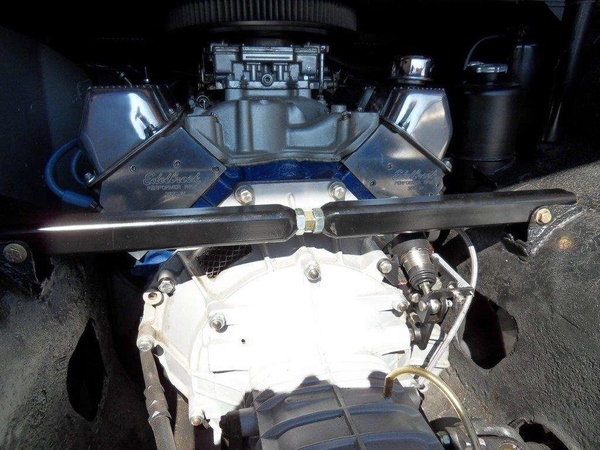
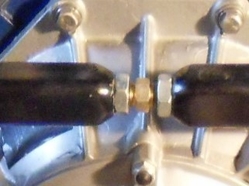
Before buying new tires, I needed to fix my Pantera's negative rear camber that caused the inner edge of my 335-35/17 tires to wear. So, I went with the BOSSWRENCH solution. Hall didn't have any adjustable camber bars in stock and no ETA. So, I built my own adjustable camber bar out of thick-wall, square tubing (weight not an issue for me). It took a few miles and a number of ½-turn adjustments to get rid of all the negative camber, but the new tires are wearing nice and even.

First photo below shows the camber bar after installation before I started making the adjustments. Second photo shows how much adjustment was needed to eliminate the negative camber.

My Camber BarMy Camber Bar 2

Attachments

Images (2)
  • My Camber Bar
  • My Camber Bar 2

I have a nice pair of left and right rear lower control arms that have been silver powder coated and not run since. I have had for about 12 years now and have kept them as spares for my car, for which I am the original owner since brand new.  Let me know if you would interested in them, as I believe my originals on my car are so nice, they may last another 40+ years, and will not need the spare ones.

You can reach me at 9630


message dated 2/27/2020 8:56:47 PM Central Standard Time, alerts@crowdstack.com writes:


| You can reach me at (630)926-0417 to further discuss.  == |
|
| |
| Hello, petematus:We're sending you this notification because you are either following the forum, the content, or the author listed below.New Reply To Topic
| Subject: Lower Rear control arms wantedReply By: trstno1In: Classified Advertising Forums / Cars, Parts, Literature, or Collectables Wanted | |


Pete- Thanks for the offer. I would need to get them re-coated though. PM your best price and I may consider them. I'm also looking at just getting mine fixed though, may be the cheapest route for me. 


View This ReplyThe De Tomaso Forumshttps://pantera.infopop.ccTo adjust your email notifications for this site, please update your notification settings.To suspend ALL email notifications from this site, click here. |

|

Add Reply

Post
×
×
×
×
Link copied to your clipboard.
×