Replies sorted oldest to newest

As far as I am aware (not having done this task myself) it is possible to replace the bolts and loctite/safety wire them with the diff in place.

A lot of folks have used a crows foot or modified box wrench to fit to their torque wrench for access.

Julian
I agree with JT that the Allen bolts can be removed so you don't have to get the bearing puller.

The challenge is that some of those allen bolts can be a real bear to get out without stripping them out.

So you might want to get a new set of them. We had to use a chisel on the side of two of them to break them loose.
Do you have to take any measurement before removing? Is there anything special required to do before reinstalling and does it just go together and tight down with everything in alignment?


quote:
Originally posted by JTpantera:
do you mean remove the diff? If so, there is a trick to it that doesn't require special tools and not explained in the manual. The trick is to remove the 8? allen bolts through the side plate opening that hold the diff together as a unit. When opened up, both halves come out easily with the side bearings still attached.
No special measurements required. Although as Rocky points out, the 5mm allen heads can be a challenge. I've had to drill several and bought several high quality 5mm allen wrenches to handle it. Cheap ones round off or break. I am working from memory and believe they are 5mm. When removing the cover, there are shims on both sides between the sideplates. Be careful recording those; some may be very thin.
From my experience....

Make up a jig (wrong term, but) or cardboard template, and keep every bolt and every spacer in the same place.

The "washers" on the long cross bolts are actually shims, and the case needs to be reassembled exactly as it came apart. There are a lot of shims on those cross-bolts, and it's easy to get them mixed up.

I would plan to replace all the "wave washers" on the bolts that seat the lower cover.

Use "Yamabond" (or the equivalent) on the gaskets. Get a gasket set from RBT / SAAC / IPSCO or your favorite vendor before you start.

There are lots of nuts / washers on the sideplates, too.

Then once you are inside - be very careful if you decide to pull things out of the differential assembly - there are lots of friction disks, gears, shafts, etc.

I am not trying to tell you not to do it - only to be very organized, and careful that you assemble everything back the way it came apart. That way you don't have to worry about things changing.

If you have the ZF Manual, it would probably not be a bad thing. It can be downloaded at the POCA site (if you are a member), or can be found on the Interwebs by searching for a Maserati Bora ZF manual.

Here's a taste of what things can look like if you aren't organized.....

I learned my lesson the first time I went in there!

Attachments

Images (1)
  • 05-06-2014_(20)_(Small)
Excellent posts from everyone.
In summary to this point, given the trans is out of the vehicle.

1) Remove covers. Note location of any shims and return to exact location.
2) Remove allen head retaining bolts on both sides of differential.
3) Lift out differential.

Will the differential come out as a single unit or in two halves? When the halves are separated are the items inside retained in place or will the be loose and able to come out individually? In other words are the guts going spill all over the bench?
The diff comes out in two parts, the top (with bearing) and then the bottom.

Just don't let all the "innards" come out of the housing assembly, and you can lift it out, and position it on your bench upright.

Since you will need to remove the allen screws with the case turned on it's side, gravity will hold all the parts together inside the differential.

Here's the unit in the housing. You can see some of the old allens, and the new ones (note that they have all been upgraded now). The top cover and bearing come off, and slide out.

Attachments

Images (1)
  • 09-24-2015_ZF_Refurb_(9)_(Small)
The advantage to leaving the diff' in the cases, besides the risk of loosing parts, getting dirt inside, replacing gaskets etc is, you can stuff a shop rag into the ring/pinion gear mesh so the wrench torque is taken up. Trying to hold a differential on a bench even in a vise while torquing all those bolts is a problem not easily beaten unless you make up a jig.

Incidently, removing those half-height metric allen bolts without stripping the heads is often easier if you clamp a vice-grip on each bolt-head and use that along with a metric allen wrench to untighten them. FWIW, 0.032" dia stainless aircraft safety wire is what most guys use. I've seen some ZFs that used much larger OD wire and its apparently not stainless. The drilled bolt-heads are most conveniently wired together in pairs and it CAN be done in-place by progressively rotating the ring gear to the cut-out portion of the ZF case for working clearance. To each his own....
Is there enough space to get the torque wrench and socket inside the case keeping the differential mounted in place? I'm thinking 1/2" Torque wrench with socket. Could always modify a socket as well.


quote:
Originally posted by Bosswrench:
The advantage to leaving the diff' in the cases, besides the risk of loosing parts, getting dirt inside, replacing gaskets etc is, you can stuff a shop rag into the ring/pinion gear mesh so the wrench torque is taken up. Trying to hold a differential on a bench even in a vise while torquing all those bolts is a problem not easily beaten unless you make up a jig.

Incidently, removing those half-height metric allen bolts without stripping the heads is often easier if you clamp a vice-grip on each bolt-head and use that along with a metric allen wrench to untighten them. FWIW, 0.032" dia stainless aircraft safety wire is what most guys use. I've seen some ZFs that used much larger OD wire and its apparently not stainless. The drilled bolt-heads are most conveniently wired together in pairs and it CAN be done in-place by progressively rotating the ring gear to the cut-out portion of the ZF case for working clearance. To each his own....
[Is there enough space to get the torque wrench and socket inside the case keeping the differential mounted in place? I'm thinking 1/2" Torque wrench with socket. Could always modify a socket as well.]

Sort of. We use a 1/2" torque wrench with open-end-style 'crows-foot' sockets. I doubt if a 6-point or 12-point cylindrical socket could be cut down enough to fit like you're thinking. A cut-down 3/8" socket even with U-joints & extensions would be clumsy to use in this application. Crows-foot socket sets are cheap and work well.
Thanks for the illustration, my book doesn't show that. Is there some type of retainer or is it a press fit?


quote:
Originally posted by JFB #05177:
quote:
Originally posted by r mccall:
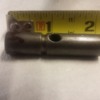
That is part of the vent tube . It is pressed into the case from the opposite side from the "bullet" that sticks up from the top of the case above the diff.


Ron


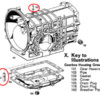
and an illustration
The short stock plastic vent hose often winds up dumping any collected stuff etc in front of the right rear tire. Many fastidious owners tap the hole for a right angle dash-4 AN fitting and run a ss hard line straight back to the center-rear of the transaxle. If you have a small lathe, you could cut the threads off such an AN fitting and lightly press it in the existing hole. Or, route a longer plastic hose to the same area. There's zero pressure in the cases so AN fittings & lines are enormous overkill, however 'racecar' they may appear.

Add Reply

Post
×
×
×
×
Link copied to your clipboard.
×