Switched to this thread from previous "Production Data" thread.
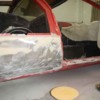
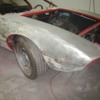
The plan is to refurb both the exterior and the motor of 69 Goose 8MA642 (wouldn't call it a restoration). Will include pulling majority of components and have them cleaned/hot tanked/painted/chromed/etc or replaced if necessary, and replacing cam/lifters/pushrods to better accommodate Boss 302 with IDA Webers performance. Headers may be a bridge too far since the frame mod for the motor leaves very little room to route headers (unless I come up ala GT40). All the shortys and huggers I've seen on line are just to big.
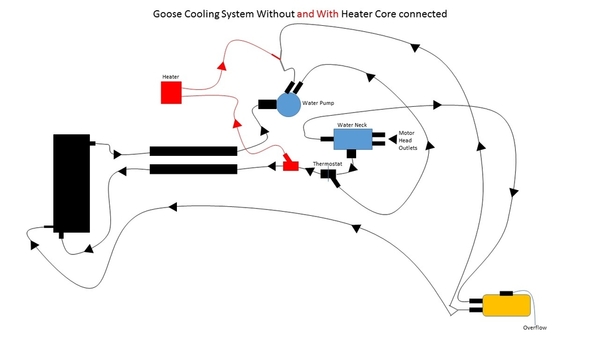
Have gone thru the various versions of Goose cooling diagrams on the forum, and have come up with the attached cooling system without and with the heater connected (right now its disconnected). Does this look about right?
Thanx
Mark
Replies sorted oldest to newest
I do think the flow from the radiator vent would be towards the yellow tank (fill tank ?)
Wondered about 'vent hose' flow, but all the drawings I looked at showed the flow the same making me think it's not a vent hose.
Mark
When my engine was redone the builders wanted to use 22/4 inch headers pipes to the mufflers. We built a beautiful set of headers that instead of going down and through the rear suspension like the original went up.
The tubes come off the heads and go up and back to a collector, over the top link of the hub carrier and then turn straight down, they turn again to the back of the car and straight in to the mufflers. It works great as there is no exhaust heat near the starter or motor mounts.
The gave me the large header pipe and no interference with the rear suspension. My headers are equal length tubes and very efficient. I have never had any trouble with them, they are jet coated silver.
DICK RUZZIN
quote:Originally posted by Dick Ruzzin:
REGARDING YOUR HEADERS.
When my engine was redone the builders wanted to use 22/4 inch headers pipes to the mufflers. We built a beautiful set of headers that instead of going down and through the rear suspension like the original went up.
The tubes come off the heads and go up and back to a collector, over the top link of the hub carrier and then turn straight down, they turn again to the back of the car and straight in to the mufflers. It works great as there is no exhaust heat near the starter or motor mounts.
The gave me the large header pipe and no interference with the rear suspension. My headers are equal length tubes and very efficient. I have never had any trouble with them, they are jet coated silver.
DICK RUZZIN
We want to see pictures... Sounds like an interesting setup.
- So I don't have to go thru the syncing gears/linkage/turnbuckle drill during reinstall, does anyone see a problem with drilling out the pin on shaft from ZF that connects with linkage and just replacing with SS nut/bolt? I did this on a Bora 10 years ago and its worked fine.
- Went thru the forum to determine best way - both together or separate (the way I did this a few years ago). For separate, does the bell housing come out with the ZF or does it stay with motor? For separate, looks like a clearance issue at the back of he ZF with the frame. Do you jack up motor to angle ZF for clearance of frame?
Other
- How do you remove wipers?
- Assume you remove wiper motor and window sprayer from inside the dash. Is this Right?
- Assume you remove Ghia emblems from sides by going in thru door in each wheel well. Sound right?
Thanx
Mark
Once the pin is out, an aircraft-grade 8 bolt & nut will work fine and be easily removable. But what normally happens is, the mild steel clevis ears of the connecting shaft elongate, introducing slop. Bushing the clevis holes while leaving the short ZF shaft alone, works best.
quote:How do you remove wipers?- Assume you remove wiper motor and window sprayer from inside the dash. Is this Right?- Assume you remove Ghia emblems from sides by going in thru door in each wheel well. Sound right?
Hi Mark, sounds like your project is moving along. I agree w/ Jack the gear linkage is a pain to work on, the positioning is all terrible!! That said on my car the pins were roll pins and the rear one (which I think you are referring to) comes in/out with relative ease. The one further ahead, near the joint in the shaft and near the engine mount, is MUCH worse to deal with. IIRC the shaft assembly can be disconnected by removing the rear pin only, assuming it cooperates.
Re the wipers and sprayer it's all under the dash as you mention, should not be a problem. As for the badges they are actually ahead of the shields located behind either front wheel so you don't need to remove anything to get access.
Dick, have some 351C headers that will fit Boss motor ... already had cut flanges from pipes; once motor is out and while car be repainted, will try to fit/cut/weld them so they exit up over suspension as you described ... just isn't enough room on either side thru frame/support to install headers going down.
A few questions,
1) how are the stainless steel wiper blades removed to get to nut that allows complete removal from under dash ... doesn't appear to be a small screw on wiper hub, but I do see a pin where the blade meets the wiper hub?
2) with front bonnet wide open and disassembled, what are key areas to refurb up front (already implemented the dual electric fan fix with spal fans a few years ago)?
3) both wheel/tires up front appear to tow out ... can a std wheel/brake/alignment shop work on the Mangusta front end?
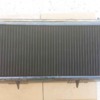
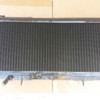
3) radiator is removed ... didn't leak; should it be cleaned and if so, what is the best best method?
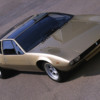
When car was painted red in 1971-72, they neglected to paint under the pad on the inside of the front trunk lid. So, original color is loud and clear and it appears to be a gold metallic(very similar to prototype - see picture). Any one know what this color is?
Thanx
Mark
Attachments
Will tackle pulling windows from doors today.
Very nice.
re the cooling diagram, I can only say that it looks too complicated. I'm also not a Weber expert.
I would hook it up exactly like a 69 Mustang with webers. Excepting the "Y" pipe at the front of the engine that the Goose uses from T-stat outlet down to pipe to up front (hot water out). Also, the one small connection at the bottom of the radiator is different.
All the rest of the connections could be made as if it were a simple Ford. That is what I boiled my drawings down to...while comparing to a very original car with water valves...and then there was my car with nothing left of the valves, and no crossover between the two heater core hoses, BEFORE the shut off valves that I installed in the cabin for emergency and ease of activating heater! Yes, it gets used in my car!
ZF comes out while tipping engine forward...loosen everything that would allow you to do this...take off dist cap....
While engine is tilted forward, you can take off front jackshaft pulley. This makes pulling engine easier.
Then take off starter, bellhousing, flywheel, and block plate. This really makes pulling engine much easier!
Steve
Thanx
Mark
1.
The wiper ARMS are removed by depressing a small stainless tab toward the center of the shaft and then pulling the hub straight up in alignment with the center of the shaft.
It is hard to see, I think it is facing in the direction of the blade. Look very closely to find it. Once the little is depressed you can wiggle the base of the arm, pull gently and it will come off. Do not pull it without depressing the lock first.
2.
Up front seal everything so that ALL air entering the front of the car has to go through the radiator. At the top of the radiator before putting the top panel on use foam to block off all spaces so that air cannot go over the radiator and then behind it. See the article on Mangusta International for details.
3.
Try to find a shop that has a computer alignment machine with two towers as described in the article on MangustaInternational.com. They have to align the rear wheels first and then the front. A good technician will know what to do. Show them the description described above.
4.Your gold paint may not be like the paint on the prototype. The prototype was a different car altogether although it looked to most people like the later production version of the Mangusta. You might be able to get a color content reading at a paint supply with a computer if there is enough surface to measure.
DICK RUZZIN
Appreciate all the advise.
Thanx
Mark
Attachments
I suggest an adjustable, brake proportioning valve to be installed in the front brake T. They make them now to include the stop light switch.
A huge safety improvement.
Dick Ruzzin
That car is "numero uno"!
Factory museum car, originally a push car...later converted to an operational car!
My DNA is in that car....
Steve
Dick Ruzzin
Mike
- status while in car was no leaks
- from what material is original goose radiator constructed
- with radiator removed from car, what is best approach to cleaning it
- for storing over the next three-to four months, should I fill with 50/50 mix to prevent corrosion
- any ideas would be appreciated
Thanx
Mark
I didn't get the original radiator with my car, but these were built by the same company that built radiators for Fiats, or so I was told, and our old Fiat had a brass radiator.
Most that still have them, are happy with them as far as cooling goes! Providing you get cool air into the motor to begin with...!
I would drain it, rinse it out, and just let it air dry. In TX that shouldn't be much of an issue.
If you are going to have it serviced, ie professionally cleaned, a shop will server you best here as they'll have a large tank to dunk it in...save you a lot of PITA work! Have them flow test it first. If it flows fine...it doesn't need much cleaning!
Cheers! That gold is going to look nice! Can't wait to see more pic's!
Steve
You just really don't want to guess whether the radiator is cooling as it should...just too easy to have a radiator looked at professionally. Especially for a 45 year old Italian car...Lee
I am starting repainting my Mangusta 8MA1242 bought 3 years ago. It is painted red, but, as it often turns out, when peeling off that paint, the original color appeared : dark (slightly metallized) blue.
Problem is, in Denis C post from June 27,2011,this color is not mentioned. However, 8MA1242 is a late car, and, according to Pantera International, the official colour catalog of the early Panteras features a "Bleu sera met. n°033.8.012" from Glidden (Industria Smalti e Vernici, Milano).
Would anyone know if that colour was also used on Mangustas ?
Thank you for your advice.
Jean
Thanx
Mark
I'd say it's $600 of one or $600 of the other....!!!
The originals are alleged to be fantastic radiators.......
I put a new aluminum one in ONLY because my original was long gone and mounts were already modified (not to great standards..), not to mention all the fan stuff was cobbled together too.....so it wasn't like I was "changing" anything from stock.
I would like to see the original style maintained if possible. But that's me.
If they can get you the same style of core, with all the fins etc, that would be great!!!!
Fans could probably use help however. At very least, take originals out, lube the bronze bearings with oil, and seal up any air leaks around the radiator so air doesn't bypass it!
(thanks Dick!!!)
Steve
Thanx for you help
Mark
It is a great question, and one that is really hard to answer, since everyone has a opinon on the topic.
If you were going to show the goose at AACA, they would say you have to match the orginal design. As for any other car show, I am guessing they will not be able to tell you that it was not orginal unless the design looks too modern. With the price of gooses going into the upper limit, I am guessing originality will count for something. But as I learned years ago, deTomaso was never about originality.
A couple of years ago, I was talking to my aunt about the idea of an Orginal Pantera. She said that when they had a "reunion" a couple of years after the Pantera was launched, people asked to be judged. Bertocci(not sure of the spelling) was asked to do the judging. He took points off for everything that he believed was not original. She said that in the end, he said only a Pantera that was pushed into the event would have been original. The net net is, do what you want, but if you want to drive it, I would have the best radiator you can find, as nothing is worse than an over heating car.
20% increase but look old!!!
Steve
Denis
If this is no big deal (ie, not being a structural engineer, I have no idea if this is actually a frame integrity issue), I won't worry about it. I will just clean up frame and POR-15 it to prevent rust.
However, if need be, I can craft 4 appropriately sized pieces steel and weld them around all four sides of the damaged area.
Thoughts?
Thanx
Mark
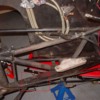
NOTE: this pic shows pretty well how the frame was modified at some point to accommodate the Boss 302 motor.
Attachments
If I still had one, I'd use a 7" (or 5-3/4") double-disc race clutch, a matching small OD flywheel, a reversed starter and trim the bottom of the bellhousing off. One could gain about 3" of badly needed extra ground clearance for maybe $3000.
Interestingly, they said they had to scrap the first core they made because as they installed it, they realized that this radiator had directly flow through separate baffles on the top and bottom. Said Ferrari had also tried this (probably same radiator company!) in the 60's.
Attachments
So what did you end up with in terms of fluid flow? Are these tanks open end to end now vs having baffles to redirect (twice thru???) ??
What are "directly flow thru separate baffles"?
Was it like the failed Pantera "double flow" radiators that are so scorned today?
Very nice job!!!
Steve
(Has no original radiator to play with..
I didn't see the inside of the tank so I can't confirm the configuration, and am not familiar with Pantera radiator.
Hopefully the staggered tubes and louvered pins will make this goose run a little cooler.
Mark
Motor top end rebuilt and have decided to build headers to accommodate Boss motor and rear chassis frame. Shortees and normal long pre-fab headers, whether right side up or upside down, just won't fit.
Mufflers are original and tips need to be re-welded to drivers side muffler. Got me thinking, has anyone installed more modern muffler and retained original look? If so, what mufflers have been used? Boss motor will have IDA webers and 1 3/4 OD headers so would like mufflers to not inhibit carb/motor/header combination.
Thanx
quote:Originally posted by Dan Mershon:
I'd love to see some restoration pics of any kind. I've got a goose also. Not sure I'm ready to go down that path,love to see any pics at all of it apart. Dan Mershon 937 605 1505. dan@mershons.com. Thanks
Dan , I send you a PM whit pictures.
Simon
I need to address a couple of issues when I get it back (should have done before repaint). Any help or documentation would be greatly appreciated:
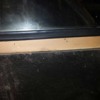
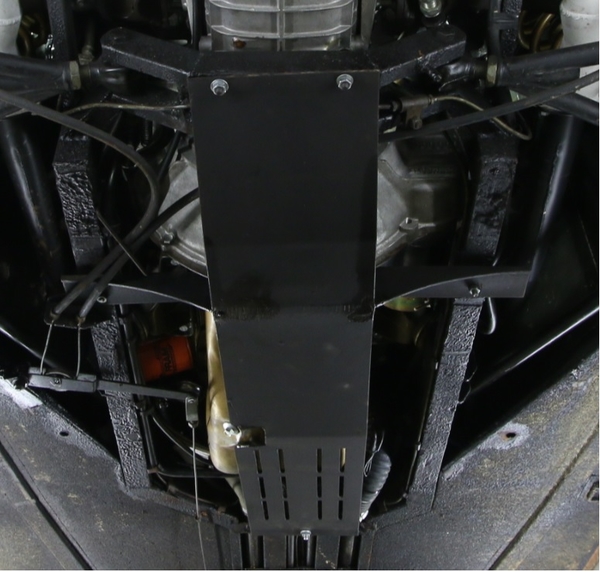
- At some point, someone tightened skid plate bolts on lower frame to tight and caused them to 'in dent' top of frame (see box in attached pic). Is this something that must be addressed? And, if so, how best to do it? I have welding capability.
- Steering is very loose/a lot of play, front wheels each appear toed out, and all the rubber steering rack and other boots are torn and need replacement. (have read various posts on this topic to include Johnny Woods detailed post)
Attachments
IMHO, a skid plate is worth adding to any Mangusta that's driven on city streets. I have an empty Mangusta diff case in my shop that was the victim of snagging a high-mounted manhole cover in a suburban U.S. street. A 'Goose snagged it at speed and ripped the bottom of the bellhousing and ZF diff-case completely out of the car! LOTS of expensive TIG-welding pieced it together like a metal jigsaw puzzle. The outside looks stock; the inside- wow!
I was so in awe of the car....that I FAILED to bend down and look at the stupid skid plate...!!!! Left 2 or 3 rolls of unused film in the rental car also... duh! Boy, what I would have taken pictures of today if I knew what I know...... IT was and probably still is a VERY nice car, but is suffered from one thing.....lack of use! All of the interior had sort of a fuzz growing on it....where if fingers had been involved...probably wouldn't have been there! It was kept in a climate controlled garage with CAV002 GT40, two 67 Vettes (his and hers of course!) and a Jag XKE that was in progress.
My car seemed to have a few extra holes in the cross member.....that looked sort of caved in also!
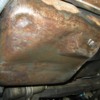
What people fail to realize is that these motors were regular old 68 Mustang 302's....and those oil pans were fairly restricted to their use in 68 and 69 from what I know. Many of the 302 oil pans sold as proper....are only the substitute part when you order one from the dealership...or from the aftermarket....(which year pan did they copy????)
The 68 pan from what I recall of crashed and dented lower engine photos, shows a drop in the center front of the sump where the drain plug went. Most later ones have a side dump....and may vary in depth again, because of revisions made and then shown as "backwards compatible" to 1964 or so....!
The stock pans were about even with the bottom of the bellhousing when installed in a Mustang. Check out the next 68 or 69 when you see it at a car show....or around....
I don't like the idea of anything "oil retaining" hanging below the frame rails, especially at the front of the engine..a tapered pan with rear pickup would be good...once your wheels start over a bump, the car rises clearing speed bumps and driveways! Different story for big rocks! ....have heard tales of owners backing out of their driveways and loosening the drain plug...! Bad bad thing!
IF you have a mangled one...they can have the dents worked out with body tools..the pan is pretty danged thick material! Weld up cracks...file it all down. I even saw inserts in the Fastenal or MSC catalog for the threaded portion that the drain plug screws into....the inserts were spot welded into the pans in three spots I believe. Any leakage around this insert was stopped by the nylon gasket on the drain plug. The stock drain plugs were a large headed thing....7/8" or 15/16 or so.....
SOOOO if you really want to be proper and correct, you need to rob a pan from your neighbor's garden variety small block Mustang and give him a "brand new NOS" pan......yuck yuck hah hah! Wouldn't be the first time....
The oil pans are also date coded! Some have a part number stamped in them....but that could be just for special pans like Boss 302's etc.
There are some other posts about skid plates....some rather long...... but who knows how many variations of this were made......
Glad to hear you are "almost" out of body shop jail!!!!
Steve
PS: Note that in the above picture, that the upper frame rail and supports have been changed by a previous owner to accommodate a not stock engine and some REALLY bastardized exhaust manifolds! ...could have built some nice headers.....!
Attachments
Modded frame accommodates 69 Boss 302 with IDA webers, jackshaft removed, and A/C disconnected. Previous owners have told me this frame mod dates back to 69-70 timeframe.
Steve, you are correct, car has a "frankenmanifold" on pass side and OEM manifold on drv side. Since I'm not in a rush (obviously), have all the equipment necessary to build a set of headers that work there way around that mod'd frame. Once motor is back in car will build the headers inch by inch.
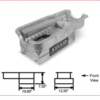
Here is a link to their page on the pan, and here is a picture of it.
The pan is designed to alleviate the clearance issue. I don't have a 'goose so I can't guaranty anything, just that they do make a pan.
http://aviaid.com/shopsite_sc/..._oilpns_sbf-ss3.html
I suppose that you may have a perspective of wanting originality BUT if that is your intent, I think you are going to have ALL of the original oversights?
I would speculate that the value of a Mangusta in the future is going to be to a knowledgeable buyer? If that was me, I'd want the oil pan clearance issue solved?
I believe this pan is 1" shallower like what Shelby did with the 289 in the "Cobra Daytonna Coupes"?
It IS NOT a T pan. The illustration of the pan is not correct. Look at the picture of it.
Attachments
DICK RUZZIN
Attachments
I revise my statement about the oil drain plug....it was toward the side....!!!
I think you guys have the right pans....!!!
Mark: YOU NEED NEW REAR SPRINGS/SHOCKS YESTERDAY!!!
My bellhousing was ground down so far that the bolt holes had no bottom....the holes were reduced to about a 235 degree hole....the rest is out on the roads of CA somewhere!!!!
Steve
I had Armondo build me a 6"ish deep pan, full length, fully baffled, holds 6 qts. I wouldn't call it a racing pan because of the small capacity....but it IS a confidence builder/pucker factor reducer....as I know I will NOT be scraping this mother!!!! Now, the bellhousing still hanging down there is a different story!!!!
Steve
quote:Originally posted by Mangusta:
Mark: YOU NEED NEW REAR SPRINGS/SHOCKS YESTERDAY!!!

Steve
Well yes, but not for that reason. My Mangusta sat so high I could almost drive my GT40 under it. The shocks were fine but I will replace them because I want the car to sit much lower. And, yes, I WILL be fitting a skid plate!
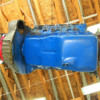
...Mark, here is a picture of the most perfect original pan yet
Nice job!!! Yes that is the correct drain plug!
I cannot say that I have seen that particular way to set the timing. That pointer in that location...... Seems like there are many different/similar solutions so that console center cover need not be disturbed!!!
Did the balancer get remarked or do you take the timing off of a different cylinder??
Lookin' good!!!
Mark, if that bellhousing is from your car....you need new shocks..or your springs are too soft...or both...no matter what the ride height! (Stock DeCarbon shocks or changed...?)
Scraping the bellhousing is caused by either a SERIOUS crown in the road....or serious ass dragging by the suspension allowing the car to sink too low.....there should be travel limiters installed in the shocks....and the springs and shock damping should reduce the excess movement but for the worst of worse cases....then you are on the limiters in the shock to protect you! Perhaps that is why my bellhousing looked so.....similar!
Cheers!
Steve
Searching the web, looks like Hall Pantera has a wiring diagram for 20 bucks, has anyone bought it? Is it any good?
.....obviously early....as none of the Carello relays adjacent to the fuse panel are shown!
But that aside....it is somewhat functional at least in Italian as "a suggestion"!
Steve
It is good to see these De Tomaso books coming out.
Have you seen my book, BELLA MANGUSTA?
Dick Ruzzin
Steve, just to finish on skid plate...Our friend '696 (the gold car in Miami...really does seem to be a nice car) has a clear pic on skid plate mounting...I think I've seen others make this notch for the drain plug.
Nate, for me the hardest thing about the Schematic was dealing with the "2 halves" (where one page has a displaced gap with the other). Good news, the car is simple enough.
Dick, yeah, our family has 2 copies of Bella ![]()
Lee
Attachments
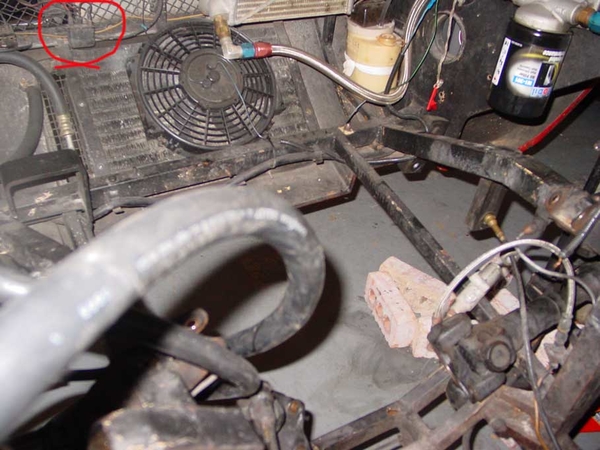
Am prepping for engine stand run of rebuilt motor and plan to use rebuilt radiator to test it. The picture shows a port at the top circled in red that was connected to the overflow tank in the engine bay since I've had the car
The bottom red circled port has been blocked off since I've had the car.
What is the correct connections for the coolant going into the radiator other than the main coolant input coming in from the thermostat housing? Should I be running the hose from the overflow tank to the top port (way the car has been for years) on the radiator, or the bottom port (blocked off for years) on the radiator?
Thanx
Mark
Attachments
I ran the top connection on my expansion tank to the small connection on the front "Y" Pipe off of the thermostat housing.
The lower expansion tank connection went up to my small connection on the radiator, where-ever it was..... I believe it was at the bottom....
My diagram I posted showed originally the lower connection on the expansion tank tied into the crazy hoses that were the heater shut-off valve circuits. I believe you said that you weren't running a heater???
For testing just connect the main large connections and don't worry about the small stuff. Connect it like it was in a regular Ford! Keep the radiator high enuf to be the "top tank" in a normal car, and just watch the water via the radiator cap there! Keep it simple!!!!
Make some noise!!!!!
Steve
Alright! Progress!!!!
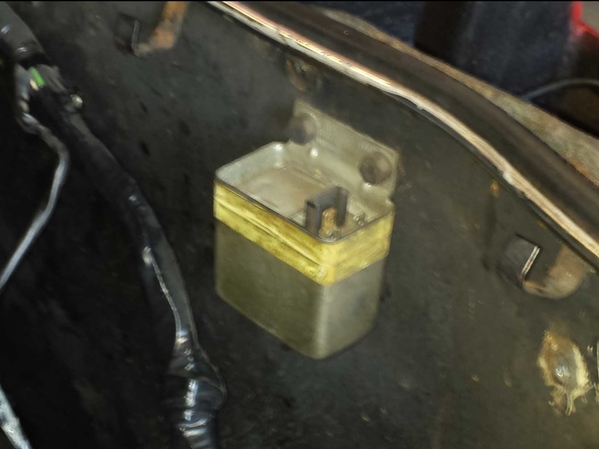
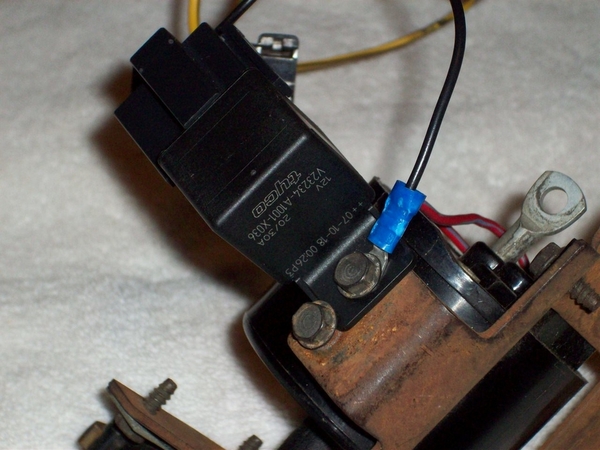
Re the relay above the AC condenser fan.....while the connectors from afar appear to perhaps be original style, I have no idea what it is for....unless it is for lights or the fan.
Follow the wires.
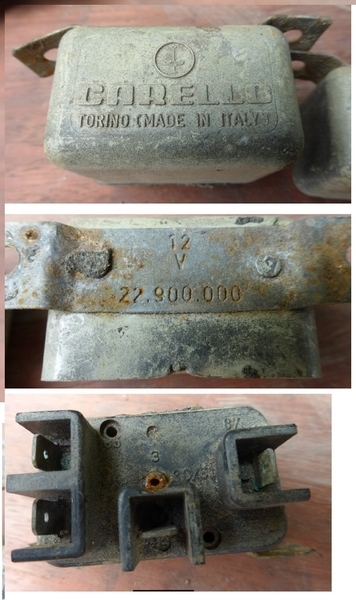
As for relays on factory wiring diag's, they are notably missing from copies that I have and what I have heard from others...... The two above/adjacent to the fuse panel are for AC, stuff under the dash..... and radiator fans if memory serves me. Carello....plastic housings....tend to "soften" with heat....!!! Keep some Bosch "relays on a tab" handy.... Don't forget to assure that your ground connector(s) to these relays are making good contact.....thru thick insulation!
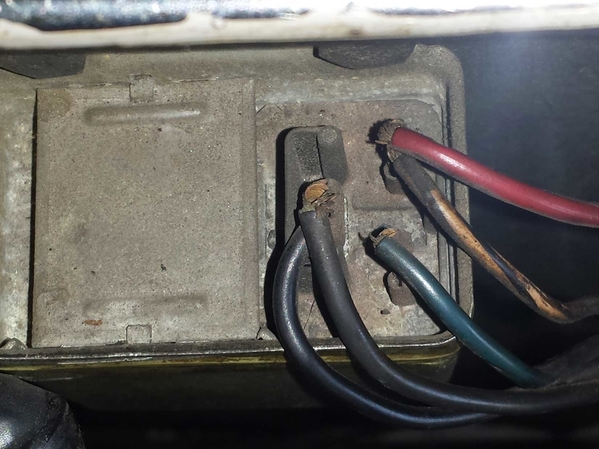
Ok, second relay....if this is on RH wall of engine compartment, I would bet that this is a voltage regulator of sorts.
Get numbers off of the cases of both....and you can likely find new replacements! The regulator came in two sizes....20A and 30A or 30-40.....and were paired with the Bosch alternator size....(current).....
These voltage reg's showed up on VW's and others...... IF that is what is is.
Mine was mounted wiring connectors down.....opposite of yours.......
Gobble gobble!!!!
Steve
Mark, the relay in the back isn't original; the voltage regulator (2nd [pic) was used on Mercedes and Porsche 914, check Bosch #30-051 or 0 190 601 006 (I have no idea if these are 20A or otherwise as Steve mentions). These are available as aftermarket, and probably won't take too long even to find NOS.
The fan relays Steve mentions were Carello, 22.900.000 . I haven't been able to find these anywhere...Lee
Attachments
If you burn up one of these Carello units, the BOSCH "block" relays work fine. Best is the ones with the mounting tab on them. They come in two flavors, 30 and 40amp. 30's should be sufficient for these cars, excepting some aftermarket fans!
Steve
Once I get car back from paint, I'll some sleuthing to figure what rear relay might be. Right now, am just building engine test stand wiring so that rear relay isn't a player.
Fan wise, I replaced my radiator fans with two 1500 cfm Zirgo's and used a couple of Bosch relays.
Mark
quote:Originally posted by LeeA:
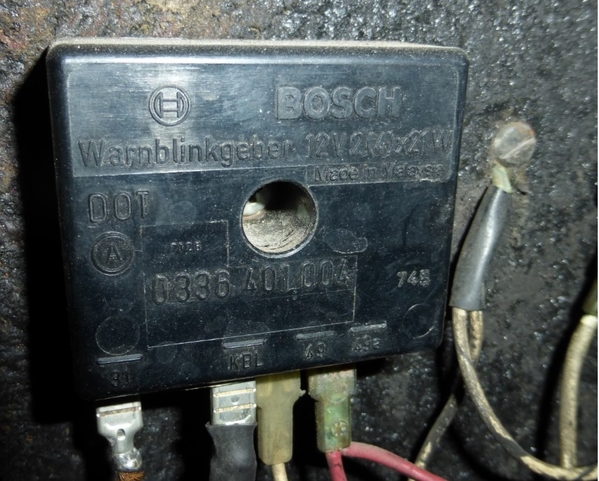
(Just adding a pic of the Bosch relay Steve mentions, must have been Hall that provided these ~30 years ago...!)--Lee
Thats a turn indicater relais ,this is not what Steve mentions.
Simon
This is one of the cube relays..... in a completely different application....but you can see the mounting tab! There is a socket installed on this one.....which could be potentially used in the Goose, but not necessary.....unless all of your connectors are toast and need replacing anyway!


