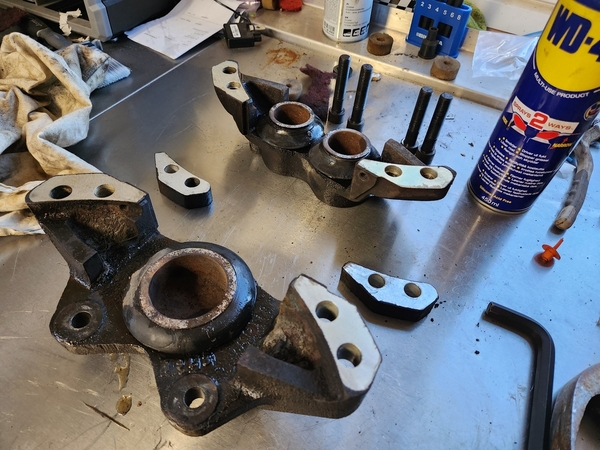
Was hoping to put the brakes back together in order to do a function test on all the parts I've worked on so far. This is ofcourse not the correct course of action, as I have not done the calipers yet, but a lack of patiens and an urgent wish to finally drive the car gets the best of me..

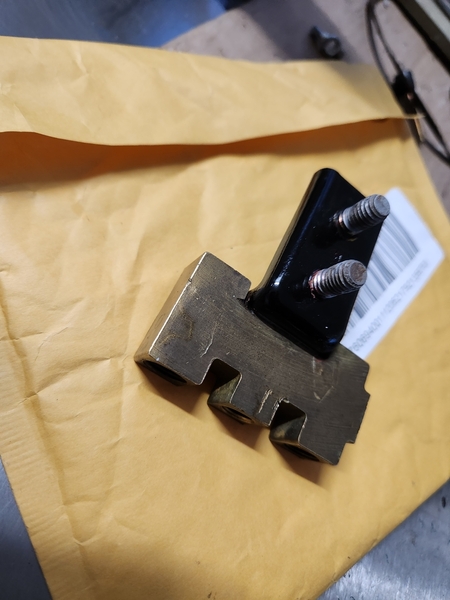
Differential switch valve block looks better now. The parts from Muscelcarresearch fit as supposed.

20240128_135953

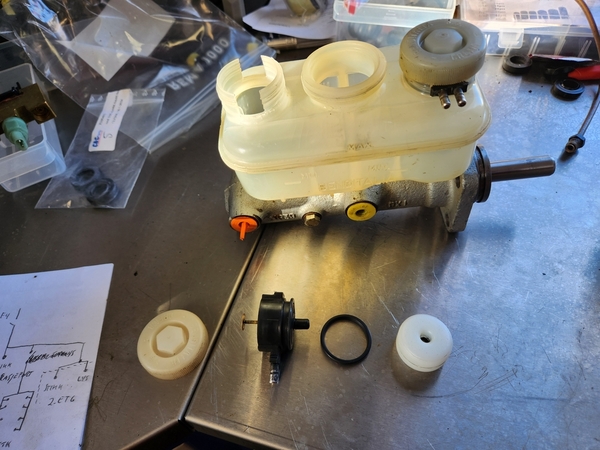
Cleaned up and assembled the master cylinder with floats.

20240316_140620

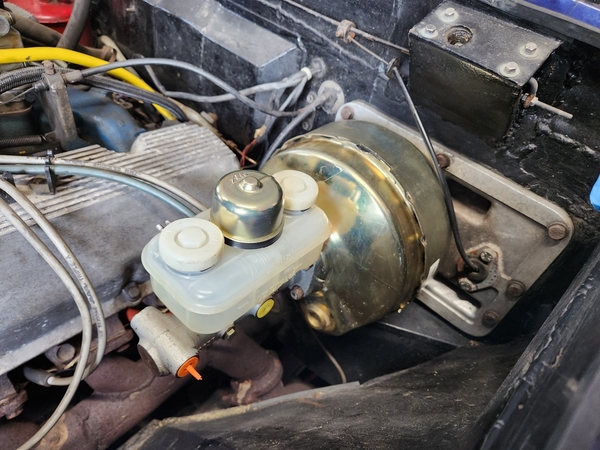
Still fits in the car. Made new cunifer brake lines, but will need to re-rout them when I take the engine out.

20240317_142852

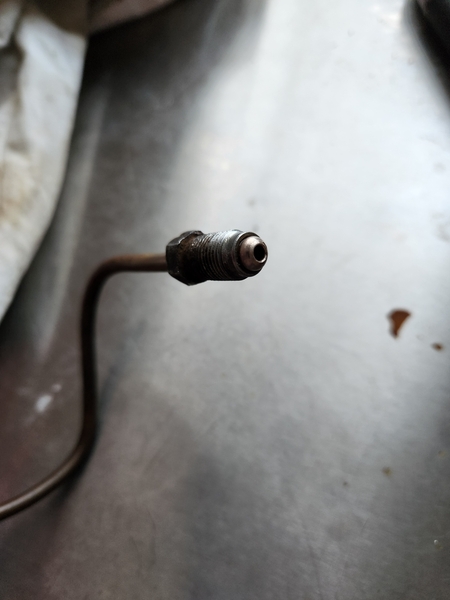
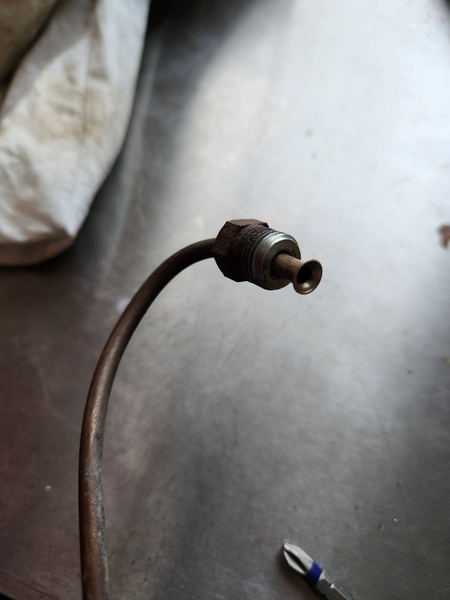
The old pipes had bubble flares on the brake master side, and single flare towards the brake switch block. As far as I am aware, the single flares are only recommende for use in low pressure system (fuel lines etc.) as they are prone to cracking in the flare, causing leaks.

Bubble flare

20240317_150149

Single flare. I replaced these with double flares.

20240317_150156

Now, with all brake parts back in the car, time to bleed the brakes and see if it all still works.

20240401_115804

Or not.

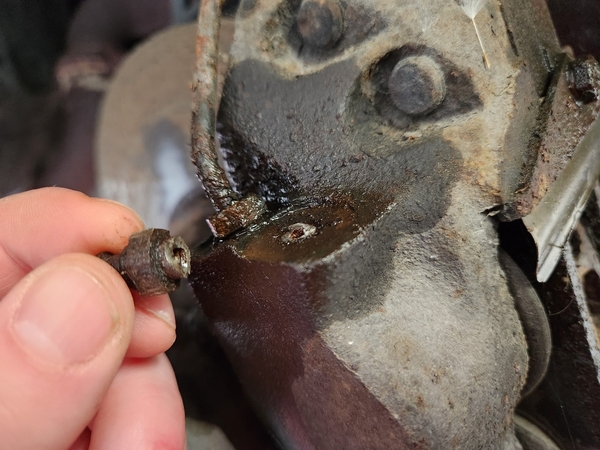
Bleed screw broke off with minimal effort. Which is great.. Time to overhaul the calipers.

20240401_115809

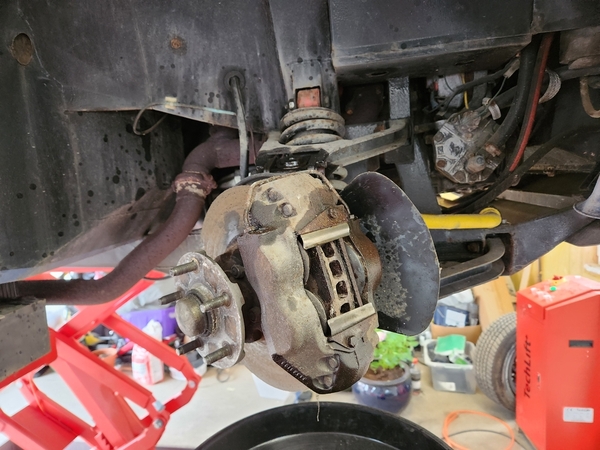
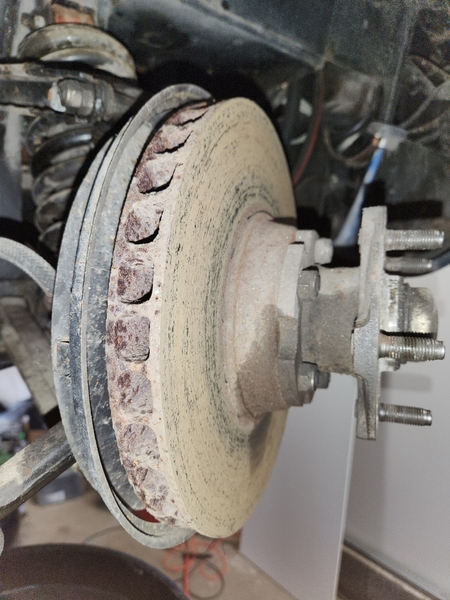
I tried to remove the crossover pipe in order to evacuate the fresh brake fluid, but the hose going to the wheel seem to have swollen inside to such an extent, not a single drop would reach the caliper. Upon removal of the crossover pipe however, the pressure already present in the caliper was released, which explains why this car has been less than easy to move around. The rotor now spins freely (which revealed a bad wheel bearing).

20240402_192136

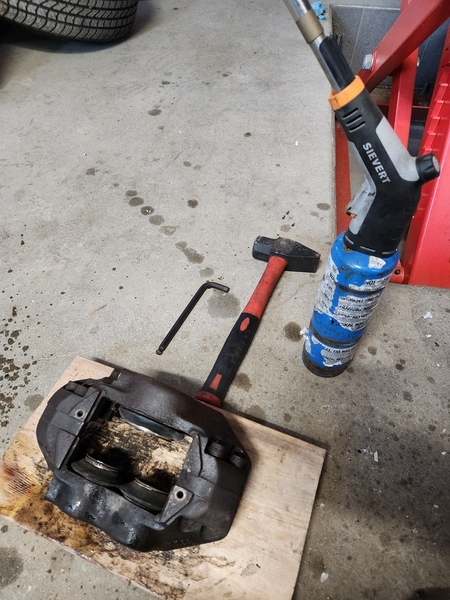
Fire is always useful.

20240402_192816

While I do posess the parts needed to remanufacture the brake caliperes (if the bores are salvageable), I can't seem to find any good information on the wheel bearings this car uses. If anyone knows, please advice.

20240402_181804

It's a rather interesting hub-setup, and doesn't look like the Pantera setup. Is it the same on the Longchamp? Maserati QP?

Attachments

Images (10)
  • 20240316_140620
  • 20240317_142852
  • 20240401_115804
  • 20240401_115809
  • 20240402_181804
  • 20240402_192136
  • 20240402_192816
  • 20240128_135953
  • 20240317_150149
  • 20240317_150156
Last edited by S.Hafsmo

The bearings are used on most Maseratis from the late 1960s onwards. I don't have the numbers on the outer shells and inner racers. Maseratinet.com sells them for sure.

I did replace the rear ones in the past. I gave the numbers on the inner and outer bearing to a supplier here in Amsterdam and they ordered them for me from Timken. Same story for the seals. A local supplier had them on stock.


That broken bleed screw is always painfull! One of those live and learn experiences I guess. Believe me, I have been there!

Now, when working on dodgy callipers, I always start with applying heat to the bleed screw and making shure it frees up.

I was aware that the shortcut I was pursuing probably would end up with something like this happening. All remaining pipe connections needed a bit of heat to let go. Removing the leftover bleed screw should not provide much of a problem.

Does your front hubs look similar to mine? Just want to make sure nobody has been modifying anything before I start ordering parts, and I couldn't find any decent photos of a stock Deauville or Longchamp front hub.

Quote S.Hafsmo "Removing the leftover bleed screw should not provide much of a problem."

Such a stupid thing to say. This is what remains of the bleed screw after copious amount of time spent drilling and knocking out the remains. Fortunately I managed to save the threads in the caliper body.20240419_20075520240419_200822

Finding new wheel bearings did however not present any issues. There is a swedish company called Momentum Industrial which has a store a few minutes away, who had bearings and seals in house.

The seal is sized  44,45mm x 63,5mm x 7,93mm, which seems to be a somewhat common size.

Part numbers,

  • SKF LM 11949/910/Q
  • Timken K-67048
  • Timken K-67010


Hub and caliper dismantled. The bores of the calipers seem to be in decent shape. I'll run the hone through them, just in case.

20240406_18535920240423_13060520240423_13061020240423_130614

Paint removal,

20240822_205254

After a bit of glass bead blasting,

20240426_10121620240426_103028

20240417_195420

20240628_12364120240628_123700

Masked for heat resistant paint

20240423_20100320240423_201010

I also tested the heat resistant paint for the calipers, but the result were not great at all. This is the Motip Heat resistant paint.

20240425_06193820240425_061943

The girling calipers seem to have a rather rough and untreated casting surface.

20240508_180720

I was hoping the curing procedure (oven acquired for this purpose) would add a bit of shine. I also tried to cover it with a layer of high temp clear coat.

20240508_195346

But the result was possibly even worse.

20240509_104307

This paint also has absolutely no chemical resistance. Which made the process of removing all this paint surpisingly easy.

This time I spent an insane amount of time removing casting imperfections.

20240618_20172920240618_201734

And used Foliatec 2k epoxy paint. Which turned out great.

20240717_17381620240718_182310

First attempt of a crossover pipe. Not satisfied at all, and it touches the wheel.

20240821_184529

Revised crossover pipe.

20240905_200210

Plenty of space.

20240905_200243

The car is now possible to drive, and stop. Which is nice. A couple weeks ago I had my first test drive around the block, and these cars are just something else. A very satisfying experiance indeed.

20240905_201159

Next up is a bit of electrical work.

Attachments

Images (27)
  • 20240419_200755
  • 20240419_200822
  • 20240406_185359
  • 20240423_130605
  • 20240423_130610
  • 20240423_130614
  • 20240423_201003
  • 20240423_201010
  • 20240426_101216
  • 20240426_103028
  • 20240628_123641
  • 20240628_123700
  • 20240417_195420
  • 20240425_061938
  • 20240425_061943
  • 20240508_180720
  • 20240508_195346
  • 20240509_104307
  • 20240618_201729
  • 20240618_201734
  • 20240717_173816
  • 20240718_182310
  • 20240821_184529
  • 20240822_205254
  • 20240905_200210
  • 20240905_200243
  • 20240905_201159
Last edited by S.Hafsmo

To make certain that the car does not catch fire when its accessories are activated, I've gone through each and every relay. Dismantled it, cleaned up all contact points, applied protective coating, function tested, and reassembled.

These old relays are tiny works of art. This one I believe is relay #68 - Relay Low beam. And the coil actuate an arm pushing down a clever mechanical design which switches power between two outputs.

56a powers fuse 3 and 4, where 56b powers fuse 5 and 6, which is essentially High/low beam.

20240924_20084520240924_20084820240924_20085720240924_200917

Wires are indeed easyer to follow in an interactive dxf-file. Here showing the 56b output to fuse 5, and 6, as well as the outputs from these fuses.

That being said, there will be quite a lot of work before this schematic is entirely correct, as the paper version from De Tomaso does contain some errors.

I love how the amount of thought that went into the plate the relays attach to.


20241012_183544

Relay 105. Defined as "Unknown relay", connected to switch 30, defined as "unknown switch". It's a two pole relay that shorts its own inputs when activated.

I was hoping to find its purpose in the drawings, but it all ends in the steering colum/stalk/ignition switch, along with lots of other "loose ends".

20241012_18512720241012_185135

Hard to say whats going on in here.

Attachments

Images (11)
  • 20240924_200845
  • mceclip0
  • mceclip1
  • mceclip2
  • mceclip3
  • 20240924_200848
  • 20240924_200857
  • 20240924_200917
  • 20241012_183544
  • 20241012_185127
  • 20241012_185135
Last edited by S.Hafsmo

While in there I managed to get the fan motors working. It seems both temperature switches were broken. When shorted, the relays work as supposed, starting the appropriate fan.

The ones I found was from a Fiat 124 (and several other similar vehicles). One of them closes at 87°C and opens at 92°C. The other operates at slightly higher temperatures (88-95°C if memory serves me right).

Fiat-124-127-128-131-132-alfa-lancia-temperature-switch-92-87/

Fiat-124-127-128-131-132-engine-radiator-fan-temperature-switch

the old switches (below) operate at a lower temperature, so if anyone knows of similar switches with lower temperatures, let me know.

20241007_19333720241007_193340

Attachments

Images (2)
  • 20241007_193337
  • 20241007_193340

This brings back memories of being upside down under the dash figuring what does what, without a proper diagram! Could the 2-pole relay be for the high beam flash function at the end of the colum stalk?

The previous owner messed with the wiring so I basically had no high beam and or flash and occasional low beam. Took me a while to get things going again with that switch over relay and how it functions. The colum stalk switch on mine was dead with regards to the high/low beam. So I used the the small round switch under the main light switch on the center console for that. It is supposed to activate the right front door lock release but that is something I decided I could do without.

For the cooling fan switches I have the low temp one with an 85-80 degree on and off range, the higher one is 92-87 I believe. I will check at work tommorow what the numbers are in my Facet switches book.


I saw that you changed some brakepipe flares from single to double flare. Do they still seat properly at the other end? Usually the counter mating surface matches the flare. So single flare matches a cone at the other end and double sits in a countersunk surface and not in or on a cone.

...the level of technical capability in all these works is so impressive...as an electrical engineer, I'm so humbled that I used only "Paint" to make the Mangusta drawing.  But wrt to the relay near the indicator stalk, at least Euro cars (and maybe all 4 headlight cars) had a relay that would allow flashing without needing the headlight power. https://pantera.infopop.cc/top...gusta-wiring-diagram see breakout on the headlights.

Last edited by leea
@dutchie2 posted:
Could the 2-pole relay be for the high beam flash function at the end of the colum stalk?

This is very plausable. That would however dictate that all the current going through the relay, also goes through the switch, unless there is an additional relay somewhere around the steering colum. I haven't been there yet.

I must admit, I struggle with understanding the purpose of a relay where the circuit powering the relay, is the same as the one being activated by the relay. It seems to defeat the purpose of having a relay in the first place.

@dutchie2 posted:

I saw that you changed some brakepipe flares from single to double flare. Do they still seat properly at the other end? Usually the counter mating surface matches the flare. So single flare matches a cone at the other end and double sits in a countersunk surface and not in or on a cone.

Single to double flare shouldn't change any angle or mating surface? As far as I can tell, the only difference is that the nut will sit a bit higher due to the increased thickness. The contact pattern after the inital tightening seems to be decent.

Or perhaps you were thinking about a bubble flare? If I remember correctly, the crossover pipe on the Girling caliper utilizes 3/16 pipe with bubble flares, where I've found quite a few single flares on the rest of the car.

Attachments

Images (2)
  • mceclip0
  • mceclip1
@leea posted:

...the level of technical capability in all these works is so impressive...as an electrical engineer, I'm so humbled that I used only "Paint" to make the Mangusta drawing.  But wrt to the relay near the indicator stalk, at least Euro cars (and maybe all 4 headlight cars) had a relay that would allow flashing without needing the headlight power. https://pantera.infopop.cc/top...gusta-wiring-diagram see breakout on the headlights.

Thank you. Appreciate the feedback.

The relay is not located lear the stalk, but behind the glovebox, together with the rest of the relays. I'll check if there is an additional relay near the steering column.

In the not so distant future I'm planning to move all heavy loads out of the cabin, to shorten the distance between power source and load. That would include an under-hood fuse box with relays powering electric fans, headlights, horn etc.

There are a lot of melted connector insulators, and deformation on the current fuse box, so this part of the system definately needs to be revised.

Has anyone actually checked the weight of their car? I put mine one the weight today, and with an 80kg driver inside, it weighs 1740kg (3836lbs). This is quite a lot less than the 1940kg stated in the cars papers.

Would be interesting to see if a stock Deauville actually does weigh 1940kg, or if it's lighter than stated.

1000 kg / 740 kg front / rear axle weight.

20241019_100202

Late night pre-drive inspection yesterday.

20241018_180049

Attachments

Images (2)
  • 20241019_100202
  • 20241018_180049
Last edited by S.Hafsmo

It must have been the bubble flare then. Altough I seem to remember that some connections on the distribution block needed bubble flares as well. But it has been a while since I worked on mine.

Some of the electrical solutions are curious indeed. Either wel thought out or not at all.

Is there any fiberglass in the Jehle conversion or is it all steel? I never weighed mine but it would be interesting to see what the weight would be. Must put it on the scales sometime, we have a set to set up the suspensions and corner weigh the racecars that we work on.

The 4 speed conversion must be a real bonus!

The handbrake pads are a girling system I believe. Also used on the Aston V8s, Rolls Royce Silver Shadows and Jensen Interceptors. They look really odd because of the way they seem to be worn away on one end and not on the other end.

Powerflex poly bushes do have most suspension bushes and the rollbar bushes, though not fot the drop links.

Add Reply

Post
×
×
×
×
Link copied to your clipboard.
×