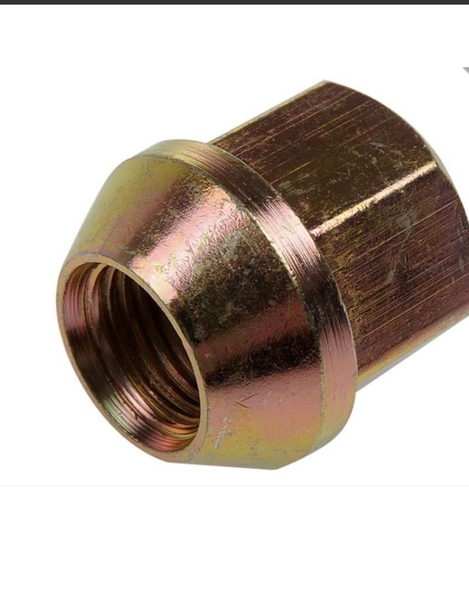
panterapatt, only 1/2in is exposed, meaning that is all that comes out of the beginning of the 60 degree cone of the wheel, it does not extend 1/2 in. out at all.  Start to finish, only 1/2in can be seen.

Larry, just measured it three times.  Exactly 3/8 in. of the thread is engaged.

I wish 1/2 in. or more of the thread was being consumed, but it is not.  I completely agree there is no value in having longer studs than what the nut needs.  I don't want these to look like truck tires with obnoxiously long lug nuts.  I paid way too much money thus far to ruin this by silly looking long lug nuts.  I want the shortest stud/lug nut combo that is safe.

I measured the Hall Ultra wheels for comparison.  If these had 8 full turns of engagement, then the value of it to me would be in the fact I ran those Ultra wheels with 8 turns of thread engagement for years, so I would feel safe if these would also have 8 turns of thread engagement.  But they do not.  4.5 turns and 3/8 in. engagement does not give me any confidence.

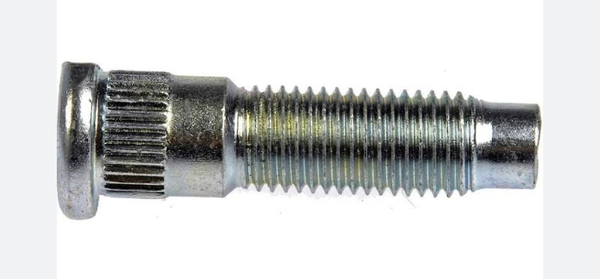
Switching wheel studs is a weekend job, assuming you have the correct tools, parts and equipment. You also need to know how to do it! You should be able to find all the info you need here. If you aren't comfortable doing it yourself, have a Pantera vendor do it. Don't trust your local mechanic. The stub axle needs to be pressed out of the upright, to access the studs. Make sure you know the length (minimum and maximum) of studs you need and that the GT-5 studs do indeed fall within that range. While you have the uprights "out" and apart, I'd do all of the usual maintenance we Pantera owners do when our uprights are apart. Replace the bearings (GTS mod?), turn or replace the rotors, check axles for signs of wear, etc., etc.

@panterapatt posted:


I also do not believe Roin purposely made these such that the studs needs to be replaced.  He has sold plenty of the wheels.  

These are copies of the original Campi wheel, they have thicker hubs, the Group 4 / GT5 / GT5-S cars these wheels were designed for had longer studs, in fact so long that a spacer was also used behind the wheel!

IIRC, aren’t the DeTomaso studs hard to source?  <Edit…  Maybe not!>

Fuzz, I think you’ve got a beautiful set of wheels, and I want to see them on the car, and wish you the best of luck…


I just recall discussions of the splined segment of commonly available studs being too small for the mating holes in the hubs…. And the part that made this stand out in my mind is a discussion that tack welds (as people have used to retain the bolts) won’t hold due to dissimilar materials?

Hope I’ve got this mixed up, and maybe someone can chime in and correct me…

<Edit - Here’s a link…  hopefully helpful!>

https://pantera.infopop.cc/top...-standard-hubs-studs

Last edited by rocky

I thought of that too, John.  It is a solid idea with one exception.  The conical insert in the wheels where the studs come through is shaped like an ice cream cone, and it looks like a Y if you were looking at it from the side.  These inserts look like to be steel, and not aluminum like the rest of the wheel, and they have been definitely machine pressed into the wheel.  They do not appear to be thick enough to endure deepening.  Looks like if I would machine it deeper, the top V part meeting the stem, or the I part (I am trying to explain this with letters!!!), would become too thin and would not hold.  In fact, just eyeballing it, it looks like it would definitely destroy the wheel's stud holes.  I know I am not using the correct terminology for all this, so forgive me for that.

I took some closeup photos and I will post them the first chance I get.

Just had a machinist in my office John, and we discussed deepening the stud holes in the wheels, and he strongly suggested against it.  He said the wheels will fail in a catastrophic way, because too much "meat" will have to be taken out to deepen those holes.  He has a $200,000 CNC machine that could do it easily and he would do it for free, except he won't because he feels it is truly unsafe.

Also, last night I had a former race car driver and now race team head mechanic at my place looking at the wheels.  He has over a decade of racing success, and is a damn good mechanic.  Anyway, he says he raced his race car for years with only 3 full turns of the lug nut, and he claims he would bet his life on it that 4.5 turns is plenty to keep the wheels securely on.

I trust him because he has no reason to lie to me; however, that is insane in my book.  I am still going to go with longer studs to get the full minimum 6.5 turns davidnunn's chart shows as a requirement.  I know it is more money and time, but I rather go with safe than sorry.  And if I ever sell this beast, the next owner will appreciate that I did it the right way and took no shortcuts.

In the meantime, I will mount and balance the tires on these new wheels, then put them on the car temporarily to be able to take some photos to post.

Fuzz,

You’re on the right track. Just remove your uprights, pull them apart and install longer wheel studs. This has the added benefit of allowing you to make sure your wheel bearings and axles are in good shape. If you haven’t had the GTS rear bearing mod done, now’s the time. If you aren’t comfortable doing it yourself, ship the uprights off to a vendor and let them do it. Good luck!

No offence to anyone but saying 3 turns is enough and encouraging sub-minimal thread engagement is, well........ Maybe a complete analysis of the system and testing might support that statement but that has not been done. Fasteners is a discipline into its self.

Install the correct longer wheel stubs. Like other have said, it will give (force) you the opportunity to refresh some of the suspension.

Doing it right so the next person in line gets a safe car is admirable and shows your good character. As Larry said, "I wish every owner would adopt that philosophy".

Spoke with Dennis Quella from Pantera Performance out of Denver, CO.  What an impressive gentleman and a human encyclopedia when it comes to a Pantera.  Found out he has been restoring Panteras full-time since 1979, owns two street Panteras, and owns a beast of race car Pantera.  And a pleasant man to talk to.  Loved this guy.

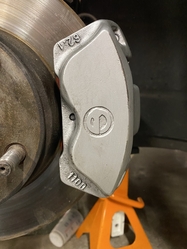
Anyway, after speaking to him at length, I am pretty sure I am just going to upgrade the brakes to Wilwood ones, which sounds to be a world of improvement over the stock brakes.  While I have the whole thing out to replace the studs, might as well upgrade.

A couple of years ago I installed new shocks aluminum shock absorbers I purchased from Hall Pantera.  Some folks on this site have suggested modifying the rear wheel bearings.  What other suspension upgrades are folks suggesting I complete?

By the way, I purchased a new brake booster/master cylinder from Hall Pantera, new brake proportioning valve from Jerry at PI Motorsports (another great guy always willing to help over the phone), and new brake lines, all of which will be installed this weekend...hopefully.

Two weekends ago I had the front trunk carpets replaced.  Looks awesome.

You mentioned suspension upgrades while everything is apart, but another upgrade in the back end that Dennis sells is a CV conversion kit that I know a few have been quite happy with.

Good luck with your project. The wheels are beautiful and the car will be exceptional when it's all buttoned up. Mods are often a roller coaster of emotions.

@ehpantera posted:

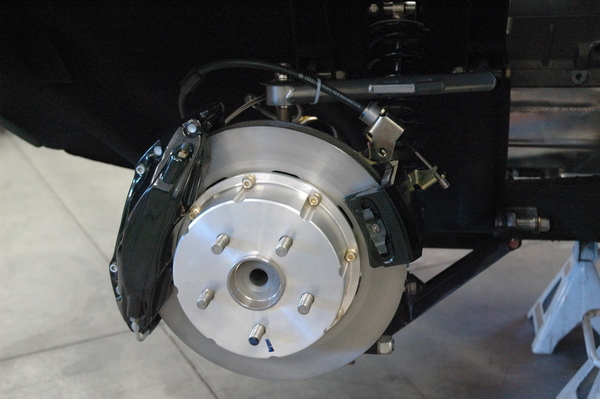
If you are installing new  brakes, you might want to consider having the rotor hats installed on the outside of the axle flange. It makes much easier to machine the rotors when needed.

Mark

I have my rotors mounted on the outside of my hubs (like 99% of all other cars) but the really big advantage of doing this is on the rear. I believe Dennis Quella sells the appropriate Wilwood hats. Keep in mind, this mod will space your wheels outward by 1/4". You can avoid this on the front by using IPSCO hubs but it can't be avoided on the rear.

Like others have said, mounting the rotor/hat assemblies on the outside of the hubs is worth considering. This mod can save you lots of grief during later maintenance. If you decide to do these mods and upgraded your brakes, pay close attention to the adapter bracket offsets and fasteners. Buying all the parts from one vendor is the best bet for getting it right the first time.

I have the IPSCO hubs on my car. They are aluminum and very nicely made.

bosswrench, good to know.

racecarmike, do you have a good photo of what it should look like with the rotor/hat assembled outside the hub? What are the benefits?  According to Dennis Quella, one of his customers has over 100k miles on his Wilwood brakes and he has never had the need to shave the rotors.

All help is appreciated, as I consider myself a novice in this area.  I plan to order the brakes from Dennis Quella today.

Thank you in advance.

Fuzz, As David said above. Also with aluminum hats, it make more sense (to me) that they are placed between the hub and wheel.

I agree that the likelihood of rear rotor maintenance or replacement is low, it's nice to know it can be done much easier. Stuff happens.

Our rear weight biased, fat rear tire cars use more rear braking then their counterparts, but it's still relatively light with normal street driving. Track use is a different animal.

Either method can work. What's more important is that your upgraded kit is designed and sized correctly. Changing any aspect (or parts) of your brake system can (will) affect the brake balance. The change in balance can be positive or negative or diabolical.

To add to what Boss said above, the threads being exposed beyond the lug nuts rule is in place primarily for the techs to be able to do a quick visual. You would be surprised to see some of the weird stuff people do at the track.

Dennis' outboard mounted rear rotors will not fix his too-short wheel stud problem. I think those rotors ALSO require longer wheel studs due to how they're mounted. Also know that there are a few 'gotchas' in R & R-ing the whole rear suspension, not the least of which is, each upright assembly weighs around 50 lbs and has pinch-y protrusions everywhere. NOT a job for rookies!

@Fuzz posted:

Here are the closeup photos of the new wheels' stud holes I promised earlier...IMG_0393IMG_0394IMG_0395IMG_0397IMG_0398IMG_0399

I have the same rims (10" front and 14" in the back), from Roin. In the front I installed 15mm bolt on spacers from H&R to get the wheel out in the fender, and to avoid replacing the oem studs to longer. In the rear the studs was long enough to use the nuts as always used.

Tiptop, that is very interesting.  So I did just try on the rear wheel.  So far I only had looked at the front, and figured the rear would be the same.  But I was wrong, as I often am.    With the stock studs I got 7 1/4 turns with finger tightening alone.  So it appears that the rear studs don't need to be replaced.  So I compared the back of the front wheels to the rear wheels, and the fronts definitely have a deeper stud hole from the rear, which gives it less exposed threads.  Looks like I only need to change the front studs after all, which is a much easier task.

Panterapatt, the pressed in steel seats are definitely 60 degree angled both for the front and the rear.

This project just became a whole lot easier.  I am still going to invest in the Wilwood brakes.

Last night I finished installing all new brake lines and a new brake proportioning valve I bought from Jerry at PIM.  Everything looks so clean and tidy now.

Time to order some front studs, replace them, and put these bad boy wheels on and take a few photos.

Add Reply

Post
×
×
×
×
Link copied to your clipboard.
×