Your money is safe!!!! No need to worry! It wouldn't work in your car......... the shifter arm is too short!!!! ![]()
![]()
![]() Steve
Steve
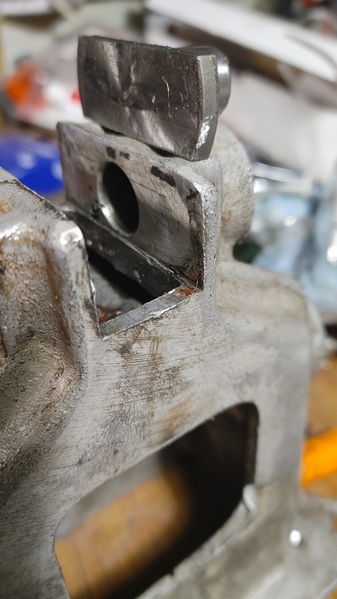
Took everything out, cleaned and polished all surfaces, greased the bjeebus out of it all and now she's shifting like new...
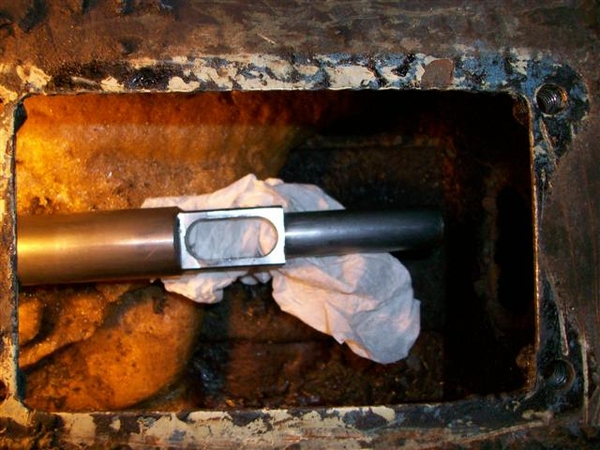
I'm pretty sure one (or both) of the T-plates was everso slightly rotated and sitting on that little ledge... (Pic is from when I first pulled it out, T-piece sitting on top)
MH
Attachments
SUPER BUENO!!!! Perseverance pays off once again!!!
Cheers!!!!
Steve
Ok, today's challenge... how on earth do you get the heater box and A/C out? from pics I've found, the heater comes out first, but the little brace on the lower front that holds it up seems to be welded in place and the unit won't drop down enough to slide out. on the A/C unit, is it just the two bolts up high in the rear, or are there bolts along the lower edge of the dash also? seems like there would be, but I haven't found them yet...
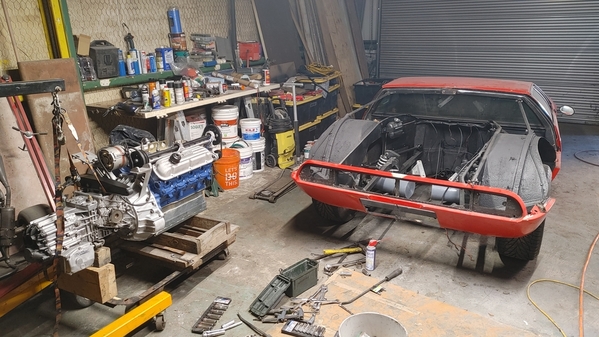
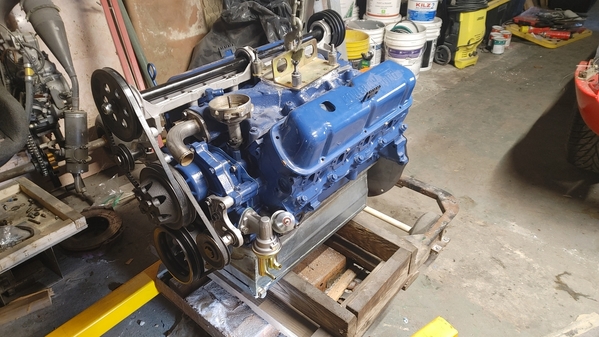
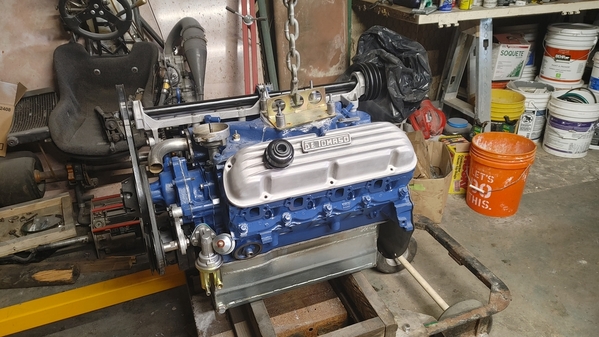
She's VERY close to reinstalling the engine... chasings hoses and belts at the moment. I have the correct valve covers and DT Emblems, but I kinda like the aluminum ones for now
Attachments
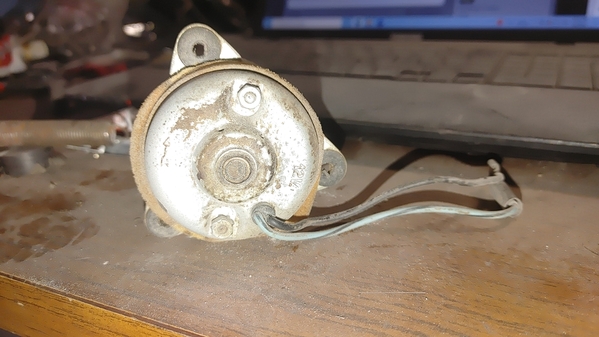
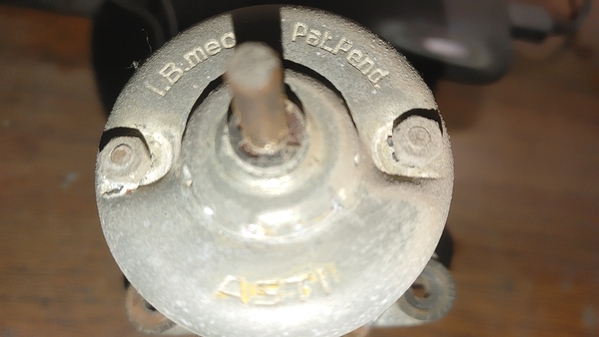
Mike, I'm not dead sure if at that time the maker was called just "Asti" instead of later "Gate Asti", the motor number is MP3920-31... The overall number MP3920 was apparently used for years and years, the -xx number will vary with the actual spec. But its entirely likely that yours is fine, or that any electrician could clean it up.
I also guess that the UK mini fan blade would work. The Goose heater box is 'shared' with the Mini Innocenti (the Italia version of the Mini), and then only the chimney is added on the IPRA Goose box. Somewhere on my shelf there I have NOS motor and also a used Innocenti box...
For the AC, I think the motor is a Behr, made in Ft. Worth TX ![]() . But that basic style was used for decades (esp, 80's Alfa Spider), and even I think the retrofit Pantera AC fan solutions just may fit. Trying to find genuine 60's AC components is damn difficult, it just seems that not many cars, really, had AC...Lee
. But that basic style was used for decades (esp, 80's Alfa Spider), and even I think the retrofit Pantera AC fan solutions just may fit. Trying to find genuine 60's AC components is damn difficult, it just seems that not many cars, really, had AC...Lee
ps. btw, I think your valve covers are pretty cool, got a picture to share?
@leea posted:Mike, I'm not dead sure if at that time the maker was called just "Asti" instead of later "Gate Asti", the motor number is MP3920-31... The overall number MP3920 was apparently used for years and years, the -xx number will vary with the actual spec. But its entirely likely that yours is fine, or that any electrician could clean it up.
Mine is in very good shape aside from a questionable bushing on the cage end... Wasn't turning at all initially, now it's turning ok... Could be better though... The bushing might clean up.
Thanks for the Innocenti info, always good to know possible sources if needed...
A/C investigation is pending...
I'll post close ups of the valve covers soon...
MH
For clarity's sake (and my old guy sanity!) is it possible to place a picture of the "type" of AC/Heater system youse guys are a working on??? I'm guessing that you are working on the later "in dash" AC vs the most common "underdash" version???
The conversation was throwing me, in that the under-dash system was made in Spain.... and you were mentioning non-Spanish vehicles!!!
Good stuff!!!
Steve
Steve, Mike's car is 8ma898, so almost perfectly familiar Ayacsa AC on the right and separate IPRA box to the left for the heater...So Spanish and Italian. I haven't ever seen pictures of the in-dash solution at 8ma1100 and later.
The only reason for "almost perfectly familiar" is another twist on the AC box for Mike, where he doesn't have a glove box (he does have a glove box door...) and instead of the glove box he has additional AC vent piping to exit by the driver... But that is all a different story ![]() Lee
Lee
Well crapples... I had a full reply typed out and got distracted and never hit send.
Quick version is "what he said"
+ I cleaned both heater fan motor and condenser fan motor and they're both working fine now... Condenser fan motor was working before, just made an odd sound... Also having new hoses made as well as condenser itself... They goal is to have A/C working... Even sourced some of the forbidden juice !!! (R12).
I might replace A/C fan motor in hopes that a newer one will move more air...
Yes, 898 has additional vents left and right under the dash by each door jamb... and an interesting manifold of sorts feeding them... I spoke with Bill Lavinger (owner from 70's to 90's) and he said those were factory... He owned three Mangustas, so I knows them well...
MH
Michael,
I believe that those valve covers "could be" period Edelbrock or one of the other big names.......I have a set somewhere but couldn't put my hands on them if you gave me another Mangusta!!! (But I'd sure try!!!) The logos look either custom made or modified Pantera versions not the "pork chop" version the Goose typically comes with....
I would also implore you to install a thermostat in the engine. If you've already modified the 90 degree fitting off the front of the intake to accept a t-stat, well then good job!!!!
Without one, you are begging to wear out your engine prematurely. It will never warm up....to proper operating temps! ....OK perhaps not never, but perhaps not as quickly as it should......to get your heater working ASAP for winter driving!!! ![]()
I had a think 3/8" or so piece machined up to fit between the pipe, and the intake. It had the recess carved into it and fit using 2 gaskets and slightly longer bolts to secure it. Worked like a champ! Quick warm ups! NO ONE will ever point it out that it's "not factory"!!!!
Cheers!!!
Steve
Ooops! Missed replying to the AC thing.....
1) NEVER have seen AC venting at door jambs. Yet. Not that they were not put in place by the factory, but this is the first that I have ever seen mention of it. Not sure what all Bill L has seen or owned, but pic's would be super! I always wanted to put a vent on the drivers side of the steering wheel!
2) AC Fan Motor: YESSS!!!!! This is the ONE, ok ONE of the things that dearly could use more HP!!! The fan motor for blowing cold air into the cabin fails...... I had heard of a guy in Santa Cruz that could rewind them to get more RPM's but failed to push it further. TOOOO much apart....needed to go back together....
In the end, with new rotary pump, new hoses, lubed bushings in the condensor fan out back, and a good charge of R12..... that AC unit blew cold air something fierce....sorta like a small kitten.......when it needed to blow LIKE A BIG LION!!!! Many times while driving the Goose, it was simply easier to roll the window down just to have fresh air blowing around vs trying to kid yourself that that measly sickly fan motor would push enuf air to cool the cabin down!!!!
I wish I could have spent more time exploring another electric motor for that feature! It sorely needs it.
Ciao!
Steve
@mangusta posted:Michael,
I believe that those valve covers "could be" period Edelbrock or one of the other big names.......I have a set somewhere but couldn't put my hands on them if you gave me another Mangusta!!! (But I'd sure try!!!) The logos look either custom made or modified Pantera versions not the "pork chop" version the Goose typically comes with....
I would also implore you to install a thermostat in the engine. If you've already modified the 90 degree fitting off the front of the intake to accept a t-stat, well then good job!!!!
Without one, you are begging to wear out your engine prematurely. It will never warm up....to proper operating temps! ....OK perhaps not never, but perhaps not as quickly as it should......to get your heater working ASAP for winter driving!!!
I had a think 3/8" or so piece machined up to fit between the pipe, and the intake. It had the recess carved into it and fit using 2 gaskets and slightly longer bolts to secure it. Worked like a champ! Quick warm ups! NO ONE will ever point it out that it's "not factory"!!!!
Cheers!!!
Steve
Actually, Gary (previous owner) had that snout redone in SS and had a thermostat space included. In Texas we don't have much need for a thermostat in our cars... and I will definitely never take the goose out if it's bad weather... Generally keeping it from overheating is a real concern here... Getting the heater working is really more of an OCD kinda thing...
But... If I were to put one in, this WOULD be the time to do so...
The cast valve covers look pretty old school, which I like... They seem period correct for a '69 model... The emblems are nicely done cast pieces, but their origin is unknown... I used the 3M thin double sided tape that has the grip of death when I put them on... So far they've help up nicely. (5 years)
MH
AHAH!!!!
You have Gary's car! I recall him doing that now....somewhere I have pic's of what he did! VERY NICE work!
TX weather or not, the T-stat is a smart thing to do. Doesn't cost you poo to put in, and it really doesn't hinder keeping the engine cooler...... that's all radiator fans and water pump capacity for better "water movement". I ran it all the way to Phoenix from CA, twice for the POCA national show, and didn't even worry about it! If you have the original FIAMM radiator, you just need better fans and shrouding. Put the fan switch on relays....!!! The radiators were well built!!! Just heavy!
Still have the old C9AF-U Holley on it?? Good carb!!! I love them....735CFM with the vac secondary and heated choke. Put them on 428's I owned, 390, and 351s! They just work with minor jetting for proper fuel/air ratio depending on engine size. Will need another soon like down the road!
Cheers!
Steve
@mangusta posted:Ooops! Missed replying to the AC thing.....
1) NEVER have seen AC venting at door jambs. Yet. Not that they were not put in place by the factory, but this is the first that I have ever seen mention of it. Not sure what all Bill L has seen or owned, but pic's would be super! I always wanted to put a vent on the drivers side of the steering wheel!
2) AC Fan Motor: YESSS!!!!! This is the ONE, ok ONE of the things that dearly could use more HP!!! The fan motor for blowing cold air into the cabin fails...... I had heard of a guy in Santa Cruz that could rewind them to get more RPM's but failed to push it further. TOOOO much apart....needed to go back together....
In the end, with new rotary pump, new hoses, lubed bushings in the condensor fan out back, and a good charge of R12..... that AC unit blew cold air something fierce....sorta like a small kitten.......when it needed to blow LIKE A BIG LION!!!! Many times while driving the Goose, it was simply easier to roll the window down just to have fresh air blowing around vs trying to kid yourself that that measly sickly fan motor would push enuf air to cool the cabin down!!!!
I wish I could have spent more time exploring another electric motor for that feature! It sorely needs it.
Ciao!
Steve
I'll take some pics of the side vents and manifold... It's definitely NOT some homebrew setup... I'm wondering if it was a design used on the Ghibli or other such cars that DeT decided to try out on a goose...
Lee and I both have the solid wood steering wheels... No leather sections at all... So DeT wasn't above randomly trying different things...
MH
Yeah, Steve, I think the improvement on 8ma898 AC venting was to remove the backpressure from the mis-applied Ayacsa unit. Just cranking up the horsepower probably less efficient: As you know, the Ayacsa unit came with 3 vents, but the right-most vent was sealed off by DeT either for looks or to somehow prioritize air to the driver...But you can see, this blocks the most optimum outlet for the air and then forces all the output thru a rather narrow neck. Note also on this picture (the NOS, were we sleeping thread) all the holes in the top panel--clearly an attempt by Ayacsa to let the thing breathe a bit without getting noisy-as-a--clogged-vaccum-cleaner...
Mike's car is best described in a Binky episode--a glove box door, but no glove box---instead, air tubes that take the air to under the driver's left dash...
And yes, the Cal-custom look for the Valve covers is my 2nd favorite look...my favorite is the Detomaso Weslake conversion I have only seen in a very old Ford 302 hop-up book... (see pic) Lee
Attachments
@mangusta posted:AHAH!!!!
You have Gary's car! I recall him doing that now....somewhere I have pic's of what he did! VERY NICE work!TX weather or not, the T-stat is a smart thing to do. Doesn't cost you poo to put in, and it really doesn't hinder keeping the engine cooler...... that's all radiator fans and water pump capacity for better "water movement". I ran it all the way to Phoenix from CA, twice for the POCA national show, and didn't even worry about it! If you have the original FIAMM radiator, you just need better fans and shrouding. Put the fan switch on relays....!!! The radiators were well built!!! Just heavy!
Still have the old C9AF-U Holley on it?? Good carb!!! I love them....735CFM with the vac secondary and heated choke. Put them on 428's I owned, 390, and 351s! They just work with minor jetting for proper fuel/air ratio depending on engine size. Will need another soon like down the road!
Cheers!
Steve
Gary & I have been friends for 25 years... He was my co-piloto when we were racing La Carrera Panamericana in my 230SL. In fact, around 2004 he told me he wanted to buy a Pantera and I found 898 for sale online and sent him the info... Next thing I knew it was headed to Texas...
I bagged-n-tagged the original radiator fans and installed twin tractor fans, they work great.
I called Gary when I was wrestling with that downtube that was corroded... He said it was a "right place at the right time" kinda thing on having that snout redone... It was definitely well made... and Gary likes to plan for any eventuality, so he had them add space for a thermostat.
Yep, still have the Holley carb, it ain't broke, so I ain't fixin' it... I considered going to an EFI, but I kinda like the old Holley... Runs great!!!
MH
Lee,
Holes in top? Right picture? NICE UNIT!!!! Will 3 speed Pantera (MSC Supply?) motor fit this?
Steve
DON'T IT FEEL GOOD?????!!!!!!
Each thing you bolt on from here out will be all that much closer to VROOOM!!!!
Exciting!!!!
Steve
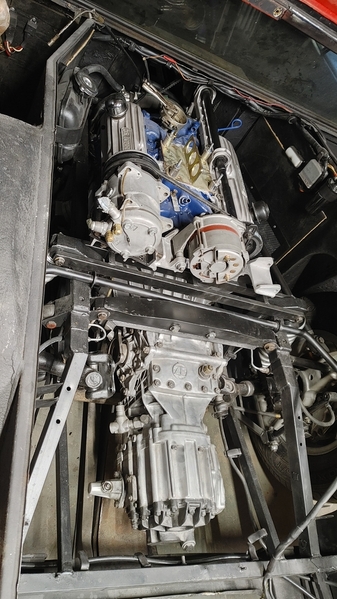
I was so tired of seeing that empty engine bay!!! Then so stressed about the install... Luckily I recruited several friends that are also wrenchers... More eyes and hands are always a good thing when shoving the baby back into the womb!!!
Only issues so far were that the alternator bridge wouldn't go in until I unbolted the frame bride and lifted the ZF up a bit... But it's in and happy... Also, somehow when I put the shifter shaft back in i ran the rear end of it outside of the frame rails and didn't tuck it back in at the rear... and of course now I have to take apart the middle u-joint to route it properly... But no broken rear window or damaged parts... So I call it a good day...
I hope to have her ready to start next weekend...
Thanks to you Steve and the rest of you guys for all the tips, advice, warnings and encouragement along the way... Front suspension is next, then off to paint and body...
The journey continues!!!
MH
Mike,
Ah yes, that pesky rear upper ladder bar!!! I recall futzing with that and bellhousing or ???? removal/install!!!
Front suspension is easy peasy!
Please tell me that once you get it running AND rolling, that you'll take it for a spin or three and see how it feels!!!!! Perhaps you'll reconsider painting it...... ![]()
![]()
![]()
Steve
I'll take her around the block a few times, but she'll be in for paint soon... I have already stripped lights and shiny bits in preparation. I drilled small alignment holes in the spine mounts and such, don't want to start putting all that back on until she's painted.
Speaking of... Should the spine hinges be painted body color or black? Should I isolated the steel spine from the aluminum deck lids somehow? I have literally zero galvanic corrosion so far and would like to keep it that way.
Thanks again,
MH
Mike,
I learned long ago that I can't comment about "what something should be" in terms of stock paint and where, as my car had been "touched" in so many ways (see many of my old posts!) that it's not safe to use it as a gospel!
I do remember paint in the rain channels of the spine piece, and if the hinges are welded in place on the spine, they then probably were painted from the top..... from the bottom........I'll defer to others that may have a more original car than mine!!
I don't recall seeing any insulation materials between the hinges and the hatch covers......and my car was very free of hatch corrosion "that I could see".... so am thinking that the hatch steel frames were essentially grounded to the chassis via the hinges. Any corrosion resistant treating would be between the aluminum skins and the hatchs' steel frameworks...??
Any chemical engineers out there looked under their skins? ![]()
Cheers!
Steve
Galvanic corrosion occurs with direct contact between two different kinds of metals in the Galvanic Series, not necessarily whether there's an electric ground. I suggest separating the aluminum from all iron/steel with a non-conducting strip that's outside the galvanic series, especially if you live in a damp climate (like So-Cal this year!).
@bosswrench posted:Galvanic corrosion occurs with direct contact between two different kinds of metals in the Galvanic Series, not necessarily whether there's an electric ground. I suggest separating the aluminum from all iron/steel with a non-conducting strip that's outside the galvanic series, especially if you live in a damp climate (like So-Cal this year!).
@bosswrench Do you think a layer of paint is sufficient?
MH
Yes, but... lots of stuff that depends on paint as a protectant tends to dry, harden and chip over time. Cars vibrate their parts in amazing ways. If you do, just grab the support bracket(s) and pull on them now 'n then to check for looseness.
.....grab them gently!!!! ![]() They're supposed to be welded........ Makes ya wonder how the XKE race alloy race car bodies were attached....or the alloy Cobra or GT40 skins were attached or insulated from...the steel chassis!!??? I'll ask another Goose owner out here that just finished his, ok...made it show worthy...enough to drive....and had to go thru the same shite!!!
They're supposed to be welded........ Makes ya wonder how the XKE race alloy race car bodies were attached....or the alloy Cobra or GT40 skins were attached or insulated from...the steel chassis!!??? I'll ask another Goose owner out here that just finished his, ok...made it show worthy...enough to drive....and had to go thru the same shite!!!
Steve
Mike, yeah. pretty much once the car is assembled, the only thing you can do to avoid the electrical action is to keep it dry...and paint is at least a way to keep the metal electrically isolated. At build, putting tape over the steel is the best way, but luckily you don't have that option ![]() .
.
When attached directly, DeT used copper rivets--for example the engine covers, where the support strap is attached to the aluminum trays...or on the hood at the front edge. I've got no idea how this helps, unless it drives for just the opposite of isolation (by quenching the voltage to zero maybe?)
Cosmetically, all the inside of the rear (that the driver could see thru the back) is blackened. For paint lines, the combination of 8ma1074 and that gold car show I think how the factory blackened, https://pantera.infopop.cc/top...for-sale-in-michigan , esp black over the latches, over the "roll bar" at B pillar (everything to the inside of the roof edge and up to the chrome/vinyl edging) and then covered with the gasket), but the outside-facing channel of the spline is body color.
8ma1074 was downright peculiar with the blackening line for the hood/engine covers, esp in the way the black was carried over onto the aluminum (where anybody in their right mind would have taped at the edge of the aluminum). That and the blackening on the forward interior edge of the door...so freaky that only a factory would have done it (!) And I'd love to see confirmation in another car, so hoping that Steve's pictures of 8ma716 (before it was re-painted) agree.
8ma1046 was original paint, but since all black not so easy to distinguish the flatter blackening...
Attachments
Mike,
Lee's got the idea pretty good....seal....seal....
I spoke with another owner nearby, who just went thru repairing his hatches, of rust or corrosion along the bottom edges. When asked about the contact between aluminum and steel at the edges, he said that they found some sort of "creosote" dipped/saturated material that was between the two metals....of course by now, this material had turned to dust. He mentioned using sealer.....but couldn't provide any further details, other than "I'm never going to wash the car....."! ![]()
As far as insulating the hinges, there is no need for this. At the hinges, you're at steel, welded to steel (at the spine piece) then bolted to steel (at the hatch frame), using steel bolts thru all the bits. So even if you insulated the spine hinge flap from the hatch frame, the thru bolts negate all of this!
The culprit or problem area is where the aluminum skin sits against the frame, or where it is folded over to retain to the frame. These are the areas to be concerned with. Keeping air (contains moisture) off of these areas would seem the goal!
I would think that the GT40 and Cobra guys would be concerned with this sort of thing also, and may be a resource to tap. I will throw a note across the pond and check with a Goose owner who owns a body shop dealing with rebuilding Jags and such other high end cars from the 50's-70's. See how they deal with it!
Steve
Mike,
How the hay did you get this shaft out of position????
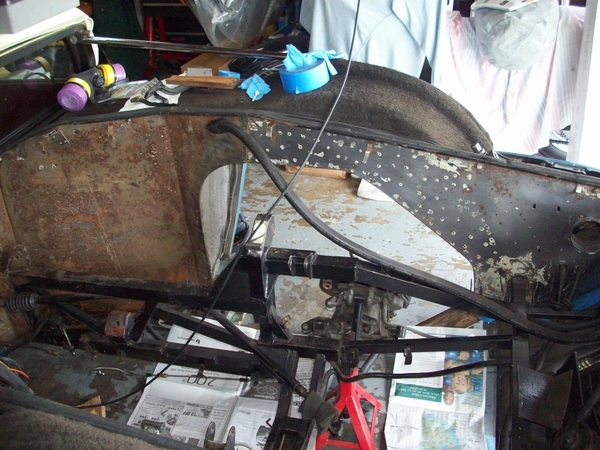
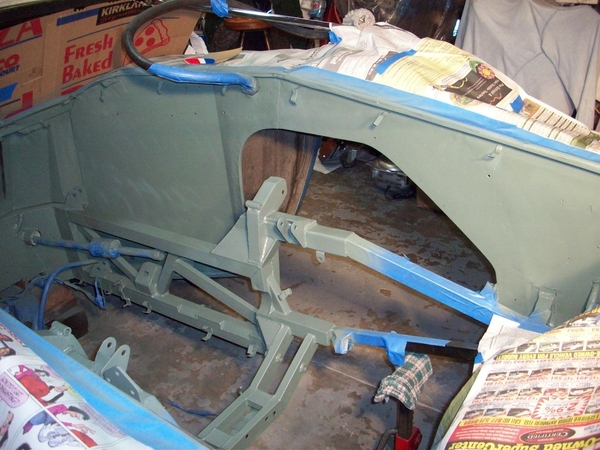
I revisited my pictures, and it looks like I never really took mine out......but I recall doing a dissection of the shifter box.... so I could be lying.....!!! BUt in these two pictures you can see where my shift rods ran, around the shock tower and then back into the inside of the frame to the trans.
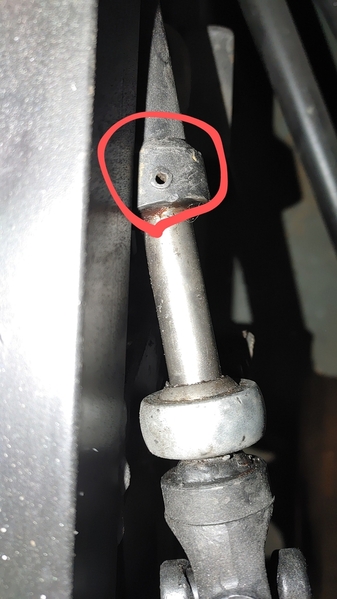
That roll pin could be a REAL bugger to tap out and back in without supporting it. Taking the u-joint apart makes me feel more troubled......... I think we determined that the only place to get the u-joints is from some little Italian shop in the middle of nowhere...... I don't recall where....but seems like they are rare AND expensive! So grease it and leave it if at all possible?!
Start with removing the rear piece of the shaft that is adjustable, then remove the trunion retaining nut and lift it up....see if that gives you enuf? If not, then attack the shifter box??
I'm thinking remove the shifter box and strip the shaft out of it....then move the entire shaft forward until you gain enuf clearance to tuck the rear rod back into the frame. then tuck the shaft back in where it should be and reverse!
OK, I found my lie! First two pic's below are before sealer/no-rust paint, where I tied up and wrapped up the errant rear section of shift shaft, but the third pic shows that I succumbed to the need to get the danged thing out of my way, so I MUSTA popped that roll pin out....... Hate when pictures tell me that my mind is developing holes......! You can see just aft of the rubber firewall boot that I had taped off the end of the shaft.
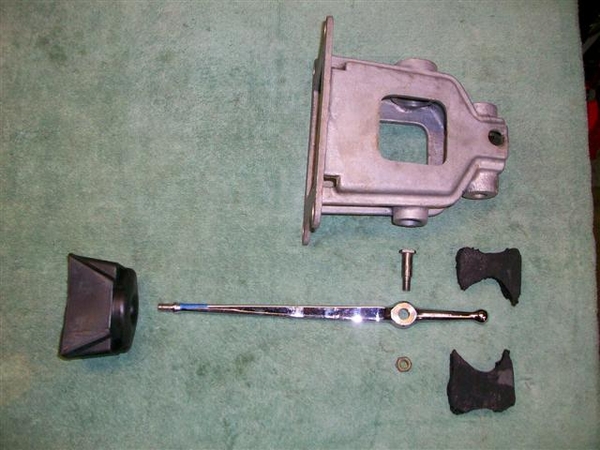
The shifter box is really a "not much to it thing"! We've already determined that it doesn't have as much BS in it as the Pantera shifters. No detentes/balls, no extra springs...
Once the box is out of the way this would have some room to move forwards, but not certain of how much! Certainly it could go rearward and out.....reposition rear shaft etc, reinsert....reverse! NO HAMMERS required!!! ![]()
You needed to grease that little ball down at the bottom of the shift lever....right??? ![]()
![]()
![]()
Steve
Attachments
Yeah, I already mastered the shifter tear down... If I can't get the pin out that will be plan "B"... Now that the engine & suspension are back in I don't have as much room to experiment...
Good to know it will come apart at the pin...
MH
I hate when that happens......! S
Pulled the shifter, no love... Pin wouldn't budge then I turned the rod over and tried from the other side... Popped right out !!! She's all back together now with the rod going where it's supposed to go... Adjusting it properly is now on my list...
MH
Mike,
COOL!!! Those pesky one way pins.....whoodakno!!!
OK, be sure not to do what I did with the center heim/trunion joint! When you put he shifter in 2cnd or 4th check the clearance at the firewall thru-hole to make sure that you are not "too close" to the tube that passes thru the firewall..... Mine was fine....., then I "optimized my center trunion height by eyeball.....wrongo! I guess I lowered the shaft a bit.....
With the rubber boot installed, I ran into "too much stuff in the hole" and that being so, would interfere with trying to get fully into 4th or 2cnd gear!!! The fix was to simply "raise" the center trunion until everyone was happy again!!! (With no boot.....it was fine......!!!) 2 & 4 felt a bit spongy at the end of the shift...arm didn't go all the way forward in the gate.....shoulda been the first couple of clues that things were amiss!
Shifter adjustment is easy. Center it R-L and snug the nuts a tad, then center it Fore-Aft in the middle of the shifter gate, adjusting length as needed, rinse....repeat.... until it is centered at rest, L-R & F-A. Then you should be golden!!!!
In my case, I pulled my ZF out to look for issues and magically found NONE related to my shifting! I did find a crazy problem with my input shaft bearing being out of place however, and I replaced 1st and 2cnd gear blocking rings whilst I was in there! So all was good! Put it back in and didn't fix a thing! That's when I just sat and stared at it for a LONG time.....until I traced the shifter shaft back to the firewall.....pulled that boot back and it worked fine!!!! DOH! Adjusted the trunion joint higher......and went for a drive without worrying about 2cnd or 4th popping out of gear any more!!!!! ![]()
Cheers!
Steve
Wow... Sounds like something would happen to me... Finding something simple after methodically eliminating everything more complex first.. I will check tube clearance just in case your gremlin moved to Texas... Thanks for the heads up...
MH
Fired her up for the first time today, carb leaking in several places of course... Still running rough, but running... Had to set the timing by ear... Is there any other way? No way to see the timing marks...
MH
Mike,
If you have the stock timing pointer and marks, you actually can see them BUTT, ya hafta put the timing light near vertical, and mash your head up against the firewall window and look directly down.......
It can be done!!!
Those new blue reusable gaskets for Holleys work very well!
COOOOOL!!!!!!! Getting closer!!!
S


