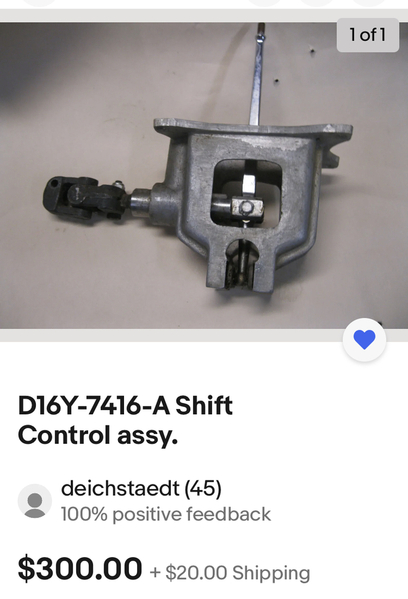
Looking for thoughts on distributor swap.  I'm considering purchasing this as it appears to be a direct swap without an external box so I can keep the stock look.  It will give me an electronic ignition and rev limiter...  (I hate points)

https://www.summitracing.com/p...x-d7130800/make/ford

Anyone see any issues or concerns?  I will be using the stock Mangusta air cleaner, so clearance it always a concern.

MH

If you must....... simply put a Pertronix unit in your existing distributor.  Valve springs will be your rev limiter............if your eyeballs can't read the tach!  Which being Italian, is only a suggestion....!  Perhaps they now have a drop in unit that has the rev limiter feature, negating the need for a new dist' body?

I am more of a fan of Duraspark II for run of the mill "sane" driving.    No one should be taking their GOose to the rev limiter anyway.....as it takes $1K off of your 401K each time you do that.... !        Easy start on high compression engines, works, works, works......   Lube the center shaft of the distributor every oil change and you should be golden for the rest of it's life!

Cheers!
Steve

@mangusta posted:

If you must....... simply put a Pertronix unit in your existing distributor.  Valve springs will be your rev limiter............if your eyeballs can't read the tach!  Which being Italian, is only a suggestion....!  Perhaps they now have a drop in unit that has the rev limiter feature, negating the need for a new dist' body?

I am more of a fan of Duraspark II for run of the mill "sane" driving.    No one should be taking their GOose to the rev limiter anyway.....as it takes $1K off of your 401K each time you do that.... !        Easy start on high compression engines, works, works, works......   Lube the center shaft of the distributor every oil change and you should be golden for the rest of it's life!

Cheers!
Steve

Does the Dura Spark fit under the air cleaner?  Any issues with wiring to consider?

MH

I think you're referring to the "big cap" vs the normal cap.....  IIRC it is very close with the original air cleaner.  I used the large cap on mine, however, I had to make my own air cleaner for other reasons (taller intake!).     The DuraSpark II system will work with the small diameter cap just fine.  The large cap came about to control spark "scatter", where spark could jump to the wrong terminal under some conditions.

Wiring consists of using an original or prefab harness from control box to distributor, two wires to provide "ON & START" to the control box, and then reuse the original coil to ignition switch wire.   I think I wired in a relay to provide the either the start or run signal for some reason to do with the original Goose wiring at the starter solenoid.....  Would need to dig out my notes to confirm this.

But it was a fairly easy job to do.   I found an original dist-control box harness from a late 70's early 80's Galaxie-ish car, extended it to fit where I put the control box, and wired in the two power wires (start & run) to the control unit, and also into the original coil wire as needed.

I put my box back on the rear engine panel below the air cleaner  duct hole but it could go anywhere away from major heat sources.

The 10 degree "retard at start" provision of the 'BLUE' strain relief control box allowed me to run a "mechanical advance only" distributor of 8 degrees, and a total all in timing of about 34 degrees. At start the mechanical advance wouldn't yet be active, so now the advance is only 26, bring in the 10 degree retard and my initial timing needed to be 16 at the harmonic balancer....doable!  My compression ratio was somewhere in the 9.5-10.3 area (CRS!) running alloy heads, and it cranked over just fine in all conditions I ran into driving it to POCA rallies in Vegas and Phoenix!

I could have run a vacuum advance distributor also, but would have just limited the amount of vacuum advance......to get a tad more fuel mileage out of the deal. But I was getting close to 20mpg (again IIRC!) on regular pump garbage gas!!!

Your mileage may vary!!!
Steve

@rene4406 posted:

Excuse me for going far back and talking again about the Rub'n buff for the gearbox. Looks amazing and I'd like to apply some to my Pantera gearbox but I'm wondering what temperature this wax can withstand and how resistant it is to oil or gas drips???? ?

I haven't put it into service yet, but i know of several people using it on vintage Mercedes aluminum valve covers for years and they all love it.

One note, the commonly used color is "Silver Leaf", but personally I find "Pewter" to look more correct as the silver leaf seems to me to be unnaturally bright.  The pewter color looks more like the natural aluminum to my eyes.   If your order it, a little bit goes a LONG way and you can order multiples of just one color or multi color packs.  The tubes are small, but just one tube will likely do the entire transaxle AND the bellhousing!!!  I also recommend using a combination of cloth, Q-tips & stiff tooth brushes for application, and of course, thoroughly clean the piece before application

and WEAR GLOVES or you'll be silver from fingertips to elbows in no time.

Let us know how it turns out for you.

MH

Last edited by mkeh

I am still attempting to find a suitable replacement for the bitumen impregnated fiber board firewall pads. I have found the Filzfelt ($$$) but it is just the felt, not bitumen impregnated. I know we've discussed this before, has anyone found a replacement they liked? or something to avoid?  I got some that vintage Mercedes use and while it looks great, it's much thinner.

I am missing the two sidewall pieces, if anyone has measurements and/or pics of original pieces in those locations I would appreciate the info.   Same with the asbestos panels, I have the frames, but haven't located a decent replacement for the asbestos...

MH

Last edited by mkeh
@mkeh posted:

I haven't put it into service yet, but i know of several people using it on vintage Mercedes aluminum valve covers for years and they all love it.

One note, the commonly used color is "Silver Leaf", but personally I find "Pewter" to look more correct as the silver leaf seems to me to be unnaturally bright.  The pewter color looks more like the natural aluminum to my eyes.   If your order it, a little bit goes a LONG way and you can order multiples of just one color or multi color packs.  The tubes are small, but just one tube will likely do the entire transaxle AND the bellhousing!!!  I also recommend using a combination of cloth, Q-tips & stiff tooth brushes for application, and of course, thoroughly clean the piece before application

and WEAR GLOVES or you'll be silver from fingertips to elbows in no time.

Let us know how it turns out for you.

MH

Thank you for the answer.

Sorry I haven't posted updates on awhile, but refreshed engine has been sitting on a pallet ready to go back in... 

So far aside from the ol' take apart, clean and paint, I've put in new rear wheel bearings, new hard lines for brakes, refurbed ebrake cable, new bushings in frame bridge & sway bar, new pistons in calipers, new brake pads, new firewall pads cleaned and finished ZF, new pilot bearing, new clutch disc, new heat shielding (replaced asbestos), new throw out bearing, new brakes hoses...  and probably a few dozen other bits...

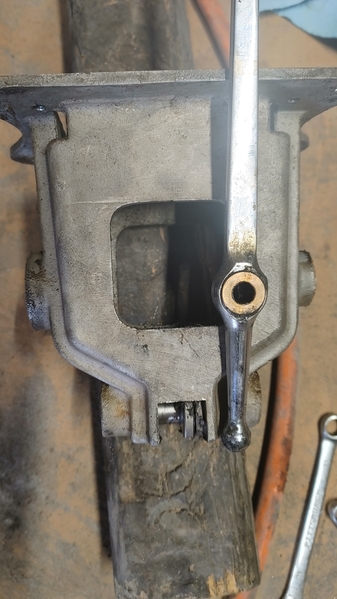
Today's WTF is putting the shifter back together...  The shifter itself doesn't go all the way in...  It's hitting the rod in the base of the shifter box.  AND if course, that's one of the few things I didn't take a picture of during disassembly...

What am I missing here?

20221209_130122_HDR

MH

Attachments

Images (1)
  • 20221209_130122_HDR

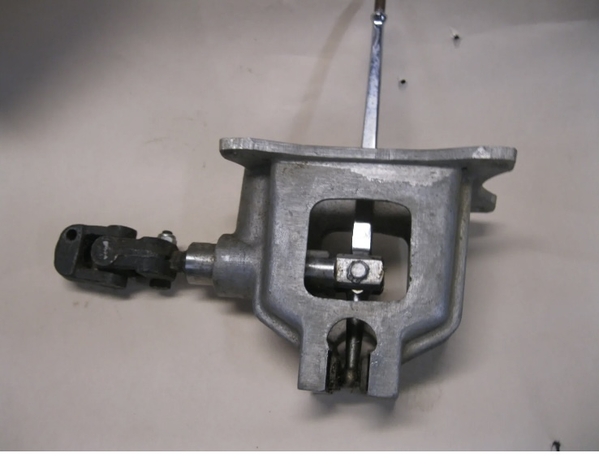
not sure I understand what your problem is. Perhaps this photo will provide some clarity for you.

if my memory serves me correctly, you should assemble the unit as pictured prior to installation  

The shift lever bottom ball should index between the two black hardened “guides” at the very bottom of the cage.

The clevis at the tip of the shift linkage rod will attach to the shift lever with the bolt through the two brass bushings

hope this helps just a little bit,

Larry


EAA14FC5-ED4C-424D-8521-19BEBF685912

Attachments

Images (1)
  • EAA14FC5-ED4C-424D-8521-19BEBF685912

Hammer???  

It looks like one of the pads may be out of position in the housing???

It should be a "no problemo" sort of fit!

It is interesting to see that your Goose casting is different than what I found in #878,  Yours kinda sorta has Pantera-ish features, AND Goose uniqueness.

The Goose does not have the U-joint right out the back door of the shifter housing......but rather further back on the shaft......

See if you can't put the arm in place without the shifter box in the car, so that you can see where the lower ball resides when in place between two pads.

The shifter should slip thru the hole in the shift rod....with no issues.....ie check your shifter bushings to see that they are in proper position and not out of place.

I do NOT recall where those black foamy looking things resided.....CRS disease!

Steve

PS:   In my "Oops I'm doing it again" post, towards the end pages, I found some materials that I used for the heat shields.   Check it out. If you can't locate it, ping me back......I have some of that material still.  Possibly the rivets and a die for the rivets that I had machined up..........as well.


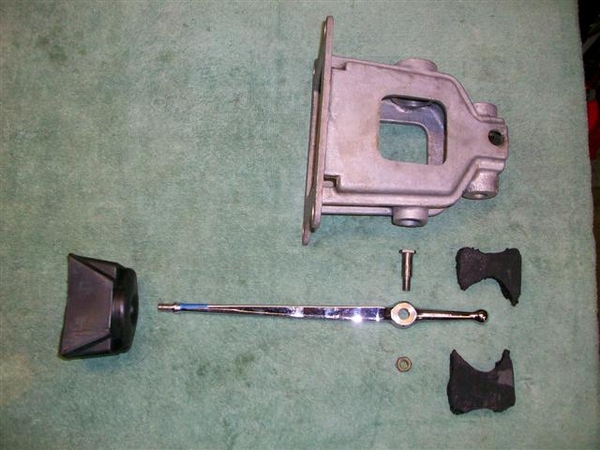
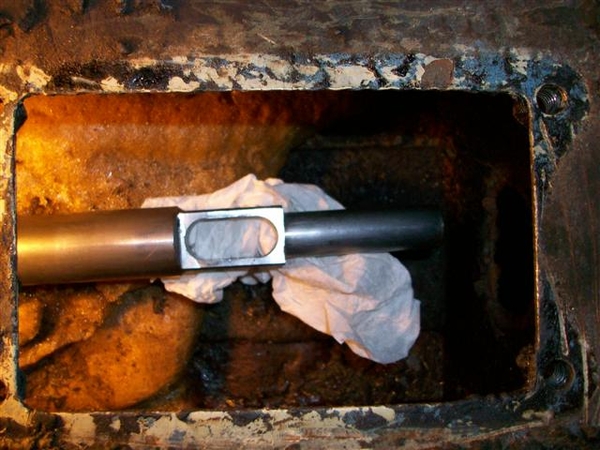
shifter1shifter2

Attachments

Images (2)
  • shifter1
  • shifter2

Can you try holding the housing up after you put the main shifter shaft in place.....THEN from the top, drop the shifter handle down while trying to reach into the tunnel hole and finagle the shifter ball into place by moving the spring loaded pad????     My car had no spring loaded pads that I can recall......otherwise I would have pulled them out of the "blowed up" picture!

The "no u-joint" at the rear of the housing (and so much more!) prevents Larry's response from working!    

Steve

Well, attempt #47 was semi-successful...   I wedged a small piece of rubber tubing between the plates and them tapped the shifter in which knocked out the tubing,,,  seemed like I was done,,,  except I wasn't...  now the sifter moves front to rear fine, but is EXTREMELY tight moving left to right...   I have a feeling it's all coming out again tomorrow...

seems like the plates are too tight against the little ball on the end of the shifter rod...

MH

When rotating R-L L-R, the shifter lever will be pivoting on the round shifter shaft (main rod), so that rod should have been lightly greased  (in the housing also) with some synthetic lube of sorts, and the bottom ball "should" be sliding also L-R  R-L as it's movement will be 180 out from the top of the shifter handle....and this point on the sliders "should" also be lubed.....?     Also your entire shifter shaft will be rotated when you do this....so it's not gonna be freeeeely floating......  Try it from the top of the shift lever and see how it feels......but be sure that all is lubed!!!

A note that hosed me up....    Be certain to adjust your single Heim joint at the rear chassis (two Heim joint systems could be different!) mounting point so that the shift rod doesn't get hung up on the rubber boot at the firewall, and dork with your 2 & 4 shift or perhaps 1-3-5 positions!    I rebuild my ZF thinking it was majorly hosed as it was popping out of gear  (but it also was minorly hosed!!!) when all that was wrong is that I had adjusted the Heim joint height incorrectly and the rubber boot was getting pinched!!!! DOH!!!!!    The shaft takes an unusual path when it actually moves........have seen some pretty bent up shifter shafts to get it right!  (Factory bends!!!)

Steve

@lf-tp2511 posted:

not sure I understand what your problem is. Perhaps this photo will provide some clarity for you.

if my memory serves me correctly, you should assemble the unit as pictured prior to installation  

The shift lever bottom ball should index between the two black hardened “guides” at the very bottom of the cage.

The clevis at the tip of the shift linkage rod will attach to the shift lever with the bolt through the two brass bushings

hope this helps just a little bit,

Larry


EAA14FC5-ED4C-424D-8521-19BEBF685912

I think I see part of the problem, I don't have that splined coupler right off the back of the box, just a u-joint.  I dang sure ain't taking that apart as I'd NEVER get it back together while inside the tunnel!!!

My rubber hose temporary spacer seems like it will do the trick, I think there is an obstruction keeping the two plates from opening all the way and the ball at the end is REALLY tight in between the plates...  so I wouldn't call what it's doing "sliding" by any stretch.

I'll take it all out again, see what's going on with the plates and start over...

I appreciate y'all posting pics, it definitely helps to see others.  *IF* I had that splined coupler this would have been 100x easier...  Oddly, what is in there LOOKS factory...  I can't imagine why a previous owner would have made such a change...    and if they did just weld it all up, they did an impressive job!

Once I have it out again I'll post pics of how the shaft looks on the shifter end.

One other thing I just noticed, the shaft on mine extends all the way through the box and slides out the front!  I just noticed yours stops at the shifter!   Mine is like Steve posted and described.   I do have the "black foamy bits", on mine it's a single thick black rubber piece with a hole in the center.  I don't have the cup looking thing towards the top though.

Thanks guys.

MH

Last edited by mkeh

What you have is original!   What Larry posted is likely from a Pantera.

As I stated, your "housing" is slightly different than what was used in my Goose, but not by basic design and function.     The Goose got no detents or extra springs.....or the nice splined bit right behind the box!!!    ....and I don't recall any springs down in the ball area.....but I could be totally mistaken, has probably been twelve years since I visited my shifter box!  The shaft, if I recall, had to be completely removed in once piece all the way back to the ZF!

I know that I repainted the entire shaft assy, BUTT, I can't find any pictures of the whole shaft out of the car.  It was grungy in one pic.....beautiful fresh paint in the next go.......!

I like your idea of removing all, starting from ground zero!!!

Good luck!!!
Steve

Add Reply

Post
×
×
×
×
Link copied to your clipboard.
×