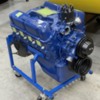
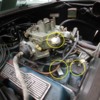
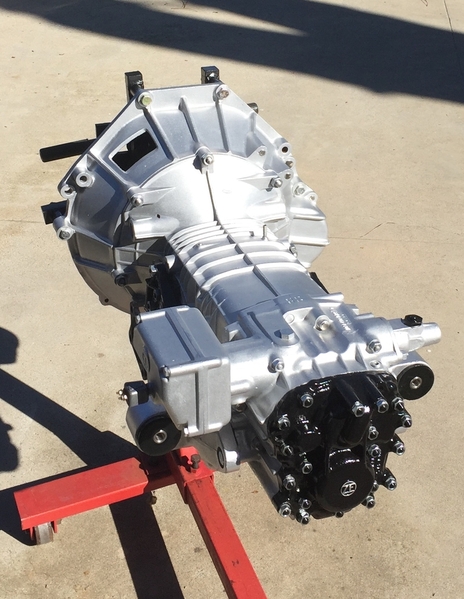
After blowing a leaky freeze plug I've decided to pull the engine for a full rebuild, too many unknowns to chance it.

I haven't found any threads on the proper sequence for pulling the engine on a goose, if there is an existing thread my apologies and a link would be much appreciated, if there isn't, any advice and suggestions would be appreciated.

Obviously the first task is to unbolt the spine and remove the hood "wings".

Should the transaxle come out with the engine or remain in place?

what about starter, oil filter, etc...?  I know all too well how tight a fit things are in there, seems like unbolting everything possible would be helplful.

While the engine is out are there other items to attend to?  I plan on replacing the heat shielding on the side of the fuel cel.  I've already replaced the bearings on the jackshaft.  Obviously new hoses, belts, water pump.  I'd also like to put "factory" valve covers back on the engine as well.

Thanks in advance, this may end up being a long thread!

MH

Last edited by mkeh
Original Post

Replies sorted oldest to newest

I don't have much in the way of answers but good luck to you on this project!

You may have seen the thread from the recent past where removal of the rear hatches was discussed. Apparently, that can all be peeled off with the help of a friend or two.

Just speculating but I doubt there is room to un-mate the motor and trans inside the car. Not sure.

Just a few days ago, I was driving 8MA-596 when suddenly I was greeted by the sounds of major engine failure and the car promptly shut down. Luckily I was in a safe location and was able to flatbed the car a short distance home. So now I am facing a similar project.

Good luck and please do post some updates to the thread, I'm sure plenty of us look forward to watching your progress.

Hey MH,

It's been a while since I pulled mine,. The spine and wings and then headers off obviously. Then also remove the jack-shaft assembly (the front pulley will smash the rear glass). Remove the starter and AC condenser, and all hoses/wires etc. I removed my engine and ZF as a unit and it was probably easier than separating them (but I've only ever removed them as a unit from Panteras as well). Once all is disconnected it's a quick job.

Attachments

Images (3)
  • IMG_2560
  • IMG_2563
  • IMG_2568

Hey MH,

It's been a while since I pulled mine,. The spine and wings and then headers off obviously. Then also remove the jack-shaft assembly (the front pulley will smash the rear glass). Remove the starter and AC condenser, and all hoses/wires etc. I removed my engine and ZF as a unit and it was probably easier than separating them (but I've only ever removed them as a unit from Panteras as well). Once all is disconnected it's a quick job.

Pictures are very helpful, Thanks!

MH

Do Mangustas have an engine number tag like the Pantera? Is that an issue for value?

I'm running a Progression Ignition and am a huge fan:
https://progressionignition.co...mall-cap-distributor

The ability to see live timing and adjust on the fly is great. I have 1000 miles or so on it and it's been flawless. Size-wise very similar to the MSD Pro billet. No interference issues with Pantera using stock or aftermarket air cleaners.

Last edited by jmardy
@jmardy posted:

Do Mangustas have an engine number tag like the Pantera? Is that an issue for value?

I'm running a Progression Ignition and am a huge fan:
https://progressionignition.co...mall-cap-distributor

The ability to see live timing and adjust on the fly is great. I have 1000 miles or so on it and it's been flawless. Size-wise very similar to the MSD Pro billet. No interference issues with Pantera using stock or aftermarket air cleaners.

The block isn't stamped (to my knowledge), there is an aluminum tag bolted to the intake manifold (which I have).

That's a nice looking distributor, one the Mangusta the air cleaner is right up against it, I'll try to compare dimensions to see if it'll clear.  Thanks for the link.

MH

Mangusta blocks are not typically stamped with a Ford serial number as they were supplied in bulk to DT blank. The intake IS stamped with the "engine number" that corresponds to build sheets. I think many of the people claiming they have the original engine may not even know that they do (or don't). The easy tell is if it has a stamped Ford number, it's not original to the car.

I decided to go the rebuild route and do the 331 stroker as well. My engine shop did use the original heads and intake, but did open up ports to help improve flow. I ended up with around 310HP and 400 ft-lbs of torque in an engine that sounds absolutely awesome, yet appears completely stock from the outside (carb and distributor aside).

Attachments

Images (1)
  • IMG_9092

Mangusta blocks are not typically stamped with a Ford serial number as they were supplied in bulk to DT blank. The intake IS stamped with the "engine number" that corresponds to build sheets. I think many of the people claiming they have the original engine may not even know that they do (or don't). The easy tell is if it has a stamped Ford number, it's not original to the car.

I decided to go the rebuild route and do the 331 stroker as well. My engine shop did use the original heads and intake, but did open up ports to help improve flow. I ended up with around 310HP and 400 ft-lbs of torque in an engine that sounds absolutely awesome, yet appears completely stock from the outside (carb and distributor aside).

Which distributor did you go with?  any clearance issues?

One of the crate engine companies asked if I wanted/needed the block with the clutch pivot point...  since all gooses (geese?) have a hydraulic clutch, I'm assuming that's a "no".

I have a brand new set of headers (I think from Hall) that the previous owner purchased, but never installed...  this would be the time if I want to install them, I'm just not sure how much of a difference they will make though.  Like you, I want to "appear" stock.

MH

M!ke, I'm with Mark on the engine removal--its straightforward to bring it out with the ZF. Removing the jackshaft first is necessary. Take special care with the oil pan, at least if its original, even consider getting cheap repro pan during the process of removal and transport. The original pan (with oil temp sender and pointer) is a neat thing to have.

You may locate the gullwing mounting before removal--meaning, use a very small drill bit and drill a hole at the spine, so you can locate the position easier when putting back on. Getting a good fit of the engine covers is not easy. See picture on 8ma1046.

  After that, the good news is that it is all Ford, and if leave it all in original tune you might be happy forever. I installed Pertronix ignition modules in 8ma1046 and 1076--I am not a believer in colorful/fancy ignition, and only went back with more hydraulic cam (which just requires screw in studs, but keep the high compression heads), and polished and balanced the rods (and lord knows why, its not like I'm going to be speed shifting at 6000 rpm...).  A roller cam and the stroker kit are not going to hurt the value of the car, and just may help the driveability. But more than that may be a 'stay busy/spend money' trap,  a Tesla 3 is still going to be faster and you may just be happy having the car in great tune again... I would personally work to keep as many external pieces in place as possible, even including the original headers.

Geez, your car has 52 year old paint and the engine has never been out? Pretty awesome...Lee

Attachments

Images (1)
  • 8ma1046 locating hole

Hi M!ke, one thought about those Hall headers.  Before you pull the motor (but have the existing headers off) I'd test fit BOTH Hall units to see if they line up properly.   Mine certainly didn't.... off by 1-2".... which required much painful tube cutting & welding .  There may have been more than one Hall header design down through the years but the set I got - cheap as it was - was no bargain!

About the jackshaft, as long as you take the front pulley off, you can pull the motor without removing the whole jackshaft assembly.  That said, you'll probably find insufficient clearance for sliding the pulley off the end of the shaft unless the powertrain is 'loose' and angled or moved a bit to make space.  I was surprised how tight things are at that end of the jackshaft....on 1010 (w/ non stock manifold) I've never had any luck installing a fully assemble jackshaft back on a fully mounted engine....just not enough space.  Always need to install the front pulley 'mid-assembly', one way or another.

Good luck with the project, be interested to see things come back together!  Regards, Nate

Last edited by nate
@nate posted:

Hi M!ke, one thought about those Hall headers.  Before you pull the motor (but have the existing headers off) I'd test fit BOTH Hall units to see if they line up properly.   Mine certainly didn't.... off by 1-2".... which required much painful tube cutting & welding .  There may have been more than one Hall header design down through the years but the set I got - cheap as it was - was no bargain!

About the jackshaft, as long as you take the front pulley off, you can pull the motor without removing the whole jackshaft assembly.  That said, you'll probably find insufficient clearance for sliding the pulley off the end of the shaft unless the powertrain is 'loose' and angled or moved a bit to make space.  I was surprised how tight things are at that end of the jackshaft....on 1010 (w/ non stock manifold) I've never had any luck installing a fully assemble jackshaft back on a fully mounted engine....just not enough space.  Always need to install the front pulley 'mid-assembly', one way or another.

Good luck with the project, be interested to see things come back together!  Regards, Nate

Thanks Nate, good to know the headers might be Hiding an issue.  I have a spare seat of heat shields...  Will have to see if they can be fitted to keep it stock looking.

Are there conflicts fitting the jackshaft to aftermarket intake manifolds?

Thanks guys

MH

M!ke, I went with the Hall headers--and decades later, at least the idea of 'disguising' them to look like Ansa is where I'd go instead....Strange that one of the things I'd like to do is get the smog pump back on and maybe even working, have the heat riser for the mechanical choke (instead of the electrical kit on it now), and cover over with the heat shields...

btw, the talk then with Gary Hall on the manifold then was 'leave it' (its a good, wide range dual plane manifold. Thank goodness I didn't swap the manifold, decades ago I didn't think any of the Ford pieces were precious and who knew then that the engine number was on the intake...Lee

MH, while the powertrain is out, you could pull the top cover and check for safety wire in your ring gear bolts. This is usually not as much of a problem with Mangustas as it is on Panteras, but with your run of luck with the car recently.... If you're careful in pulling the cover, you won't need to replace the gasket. The clutch pivot thingy on the block is a Mustang attachment. And check the jackshaft before replacing it. Seems like the center bearing is the one that goes out.

http://hallpantera.com/cgi-bin...a-inc&item=22078  Here is the kit from Hall for the ZF wiring. $75 and someone who has a clue

Btw, I was surprised to see there is now apparently a really correct repro oil pan, Scott Drake makes a 5 quart version of the C5AZ-6675-BL for 64-69 that appears to Not have the kidney dimples (the impressions that most repros have on the left and right rear sides). I had to look for a long time before I found a decent used original part to modify. Some really talented guy generously made this drawing for the pointer a few years ago, I won't name names, he may have the copyright   .

  Repro bell housing spacers are cheap and available, in case yours is scraped. Since the tranny and the engine may be mated for another 50 years, it may be a great opportunity to powderpaint these and have them in place forever....

  But plan B, if compression is still lively in the engine and the only issue is a freeze plug...or if your guy can get the work done before Spring weather and get you back on the road, all is good...Lee

Attachments

Images (1)
  • nates amazing oil pan pointer drawing
@bosswrench posted:

MH, while the powertrain is out, you could pull the top cover and check for safety wire in your ring gear bolts. This is usually not as much of a problem with Mangustas as it is on Panteras, but with your run of luck with the car recently.... If you're careful in pulling the cover, you won't need to replace the gasket. The clutch pivot thingy on the block is a Mustang attachment. And check the jackshaft before replacing it. Seems like the center bearing is the one that goes out.

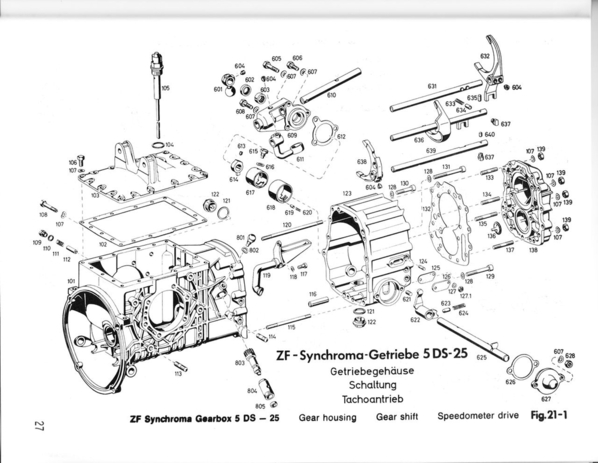
Top cover being #103 in this drawing correct?  I'm on the edge of my comfort threshold here, which is fine, just want to make sure I'm tearing into the right bitsDash_1_

I replaced all the bearings in the jackshaft a few years ago, but need to replace the one in the idler pulley since it recently began squealing...

doesn't look like a goose needs the clutch pivot hole... as far as I can tell...

Thanks,

MH

Attachments

Images (1)
  • Dash_1_
@leea posted:

http://hallpantera.com/cgi-bin...a-inc&item=22078  Here is the kit from Hall for the ZF wiring. $75 and someone who has a clue

Btw, I was surprised to see there is now apparently a really correct repro oil pan, Scott Drake makes a 5 quart version of the C5AZ-6675-BL for 64-69 that appears to Not have the kidney dimples (the impressions that most repros have on the left and right rear sides). I had to look for a long time before I found a decent used original part to modify. Some really talented guy generously made this drawing for the pointer a few years ago, I won't name names, he may have the copyright   .

  Repro bell housing spacers are cheap and available, in case yours is scraped. Since the tranny and the engine may be mated for another 50 years, it may be a great opportunity to powderpaint these and have them in place forever....

  But plan B, if compression is still lively in the engine and the only issue is a freeze plug...or if your guy can get the work done before Spring weather and get you back on the road, all is good...Lee

Sounds like there was no safety wire on the ring bolts from the factory.

The oil pan was replaced by a former owner so I don't have the original.  I'm seriously thinking of mothballing the original engine intact and dropping a crate in place, just make it look stock, but keep the original for historical purposes.

Bellhousing spacers?  ya lost me there...

on the ring bolts, we're talking #907 here right?

-1

Thanks for the suggestions and info, keep 'em coming!

MH

Attachments

Images (1)
  • -1
@jmardy posted:

Do Mangustas have an engine number tag like the Pantera? Is that an issue for value?

I'm running a Progression Ignition and am a huge fan:
https://progressionignition.co...mall-cap-distributor

The ability to see live timing and adjust on the fly is great. I have 1000 miles or so on it and it's been flawless. Size-wise very similar to the MSD Pro billet. No interference issues with Pantera using stock or aftermarket air cleaners.

Did you have any issues with the tach with this distributor?  Some of the others I've seen required an adapter of sorts

MH

Jmardy, there are only 2 tags on the engine, but 3 unique IDs--standard tags were the carburetor and then the engine ID on the intake manifold. These are available as repro. The key ID is the Detomaso stamp on the intake. The block  on '1076 was stamped with the machining date, of course all the castings have date codes and it seems that the first week in July 1968 is pretty common (but nobody can say exclusive) for the J-codes that went into Mangustas.

Mike, the Veglia tach will work as long as you are taking the tach signal from the  coil. Otherwise, for about $25 you can buy "tach amplifiers" that take a pure +12v or digital signal and basically include their own coil to burst up to something the tach will hear. (Wish I'd known this when I put the electromotive ignition on my 308...)

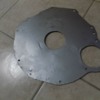
The bell housing spacer is just that flat disc between the engine and the ZF, and likely the first thing that gets touch from below...But cheap and simple at this moment to replace.

https://pantera.infopop.cc/topic/wiring-gearbox is of course the best information on the ZF safety wiring...(where else but here? ). My guy replaced the differential carrier bearings , its a great time just to replace 50 year old seals--esp, between the shifter box and the ZF case, the dust boot at the shift box, whatever.

Attachments

Images (3)
  • engine IDs
  • block stamping
  • bellhousing spacer
Last edited by leea
@mkeh posted:

Thanks Nate, good to know the headers might be Hiding an issue.  I have a spare seat of heat shields...  Will have to see if they can be fitted to keep it stock looking.

Are there conflicts fitting the jackshaft to aftermarket intake manifolds?

Thanks guys

MH

Afaik, fitting an assembled jackshaft on a previously installed stock engine is no problem - - no need to remove the front pulley.  There will be plenty of space to position the jackshaft assembly where it needs to be. 

No matter what manifold you're running, however, if you want to PULL the engine w/o removing the jackshaft first, you'll need to work the front pulley off during the process to clear the chassis structure. 

I was planning to re-re-install my engine with the jackshaft in place (...install front pulley before it's all the way in....), but reconsidering things now given Mark's comment about possible smashed glass!!

@nate posted:

Afaik, fitting an assembled jackshaft on a previously installed stock engine is no problem - - no need to remove the front pulley.  There will be plenty of space to position the jackshaft assembly where it needs to be.

No matter what manifold you're running, however, if you want to PULL the engine w/o removing the jackshaft first, you'll need to work the front pulley off during the process to clear the chassis structure.

I was planning to re-re-install my engine with the jackshaft in place (...install front pulley before it's all the way in....), but reconsidering things now given Mark's comment about possible smashed glass!!

Nate, I replaced the bearings in my jackshaft a few years ago.  I had no problem removing and reinstalling the assembled jackshaft with the engine in the car.   I would recommend adding it after the engine is installed.  Just one more thing to get in the way or to get damaged while putting the engine back in the car.

MH

@leea posted:

Jmardy, there are only 2 tags on the engine, but 3 unique IDs--standard tags were the carburetor and then the engine ID on the intake manifold. These are available as repro. The key ID is the Detomaso stamp on the intake. The block  on '1076 was stamped with the machining date, of course all the castings have date codes and it seems that the first week in July 1968 is pretty common (but nobody can say exclusive) for the J-codes that went into Mangustas.

Mike, the Veglia tach will work as long as you are taking the tach signal from the  coil. Otherwise, for about $25 you can buy "tach amplifiers" that take a pure +12v or digital signal and basically include their own coil to burst up to something the tach will hear. (Wish I'd known this when I put the electromotive ignition on my 308...)

The bell housing spacer is just that flat disc between the engine and the ZF, and likely the first thing that gets touch from below...But cheap and simple at this moment to replace.

https://pantera.infopop.cc/topic/wiring-gearbox is of course the best information on the ZF safety wiring...(where else but here? ). My guy replaced the differential carrier bearings , its a great time just to replace 50 year old seals--esp, between the shifter box and the ZF case, the dust boot at the shift box, whatever.

Lee, thanks for the link on safety wiring the ring bolts.  Seems like a task I can handle.  He did mention torquing the bolts, but not the torque #'s...   Does anyone have them?   I'm guessing gaskets are readily available, so might as well replace them too...

MH

Last edited by mkeh

After much deliberation and discussion with friends, I've decided to stay stock and have the engine refreshed.  I will use Johnny Woods web page (link above) as a guide to restore the engine bay while the engine is out.  I have no intention of racing the car and as we all know, it can provide more than enough excitement in stock form.

I will have the ZF vapor blasted and all the brackets and pulleys and such replated or painted as per original. 

Is the clutch disc a standard item or unobtainium spec?  What about U-Joints?

I'm open to "While you're in there" suggestions as well.  Right now I'm making my shopping list.

I might as well address the front end too.  Ball joints, tie rods, etc.  If anyone has recommendations on part #'s or suppliers you have my attention.

MH

M!ke, the only 'wrong' thing would be to keep your car off the Houston streets for too long...Here is the longer story on clutches, short story is that the cover is standard Ford and a Chevy disc works but may need machining back the nose...I think Steve published a picture somewhere in another thread.

https://pantera.infopop.cc/top...223#1598208420756223

Steve had motor mounts and u-joints, the U-joints are supposedly common with Chevy truck. Should be easy to confirm with your favorite parts guy.

Front ball joints are here, https://pantera.infopop.cc/top...angusta-ball-joints, see Dick's part numbers but also note that fiat Plus C. Obert  http://www.fiatplus.com/LOWER-...KIT-0005880297N.html

distinguishes which version of Fiat 124 is a mate for the Mangusta (at least 8ma1076 needed the <40mm ball joint).

I bought front suspension poly bushings from Hall Pantera. Renault R4 rack (Dauphine) supplies the steering rack boots. Tie rods I thought were from a Fiat 600, but the parts manual lists them from Fiat 1300 (as are the stub axles themselves, see below).

Re: other things to do while the engine is out--I'm a big fan of replacing everything old and rubbery--You might use the opportunity to re-grease the Heim joints and replace the plasticized heim joint booties--stretching these on with grease is actually very easy. Guessing that all the water hoses are old, just a lot easier to replace the lines now. And with all coolant out, treat/repaint the water tubes while its easy. Paint or WD40 on the bell housing (I went with paint), a pair of new motor mounts. And yeah, not a bad time to pressure wash and even hit what you can of the frame with epoxy primer-- Next to replacing rubber, I'm next a fan of rust prevention (! esp, cleaning anywhere that holds water, drilling drain holes and bathing anything that could hold water in POR15). But not much is coincident with the engine work and you just don't have to spend much more focus than just getting the car running again.  Everything else can be its own project...

Attachments

Images (1)
  • mangusta tie rod ends
Last edited by leea

“I will have the ZF vapor blasted….”

I assume you mean blasting with dry ice pellets?

I was able to find a local business that did that for my ZF during the reassembly of 2511. It gave a very clean surface but it didn’t return everything to the same uniform appearance. It seems cast aluminum pieces, after 50 years of use, are hard to return to original.

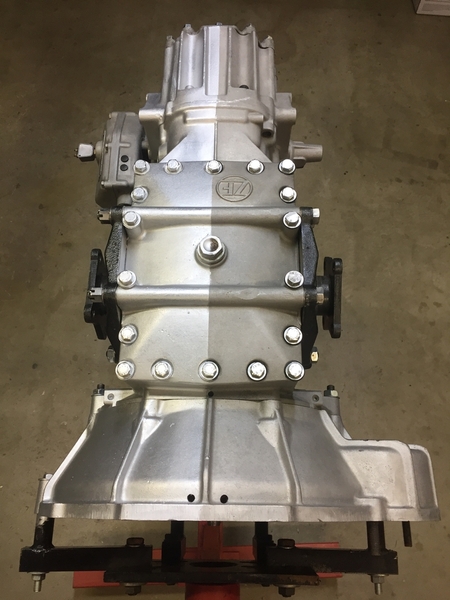
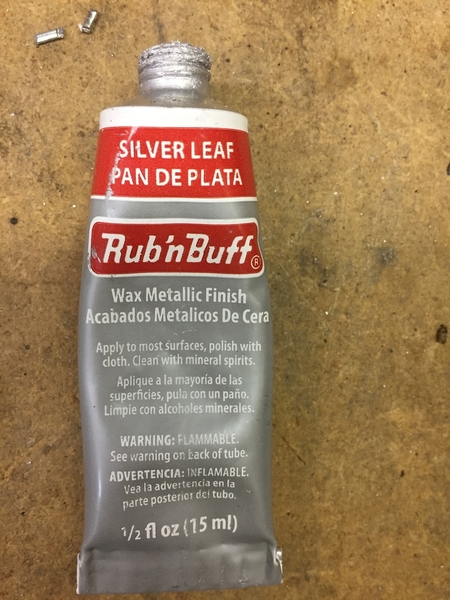
I chose to do something others have used before me, a colored Carnuba wax called rub n buff. As others advised me, it seems to be holding up quite well and allows the bell housing and the ZF case to have matching appearance

left side is with the wax, right side is the dry ice blasted finish.  there is a darker gray wax available that would be a closer match to the cleaned surface, but I opted for a little bit more shine

C18FF9BE-74ED-4FDE-956F-6EFDAE11239A


it comes in a 1/2 ounce tube and the coverage is phenomenal. I used one tube and maybe 1/4 of a second tube for the entire project

2D749C87-0FA5-4E74-879C-31080416AD0C

DFACFAD1-8A88-46F0-88B0-0A56D4F09F07

Larry

Attachments

Images (3)
  • C18FF9BE-74ED-4FDE-956F-6EFDAE11239A
  • 2D749C87-0FA5-4E74-879C-31080416AD0C
  • DFACFAD1-8A88-46F0-88B0-0A56D4F09F07

Back to the jackshaft assembly for a moment...I've always tried to install the jackshaft and intake manifold at the same time, torqueing all bolts in the proper sequence, and avoided removing the jackshaft alone later for fear of promoting manifold leaks.

Thinking now this is excessive caution.....but it begs a question:  If the jackshaft is removed by removing it's four main bolts/screws, should the 8 other manifold bolts be loosened and ultimately re-tightened in proper sequence, or should they just be left alone, to minimize possible disturbance to manifold sealing surfaces?

I can see an argument for either option, anybody end up with a leak after R&R of a jackshaft? Thanks! Nate

Last edited by nate

Add Reply

Post
×
×
×
×
Link copied to your clipboard.
×