
Hi all! Introducing myself after joining the forum a few weeks ago - I have recently acquired Pantera 1424 which allegedly has some interesting history in the movies which I'm looking to clarify as part of the cars complete restoration in time.

First things first though - getting it back on the road and registered here in Australia so I can enjoy the car a bit while getting it around to relevant specialists to get everything sorted for a full bare metal strip down and restoration of the car inside and out.

I hope this all posts up ok - my forum experience is a good as my Pantera experience, but I'll be looking to improve both in the very near future.

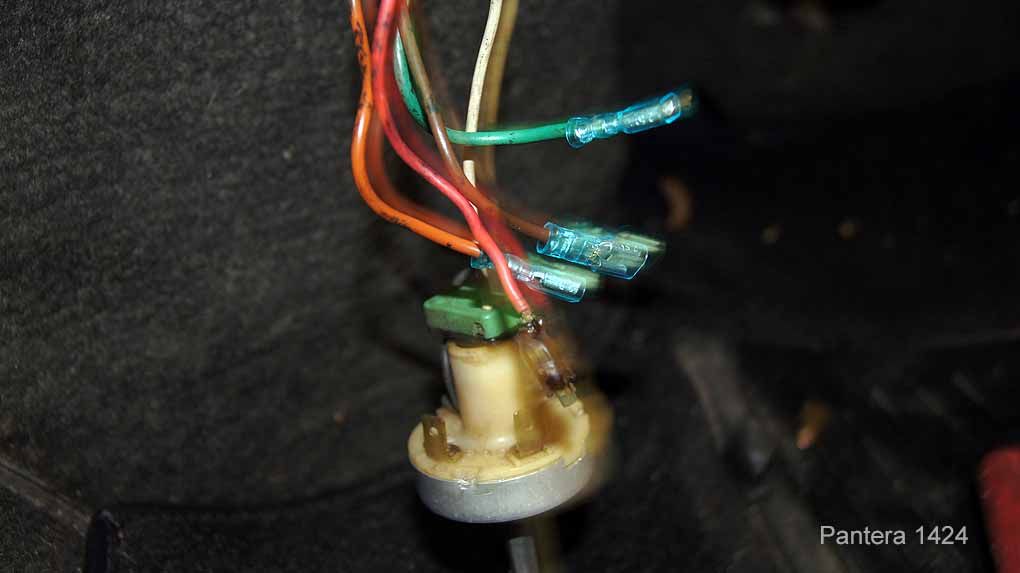
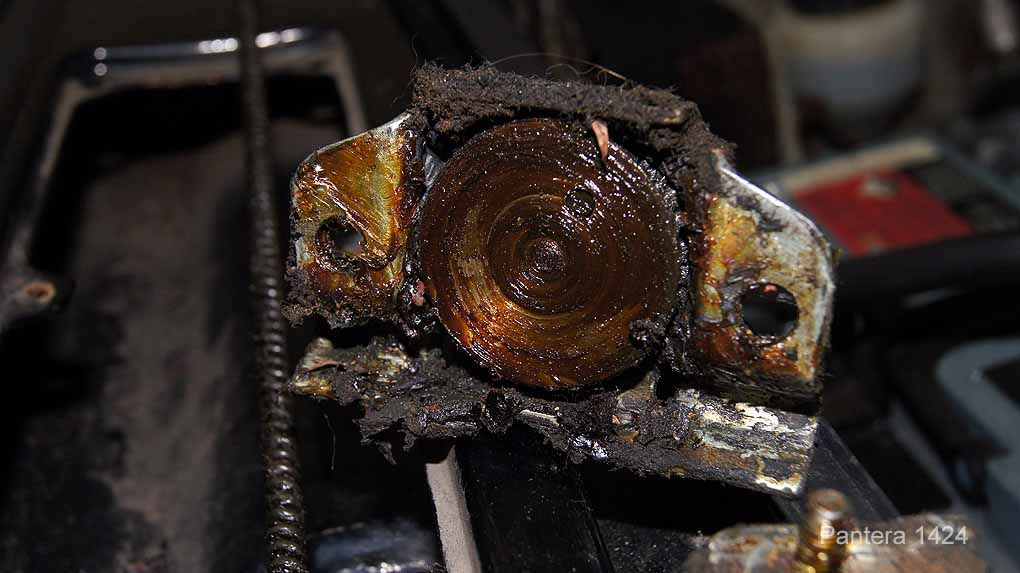
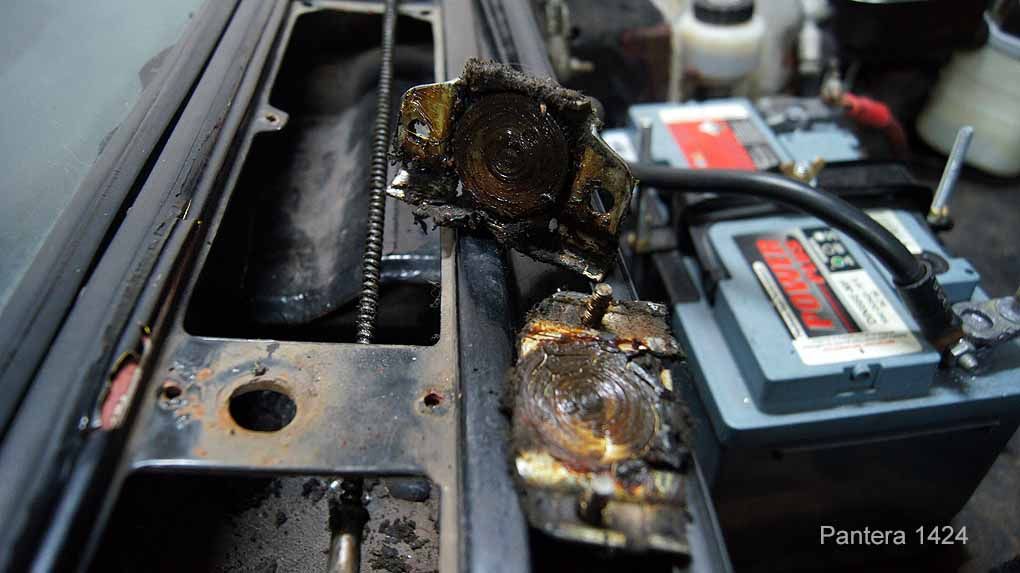
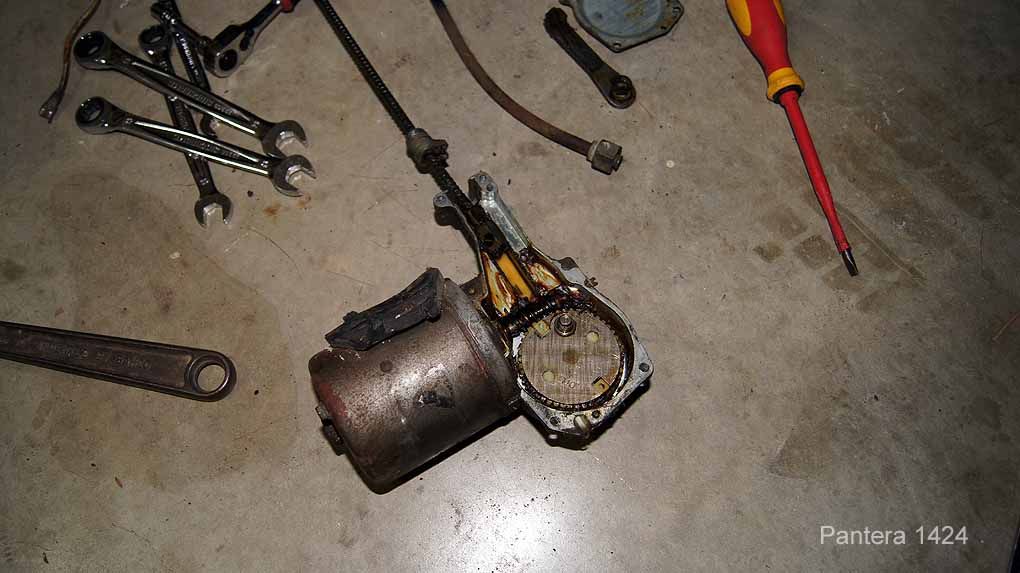
We got it out on the road a couple of days ago and while it's got a lot of electrical work to be done (next weeks project for the auto elec) mechanically it's not too bad after a new clutch install and general motor service and tune.

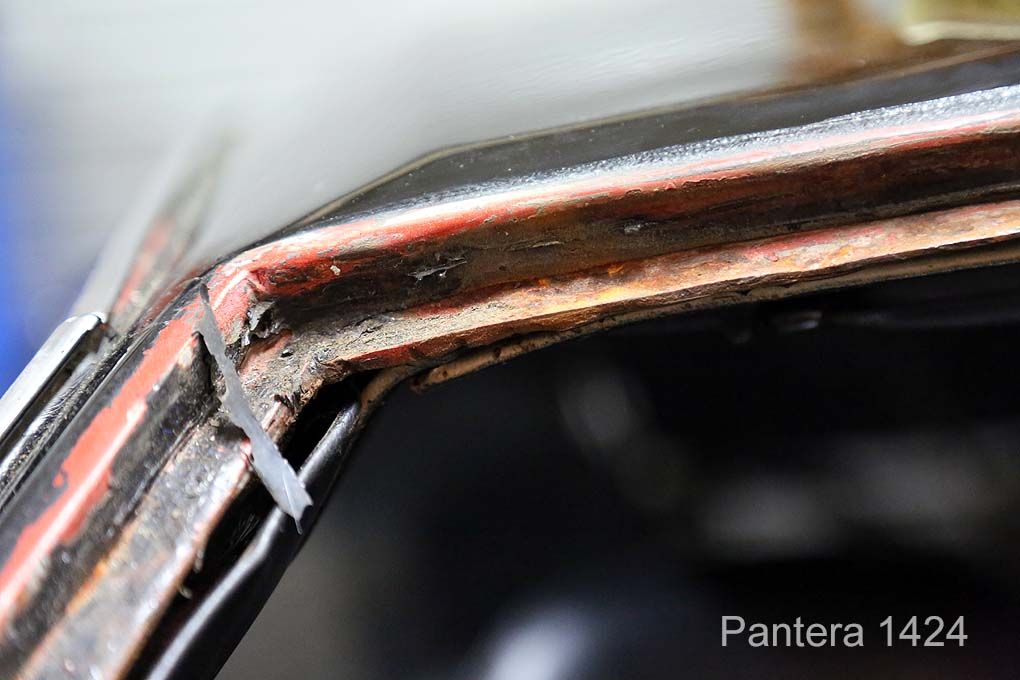
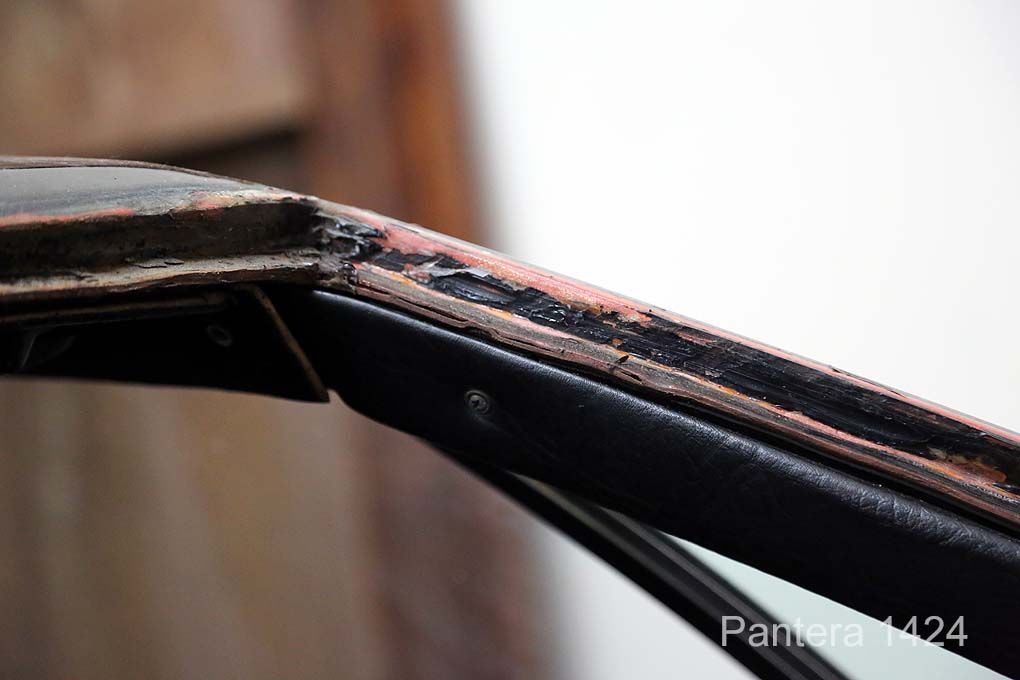
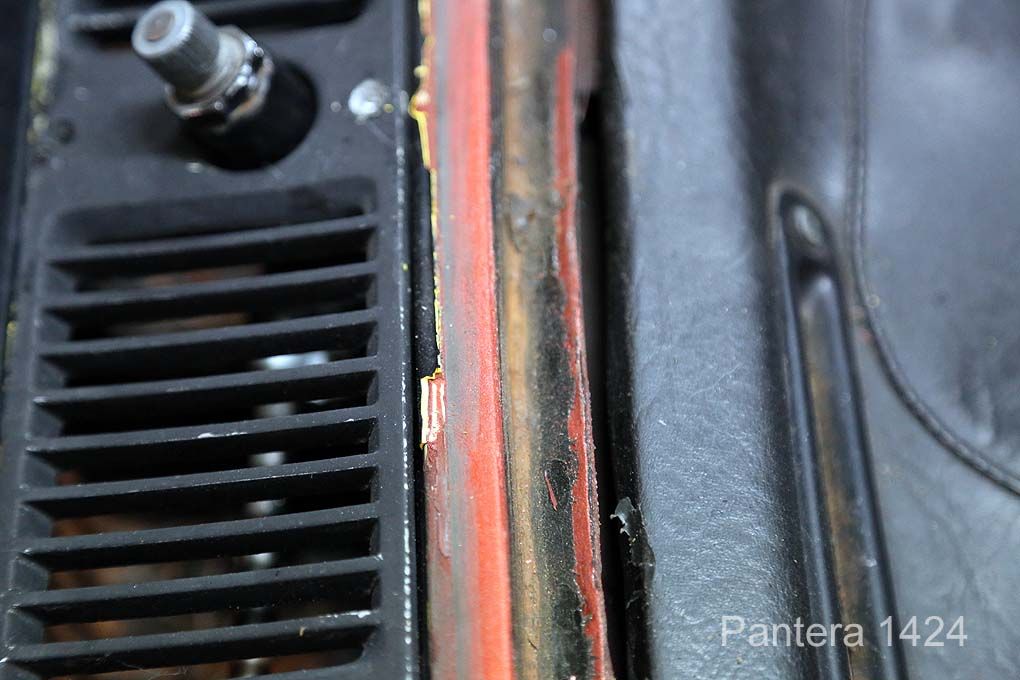
It's had at least three lives that I can see just looking at the paint - the original orange / red / rust colour on the bottom with a yellow over that then the black which it has now. Depending on how it's history can be determined coupled with advice from others (like you guys here) in the know I'll try to do this particular car justice in the best possible way.

I'll get some more stuff up on it's progress / slowgress / nogress / regress (my four stages of project management) later.

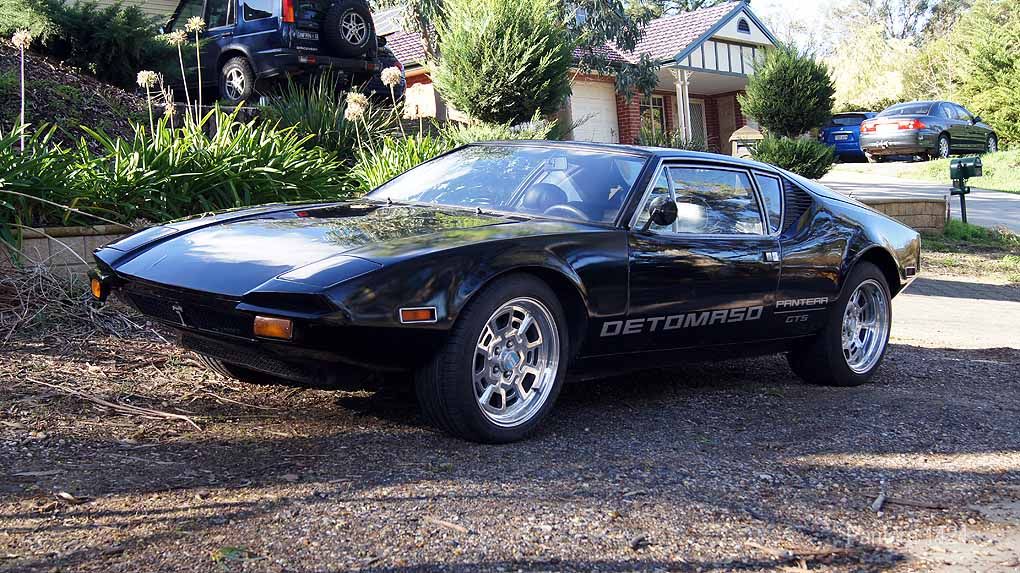
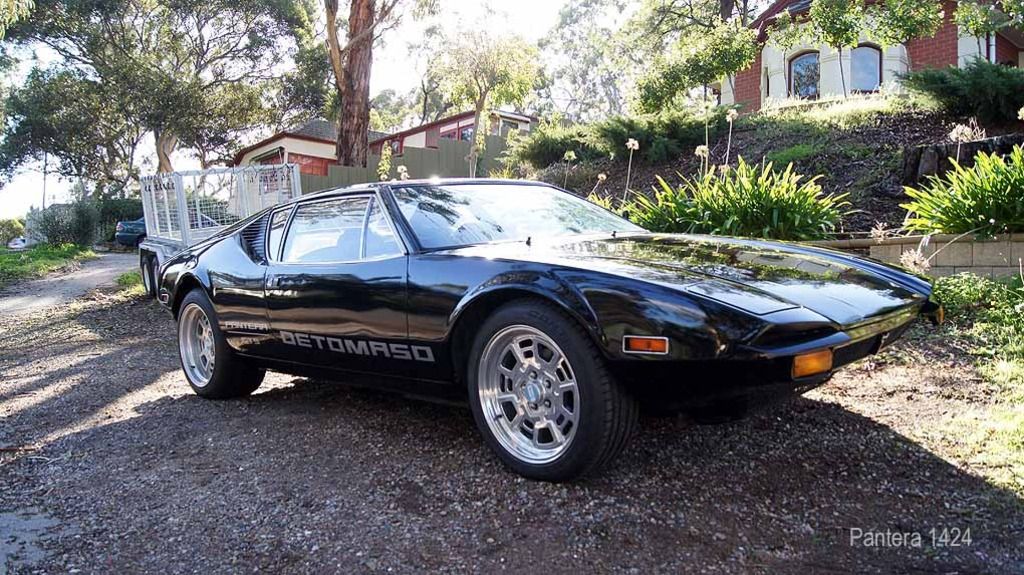
However - here's a shot of it as it stands just now.

Cheers!

Michael.

Attachments

Images (1)
  • IMG_6686
Original Post

Replies sorted oldest to newest

Hey tajon,

Being a Fast 5 Car is definitely the word on this one along with potentially being in Gone in 60 Seconds (the yellow Pantera behind Angelina in the shipyard which would explain the yellow paint under the black) and possibly more.

I have a copy of the Certificate of Title listing Universal Studios as the owner so one can assume its been in their lot at least - I'm hoping they can shed some light when I contact them on what specifically this car has been involved with so I can make some good decisions on what I do with her - at least externally.

Apart from being a huge Fast & Furious franchise fan making having this even more awesome - they're unique, rare and beautiful looking cars and I'm stoked to have one.

If anyone out there has any history on her it'd be great to hear from them.

If it's a true Fast 5 car then it'll stay black and as close to this look as possible. If she's not, then we can back to yellow for Gone in 60 Seconds if she was in that or if she's not been in anything then who knows - either way she'll be stripped back, rust taken out and metal filled and treated so she'll be in perfect condition once done.

M.
So I've been out of town for a bit and come back to see how Peter and his guys have been going on the car and find front hood off, radiator out, seats out and more indications of the previous life(s) of the car.

The front isn't any way near as rusty as I thought it would be now we can see more clearly into it with the radiator out - but the electrical work is proving frustrating for the Auto Elec as it's a step by step process for him - find a problem, then we have to find parts to sort that then move on to finding the next problem.

Burnt out light relay and wiring is the next thing to sort after getting rid of the complete electrical system bypass that had been installed by Universal. The car even with the fuse board removed to get cleaned was able to be started..

With the radiator now out - I'll look into getting all that upgraded as well. It was going to happen eventually, but no time like the present with the Australian summer coming on (might need to look into getting the AC system re-enstated as well).

Photo below shows the different colours the car has been from the original metallic rusty red (don't know the official name of that colour yet), to a yellow to the black....

Attachments

Images (1)
  • image5
Hey Hemi,

I've had a look through their site and will definitely be talking to them I'm sure through the "next phase" of the project!

At the moment it's keep it as original as possible to get it AU registered as it's not been done yet since it was imported. Once that's done the strip down, make it awesome stuff happens.

I note you're in Sydney and I'm heading there next week on business - it'd great to have a look at what you've done depending on how my and your time is....
So, today we hit a block with getting this all up and running. I've managed to get a bunch of bits from Joe in Sydney including a complete hand brake / Emergency Brake assembly to find that the mount on the chassis has been cut off (See photo below).

I've had a good scroll through the body section of the forum and have found a few photo's of the removable brackets that are about but does anyone have a photo of an original 71/2 hand brake mount that we can use to know what it was like originally to get something fabricated up - or is there an off the shelf kit that can be used?

Cheers,

Michael.

Attachments

Images (1)
  • IMG_6829
Hey Michael,
Definitely go with the removable assembly. I made my own.

With the stock crossmember you can't drop the oil pan without removing the engine. It's still not that easy even with the removable assembly, but it is possible.

As to your transmission mounts. Obviously someone has already updated yours. You can have both side and rear mounts concurrently, but you risk breaking a stud on the ZF if things move around too much for whatever reason. I converted mine to side mount only.

I don't think there is any increased chassis stiffness with both mounts given the size and strength of the studs.

I removed the rears so I didn't have to worry about it.

Good luck,
Mike
Thanks TransSami, ktmike and Hemi.

For the sake of time I can make one up here based on your photo's Hemi, some more from Joe in Sydney.

A project for next week.

Had the original radiator out to get checked out - apparently fully bypassing internally and 60% blocked. Had a new baffle put in so its a proper 2 pass again with the tubes cleaned out... should work just a little bit better now Wink.

M.
We've been quietly working away on 1424 the past few weeks - it's still looking rough when I left it on Wednesday but hopefully it'll be coming together the past couple of days and next week.

Peter (the awesome mechanic looking after the works at the moment) and his guys have had their auto elec go through the whole car and get all the lights working. They've undone the hollywood treatment so it starts off the ignition barrel now instead of having everything bypassed.

We've installed the radiator and of course with the electrical all sorted we've got the radiator fans working now as well. Hopefully now we'll be able to not cook it when it drives....

The lights have new limit switches are installed, a new light switch and headlamp relay (still coming but will be here Monday) will help and brass cogs have been put into both the light and electric window drives.

Replacement front bumpers and indicators should arrive Monday to get installed so we can then get the rough parts of the paint "touched up" to see how it goes on it's first attempt at getting registered here.... Being a LHD car and I intend to keep it that way they want it "as stock as a rock" so we'll see what they think of the 17" wheels and black paint... everything else is ok (apart from the Holley carb and the MSD ignition....)

Interior all boned out at the moment...

Attachments

Images (1)
  • Pantera-1424-6
Started scraping the paint off the stainless door trims to get it "as stock as a rock"....

Also spent some time getting all the tint off the side windows and windscreen... (have to hand it to the stunt guys who can drive these things like demons with little to no vision)

It's going to be the hardest decision of the whole project later I think - to polish or paint...? that is the question.

Attachments

Images (1)
  • Pantera-1424-01
Took it out back for her first wash in a while - one thing was made very apparent - new rubber required all round. 1424 doesn't keep the water out too well at the moment.

Looking into a dual action polisher to see if I can get the paint looking as good as it can while I sort out the body project later.

Attachments

Images (1)
  • DSC09538
Spent a bunch of time scraping things off... Black paint off the stainless to get all the silver exposed again for registration and all the remaining tint and "sticky" stuff off the windows.

All the way through the signs of multiple lives are popping through with hints of yellow and metallic bronze popping up all over the place.

So far I'm seeing it as original metallic bronze with silver window trims, then yellow with silver window trims then all over black....

Attachments

Images (1)
  • DSC09561
All the silver ware exposed again. And the aftermath on the floor.

Would have liked to have had the window closed but the new switch that I got has fallen apart already so it's stuck down at the moment until I get a new new switch.

On a side note - the window switches seem pretty fickle, any suggestions on how they can be kept together better?

Attachments

Images (1)
  • DSC09574
Removed the covers on the inside of the engine bay and the fuse box cover. They've still got the 1424 numbers on the back side of them... A little reluctant to clean that off them as they're car specific so looking into ways of preserving the numbers on the underside with a few coats of clear and getting the colour on the top side. Not sure if that's possible...

Attachments

Images (1)
  • DSC09575
And the door trims... Original units, but have been I think well broken. I can't see how they clip in and I'm probably missing a heap of little bits to make it all work.

I've got her booked in to get AU approved seat belts installed and the front carpets replaced on the 25th of Jan at a really good interior motor trimmer here so they might have some ideas, but if anyone can share some details on how that all works it'll be good to see how it should be.

Attachments

Images (1)
  • DSC09557
The gutter trim was driving me nuts just sticking out all over the place. Was not sure I wanted to put rivets back in as they're going to have to come off hopefully soon enough for the strip down so I got some nice stainless screws and put them in instead. I think they look ok for now at least and we're not having to drill things out again later.

Attachments

Images (1)
  • DSC09578
Testing some links.... Hopefully it works.

Since Jan I've been steadily working away on things as I've had time. Lots to catch you all up with - but we'll try this and see if it works before I get carried away.

Finally got to dealing with the flakey clear coat on the drivers side guard.

Had to scrape the busted up clear coat off then sanded back until it was all smoothed out.


Found some more of the cars history with the yellow coming through but also had some filler on top of it in some areas....


Masked up and ready to paint - first time I've ever put paint on a car... so it might as well be on a Pantera.


The black in two areas over the filler just wouldn't smooth out.


Ended up getting a sealer coat down over that area and sanding back... made all the difference.


Ended up getting a nice colour coat on it finally.

Hey JT - thanks.

I wondered if they would or not based on what I was seeing (little blue squares with question marks) once I posted it up.

I've set up a photo bucket account so I can get more than one photo in a post - but I'mn clearly not getting something quite right yet. I'll see what I can do!
The windscreen wipers weren't working - so looked into the electrics and found that the switch itself seemed as though it was stuffed, but hot wiring the wiper motor showed that the mechs were all seized up with the old grease in it as well.

All the terminals on the switch were pretty worn so I re-terminated them all.


So, the whole set up got pulled out, degreased, re-greased and re-installed. The wipers now work when they're hot wired, just waiting for a new switch to arrive and we'll be all good.


I thought I had some photo's of the gear all cleaned up - I'll add them in once I find them.
Michael, if the Lucas wiper drive still gives you trouble, by design that spiral wire is used as a worm drive and it is not hardened enough to do this very long. By unfastening the spiral wire at both ends and rotating it 180 degrees, then re-tightening, you get a fresh surface and another 40 years of potential wear at no charge but a little labor.
I haven't been able to get anything done on the wipers or car in the past few weeks but did order a Marti Report on the car which came in last night enabling a double ended search to start to try and flesh out 1424's history from the brand new end and from the guy I bought if off end.

Hoping this week to get back on to the mechanicals again though Wink Summer is coming so it'd be great to have her rego'd for the nice weather coming!

Attachments

It looks great!........But I'm sure that I am biased.......
When I added #4744's Marti Report to Chuck Melton's ProvaMo Registry, (As I'm sure you will soon add #1424's) he asked me to send him a photo of my actual door plate, which in spite of my vin's "Y = October" build date, actually indicates a December build date.
This seems to another one of those DeTomaso mystery numbers, so I'm curious - is yours still present, and if so, what month does it indicate?

Attachments

Images (1)
  • 4744
I think I've already put the door plate up on the registry - I'll double check...

My door plate matches the Mari Report so I think my April 71 is still April.

On another note, I spent a few more hours looking in to my wiper problem and I think I've treated the symptom and not the cause in replacing the wiper switch. I disconnected the "screw" wire and just ran the motor on it's own and it's sketchy and only barely working. I've pulled down plenty of motors in my time and thought I'd have a quick look inside and its looking pretty toasted. Nothing that probably cant be sorted providing I have the time to find some new bushes and strip it all down but I've put some feelers out for a replacement that will hopefully take less time to sort...

Attachments

Images (1)
  • 055A0694
Hey Rocky - I believe so.

There were two "driver" cars and two spares from what I've learned so far. I have been in contact with the owner of the other driver and we've I think sorted out who's cars did what where in the scene based on a few tell tales.

His is a single pod dash and has the ridge on the rear deck lid so the one that is lowered down the ramp on the truck has the ridge so that's clearly his - mine has the two pod dash so the interior scenes are mine, I've got the rim rash still showing from the pull (and the sideways scuffs on the tyres) so that's also likely to be mine and I've also go the stone chips in the paint on the guards and rear deck lid from the desert bashing and the barked up drivers (LHS) front guard lip that you can see on the car doing the bashwork as well.

The other car has been restored nicely and is back on the road in LA I believe - It'll be nice when I've got mine back driving as well Smiler.
Some slowgress is being made on getting 1424 on the road over here.

When I got the car the front windscreen apart from being hollywood tinted had a really perished rubber and no trim holding it in - so I've finally stupmed up for a replacement 2 piece trim and have a rubber on it's way as well.

Took the windscreen out on Tuesday and was pleased to see no rust issues around the screen metal at all. Lots of dirt stuck about the place and you can see once again the mulitcoloured history...


So things got real yesterday....

My glass guy wanted the dash "pulled back a bit" so he could get the screen in easier so I figured it wouldnt hurt to get a good look underneath to see what else if anything I should be doing.

Lots of old dust.. But otherwise considering not too bad. Thinking that seeing I've got a month before a new rubber for the screen gets here I'll get all the A/C and heater piping replaced and relocate the bypass valve to the engine bay while I wait.

Attachments

Images (1)
  • IMG_7851
It's been a while since I've posted anything up properly on 1424. Mostly through having issues with linking photo's so I ended up giving up.

In that time though - Fast5Pantera has been moving along. Finally registered and in that adds another accolade to its history being the first ever modified LHD car registered in South Australia with the new laws that came in 1 July this year. It's got its plates on - FAST V. It's also been through the paint shop and brought back to looking as close as possible to the way it looked in the movie. The only differences are the passenger side mirror and indicators on the front bumpers.

Pretty stoked with how she looks now. Hope you guys like her too. Thanks to those who have helped me along the way with info, help and ideas.

Next step - interior and engine bay.

Attachments

Images (1)
  • IMG_9818
Hi Dave,

No way near as much work as you've done on yours I suspect.

Mechanically - new clutch, rear wheel bearings replaced, handbrake installed (they took it out..), radiator cleaned and new baffle installed, steering rack re-built, new suspension bushes front and rear, sway bar bushes replaced, carby serviced, whole bunch of re-wiring to get it all sorted, new guages, new tach, new speedo cable, new switches. Then the cosmetics, rust removed, re-skinned the front hood, window mouldings and rubbers on the front screen. New SPAL fans on the original radiator - 14" sucker on one side to the drivers side and 14" pusher on the other passenger side of the rad.

Mario the guy here who did my paint was excellent. I charged him to get it looking good but keep as much of the paint history as possible on the car. So the original bronze metallic is still there, the yellow and then the first black from fast 5 then the coat you see now. I think there's less bog on it than there was before which is great.

Body is in gloss jet black and all the trims are in a satin / matte.

Lots to go still yet with engine, engine bay, interior... but one step at a time.

Drives well actually for a 46 year old car. I love getting out in her and feeling how she responds to things. Seeing as she's not really been driven since the movie we're just easing her back into life on the road.

quote:
Originally posted by David B:
I just reviewed this post from the beginning. What a great looking result!

What mechanical work did you have to do to get her on the road? How does she drive?
Last edited by michael1424
I have 1418 which interestingly (to me) was also originally bronze and is currently black.

Did your car have a tag in the engine compartment forward of the emissions plate? How about one over the brake booster VIN stamping under the hood?

Mine has neither, and I do not see any rivet holes to indicate that it ever had them.
quote:
stamped, but I have no way of knowing if it is the original one


* Anyone who knows more than me, please feel free to correct me, but... *

I might suggest that if it is stamped with a 4 digit number on the back, left (driver's side for US cars) of the engine, it's probably the original engine, because....

1. That's wasn't a "standard" Ford stamp - those were put on by DeTomaso (I think).

2. Most of the replacement blocks you would get from either the Ford factory, or that you might pick up in a junkyard don't have a number there.

You should post the number, maybe it is close to other cars in your series.

Regards -

Rocky
I haven't stuck my head in here for a while - Garth, I am lucky enough to have one of the Hot Wheels Fast 5 Pantera's. I managed to get #19 of the 25. I'd love to get my hands on #5 if it ever comes available.

I'll have to have another look at the holes / plates etc. I know the motor has been stamped, I can only assume its the original one looking at the condition of it as it is just now.

From my recollection of previous discussions Rocky you're bang on re: engine # stamping. My # is 0276.

Perry, if your block is stamped its highly likley its still the original motor...

That said, I dont have the factory paperwork so in the current Pantera environment I dont know if my Pantera really is a Pantera at all.... It could just be a re-badged Kia.
quote:
My block is stamped 0271 so our cars are off by 6 and our blocks by 5. Maybe someone didn’t get an engine.


As I understood it, that's pretty common. They would bang out a number of bodies, and get in a number of motors, and poke them in. The motor numbers and body numbers were not precisely aligned.

Anyway - my guess is that you have the original block in there, but you cant guarantee that someone didn't just get his own set of stamps and duplicate the number. And you certainly can't say what's inside the block... You would hope any changes are an improvement.

Rocky

Add Reply

Post
×
×
×
×
Link copied to your clipboard.
×