Sunday night-late.
Engine compartment and rear chassis is in green self etching primer...
My fingers ache with every touch of a key.... did I mention I hate sanding? Didn't get done sanding until late yesterday...ugh.
One day behind schedule....was supposed to spend yesterday painting....but when I got into the chassis pieces......there are a BAZILLION NOOKS AND CRANNIES!!!
OK, wife has banished me to the showers before I can get into bed, so here is the Reader's Digest version to catch you all up to speed.
Welded up two tiny cracks I found near the rear crossmember (will post pic's later) and welded the ebrake cable support....of course I found it sitting on the work bench AFTER I had put the welder away from doing the cracks....ugh!
Cleaned the entire bay and chassis with PrepSol, washed it down, went over the entire thing again with GalvaPrep, dried it off, let it sit for a while, blew out the cracks and crevices with high pressure air, let it sit more....and started taping it all off in prep for paint.........
FINALLY, got to put the primer on.
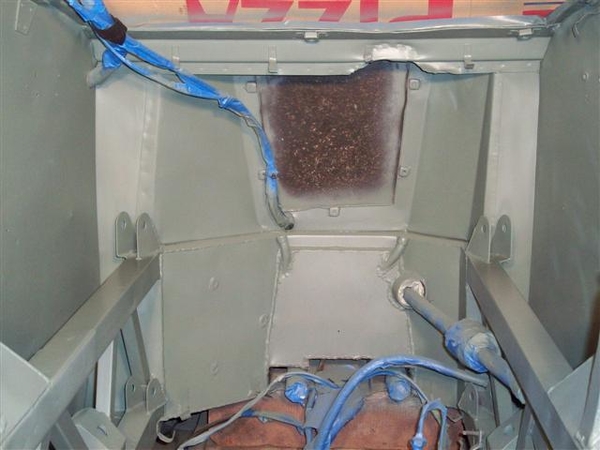
Here we are all taped up: (taken AFTER I was done spraying...)

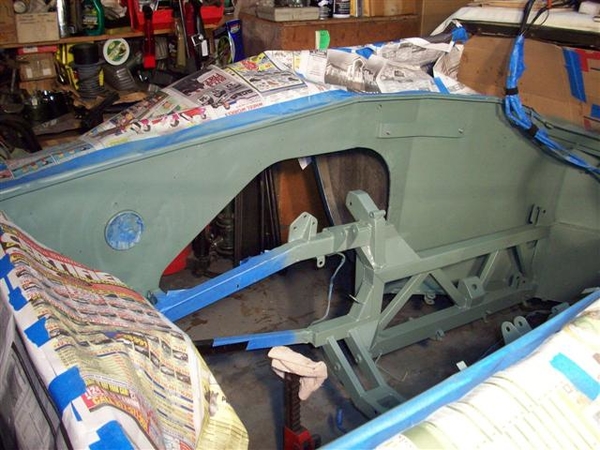

I did remove the rear portion of the shifter linkage...only a roll pin...drew blood...missed with the hammer...once or twice...did I mention that my fingers are killing me? Anyway, it made for less stuff to paint around....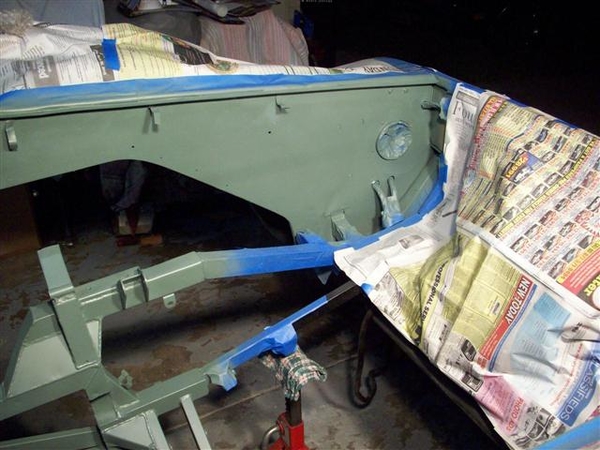
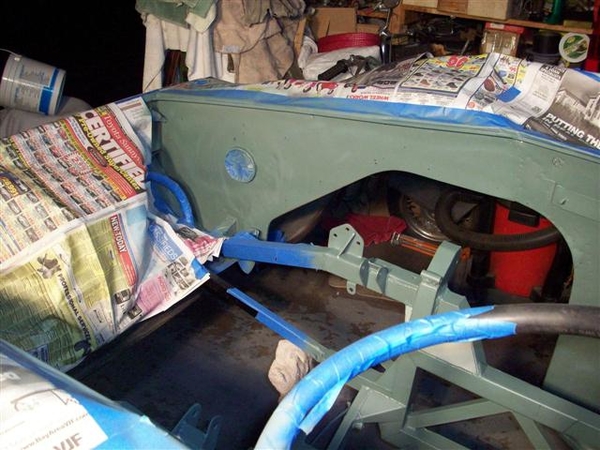
Hopefully tomorrow it will be nice enough for me to do the following:
Apply seam sealer to the various joints.
Apply new silver (slightly metallic) paint!
Off to the showers....ugh!
Steve
Monday night: Seams are caulked and silver paint has been applied. The metallic in the paint was a bit more of a mess (flying around!) than I had anticipated and it is a little more metallic than I had thought.....oh well, it does what I wanted it to....brighten up an otherwise dark place!
Left side:
Right side:
Center: Now I can see a lot more of the welding and problem areas. Of course put an engine in here and poof! That all changes! ....let's not forget about the heat barrier stuff that needs to go all over the place too......won't be able to see anything of this!!! ![]()

Left Hand lower corner of chassis to center spine area where road smegma tends to collect! (Sorry for the blurry photo!)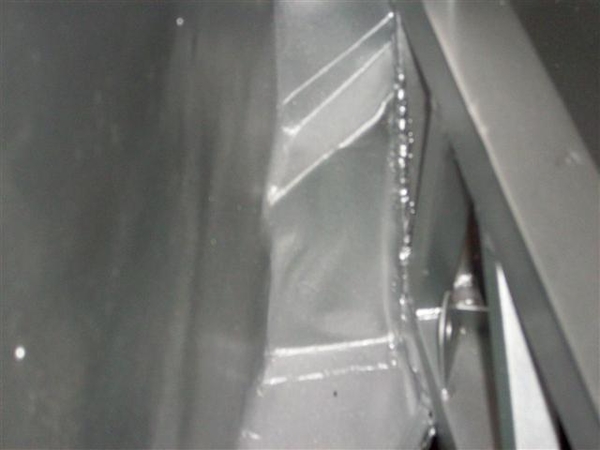
Right Hand lower corner...note the small hole....this was one of my rust holes that I found. Not worth trying to repair from any angle in here! So figure if I hit any large quantities of water, it will allow it to drain out.... That's the story! The other hole encountered was even smaller (and in a less accessible spot) and was covered by caulk in the end. This is what painting the compartment a light color was all about. Being able to see details more easily...
Of course now every part I bolt back on will look like crap! ![]()
![]()
![]()
Off to the showers again!
Steve
Attachments
All that taping looks like a LOT of work. I've found that Aluminum Foil works great and is a LOT quicker for masking hoses, wiring, and any odd shapes difficult to tape. Simply wrap and squeeze - it instantly conforms and holds onto the piece it's protecting.
quote:This is what painting the compartment a light color was all about. Being able to see details more easily.
The vintage AMC Javelin race cars had/have white chassis for the very same reason; any cracks or defects show up instantly as a black crack against the contrasting white paint.
Anyway, can't wait to see the finished product.
I just wanted you to know I'm following your progress with admiration and envy! You're doing a great job and I so much appreciate being able to see every step (OK, probably not EVERY step) you've taken for when I pluck up the courage and find the time to tackle mine. Keep up the great work and THANK YOU for doing such a great job of sharing your progress!
Mark
quote:I so much appreciate being able to see every step (OK, probably not EVERY step)
Yes, please, no shower photos!!!
You're doing a great job, and the documentation is great, and appreciated.
Hang in there.
Larry
Well, it IS that time of year again......TAXES!!! Since I owe a bunch, no sense in giving away your money too soon...so I put it off until the last minute...earn that extra penny or two....pay for Goose parts!!! HAH!
I have been working on the car....took a break for Easter with the family, and the temps have been lower than previous, so did whatever I could find that didn't involve paint.
I will update more photos....but gotta get back to the taxes first! Work before play....
Here are a couple of NEW bits that I picked up today for the car. Dug out two new rubber booties for the inner lower A-arm Unibal joints from my stash. I had two new rear brake lines made up in DOT approved braided material, with custom blue inserts(!), and a new brass heater hose fitting for the intake manifold! (Engine stuff to come...chassis first!) Not shown is some new blue 1/2" Goodyear Hi-Miler heater hose. Easier to work with than Gates Green Stripe for this application. (Gates Green Stripe will be used for all of the large "union" or connections between the 1 3/8" pipes up to the radiator.)
I had previously purchased a set of beautiful braided brake lines from Dana @ Mangusta Int'l only to find out that because of my "unique" 3 piston calipers on my car, that they wouldn't fit....![]()
So looked around and found a place that did these in about 15 minutes! Great service, reasonable price! (Royal Brass in San Jose)
Friday looks like 70 degree temps here so hopefully will put some final touches on stuff that needs to be painted and then start slamming parts back on!!! Whoo HOOO!!!
Ciao!
Steve
Attachments
OK! Slow night in the garage, taxes are off to the tax man...I give up this year....toooo many circles to chase...not zeros....!
So I'll take this time to back up just a tad and post the pics of the frame work that you all missed between those back at the end of page 6, until I hit the primer!
Please do not mistake the smile on my face in any pictures as being from enjoyment......my wife picked up the camera and said that she wanted to document her view of me working on the car during the week.....this was my "crunch" to beat the downturn in weather temps...which hasn't quite returned yet! (Good painting weather!)
Stripping the chassis for painting, scraping, sanding, deburring, cleaning, treating, and then covering everything up that you don't want painted....was a 7-8 day marathon! I think...now, it all seems like a blur!!!
Here she caught me in a typical position for a couple of days with the stripper!
No true mechanic is without his trusty junk yard dog...Pepper. Mine warns me of impending deliveries by UPS drivers! The local driver has been getting a good blow by blow on the car with each piece he delivers!
OK, enough old men and pets...the following progresses through stripper on the engine compartment panels, then stripping the frame, then sanding...
Here is the engine compartment after stripper and brushing, and water/soap cleaning to neutralize any stripper.

Getting down in the chassis with stripper and brush! Working on RH side:
View from the other side:
We pause for a word from our sponsor....and scraper... Pretty danged tired of sitting in this chassis!
Working on the other side: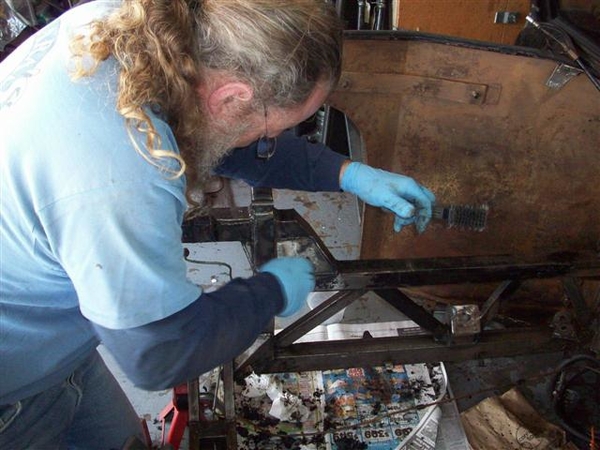
Occasionally I busted out a small file and worked down any burrs or welding spatter that I encountered. The latter required a hammer and sharp tiny chisel to convince them that they no longer needed to be there! (Picture is a little out of focus...sorry!)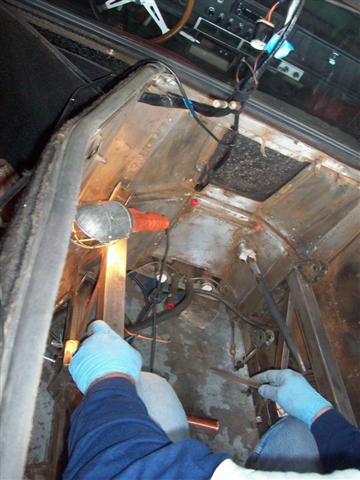
Agony of sanding....soooo tired of sanding! 220 or 180 grit works well....by hand...because most of it is by hand...because my whippy dippy new orbital sander fit only in about 35% of the spaces...then there are 4 sides to ever piece of frame rail, frame rail reinforcement.....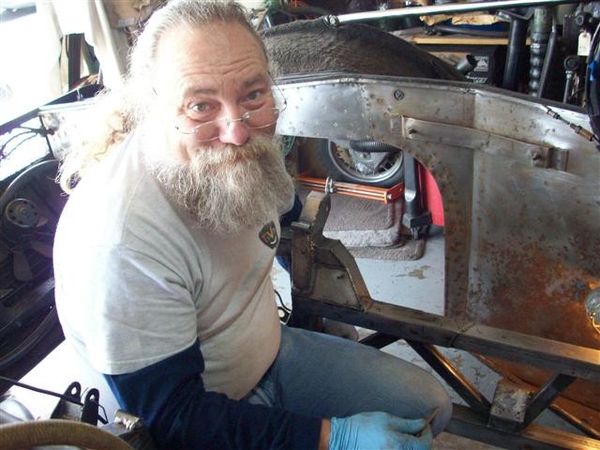
OK, I do believe that this now the point I was at for being done sanding. This process took one day longer than my estimates. Like I said, the chassis had much more to it in terms of hard to get at real estate, and I underestimated the time it would take to do each side.... There are some areas that were slightly pitted due to rust behind the heat shields. I sanded these as much as possible to remove the high spot surface rust.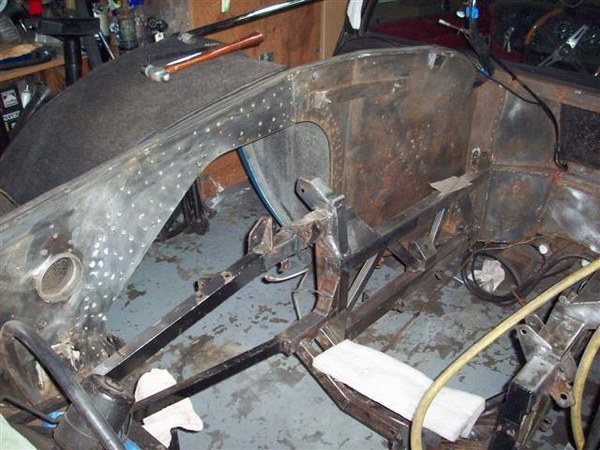
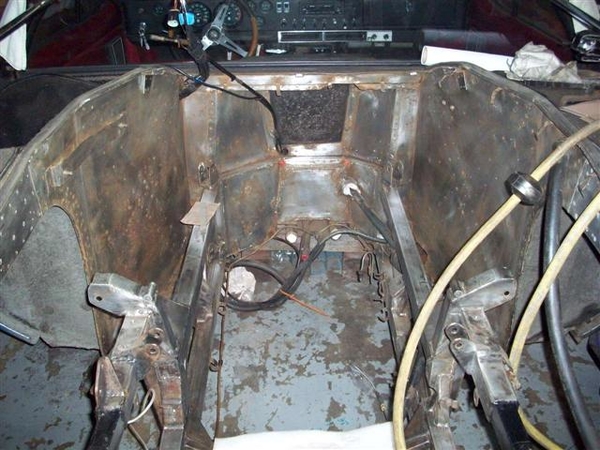

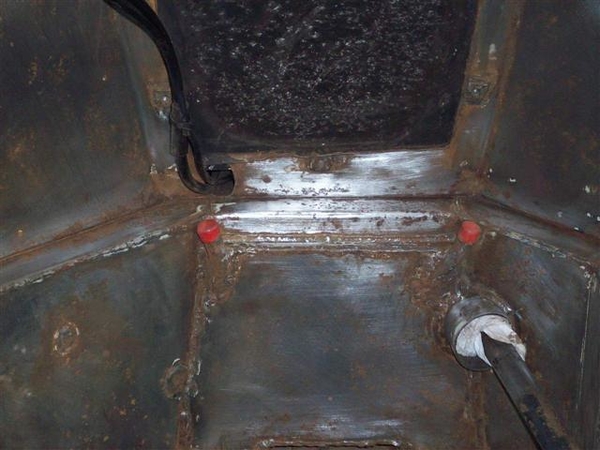
Next shots are of the metal after hitting it with "MetalPrep" a solution of muriatic acid to remove any surface rust and oils. Brush on, keep wet by brushing on more, and then rinse off with water. I used water and a sponge to wash it down. You can see that some etching remained. Following this, I treated the metal with a galvanizing agent, GalvaPrep. Again, brush on, keep wet, then rinse well, and dry. Some of the discoloring of the rust still remains in the deepest of craters. Only way to get that out would be to media blast and that is way too messy for this job. The self etching primer sealer will serve as a barrier to any more continued oxidation.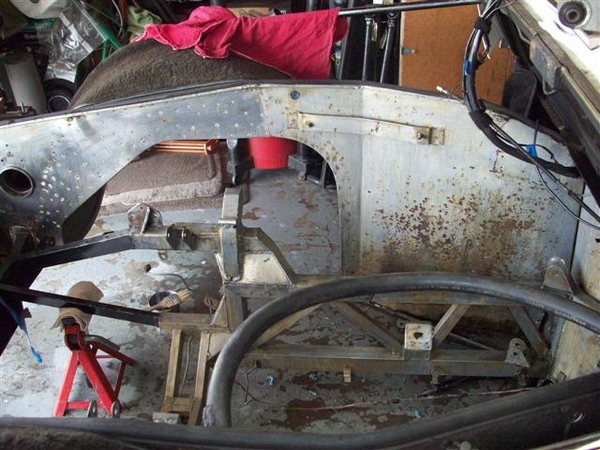
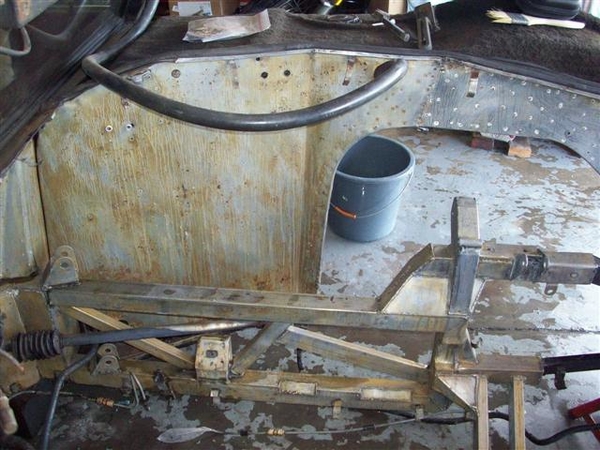
Next two shots are of the areas that I found small cracks in. Strange little reinforcement and the fact that they were both cracked means that this area of the chassis was moving somehow...
These are located just above the bolts for the lower inner a-arm attaching point.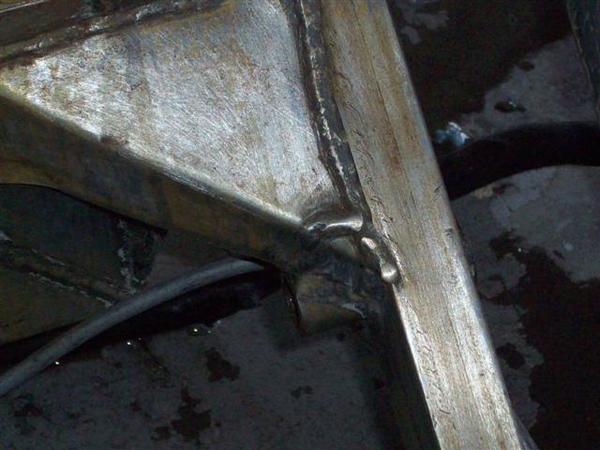
Here you can see the e-brake cable that I managed to bust off moving around in the chassis to remove paint.... I think it was already cracked...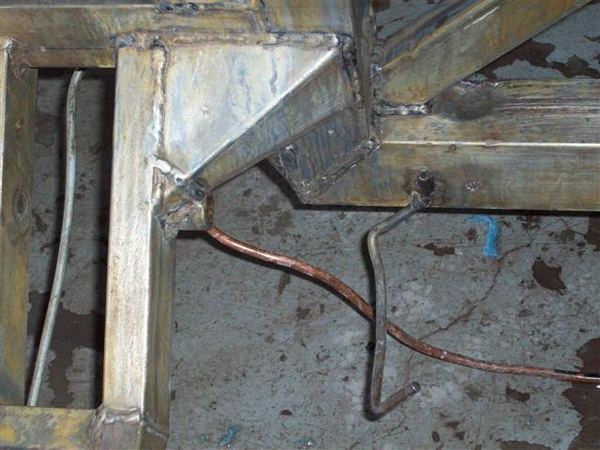
At this point, this fills the void between taking off the insulation and green primer and eventually silver paint!
Next post will cover from silver paint to present!
Steve
Attachments
After silver paint, here is what I have been dinking around with while we've been sitting in a little cold snap. Lots of small detail stuff.... Covering blood letting brake line and wiring clips with heat shrink, repairing old cracked wiring insulation, etc.
Follow along!
Lower frame clips for securing brake lines and on the LH side, the clutch slave line and the vacuum supply pipe as well. (vacuum to the brake booster)
NB: Find length of new 1/2" PCV line to replace bits of un-reinforced heater hose....not good in a vacuum situation as they can collapse.
Added new rubber hose as insulators on the clutch and brake hard lines.
RH side, only one line in at this moment:
A few shots of the wiring retainers, with new heat shrink protectors. These puppies drew more blood than anything...or perhaps I should say caused more loss of skin...than anything so far on this car!


Here is the new materials I used along side the main harness that I fixed up a tad. There is "hard line" vinyl tubing which was used on the "single wire" runs for the oil temp sender, water temp sender, perhaps the oil pressure sender too....and a couple of other spots where something similar was used...the "compartment light"....
I used slighty oversized heat shrink to do the two wires to the fuel sender in the gas tank. The original Italian ends were in place and I didn't have the heart to cut them off! So I searched the electronics scrap dealers in the area for some surplus heat shrink!
Larger heat shrink on the right (of the three pieces) I used for the lower rear wire retainers that retain the main power cable to the starter. Those retainers are a little wider than the rest used on the chassis for brake lines and the main harness.
In the pic above, on the RH side, you can see what the new coverings did to clean up the look of the harness! I used waterless handcleaner (no pumice!) with "Lanolin" to clean and condition the old vinyl! Came out looking nice! In some cases I had to re-wrap the plastic tape that was either damaged or missing.
I also found that the black plastic covering on the throttle cable was all messed up with large cracks and missing pieces. I cleaned all of that off up to the firewall and replaced it with more of the heatshrink. Not real black, but certainly now it is uniform!
More of the same: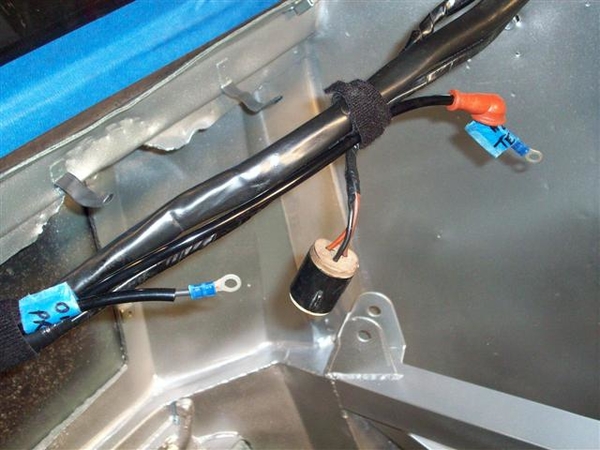
I am out of pictures!
Steve
Attachments
Loaded more pictures....
This weekend, starting on Friday, I tackled the last section of frame, that I didn't want silver.....not sure why, but maybe it was something to do with black being used on every other car, I had to have some too.......or it was the paint fumes....
Anyway, stripper was back, sand paper and sore fingers, more primer and we ended up here!


OK, fast forward thru black paint and some backwards here.....I got a little "thin" on the silver paint in this area around the air inlet opening and to either side of it....SO, while I was masking, I hit this area with more silver so that the green wasn't leaking through! So before black paint, there was silver paint....and then more masking and black paint!
You can see where I mounted the bracket for the Lucas wiper washer bottle, the hose retainer, and a new rubber insulator/grommet for the LH tail lamp wiring etc. Pieces actually going back on the car!!!! WHOO HOO!!!! Sorta like coasting down a hill after you worked so hard to pedal up the other side!
Here's the other side. Actually a picture from yesterday's progress....
I had mounted up the a-arms and rear hub assemblies, wiring grommets had been pushed back into their holes (to the right of the DuraSpark module) and insulation was added to the wiring retainer clips, with the starter cable now securely retained! Like I said... "coasting!"
View from outside looking in on RH side. Battery cable where it transitions to outside of frame, and new braided brake lines installed to calipers.
Here is a shot of my new lower a-arm inner bootie looked like after installation. Good thing I had two.....
BECAUSE....it took two to get one on....properly....
That's a torn up $12 bill or so! You'd swear that they will not fit over that great big spherical joint...but they do! I used a little silicone grease (pool pump grease) to assist rather than actual grease. Once the bootie was in place, I added additional grease to it, then installed the adapters/spacers.....
On the RH side is the original rubber grommet as found in the Left Rear corner next to the battery. Looks like acid mist had taken it's toll on the rubber. New grommet below it.
Here's a close up of how it turned out installed.
I couldn't or didn't want to completely remove the rear wiring harness to put the grommet on in one piece, so I cut it and worked it into position. Will do the job nicely!
Also worked on some other stuff over the past week too when I couldn't tackle a larger job!
Finished the other heat shield for the sides of the engine compartment walls:
Started working on my coolant reservoir clamp, only to find out that a PO had cut it apart too much such that it could not be put back easily by simply welding the pieces back together....SO, I had another clamp that was sorta rusty chrome (thank-you Greg!) that I blasted with beads/aluminum compound, primed and painted (had one or two days where the sun came out!).
New 1/2" high(er) pressure Goodyear heater hose delivery was detected by the dog.... This will go in after firewall insulation is cut and installed, later this week! Weatherpersons promised warm by weeks end!
Patterns for cutting insulation are ready... those pizza boxes came in real handy again!
Finally, Saturday and yesterday, I cleaned up the 4 strut rods for the 4-link suspension. They are deburred, sanded, washed, and ready for primer and paint.
Once the paint hardens, I'll replace any rubber booties that look bad (all were replaced 6-7 years ago and are still soft and pliable) and give them a shot or three of grease before dropping them back in place.
I tagged them to retain front to rear and side to side positions so that alignment is not affected.
So warm weather gives me a short list:
-Cut and install firewall insulation.
-Paint 4 strut rods
-Re-install wiring harness, coil, light, voltage regulator, misc clips and bits...that are in bags on my work table! (They should all be empty when I am done....bags and table top!)
-Install 4 strut rods
-Install shocks and tires
-Set car back down on ground
-Install rear brake pressure amplifier and connect lines up back to calipers.
After this, we go back to the engine for intake porting!
Ciao!
Steve
Attachments
awesome work, thanks for sharing it all in such detail!
OK, a couple things about lists of "things to do"......they never quite get all finished, because you're always finding more things to put on the list.....to finish...!
Friday was a very nice day here, so wrapped up a lot of small stuff! Primed and painted up the rear strut arms. I used Garth's trick of aluminum foil to cover the booties! It worked fantastic! Precision taped the large lock nuts, and then the tin foil worked to cover the rest! No primer or paint where it shouldn't be!
Here's a shot of the clothesline in play...
I let these "age" over night after baking in the sun, before unwrapping them.
Friday before painting started, I cut and did a final fit on the firewall insulation material, and once the temps warmed up a bit, installed it all!
Installed the heat shields, wiring, coil, engine compartment lamp, voltage regulator.
Looked like this before I started on Saturday morning.
ONE thing I am EXTREMELY grateful for during these activities, was the digital camera. I went back in my archives to over a year ago, where I had stored pictures of the "before" I started repairs/stripping, fresh after the engine was pulled. I took fairly high resolution pictures, and when printed on standard size paper, I was able to see all sorts of details that aided me in reassembly!!!! If I couldn't see it clearly on a picture, I could always go back to the computer and blow it up 300%...or so it seemed, to check the little things that "got away" from this rusty steel trap of a brain!
Saturday, unwrapped the ends of the strut rods, disassembled them a tad, squirted a few shots of grease in each rubber bootie, and replaced three booties as they were cracked or damaged. (Perhaps header heat didn't help....who knows....)
Dug out the shocks and set them in place. Connected up brake lines to the new caliper hoses, worked on fitting the clutch slave line back in place. Copper tubing had gotten slightly out of shape, but it was convinced to cooperate!
After installing the heat shields on the front firewall surfaces I find out now that the insulation is so much thinner than the original stuff, that I don't need such long screws.....they stuck thru the carpeting!!! And also I didn't like the idea of that going on next to the gas tank on the RH side, so today, I picked up some shorter stainless #6 sheet metal screws and then cut the last 1/16" or 1/8" off of them to "dull them up!" Came out nice!
I also installed the speedo cable and brake vacuum tube on the LH frame rail and secured it into place along with the clutch line.
Rebuilt the heater hose "tree" with pieces of the new Goodyear blue Hi-Miler where I could use it, and some other bits and pieces as needed. 1/2" on the LH side including connection to intake, and 5/8" where it connects to the water pump...although I guess that could technically get swapped to a 1/2" fitting in the water pump....we'll see.....it's got new 5/8" for now!
When installing the new motor mounts I sourced out, I ran into a small problem with the LH line where it connects to the brake amplifier, mounted on the RH inner frame rail (NOT ALL CARS GOT THESE!). Piece of new hard line I formed and ran was too tall and hit the aluminum engine bracket! When the old modified frame mount was there, it cleared. Since I shortened it back to stock....problem #1!
Can't put the wheels back on, because I need to bleed the brakes....and I can't bleed the brakes...because...
I had used a Swagelok 3/16" brass union to splice the front bubble flare piece of tubing, to a standard flare piece of tubing when I replaced the hard line to the left caliper a few years back. It had a rub through from contact with the axle at some point in it's life....I got to experience the failure one year after the big show in Vegas...luckily while on a trip home from work!
The Swagelok fitting turns out to be one time use thing when it comes to the ferrules. I successfully reformed the tubing for clearance, but needed a new ferrule to install as now the old tubing was too long.... I reduced a "loop" and now had extra length....
Well, I used to have an extra union, as I bought two....but for the life of me, I couldn't find it! (I hope whoever I gave it to used it well!!!)Looked through all of my Goose parts boxes, the traveling tool box, by garage box, small parts bins....nope.
So, about 5 minutes scrounging around on Ebay, I found a new stainless steel version for $5, and a brass "T" for another $4 which I will gut for parts so I can re-use the old union as a spare in the tool box! Those should be here by Tuesday or so.
Today, I added some tie-wraps in critical places (used them danged pictures again!) and washed up the wheels and tires. Cleaned up the coolant overflow tank a bit, gently knocked it on the workbench to loosen up some scaly bits stuck to the bottom....
I tried to find some 1/2" PCV line hose, or vacuum hose, but struck out at the local parts houses... will keep looking. I used a piece of heater hose from the brake vacuum tube to a piece of hard line which connected to a fitting on the intake, but noticed that it was very collapsed. If it collapsed under braking, that could be bad....so I need to find a length of reinforced rubber line that will not collapse so easily.... Hard line to the fitting on the intake may all change too...since this intake is not as tall as the Boss intake was......so will keep this on the list for engine stuff!
Didn't yet install the last piece of shifter rod. Helped the wife re-pot some plants....least I could do!!! I'll wrap this piece in shop towels to protect the paint....be careful with the hammer this time!!!!
So, without further delay, here is my new engine compartment, "almost" ready to receive an engine!
First, a (slightly fuzzy) reminder of the old, from up in page2:
And now, TAH DAH!!!

What to do next:
Repair brake line
Fill and bleed rear brakes (pray for no leaks!!!)
Install RH motor mount
Install rear wheels
Install rear shifter rod piece
SET IT BACK ON THE GROUND!!!!
Start an "engine" list!!!
I will install the drive axles once I put in new seals and grease, when I get closer to putting the trans in...no sense banging up all the paint with spinning axles....well, they will not be spinning at a high rate of revolutions...but you get the idea!
Parking brake cable will also get tied into the whole deal once I get the new stainless (Mangusta International) mufflers fitted up. Always install these buggers with the full weight on the rear wheels! They fit easily with the wheels hanging in the air....it's when you put them into the "at rest" position that the problems start happening!
Ciao!
Steve
Attachments
Excellent job, Steve!

Larry
Mark
S


