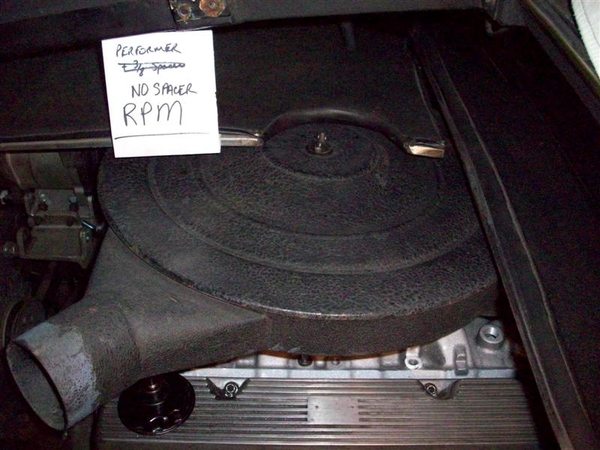
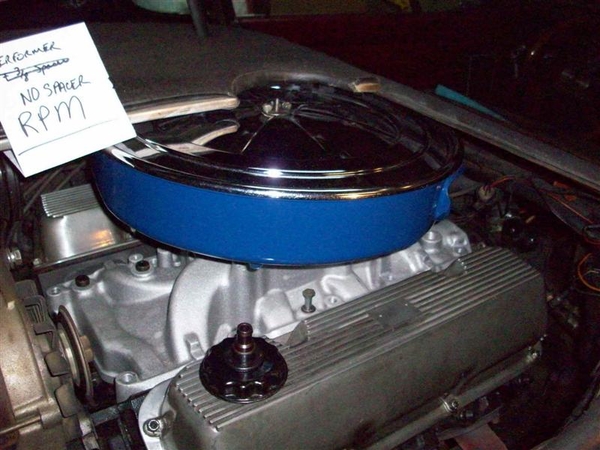
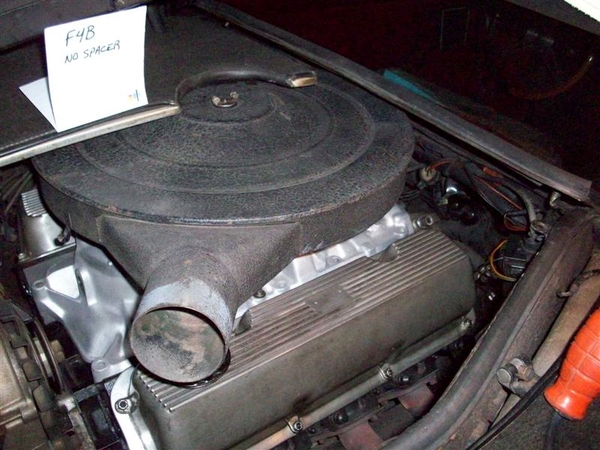
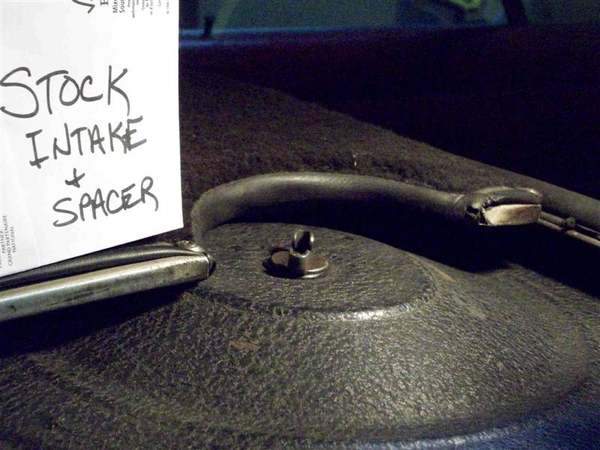
I started on my engine swap last week. Have been working on the new engine for over a year, with other stuff thrown in for fun & distraction...and it has been easier to just turn the key and drive the car....but I want to have it installed for the 40th anniversary of the production Mangusta, and drive it to Reno for the annual POCA convention in June!

Needless to say, the process of taking out the ill fitting and worn out Boss 302, and fitting a new 5.0 based 302 has been a challenge!

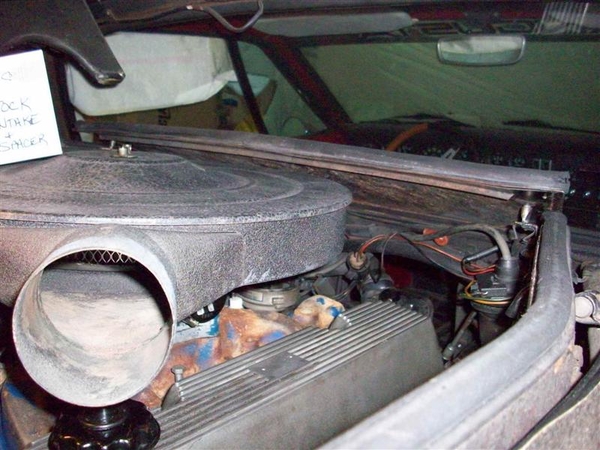
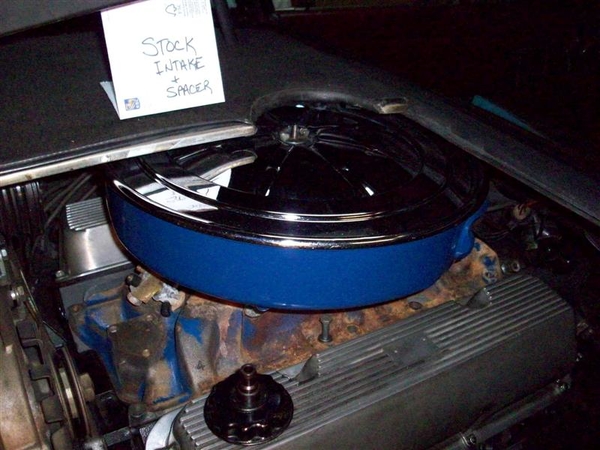
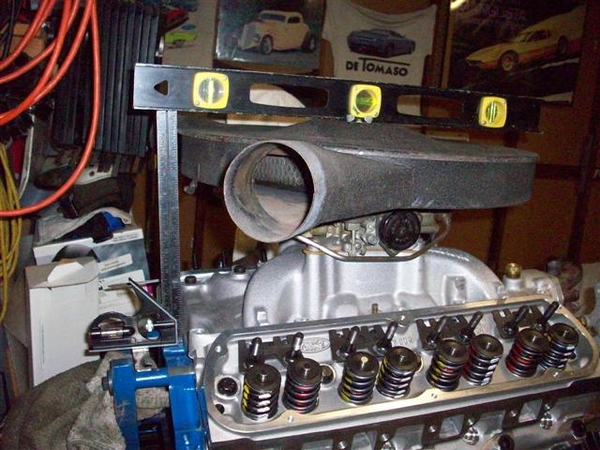
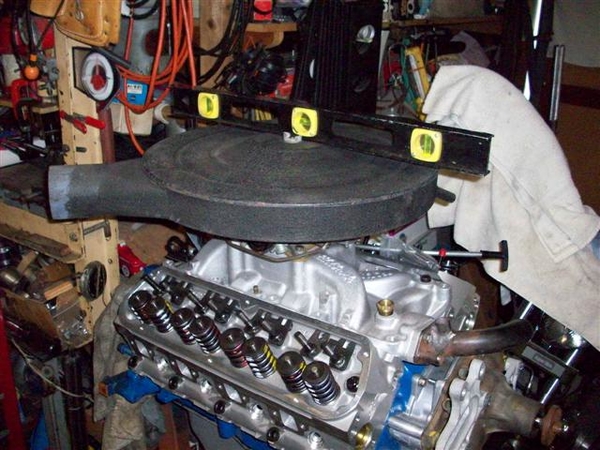
One of my major goals was to fit the stock air cleaner back under the shields, so that I can draw cool air into the engine. I always had cooling issues, exaggerated by Las Vegas temps on every visit, and this last year, found out that I need CLEAN air as well!!! Those of you that watch the DeTomaso Forum know what I speak of.... I also wanted to have the car look a little more stock, since my car came with a lot of the original parts still in tact. Perhaps chromed, but there!

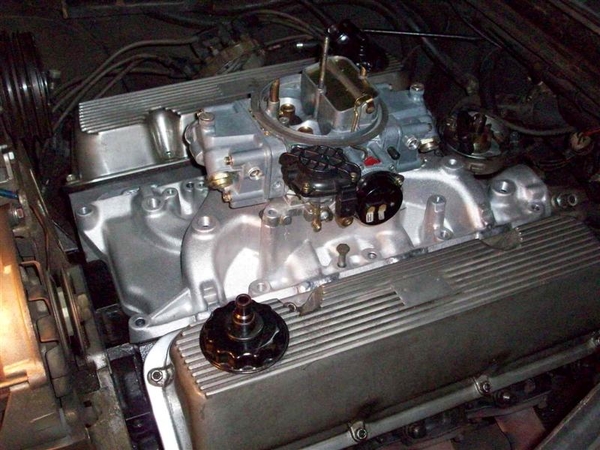
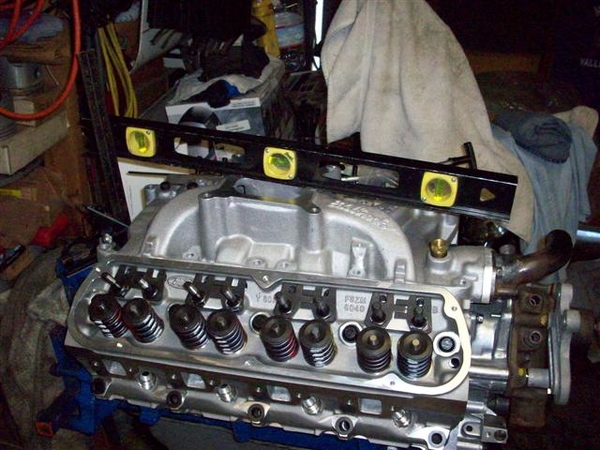
Another goal was to use a 5.0 based roller cam block and use "off the shelf" parts. In this case, aluminum Motorsports Y303 heads, and an Edelbrock RPM intake, Holley carb, and the stock air cleaner.

All of my calculations and measurements on the engine stand were coming up bad. The RPM model was too tall. So, I had an Edelbrock Performer modified to fit the tall port Y303 heads. It turns out to barely NOT clear the hatches according to the calculations as well!!!!

I bummed an old Edelbrock F4B from a friend after an owner up in Reno said, "yah I have an F4B and the stock air cleaner fits just fine! Well, again, my measurements said otherwise....

I was beginning to doubt my abilities to run a Stanley tape measure!!!

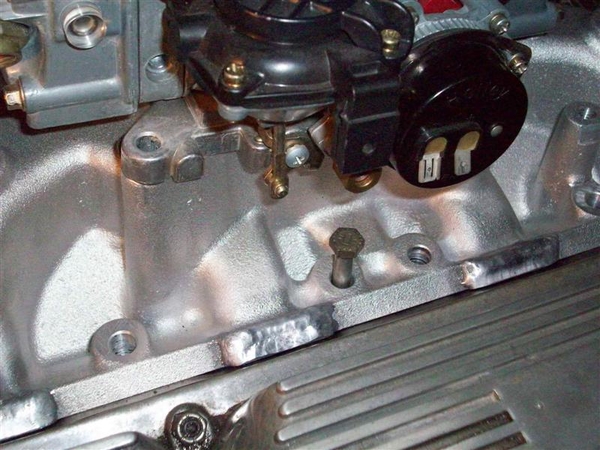
So, I borrowed a C8ZE (stock cast iron) intake and carb spacer from another buddy and figured that this would end all issues.... It didn't. In fact the stock setup was only a matter of thousandths of an inch shorter than the Performer RPM!!!! Something is wrong here.

So, since I was doing this all on the engine stand, and comparing measurements to known similar/same points in the car and it was only serving to frustrate me, I made the decision to begin this odyssey once again.

Last time I did this, it was 2001. That was the first time that I had the car back together, after receiving it in various boxes and loose parts, that I drove the car with any sort of confidence and any sort of distance! It turned out to be quite an adventure including bottoming out the on the bellhousing not 15 miles from the driveway, a speeding ticket 2 miles further up the road and an oil pan repair in Barstow CA on the return trip, but we made it there and home, and have done it every year since then....including more adventures!!! It has been the ONLY Mangusta in Vegas for 7 years! nudge nudge wink wink!

So, please follow along with me as I attempt to document this process in word and picture....as soon as I figure out how to add pictures properly without taking up too much server space!!! (My avatar photo was taken in 2001 as I thrashed to get the car on the road!)

Day 1. Hatch off to begin test fitting manifolds and eventually install new engine.
 
dayone1dayone3

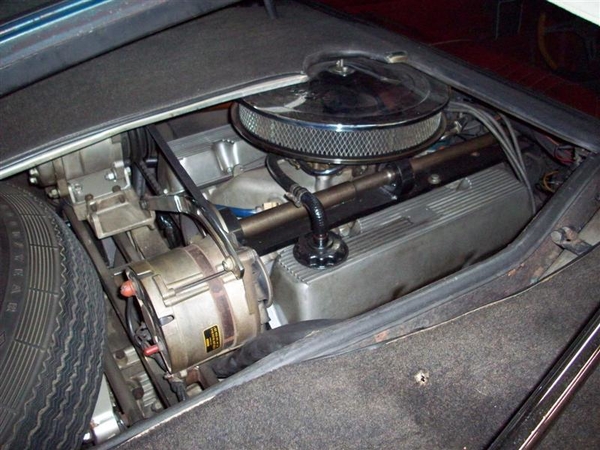
My Boss 302 installation. Note modified hatch cover and missing hatch cover stand. Also how tight the smaller diameter air cleaner is to the hatch. There is actually tension on the air cleaner by the hatch covers. (Aussie 2V heads with Street Boss intake on a Boss 302 bottom end.)


More Later!
Steve

Attachments

Images (2)
  • dayone1
  • dayone3
Last edited by mangusta
Original Post

Replies sorted oldest to newest

Day 2.

I removed parts and pieces so that I can pull the intake and begin test fitting intakes.

First was removing the interior, seats and console to get to the front of the engine to disconnect various bits. I also started draining the cooling system and the oil.

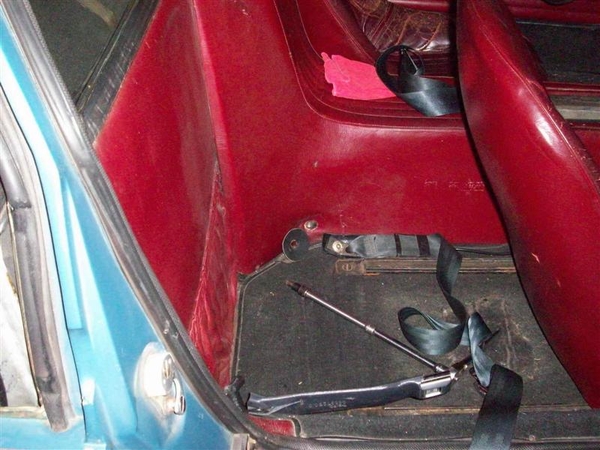
I have installed seat belts from a mid 90's Thunderbird. Rear seats I believe. No shoulder belts. All attaching nuts were already welded to my chassis. I had to cut the holes in the console leather and I did have to shorten the Ford bolts, but the threads were a match! Picture shows bits and pieces with console still in car. I used a piece of leather to cushion the load on the console leather as it had shrunk and pulled away from the fiber glass, to prevent tearing.
 

Here is a shot backed off a bit.
 

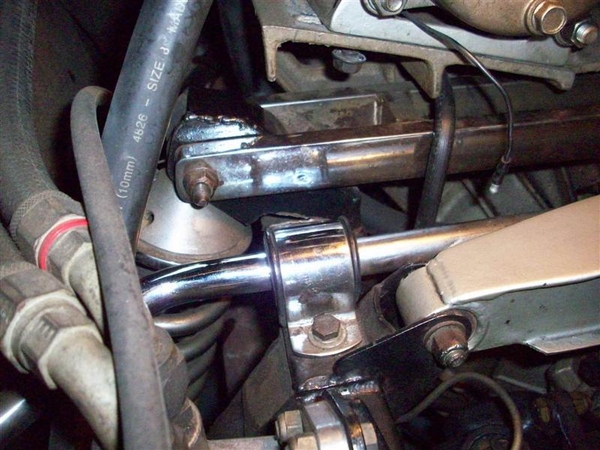
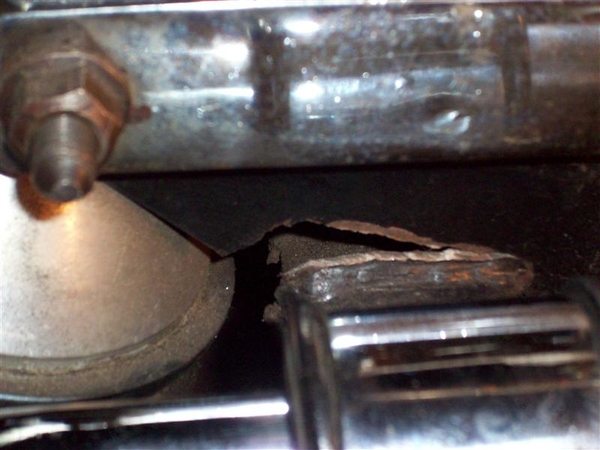
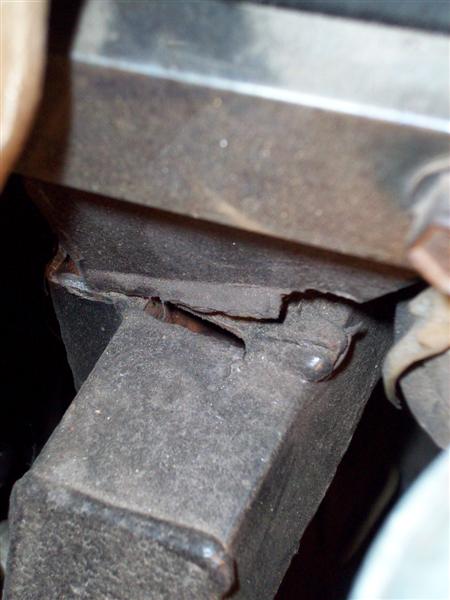
Then things got real crazy when I found this. I had noticed my clutch slave hose was tight on the "ladder bar" that connects the two shock top mounts together...


NOT GOOD!!!


Front side view:
 

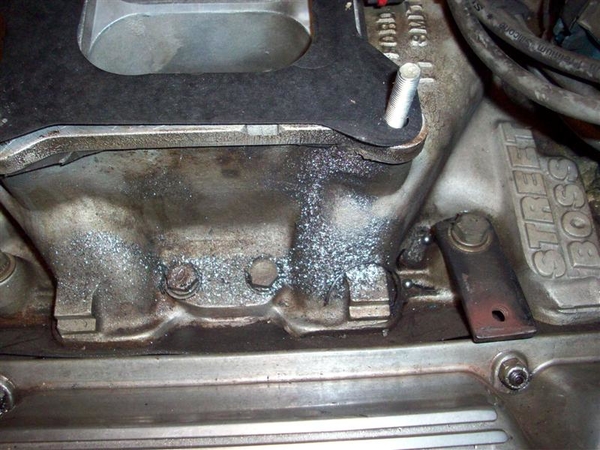
Here is a shot of what is left of my center jackshaft bearing. This went south on my way home from Vegas this year. Since I was planning on replacing this whole mess anyway, and since the other two bearings were fine, I didn't bother rushing to repair anything. This is with the jackshaft bracket was removed....and I found this residue hiding....


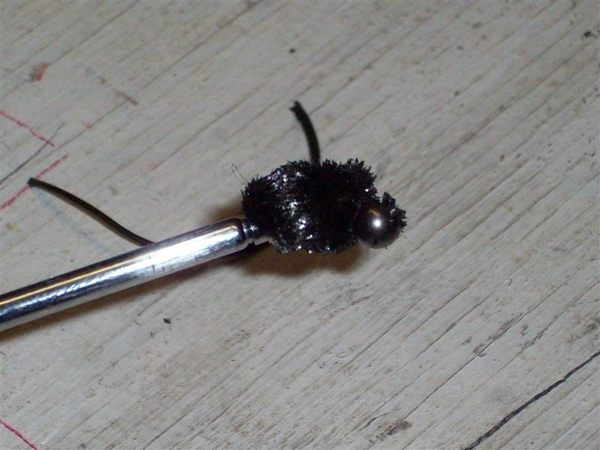
Magnet worked to retrieve the big parts!
 

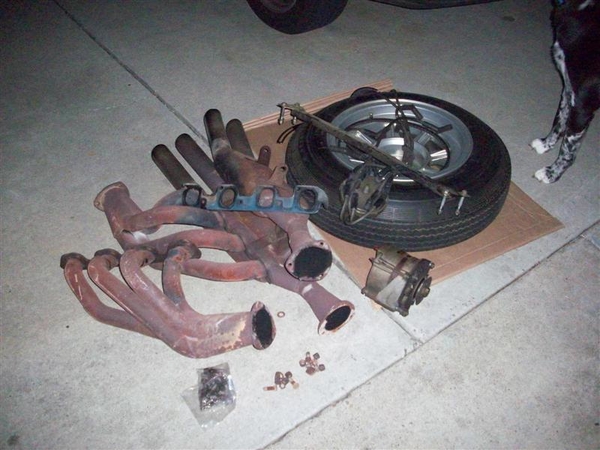
The removed parts pile for the day.


Intake came off after I cleaned up all the metallic bits and blew it off with air and a vacuum to catch some.....

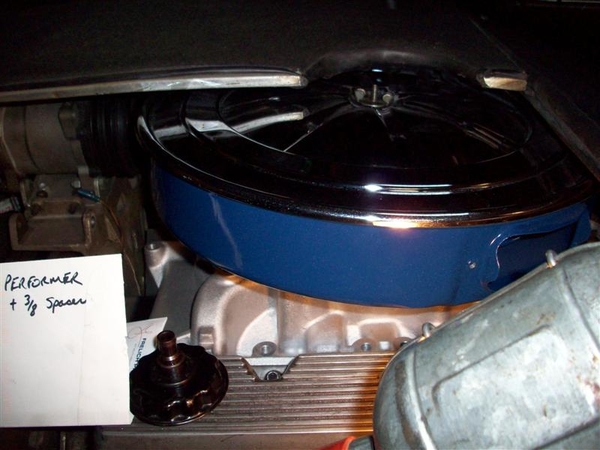
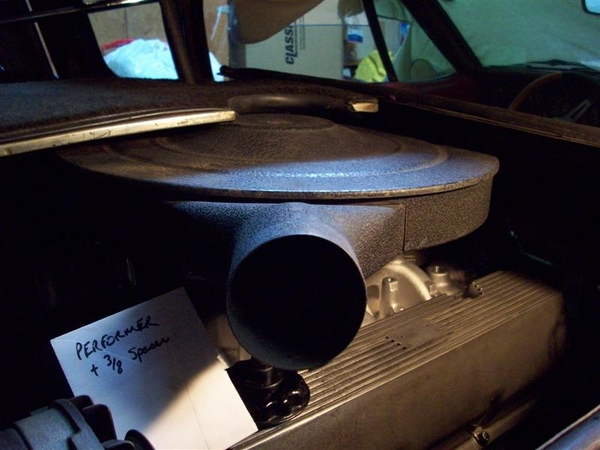
First test, Performer 289 Intake, 3/8" spacer (to help carb clear the jackshaft)and a 428 Ford air cleaner. OK fit! But I'd hate to cut up a $500 air cleaner base to do this!
 

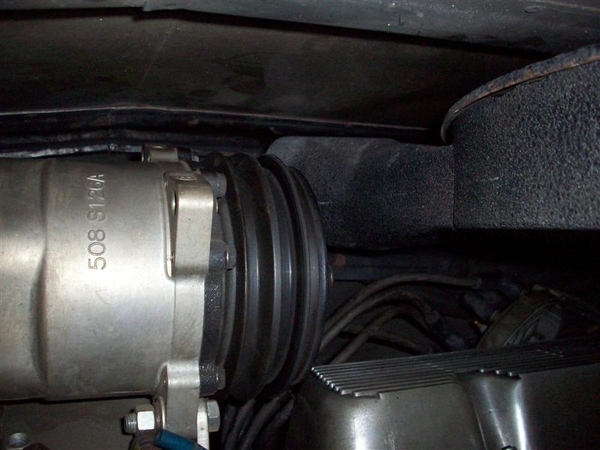
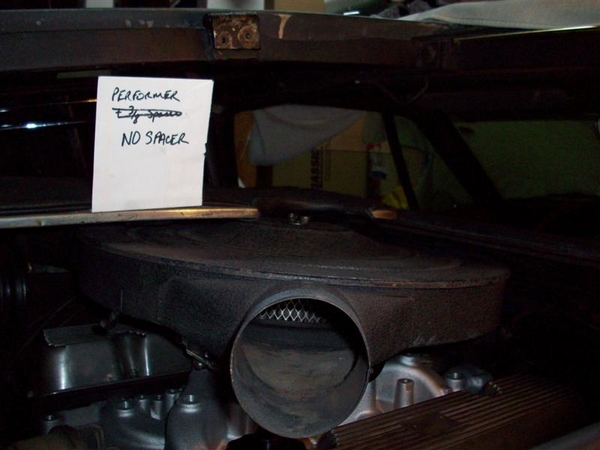
Now the stock air cleaner. Interference at front panel and at rear air tube connections. Removing the spacer resulted in only a slight touching of the front panel. Rear was OK.
 

Here's a shot underneath showing no spacer.
 

Top View
 

Now I switch to the Edelbrock Performer RPM, carb and stock air cleaner. No carb spacer. Note interference at rear of the hole cut in the shield and the gap at the front caused by the air cleaner hitting the front panel. No way a spacer is going to work!
 

I tried the 428 air cleaner just for kicks... slight touching at front, ribs on shield would probably just touch the air cleaner top.
 

Now for the vintage F4B Edelbrock that supposedly fits! No spacer, no way! Note gap at front! Contact at rear of hole.


The 428 air cleaner had some touching at the front and probably at the rear again....

STOCK AIR INTAKE MANIFOLD...this has gotta fit, right???
 
NOPE!

This shot shows how the front panel doesn't fit down....
 

428 air cleaner actually fit well! Note the light you can see in the gaps!
 

OK, enough intake madness!!!

For those of you wondering how I can test regular intakes on a set of Boss 302 type heads, note in this shot that the two center bolt holes are in the same location! This is a shot of the Performer intake with extra metal added onto the top so that they would seal better to the heads! (RPM has this metal cast in place...)


Tomorrow, more discoveries!

Steve

Attachments

Images (22)
  • blobid0
  • blobid1
  • blobid2
  • blobid3
  • blobid4
  • blobid5
  • blobid6
  • blobid7
  • blobid8
  • blobid9
  • blobid10
  • blobid11
  • blobid12
  • blobid13
  • blobid14
  • blobid15
  • blobid16
  • blobid17
  • blobid18
  • blobid19
  • blobid20
  • blobid21
Last edited by mangusta

Day three.

When I sent my original email out to my private Goose mailing list a few days back, regarding jackshaft bearings and my intake issues, Dana Hansen of Mangusta International fame answered back saying that his engine was out currently and that he could measure anything I needed...

So, I took him up on it. I measured from the top surface of my engine compartment to the top of the frame rails (at rear of engine/bellhousing parting point) . I also measured the height of the frame rails <2">, and the height from the bottom of the lower frame rail to the top of the engine mount bracket , typed it all up and mailed it off to Dana.

A matter of minutes later, (while I was removing a scad of other stuff to be listed later...) I got a note back from him with a picture full of blue masking tape and black numbers and arrows! Imagine my surprise when I noted that his dimension for the engine mount bracket was only 5"!!!!

Here is a view of the right hand mount, outside of the fame rail. Note the extra seams!!! Frankenmounts!!!
 

Left mount, again outside of frame rail.
 

At last!! I finally know what my problem is! The previous owners had to raise the Boss 302 to get the exhaust ports raised above the frame rails.... It was either raise the motor or lower the frame rails..... I guess raising the mounts was easier!

Some more shots dinking around....trying to fit my NEW jackshaft bracket and idler pulley bracket to the motor with a stock intake, to get a baseline to determine how far off a different intake would put stuff....


View of new bracket on engine. Note that the rear bearing is now a 52mm diameter where all earlier versions were 47mm!!! (I was able to find bearings easily to fit!)
 

Mismatch of idler bracket to front of J/S bracket. I will need to do some work on this...machining rear mounts of idler bracket and perhaps welding up the holes and redrilling in proper location.
 

Spot facing of J/S bracket may be needed too. This is not a "snap together" project!
 

Enuf for now!
Steve

Attachments

Images (5)
  • blobid0
  • blobid1
  • blobid2
  • blobid3
  • blobid4
Last edited by mangusta

Day three and a half/four!

Here is a list of stuff that I worked on disconnecting etc on day three and into day four.

Jackshaft is already out, rh idler bracket, as is intake.

Water pump pulley
All belts
Coolant overflow tank
Heater hoses
Alternator
AC compressor mounts
Oil Temp sensor wire
Oil Pressure sensor wire
Fuel line
Oil lines (remote filter) and filter adapter
Starter wire and bolts (starter is held captive by pan and frame rails! Don't drop it!)
Bellhousing lower shield bolts (3)
Header bolts, and mufflers
Clutch slave cylinder
Speedo Cable
Shifter linkage roll pin

Loosened bellhousing bolts
Shock upper mount bolts
ZF crossmember bolts
Axle flange bolts (removed two each, left two in case I move the car, don't want axles flopping....)

Disconnect any coil or distributor wires, temp sensor wires. Throttle linkage.

Have ZF bolts to loosen yet, to bellhousing. Will do these just before removing ZF. I don't try to pull the whole thing out as one assembly.

Here are some shots of an intake manifold that would fit just fine!!! Don't think I'm not thinking about it!!!!
 

This is a modern "GT40" tubular intake for fuel injection. Jackshaft bracket would require modification to clear injectors...and I'm not quite ready to cut up my brand spanking new one just yet!!!
 

Plenty of clearance!
 

But, I need to find a place to hide the computer and wiring, add a high pressure pump and return lines...PLUS troubleshoot the whole danged thing.....before June....

Here is a shot of my current oil pan... that will be dropping down at the front by over 1.5".....note the bracket for the brake proportioning valve sticking down....it has lost some material on my driveway....!!! Oil pan will now be lower! ANGLED entry and exit from the driveway! No head-on moves!!!!


I guess I could shorten the pan....I believe it is a 9qt (with remote filter) capacity, and is fully baffled. If it were to be cut back to 7qts that wouldn't be a large deal I don't think...but perhaps taking a half inch to 3/4 inch out may be in order....


I also found this pic of the Right Hand mount, but picture from the inside of the frame rail. Note my 57 Chevy rubber biscuit, the Frankenmount welds, and the top of the brake proportioning valve.


Maybe I can come up with a stepped mount such that when I decide to put in the GT40 EFI manifold, I can easily raise the engine back up in the front?????

To date, she sits waiting for time to part the ZF and engine. Maybe Thurs eve....or the weekend... Did some calling and ordered jackshaft bearings from a local bearing house. Ordered spares.....for the traveling tool box.

Ciao!
Steve

Attachments

Images (7)
  • blobid0
  • blobid1
  • blobid2
  • blobid3
  • blobid4
  • blobid5
  • blobid6
Last edited by mangusta

Day Five/Six ish.

OK, finally got back into it this weekend. Took the ZF out, bellhousing/clutch, and eventually the motor. Took some engine compartment shots for "reference" to help me with what it looked like when it was still working......

NOTE: If you haven't recently checked the torque on your bolts that hold the axle shafts to the flanges, do it! Mine were replaced with new bolts/nuts about 20K miles ago, and I found a couple that were starting to loosen a tad. I will add this task to my "oil change" list....stuff to do to the car when you change the oil.....

Getting the engine out was interesting, since I had to remove the trans cross member and the ladder bar and due to my cracked shock mount, made that task all the more interesting, as any pressure in the form of weight on the LH wheel made the crack want to go BIGGER!

So, the LH frame rail found a jackstand holding it up....while the engine hoist went in over the RH tire on a diagonal course. The boom arm was not long enuf to come straight in from the rear.

Once the engine was out, I put a jackstand on the RH side of the frame too, but left the wheels on with blocks underneath....we are in earthquake country after all.

Trucked the LH hatch and spine down to the mini-storage for safe keeping while I clean up the chassis and ready the engine for installation. Cleaned up the ZF, bellhousing, and all the rest of the greasy parts that came out. Better to do it now....next time I touch them, they'll be clean! That ZF is one heavy piece of aluminum.....!

Good things: Clutch wear on the kevlar/kevlar disc looks fantastic! Wear on flywheel and pressure plate is non-existent! (No pic yet!).

I did think that I made a mistake in my pilot bearing though, by putting some grease in the hole before putting the trans in. This is a no-no, as grease will clog the holes in the sintered bronze and prevent oiling.... Oil is OK, but grease is not! Polished the ZF input shaft up with ultra fine wet/dry paper and parts cleaner solution. Looks great! May need a new pilot bushing....

OK, here are some pic's of the efforts.

Mismatch in the ZF cross member area, RH side. Tension on the frame.
 

I had to rig a tie-down strap to release some of the pressure, in order to get the bolt out...
 

Missing the pic's but basically used the engine hoist to lift the ZF while maneuvering it out. Sort of a counter clockwise rotation of it worked, until it could be lowered out the opening just aft of the axles. The top ears fit thru the tailpipe slot in the rear valance area, so I didn't need to lift the car up any further.
 

Here is what is left......
 

What I found when I pulled the bellhousing off, and the pressure plate. Guess I will be using some different lock washers.......
 

The discard pile for the day!
 

Out comes the engine. One less stressed mechanic when the engine got this far... Getting the hoist in there is a puzzle of sorts....and easy does it moving it up and out...over the charged AC line!
 

That was it....plus cleaning up greasy parts. Loaded the engine onto my trusty shopping cart just for moving such things and moved it out on the side of the garage for storage, and eventual stripping of Goose bits from it, pulleys, idlers, pilot bushing adapter, and oil pan.

Steve

Attachments

Images (7)
  • blobid0
  • blobid1
  • blobid2
  • blobid3
  • blobid4
  • blobid5
  • blobid6
Last edited by mangusta
Steve,

I'm sure there are a bunch of us who are following your project with great interest. I too REALLY appreciate you putting all this work into posting your progress for the benefit of the rest of us. I really wish I was closer so I could come over and scrape some knuckles while learning first-hand. Many thanks and good luck!

Mark

Day 7.
Thanks guys!!!

I had forgotten how much fun it is to climb in and out of a Mangusta chassis.... Now that the hatches are off, it is the only way to do things, if you don't want to lay on your back and work, although some of that is required too whether you want or not! Kicked one blade of my AC condensor fan with my timberline and sent half of it flying.....ugh. Put it on the list...

Was going to start washing down the frame rails with solvent tonite, but it got to late to be stinking up the place....so settled for popping off the motor mount brackets (the 57 Chevy fix..) and the LH shock and wheel so that I can get at stuff. Also pulled the axle shafts for cleaning and inspection again.

Motor mount brackets: When you drill and tap 1/2" steel for threads, be sure to used anti-seize or something on the threads. If you don't, PB Blaster (or similar) is your friend!

Axle shafts: Said this before, if you haven't checked your nuts for proper tightness.......do it! Found a couple that were....not exactly tight. May have one u-joint going south, saw just a little play in a cup. Need to check clocking on shaft too. Was 90 degrees out, which I think is ok. Run them at 90 or 180 out, but not anything in between....

Shocks: Pleased to report that the QA1 shocks and springs I used out back are holding up nicely. They have a nice thin coating of road dirt and engine oil/gas film on them that has yellowed the finish a tad....a nice patina! I've told others that I am not a fan of chrome on springs. Great on a hot rod where they are out in the open and you can get to them....not so much on a street car where they are buried. The powdercoated silver is a better surface. It won't rust. Not sure how much chrome polish I want to invest here..... Have cracks to weld!! One good thing is that the ball ends on these shocks seem to be holding up well! Upper on the one shock I removed is just a tad loose, bottom one still feels tight. (Non-lube versions. I think I have 17-18K on them.

Will hope to clean these parts up real quick Tues and take some pictures! Start washing down the grime, and get ready to strip some paint near the cracked area.

Here is something I need feedback on. Not sure if this is a factory modification or an owner mod. Here are pictures of the ladder bar (upper shock mount frame brace/spreader for lack of better description!) and the RH upper mount from car #1134, also getting an engine-dectomy at this time.

 
Note that it has 4 thru holes for bolts. On mine, you will find only two mounting holes. (See two pics up into days 5/6 to see mine.) Note the inboard holes on the one above, and the absense in my bracket. They correspond with the extra "tube" welded on to the top of the mount as seen in this pic.


Compare this pic above to the 3rd pic of mine, in day 2 way back up top!

I'm gonna guess that all four holes in the ladder bar are not just thru holes, but have inserts welded into them for support. Then it was chromed, similar to mine, but not from the factory. My car is #878 (March-April 69 build-window dates) so did the factory have problems with cracking mounts in late 69??? I do know that much later cars had yet different upper shock mounts that tied into the rear sheetmetal.... Have an old photo somewhere of a Goose that showed up my first year in Vegas. I think it was #1254 or so, and this area of the chassis was markedly different in design!

How many of you have a four bolt ladder design or something different??? Would be nice to know! Perhaps there is a fix or mod that more of us can use?

Attachments

Images (2)
  • blobid0
  • blobid1
Last edited by mangusta
Mark,
Fantastic! Just what I was looking for! Your car was built 10 cars before 1134, so your pic' proves the extra inner 3rd and 4th bolts thing was done at the factory! What 1134 is missing, is the wings that go from the top of the shock bracket up to the frame! (This is what I saw on the car in Vegas, #1254ish) I can just see the "punched" holes that lighten and strengthen it, but what does it weld to on the side of the engine compartment!??? What is odd, is a modification that occurred later.....or #1134 passed #1114 on the assembly line.....

Your jackshaft pulley is an odd one like none I've seen before! As is the valve cover bolt arrangement....That's a unique setup I thought reserved to exhaust pipe bolts on Harleys, so that you don't strip out the cast iron.... Not a problem typically with VC bolts on Fords!

Looks like you've got a good solid car to play with!!
Thanks for the shot! Take one of the top of this bracket, where it attaches to the chassis/engine compartment, perhaps it can be duplicated!

Steve
Steve- pull the top cover of the ZF off and check for the presence of safety wire. 8MA-0760 had the ring gear wired with .060 thick wire- maybe from the Factory? I always use .032 ss; .060 wire is good for ships and locomotives....
If you don't do this and you ever have ring gear trouble, I will say "I TOLD YOU SO" several times a week for years to come!
Steve,

Is this any better? The car is in my shop under cover and I only have the photos I took before I put her away in the fall. I can snap a bunch more and take whatever dimensions you'd like, but you'll need to guide me like the blind to get the right details.

Mark

Attachments

Images (1)
  • IMG_1019

Mark,

First let me say that no, I was hoping to see the top of that piece with the hole punched in it, top left in your last pic! To see how it attaches to the body and provides any support for the shock and frame, to keep it from flexing.

Secondly, that is one god awful job of welding on the bottom of that piece, where it joins the shock mount!!! (look just above the top of the shock) I hope it is grease and not welding!

Third, check out the top of the shock mount where it meets that welded piece. Is that a crack going horizontally about an inch??????? You need to check that out!

Day Eight.

Not much major today. Received two samples of window channel weatherstripping, #21 and #22 from JC Whitney to try out. They are not a good fit IMO, so am going to ask for a sample of #24. It is the last hope of what they offer, to work. The #24 is 1/2" wide but the channel is .650" wide, yet the wider stuff was too tall and stuck out of the channel too much.... IT is also a little shorter, so I hope that it will work out. Worst case, some adhesive should hold it in place nicely. Their listed dimensions are more like estimates.... or suggestions! We'll see....

I cleaned up the parts that I removed yesterday and tweeked on the half shafts since I found one of them clocked out 90. BossWrench confirmed that they should be in phase with each other and NOT 90 degrees out.

So, I took them apart and cleaned everything up real nice, then realized that I need new cork seals in them. Anyone??

Here are the bits I removed yesterday. This is after a bath in parts solvent. Got the greasy stuff off, but left a fine yellow tint...of burned dino oil....? I'm not going to get into polishing stuff to a bright sheen only to have it garpy the first puddle I hit, or the first long drive behind a bunch of Panteras....oozing unburned hydrocarbons all over the place... Smiler

Clean is good. It will match the rest of the car better! I just want to be able to tell when something is leaking or amiss easily without wondering if it was from last years disaster..or the year before...or...!

The shock is a Carerra (Now QA1) chrome economy model, fixed 60/40 valving with 400# spring. (I would do a painted shock body and silver powder coated springs in the future, paint the shock green to sorta mimmick the original deCarbon....
Motor mounts are 57 Chevy rubber biscuits with a thru bolt and a custom "non-rotating" overkillmaximus nut thingy.... I may shave some weight and substitute a washer and a nylock here.... Smiler

On the half shafts, notice where the one on the right does not have both center shaft u-joint cups facing up at you like the LH one does!


NOTE: I now have PROPER MANGUSTA replacement motor mounts available for your cars!!! I did not show them at the time I was doing this portion of the swap... they might show up towards the end of this thread!! So what you are seeing here is simply historical stuff from my car! If not, I have them posted over in the For Sale section of this site. Steve

Here is a shot of the motor insulator affair. It is a design that came with the car and I simply carried it forward since it was working. Once I lower my frame mount brackets, I can afford to use the correct style mounts that were located recently by another Gooser. If I need more clearance still, I can put something like these back in easily.


Closeup of my maximusantirotating nut thingy.... big chunk-o-steel shaped to fit the recess of the aluminum mount, drilled and threaded! It works. I didn't realize that you can't pull the motor out with these mounts affixed to the motor. You need to install these first to the frame, then you can drop the engine down on top of them. My idea was that with these things, you could swap the biscuits without much effort! Good thinking, but not needed!
 

Here is an exploded half shaft. Made by Spicer Hardy. Pretty simple. I marked the u-joint cups with a grease pencil so that I could get them back together the same orientation. Threaded round cover on the RH side has a tin retainer and a cork seal. Loosening this threaded cover allows you to slide the two pieces apart.


Here is a closeup of the cork gaskets. Gonna see if I can find them locally tomorrow or Thurs at Motion Industries.
(3-18-09 OK, MI doesn't carry these Spicer Parts. The cork seal part number is #3-16-53. Now to find a dealer that will sell a small qty! (2))

The bent tin piece (washer is what they call it) is actually deformed from taking it off of the shaft. It is soft metal and forms back in shape easily. The ends of the cork piece are actually tapered so that they nest in each other once installed! Nice detail! One of the threaded caps was not going on very far, and the threads are very fine. I show my "thread file" (#1) that is an extremely handy tool! Seems that these threads are a standard thread and are a 24 per inch type! Lo and behold, the thread file had a #24 section on it, so I sat and cleaned and reshaped threads until I could get the cap threaded on far enough so that it would compress the cork ever so slightly. There was paint in the threads and a couple of tiny dings. These files serve to realign material and will not remove much at all if you take your time and get the "feel" of when you are in the groove....and not cutting new threads!! Smiler


Took these pics, and then gave the rear of my chassis a towel bath with a solvent soaked wash rag, and a clean light colored towel. Clean with the rag, and then polish with the light color rag! IF you get dirt, you missed..... re-solvent, re-towel.... At least next time, I can climb into the rear with a solvent pan and I can wash down the rear lower (greasy!) cross member and the front frame rails, without getting all full of crap! Maybe a little, but not a grimy disaster! Work clean weedhopper!

Steve

Attachments

Images (6)
  • blobid0
  • blobid1
  • blobid2
  • blobid3
  • blobid4
  • blobid5
Last edited by mangusta
quote:
Originally posted by Mangusta:
I was hoping to see the top of that piece with the hole punched in it, top left in your last pic! To see how it attaches to the body and provides any support for the shock and frame, to keep it from flexing.

Secondly, that is one god awful job of welding on the bottom of that piece, where it joins the shock mount!!! (look just above the top of the shock) I hope it is grease and not welding!

Third, check out the top of the shock mount where it meets that welded piece. Is that a crack going horizontally about an inch??????? You need to check that out!

Steve,

Thanks for the concern, but that "crack" is an optical illusion because of the angle of the photo. Here are a few pics of the bracket. And, yes, that is one of the fugliest welds I've ever seen. I'm pretty sure that even I could have done a better job on those. Check out the "secure" method of attaching that bracket to the frame! At least it LOOKS cleaner than those welds.

Keep up the great posts!

Mark

Attachments

Images (1)
  • IMG_4589
Mark,

Great shots! Those pieces really don't look like they'd do all that much, but perhaps it is "just enuf"....

OK, played dig in the Spicer website (www.dana.com) to try and find out info on the cork seals and the half shafts in general. Actually they are "drive shafts" just short...

Cork seal has a number: #3-16-53

Shaft pieces have numbers too!
Slip Yoke assy:3-3-118KX
Dust cap and washer (and cork) kit: #D3A
Yoke assy: 3-82-268X

These numbers do not include the parts that bolt to the hub axles, or the ZF.

U-joints remain to be found yet!

Will update this when I find a dealer that will sell small parts in case you find one that is wanged out of shape, or need cork seals too!

3-19-09 UPDATE. OK, it appears that Dana Spicer is the only remaining portion of this perhaps otherwise British company, here in the US, and has entered bankruptcy! The company that bought them up, is not selling much of the products and it was uncertain how much will be available in the future according to the person I spoke with at a local driveline shop!

Bad news....good news..... the cork seal listed above is not commonly available here or in Australia, the only other continent that seemed to be offering Hardy Spicer/Dana parts.... What IS available is called a "Dust Cap Assembly" #D3A and IS available locally. Check a DANA Spicer driveline shop near you! What the #D3A "cap assy" consists of, is a new threaded cap, the metal washer, AND the cork seal! Aprox $12-14 each. I ordered a pair from a biz by the name of Driveline Service in Pittsburgh, CA. We'll see how they come out!

On other good news bad news....my bearings that I ordered for the jackshaft are in....but it would appear that an opportunistic employee of the bearing company "may" have hijacked my credit card number and a few others.... authorities are now investigating..... made for a crazy few days of phone calls and no credit card with which to buy more parts! Frowner (Credit card co. actually flagged the bogus transactions and shut my card down almost immediately! Smiler )

Steve
Last edited by mangusta
quote:
this is the best thread on the board right now ...

Keep those pix coming! I totally appreciate it when pix are included with posts ... I learn a ton more!

Agreed! And if you don't have one of those thread files Steve mentioned, get one! I have one and I can't tell you how many times it's saved my derriere! Just need to get a metric thread file now.

Attachments

Images (1)
  • thread_files2
A great BIG box arrived today..... with my new mufflers inside!!!! You and I will have to wait to see them.... Frowner I am heading out of town for the next few days and won't be Goosing.... I will be preparing a beautiful 1969 Torino Talladega for sale, as well as a few other odd cars, like an original 1962 V8 Comet station wagon, an SVO Mustang, a Turbo T-Bird, plus a few more... and a BD-5 airplane kit! All remarkably rust free examples! And a host of spare 427/428/429 parts.... Helping a friend that has decided it is time to liquidate his collection but he is physically unable to manage it himself, so a friend and I are undertaking this crazy task!!! Hope it doesn't rain too much!!!

Ciao!
Steve
Hey Steve, I know you are familiar with the Boss 302 here is a pic to prepare you for that big block 429. Here is a '70 429 CJ and a '71 429 CJ 4 bolt main. Tons of torque all day long. Drop me a PM if you need parts for that 429.... Too bad they are too big for a Cat or Goose Frowner
Denis

Attachments

Images (1)
  • RB1_262s
Last edited by denisc
Denis,

Now that's some serious heavy metal! Still has the expensive smog stuff on the 70 and the original Holley on the 71!!!! Nice pieces! In your garage???

This guy had a Boss 429 Mustang, so who knows what we'll dig up. I know there are two blocks in the corner, but I suspect that they are garden variety 1969/70 Lincoln versions... But I did see some Nascar parts....

They'll fit in anything! Just a matter of how much welding you want to do!!! Smiler

Steve

OK, back in the garage, long weekend helping an old friend out, getting ready to liquidate his collection of stuff... Anyone for a 69 Talladega?

These were waiting for me when I got home. New seals for my half shafts!
 

About $13 each.

Here was something that I wanted to display as well...FYI thing.... This is a fuel filter that I carried as a spare in the tool box in my Goose. Installed it in my son's 68 Cougar a few months ago....and recently started having problems with sticking float needle assys and flooding out.... One day I was working on it and pulled it off to see what was in it, in terms of what would fall out of it....well, I heard something rattling around in it!!! Figured that was not right, so replaced it with an original Ford part, similar, only much smaller in diameter. Last week, got bored and wanted to see what was inside..... Glue had separated and filter was rattling around loose, letting crap float past the filter! No spring to hold this one in place!!! CRAP filters!!!! Beware next time you buy..... I won't be doing this again!


Here is what I installed back into the Cougar. (FG-44A Gasoline Filters. They cross to Ford D3FZ-9155A, Fram G3515, and Puro GF24.)


Will be doing something similar with the Goose too!

Steve

Attachments

Images (3)
  • blobid0
  • blobid1
  • blobid2
Last edited by mangusta

Days 9/10

Clean, clean, and clean. I know I just did this 20,000 miles ago.....but it needed to be done....oil seepage, blown header gaskets, blown header pipes(!), and just plain road grime....

Found one of my lower a-arm Uni-bal booties will need replacing again. One was getting hard and had cracked, other one was soft and supple, yet I replaced them at the same time! Go figure.... That is a job that doesn't need to be done now, and can be done easily with the car up in the air and one bolt..... I hope!

So I cleaned off the frame as best I could with some solvent based cleaner. Here is the after shot.


It will need some paint on the top rails where the headers were REALLY close. I do need to lower the frame mounts back to stock, but it is good to know that they can be lifted too!

Here are two shots of the cracked shock mount after I got the sway bar and everything else out of the way. Looks a bit worse than first expected. It actually started tearing the metal that would be directly under the sway bar mount!

Rear view looking forward:
 

Front view looking backwards:
 

Recommendations to date have consisted of removing the old brackets, replacing the top section of the frame with some 1/8" stock and then welding it all back up again....

After looking at the different thicknesses of the steel, this would seem logical. .125" is only a few thousandths thicker than the original steel used.

Steve

Attachments

Images (3)
  • blobid0
  • blobid1
  • blobid2
Last edited by mangusta

Day 11
When things get worser....should be the title, or perhaps day 13.....or I stopped cutting because I ran out of Dremel wheels!!!

....actually I didn't run out of Dremel wheels, but my balloon got seriously deflated by what I discovered tonite!

I cut off the LH upper shock mount and part of the piece that the sway bar attaches to, in order to expose the top piece of the boxed frame rail, thinking that this was the extent of my problem. Wrongo! Once I got the piece out of the way, I discovered that the crack extended all the way down the outside of the frame rail, and wrapped around underneath! It hadn't gone 360 degrees around, but it was well on it's way to 270!

I used a variable speed Dremel with 1" cut off wheels. I started with a 1/16" wheel and when I got thru the steel in some spots a thinner wheel (.035" or so) worked to get at the welds that were deeper inside the outer cut. It allowed also for some movement of the Dremel....or unsteady hands....before the wheel shattered....! I only used a hacksaw on the last cut across the sway bar mount, as I couldn't get in there real good with the Dremel, and it was a straight cut...

In the following picture, the stainless rule is sticking in the crack as it heads down the outer side....
 
Note the lack of a drain hole in this area. I would have thought that a hole or notch at the bottom of the shock mount would have been in order, similar to what was done for the engine frame mounts. At this point, that wouldn't sacrifice any strength.

Here are the pieces that I cut off today....sorta feel like Jeff Goldblum in "The Fly" with this collection of parts....! Check out the piece that I removed from the sway bar mount. I thought perhaps it was a solid piece welded on to the top of the frame rail...nope! Piece of boxed or bent steel, with two nuts welded on underneath!!!
 

Time to consult some experts in the club and see if a chassis shop is in order....or just more cutting and more welding.....!

Next, take measurements and pictures of where things go...then grind some of the excess weld material down a bit to facilitate fabbing new parts. All of the mounts are made from flat pieces welded together! No shaped box tubing here!

After that, I'll tackle shortening the engine frame mounts back to stock height. I was thinking about it today, and if you wanted to lift your motor quickly, why not put spacers in your engine mounts where they attach to the block? Use longer bolts, and 1.25" round spacers and you would have plenty of support...make them as thick as you need. Would negate the need to doink around with raising the frame mounts! Am I missing something here...could it be that simple? (MIne was raised 1-9/16"....which is a LOT, but if you wanted to come up 1/2" or so, I think it would be fine.....)

Ciao!
Steve

Attachments

Images (2)
  • blobid0
  • blobid1
Last edited by mangusta

Day something or other.....13-14...all running together, with little progress, BUT, forward intentions!

Car is scheduled to head to a frame shop this weekend. Owner also has a Goose! So should be interesting to see if we get any work done between BS storms!!!

Have spent the last couple of weeks sort of agonizing how I was gonna get my "three wheeler" onto a trailer, as since I cut off the top shock mount, there would be no way to anchor the top of the suspension to limit travel! Ooops! It just fell on the ground...!

Earlier this week, late one nite while looking at it, it struck me! A crutch is needed! AND, I have all the convenient places for which to mount it! I was gonna build a cradle or some elaborate 4th wheel of sorts....glad I didn't get that far!


I found some old scrap 1" square tubing out back (OLD mainframe computer chassis!) that I drilled, cut, welded and drilled some more to fit. It mounts in the lower a-arm where the sway bar end link would fit, and anchors on the top frame rail, where previous owners mounted a remote oil filter. How convenient and nice of them! (NB: I need to move that damned mount....all it does is drop oil all over my exhaust system when I change oil.....!)

I test checked what I figured would be the top a-arm angle when loaded and sorta went with it, using the RH side as a pattern. No engine or trans so should be fine to just get it onto a trailer and off a couple of times, even if my design is off a tad!!!

I also started removing "stuff" in order that the frame shop will have less crap to deal with. One thing that I liked about mod's the PM's did, was this shield on the wheel opening area!
Here is the LH side without:
 

You can see all the way to China!!! Contrast that to the RH side with the shield still in place.
 

These are pretty nice! They work really good at trapping crap (and probably heat) in the engine compartment....I can only hope that they have worked as well to keep an equal or greater amount of crap OUT of the engine compartment!

Here is a shot of the LH shield removed. It is fairly thick rubber mat of shorts. A good 1/8 to almost 1/4" thick piece, nicely trimmed to fit around rotating and upin' and down'in things!


So my list of stuff to do before Sat morning is slowly shrinking. Had to write an auction for my friends 69 Talladega sale tonight. That was tense!

List looks like this:
Drain rear brake system (Clutch is done)
Loosen rear brake line to caliper (for easy removal of LH rear suspension as a unit if needed).
Drain Gas Tank- gonna be weldin' goin' on!

Remove vacume line from lower left frame rail. (Don't want it to get bent or damaged)
Remove LR brake caliper...may do this before it leaves instead of just loosening connections.
(Already loosened upper/lower a-arm and trailing arm connections)
(Took off apron)

Call about trailer for Thurs or Friday pickup!

Remove carpets off of wheel well arches!? Will be towing with no rear hatches, don't really want them to beat themselves to death in the wind! May bungee them down....

Remove AC pump? If I can find suitable fittings to cap the system, I'll just remove the AC pump. System has lost it's charge but remains "mostly" air tight....just don't want system to be open to atmosphere.

Put wheel back on and remove jackstands put car back on floor!
Hide all the crap stored on top of the car, somewhere else in the garage!!! UGH!

Ciao!
Steve

Attachments

Images (4)
  • blobid0
  • blobid1
  • blobid2
  • blobid3
Last edited by mangusta

Well, the car is at the frame shop, getting it's butt shored up!!! Here's are shots of the car loaded and ready for transport! Car looks fast and sexy still!!! It was fun watching the Corvette drivers do the neck-whiplash moves to see "what was on the trailer!?" while in transit!


Had to brace up the frame so that it didn't "bounce" on the brace and bust something else!!! You can see a different view of my temporary brace!
 

The chassis expert immediately recognized that my rear mounts had also been raised slightly, as the welding "looked like MIG". Comparing shots of his Goose, I could see what he meant!

Now, I'm having the extensions removed on my frame mounts but that doesn't mean that I won't want to raise it back up a tad if I have the room!!! So, I intend on leaving the rear bolt holes where they are, above the tops of the frame rails. If you go way back in this post and look at some of the reinforced mounts for the ladder bar and top shock, you will see where these same bolt holes are in about the same position as mine are now. The earlier versions have these holes below the tops of the chassis rails..... Raised the trans bellhousing close to an inch! Any more clearance on a bellhousing to tarmack is a good thing in my mind!!! Hope to go retrieve the car this weekend!

Ciao!
Steve

Attachments

Images (3)
  • blobid0
  • blobid1
  • blobid2
Last edited by mangusta

Day 15 or 16 or maybe it's 25.....

Good news is that the car is back from the chassis/frame shop! Took it to a place just about 20 minutes east of Sacramento. Owner/fabricator was SUPER interested in looking and working on the car! We talked a LOT about ways to make this a stronger car in some areas...and he came up with some good ideas.

I think once he got into this job, the way that the Italians did the job in the first place kept him challenged in what appeared at first glance to be perhaps a straightforward job... yah right!

Anyway, the end job is fantastic! Not only did he and his crew repair the cracked shock mount, but he added additional supports to the tops of the shock mounts, and modified the ladder bar to accept two more mounting bolts! (This is similar to cars starting around the 900's from what I've seen guys posting (mine is #878).... Factory musta had some busted car reports coming in!)

Here is a shot of the LH shock mount:
 

He added this piece down the LH vertical support:
 This mirrors what the factory originally did on the RH side to make up for the notch in the frame to accommodate the shifter linkage.

While they were in there with the cutting and welding tools, the frame mounts for the engine were lowered back to the stock location!
 

Now, if I have room to raise the motor after I get it all installed....I will add shim plates under the mounts on the engine block!

Now I just need to get back on the motivation train to get it all rolling again!!!

Yesterday I did buy the silver paint I want to use on the chassis.... baby steps...baby steps!!!!

Steve

Attachments

Images (3)
  • blobid0
  • blobid1
  • blobid2
Last edited by mangusta
Hey Steve, I need to start off with this:

I have no interest - ever - of starting a Goose restoration of any sort whatsoever, however...

Your posts are just great. I read them all through, and man, what a job! Ingenious work, nice write ups, great pics, and an obvious passion. How could I STOP reading?!

Great going. Best wishes! Keep us posted on the work. That is one beautiful car, even half disassembled!
AH...
Thanks for the comments!

Yah, it does look so good just sitting there, it's tough to get back to work on it!!! Smiler

Will keep the updates coming as I get it back on the road! Can hardly wait!!! Have a lot to do but I've done most of it already once, so it is really old hat.....or at least that's what I'm telling myself!!!

Steve

Here is a classic example of why doing work on classic cars takes so darned much time!

(I haven't been working on the car much lately...have been multi-tasking it with a project in the backyard that includes new sprinkers getting dug in, and now I'm expanding our back patio area, so am leveling dirt, moving dirt, gonna shovel in sand, and lay in a few hundred square feet of stained pavers....have been busy and have a bunch to go!) ( I did order new motor mounts...! They are on their way!)

Out back, on the left and right sides of the engine, there are two "heat shields" (asbestos sorta stuff....) that are meant to keep heat off of the stuff in the LH luggage area, and on the other side, the gas tank.

Well, the one on my LH side is toast, and I have been meaning to replace it with something more modern with less or no asbestos content.

Since I have the engine out, this should be an easy job. I figured about an hour per side.... I ordered some "prime candidates" for materials, and a day or two back decided to jump in and pull the shield off and see how it is constructed and what I can do to rebuild it!

(There are before shots above somewhere....)

Here is a shot of the insulation pad and the heat shield removed from the wall of the engine compartment. Now keep in mind that I've already welded a canvas Eddie Bower bag to the inside carpet of the LH luggage area a few years back, so I know there are issues.....


Hole is not really obvious.

Removing the small 11ish x 14"ish asbestos pad reveals this!


Had not figured on this piece being so destroyed!!! (This is the same crap that DeT glued to the bottom of the gas tank and the insides of the doors and rear quarter areas. REMOVE THIS STUFF AT YOUR EARLIEST CONVENIENCE!!! It does nothing but trap moisture against the steel....and we know what that results in? Ferrous Oxide.....ugh!

Here is the other side of the heatshield, note the thru hole...this is the side that sits against the inner pad.


Here is what awaited me underneath the padding..... ya think those headers got warm? Smiler


I had not planned on refinishing the engine compartment walls.....!!! Not sure how much I want to do! It will NEVER end.....

Lastly here are the two products that I am considering. Both were procured from Aircraft Spruce. The stuff on the left "Fiberfrax" is what I want to use to recreate the asbestos stuff in the small shields. I was thinking of backing it up with a small piece of the stuff on the RH side "Cool It" that would be hidden from view.... It is two silver metallic sorta layers with a thin sandwich of yellow fiberglass sorta looking insulation in the middle.


I'm not real wild about using the Cool It for the engine compartment wall....not sure about the silver look.... Will see what some others have done and how they came out! Feedback is good folks..hint hint....

So here is how my "hour long job" (per side) has turned into a saga.... Now I need to source some flat head rivets, cuz the asbestos was held in place with rivets.... I need to source, pattern, and install padding before the shield, AND I need to clean, sand, and repaint the inner fender well before I can do either of the previous!!!! Double UGH!

I sure am glad this is one damned fine looking automobile!!!
Ciao!
Steve

Attachments

Images (5)
  • blobid0
  • blobid1
  • blobid2
  • blobid3
  • blobid4
Last edited by mangusta

New Motor mounts. Had to buy 12 to get 2....so will have a few extra sets to get rid of!!! Bought stainless nylock nuts, and hardened washers for backing up the nuts. 12MM studs, 1.185" (30MM) tall. 500lbs rating on each.


More later...


OK, it's later! (6-30-09) After digging into the material these mounts are constructed of, I found out that their temp rating is far lower than what I would feel comfortable using or selling to anyone else. Something like 140F, 160F max short term. Having a 195F-ish degree engine(core temp) and headers passing down about 4-6 inches away.....I don't think so. Am working on having these remade with something that is more like 240F tolerant plus much better resistance to oil and gas exposure.

Does anyone have a new original mount handy??? Even a toasted original may be good just to be sure that I am not chasing down a wild goose trail! Hah! These are 1-1/8" thick but I would just like to know how thick the originals were....

Anyone need some HD vibration isolators for some heavy equipment? I have some I can turn loose!!!

UPDATED 11-15-09 I have new nitrile rubber mounts now in stock...they look just like these, but are a better suited rubber for exposure to high heat, gas fumes, oil, and grease. See my posting in the Goose for sale forum for more info on purchasing a set of these!


Steve

Attachments

Images (2)
  • blobid0
  • blobid1
Last edited by mangusta

SMALL PROGRESS IS GOOD PROGRESS....RIGHT??

Went to Reno with POCA and had a blast, finished up my patio project so that I could throw a party for the wife's birthday....(and garner up some stock of brownie points!....) and am now ready to dive back into the Goose!

In between laying bricks and everything else, I managed to find some rivets that were close but not that close to the originals, and a rivet set (punch) to set the rivets with.

My dad sent me this from his garage....to mine.... I wanted something simple.....and while this is bigger than what I was thinking about, sure makes it simple to set rivets!!!


I bought some dies for the rivets, and he machined up some adapters to make them fit into this press. Works like a champ....once I clamp it to the bench...!

Here is my end result after bead blasting the heatshield frame and painting it "BBQ black" (flat black hi-temp) cuz I couldn't find any hi-temp semi-gloss black at Home Depot and I wasn't about to chase around looking for a can of paint for something that you can't see once the engine is in place!!! I had one spot next to a rivet where the tin had evaporated a tad, but as I said, not going to sweat this particular detail a whole lot!


Another bit that was needing servicing was the rubber bushings at either end of the trans cross member. A while back I had sent back some drawings to my dad, a retired machinist, and he made me up this pusher/holder affair to push old bushings out, and new in... What complicated matters was the fact that the resting surface on the crossmember is not flat due to welding during the construction process. This required putting a step in the holder.... Looks like it will work just fine, either side now. I'm not going to push my old bushings out just yet until I get all of the other pieces to fit properly, ie sway bar, ladder bar...


AND last but not least, I was missing the RH idler pulley stand for the engine/jackshaft idler....and Greg T., another local Goose owner working on a puzzle car, came by the other nite before the PCNC meeting to check out my car and take some reference pic's to aid him in getting his car back together! He brought by this pulley and stand-off assy and I'll spec it out, make a drawing, and have my dad whip out one of these for me! Sure is great to have local guys with cars that are apart!!! Smiler


NEXT! Make up a cardboard pattern, and cut out the LH heat shield for the firewall, sand down the old garpy paint, and get it coated with something high temp that will accept the adhesive backed temp shield that I got from Cool It. (Not the yellow stuff I initially bought) This stuff is called "Aluminized Heat Barrier- Adhesive Backed" and is about $55 for enough to do the left and right bulkhead/firewall areas. Sorta pricey, but made to mount near heat sources.... Everything else I have looked at just didn't wax my paint.....so to speak.

Plenty to do, but I figured I'd update the post!

Ciao!
Steve

Attachments

Images (4)
  • blobid0
  • blobid1
  • blobid2
  • blobid3
Last edited by mangusta
Quick note: Ferrari 308 and 308GT4 use that EXACT pulley and holder setup, along with the narrow belt for the smog pump. I will look and see about finding some, the (older) Ferrari community can be very helpful too. There is a multi-million dollar vintage Ferrari parts warehouse in Sacramento. I bought my Mangusta marker lights there for less than Mangusta (or Fiat) prices.

Jay
Last edited by jmm3

OK, take 2.....

Back on the Goose again, after about 10 weeks of little to no proper progress!

Spent some time looking into finding a new idler pulley standoff, for the front of the engine, but this turned out to be a "goose" chase...of sorts! Will have one made....

Worked on getting some new parking brake cables made up, but no luck finding the eyelets for the small 3mm cable! I found cable, sheathing, and ferrels that can be modified to fit, but no eyelets! My contact is still working with some old prints.... we'll see what happens..... May just end up brazing my old ends back on..... Frowner


Something completely different: rear disc brake kits for old Ford 8 & 9" rear ends....trying to reorder parts, but now instead of costing about $3 each, they want $6! Even when the quantity is for 400! I thought we were in a recession where shops were hungry for work?????

When my car was repaired, the work that was done looked fantastic! However, upon closer examination, and when I started bolting up the other parts that all reside in this "one ton of crap in a half ton truck" area of the frame, I ran into problems with things fitting.

A hole for the sway bar mounting clamp was drilled in the wrong location and needed to be relocated. Also, the upper shock mount portion of the repair looked fantastic, but it must have slipped position before it was welded into place, because in the end, it was crowding the other parts such that bolts would not fit properly into the other mounts, or wrenches no longer fit, or the bolts rubbed the sway bar worse than before.....and being the picky SOB that I tend to be sometimes, I just couldn't see slapping it together....cuz I know it would just bother me knowing it was there!!!

I think these cars are special, and deserve proper care and repair! So, I'm taking a little time and redoing it properly. I hope.

First, I carefully removed the repaired mount, using a thin Dremel wheel where possible, and thin hacksaw blades in the odd corners and finally got it off, preserving as much metal as I could.

I then cut off a bolt, and recessed it into the maligned hole, and tonite, welded it in place, filed it down flush, and drilled and tapped it. Came out very nice, and the sway bar clamp now sits where it should!


I still may have some interference with the sway bar and the bolt heads of the top ZF mount. I had this before....and I am thinking that I may make up some 1/2" spacers to put underneath these sway bar mounts, to lift the clamps up above the bolt heads. Would only require 1/2" longer bolts.....not a big deal. Will see when I put everything back in place......whether they will be needed or not.

I finally used my new bushing tools and pushed out the old upper ZF mount ends, and cleaned up any protruding welds with a file, cleaned and greased the holes, and pushed in the new bushings! Other than some resistance getting the old rusted ones out, a little PB Blaster helped loosen one stuck one up(!), the job went quite well and the custom tools worked as they should!

I used a 6ton bench top press to get the old bushings out. I used the same to push the bushing back in on one side, but on the other side I experimented with a large c-clamp and it installed the new bushing just fine! I was able to fine tune the fore-aft position of the bushing with the c-clamp very nicely!

Here is a shot of one new bushing in place. If the center looks off center, it is. I used these briefly in a set of factory shocks, found the shocks were bad, and pulled the shocks, took the bushings out and saved them for this job! They will settle back to center when weight is put on them.


Another project I've been toying with, is a means to support the upper frame sections, from side to side, to eliminate the flex that is allowed by the bushings in the ends of the upper ZF mount. As Dick Ruzzin pointed this out, and went on to re-engineer the entire mounting and ZF support system of his car with a very involved repair or implementation, it got me thinking. Here is my very simple solution to at least part of the problem.

This is a solid bar, that with longer bolts, should be a simple affair that will strengthen the top of the frame sections by tying them together and will limit their ability to move.


While it does nothing to strengthen the area where the upper a-arms attach to the bottoms of the top frame rails, it is a start. And it only weighs in at one pound!

I measured the ZF cross mount center to center hole dimension and drilled the same dimension into this bar. Your car may vary slightly from what is shown!!!! I had to put some weight on the wheels to get the bolts back in, as having them unloaded (wheels hanging) pulled the top of the frame outwards slightly making it impossible to put the bolts in.

I have some spacers to make yet so that this bar doesn't interfere with the two ZF bolts, and I will need slightly longer bolts at the ends to snug it in place. I will also contour the ends to remove the square ends... Most of this will never be seen if you carry a spare tire....

Next? Getting that upper shock mount tower put back onto the chassis! Stay tuned!

Attachments

Images (3)
  • blobid0
  • blobid1
  • blobid2
Last edited by mangusta
Steve, At first when I looked at your pic, I was sure there was something wrong. Look at the alignment on mine. The torsion bar bracket aligns with the removable crossmember bracket.


Denis

Attachments

Images (1)
  • RB303_452s
Steve, FWIW your Goose upper cast aluminum mounts and the rubber bushings with bonded steel washers you show, look identical to a Pantera upper mount. Pantera 351-Cs run at least as hot as a 289/302 in a Mangusta, so don't worry too much about the heat-reliablity of the rubber insulators. Just don't use polyurethane, which will melt!
What I would worry about is frying the lube out of that front heim joint next to your heat shield. Also FWIW, the Pantera uses a 3-layer sandwich of aluminum, asbestos (or maybe fiberglas, now) and aluminum on our gas tank heat shields, and this stuff is available from the vendors. It bends like dead-soft alum sheet so its easy to shape.
Denis,

I have tried them all! Sort of....see my first posts above....

One common thing to ALL of these manifolds and a Holley Carb....getting an automatic choke to fit is the pits!!!! I have not yet solved this issue yet....

Here is my rundown:
Old style F4B: These are a copy of the "Ford-Shelby" intake sold over the counter, sometimes known as "C9OX" intakes. The center two runners are "HIGH" near the jackshaft and require a LOT of clearancing on an expensive bracket to make it work....

New Performer: Seems to fit with minimal modifications necessary. You may run into a "radius" issue at the front most intake bolt boss where the jack shaft bracket fits against it. Slight amount of file work will clean this up nicely.

New Performer RPM: Same notes as regular Performer.

Both of these intakes have the runner design reversed, so there is little to no interference with the jackshaft bracket.

There MAY be some fit issues with your front RH idler pulley bracket in the way that it fits with the front two support holes on the jackshaft bracket.....

I am using NOS parts to fit my new stuff together and as shown in one of my pic's above, the holes don't line up, even with a stock intake!!! Jury is still out on this one..... I may end up having some holes filled, and redrill them where they need to be...

Also, at the rear of the new intakes, there is no boss to attach the stabilizer leg of the jackshaft bracket.... I am going to have a boss welded on mine, once I figure out which one I am going to use!

Either or all three of these would appear to fit under the bonnets just fine with the stock air cleaner. I have pictures from other guys that have either the F4B or the Performers installed.

The Edelbrock Victor Jr series manifold is one that I wouldn't recommend installing if you want to retain the jackshaft. The one installation I saw of this version is missing about 6-8" of the center of the jackshaft bracket all together.

All in all, the stock intake, with the 1" spacer is a very hard intake to beat. The ports are large and everything fits.... it is merely the weight that is a factor!!! If only someone simply cast up a stock intake in aluminum, life would be a whole lot easier when it comes to an intake swap on a Goose!!!!

.....my frame work continues, just haven't had a chance to post pic's!!! Need to work on my ladder bar, hopefully next weekend, to get some machining done, and then it will be some finish welding, and some tidy up of the weld areas, and on to paint...or sanding, sanding, primer.... then pain.... I mean paint!!!

Ciao,, hope this helps!
Steve

OK, it was a balmy football night, plus raining outside....or at least rainy. Time to do some updates! I haven't been much on the computer as I've been busy with a bunch of stuff, as life does to ya.

Here's where I am in the frame repair:


I am working on placing the 3rd and 4th "reinforcements on the tops of the brackets. Presently am working in the ladder bar to bring all 4 holes up to 10mm size, per normal fasteners. I was cheating and using 3/8" bolts from a Cougar.... Smiler

You can see in the above shot, my relocated sway bar bolt hole (closest to shock tower mount on right). Since this one went so well, I decided to do the same to the one stripped out (oversized) hole on the right hand frame rail! It too came out very nicely, but no picture. So now I can run stock 5/16" bolts all the way around. A 220V home welder is a handy thing to have!!!

Need a little time on a mill, some welding, grinding, then more welding.... stay tuned.

Just got this in the other day too! My new idler pulley standoff!


Yet another gift came, from across the pond...Roger Brotton had this made up to duplicate the one that was on the engine that I sent him with Goose #760. I added the black shrink wrap (not shrunk yet!) as a possible upgrade from black electrical tape....! (Shown on a stock cast iron intake.) It will work on aftermarket intakes nicely.


Here is a project that didn't make it far from the workbench.... It needs thinner leather, and less shiny buckles!!! ...and flat head rivets....


And perhaps you have been following the e-brake cable discussion in another post...or not... Here is the most reasonably priced end that I can find, that actually almost fits!!! Option that is still on the table....design table...is to make it using a simple "U" shaped piece and eliminate the little link that is on my rear brake affair..... The challenge remains to get a crimped end on the cable, and then close the opening so that the two end surfaces are touching each other in a "closed fashion" rather than open as shown. (That's why the U-thing may work better.) Top to bottom pieces... 1) Only aftermarket piece that I can find...expensive and loooonnnngggg!!! Needs to be much shorter... 2) Aftermarket "would work" but
"can't get it anymore!" 3)Side view of recent "most bestest" contender... 4) Original brazed on brass eyelet. 5) Top view of uncrimped "possible suspect".... Of course then there are probably about 3-4 different lengths to deal with, and the pesky ferules, and the different types of housing or sheathing.....sheesh!


I spent this last Saturday trying to get this running.....a 1962 Comet station wagon, with a solid cammed 302 and a 9" rearend in it already! We got it running fine, but stopping was a different matter altogether! Going to retrieve it with a trailer on Thursday hopefully! This car belongs to an old friend that needs to sell it, so I will do some work to it to get it operationally fit, and then offer it up to the masses! Original owner car!!!


So, I have been busy!!! Even on my own car!

Steve

Attachments

Images (7)
  • blobid0
  • blobid1
  • blobid2
  • blobid3
  • blobid4
  • blobid5
  • blobid6
Last edited by mangusta

OK, time for an update!

Thanks for the leads on the marine aspect! They have something that looks interesting...but have not had the time to stop at the nearest outlet to look at the parts....but they are viable, even with some machining required....

Back to my frame repairs!!! Here is a shot of the ladder bar installed, prior to the welding of the final two "improvements #2" to the mounts of the ladder bar.


I've also put the reinforcement for the trans brace in place (actually it is sitting where the actual trans mount goes...). This is meant to limit frame flexing in this area caused by the upper a-arm forces acting on the thin box tubing during aggressive turns. More on that later when I get to that portion....

Here is a closeup shot of the final area of welding that needs to be done. I missed getting by the metals shop on Friday to pick up a thicker walled piece of tubing to use as the sleeve/mount for the top of the shock tower new 3rd and 4th mounting bolts. Spare sleeve is shown standing on the ladder bar.


The original .500 OD tubing that I used was about .050" wall thickness once it was drilled out for a 10mm bolt. That just didn't seem like enough metal for me, in a stressed point such as this. Mild steel could tear fairly easily...only .050" thick. I upped my wall thickness to almost .120 by going up to a 5/8" OD tubing in a last minute running change....so now I'm running for new tubing and back to the neighbor's lathe to cut some new bits!

Once I have these bits in hand and fitted, I can weld them to the proper places on the top of the shock mount and I will be done with the repair portion of this adventure! Then it becomes refinishing and refining from there!!! ...and of course now we're hitting winter and barely 60 degree days....not good for painting cold steel parts!!!!! Will have to get creative and hope for an Indian summer!!!

Ciao!
Steve

Attachments

Images (2)
  • blobid0
  • blobid1
Last edited by mangusta

OK, new bits of steel (shown on right) are cut, bored to 10mm i.d. and fitted to left and right shock supports. (That is what the flat spot is...to allow it to fit down closer to the support. Welding takes care of strength issue here as force of motion would be upwards, away from the thin flat area.)

While I had the lathe set up, I also modified my upper shock bushing adapters to a 10mm ID. Previously they were 3/8"....because I cheated and installed US bolts that I had lying around....! Now every shock mounting hole goes back to stock 10mm sized stuff....and nylocks!


Welded up LH support...
 

Welded up RH support...


All done!!! Well, almost....


I had to use the straps to pull the frame rails in ever so little to get all the thru bolts to slip in. At this point, all 4 bolts slide in and out loosely! That will never happen again! Seriously.... I fitted the ladder bar with body weight working against the suspension (upper rear a-arm) sitting on the ground. Once the engine etc is mounted, I may actually need to spread things apart, OR, use a combo of the jack and jackstands in different locations to get bolts to "slip easily" back in place. At least two bolts at any one time should be a slip fit!!!! Minor details....

So what now??? I want to clean up some of the welding areas to get splatter and some high spots lowered a hair, where I dwelled a bit to long with the MIG tip....

I want to make up some quick "shock dummys" to use while I refinish the rest of the engine bay....so that the shocks are not in the way of sanding dust and other such sorts of crap....while I am stripping off old frame/chassis/firewall paint in preparation for new paint and heat insulation/padding! I think I have some 1" square tubing scrap around here somewhere.....

Ciao!
Steve

Attachments

Images (4)
  • blobid0
  • blobid1
  • blobid2
  • blobid3
Last edited by mangusta

Wow! It's been so long since my last update I almost forgot my password!!! OK, it's been just under 4 months since I last posted. It's been 3 months and aprox 3 weeks since I've worked on the car! Since my next task was stripping and painting, I've had to wait for pleasant weather in order to have the garage door open...and to muster up the will power to get back out there! So tough to do when it's 50ish degrees out....We hit high 60's this week, low 70's....spring is here! I'm back in the garage! I kept busy doing ebay sales and some tilt-colums...they only need parts cleaner and no paint....so I could convince myself to do them....but freezin my butt off not to mention my fingers, and trying to will paint stripper to work....nope. Not going there!!!

OK, that is a lie. I must have found some time to work on it, because I made up the dummy shock struts! Used some aluminum angle stock I got from Home Depot. Figured I could re-use it to make a fan shroud support at some time in the future... when I get ready to build a fan shroud for a new set of electric fans....but that's a different post...

So, shocks are out, struts are in, removed all the cross member bits so I could get at things with paint stripper, sanding tools, and whatever else comes up!

Here is what I started with on Tuesday this week: (5 pics of stuff so I can figure out where to put it all back to...)


I have not yet pulled off the sound/heat insulation from any of the forward areas of the bulkhead, nor the RH side. Only from the left side where you can see the cardboard template I'll use when I work up the new insulation material...
 

I'll be leaving the ballast resistor out. No need for it with the DuraSpark II module and coil. Good shot of the Bosch voltage regulator.
 

Here's where I mounted the DuraSpark module. Gotta watch out for the jack mount on the other side here!!! The rubber/canvas wheel well shield is not stock. PO had these build and installed way back during it's rebuild where it got the Boss 302 engine. Not sure how well they work......
 

Good shot of the original style starter solenoid. This type with the "bump" button on the top are still available! The solenoid to the right, is there to supply a full +12V to the DuraSpark module during cranking. Once it stops cranking it works off of +12V from the run circuit of the ignition. This relay was from a mid 70's Ford Galaxie or big Merc, "horn relay" is the official name, so should be able to handle the current....
 

The wire holder and the bracket for the LUCAS washer bottle are held in place with aluminum pop rivets, so I hit them with the drill and popped these parts off for refinishing, and to make it easier to clean the panel and get at stuff in general!
 

A few minutes with a long scraper/putty knife and this is what it looked like! I also pulled out the wiring on the RH side, marked the wires with tape labels, and secured it neatly with 4" pieces of two sided 1" velcro strips. Now I can move it around nicely to work around it. The four 4-link bars are removed and the chassis is actually sitting on jack stands. I will be dropping the upper and lower a-arms so that I can degrease the mounting areas, clean, and repaint. Going with a silver to brighten things up in the engine compartment! A 1" thick piece of closed cell foam on the crossmember works wonders to sit on when cleaning!!!
 

I dug out an old can of aircraft paint stripper and went to town on the LH panel area. This is where I closed it down on Tuesday night. Oops! Didn't take a picture of where I stopped on Tues! I only got the forward LH side, up to where it turns to the right. I got to this point after another night with a small paint brush, can of stripper, a couple of putty knives, a plastic pickup tub, and a roll of towels and a box of plastic gloves! Oh boy!!!

Here is where I stopped late last nite:


By now I'm figuring I have 10 weeks before Reno. Actually 11, but I have a trade show and a weekend away scheduled with the wife, and I'll need a break from this thing any way, end of April.... Progress will be good as long as I can get the painting and refinishing of the engine compartment done. Stuff like upper and lower a-arms go on the "optional list, as they can be done just about any time easily. The 4 link rods will be done now....they are not so easy once the engine is back in....unless you have a car lift....go ahead, make me jealous!

My plan is to take Fridays of from now until June. I have the time, and the boss is happier if I take it that way actually....his pucker factor goes way up when I'm gone for too long...... Smiler

Smiler

Smiler


Another night spent with stripper and tools...and here is where I left off a few minutes ago. Oh, I also found that a small brass and or stainless "parts brush" really cam in handy in all of the spot welded areas, cracks, seams, and even the flat panels...


What I found under the black paint on the panels was some sort of white-ish filler primer sort of stuff. Sometimes it comes off easily, others, not so good. There is also adhesive glue from the insulation still on the walls....and surface rust....then there are the spots where it seems "super bonded" or burnt on! Could be the stripper not working properly...it's old.....

OK, I am out of stripper! Used up my stock of brass brushes, half of the stainless one I started with, and have one new one in reserve. Time to hit Home Depot...in the morning.


You can see that I stopped over the wheel well opening, where the rear panels meet the front panels. The rear sections are pretty flat, so I hope will go rather quickly. I hope.... Will need to be careful with the stripper around the rear valance area, so may take out the AC condensor to gain more access....it isn't charged...so....we'll see!

I was very pleased to see nice clean steel under most of the metal. It looks orange now, like rust, but it is surface rust that has formed from the stripper absorbing moisture in the air....or something like that. I will clean this off some more with sandpaper and then protect with something like Galvaprep and follow with Prepsol as a cleaner just before caulking the seams/corners, and paint.

Some of the paint on the chassis frame is very resistant to the stripper, and other sections, once hit with stripper, slides right off.... We'll see what happens with a new can....

I also may have baked this paint on via the header heat....but I repainted most of the chassis back when I was putting it back together last time. I'm pretty sure it was just rattle can Rustoleum, semi gloss black, maybe high temp..... It held up well, except the areas closest to the headers and where I ruptured a brake line and hosed it down with Dot4 fluid....

So, the bad news is that I will be spending at least 2 days more on cleaning down the chassis to get it ready to paint. The good news is that I'll only be spending about 2 more days cleaning and prepping for paint!!!! I did buy a new DA sander for this job...may have to bust it out and see what it does! I have some minor metal displacement from spotwelds that I would like to "dull" down. Small points of sharp steel formed and I hate cutting myself on them when I'm working on stuff..... I'm not going to go crazy and fill spot weld divots, only remove the sharp tips and points of displaced metal.

Here are some shots of my bulkhead juntions, where sheet metal body meets bulkhead, and where rear frame section meets bulkhead.

From Left to Right:
 

Here is the center section. Some guys have a big opening here with two large round tubes visible....not here!


Here are the 4-link attachment points. I have heard guys tell of these cracking too, so if you are in here, check it out, again L to R top, then L to R bottom.


I didn't get into this area with the stripper all that well. Something to do tomorrow.... Smiler


I'm glad to be back on this!
Steve

Attachments

Images (16)
  • blobid0
  • blobid1
  • blobid2
  • blobid3
  • blobid4
  • blobid5
  • blobid6
  • blobid7
  • blobid8
  • blobid9
  • blobid10
  • blobid11
  • blobid12
  • blobid13
  • blobid14
  • blobid15
Last edited by mangusta
Good job Steve, Same as you we are just getting into the warmer weather, spring is in the air!!

Super nice job. I have to get to my rear wheel bearings, blew one on the last outing in the fall
2 questions:
What are those red nibs on the front bulkhead?
Are you going to replace the brake lines? 1244, 1118 and 1042 all have copper line . Yeeachh.

Denis
Well, she's as stripped as she's gonna be. I am so sick of paint stripper right now.....my body hates paint stripper.....

We'll see how the body does to sanding..... I think I have some power tools to help out with that....

I did use a grinder to remove the "crater slag" on the spot welds holding the wheel well to the engine compartment side panels. A few had some nice "cut ya later" protrusions and I don't like giving up blood all that easily....so brought them back down to level.....

Hope to have paint going back on by Thurs or Friday. Days off! woooo hooooo Picked up some more PrepSol (miuratic acid?) for removing the light later of surface rust that has accumulated, then Galvaprep to coat the metal to a non-steel surface, then some etching primer and some silver rattle can Rust-o-leum type paint! Last stuff I used held up VERY well in the areas where it was allowed to bake onto the frame.....where it was really close the headers it burned away....but where there was a few inches of air space, the stuff is tough as nails. Stripper only softens it but doesn't bust the bond! I'll be sanding that stuff...... New headers should not be so close to the frame with the new non-Boss engine config.

Steve
OK, here's an update.

Forgot to mention that I removed the upper/lower a-arm bolts and dropped the rear axle hub assys. Need to de-slime them after 9 years of road action!! Lots of brake dust and grease oozings around the pivot points. (I'ts a pretty empty chassis now!!! No suspension, no wiring, no hoses.....! Scary!!!)

I should also point out that some of my NEW rubber Unibal (spherical ball joint) booties, so carefully replaced back in 2001 and a couple of years later, are already hardening up and will need replacing again! I have a stash of spares set aside.....if not, they can be replaced fairly easily while on the car. Amazing what grease will do to rubber!

Cleaned up the mounting points with solvent to get the greasy stuff off before sanding and grinding.

OK, last nite I dug out a new toy. A 6" orbital sander. While it tore thru some material with 120 grit on it, I used 220 for a lot of the areas to keep from scratching the steel up. I hate that when it bleeds thru the paint and you can see all the scratch marks..... Took a little longer and a bunch of sanding pads, but I got about as much done with power tools. The sander can only be used on about 50-60% of the large flat panels, and 50% of the frame pieces, namely the top, bottom, and inside surfaces.....

Oh, and wear a dust mask unless you like breathing iron oxide....(rust!)

So tonite, I go primitive. Just some 220-320 wet/dry paper and fingers. UGH!!! Need to get around all the wire retainers, the occasional pop rivet, brackets, and wiring, and power tools just won't cut it.

I hope that I can complete the sanding portion of this adventure tonight. Gonna be tough... I already don't like the orbital sander....but I'm sure on regular panels and roofs, it would work fantastic!

By tomorrow this time, I will hate sandpaper in general..... Smiler))

What else.....?
*Clean the rear crossmember- degrease with solvent.
*Weld on the ebrake cable support. It broke off after crouching on it..... it may break again too.....not much room in there!!! A 4 point hoist would be a dream about now.....
*Wipe the entire mess down with PrepSol, rinse, and apply GalvaPrep.
*Dry thoroughly!
*Prime within 24 hours of chemical baths.
*Paint within 24 hours of priming.

I have Thursday off(vacation) and Friday is a company holiday (Blue Moon Anniversary- 11 years since we shipped the first TiVo unit...been changing the way that millions of people watch TV and a couple of Cable companies manage their DVR's...ever since! Smiler )

As I mentioned, I will be taking Fridays off to work on the car from now until June. If there are any PCNC members with nothing to do.....I'll be hanging in the garage futzing with something! Can't guaranty you a beer, but I can provide a refrigerator to cool what you like!!!

Drop me an email for an address!!!

Ciao!
Steve
quote:
some of my NEW rubber Unibal (spherical ball joint) booties, so carefully replaced back in 2001 and a couple of years later, are already hardening up and will need replacing again!


Steve, not owning a Goose anymore, I haven't tried this but how 'bout spray-Armorall on the booties? Maybe keep the rubber from hardening up so fat?
I don't know about Armour-All....I don't keep it in my stable of chemicals simply for it's reputation of drying out dashpads and causing premature cracking.......

I think the booties have some sort of a reaction with grease and or heat....

I hate sanding....I can barely type....ouch....at least 6 hrs last nite, 6 hrs to go at least....nooks and crannies, nooks and crannies....welding slag....ouch....

S

Sunday night-late.

Engine compartment and rear chassis is in green self etching primer...

My fingers ache with every touch of a key.... did I mention I hate sanding? Didn't get done sanding until late yesterday...ugh.

One day behind schedule....was supposed to spend yesterday painting....but when I got into the chassis pieces......there are a BAZILLION NOOKS AND CRANNIES!!!

OK, wife has banished me to the showers before I can get into bed, so here is the Reader's Digest version to catch you all up to speed.

Welded up two tiny cracks I found near the rear crossmember (will post pic's later) and welded the ebrake cable support....of course I found it sitting on the work bench AFTER I had put the welder away from doing the cracks....ugh!

Cleaned the entire bay and chassis with PrepSol, washed it down, went over the entire thing again with GalvaPrep, dried it off, let it sit for a while, blew out the cracks and crevices with high pressure air, let it sit more....and started taping it all off in prep for paint.........

FINALLY, got to put the primer on.

Here we are all taped up: (taken AFTER I was done spraying...)


I did remove the rear portion of the shifter linkage...only a roll pin...drew blood...missed with the hammer...once or twice...did I mention that my fingers are killing me? Anyway, it made for less stuff to paint around....


Hopefully tomorrow it will be nice enough for me to do the following:

Apply seam sealer to the various joints.

Apply new silver (slightly metallic) paint!

Off to the showers....ugh!
Steve

Attachments

Images (7)
  • blobid0
  • blobid1
  • blobid2
  • blobid3
  • blobid4
  • blobid5
  • blobid6
Last edited by mangusta

Monday night: Seams are caulked and silver paint has been applied. The metallic in the paint was a bit more of a mess (flying around!) than I had anticipated and it is a little more metallic than I had thought.....oh well, it does what I wanted it to....brighten up an otherwise dark place!

Left side:
 

Right side:
 

Center: Now I can see a lot more of the welding and problem areas. Of course put an engine in here and poof! That all changes! ....let's not forget about the heat barrier stuff that needs to go all over the place too......won't be able to see anything of this!!! Smiler


Left Hand lower corner of chassis to center spine area where road smegma tends to collect! (Sorry for the blurry photo!)
 

Right Hand lower corner...note the small hole....this was one of my rust holes that I found. Not worth trying to repair from any angle in here! So figure if I hit any large quantities of water, it will allow it to drain out.... That's the story! The other hole encountered was even smaller (and in a less accessible spot) and was covered by caulk in the end. This is what painting the compartment a light color was all about. Being able to see details more easily...
 

Of course now every part I bolt back on will look like crap! Smiler

Smiler

Smiler


Off to the showers again!
Steve

Attachments

Images (5)
  • blobid0
  • blobid1
  • blobid2
  • blobid3
  • blobid4
Last edited by mangusta
Steve - your engine compartment looks great! You're an inspiration.

All that taping looks like a LOT of work. I've found that Aluminum Foil works great and is a LOT quicker for masking hoses, wiring, and any odd shapes difficult to tape. Simply wrap and squeeze - it instantly conforms and holds onto the piece it's protecting.

quote:
This is what painting the compartment a light color was all about. Being able to see details more easily.

The vintage AMC Javelin race cars had/have white chassis for the very same reason; any cracks or defects show up instantly as a black crack against the contrasting white paint.

Anyway, can't wait to see the finished product.
Steve,

I just wanted you to know I'm following your progress with admiration and envy! You're doing a great job and I so much appreciate being able to see every step (OK, probably not EVERY step) you've taken for when I pluck up the courage and find the time to tackle mine. Keep up the great work and THANK YOU for doing such a great job of sharing your progress!

Mark

Well, it IS that time of year again......TAXES!!! Since I owe a bunch, no sense in giving away your money too soon...so I put it off until the last minute...earn that extra penny or two....pay for Goose parts!!! HAH!

I have been working on the car....took a break for Easter with the family, and the temps have been lower than previous, so did whatever I could find that didn't involve paint.

I will update more photos....but gotta get back to the taxes first! Work before play....

Here are a couple of NEW bits that I picked up today for the car. Dug out two new rubber booties for the inner lower A-arm Unibal joints from my stash. I had two new rear brake lines made up in DOT approved braided material, with custom blue inserts(!), and a new brass heater hose fitting for the intake manifold! (Engine stuff to come...chassis first!) Not shown is some new blue 1/2" Goodyear Hi-Miler heater hose. Easier to work with than Gates Green Stripe for this application. (Gates Green Stripe will be used for all of the large "union" or connections between the 1 3/8" pipes up to the radiator.)


I had previously purchased a set of beautiful braided brake lines from Dana @ Mangusta Int'l only to find out that because of my "unique" 3 piston calipers on my car, that they wouldn't fit....Frowner

So looked around and found a place that did these in about 15 minutes! Great service, reasonable price! (Royal Brass in San Jose)

Friday looks like 70 degree temps here so hopefully will put some final touches on stuff that needs to be painted and then start slamming parts back on!!! Whoo HOOO!!!

Ciao!
Steve

Attachments

Images (1)
  • blobid0
Last edited by mangusta

OK! Slow night in the garage, taxes are off to the tax man...I give up this year....toooo many circles to chase...not zeros....!

So I'll take this time to back up just a tad and post the pics of the frame work that you all missed between those back at the end of page 6, until I hit the primer!

Please do not mistake the smile on my face in any pictures as being from enjoyment......my wife picked up the camera and said that she wanted to document her view of me working on the car during the week.....this was my "crunch" to beat the downturn in weather temps...which hasn't quite returned yet! (Good painting weather!)

Stripping the chassis for painting, scraping, sanding, deburring, cleaning, treating, and then covering everything up that you don't want painted....was a 7-8 day marathon! I think...now, it all seems like a blur!!!

Here she caught me in a typical position for a couple of days with the stripper!
 

No true mechanic is without his trusty junk yard dog...Pepper. Mine warns me of impending deliveries by UPS drivers! The local driver has been getting a good blow by blow on the car with each piece he delivers!
 

OK, enough old men and pets...the following progresses through stripper on the engine compartment panels, then stripping the frame, then sanding...

Here is the engine compartment after stripper and brushing, and water/soap cleaning to neutralize any stripper.


Getting down in the chassis with stripper and brush! Working on RH side:
 

View from the other side:
 

We pause for a word from our sponsor....and scraper... Pretty danged tired of sitting in this chassis!
 

Working on the other side:
 

Occasionally I busted out a small file and worked down any burrs or welding spatter that I encountered. The latter required a hammer and sharp tiny chisel to convince them that they no longer needed to be there! (Picture is a little out of focus...sorry!)
 

Agony of sanding....soooo tired of sanding! 220 or 180 grit works well....by hand...because most of it is by hand...because my whippy dippy new orbital sander fit only in about 35% of the spaces...then there are 4 sides to ever piece of frame rail, frame rail reinforcement.....
 

OK, I do believe that this now the point I was at for being done sanding. This process took one day longer than my estimates. Like I said, the chassis had much more to it in terms of hard to get at real estate, and I underestimated the time it would take to do each side.... There are some areas that were slightly pitted due to rust behind the heat shields. I sanded these as much as possible to remove the high spot surface rust.


Next shots are of the metal after hitting it with "MetalPrep" a solution of muriatic acid to remove any surface rust and oils. Brush on, keep wet by brushing on more, and then rinse off with water. I used water and a sponge to wash it down. You can see that some etching remained. Following this, I treated the metal with a galvanizing agent, GalvaPrep. Again, brush on, keep wet, then rinse well, and dry. Some of the discoloring of the rust still remains in the deepest of craters. Only way to get that out would be to media blast and that is way too messy for this job. The self etching primer sealer will serve as a barrier to any more continued oxidation.


Next two shots are of the areas that I found small cracks in. Strange little reinforcement and the fact that they were both cracked means that this area of the chassis was moving somehow...

These are located just above the bolts for the lower inner a-arm attaching point.
 

Here you can see the e-brake cable that I managed to bust off moving around in the chassis to remove paint.... I think it was already cracked...
 

At this point, this fills the void between taking off the insulation and green primer and eventually silver paint!

Next post will cover from silver paint to present!

Steve

Attachments

Images (19)
  • blobid0
  • blobid1
  • blobid2
  • blobid3
  • blobid4
  • blobid5
  • blobid6
  • blobid7
  • blobid8
  • blobid9
  • blobid10
  • blobid11
  • blobid12
  • blobid13
  • blobid14
  • blobid15
  • blobid16
  • blobid17
  • blobid18
Last edited by mangusta

After silver paint, here is what I have been dinking around with while we've been sitting in a little cold snap. Lots of small detail stuff.... Covering blood letting brake line and wiring clips with heat shrink, repairing old cracked wiring insulation, etc.

Follow along!

Lower frame clips for securing brake lines and on the LH side, the clutch slave line and the vacuum supply pipe as well. (vacuum to the brake booster)

NB: Find length of new 1/2" PCV line to replace bits of un-reinforced heater hose....not good in a vacuum situation as they can collapse.
 

Added new rubber hose as insulators on the clutch and brake hard lines.
 

RH side, only one line in at this moment:
 

A few shots of the wiring retainers, with new heat shrink protectors. These puppies drew more blood than anything...or perhaps I should say caused more loss of skin...than anything so far on this car!


Here is the new materials I used along side the main harness that I fixed up a tad. There is "hard line" vinyl tubing which was used on the "single wire" runs for the oil temp sender, water temp sender, perhaps the oil pressure sender too....and a couple of other spots where something similar was used...the "compartment light"....

I used slighty oversized heat shrink to do the two wires to the fuel sender in the gas tank. The original Italian ends were in place and I didn't have the heart to cut them off! So I searched the electronics scrap dealers in the area for some surplus heat shrink!

Larger heat shrink on the right (of the three pieces) I used for the lower rear wire retainers that retain the main power cable to the starter. Those retainers are a little wider than the rest used on the chassis for brake lines and the main harness.


In the pic above, on the RH side, you can see what the new coverings did to clean up the look of the harness! I used waterless handcleaner (no pumice!) with "Lanolin" to clean and condition the old vinyl! Came out looking nice! In some cases I had to re-wrap the plastic tape that was either damaged or missing.

I also found that the black plastic covering on the throttle cable was all messed up with large cracks and missing pieces. I cleaned all of that off up to the firewall and replaced it with more of the heatshrink. Not real black, but certainly now it is uniform!
 

More of the same:
 

I am out of pictures!
Steve

Attachments

Images (9)
  • blobid0
  • blobid1
  • blobid2
  • blobid3
  • blobid4
  • blobid5
  • blobid6
  • blobid7
  • blobid8
Last edited by mangusta

Loaded more pictures....

This weekend, starting on Friday, I tackled the last section of frame, that I didn't want silver.....not sure why, but maybe it was something to do with black being used on every other car, I had to have some too.......or it was the paint fumes....

Anyway, stripper was back, sand paper and sore fingers, more primer and we ended up here!


OK, fast forward thru black paint and some backwards here.....I got a little "thin" on the silver paint in this area around the air inlet opening and to either side of it....SO, while I was masking, I hit this area with more silver so that the green wasn't leaking through! So before black paint, there was silver paint....and then more masking and black paint!


You can see where I mounted the bracket for the Lucas wiper washer bottle, the hose retainer, and a new rubber insulator/grommet for the LH tail lamp wiring etc. Pieces actually going back on the car!!!! WHOO HOO!!!! Sorta like coasting down a hill after you worked so hard to pedal up the other side!

Here's the other side. Actually a picture from yesterday's progress....
 

I had mounted up the a-arms and rear hub assemblies, wiring grommets had been pushed back into their holes (to the right of the DuraSpark module) and insulation was added to the wiring retainer clips, with the starter cable now securely retained! Like I said... "coasting!"

View from outside looking in on RH side. Battery cable where it transitions to outside of frame, and new braided brake lines installed to calipers.
 

Here is a shot of my new lower a-arm inner bootie looked like after installation. Good thing I had two.....


BECAUSE....it took two to get one on....properly....


That's a torn up $12 bill or so! You'd swear that they will not fit over that great big spherical joint...but they do! I used a little silicone grease (pool pump grease) to assist rather than actual grease. Once the bootie was in place, I added additional grease to it, then installed the adapters/spacers.....

On the RH side is the original rubber grommet as found in the Left Rear corner next to the battery. Looks like acid mist had taken it's toll on the rubber. New grommet below it.

Here's a close up of how it turned out installed.


I couldn't or didn't want to completely remove the rear wiring harness to put the grommet on in one piece, so I cut it and worked it into position. Will do the job nicely!

Also worked on some other stuff over the past week too when I couldn't tackle a larger job!

Finished the other heat shield for the sides of the engine compartment walls:


Started working on my coolant reservoir clamp, only to find out that a PO had cut it apart too much such that it could not be put back easily by simply welding the pieces back together....SO, I had another clamp that was sorta rusty chrome (thank-you Greg!) that I blasted with beads/aluminum compound, primed and painted (had one or two days where the sun came out!).


New 1/2" high(er) pressure Goodyear heater hose delivery was detected by the dog.... This will go in after firewall insulation is cut and installed, later this week! Weatherpersons promised warm by weeks end!


Patterns for cutting insulation are ready... those pizza boxes came in real handy again!
 

Finally, Saturday and yesterday, I cleaned up the 4 strut rods for the 4-link suspension. They are deburred, sanded, washed, and ready for primer and paint.


Once the paint hardens, I'll replace any rubber booties that look bad (all were replaced 6-7 years ago and are still soft and pliable) and give them a shot or three of grease before dropping them back in place.

I tagged them to retain front to rear and side to side positions so that alignment is not affected.

So warm weather gives me a short list:
-Cut and install firewall insulation.
-Paint 4 strut rods
-Re-install wiring harness, coil, light, voltage regulator, misc clips and bits...that are in bags on my work table! (They should all be empty when I am done....bags and table top!)
-Install 4 strut rods
-Install shocks and tires
-Set car back down on ground
-Install rear brake pressure amplifier and connect lines up back to calipers.

After this, we go back to the engine for intake porting!

Ciao!
Steve

Attachments

Images (13)
  • blobid0
  • blobid1
  • blobid2
  • blobid3
  • blobid4
  • blobid5
  • blobid6
  • blobid7
  • blobid8
  • blobid9
  • blobid10
  • blobid11
  • blobid12
Last edited by mangusta

OK, a couple things about lists of "things to do"......they never quite get all finished, because you're always finding more things to put on the list.....to finish...!

Friday was a very nice day here, so wrapped up a lot of small stuff! Primed and painted up the rear strut arms. I used Garth's trick of aluminum foil to cover the booties! It worked fantastic! Precision taped the large lock nuts, and then the tin foil worked to cover the rest! No primer or paint where it shouldn't be!

Here's a shot of the clothesline in play...
 

I let these "age" over night after baking in the sun, before unwrapping them.

Friday before painting started, I cut and did a final fit on the firewall insulation material, and once the temps warmed up a bit, installed it all!

Installed the heat shields, wiring, coil, engine compartment lamp, voltage regulator.
Looked like this before I started on Saturday morning.


ONE thing I am EXTREMELY grateful for during these activities, was the digital camera. I went back in my archives to over a year ago, where I had stored pictures of the "before" I started repairs/stripping, fresh after the engine was pulled. I took fairly high resolution pictures, and when printed on standard size paper, I was able to see all sorts of details that aided me in reassembly!!!! If I couldn't see it clearly on a picture, I could always go back to the computer and blow it up 300%...or so it seemed, to check the little things that "got away" from this rusty steel trap of a brain!

Saturday, unwrapped the ends of the strut rods, disassembled them a tad, squirted a few shots of grease in each rubber bootie, and replaced three booties as they were cracked or damaged. (Perhaps header heat didn't help....who knows....)

Dug out the shocks and set them in place. Connected up brake lines to the new caliper hoses, worked on fitting the clutch slave line back in place. Copper tubing had gotten slightly out of shape, but it was convinced to cooperate!

After installing the heat shields on the front firewall surfaces I find out now that the insulation is so much thinner than the original stuff, that I don't need such long screws.....they stuck thru the carpeting!!! And also I didn't like the idea of that going on next to the gas tank on the RH side, so today, I picked up some shorter stainless #6 sheet metal screws and then cut the last 1/16" or 1/8" off of them to "dull them up!" Came out nice!

I also installed the speedo cable and brake vacuum tube on the LH frame rail and secured it into place along with the clutch line.

Rebuilt the heater hose "tree" with pieces of the new Goodyear blue Hi-Miler where I could use it, and some other bits and pieces as needed. 1/2" on the LH side including connection to intake, and 5/8" where it connects to the water pump...although I guess that could technically get swapped to a 1/2" fitting in the water pump....we'll see.....it's got new 5/8" for now!

When installing the new motor mounts I sourced out, I ran into a small problem with the LH line where it connects to the brake amplifier, mounted on the RH inner frame rail (NOT ALL CARS GOT THESE!). Piece of new hard line I formed and ran was too tall and hit the aluminum engine bracket! When the old modified frame mount was there, it cleared. Since I shortened it back to stock....problem #1!

Can't put the wheels back on, because I need to bleed the brakes....and I can't bleed the brakes...because...

I had used a Swagelok 3/16" brass union to splice the front bubble flare piece of tubing, to a standard flare piece of tubing when I replaced the hard line to the left caliper a few years back. It had a rub through from contact with the axle at some point in it's life....I got to experience the failure one year after the big show in Vegas...luckily while on a trip home from work!

The Swagelok fitting turns out to be one time use thing when it comes to the ferrules. I successfully reformed the tubing for clearance, but needed a new ferrule to install as now the old tubing was too long.... I reduced a "loop" and now had extra length....

Well, I used to have an extra union, as I bought two....but for the life of me, I couldn't find it! (I hope whoever I gave it to used it well!!!)Looked through all of my Goose parts boxes, the traveling tool box, by garage box, small parts bins....nope.

So, about 5 minutes scrounging around on Ebay, I found a new stainless steel version for $5, and a brass "T" for another $4 which I will gut for parts so I can re-use the old union as a spare in the tool box! Those should be here by Tuesday or so.

Today, I added some tie-wraps in critical places (used them danged pictures again!) and washed up the wheels and tires. Cleaned up the coolant overflow tank a bit, gently knocked it on the workbench to loosen up some scaly bits stuck to the bottom....

I tried to find some 1/2" PCV line hose, or vacuum hose, but struck out at the local parts houses... will keep looking. I used a piece of heater hose from the brake vacuum tube to a piece of hard line which connected to a fitting on the intake, but noticed that it was very collapsed. If it collapsed under braking, that could be bad....so I need to find a length of reinforced rubber line that will not collapse so easily.... Hard line to the fitting on the intake may all change too...since this intake is not as tall as the Boss intake was......so will keep this on the list for engine stuff!

Didn't yet install the last piece of shifter rod. Helped the wife re-pot some plants....least I could do!!! I'll wrap this piece in shop towels to protect the paint....be careful with the hammer this time!!!!

So, without further delay, here is my new engine compartment, "almost" ready to receive an engine!

First, a (slightly fuzzy) reminder of the old, from up in page2:


And now, TAH DAH!!!


What to do next:
Repair brake line
Fill and bleed rear brakes (pray for no leaks!!!)
Install RH motor mount
Install rear wheels
Install rear shifter rod piece
SET IT BACK ON THE GROUND!!!!
Start an "engine" list!!!

I will install the drive axles once I put in new seals and grease, when I get closer to putting the trans in...no sense banging up all the paint with spinning axles....well, they will not be spinning at a high rate of revolutions...but you get the idea!

Parking brake cable will also get tied into the whole deal once I get the new stainless (Mangusta International) mufflers fitted up. Always install these buggers with the full weight on the rear wheels! They fit easily with the wheels hanging in the air....it's when you put them into the "at rest" position that the problems start happening!

Ciao!
Steve

Attachments

Images (5)
  • blobid0
  • blobid1
  • blobid2
  • blobid3
  • blobid4
Last edited by mangusta

Alright, back to it! Spent the last couple of days side tracked on a 68 Shelby tilt column rebuild...was a small challenge....make one good column out of two bad ones please! It is packed and ready to ship....back to the engine!

I just looked at the date I took these pictures and it was almost exactly 25 months ago. I started on the rebuild way before I started dissassembly. Of course never anticipating a one year side track! Should have known...it's a Goose! Smiler


Follow along, this is "almost a long block" in around 20 pictures...and 10 minutes!

My core block, from a 92 T-bird IIRC.
 

Bought a complete engine and pretty much discarded everything but the block....sold off the EFI intake etc, heads....

I had it bored +.030 and it needed a slight amount of decking on the top of the bores to align the decks properly. (Found this when I was checking installed piston height!) Here the crank is already in as well as the new E303 Ford roller cam.
 

Nice machine work on the crank oiling holes!
 

Here is a crank spinning tool I made from an old Ford 352/390/410/427/428 harmonic balancer spacer. Drilled a cross hole in it large enuf for my big screwdriver or a lug wrench and voila! New tool! ...for cheap! Slips right on and off!
 

Closeup of a piston. Had to really dig to get a flat top piston with only two valve reliefs! Four would have cut down my compression ratio. I am aiming for about a 10.3:1 if my calculator did the calculations I wanted it to do.....correctly!
 
I polished or smoothed the edges of the reliefs to lessen chance of detonation on a sharp edge! Used a machinist's deburring tool followed up with some 320 or 400 wet/dry sand paper, maybe followed up with some 600....can't quite recall.

New I-beam rods with 12pt cap screws. I would have liked H-beams like I have already, but in this case, they would only be effective for bragging rights! (6500 absolute max RPM self imposed limit due to jackshaft...)
 

Spirolocks....hmmmm. First time messing with these little buggers!!! Two on each side of the pin.....
 

In goes a piston.
 

Slight mixture of molylube and oil for the bearings before tapping the piston into position.
 

New ARP or so, HD oil pump driveshaft.
 

New Ford double roller adjustable timing set and high volume oil pump. (NOT high pressure)
 

Lubed up the new roller lifters with more of the same mixture of moly and oil.
 

Checking piston to valve clearance. Running 1.7 rockers to get a tad more lift than the stock 1.6's.
 

New heads, Motorsports Y303 heads. Tall intake port, no longer available, replaced by X and Z series heads. These have a little more sealing materials around the tops of the intake ports....when the Motorsports tech guy said that he'd seen some cases of intake gaskets failing at the tops of the ports, it helped me with my decision! Mo' meat please!
 
I also smoothed the sharp edges on the chambers too. These are fairly large chambers...64-65cc IIRC. Will see what I find in my notes.....

Since these are Motorsports heads, they are cut for a 1/2" head bolt (351), so spacers are required to install them on the 302 blocks.
 

Close up of the chamber and valve work.
 
NB: Need to install spark plug indexing washers and mark plugs yet!

This is about where it sits right now, with heads on with only a couple of bolts, so until I can get intake manifold fitting sorted out....
 
5.0L oil pan is just to keep it clean. Also stored inside a large plastic bag!

Some shots while checking out the Performer RPM for air cleaner height.

First some checks (to deck, front and rear) for comparison against a regular Performer 289 that I had specially modified for the tall port Y303 heads. (I'm leaning towards the RPM now that my chassis engine mounts are now at the correct height!!! ....but the Performer would allow me to raise the engine back up a tad.....ugh!)


Now with carb and air cleaner (no carb spacers or gaskets)


That's about where I am.

Tonight I spent comparing and measuring for the jackshaft bracket and the two idler pulley mounting brackets.

I have all three in NOS form, and none of them fit properly. While the idler brackets are flat on the front side, where they attach to the water pump, they have gaps or are machined crooked!!! I also need to lower the main jackshaft bracket about .200" to get it to line up with the holes in the front support properly!

I'm making my list to take to the machinist....

* also need to cut a new pilot bushing for the trans....or ream the one I have out ever so slightly.

Next? More of the same...lots of staring, putting on a part, taking it off. Put on a different part or two....take them back off......

I guess I can say that it is hand built without lying!

Cheers!
Steve

Attachments

Images (25)
  • blobid0
  • blobid1
  • blobid2
  • blobid3
  • blobid4
  • blobid5
  • blobid6
  • blobid7
  • blobid8
  • blobid9
  • blobid10
  • blobid11
  • blobid12
  • blobid13
  • blobid14
  • blobid15
  • blobid16
  • blobid17
  • blobid18
  • blobid19
  • blobid20
  • blobid21
  • blobid22
  • blobid23
  • blobid24
Last edited by mangusta

Tonight I was determined to start porting on the new intake manifold...but which intake??? Dug back into my pile of notes, and found my measurements with various intakes and stock air cleaner, measured from the front and rear deck surfaces of the block to a line thru the top center surface of the air cleaner (center is taller than the edges by a bit due to the shape).

I have a choice of the Performer or the Performer RPM. Last night, I determined that the taller (+5/8") carb flange of the RPM would be desired as less cutting on the center bearing support of the jackshaft bracket would be needed to allow me to run an automatic choke! Something I have been sorely missing! If I had to run the shorter Performer, I would be required to run a manual choke and a cable...not too big a deal....but I like automatic....! Have grown fond of the feature you may say....

From my old notes, I determined that the RPM will fit, as it is within 1/4" of the height when using the original cast iron intake manifold and stock 1" spacer! I reasoned that I have dropped my engine mounts (chassis side) by 1 5/8"), increased my rubber mount thickness by about 3/4", so it should leave me in the neighborhood of 7/8" to allow a 1/4" phenolic carb spacer and proper gaskets. AND, I may even get REAL lucky and be able to put in 1/2" shims to raise the engine back up a tad to give my expensive oil pan some room to get out of the driveway!! Hey, at this point, if I can get away with 3/8" shims, I will still be a happy man!

Previously, I had already scribed marks on the intake ports to use as a guide.
 

These marks are out to the extreme of the gaskets, which were made to fit a number of Ford small block aluminum heads. They are Felpro gaskets, but nothing you can buy over the counter...go figure! OEM (Ford Motorsports) only! So, I've been buying up a few sets when they pop up on ebay when dealers are closing them out! There are other gaskets made that will now work, Edelbrock and others have similar that will do the trick. In my case, I do not want to take out all the material to the lines. I need to leave about 3/32-1/8" as the ports are almost right...but the tops and bottoms of the ports can use some work, and then straightening on the sides a bit.

SO, out to the garage to start porting....dug out the porting kit I bought from Standard Abrasives, and scanned the directions.... "go easy on aluminum" seems to be the mantra....AND you need a 1/4" die-grinder, air or electric..........something I failed to purchase! Hmm, too late to hit Home Depot tools....so on to something else....

Here are some other manifold mods....did most of the measuring last night but didn't mention it.
Last year or so I was checking this all out and I removed some casting material from the first and second bolt holes on the RH side to allow the jackshaft bracket to sit properly. I will be lowering the bracket by .200" also..more in a few! Will probably now need to remove even more material!
 

At the rear of the stock intake, there was a boss about 3" in from the RH side of the intake. The original jackshaft bracket bolted to a hole here for additional support. I hope to make up a piece and have it heliarced in place to allow this support to be utilized.
 

My jackshaft bracket is a new unit that I picked up in Italy on a business trip that allowed me the opportunity to visit the factory! This was back in about 96. So far, very few of my NOS pieces that I picked up from the factory have actually fit with out some sort of needed tweeking or major difference from the old part! Testament to the fact that these cars are "moving targets" when you are trying to get parts to fit properly, from the vendors!!! ...or anywhere else!

In comparing my original bracket to the new one, the new stands are aprox .200" too tall.
 

Lowering it this much will allow the front support bolt holes to line up properly. The front surface of the jackshaft bracket was originally fly cut straight across where the front bracket attaches. The new one has been spot faced...and now has material in the way of the two pieces mating properly.....so that will need to be addressed also.

In addition to these differences, the size of the rear shaft bearing is also larger!!! Already purchased new bearing in the proper size...now have extras of the old ones!

I also bought both idler pulley brackets new from DeTomaso. The original RH unit I have looks like someone went after it with a hammer, shattered it in three pieces, and someone welded it all back together with large pieces of gum! Makes me wonder if I shouldn't have this new one reinforced too!

 
While the jackshaft bracket machining seemed straight, the work on this piece was anything but! These two nearest bosses are not flat and are not at the same height relationship to fit properly on the water pump bosses to allow it to sit properly to meet up with the jackshaft bracket front two support bolts. It's totally a Goose thing, if you are a Pantera owner scratching your head....

I will have .070" taken off of the small boss, and the long one "flattened" or made parallel to the front bosses....all of which appear to be level with each other when placed on a super flat surface!

My original LH idler bracket is in great shape for some reason, so I will re-use it. The new one I picked up seems like it will do the job as well but could need some machining.... I will test everything with the Edelbrock water pump that I swap off of my old engine before passing final judgement. I am using a 1973 water pump (D3TE Ford casting)for mockup, and found some slight fitment issues when I dug out an original 1968-69 Ford pump casting! The idler bracket fits that older casting very well!!! The early pump was still on a family car driving around.....last time I worked on all of this, so wasn't readily available for test fits!!! Smiler

Now I know it is a good part to have around! I had been wondering what to do with it...scrap pile or.....?

Maybe that will be a good thing for this weekend.....swap remaining parts off of the old engine....pulleys, install fuel pump and water pump, align at least the LH idler pulley properly. RH will need to be done after the machining is complete.

It probably took me longer to describe all of this than it took for me to get to the point this evening where I needed more power tools to go further. In order to move the entire project forward, I dug out the halfshafts and got them ready to roll!


I installed a new cork seal in each and greased up the splines. I also lubed the u-joints. They took a rather disturbing amount of grease....which makes me wonder if they were ever greased ?! I must have given them a few shots the first time this was all apart, as I remember shooting grease out the air hole of the splined inner half shaft...and having to clean it off of everything after a drive..... The splined slip joint portion of the shaft does not hold much grease to keep the splines happy!!! As for the u-joints...maybe I missed it! All 4 of them??????

Tomorrow: shop for new air tool and grind away!

Out!
Steve

Attachments

Images (6)
  • blobid0
  • blobid1
  • blobid2
  • blobid3
  • blobid4
  • blobid5
Last edited by mangusta

This last weekend was a good weekend of small progresses....

Buddy had a die grinder, so just borrowed it instead of buying one.....

With about 2-3 hours, I ended up with this:
 

But what you really want to see is this!


Remember, I never intended to take the grinding out to the scribe marks. They are the gasket size, but not the port size of the head....

While the heads were still loose, I installed spark plugs and "indexed" them, so that the electrode is not shrouding the spark. I used indexing washers, which are various thicknesses, to cause the electrode to land in a different spot when tightened down.

Installed and torqued down the heads. Whoo hoo!
These Y303 heads are made for 351's and have the large 1/2" head bolt holes. Since the 302 takes smaller bolts, I had to purchase special shimmed washers to take up the space. (Ford used to have special stepped bolts....but no longer....you get washers!)

Received my new Swage-lock fitting and installed it today after bending the line to clear the motor mount properly.
 

Removed many components off of the old motor. All that remains is to claim the oil pan! Need to eat my wheaties.....and get the long block up on an engine stand to do so...then give it a quick bath in parts solvent. Maybe later this week after it rains...big storm a comin'!

Spent a LOT of time on the jackshaft brackets and alignment. Ran my (new)brackets down to a local Mustang shop which has a small machine shop and the guy to run them...!!! In just short of two hours, I had a .200" shorter jackshaft bracket as we cut down the 4 mounting towers, spotfaced the front mounting surface so that it will mate properly with the front support bracket, a support bracket that was altered very slightly as well to fit better.

I played around with various shims and washers and got the belts to align to the point where they shouldn't go flying off at high RPM's! I have yet to mount the actual jackshaft and it's bearings etc, so will probably need to do some more work to line the front (and rear!) pulley up!!!

I'll need a new small belt (idler only) due to changes in where the idler bracket mounted... and probably a new belt for the jackshaft...we'll see!

Here is a shot with the water pump mounted, fuel pump, oil sender, harmonic balancer is torqued down, and crank pulley is installed. This shows the relationship of the idler pulleys and their mounting brackets nicely.


I may need to dredge up on of those spacers that you find for the nose of the water pump. DeTomaso cut a 3/4" hole in the pulley and the shaft is 5/8"....could be mounted off center easily! I think their first motors may have been industrial types....which supposedly use the larger shaft size! I know I saw one of these spacers not that long ago, perhaps last water pump job we did here.....but I have no idea what the heck I did with that spacer!!!! AP store will have one..... Didn't need it before, but just in case the bolts don't center it properly, I don't want a vibration....for a $1 cure!

These pulleys, water pump and crank, are special units cast up by a vendor for DeTomaso. Although some of your cars will have a stock Ford Crank pulley, found on some early Mustangs (1965-1966), it will most likely have a DeTomaso version of a water pump pulley on it, as Ford never produced a two sheave water pump pulley with one small and one large belt (width)....just the crank pulley! I dug through the Ford parts books and could not find a stock pulley which would do the job! Not made by them!!!

Tonight, I spent time aligning the pushrod guide plates. I had a set of Motorsports guide plates, but they seemed a little on the weak side and they really didn't allow fine tuning of the rocker arm position!
Here is a shot with a Motorsports fixed version on the left and the unnamed adjustable units on the right. Once they are in position, you are supposed to tack weld them together so that they don't shift when you torque the studs down! That will be interesting!


One thing that I have not yet figured out yet, is the oil dipstick. I would love to use this version here.... from a 91-92 T-Bird and probably a few others!
 

It could go on the RH side in the stock location but I want to bend it back some more to get out of the way of the coil and front hinged cover, so it is easy to get at when filling up with gas.

Something like this, only bent back more...
 

If that isn't going to work, then put it on the LH side but instead of curving towards the front of the engine, swing it 180 degrees towards the rear. Need to figure out if the AC compressor will be in the way there, or perhaps the paper tube for the air cleaner, or even the water tank! We'll see!


That's it folks!

Shopping list:
Various bolts, washers, lock washers.
Water pump shaft spacer
Belt(s)
Lower hose for water pump
1/4-3/8" carb spacer. More choke clearance!!! Almost there!

Research:
Colors on distributor gears for roller cams. New gear I have has yellow paint on it. Distributor that is from a roller motor...has orange paint on it.....not sure who is telling the truth! Could be both are good!

Valve cover spacers...did I forget to mention that my whippy dippy late model "powered by Ford" aluminum valve covers will not fit with the adjustable roller rockers installed???? UGh!

Always something!
Ciao!
Steve

Attachments

Images (8)
  • blobid0
  • blobid1
  • blobid2
  • blobid3
  • blobid4
  • blobid5
  • blobid6
  • blobid7
Last edited by mangusta
quote:
Ford never produced a two sheave water pump pulley with one small and one large belt (width).

Would love to see a picture of that pulley from the top looking down onto the sheaves. My 66 GT Mustang has a 2 sheave water pump pulley, but both sheaves are the same size I believe.
quote:
One thing that I have not yet figured out yet, is the oil dipstick. I would love to use this version here.... from a 91-92 T-Bird and probably a few others!

If you need a longer dipstick, you could use one from a 1990 Ford Econoline Van that had the 351W engine. Trevor used one on the 392W crate engine in his Pantera.
Ford Motor Company part numbers:
Dipstick: F2UZ-6750-B
Tube: F5UZ-6754-B

Attachments

Images (1)
  • dipstick_90-Ford-Econoline_1-sm
Garth,

Thanks for the shot of the Econoline setup! I know I have seen them......just forgot about them!

As for that pesky pulley, nope. Ford never made one with the small sheave in the rear, and the larger sheave in the front.

The reason that they do have a crank pulley that fits is due to power steering cars. They used the larger 1/2" belt on the pump, but it was driven directly from the crank pulley and didn't go 'round the water pump!

In later years, the sheave on the P/S pump went smaller as Ford started using smaller width belts depending on application....

It's always something.....

Steve

Well, here we are mid week, wondering if I went forwards or backwards!!!?

Some updates:
Distributor gears: orange is for a flat tappet cammed 302...ugh. Just what I don't need! Not what I was sold either....this "had been in a roller cam motor..." Yah, may have been in it, but wasn't correct!

It is in great shape, very little use on it, so will go in the spare pile for spare 302 parts...non-5.0L parts!

Yellow paint: AHAH...for a 302...and a 351W....hmmm. This won't fit either....in the early 90's or late 80's.... Ford decided to use the same gear for both engines...seems logical! That made the shaft diameter grow to about .530" from .470 or so.... Another part for the "spares" pile!!! But it will work for the old 351W if I ever get around to that project.....ugh.

Ordered a new gear off of ebay...we'll see what happens.

Tore down the distributor and am working on learning about advance curves etc.

All it really did is make me wonder about "what is the more ideal magic approximation" of a max timing figure? I had always thought 34-36 degrees but that may just be for the Clevelands.....and we're talking 302 here.... What was odd, is that the mechanical advance mechanism under the "breaker plate" had the stop set up in the "21L" slot, allowing it to advance a whopping 42 degrees! (2x the stamped number= advance degrees.) Add in 4 degrees of static or initial timing and you've got a whole lot of timing! I guess the old 80's non-roller, non-efi engines were pigs with low compression.....

Again, will need to do a little more research on timing max value and a curve. I understand that both are a matter of how much compression you have......and of course...fuel quality....

Pulled the old gear off of the distributor tonight and put all the bits away for later reconstruction!

Carb Gasket/spacer: Found an Edelbrock #9266 extra thick gasket (.320") with four longer carb studs in Summit's stuff on ebay. About $20 shipped... Would cost me at least $5 in driving around.....I'll let the UPS or FedEx guy deliver...will give the dog something to get excited about.....

Hoses: Trying to figure out what I bought for a lower water pump hose....I thought I may have borrowed it from my stock of 68 Cougar parts....we'll see!

Worked more on the fitment of the jackshaft bracket to the intake. I want to have a rear support boss welded onto the intake....so cut up a mock piece out of some firewood.... then found a piece of aluminum....but need to shave it down with a mill to .352" thick and then had file it to fit the contour of the intake runner.... It shouldn't take much stress...just act as a support for the jackshaft bracket to keep it from rocking.

Looked at jackshaft bearings and how to get them on and off..... THIS is going to be a real PITA!

I have a puller for getting bearings off..but this really only works well for the end bearings. (I will need to get more threaded rod....for doing the middle bearing!) I believe this is an OTC (Owatonna Tool Co) puller that I got either off of ebay or from Harbor Freight....


I had put the new bearings on the shaft earlier.....in anticipation that this would be fairly straightforward and easy! HAH! What was I smoking????

Stopped by Home Depot on the way home from work and snagged a 3ft piece of 3/8" threaded rod, a 5" length of 1" black pipe (only because they didn't have an 18" piece of it!...), and one more can of silver paint to do the trans crossmember in.... (Threaded rod to pull bearings thru bores to make it "not like the first time" when doing final assembly, and the 1" black pipe is for "tapping" the rear bearing on if need be...

Since my jackshaft bracket was new, I did some deburring of the inner bores and around where the snap ring grooves were cut. I then used the threaded rod and any number of round things with a minimum of a 3/8" hole thru them to act as pushing or pulling bits to help move a bearing through a hole! I even put an old throw out bearing to good use!


I put a small amount of anti-seize in the bores and slowly applied pressure to the nuts on the threaded rod. Starting with the center bore hole I got about 70% thru and it stopped. Since the bracket was not bolted down to anything, I saw that the front section of the bracket was starting to bend under the pressure.

I would need to fabricate long spacers to put in between the bearing bosses at the top, to prevent the bracket from bending towards the un-cast side. I stopped, reversed the pile of adapting parts, and pulled the bearing out. Did a little more deburring, polished it up with some worn 320 wet/dry paper, put in more anti-seize, and this time pulled the bearing through with little opposition! Wiped off the mess I made with the anti-seize and pulled the bearing through again!

Repeated the process with the front bearing and also the rear bearing. I have a pic I'll post later of the polished finish that resulted!

Here is a pic of the rear most bearing area after pulling the new bearing through twice. Nice and polished!


A quick check of the parts book to look for bolts (more in a bit) and found that there are three different versions of jackshaft bracket! This is a later version, that has a 52mm rear bearing where previous versions used a 47mm bearing.

As a result, I need to stop at a bearing house and pick up two snap rings for the larger bearing!

While trying to figure out the bearings, I was staring at the bracket mounting bolts(4) wondering how this shaft would best go together, and how are you going to get it all into a press......and then tighten the darned mounting bolts down again..... OR, mount it on the engine then figure out how to press the shaft into place......

With the shaft in place (OK, just barely in place!) I figured out that conventional hex head bolts are not going to be removable. Once in place they stay in place! Cannot get a good wrench on them either....not to do 18-20ft-lbs of torque on them! Socket doesn't fit on straight, and you can get in with an open end wrench...but not so good in the case of the rear most bolt......

 
This one actually looks good compared to the next one and the rear most bolt....which looks darn near impossible....


SOOOO, here is where I need your help! Providing you own a Mangusta with an operational jackshaft in place! What sort of bolts are holding your jackshaft down? Hex head? Allen head? studs with special nuts??? (the parts book did not list special bolts to use for the jackshaft mounting.... Frowner

)

I'm going to see if I can get some 3.5" Allen headed bolts to see if they will work. They take a 1/4" Allen wrench, so would just get a socket attachment that size....to throw in the tool box..... These bolts are graded higher than a grade 8 bolt, so should be up to the task of holding down an intake manifold....

Carb update: I really don't like the RH fuel entry on the carb, as I will need to bend up a perfectly good 1-->2 chrome fuel line....to clear that danged jackshaft bracket again! I tried to use my old one but it had been bent too many times before...and cracked. More for the scrap pile! But I had a new one standing by in another spare parts pile....but I really don't want to bend it up...and run fuel line across the intake manifold.......

If I change the bowls to Dominator type fuel bowls, I can change the feed side from the RH side to the LH side just by changing the fittings. I will need to install an accelerator pump diaphragm in the rear bowl, but I can take the arm off so that it will never pump fuel. (Not that the carb body is drilled anyway....) This and the finish of the bowls...natural "Holley green or brown" vs polished nickel or something.....will be different from the original... I just happened to have three new Dominator bowls hanging around...again, in that other spare parts pile....along with some new reusable gaskets (if this carb doesn't have them already), and an old but good accelerator pump rubber, and cover. I can take the pump arm off to prevent it from pumping or getting bumped and pumping....

Valve covers: figured out that the ones I wanted to use, late model "powered by ford" off of about an 83-86 EFI Mustang, will not clear the rocker lock nuts on the roller rockers. Baffle hits. Can't take the baffles out....good way to oil down the car behind you....!!!

I think I will go with a set of the new "Boss" covers that look like the old Boss 302 with the fins on the top, but they bolt up to the 289-351 type heads! Since I want to run the DeTomaso "pork chop" emblem that was stock on the valve covers, I can place them to cover all the false claims of a Boss 302...and stop the stupid questions before they roll off of a tongue! Smiler

Smiler

Smiler


Finding someone that can actually tell you what they are selling is a different matter.....some ads say no baffles, no grommets....others say comes with it all! Some say "stock height" (for what????) others say will clear "most" rocker arm combo's..... Of course all of the folks selling these valve covers use the "corporate" press release photo, which really doesn't show you what it looks like because of the poor angle it was taken at.......ugh.

So, you can see where I can't tell if I went forwards or backwards.....!

Ciao! Pictures later....(added 4-29 after PCNC meeting!)

Steve

Attachments

Images (6)
  • blobid0
  • blobid1
  • blobid2
  • blobid3
  • blobid4
  • blobid5
Last edited by mangusta
Steve, Here is a pic of jackshaft on 8MA1244. All hex heads except those in the intake.I would assume (hope not ASS _U_ME, mainly me) that the allen heads were not OE. They would have been studs with regular nuts.

With regards to the dipstick why to use an old school in pan set-up

Question for you now; I am replacing the carb. Did you say there were fitment issues with an electric choke?

Denis

Attachments

Images (1)
  • 03_2010_007
Last edited by denisc
Denis,

I believe that if you stick with the Autolite/Motorcraft 4300 type carb, that there is no choke issue as the choke is mounted higher on the body....

If you are going to put on a Holley, then yes, you will probably run into the choke unloader boss hitting the center bearing boss on the jackshaft bracket.

Thanks for the info on the Allen heads! I would like to hear from a couple more guys, but I think we know the answer...!!!

THANKS!!!
STeve
Jay,
!!!!!THANKS!!!! I would have discovered/remembered (you told me before!) this the day of installation...and my desire to use spacers to lift the engine would have been satisfied at that point.....ugh! Where's that stack of washers I had laying around here....!

I want to see what an allen headed nut is....!

Mark, wow! It looks like gravity is used on your jackshaft bracket! You appear to be missing one front bolt entirely! What's up with that!?

I see now that I will not be able to run my whippy dippy new spark plug wire holder... The boss that is on my intake runner is WAY too close to the bracket to allow me to even get a bolt/socket in there........darn! That is a part unique to the Goose.....


Thinking about shaft and bracket assembly order... something like this....

1) install center bearing on shaft. (OD of front two bearings on my bracket (later model part!) is smaller than the rear, so will pass through easily...more bits of threaded rod to use with the bearing puller/pusher!)
2) install shaft through rear boss and slip front bearing onto shaft and press or tap in place using my 5" piece of 1" black pipe (or a specially machined tool....)
3) install rear bearing. Tap or press in place
4) using more pieces of threaded rod, I can turn my bearing puller into a bearing pusher. Extend the tool using two long lengths of proper threaded rod, and something over the far end of the jackshaft bracket to act as something to pull against, to force all three bearings in place at one time.
4a) if you have already installed two of the bearing C-clips, one in the middle and one in the rear bearing location, you can push the shaft in place and not have to worry about pushing it in too far. When the bearings hit the C-clips, they will stop moving!
5) once in place, install remaining two C-clips.
6) install rear pulley. Front pulley needs to remain off during installation of engine into car...

Will think some more about this....
Steve
Last edited by mangusta
Pics of original jackshaft fasteners. There are two Allen head fasteners, that appear to be an Allen bolt that has been cut, drilled and tapped to fit over and engage a 5/16 NC stud from head. They are a length that goes down through the jackshaft carrier casting, and stops just short of the bottom. They cannot be removed or installed while the shaft is in place.

Attachments

Images (1)
  • jackshaft-3-text
This is the fastener that is missing in the picture that is 5 posts above.

quote:
Originally posted by JMM3:
Pics of original jackshaft fasteners. There are two Allen head fasteners, that appear to be an Allen bolt that has been cut, drilled and tapped to fit over and engage a 5/16 NC stud from head. They are a length that goes down through the jackshaft carrier casting, and stops just short of the bottom. They cannot be removed or installed while the shaft is in place.

Attachments

Images (1)
  • jackshaft-5-text
Jay,
Couple of things:
the 600 242 is the casting number of the part....just coinkydink that it matches your car!!! Smiler

Those Allen fasteners look like they would work well as you can still loosen them and get the whole mess off, with the shaft in place? Understood that they must be in place before shaft is installed....

My old steel bracket had just enough clearance in the bearing holes that I could tap the shaft in and out with a plastic mallet. That is the only saving thing that allowed me to change bearings out in the parking lot in Vegas one year! (Blew a front bearing....cheap or incorrect bearing seals I believe....new one looked much better! Better seals.)

If I can get conventional Allen headed bolts to work, I'll go that way... if not, then I like this idea too!

Spoke with another member last night at the meeting that is going to try some sort of double sided stud, to secure the intake manifold, and allow removal of the shaft and bracket without breaking the seal of the intake gaskets.....allowing water to enter the intake ports and the engine valley!

Certainly a unique and challenging feature of these cars!!!

Steve
Steve,

Every time I see more detail about how much brainpower is need to restore a Mangusta it makes me want to beak out the Sudoku games. I hope I'm ready for it when I finally do get around to starting.

John, those "bolts" were some late '70's hot rod guy's idea of cool. Pretty silly and they will certainly be going when I get on to the resto.

Mark
Mark,

Your puzzle point is well taken! Very much to the point in my progress or lack of lately!

Spent last weekend up in Gold Country near the small town of Plymouth. Attended a flea market where I picked up some tool widgit items, a wine festival with local wineries and restaurants doling out samples, and a small car show of perhaps 18 cars and trucks. Some really nice examples! My fav was a 1954-56 customized Merc. Sort of a seafoam metallic green with faded in highlights etc. Have pics to post later....

Before we left on Friday, I dropped by the neighborhood machinist's house and milled down a piece of aluminum that I will have welded onto the rear of the intake manifold, to act as the rear jackshaft support, as was on the original cast iron intake. It will serve to give the bracket some rotational strength. I also cut up a piece of black iron pipe (removed the threaded section) to form the basis of a tool for pushing or tapping bearings onto the shaft.

Monday night I spent hand filing and fitting this piece of aluminum to the back of the intake. Once I got that all squared away, I decided it was time to weld up the adjustable guide plates.... Tack welded them. Covered the valve springs and everything else with aluminum foil. It forms nicely around stuff and won't burn...and you can flatten it out and do it again! This went well! ...or so I thought....

Tuesday: During the day, visited the local "nut-n-bolt house" (Olanders) and picked up a set of 5/16"-18x3.5" socket head cap screws in stainless to use on the 4 bolts of the jackshaft. Pricey little buggers! Five of them ate up a $20 bill.... (need to get the socketed allen bit for these now too! 3/8" drive should be good.)

Also ordered a new set of valve covers from Rousch. They are Ford Motorsports covers, but Jack has the best price in town! $129 for a polished set! They will clear the rocker arm nuts with room to spare, and will have the old look of the Boss 302 covers. Finned on the top.... Would have loved to use my aluminum "Powered by Ford" covers, but they are just too low, and spacers cost almost as much as a new set of covers....so....it was really simple. M-6582-BOSSP is the part number.

Next....torque down the rocker arm studs and see where the adjustment is.....after the welding. Things start taking a turn for the not so good here.....

When mixing and matching parts, materials, and manufacturers, not to mention blazing a trail in engineering combo's of parts, Mr Murphy is bound to appear. He did. In oh so many ways....

When torquing down the rocker arm studs, I used a torque spec from an old Ford shop manual for removable studs..... Later I found out that I should have reduced that amount by a lot.... On one of the rocker studs, I believe the guy that machined my heads may have not taken out enough material and I believe I was bottoming the stud out....as it felt like I was moving aluminum instead of making things tight..... These instructions were later found in the rocker arm info!! Go figure..... I guess I should have "read all the instructions before beginning!"

You know you are in trouble when the torque wrench doesn't click...and it doesn't seem to get tighter.....and then your brain finally says STOP! (before you really screw it up!) Well, I think I screwed up....literally!

I gave up and started looking online for torque specs. I got nothing with the ARP studs. Their website does not distinguish torque specs between ferrous metals and aluminum......no help! Edelbrock says 50ft-lbs, but they cheat and use steel threaded inserts in their heads! (NICE!!!) After looking long and hard, a 40-50ft-lb figure appears to be in order. There is no mention of this in the Ford documentation because the heads were not designed for this type of rocker mounting! Gloom on me! (They DO mention the intake manifold torque specs....thank goodness for that! Although it really isn't all that different than the specs for the cast iron manifold!)

The studs I am using have a .710" portion to go down into the head. The top .125 of it is tapered and not threaded, to accommodate an 1/8" guide plate like I am using. When the heads were cut drilled and tapped, the machinist perhaps mistakenly countersunk the holes to allow for this upper tapered portion, not realizing that the guide plates covered this portion and that the holes could be made with very little countersink at the top! (I thought I took him in everything.... been too long, CRS...!)

With only about .575" of threaded stud going into a hole that is now shy another .125" of threads at the top of the hole, I'm getting very close to "engaged threads= 1x diameter" of fastener. Normally I think the spec is closer to 2X the diameter to get proper ratings......advertised for the fastener.....

Anyway, all of this turns out to be correctable and also a moot point. In the process of welding, the guide plates all shifted due to expansion/cooling...when I checked, all of them had splayed the rockers out off of the stems! (whatever is the opposite of pigeon toed...) I should have probably torqued the guide plates down first, then tack welded....

Thankfully I only tack welded them and was able to bust them loose again after a few seconds with a die grinder. Will need to set them all up again, and number the rocker arms to make certain there are no issues due to manufacturing variances, and then tack them again!

If this doesn't work, I will have to check out the tin Ford Motorsports version that I purchased initially, but rejected due to reports of them breaking..... If I go this route I will need to drill the holes deeper and tap them with a bottoming tap. Searched around the internet for a thread repair kit and taps....

The one thing I did do that wasn't messed up, was modify the drain boss to clear the motor mount bracket on the LH side of the engine block, as seen above in one of the shots on the top of page 10 I believe. Just needed to take a tiny amount of metal off for clearance. Smoothed it up and took off the sharp edges with a file. Add paint later.....

Wednesday: Ordered a heli-coil kit with .656" deep inserts. Should work fine for me. Will hopefully order the bottoming tap Thurs. and get that moving this way. No need to have this stuff immediately, as I am out of town working from Friday until next Tuesday when I go to work one day here, then go back down to LA for two more long days!!! No Goose time!

I also called the bearing house in Gilroy that I ordered my new jackshaft bearings from, to check on getting snap-rings for the new 52mm bearing, and found that they had them in stock! (.076" thick for an ID hole vs outside) I had stopped by my local Motion Industries on the way to work this morning, but they didn't have anything in stock and suggested that if I did order them, I'd be taking possession of a whole crap load of them!

I wasn't certain of the thickness of the snap rings when I was at work calling (didn't have a micrometer handy....) so will call Girardi back Thurs and get those moving this direction too!

Tonight I worked on getting the oil pan off of the old motor. I still had a long block out back in the shed, sitting on the bottom of an old shopping cart. It works well for a small block... My plan was to yank the heads which would allow my son and I to lift the remaining short block up onto an engine stand from where I could then remove the pan. Well, easier typed than done!

When I built this motor back in '01, I used head studs and the special spacers to adapt from 1/2" holes in the head, to 7/16" bolt size of the block. I loosened up the rocker arms, removed some for access to the head nuts, and took them all off.....but due to the studs, which sorta point all over the place, they don't just fall off like you would get once you pull all the bolts out.... All I can say, is that I didn't have any head gasket issues!!!! Eventually, with enough prying and grunting, and more prying and eventually loosening up the little spacers, I was able to get most of those spacers out....which then made it a micron easier to lift the heads up and off....but it took a LOT of prying and convincing....certainly not as sexy as when the guys do it on a top fuel motor!!!! Smiler

Eventually got both heads off (in the dark no less), short block up on a stand, fluids drained more final like, and the oil pan removed. Wiped down all the bores real good and generally cleaned it up a tad for storage, then bagged it and put it back in the shed!

Cleaned the oil pan up in my solvent tub and stood it up to dry. It appears to not have the provision for a LH dipstick mount...... Sorta rules that out......but I wasn't too wild about a LH version anyway.. It is a shame that this oil pan may now be too deep for the car!!! (Now that the chassis engine mounts are lowered back to stock!!!) Oh well, it's just money..... Maybe I can sell it to a GT40 guy!

What I will do now, is design a drill guide that I can bolt down to one of the rocker holes to guide me when drilling the other side! If the heads were off, I'd be doing this differently.....but I have a $75 set of head gaskets in there that I truly do not want to waste! Just take my time, cover everything with masking tape and tin foil, and I'll win! I'll send this design off to my dad who can machine it up and mail it back to me in time to put it to use on Friday I hope!

I am also working on thinking up a set of pieces that I can use to push and pull the jackshaft in and out of the carrier bracket, as well as putting bearings on and pulling them off of the shaft.... I have some good ideas, but need to do some more machining and cutting of some 1/2" aluminum stock that I have! Not to mention visit Home Depot's metal section to see what I can find for suitable materials that won't weigh a lot yet will be strong under compression.....

OK, that pretty much sums up this week. Perhaps tomorrow I can post some pictures, as I won't be doing too much else, except for packing my bags to travel!

Ciao!
Steve
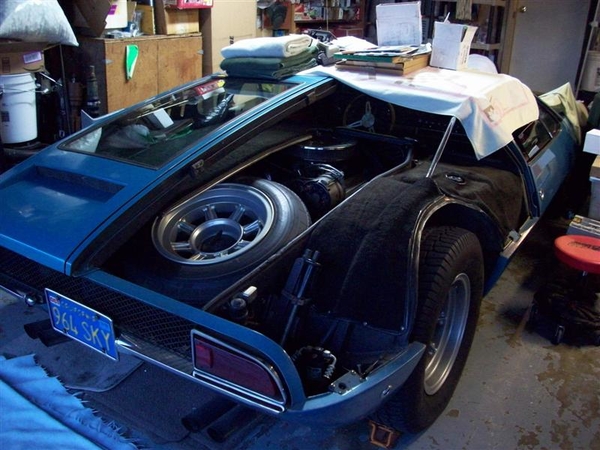
Add Reply

Post
×
×
×
×
Link copied to your clipboard.
×