Hi Rocky,
Just getting caught up on some of the updates... First...I think 45min drivetrain removal may be a record. Wink Very impressive. I think the Alt/AC bracket is slick.
- Sorry to hear about the rod bearing. I share your concern...why did it happen. I never like just moving forward w/o fully understanding the failure. Seems every time it do, I ended up with the failure again...
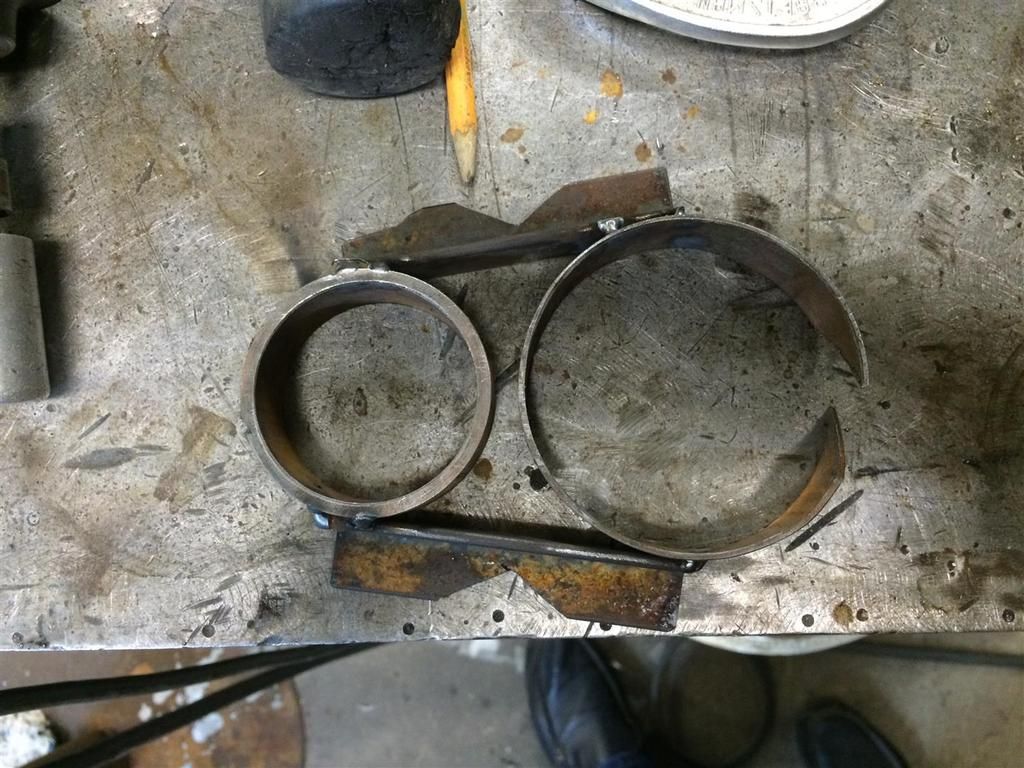
- Would love to see some detailed pics of the trans fixture when you get a chance.
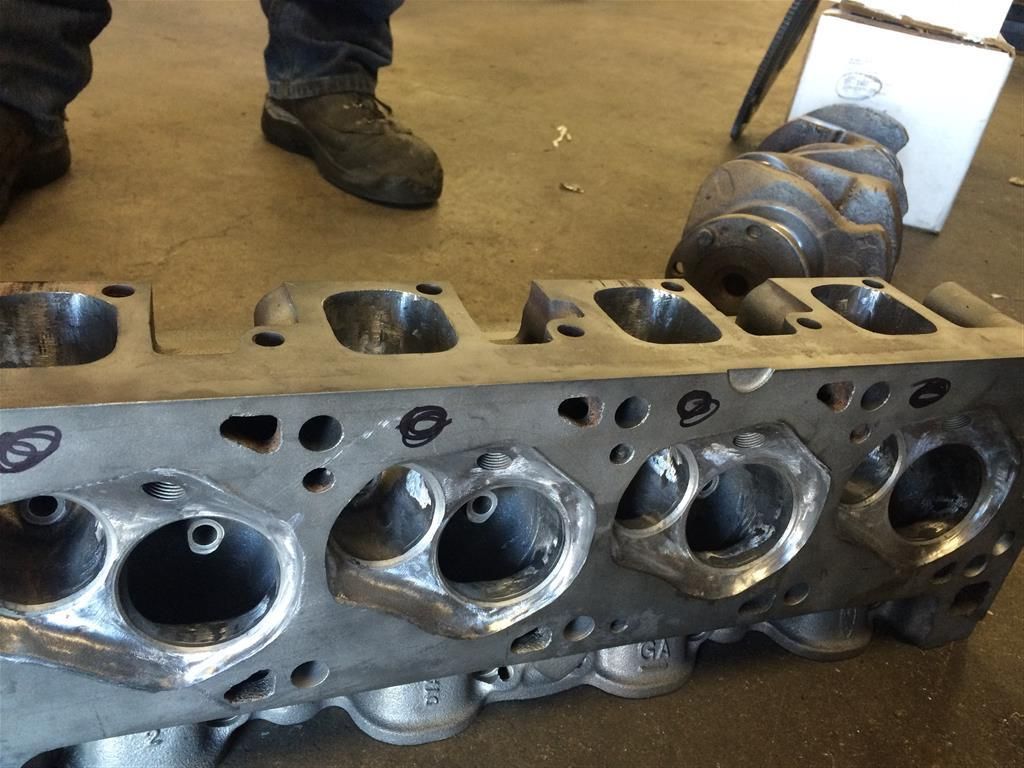
- On the heads, what did you mean by "minor hole drilling for water flow"? I have never done this on the 351C heads, and would like to understand it more.

Keep us posted. Thumbs Up!
Thanks for the compliments!

My 45 minute removal didn't include all the work leading up to it - I'm not really THAT fast!


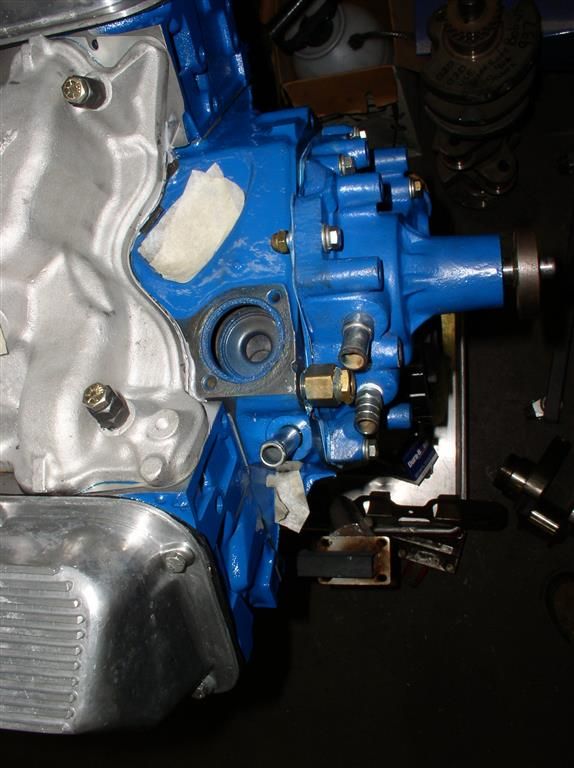
With regard to "Block and head drillage" - my block has an additional set of holes that match a set of holes in the head gaskets. The holes planned to be added to the heads are "loosely" located where the sharpie circles are.

The machining will certainly be more precise than the circles shown.

Benefits are more cooling of the exhaust port area.


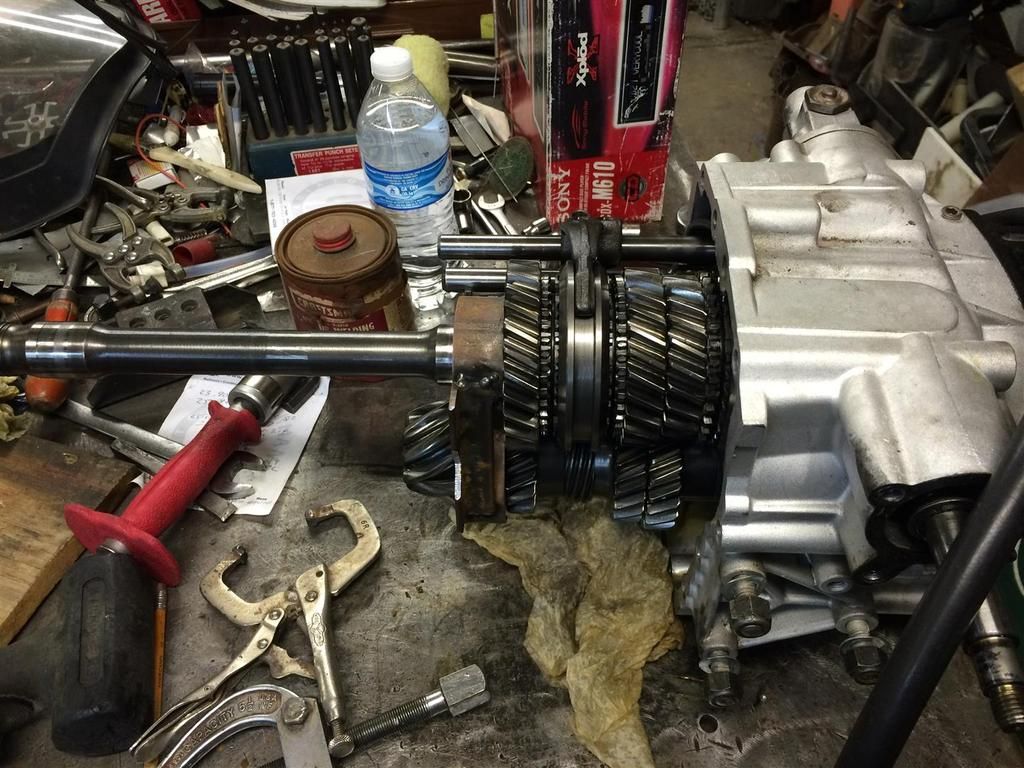
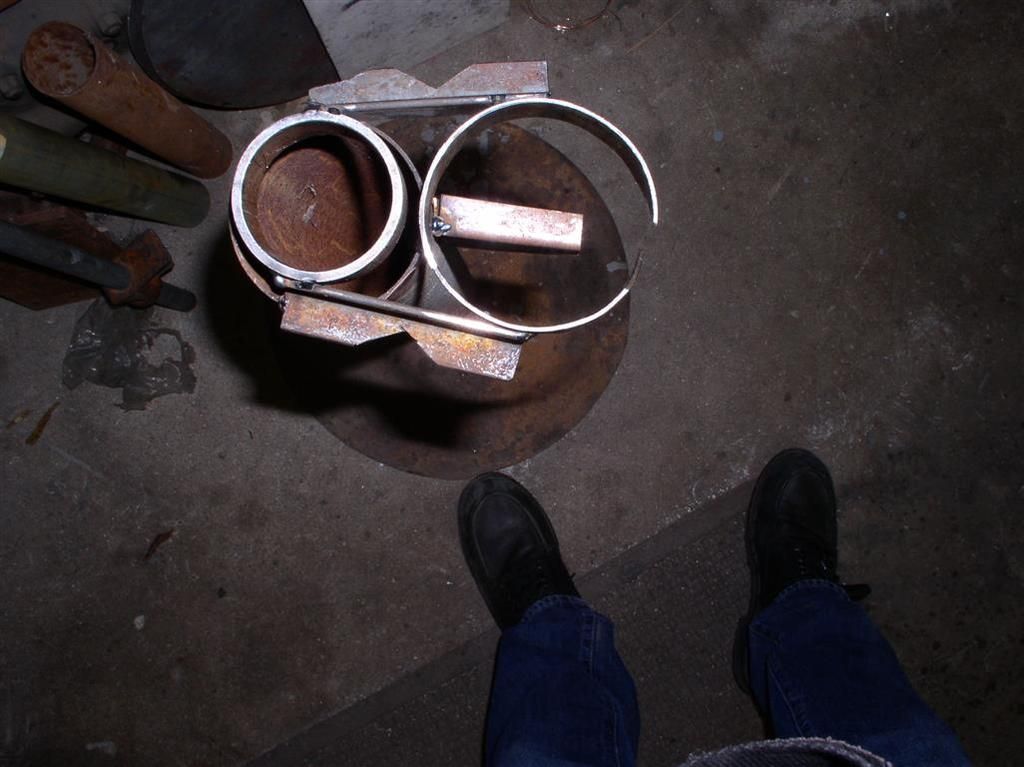
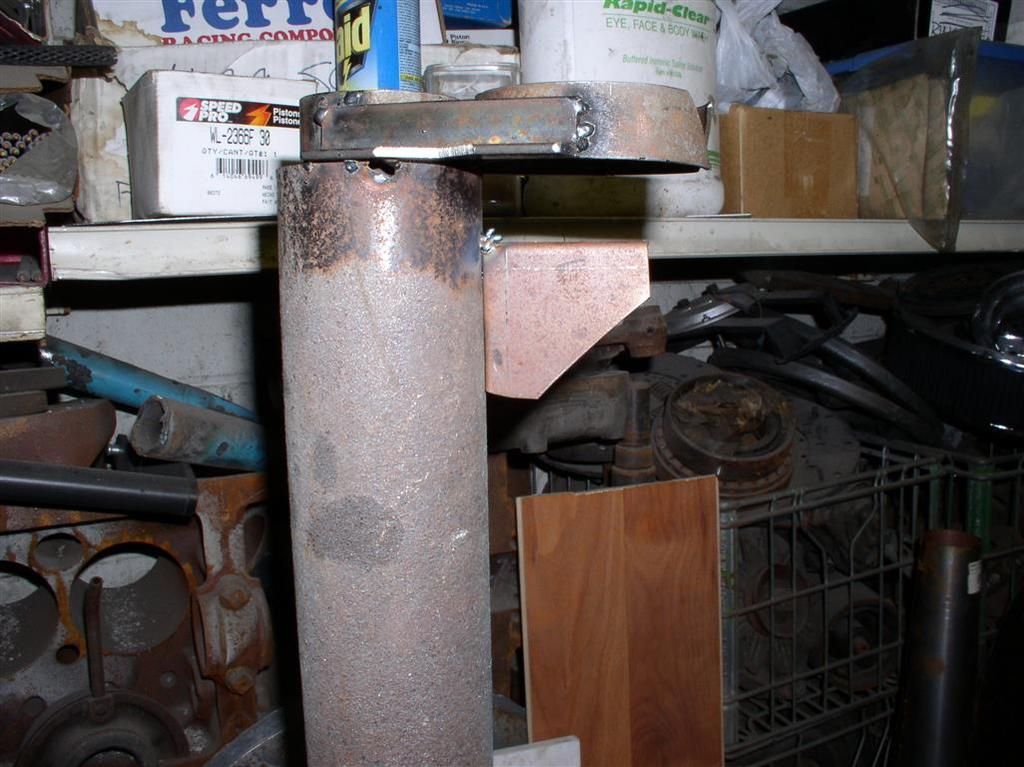
Here is the ZF Fixture mentioned in a previous post, and some shots of the assembly on the stand....

This fixture was welded to a vertical tube (you can see the base of the stand to the far left of the picture - to the left of my shoe). It gives very good access to get the "stack" out of the case...


Fit Check:


Viola!

I figured it was time to put some more information up....

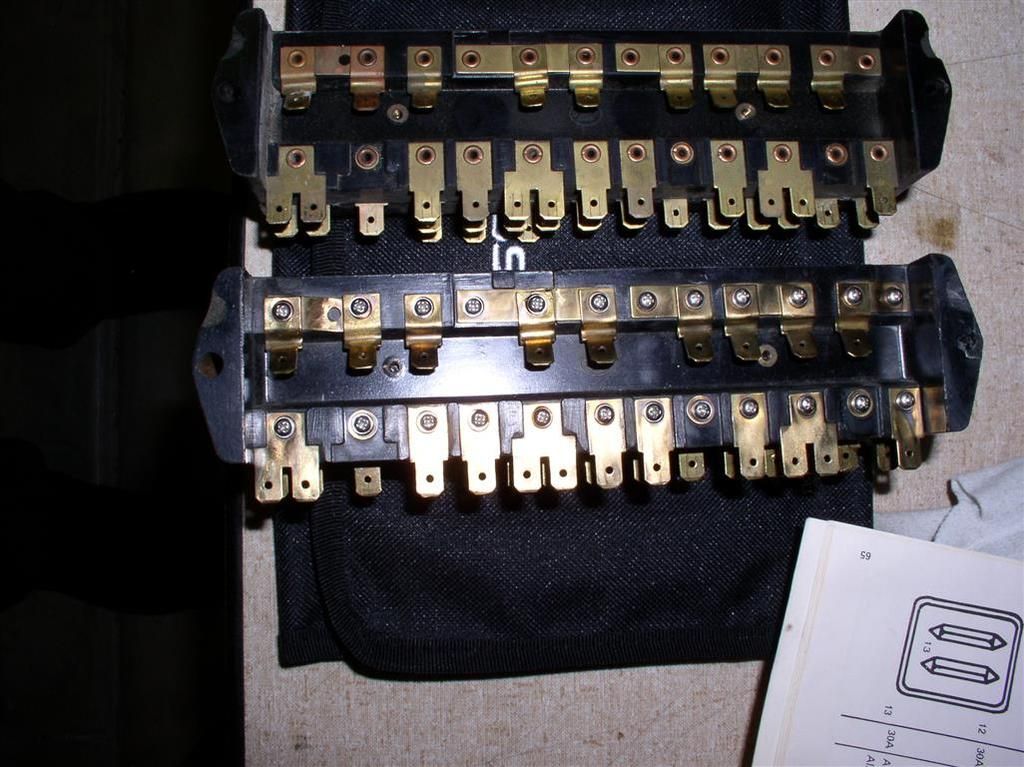
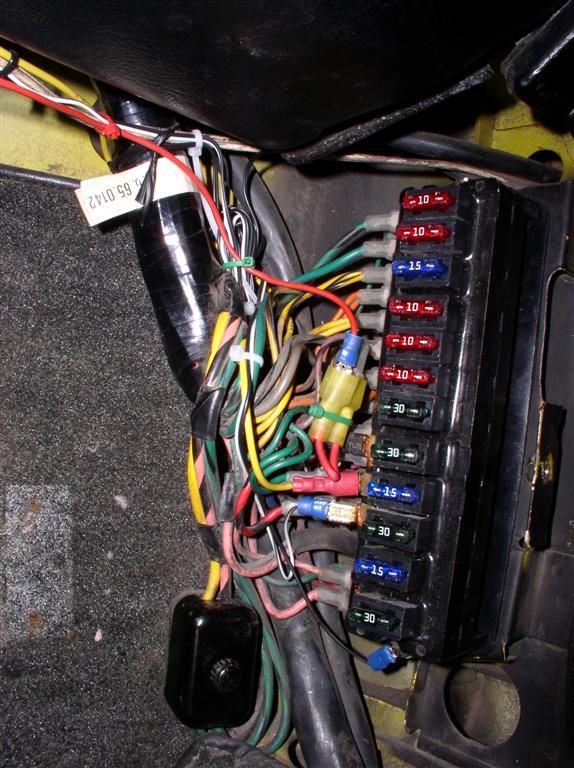
Latest project: Pantera Parts Connection ATO Fuse Box install.

Went in pretty easy - just a little pain-staking.

I always wanted to go to this type fuse although I never had any fuse problems... (knock on wood).

Took me about 1 1/2 hour for the install.

The old and the new - note how the PPC fuse box (lower) is interconnected with screws, vs. the old box, which uses a copper rivet technique.


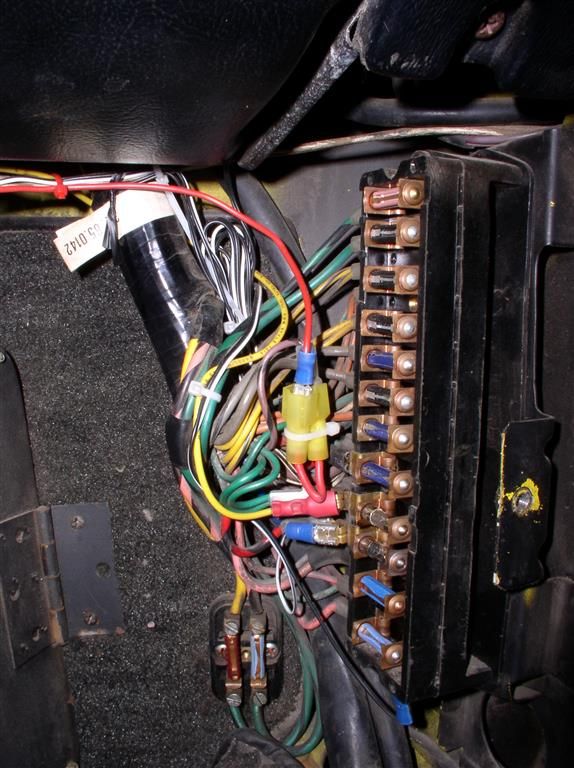
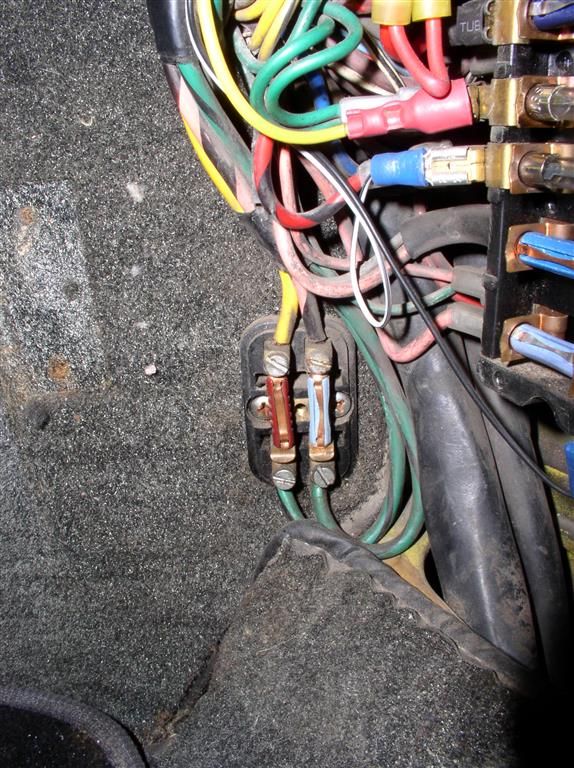
My old wiring - here's what it looked like in there....


Window Fuses - Don't have an ATO box for this, but I do have a cover!....


Viola! - Finished result. Still need to swap out the fuzes to the representative values, but since my ZF & engine are still a little ways out, I have a little time.

So if you are watching this thread, you might assume that I am not doing much on my car....

Well, you might be right, but I have not been COMPLETELY idle....

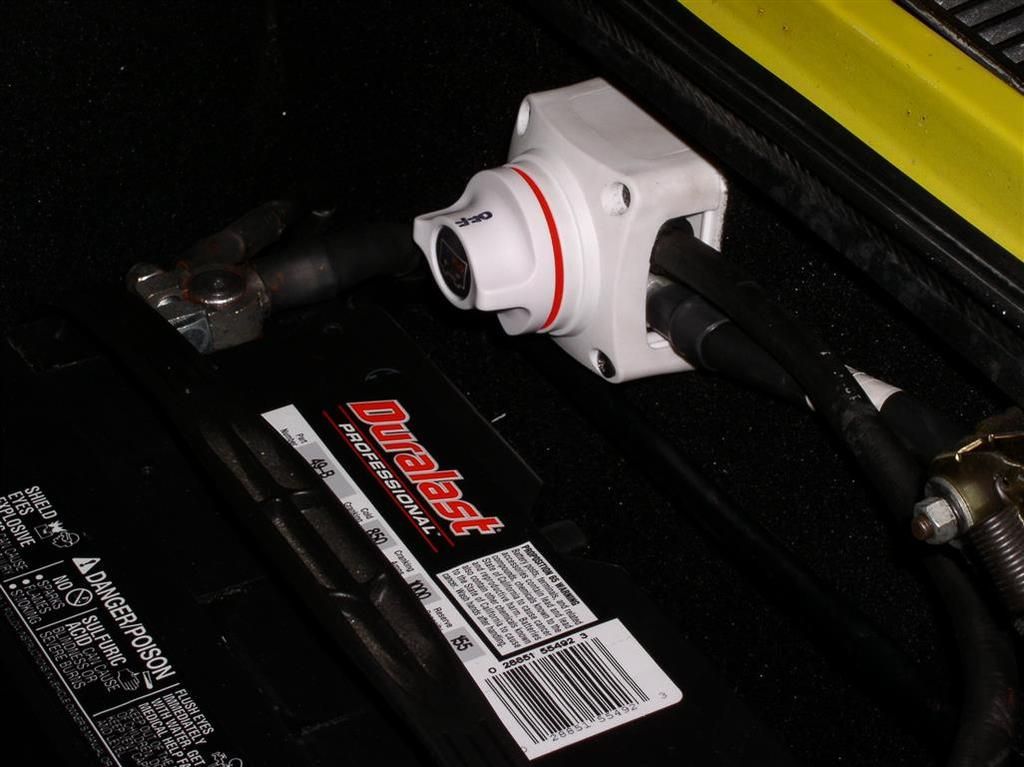
Here is the new battery disconnect switch, based on a realtime observation of a Pantera that had a starter that locked in the ON position...


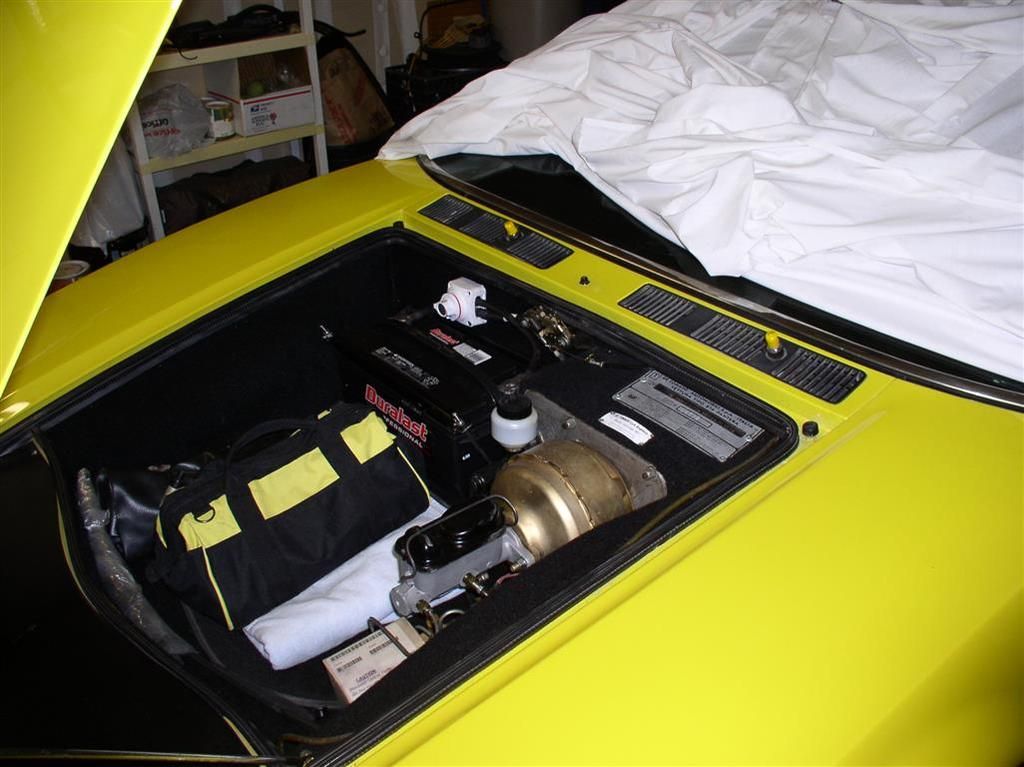
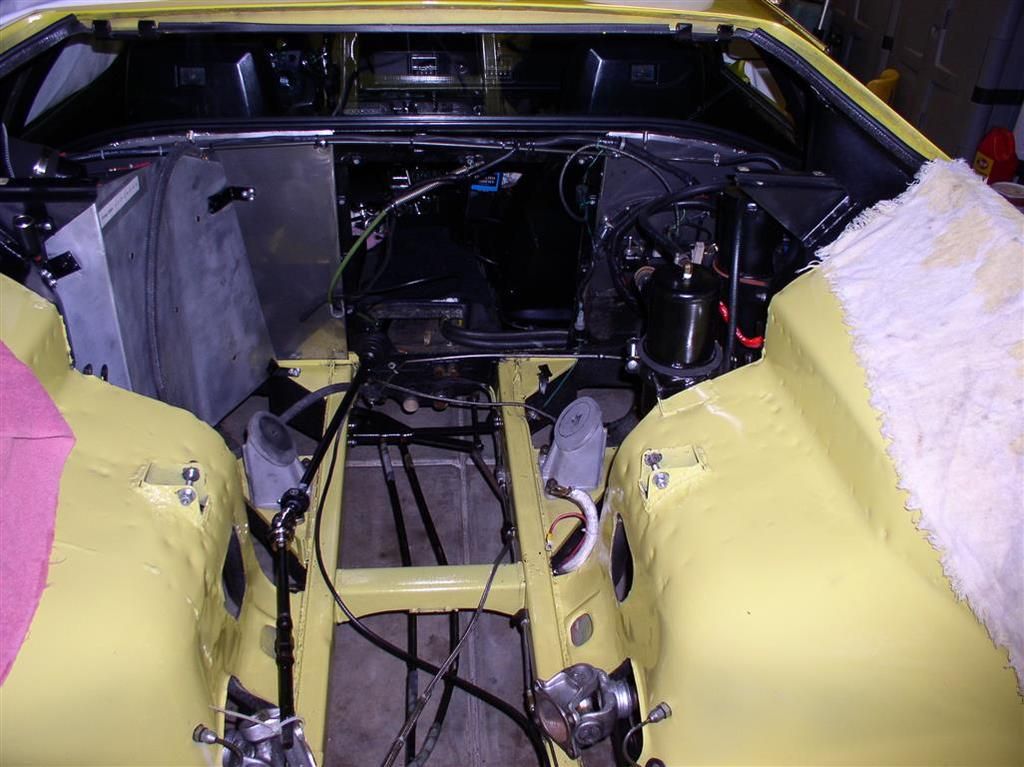
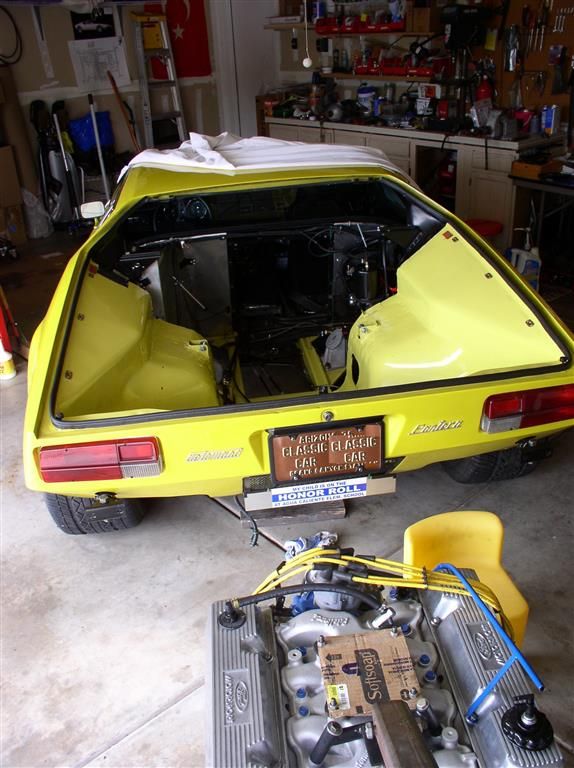
Here's the "cleaned" engine bay...

(unfortunately, it doesn't look that much different than last time....)


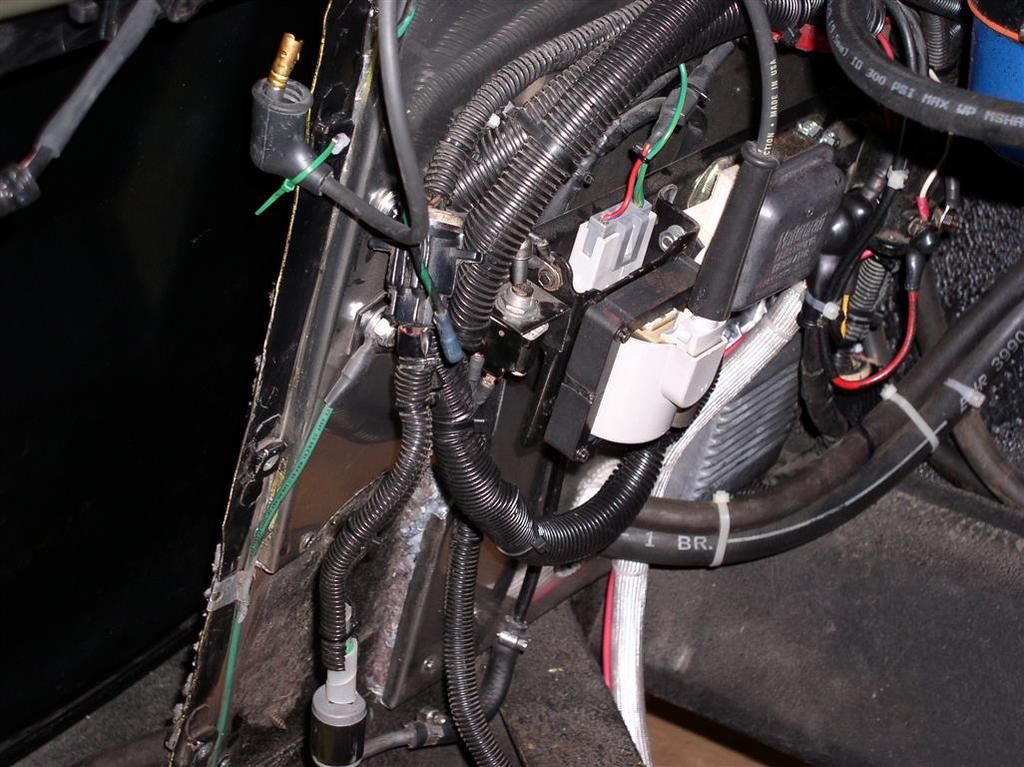
Better organized than last time.....


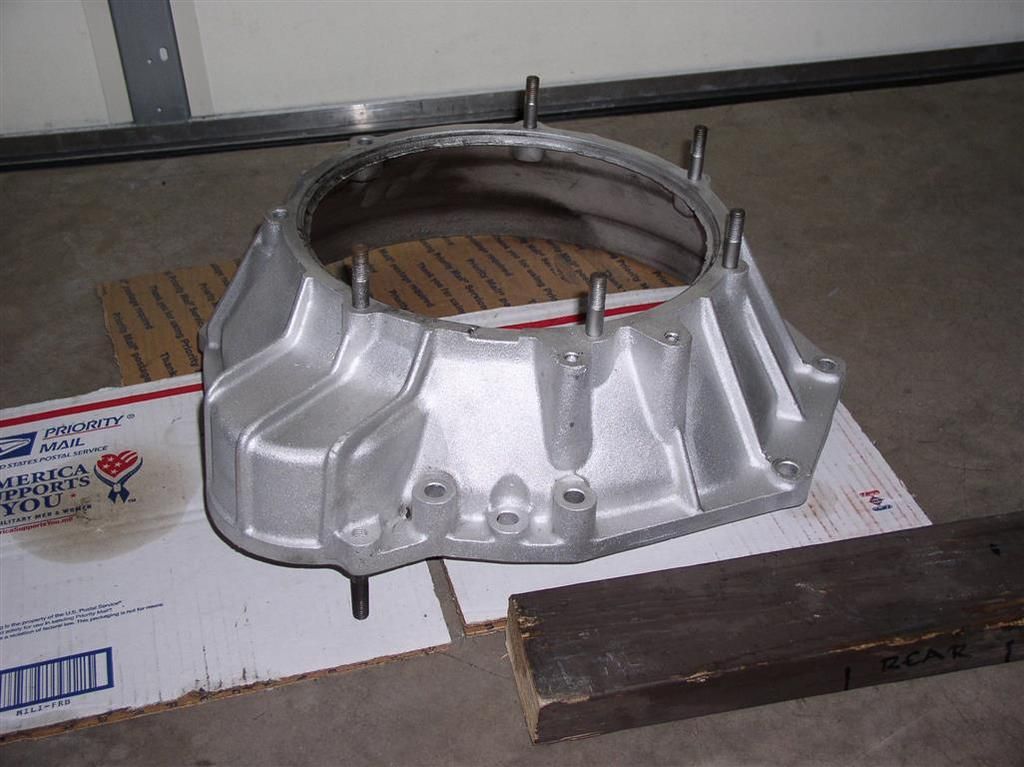
Nice looking bell housing, I would say...


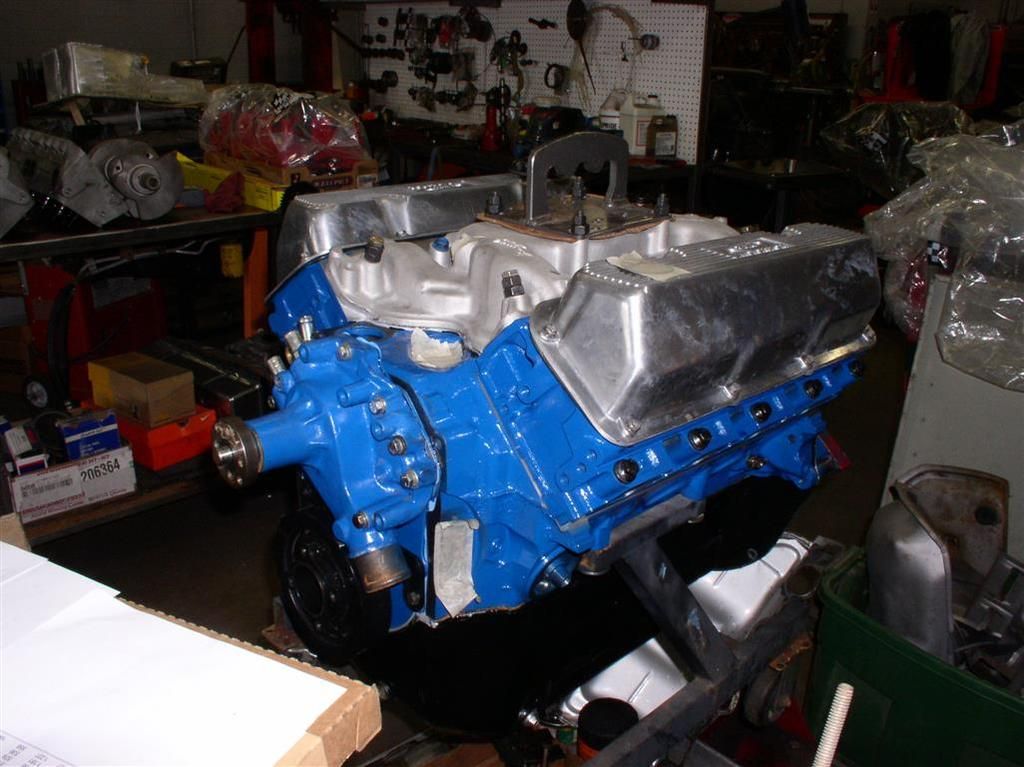
My motor is closer to reality... (2-3 weeks out). Working on rounding up the parts for the ZF - that's the big one now....

Rocky
Last edited by rocky
Completed my Taurus Motor install. Thanks to Dale Gumm (longtime POCA member & DeTomaso owner) for the parts, and the instructions.

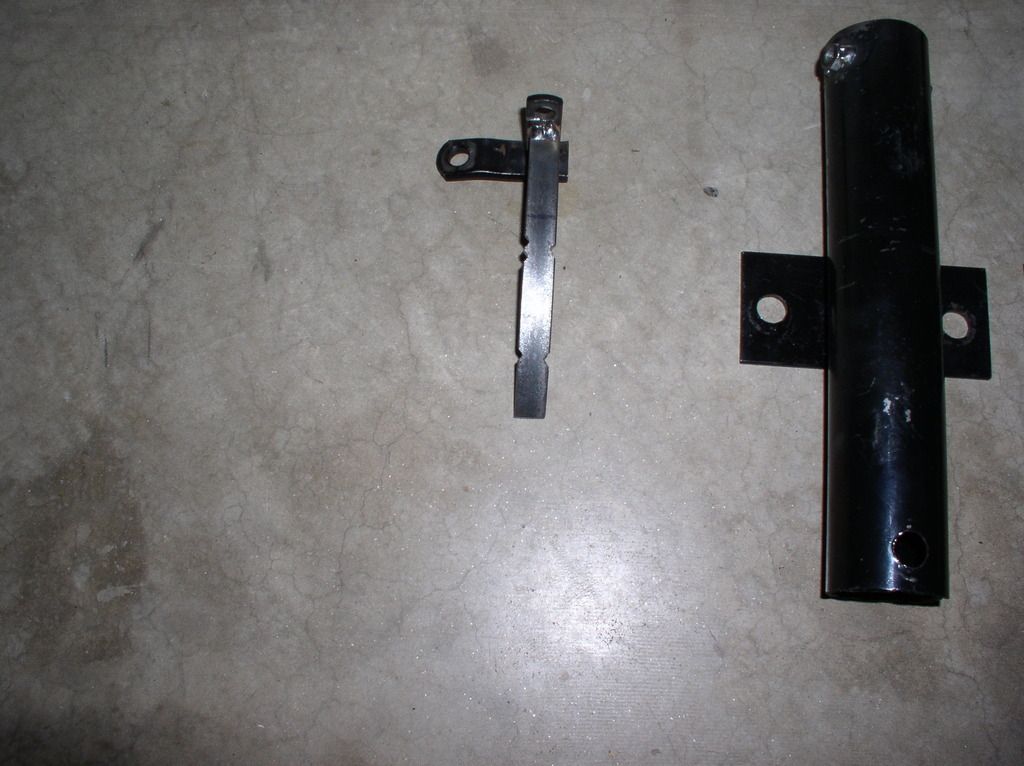
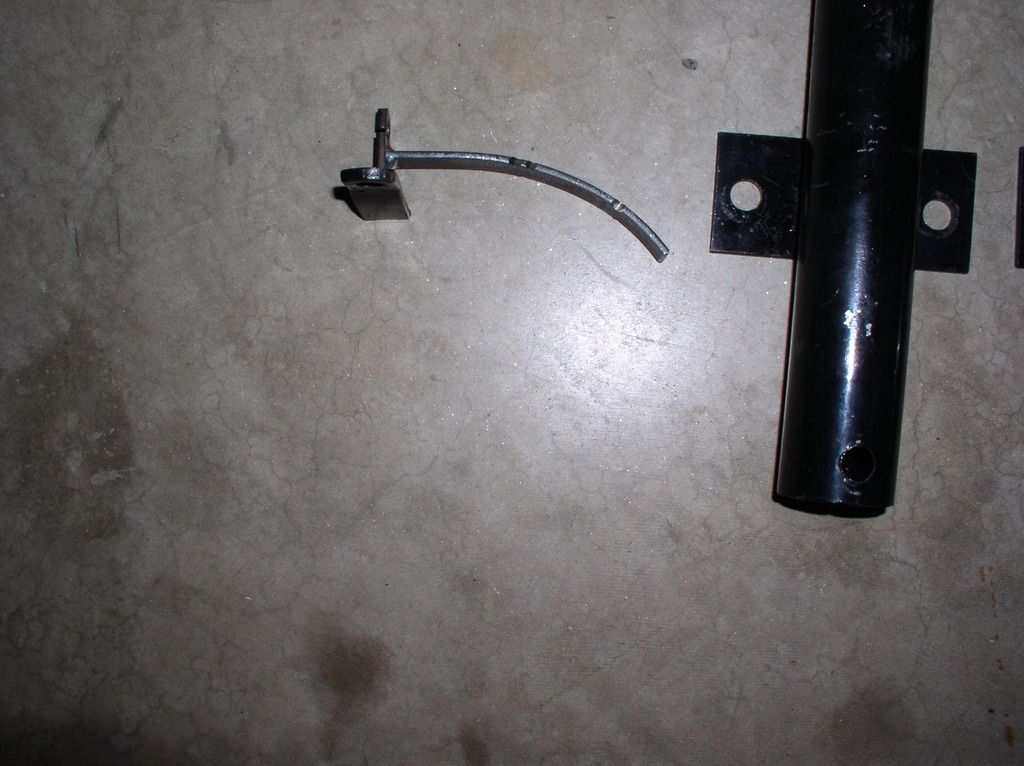
Also have my "reduced clearance rear bumper mounts" welded up. These will bring my L-model rear bumper back much closer to the car body - I think it looks better that way.

It also reduced the vehicle weight by about 2-3 lbs.

I think that no one will hit me in the back end.....

The end tubes are only temporarily installed. I need to drill the smallest diameter pipe to mount the bumper bracket, slide them to the correct depth and orientation, and then weld them up and paint them....

Bumpers and engine screens are going to be powder coated.

Rocky

Attachments

Images (1)
  • P1010011_(Medium)
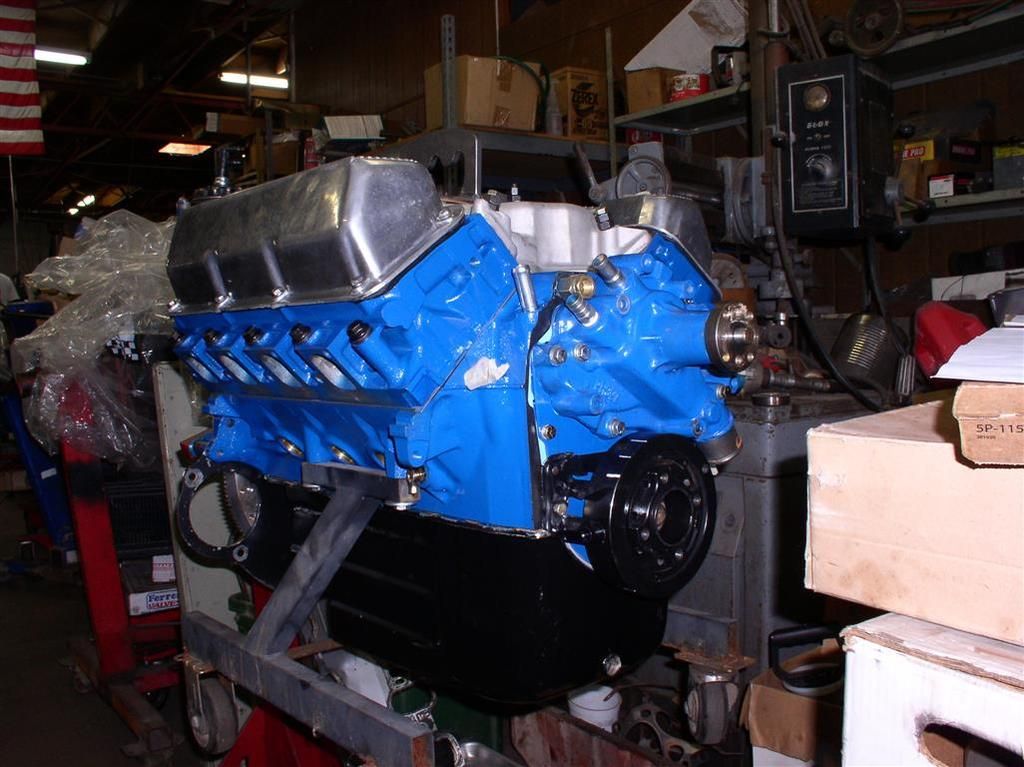
Big News - Motor is Done! Whoo-Hoo!

So my motor has been through the wringer (actually, the washer), and it's now complete and ready.

Now I have to finish my transaxle.

Basically the engine is the same as it was except....

Reduced Compression from 10.5:1 to 10:1 via:
  • D1AE GA Closed Chamber Heads
  • L2379F .030 Flat Top Pistons
  • Judicious Milling of Deck and Heads

    Slight "Align Bore" (.005") to ensure Block and Crank Alignment
  • Main Bearing Clearances Set (.0025")

    "New to Me" Crank (351C Cast - Nodular Iron)
  • Checked for Straightness
  • Micro Polished
  • Rod Bearing Clearances Set (.0025")

    Intake Manifold Heat Riser Block Off Plate

    Flow Measurements Collected with:
  • Intake - Heads Alone
  • Intake - Heads and Intake manifold
  • Intake - Heads, Port Plates and Intake manifold
  • Exhaust - Heads Alone
  • Exhaust - Heads and Headers


  • Last edited by rocky
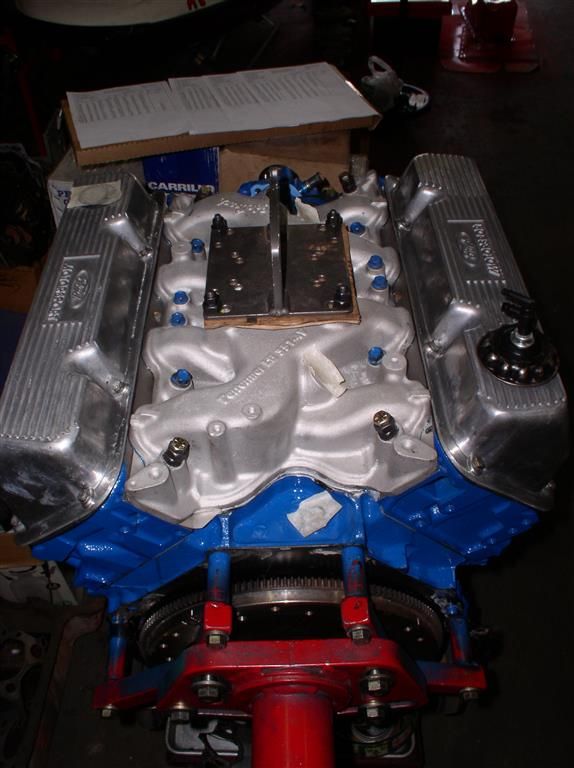
    Engine is beginning reassembly.

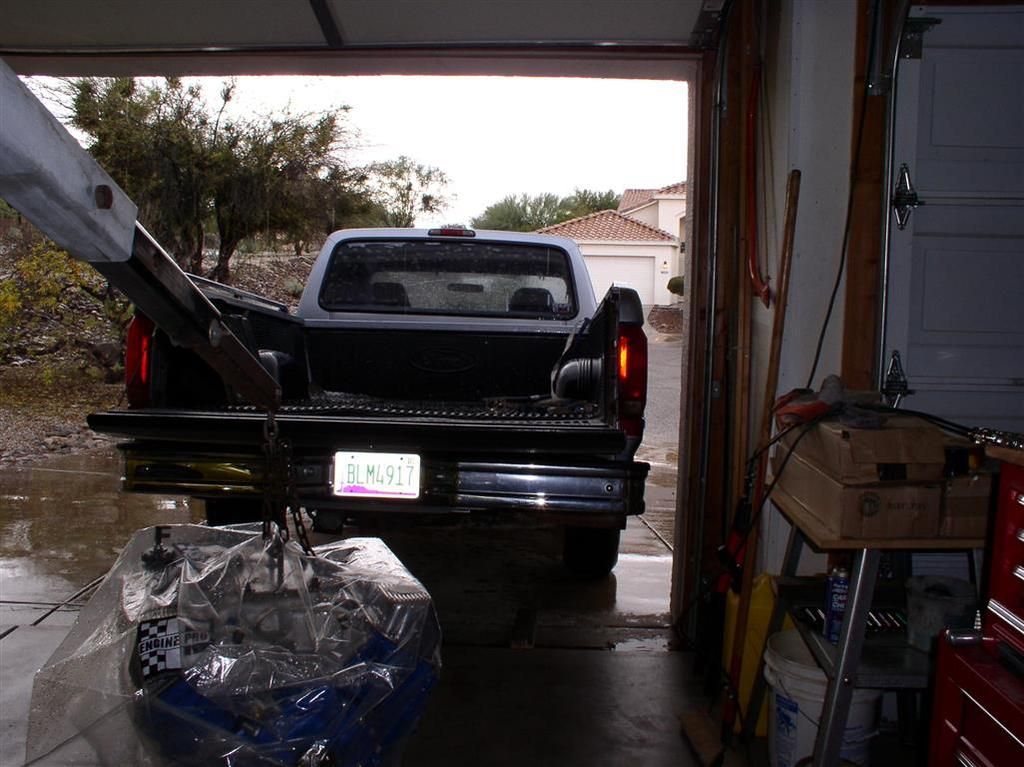
    WHENEVER I take this engine out from undercover - it rains. It is unbelievable. Saturday morning we got hail.... In Tucson AZ!


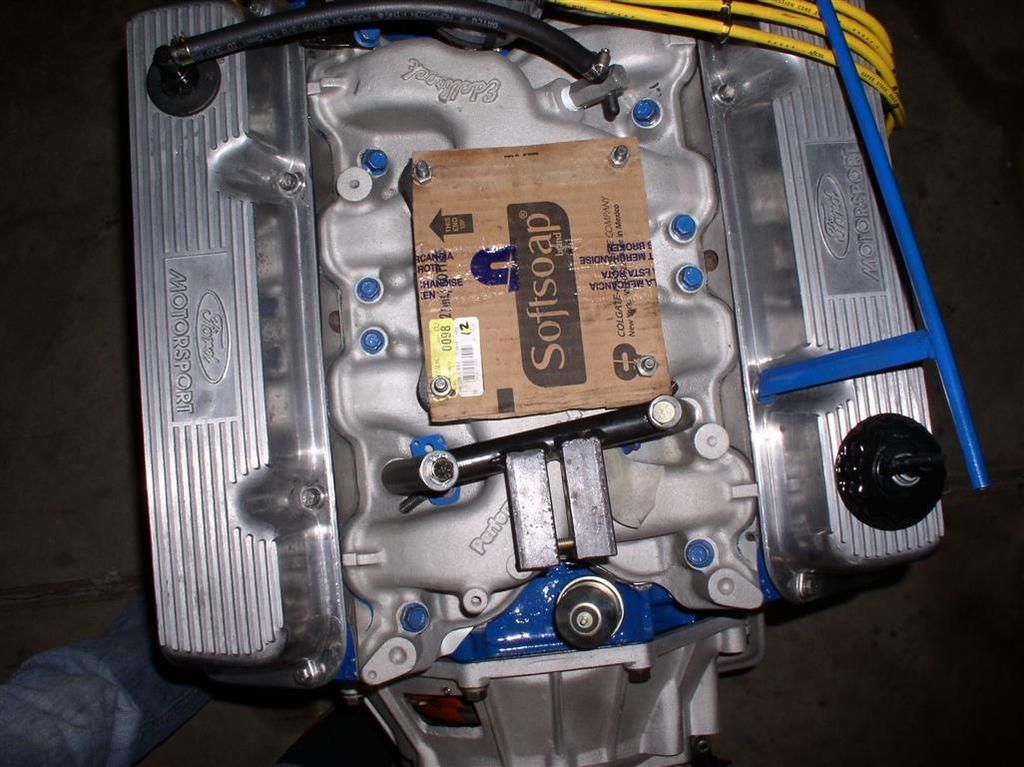
    So I first did some of the real basic stuff - got the flywheel on, intake manifold bolts, oil pressure sender, PCV plumbing, etc.

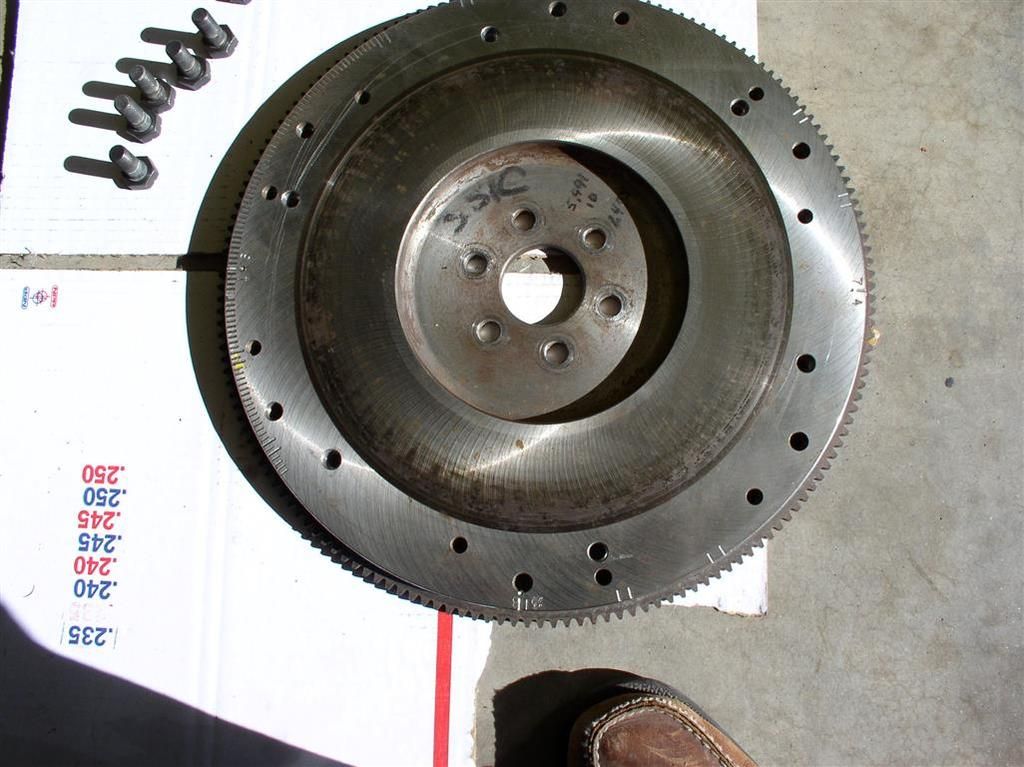
    Did you see this cool flywheel? Now it's degreed on every cylinder pair at 0 Deg, 16 Deg and 36 Deg.


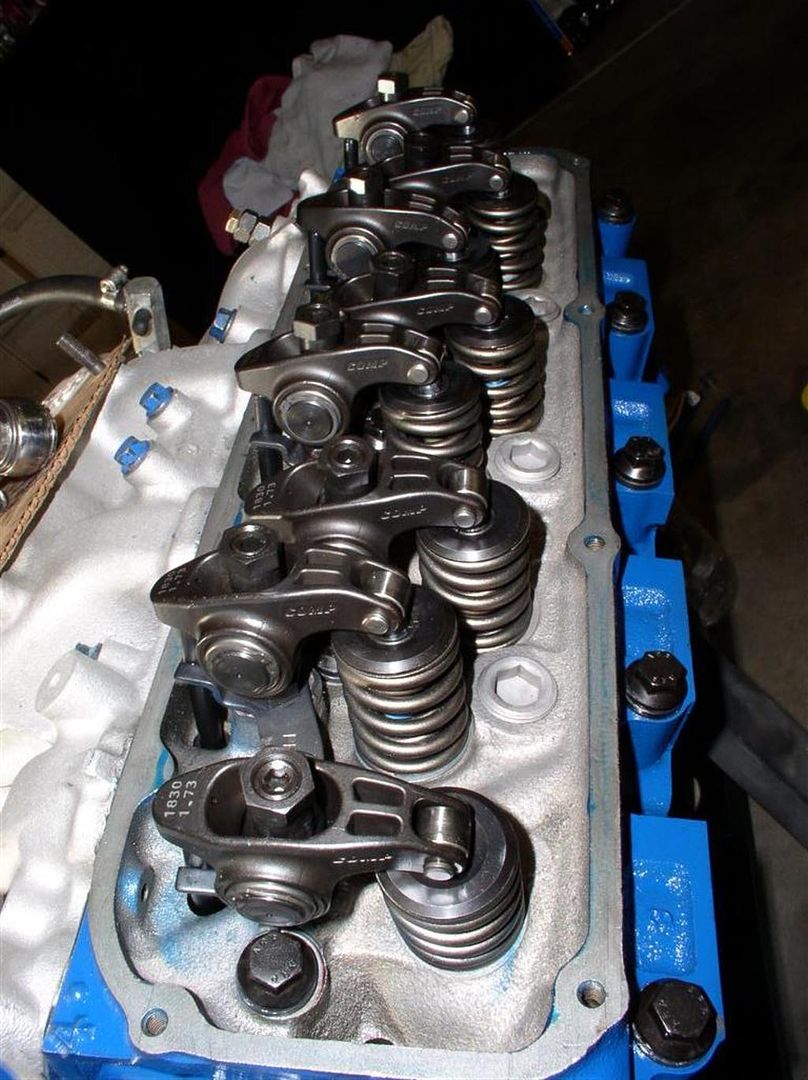
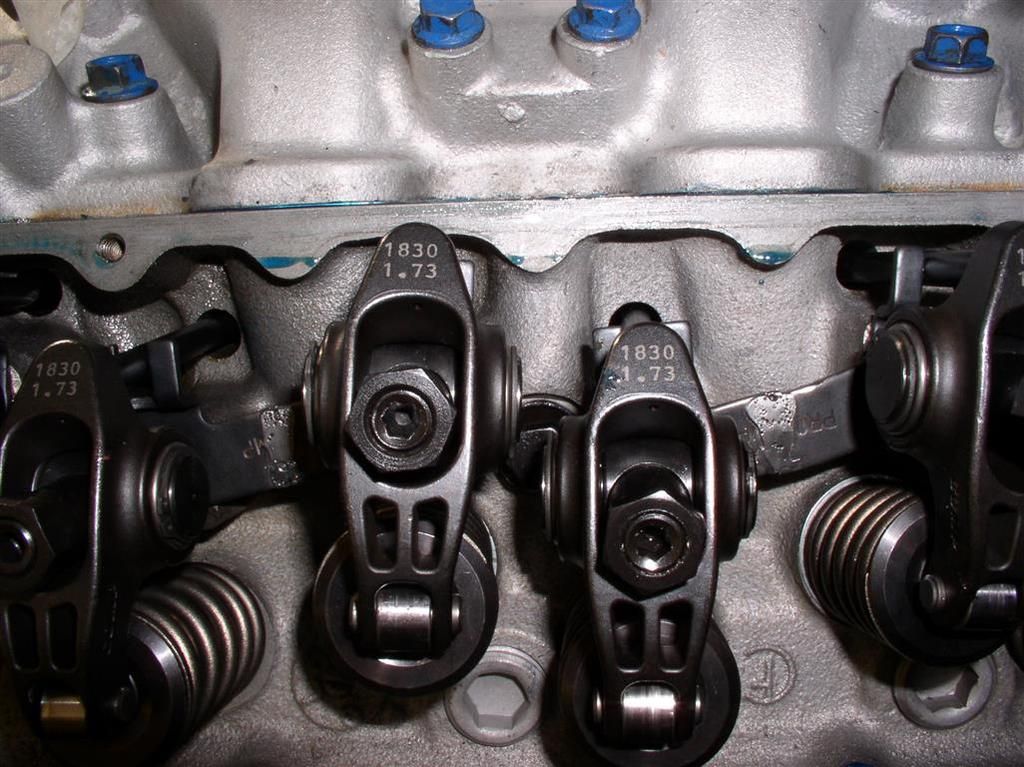
    Couldn't help pulling off the valve covers to see that beautiful rocker assembly...


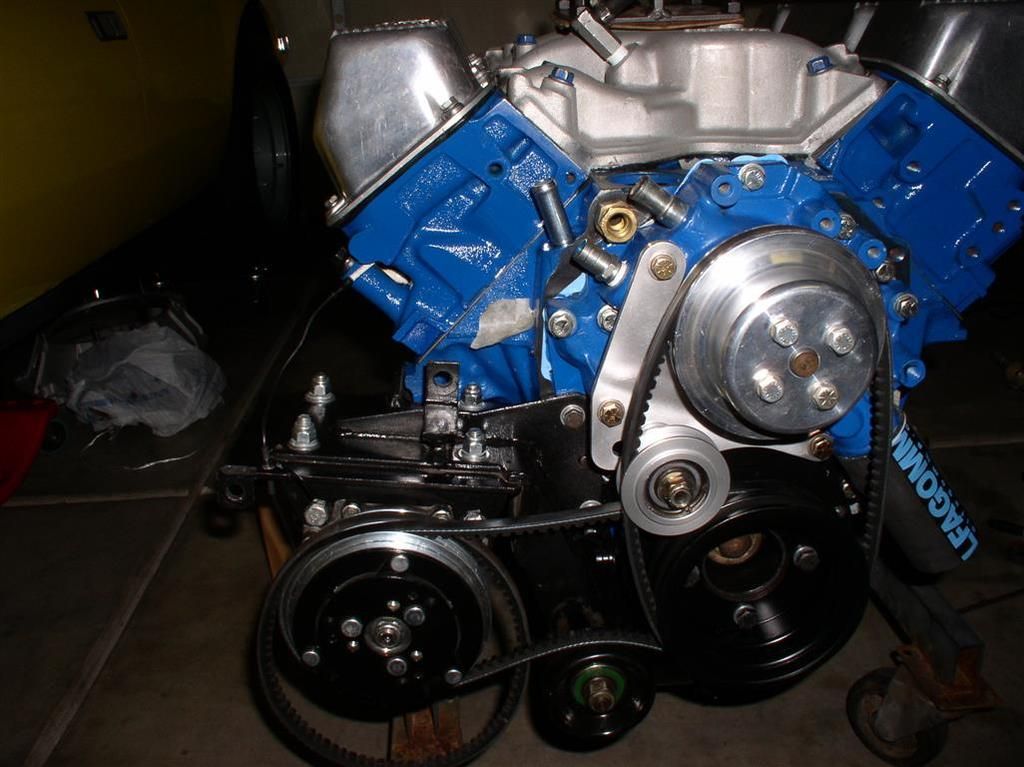
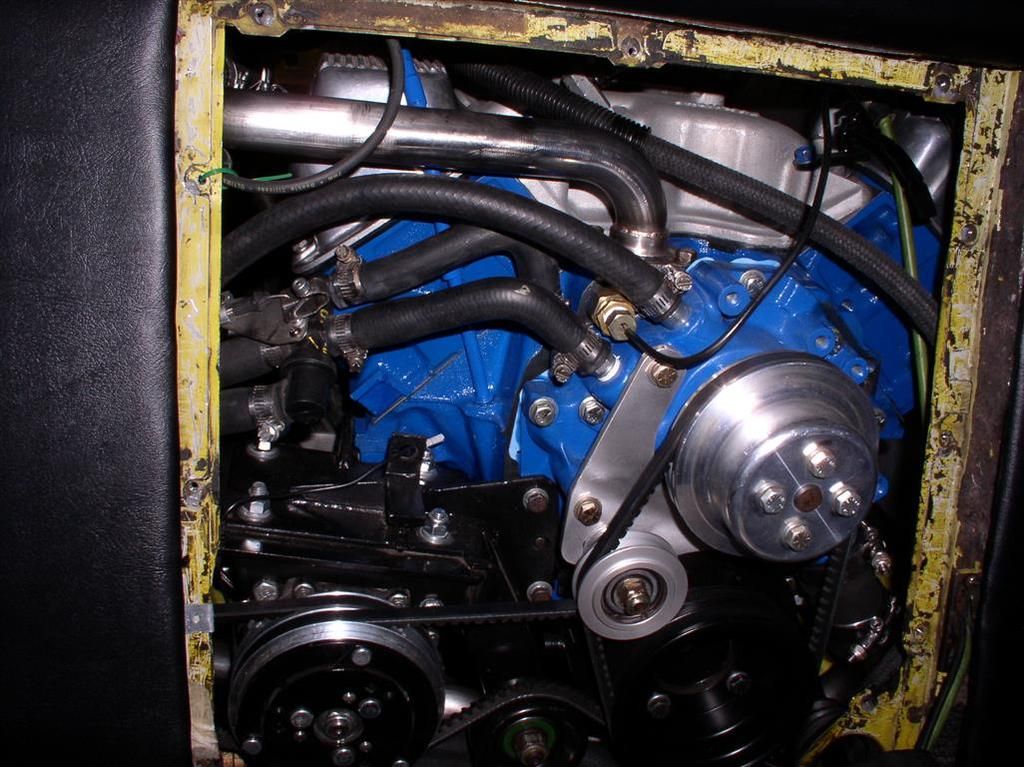
    Today I got my AC Compressor and outboard alternator, and all the belts/pulleys attached.


    Also received the remaining ZF parts from RBT. Assembly begins soon.

    Finally - I am excited about my new Throttle Cable support bracket (John Taphorn design). I am sure this will ALWAYS give me a "full pull" on that throttle cable....


    Finally - coming back together!
    Chuck,


    Looking great! Two words of advise... If you are using Kirk's engine cover , make sure that your water pump tentioner pulley clears . It sometimes takes some massaging to clear.
    Second, you might want to enlarge the three compressor mounting holes in the block. The front two bolts go from 5/16" to 3/8 " and the rear one goes from 3/8" to 5/8" . That is a LOT of weight hanging off of those small bolts!
    I once had a block crack along the boss that the rear bolt attaches to and leak coolant.
    Ron
    Still making (slow) progress. Standing by for a couple of parts of the ZF. In the mean time.....

    Got my engine screens back from the powdercoater.... They look super in a wrinkle finish black.


    Also got the bumper powdercoated in a satin black.

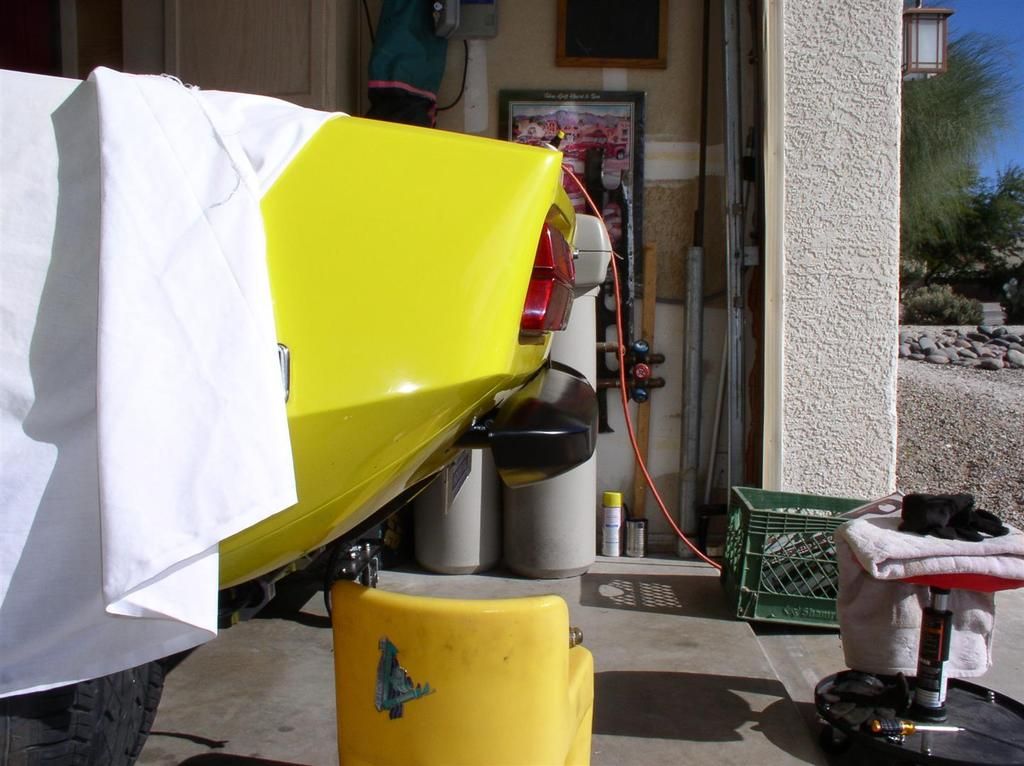
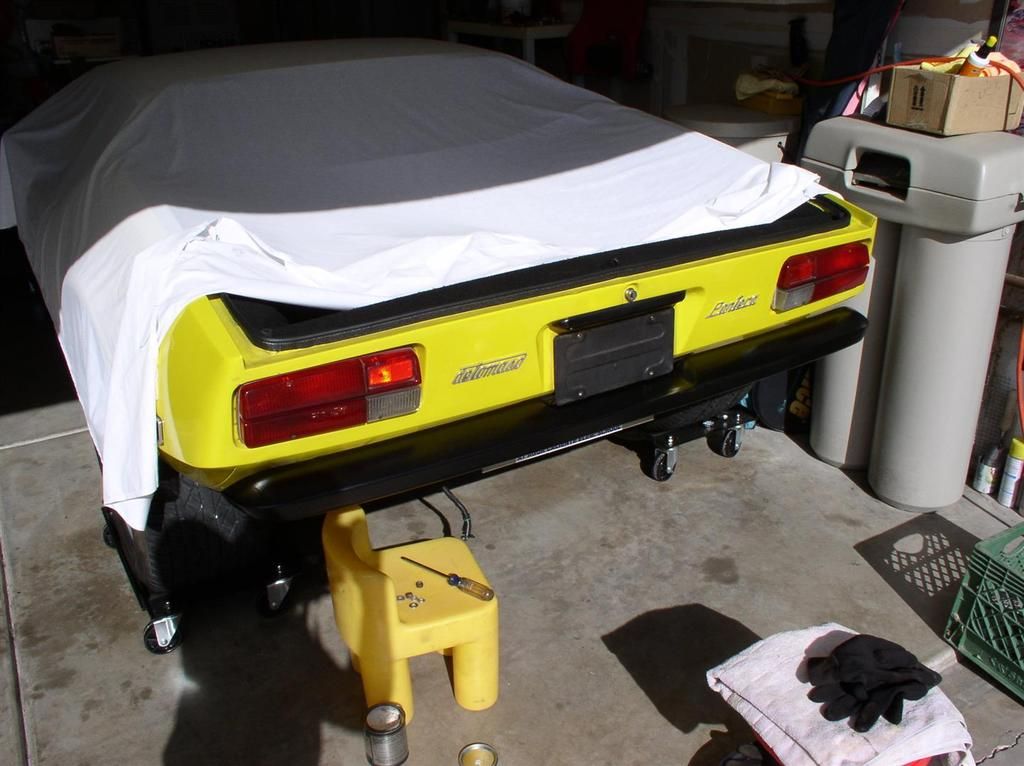
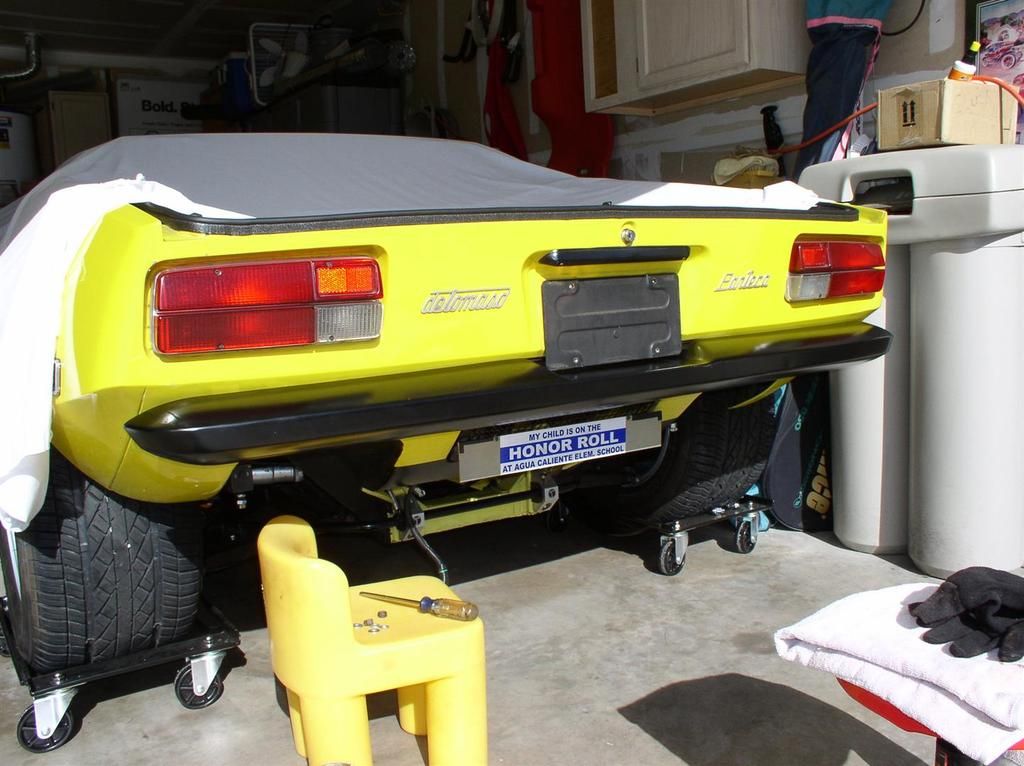
    Completed my "flush mount" rear bumper project. The intent was to move the bumper in about 3 inches closer to the body. It looks good, but honestly, for all the time I spent on this, I am not sure if the results are as noticeable as I thought they would be.

    Nevertheless, another project completed!


    Anyway - progress continues!

    Rocky
    quote:
    Originally posted by Rocky:....
    Completed my "flush mount" rear bumper project. The intent was to move the bumper in about 3 inches closer to the body. It looks good, but honestly, for all the time I spent on this, I am not sure if the results are as noticeable as I thought they would be...Rocky


    To me, it makes the CAR look finished, where the stand off looks like it needs to be pushed on some more.

    Something I just thought about and hope you addressed; with the standing off bumper, I remember the plates were slightly covered by the bumper. So does your plate now fit?

    Did the wire mesh for the engine cover get the wrinkle finish?
    quote:
    the plates were slightly covered by the bumper. So does your plate now fit?

    Did the wire mesh for the engine cover get the wrinkle finish?


    Moving the license plate up was just a matter of a little filing on the plate and frame to move it up about 1/4". The license plate frame sits on my bumper in the recess. I am going to have to go back in and put a little pad so I don't scratch up my new powder coating with the license plate frame.

    The wire mesh cover was done with the wrinkle finish. It came out great.

    Rocky
    Hey Larry -

    My buddy Wade (Mark IV/4280) has a mill with a rotary table on it.

    He basically uses the orientation of the bolt pattern on the flywheel to find the TDC point for the 1/6 cylinder pair on the flywheel.

    I am sure he has this reference orientation preset from working on many Ford motors.

    Update: He is less tricky than I thought. He just set the motor to TDC via the front balancer, and then marked out the window on the flywheel using the bellhousing. Once the limits of the window were defined, he just marked the degree marks so they would be inside the window.

    Once he sets his cylinder 1/6 TDC reference - everything else is based on this. It then becomes basically an engraving job.

    His rotary table is adjustable, and in my case, he just just marked off the 1 deg increments for the 1/6 cylinder pair. The 3/5, 7/4 and 2/8 didn't get the same level of detail, but just the key points.

    Update: The other cylinder pairs are marked at 0*, 14* & 16* and 34* & 36*.

    The intent is to allow a convenient reference for "quick checks" using any cylinder wire.

    The reference is set on the bellhousing by initially setting the timing at the front harmonic balancer & timing pointer (e.g. Cylinder 1 - 16 Deg. static advance at idle). The flywheel has a corresponding 16* reference mark milled into it.

    Once the static timing is dialed in (and verified) on the harmonic balancer in front, we just went to the little window in the back of the bell housing, and then use the 16* mark to set the reference into the bell housing. Basically we took a sharp file, and cut a line in the aluminum housing as our timing pointer.

    Having a mill with a rotary table is the key to this.

    Hope this explains the process.

    Rocky (a.k.a. Chuck)
    Last edited by rocky
    quote:
    Did you see this cool flywheel? Now it's degreed on every cylinder pair at 0 Deg, 16 Deg and 36 Deg.


    I like it Rocky and was thinking of doing something similar. I've frequently seen Panteras with flywheels marked at TDC or certain number of degrees advance for quick timing checks but that takes it a step further in convenience for running valve lash. In my case, I have a McLeod Street Twin and the pressure plate carrier covers the entire flywheel so markings would need to be on the PP carrier instead of the flywheel. I have a 14" Jomar degree wheel and was going to cut the center out it and mount it under the PP bolts but got a little squeamish about it at 7k rpm(one side is marked 180-180, otherwise the degree markings would be in the wrong direction for rear install). I think I'm just going to mark the PP with an etching pen instead. -Might be an alternative for anyone doing something similar on already assembled engines but you might need a degree wheel instead of harmonic balancer for desired accuracy. Accuracy is one very nice feature of the method Rocky shows in his post.....it's like having a built in 14" degree wheel permanently installed.

    quote:
    Basically we took a sharp file, and cut a line in the aluminum housing as our timing pointer.

    Another alternative is to drill and tap a small hole, and make a sheet metal pointer. It's adjustable to a degree and a new pointer with offset can be made if desired. This can also be done with the BH installed in the car.

    Keep the build pics coming Rocky.

    Best,
    Kelly

    Attachments

    Images (1)
    • Inspection_Window_Pointer
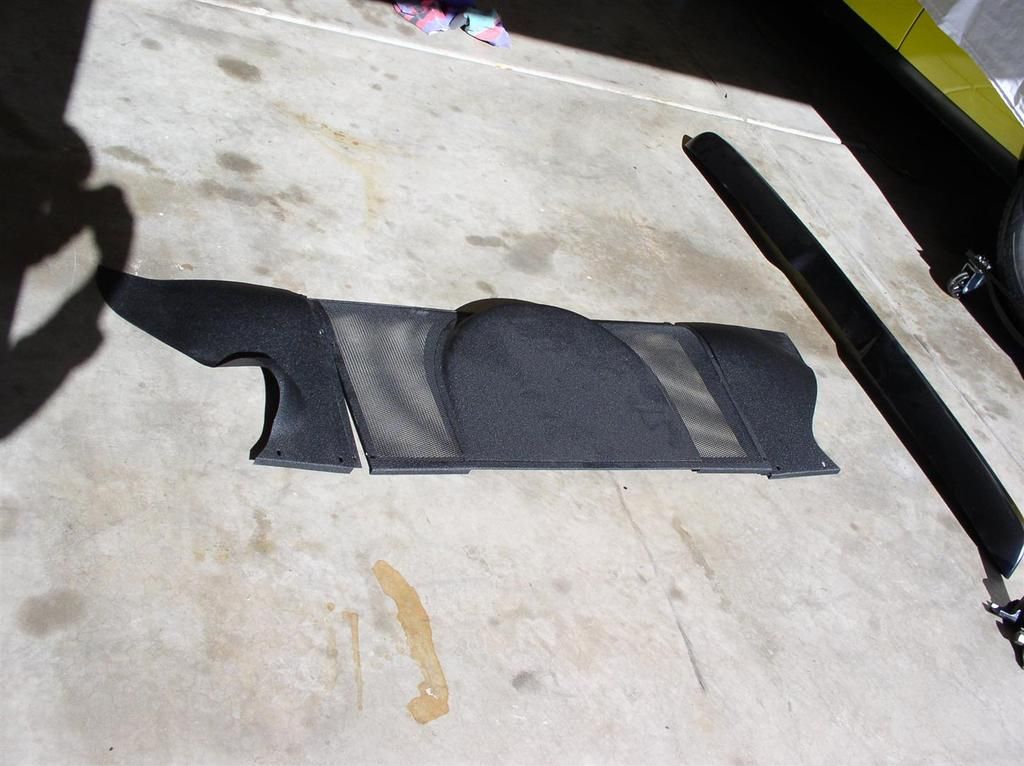
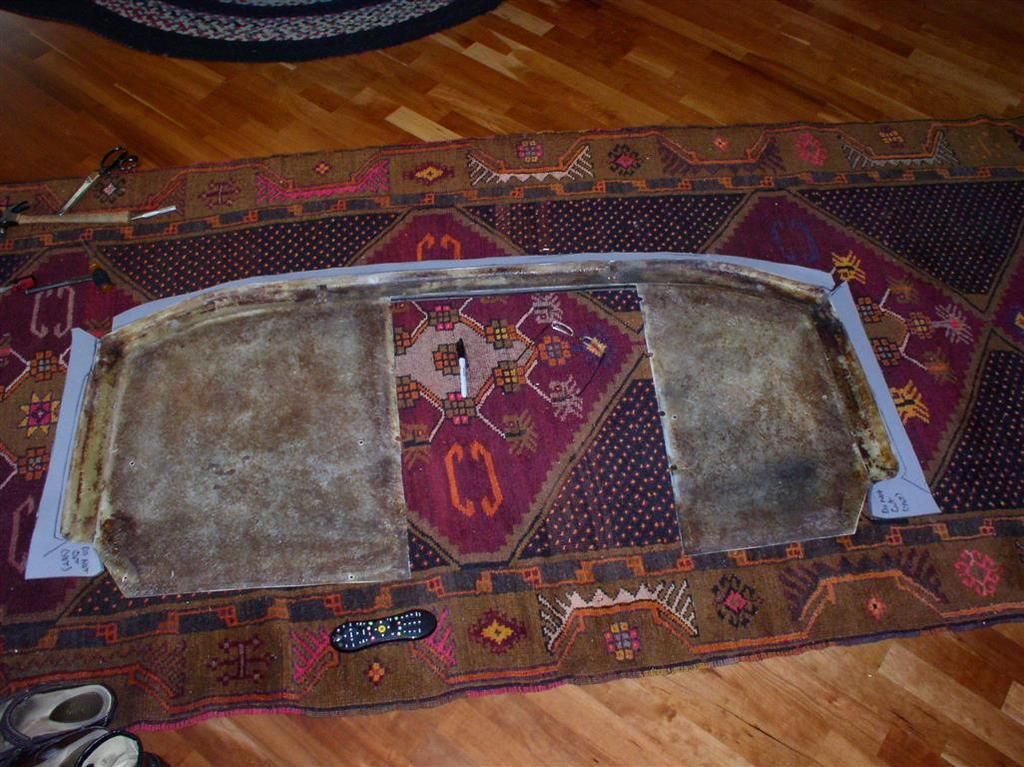
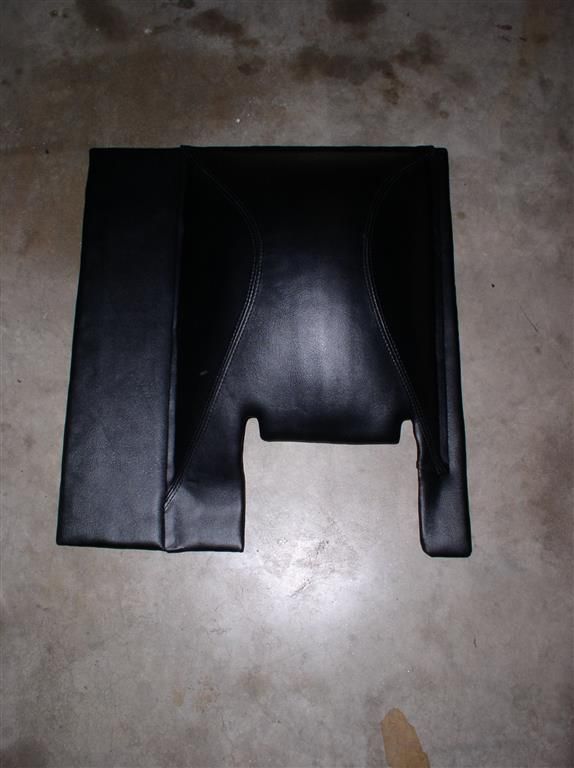
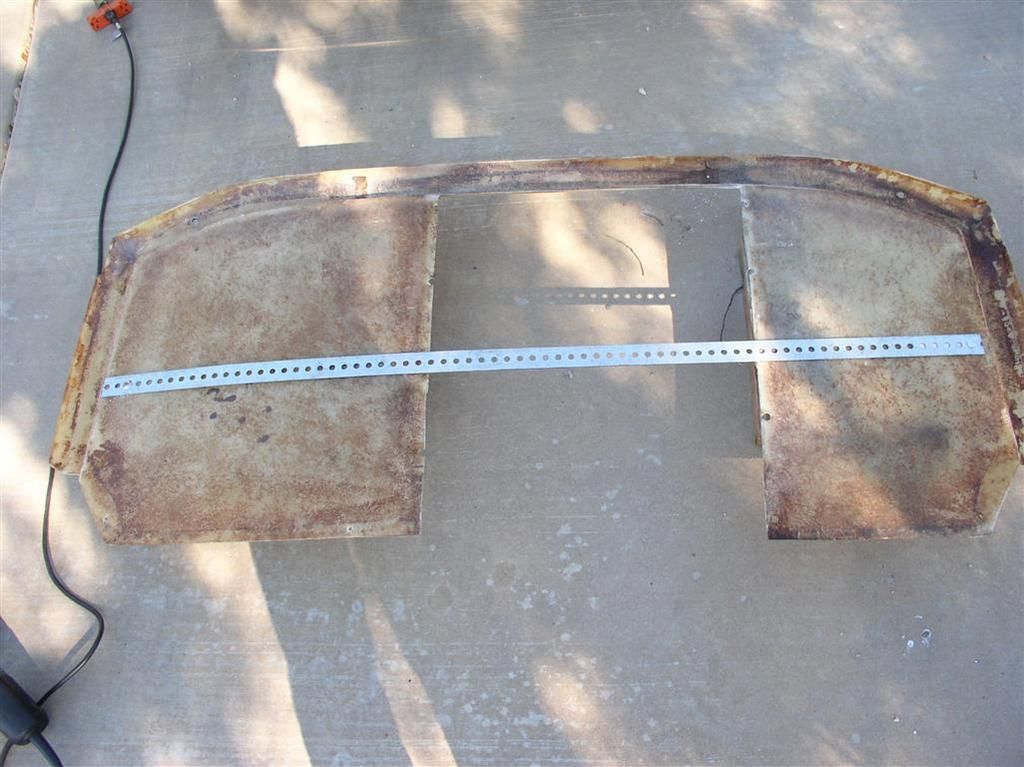
    Finally decided to get started on my "Reduced Hump Bulkhead Cover" construction. My plan is to have the center cover attached via Velcro, so I can just pull it off, and access the metal engine cover from inside, without pulling the whole big piece off.

    This project will be ongoing until I get a couple more parts for my ZF (on the way), and then will likely go into a holding pattern until I get the motor & transaxle installed.

    Anyway - I already had the reduced metal engine access cover, and all of the accessories (Sanden Compressor, and 1G alternator outboarded) - this was fabricated on my last build. You can see pictures on about page 4 of this thread.

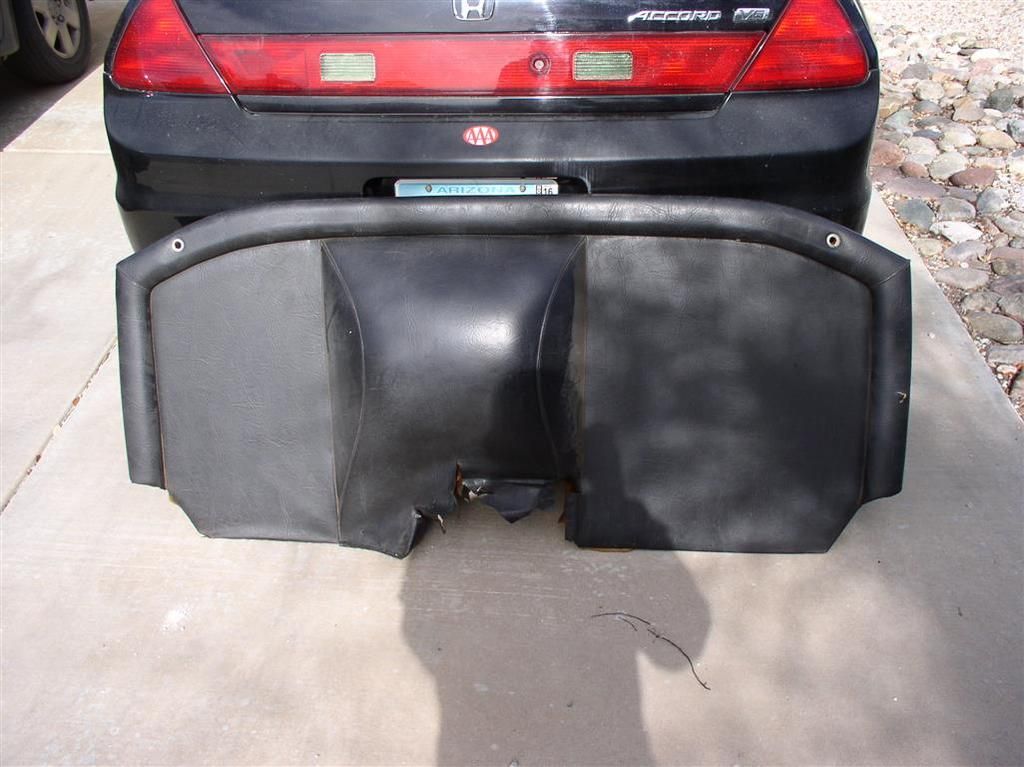
    Now I am starting with a reasonably OK rear bulkhead cover. It had some rips in it, so it would have needed reupholstering anyway.


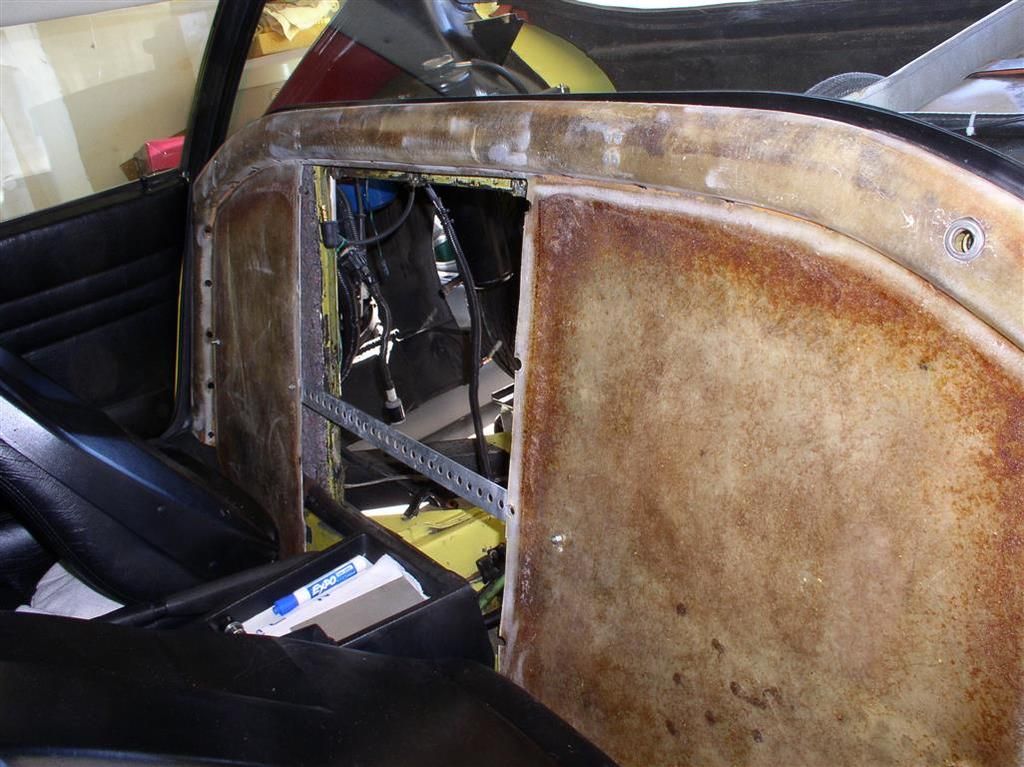
    I stripped off the upholstery and foam, to reveal a fiberglass cover in good shape. I kept the vinyl to match the fabric, and to help me with the sizing when I go to reupholster it.


    I plan to do the upholstery on the big pieces (the outside) myself. I will probably take the "hump" part to a professional - maybe. It seems like the hardest part will be sewing the seams accurately.

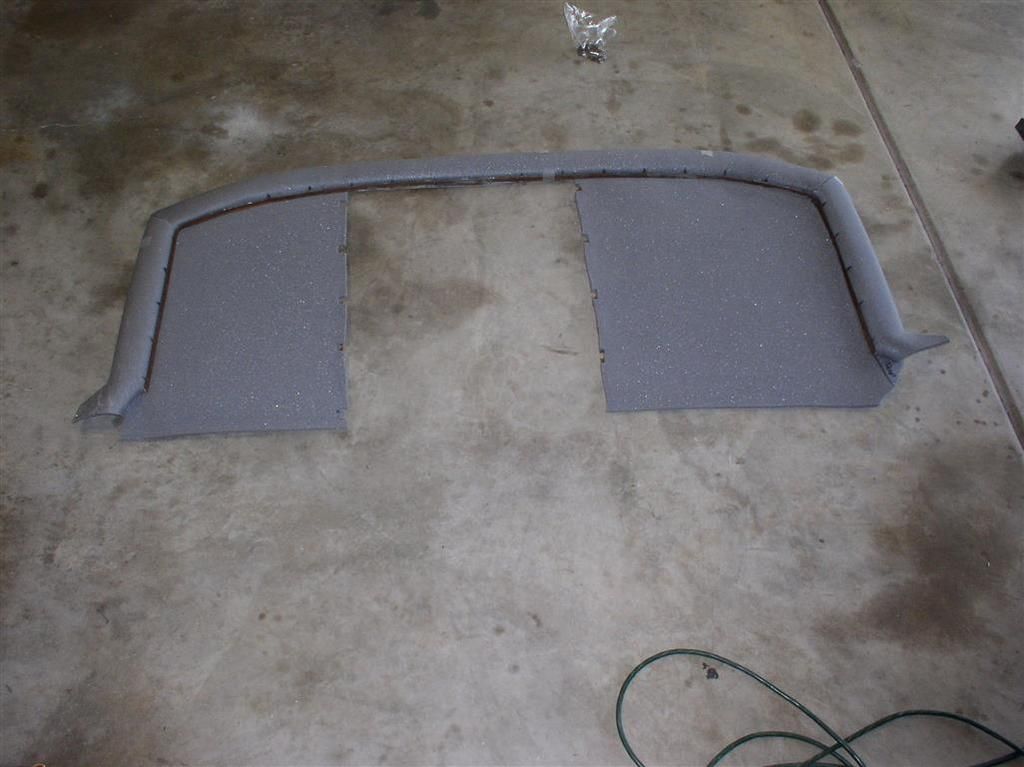
    I stripped off all the foam on the inside and outside, and hit it with a wire brush on my angle grinder. It cleaned up nicely.

    Then I cut the center section out with my angle grinder.

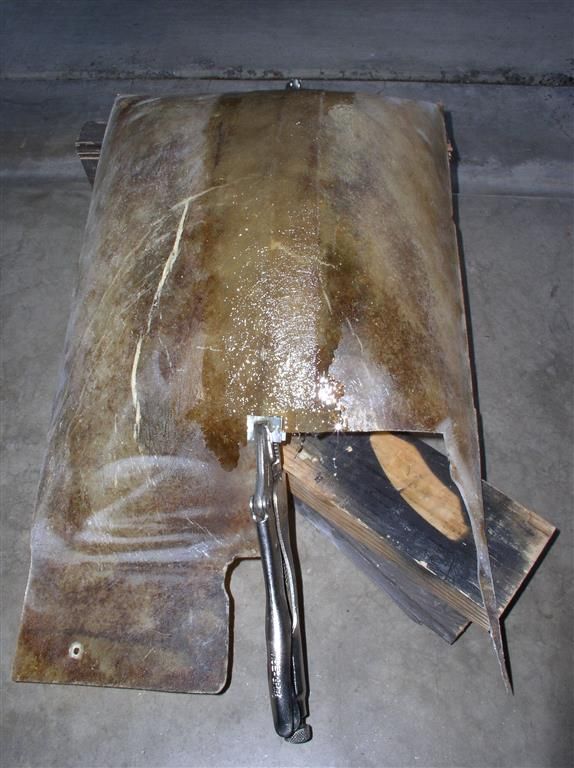
    I was worried about the thing breaking at the top, so attached a temporary support piece.


    This part fits nicely in the car. Now to start on the hump tomorrow (when I can get out and buy some sheet metal and fiberglass resin. Maybe I will look for foam and vinyl at the same time.


    Here's couple more pictures in a slideshow.... Watch this space for more pictures.

    Slideshow of Reduced Bulkhead Cover Construction....

    Rocky
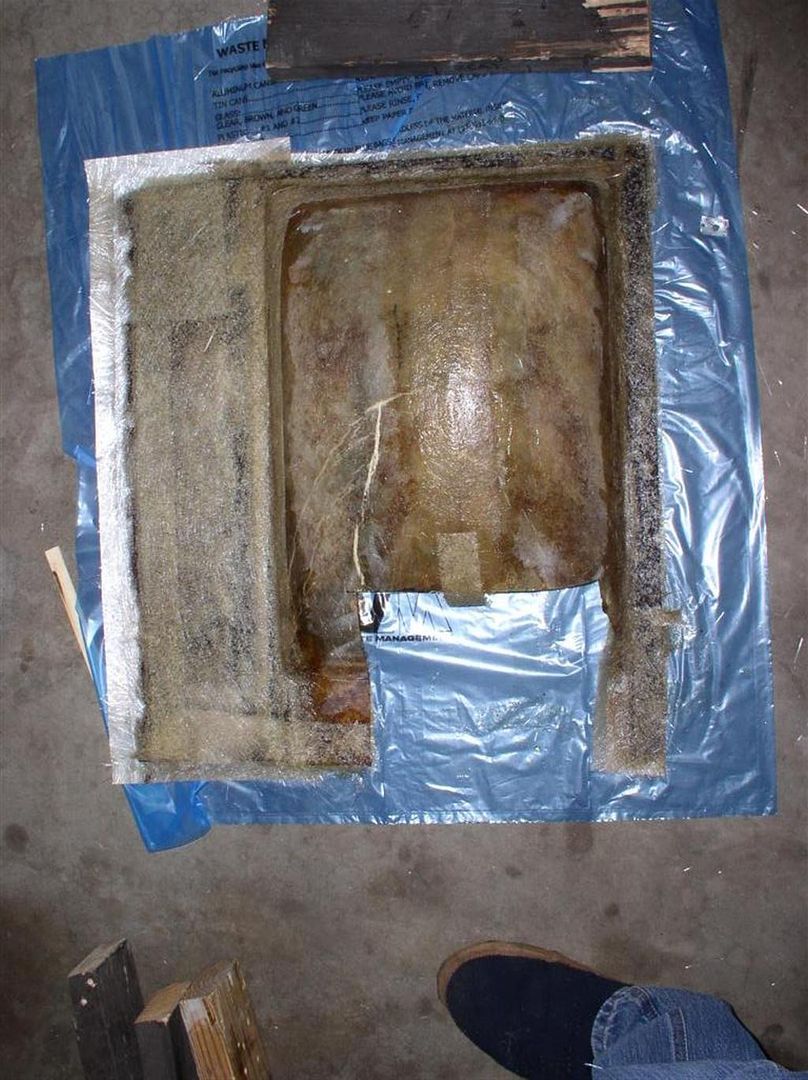
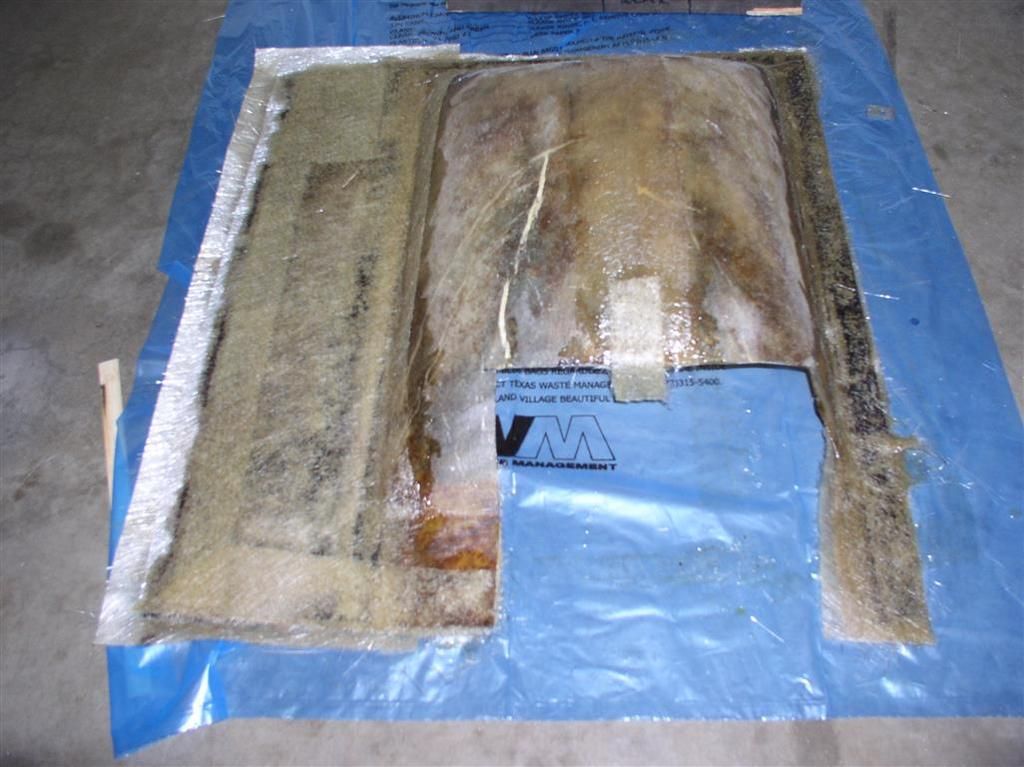
    Making a little more progress. The main panel is now fully cut and aligned. I am starting to realize this is a bigger project than I thought it was....

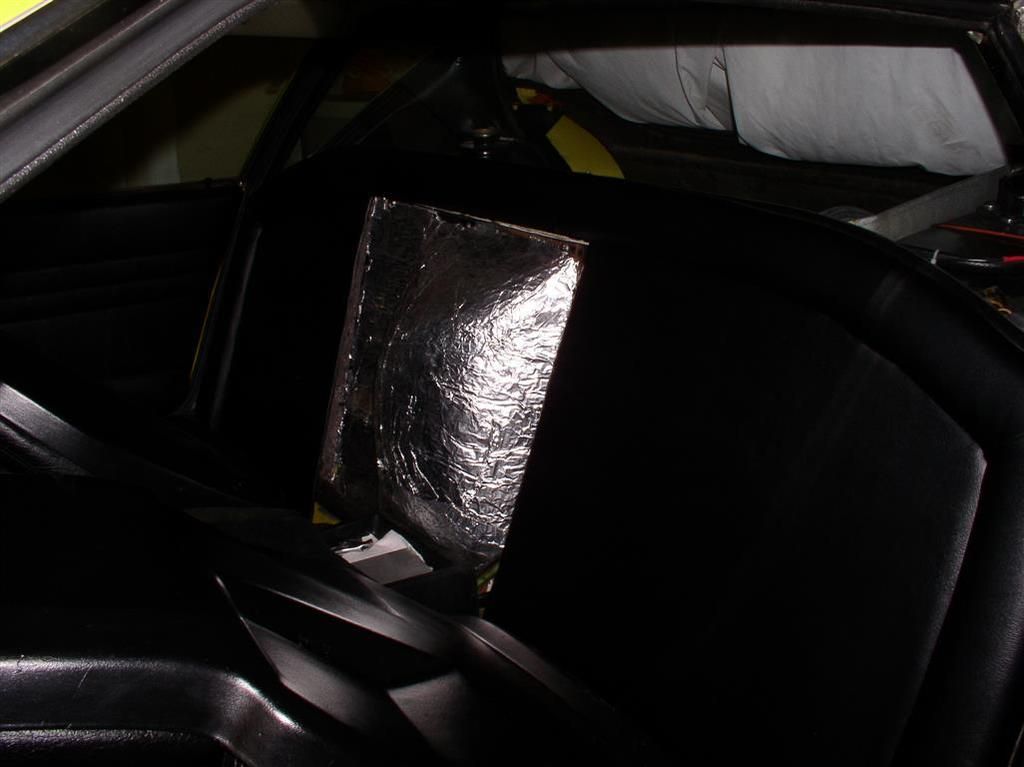
    I also found out I can easily fit 1" Styrofoam insulation behind the fiberglass bulkhead panel (in the permanent part).

    The Hump is glassed over (joined).


    Rocky
    Still waiting on my ZF Parts... Talked with Lloyd (RBT) today - he's checking on my shipment. This wait is AGONIZING!

    More progress on the bulkhead cover (thanks to my wonderful wife!)

    Bulkhead cover cut out....


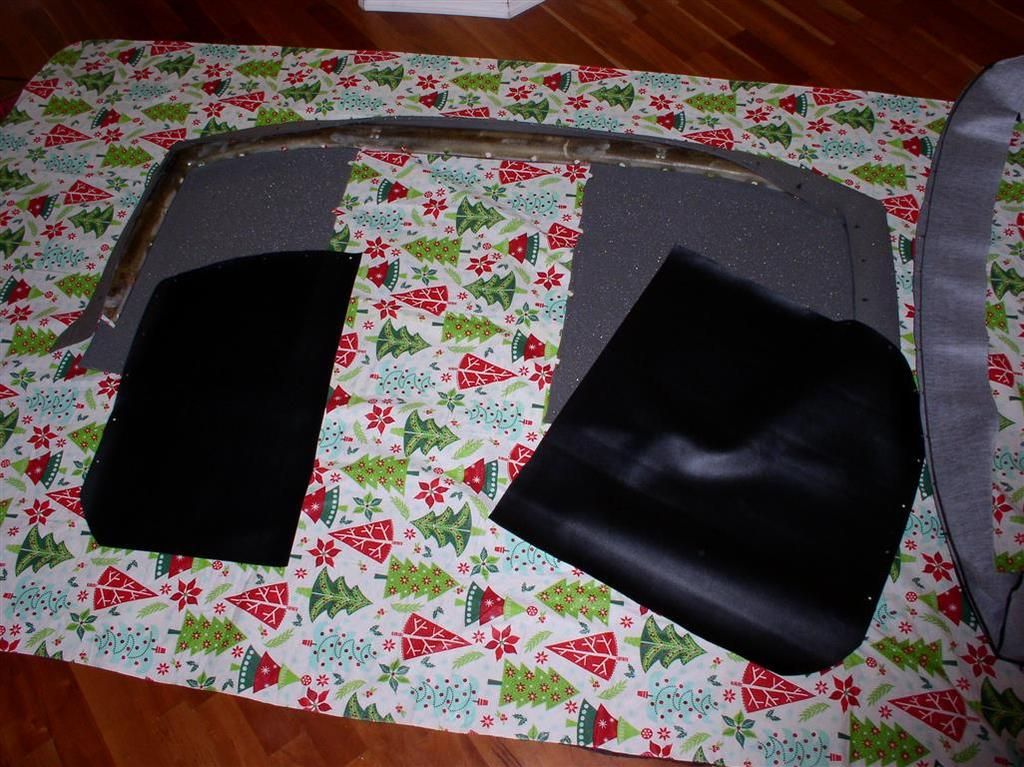
    "Scrim" attached.... (See, I'm even learning some of these upholstery terms!


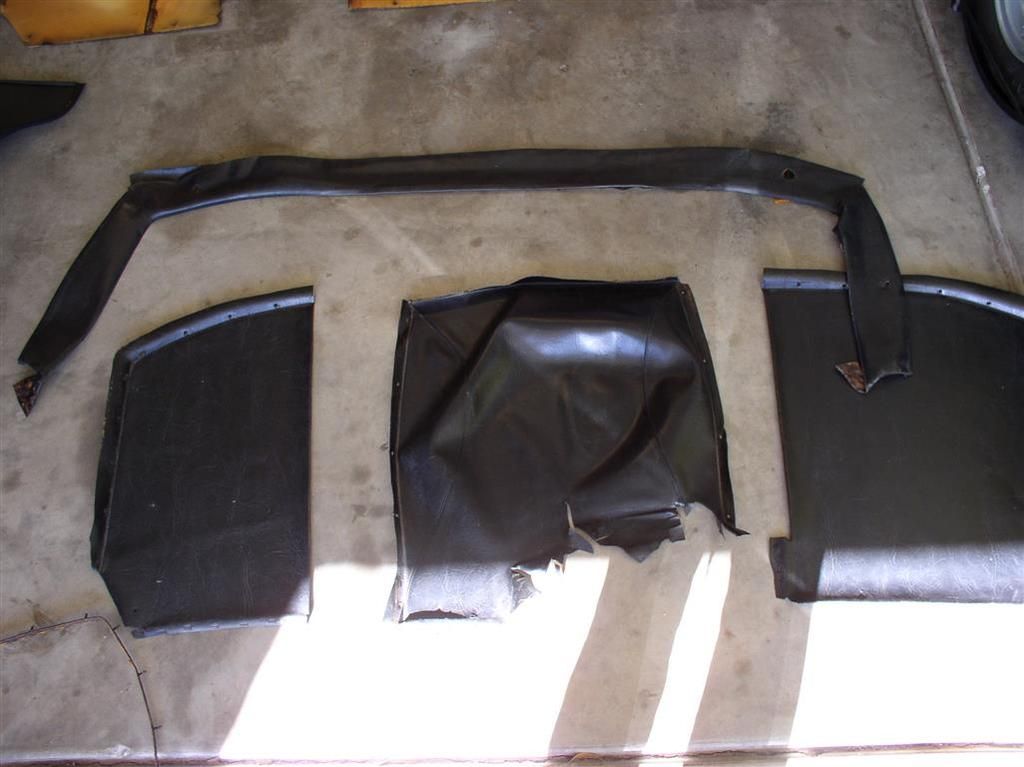
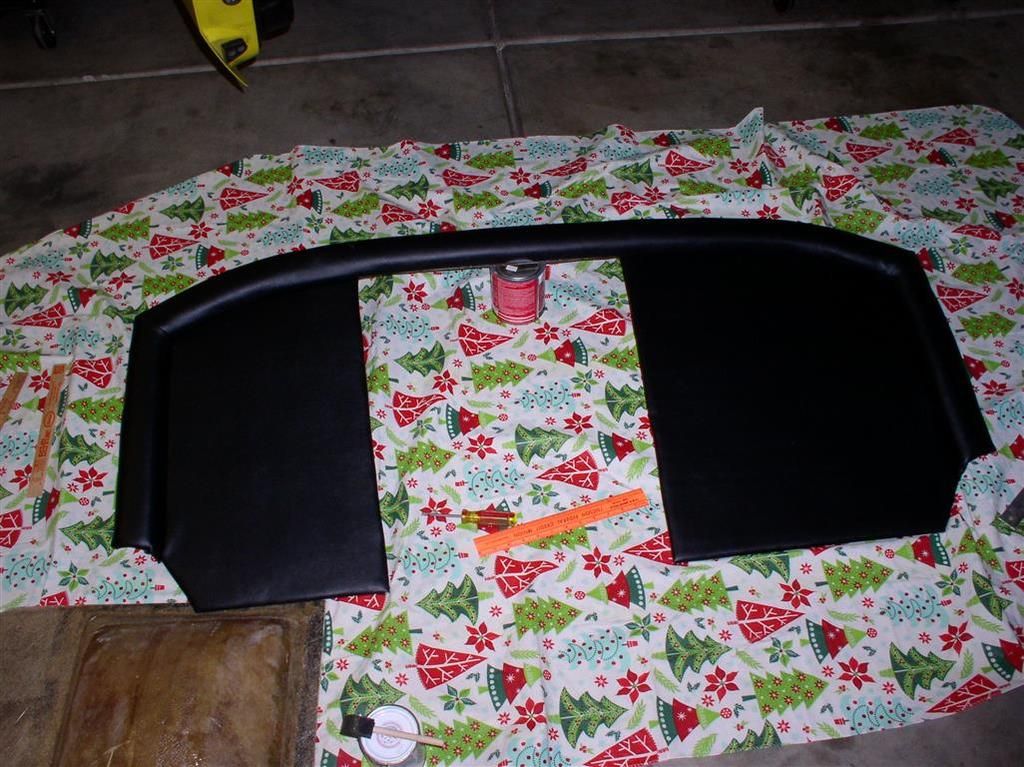
    Sections are laid out.... Note that the piece on the right is the raised "rim" cover. What you see is the vinyl turned inside out - there is a lot of flip-flopping of the materials.....


    Here's close to the end product.... It's a little wavy because I have not stretched the vinyl, and glued it to the backing yet. The technique (my technique, anyway) is to install the pieces, clamp them all with the metal rim & screws, and then stretch it, and glue it to the fiberglass board.

    Joe, thanks for the compliment. The work took a long time, but worked out to be "relatively" inexpensive so far....

    * Donor Bulkhead Panel $60
    * "Scrim" and Vinyl $57
    * Fiberglass Resin $15
    * Fiberglass Cloth $15 est.
    * Grommets $ 6
    * Weldwood Cement $10

    * Being Extra Nice to Wife - PRICELESS!

    You will note I attempted primarily a large, flat area.

    I am not really thinking I'll do the "hump" - I'm going to take it around for quotes... Hoping to do that for ~$150.... (we'll see).


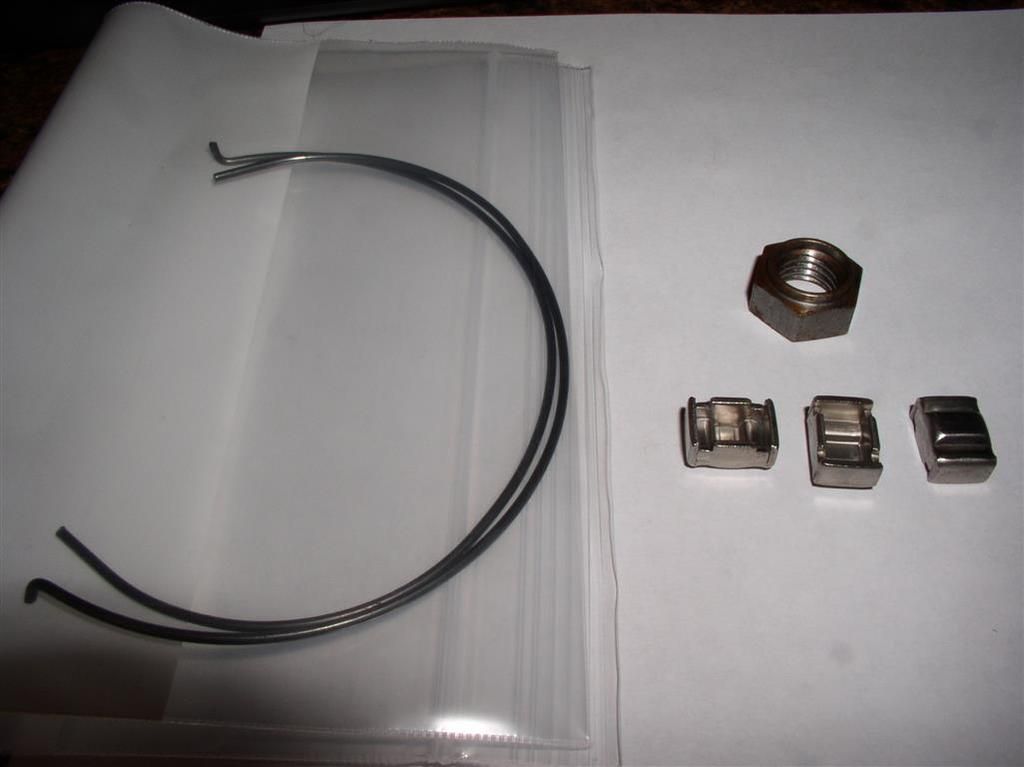
    Yes - Part #215 - Synchro Spring...

    Attachments

    Images (1)
    • PN_215_Synchro_Spring
    quote:
    be a "standard" and available


    I've searched for ZF parts, and mostly they are building automatics now (it seems) and I have not seen anything that looks right.

    I did talk to Lloyd this morning, and he told me the part was on it's way. So I am hopeful.

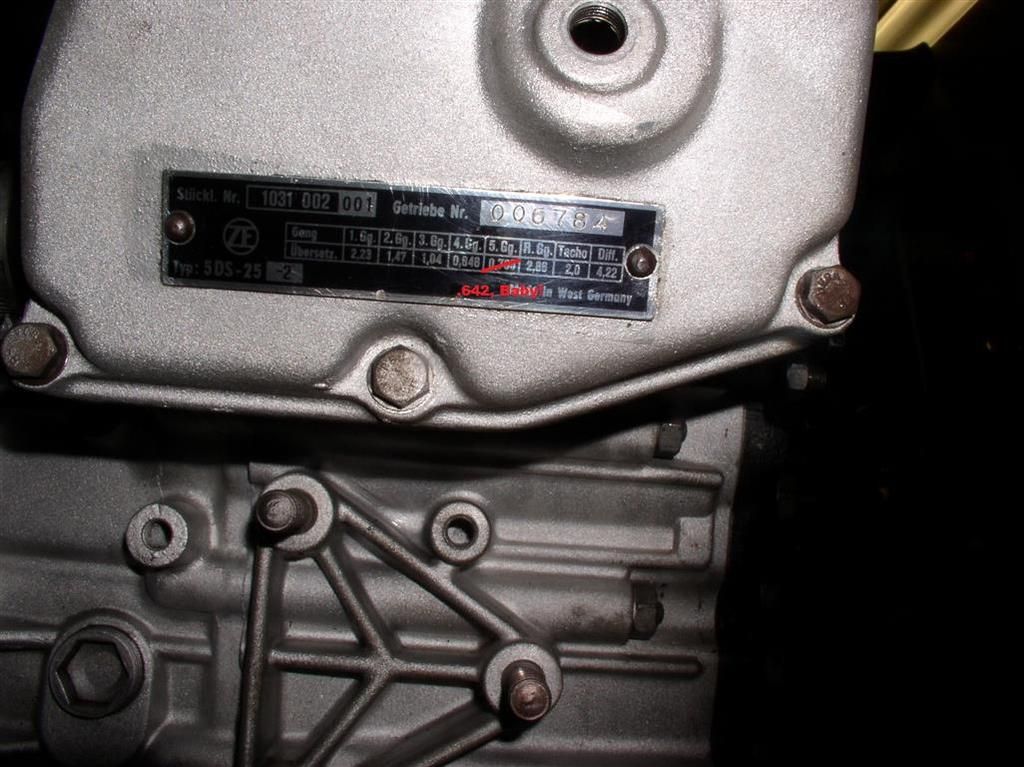
    I also hope to upgrade to a higher (lower?) ratio 5th gear (.642 vs. the current stock .704).

    Scope creep continues!

    Rocky
    Scope Creep, or Necessary Modification???

    I got the opportunity to upgrade my 5th gear set to a "taller" ratio (.642 vs. the stock .704).

    At the point where my ZF is now, the a 5th gear update to the input shaft needs nothing - I am just waiting for the new gear set to arrive to complete the assembly.

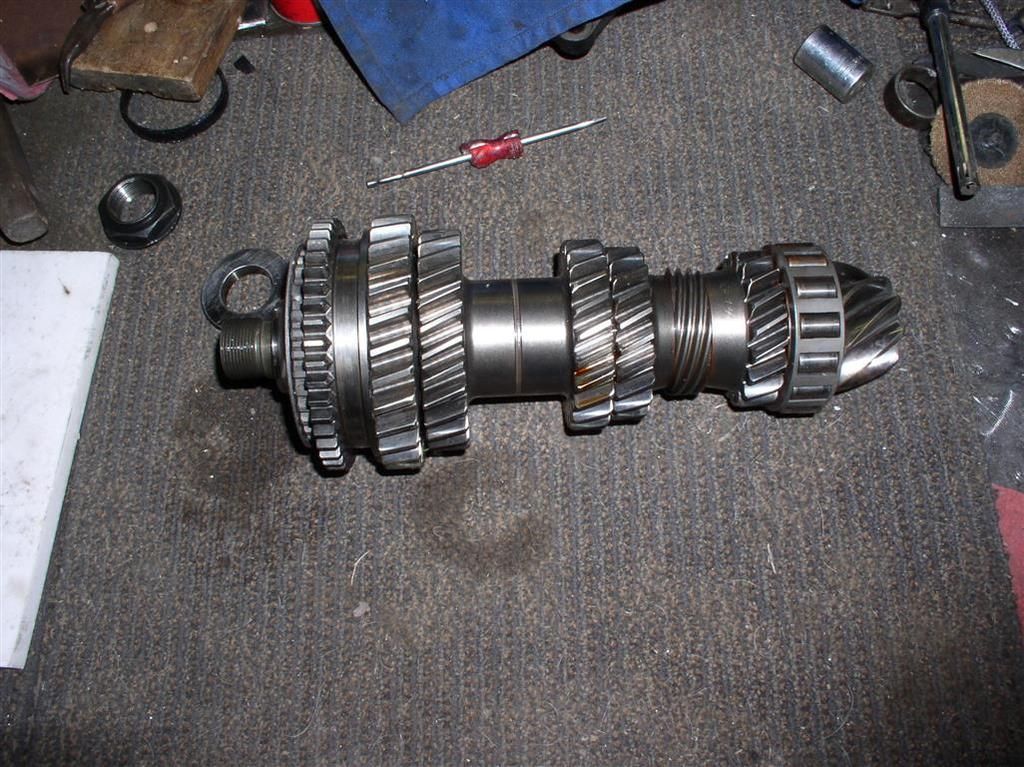
    The output shaft is a slightly different story. The 5th gear is the last gear on the assembly (right up against the roller bearing before the pinion), and the entire output shaft assembly has to be disassembled. Luckily, this was a pretty straightforward process. This was accomplished today - to get ready for reassembly.

    In this disassembly, we had not done anything to the output shaft, as my second gear synchros, etc. are all on the input shaft. Once the output shaft was disassembled and cleaned, we evaluated it as having a clean bill of health!

    One thing left - Lloyd at RBT says the "taller" 5th gear needs some clearancing of the 4th/5th gear shifter shaft. I will find out more details when I talk with him tomorrow.

    Here's some pix.....

    Output Shaft Assembly


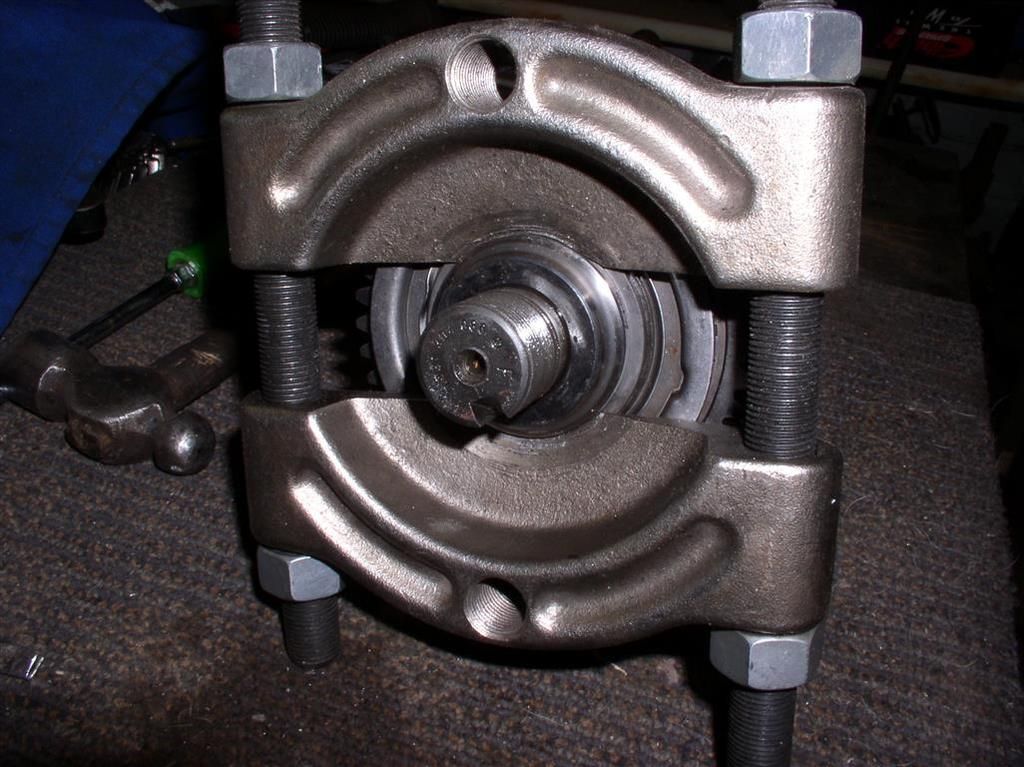
    Removing Rear Bearing Race


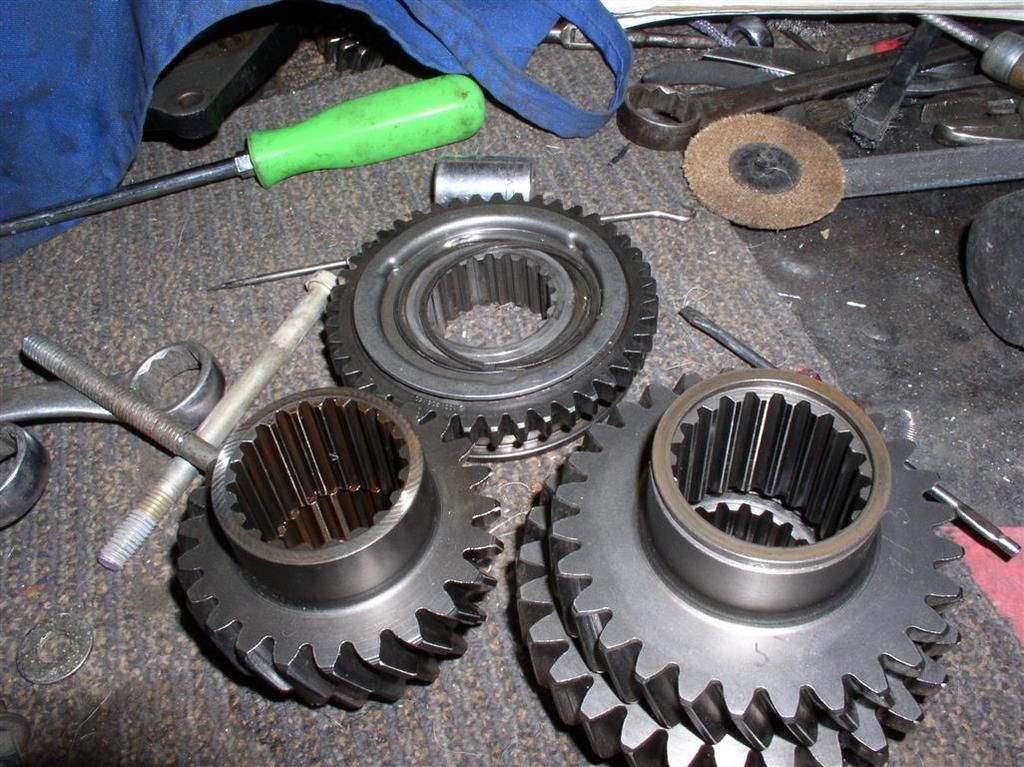
    Gear Sets


    Cleaning out Spooge and Varnish from Shaft

    The speedo drive gear did not want to come out very easily. We also marked this - obviously it has to go on in the correct orientation.


    Disassembled Components

    Last edited by rocky
    Kudos Rocky for taking on the project. I agree...I find it gut wrenching. I was a nervous wreck during the "flipping" exercise on the GT40 build. So, I really appreciate the fact you are taking it on, and that you are posting all the pics/experience. I have one that I'm going to have to go through sooner or later...as it was sitting in some guys unheated Michigan garage for 30 yrs. I am currently just procrastinating on it... Big Grin

    thanks for taking us through it.
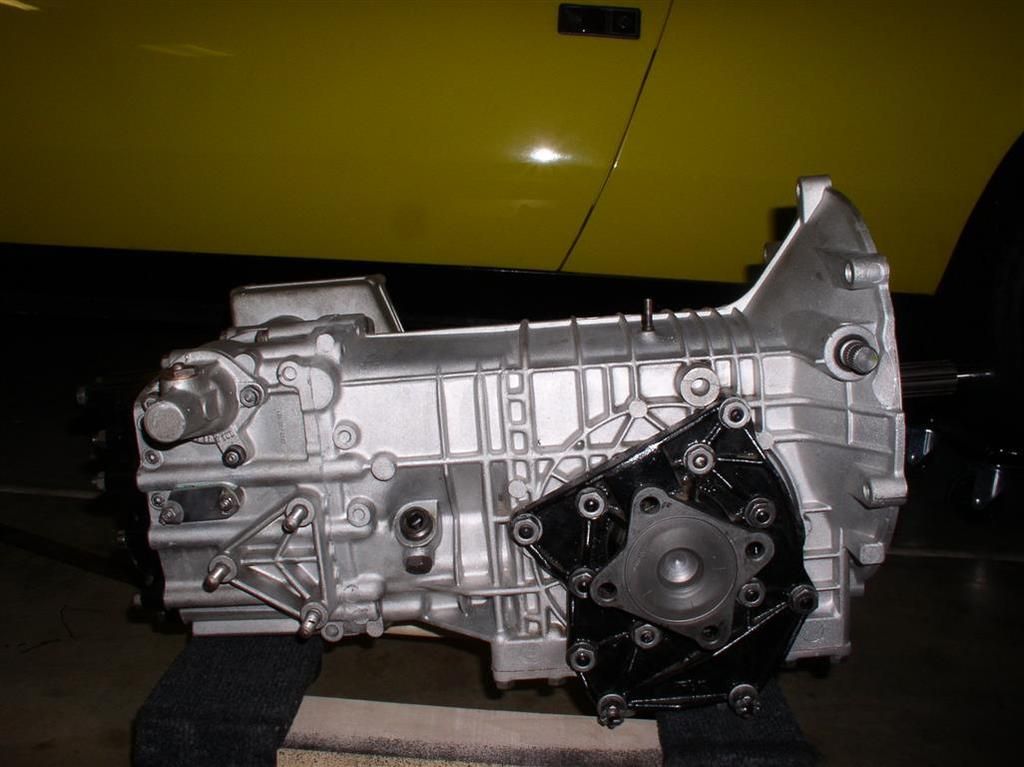
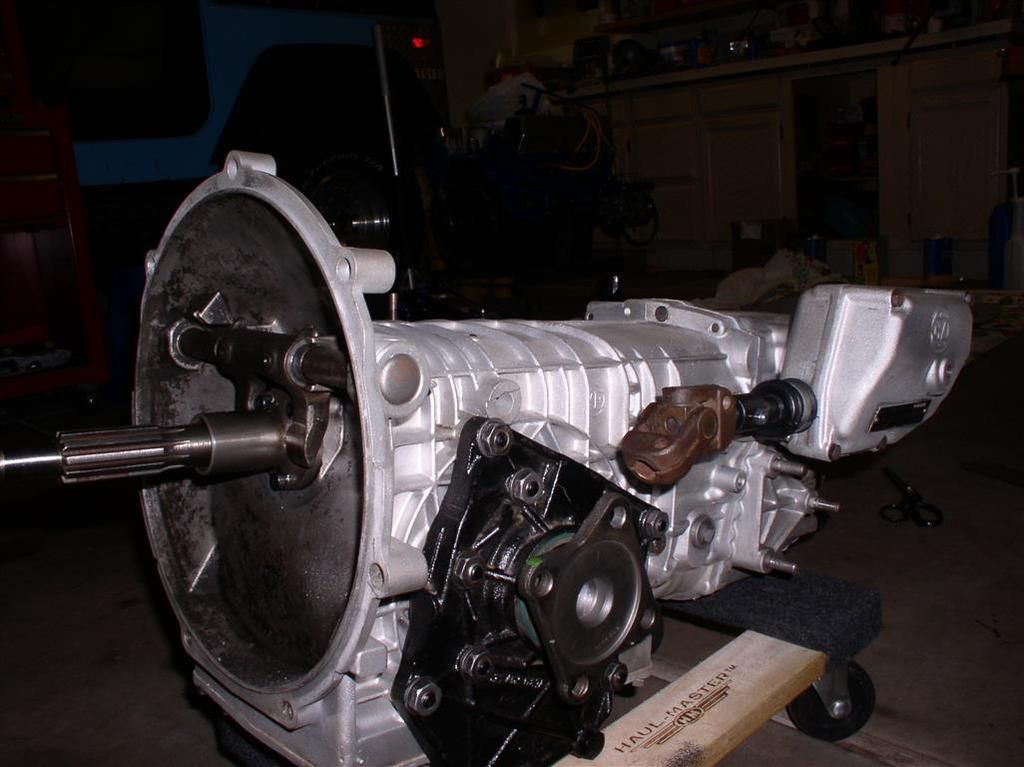
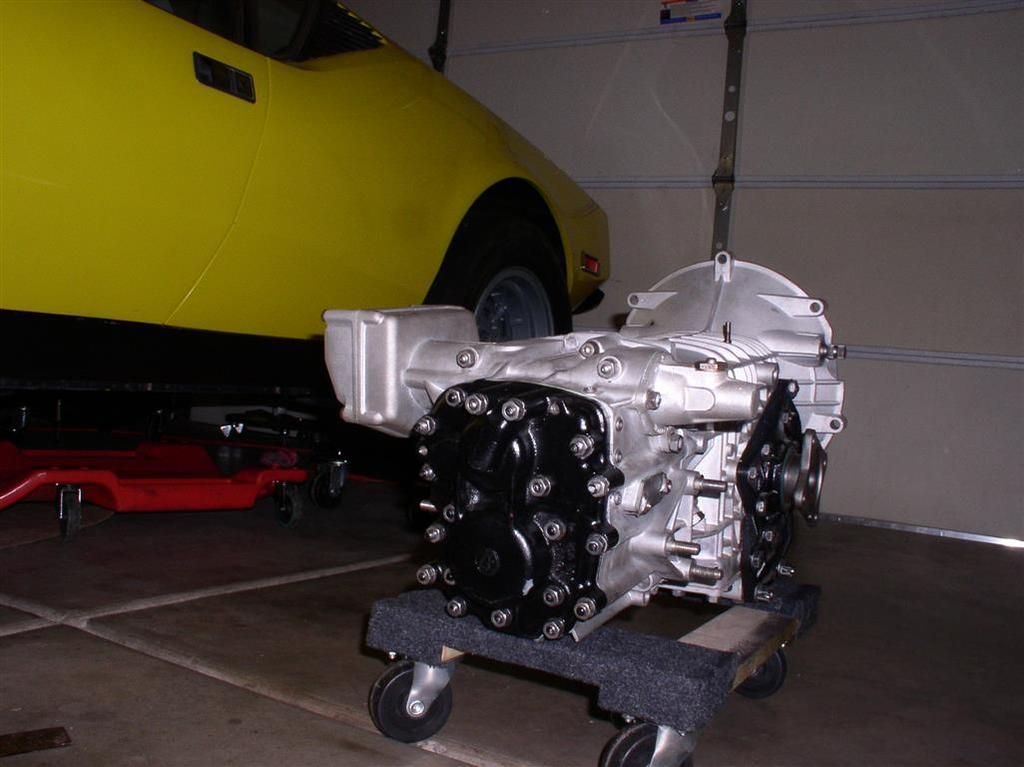
    ZF Is Home!

    Isn't she beautiful??

    It took me 4 flipping months to get a second gear cone / syncro, make some internal repairs, and upgrade my fifth gear.

    But we are on the downhill side of #5357 build #2. Watch this space for more information.

    Thanks to Wade (MarkIV/4280) and the staff at WWadeCo for all the support on this ZF effort. It would be impossible to accomplish this without his expertise.

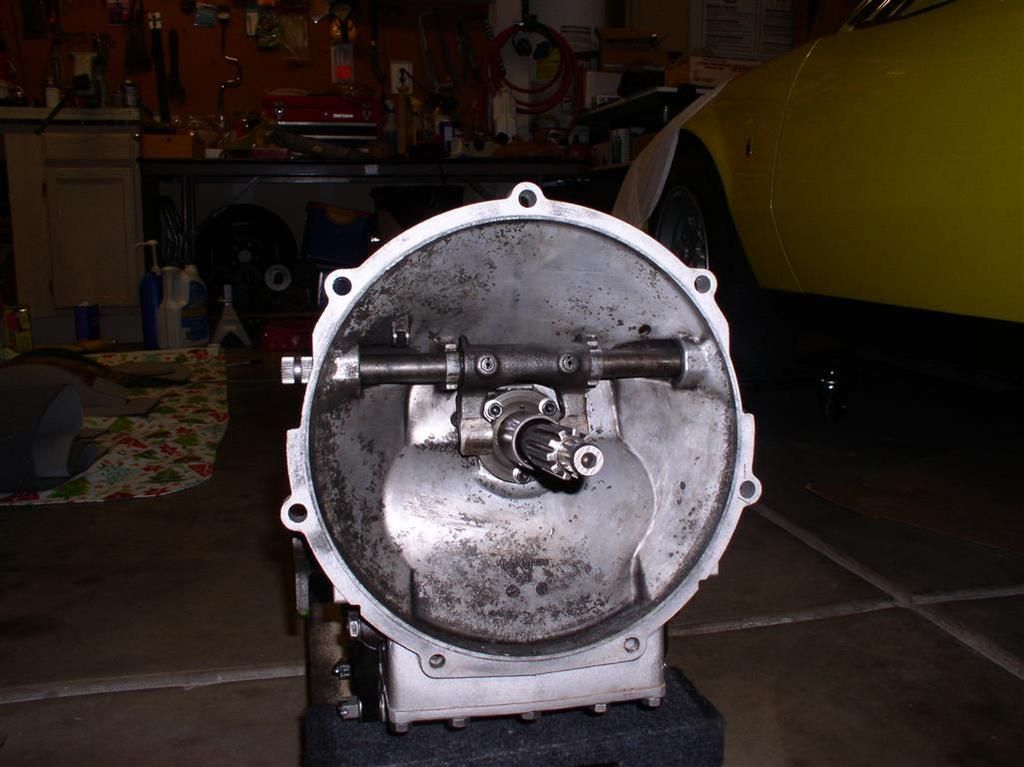
    I know you want details, but here are the glamour shots....


    And the new Tag...


    More to follow.
    Rocky
    ZF Refurbishment

    Given that I had some "downtime" on the car due to an engine build, I decided to address a second gear "crunch" that I had in my ZF. If you check out this thread, it describes a previous project to safety wire the ring gear bolts...

    Thread: "Am I the Luckiest Guy in the World?

    My 2nd gear synchro situation had been basically the same since I purchased the car, and the previous owner had lived with it. It was manageable by performing a very slow and deliberate shift from first to second.

    It seemed to be getting a little worse, so it made sense to try and address the problem, since my transaxle was just sitting on the garage floor during the engine rebuild.

    Finally, late in the ZF reassembly, I had the opportunity to obtain a "taller" (.642 ratio) 5th gear to replace my stock .704 ratio gear. The benefit of this is to drop engine RPM by about 4-500 RPM at 80mph, and give me bragging rights for a ~165 mph capability at "stock" redline. I am not sure I will try to achieve 165+ anytime soon, but it's nice to know it's there in case I need it.

    So without further ado - I wanted to discuss what's inside a ZF case, and what specifically I did to my box. This discussion leaves A LOT of the specific steps out. Ensure that you have your ZF manual, and follow steps EXACTLY, or you may break something! This transmission is like a Jigsaw Puzzle, and it only goes back together one way.

    I won't go into much detail here on the "basics" - draining the fluid, removal of all the "accoutrements" (Speedo Drive, speedo gear, etc.). Make sure the box is in neutral when you start. Remember - it's a lot more pleasant to work on a ZF if the case is clean.

    So the first thing is to build a fixture:

    The dimensions are 52mm and 79 mm (with an 80 mm center to center distance). On the fixture, you need to have reliefs for the shifter shafts, and the fixture needs to be able to handle the roughly two foot long input shaft that is always poking around in your way. On the W-Wade-Co fixture, we ended up putting a positive stop on the large hole to keep the roller bearing from slipping through.


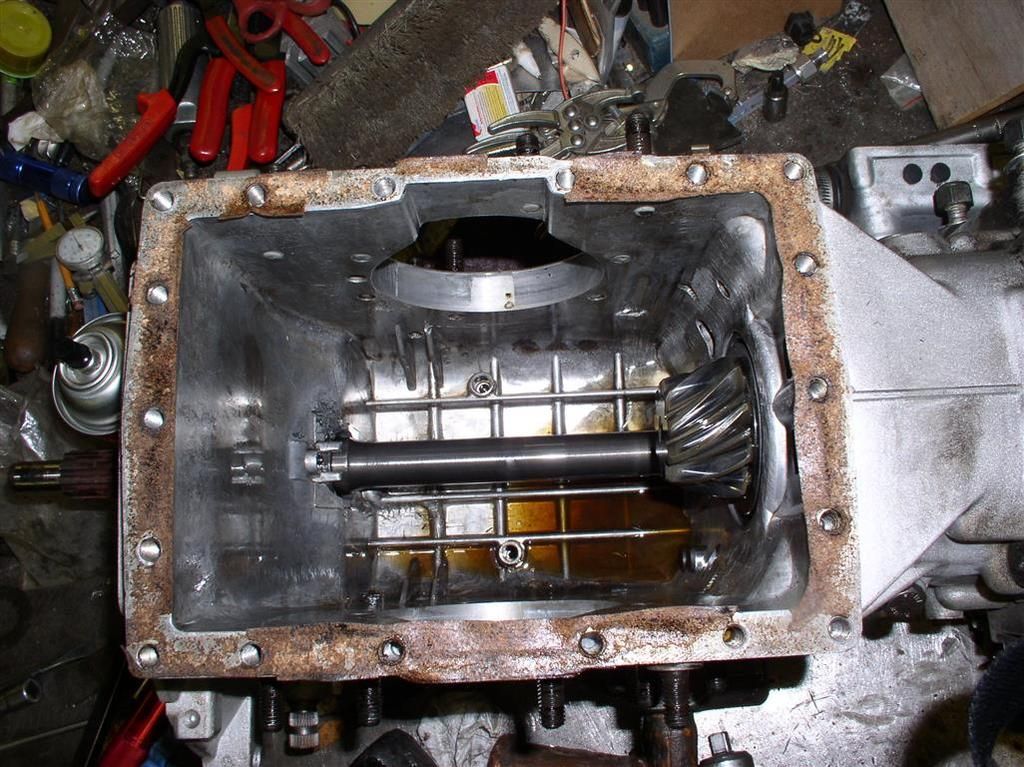
    Given that the case can be split without removal of the ring gear, I don't plan to cover this in detail.... Although we did it on mine. But here is pictures of what it looks like inside the housing....
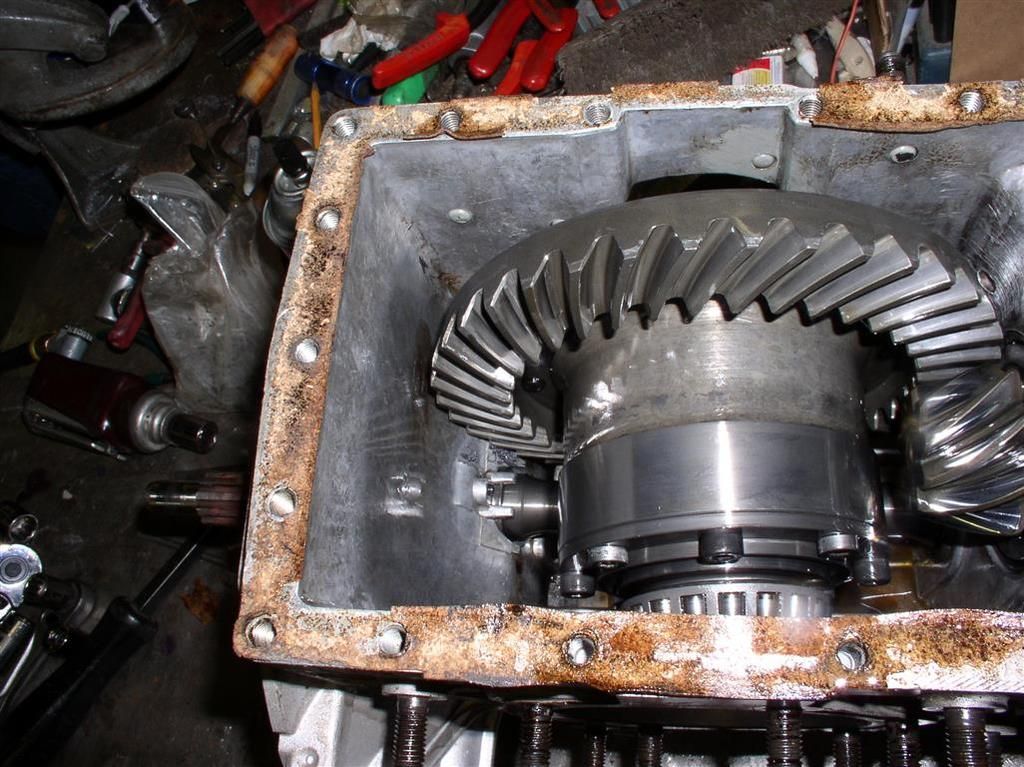


    I might augment this section later, if there is demand.

    Just watch those shims on the long lover cover bolts and put the bolts, shims, washers and cover back in the EXACT SAME orientation as you removed it!


    Open the Shifter Box Cover

    Remove the shifter cover, and look inside. Remove the two "grub screws" holding the shift rod onto the shift actuation ring. We took this apart so we could clean it up, and put fresh grease in it.

    You really don't have to remove the cross shaft from the case - we didn't. There's some kind of wacky mechanism under the little pointy cover on the passenger side. It's easiest to leave it be.
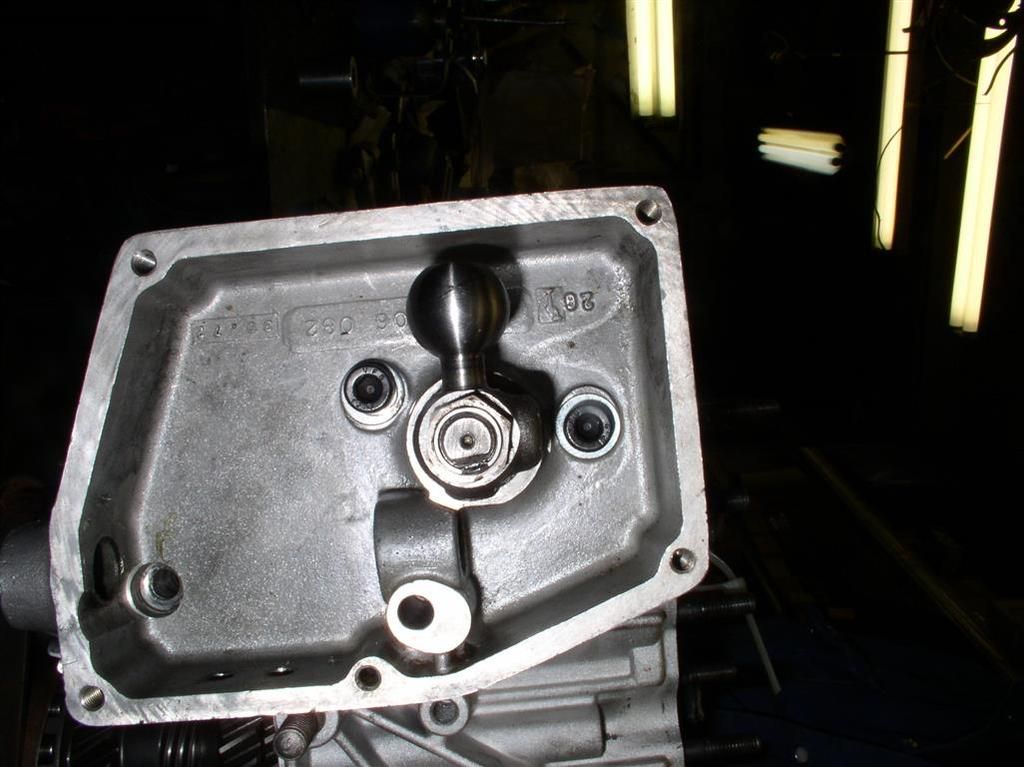


    Remove Cast Iron Cover

    There are two bolt holes in the cover that you can thread 8 mm x 1.25 pitch bolts through. These bolts push on the aluminum case to back the cover off. Here's what the cover looks like when it's off the back of the case.
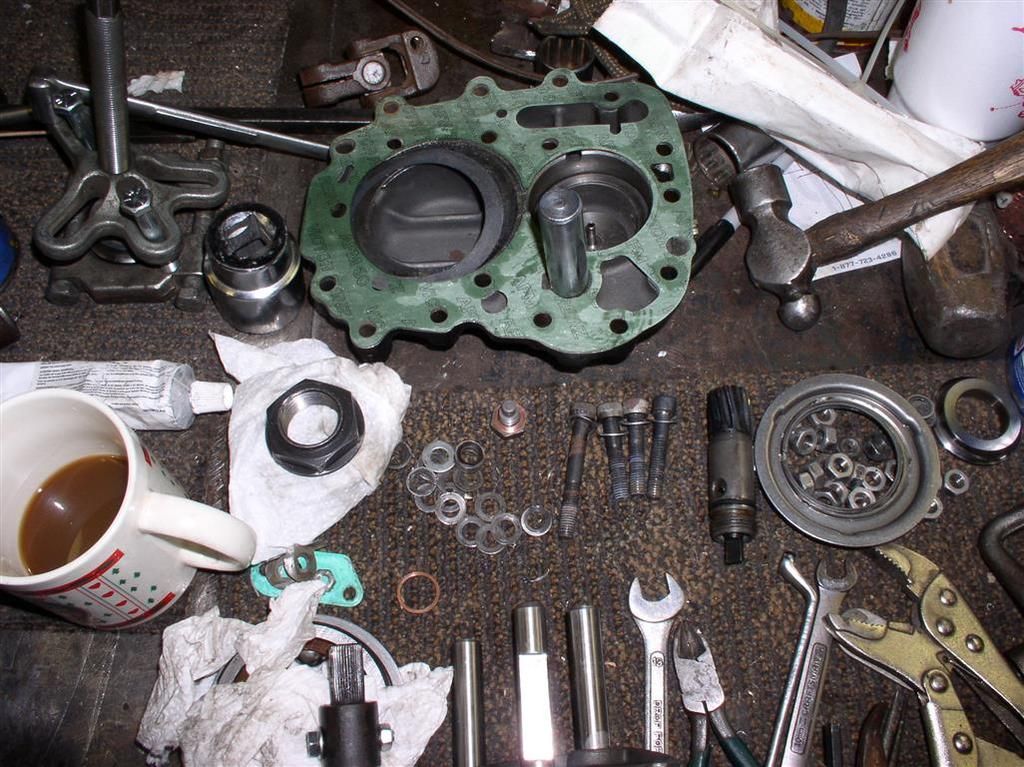


    The big steel shaft holds the reverse idler gear on the inside of the aluminum case.

    Here's what the back of the aluminum case looks like with the nuts still installed.
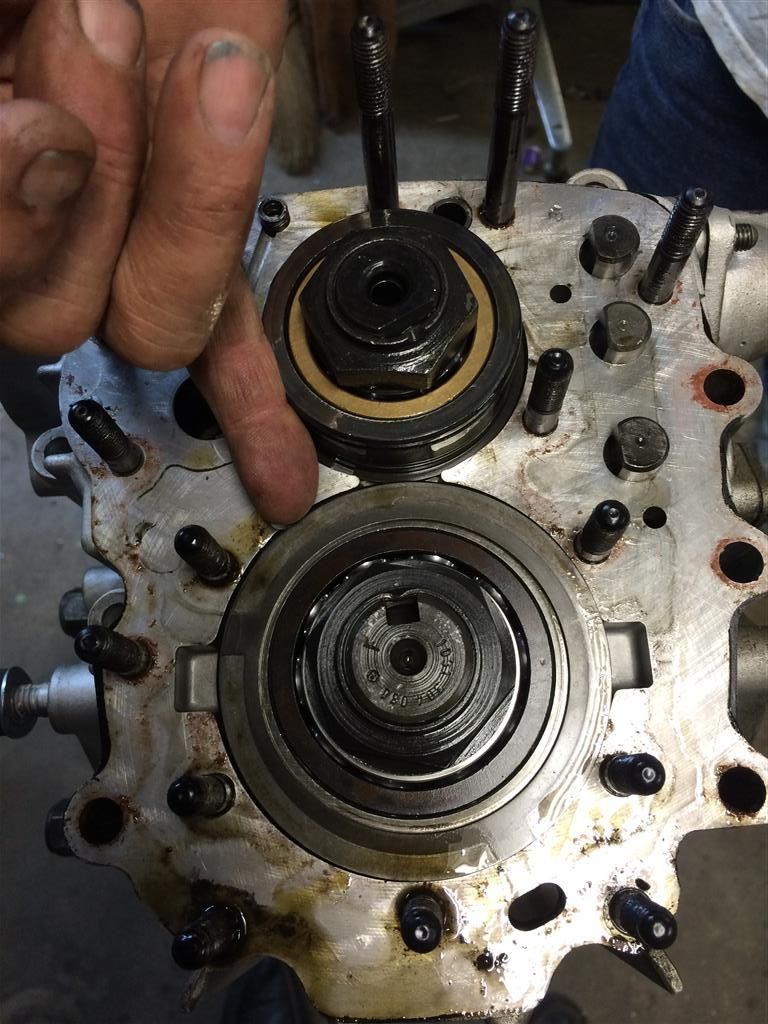


    Note that there are a bunch of shims between the rear bearing races and the cast iron cover / case. In the case of the output shaft (the big one), they set the pinion depth.

    Unstake the nuts on the input & output shafts and remove the nuts and bearing races.

    Remove Reverse Detent and Spring.


    Split the Gear Case

    Carefully split the case, and slowly back the two gear sets out of the forward portion of the ZF case. You may need to turn the two side output flanges a little to get the pinion off of the ring gear.
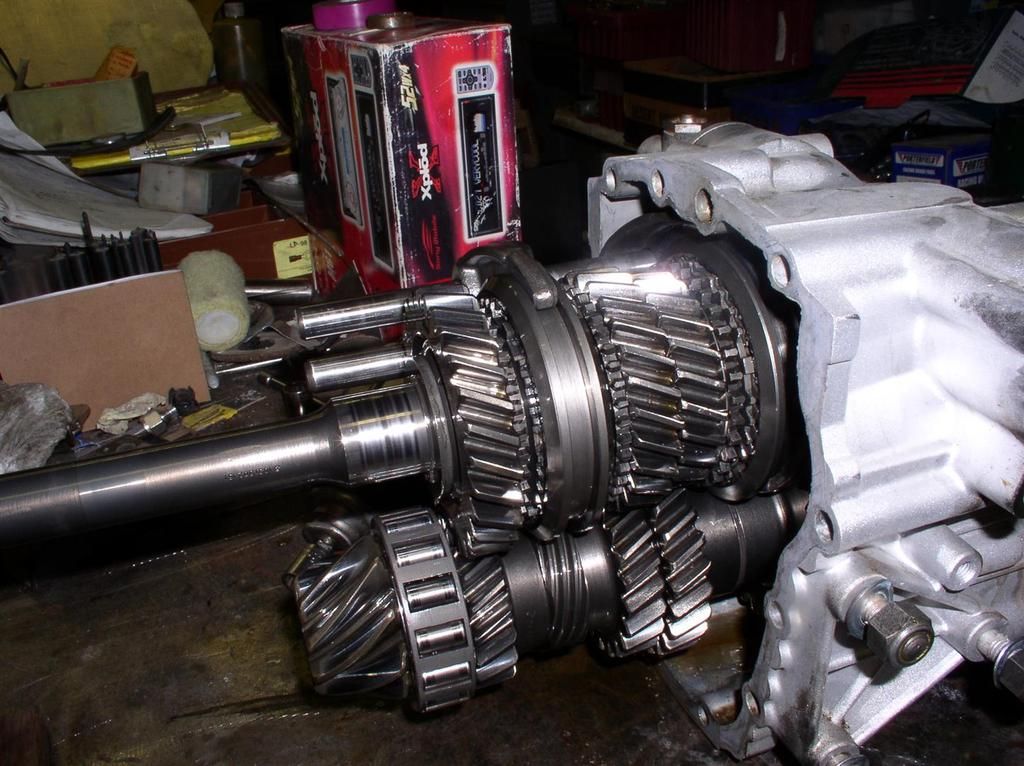


    Move the whole gear stack, which will still be installed in the rear half of the case, and mount it in your cool ZF holding fixture.
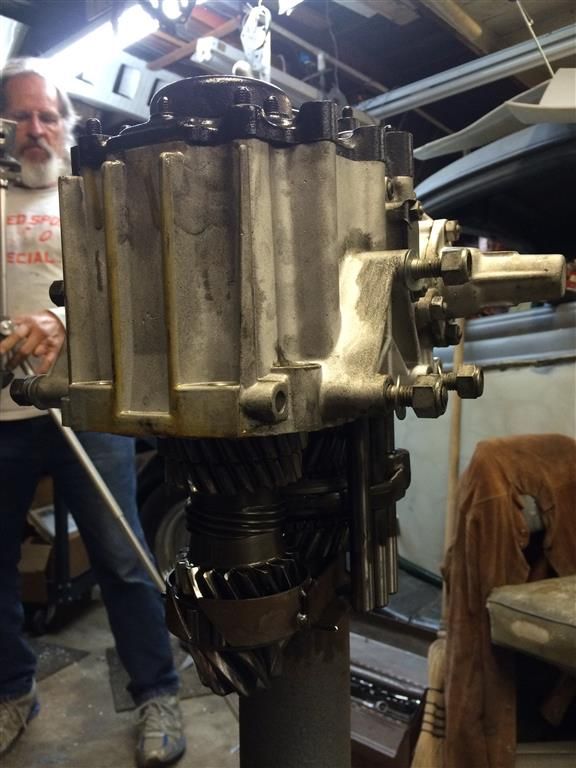


    Remove the "grub screws"" on two of the three shifter shafts. One pair of screws is accessible with the case split, the other pair is under the little access panel on the passenger side of the box.

    Slide the shift rods out of the case (down).

    Work the two gear stacks, and the single shift rod and collar down (actually, raise the rear case up off the gear stacks). Once the case is off, the gear stacks are free. Remove the shift collar and the shaft.

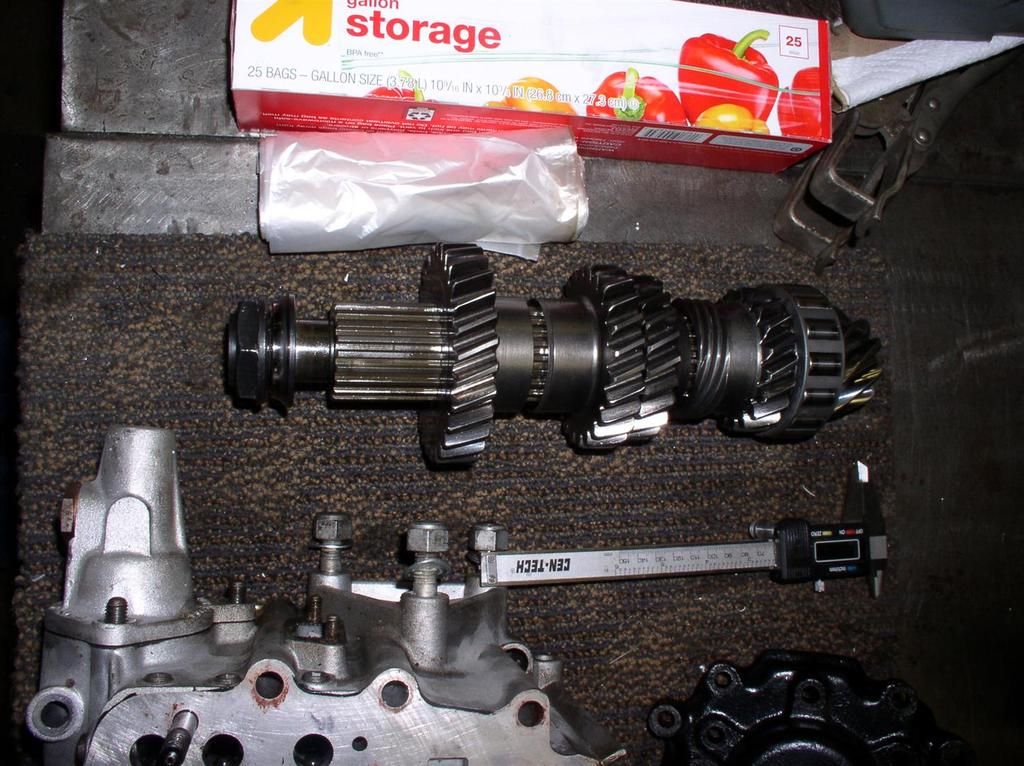
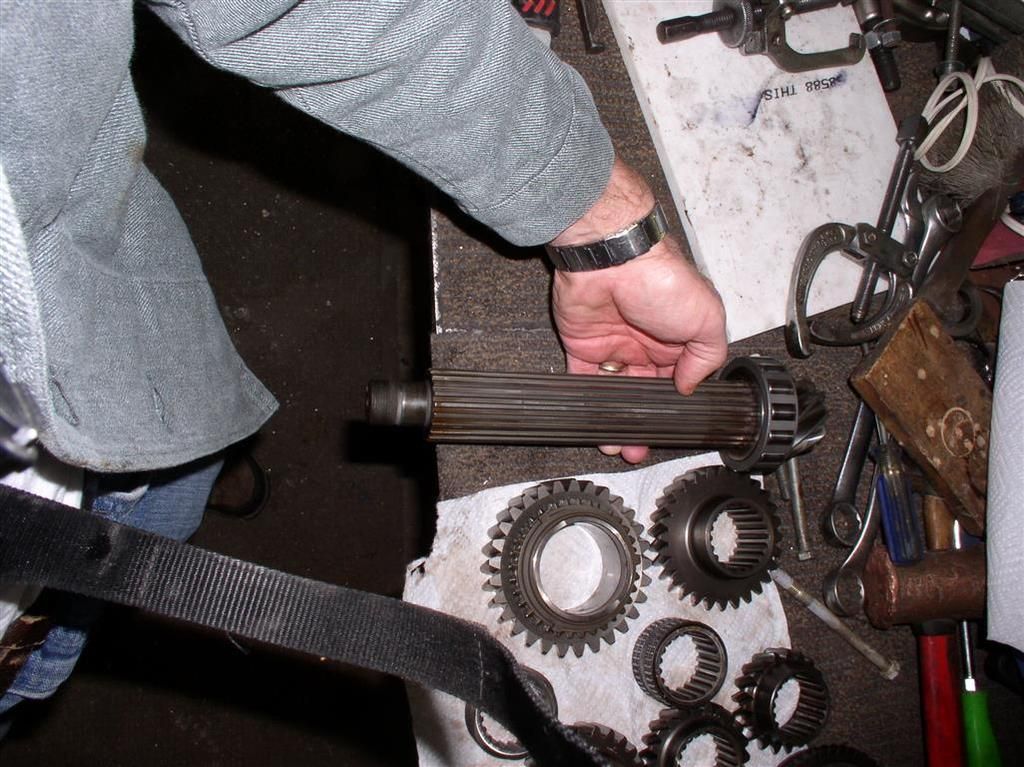
    Here's what the gear stacks look like our of the case. The top is the input shaft, the bottom is the output shaft. The little gear is your reverse idler.
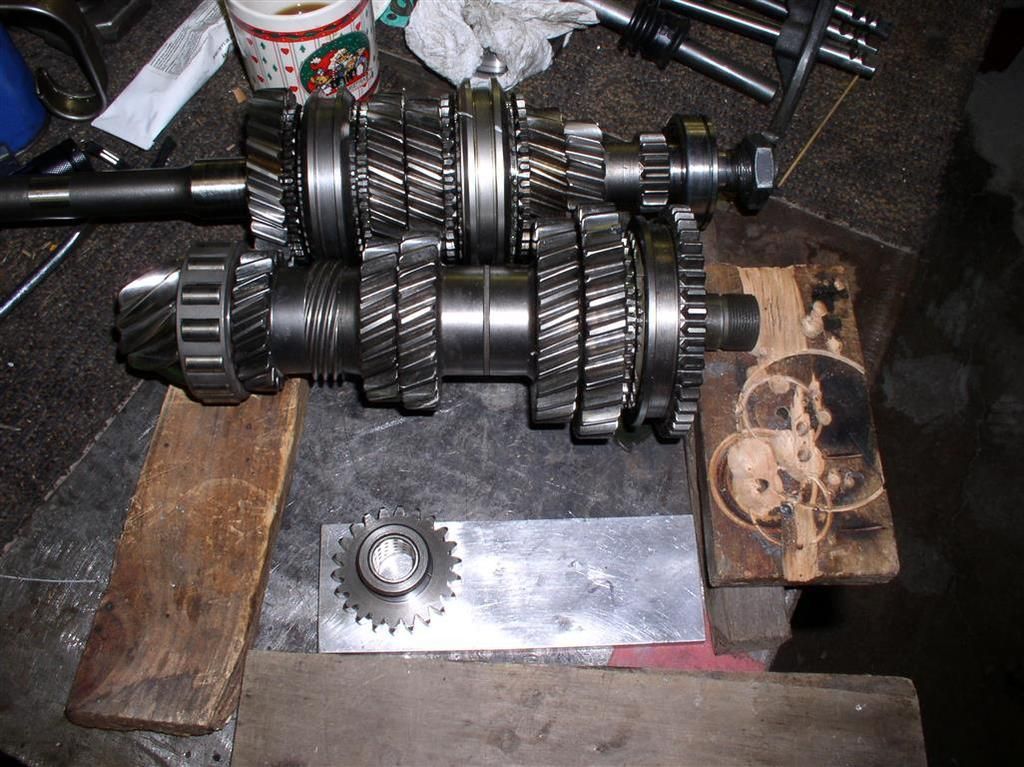


    Output Shaft - The one with the Pinion

    The output shaft has Reverse / First on it, it's at the end opposite the pinion.

    If you are not changing a gear, then you may be able to leave this alone. When I took mine apart, I found a whole lot of "spooge" under the gears. You can also clean up the 1st/reverse shift collar on this shaft if you are in there, but.....
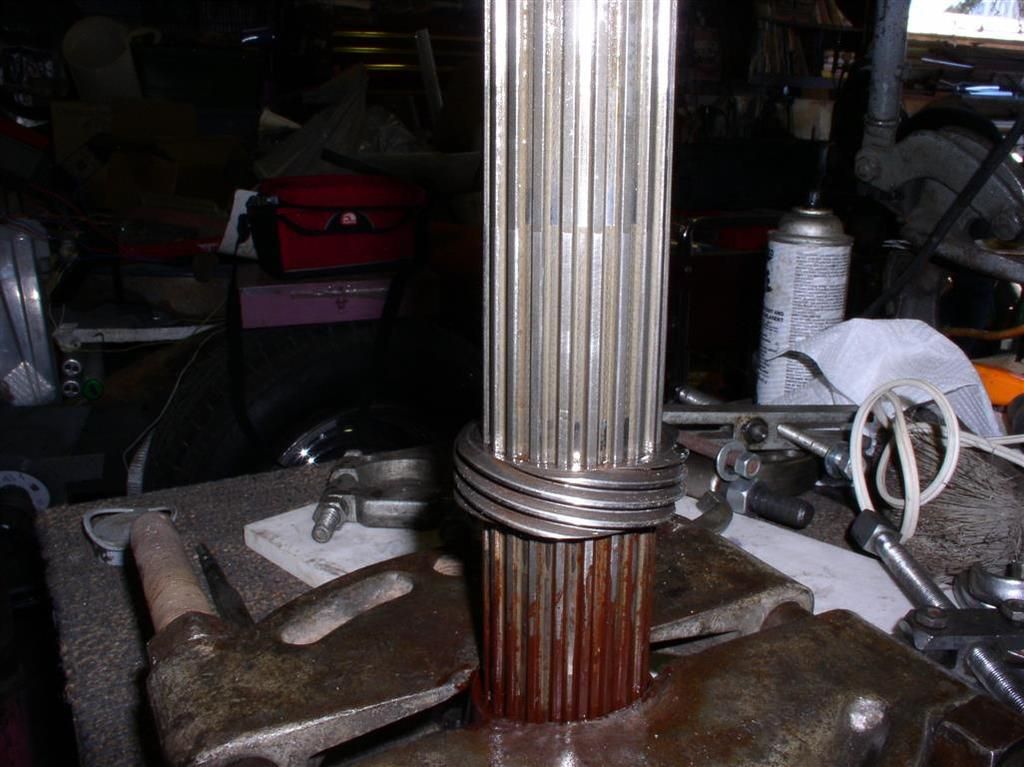


    I am not going to write a lot about this, unless by popular demand.

    Note that if you are going to a "taller" 5th gear, you have to disassemble this shaft, and also mill one of the shifter rods to clearance the gear.

    Input Shaft - The one with the Long Snout

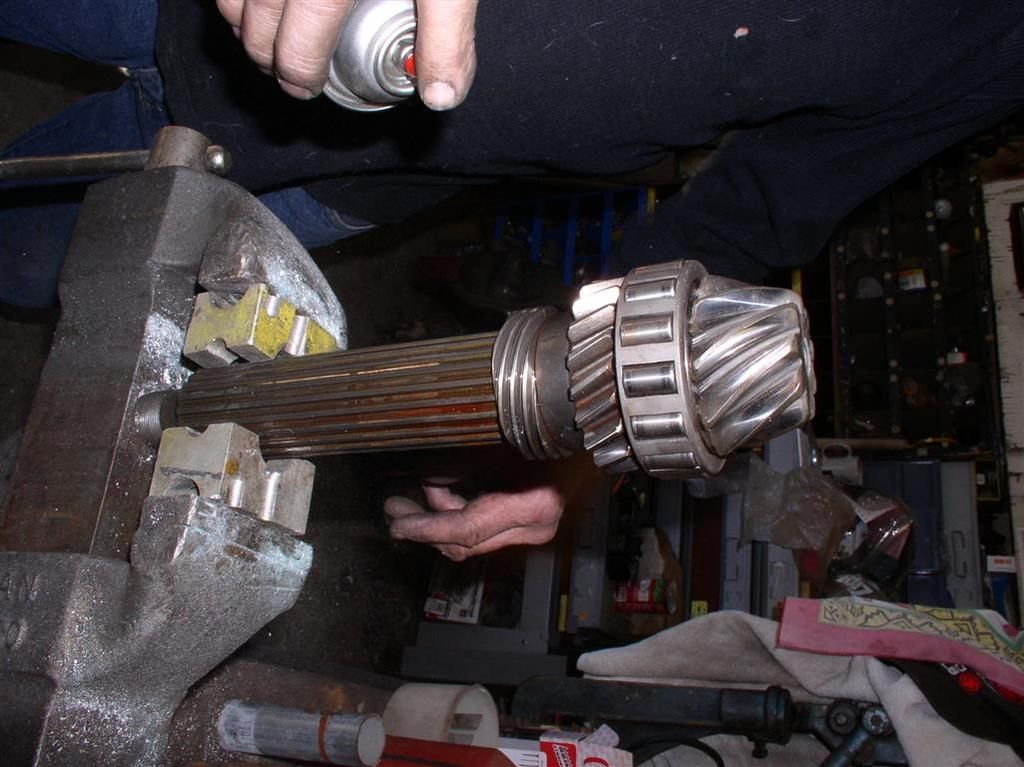
    This one comes apart if you are working on synchros. You need a press. You need to follow the book. You need to be careful. You need to know some tricks. But it's not black magic.

    But after you split your case, and before you do anything that I have described to this point, measure your Synchro Clearances. I measured:

    1st .050" Great! First Gear synchro never wears
    2nd .000" Terrible! This was a worn cone, not the syncro ring!
    3rd .036" Good - Pretty Nominal for a 100K Mile ZF!
    4th .033" Good - Pretty Nominal for a 100K Mile ZF!
    5th .033" Good - Pretty Nominal for a 100K Mile ZF!

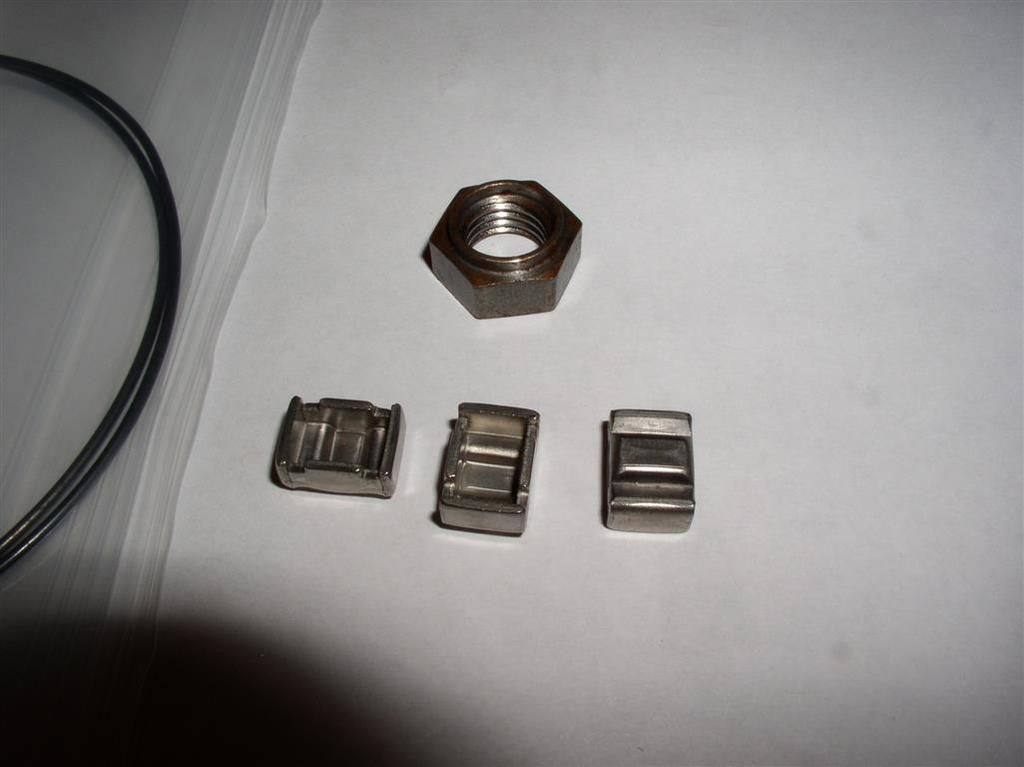
    Here's more pictures of the input shaft. Especially note that little pin. It's wise to remove it before you press any gears off the input shaft (in this picture it's a little wooden dowel used as a length guage).
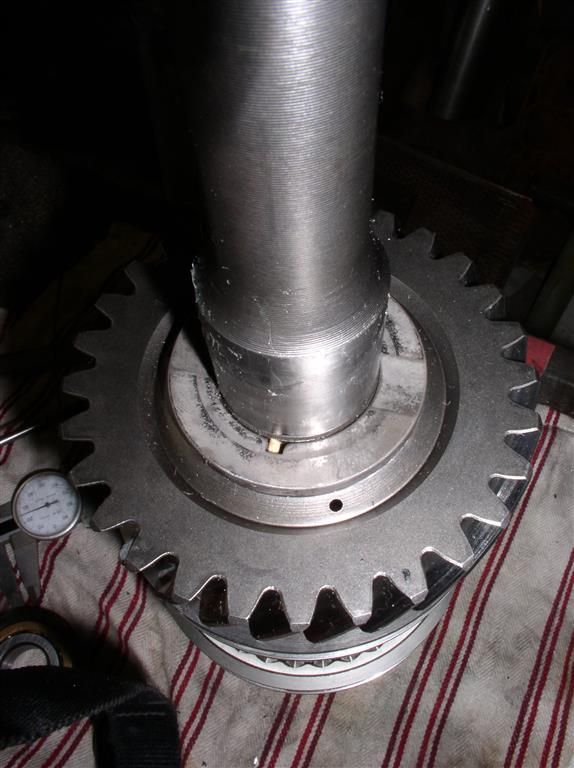


    Second Gear Synchro Repair

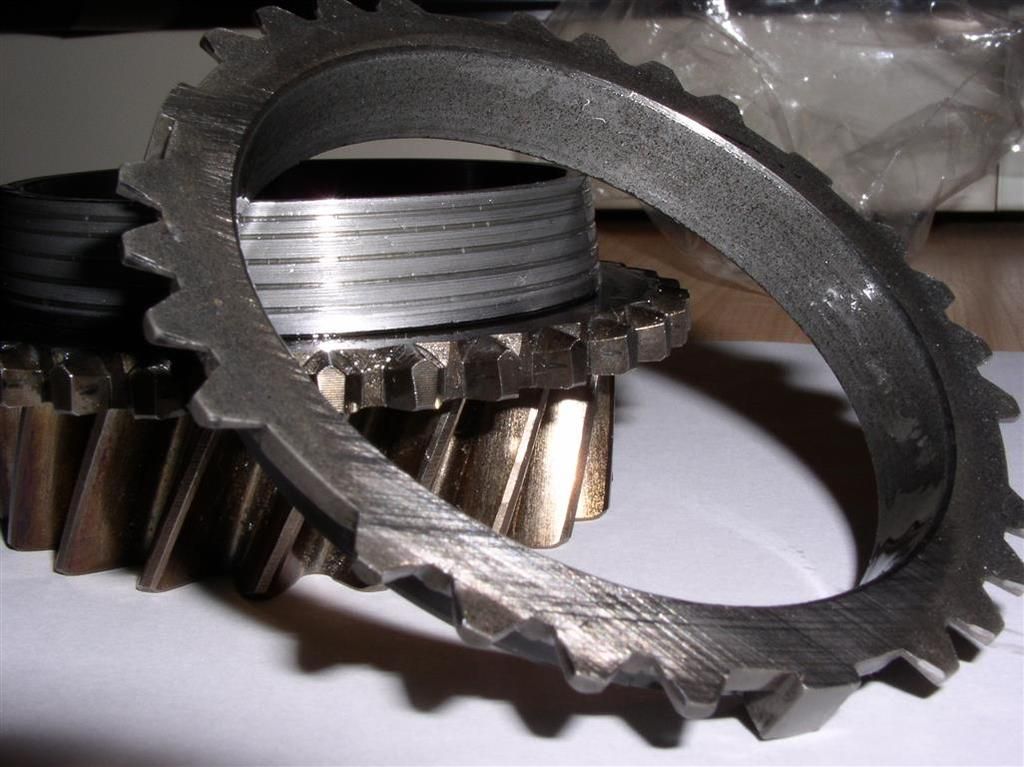
    The precise measurement data I collected on the indicated to me that the wear was primarily on the cone, and not the syncro ring. This was confirmed when I used the 1st gear synchro ring on the second gear cone. I got the same clearance (0.000"), but the first gear synchro ring is never worn, because it doesn't have to do any synchronization like second gear does. Therefore... this confirms issue is with the cone.


    Insert CRM Write-Up after successful test.


    Anyway - here's my repaired 2nd gear and synchro.
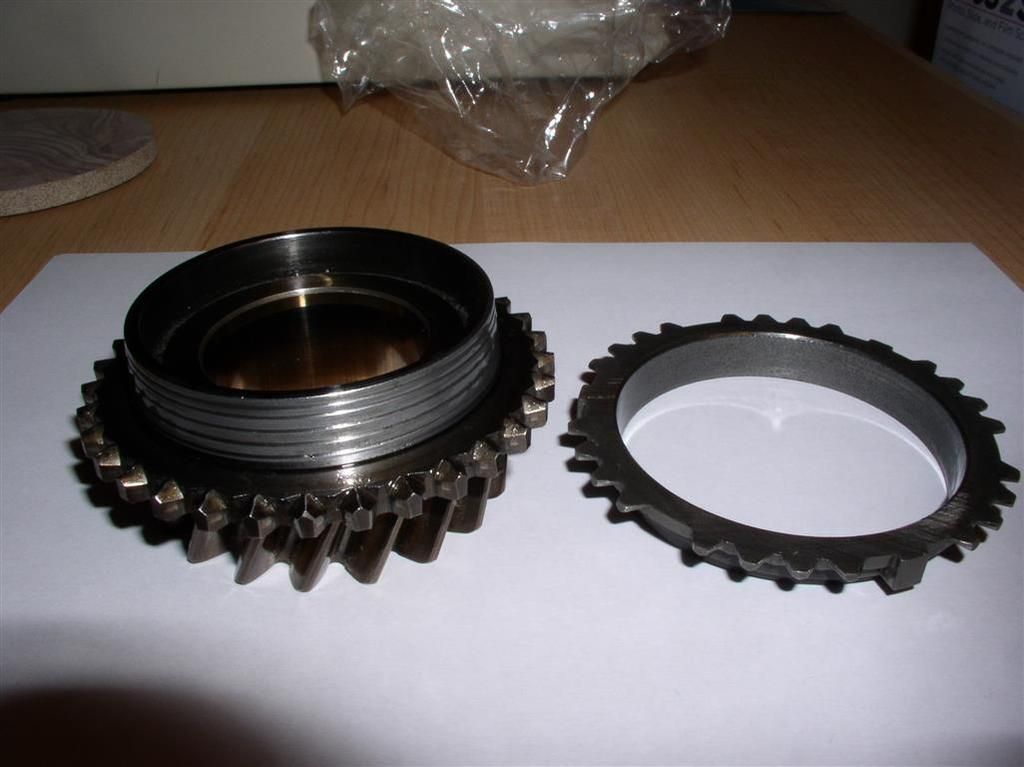


    5th Gear Upgrade

    I also hooked up with one of our members, and got a "taller" 5th gear (was .704, is .642). This is a pretty simple install on the output shaft, but it also requires the milling of one of the shifter rods (due to the expanded diameter of the 5th gear).

    Here is the milled rod. I got precise dimensions by calling Lloyd at RBT.
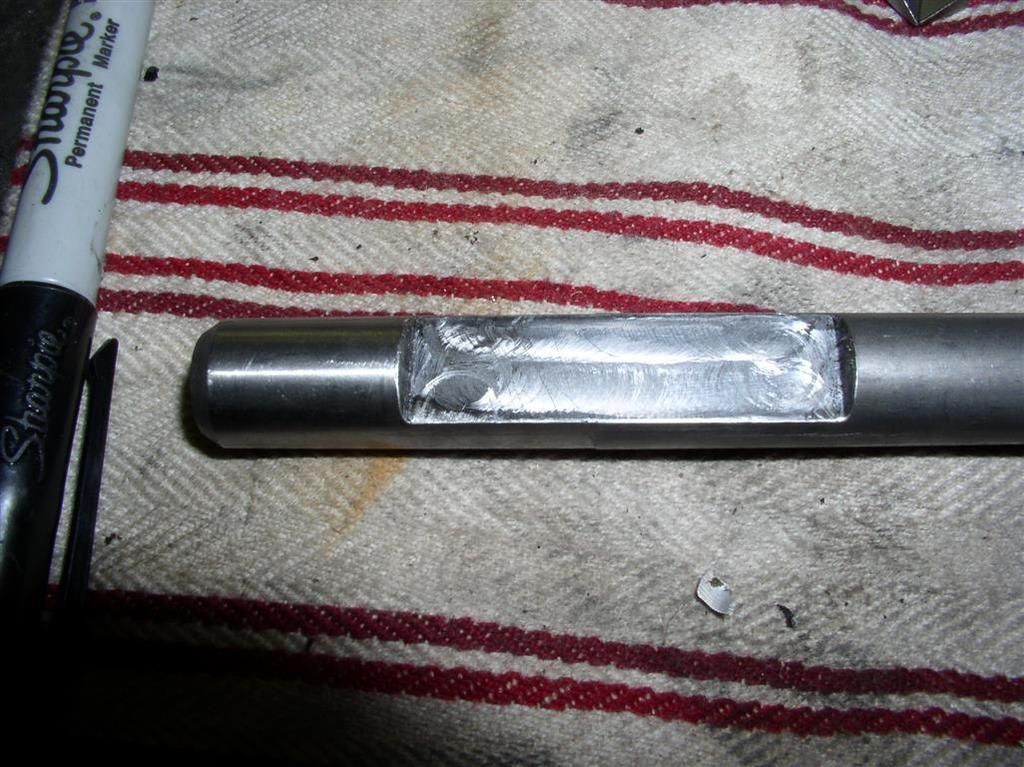


    Here is the milled rod, installed before the cases were assembled. You can see the 4th/5th shift collar on the right, and the milled slot to clearance the larger 5th gear.


    Reassembly - Just Do Everything Backwards!

    You need or know some tricks. You need to be careful. You need to put everything back in the right order. You need gaskets, and sealer (I used the equivalent of Yamabond FPIG sealer). You need to torque everything carefully.
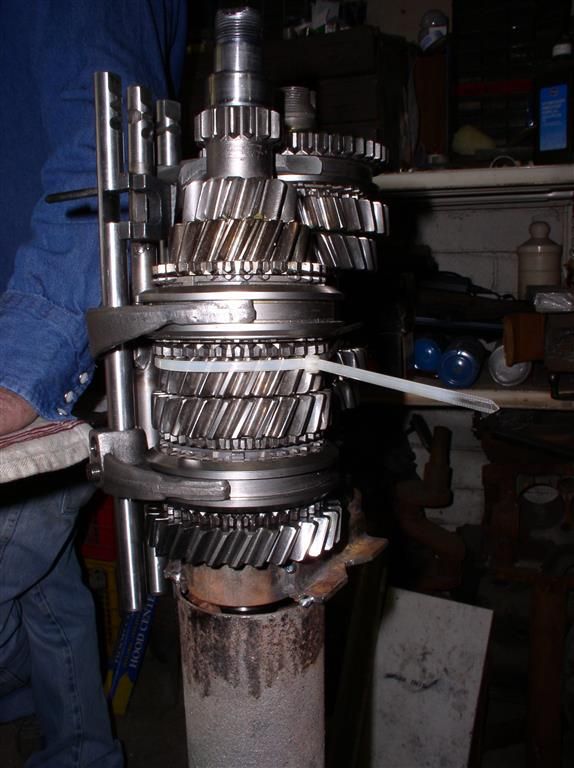


    The very first primary testing of the gears should occur before you insert them into the front of the case. Verify they all spin freely, and that you can use the shifter to move all the shift collars around. Don't do it like I did, and test the function AFTER you reassemble the two case halves.

    The issue that I had was the gear actuator tab on the cross shaft didn't get aligned properly (and seemed to lock the first gear up). So when the shifter was in neutral, the gear stack was in first, and when shifting to any other gear, the ZF was locked up.

    Correction of this minor issue took another 3-4 hours to resplit the case, clean up the mess, install a new gasket, and re-reassemble things.
    Last edited by rocky
    quote:
    Originally posted by Rocky:
    ZF Refurbishment....
    I might augment this section later, if there is demand.
    ...
    I am not going to write a lot about this, unless by popular demand.
    ..
    Second Gear Synchro Repair

    Insert CRM Write-Up after successful test.
    .


    Thanks for what you are providing!

    YOUR experance with the ZF would make an excellent article


    Now, why not go ahead and post the second gear repair?
    quote:
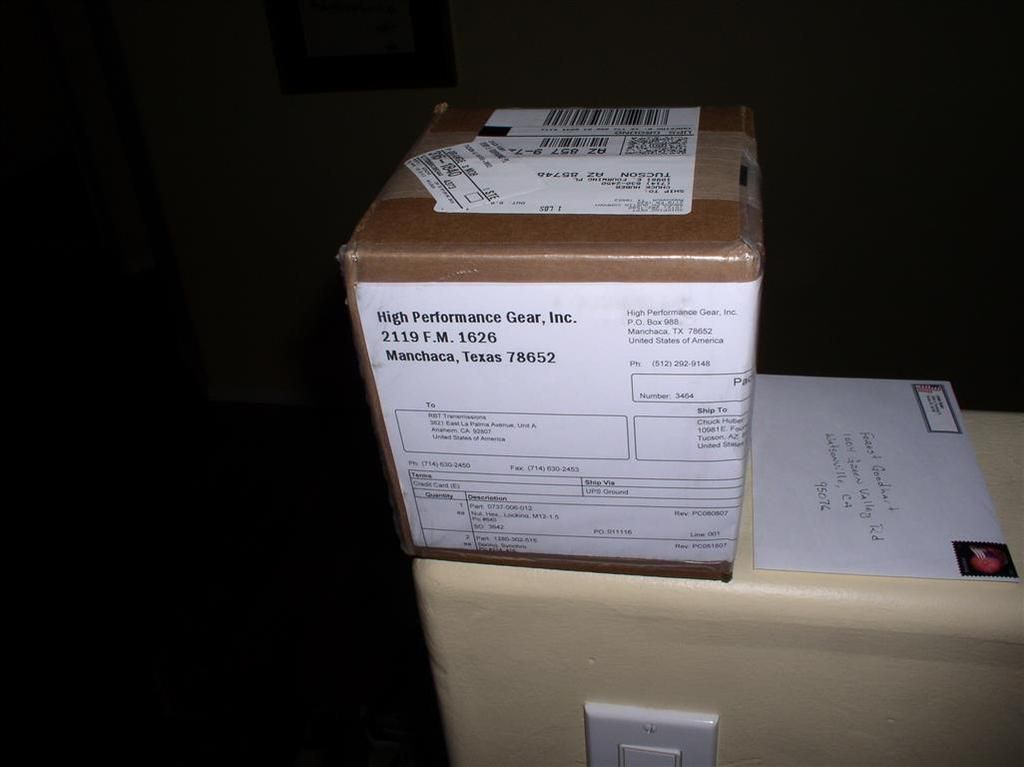
    You got parts from High Performance Gear, rather than RBT?


    Doug -

    I missed this question. When you order stuff from RBT, it ships from TX. So I had ordered those synchro springs, and they were delivered from HP Gear. Oliver Ring (I believe that is his name) runs HP Gear, and is associated with RBT. He does all the gear manufacturing & machining, as I understand it.

    But he doesn't sell direct to the public. That end is handled by Lloyd.

    Rocky
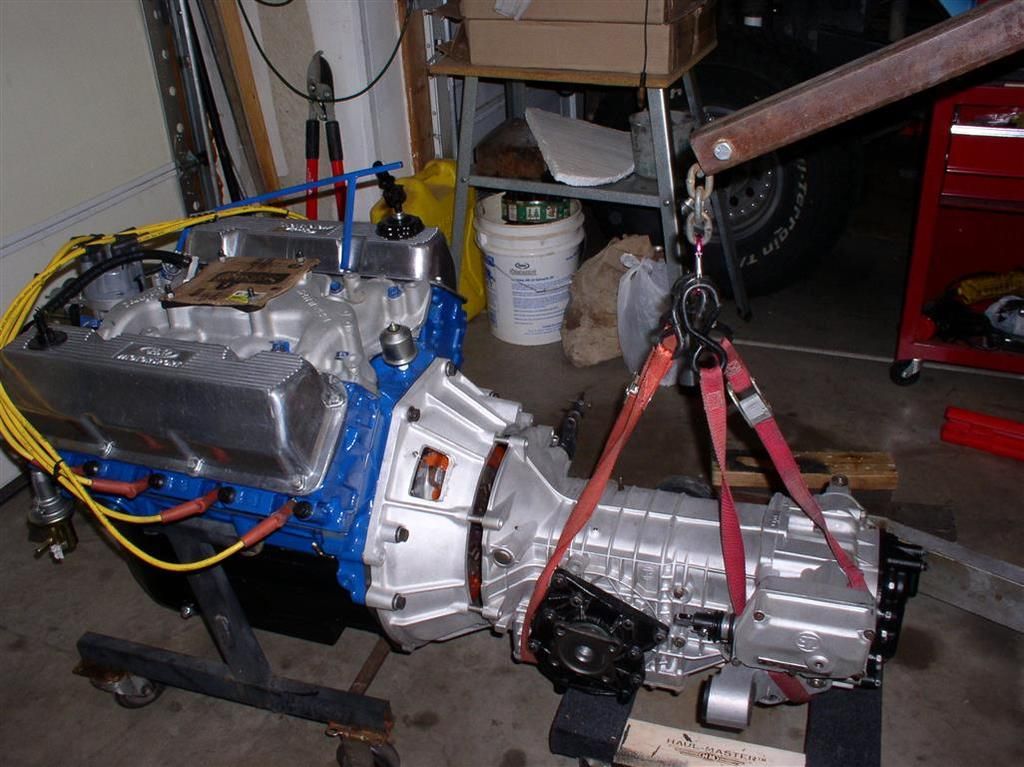
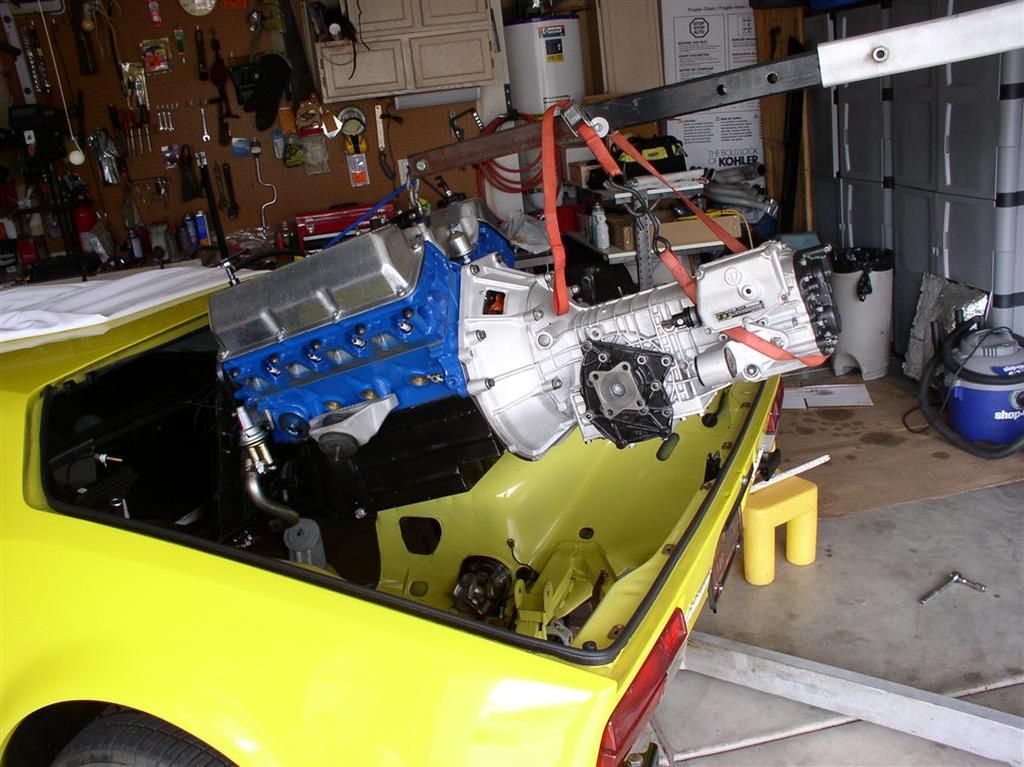
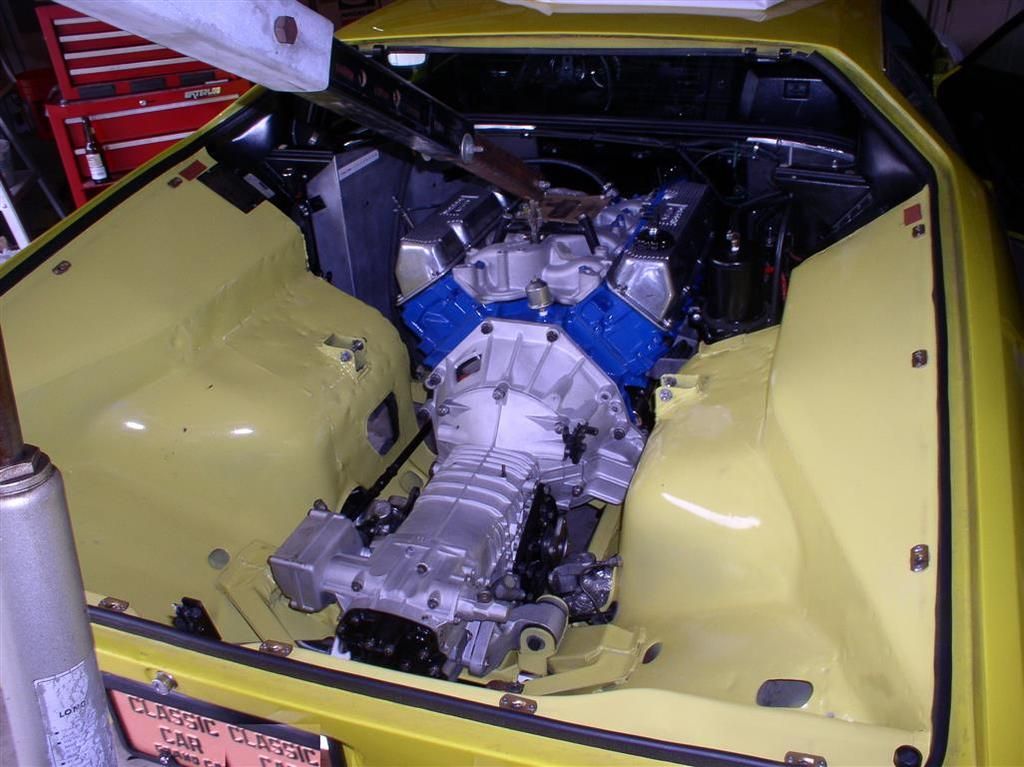
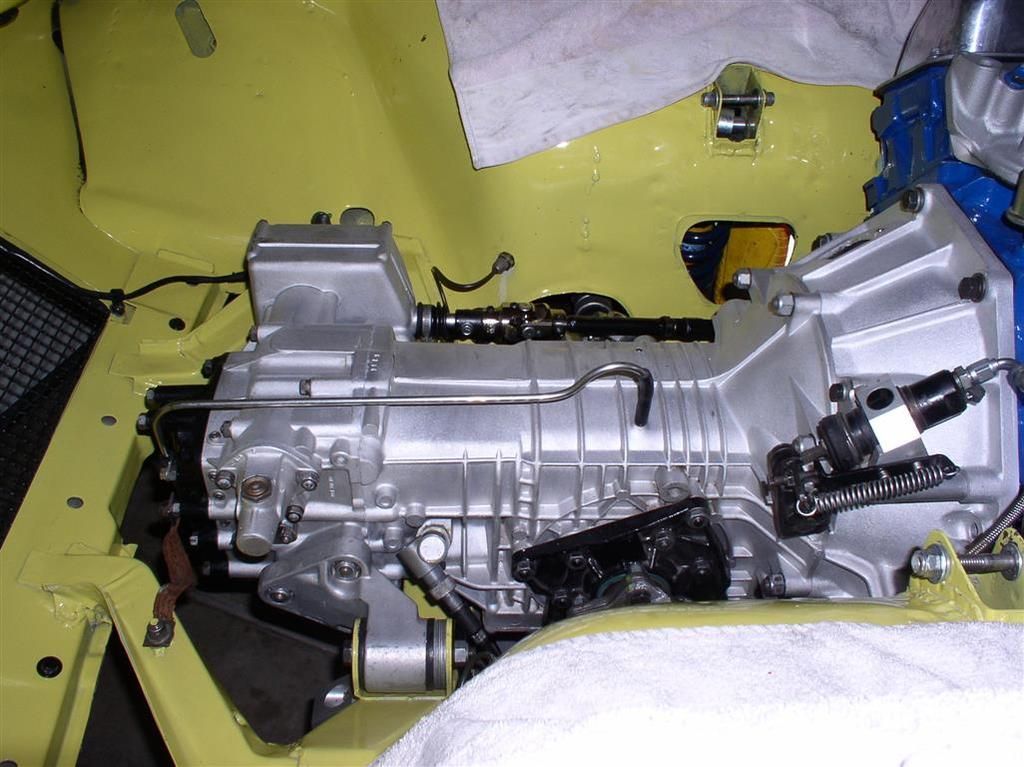
    Getting closer. Stabbed the transaxle, and am ready for engine install.

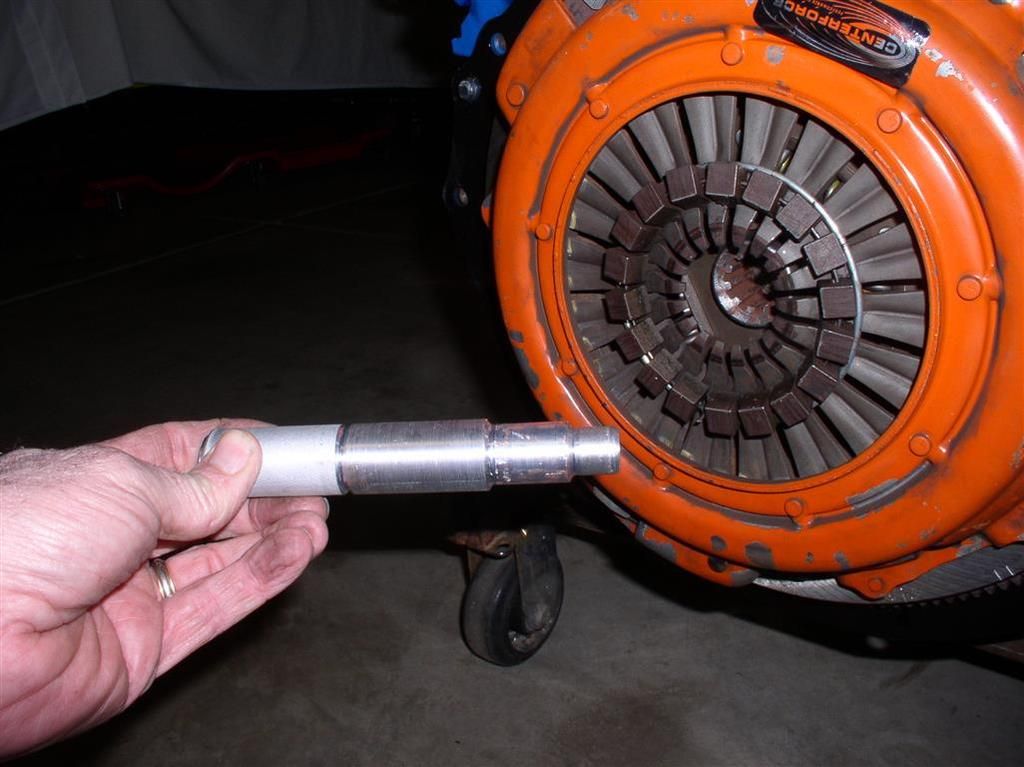
    I thought I'd show some of the cool stuff... Like a custom machined clutch alignment and pilot bushing removal tool (wet newspaper not shown) - much better than a sawed off broomstick.


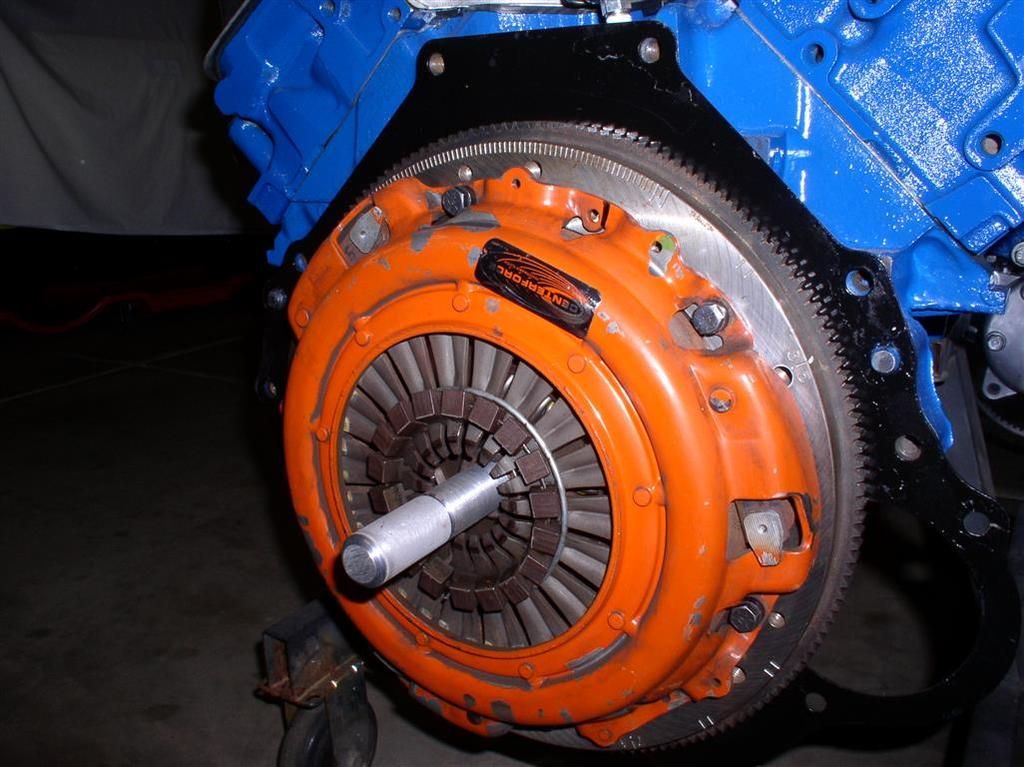
    Centerforce clutch installed


    Penetration.....


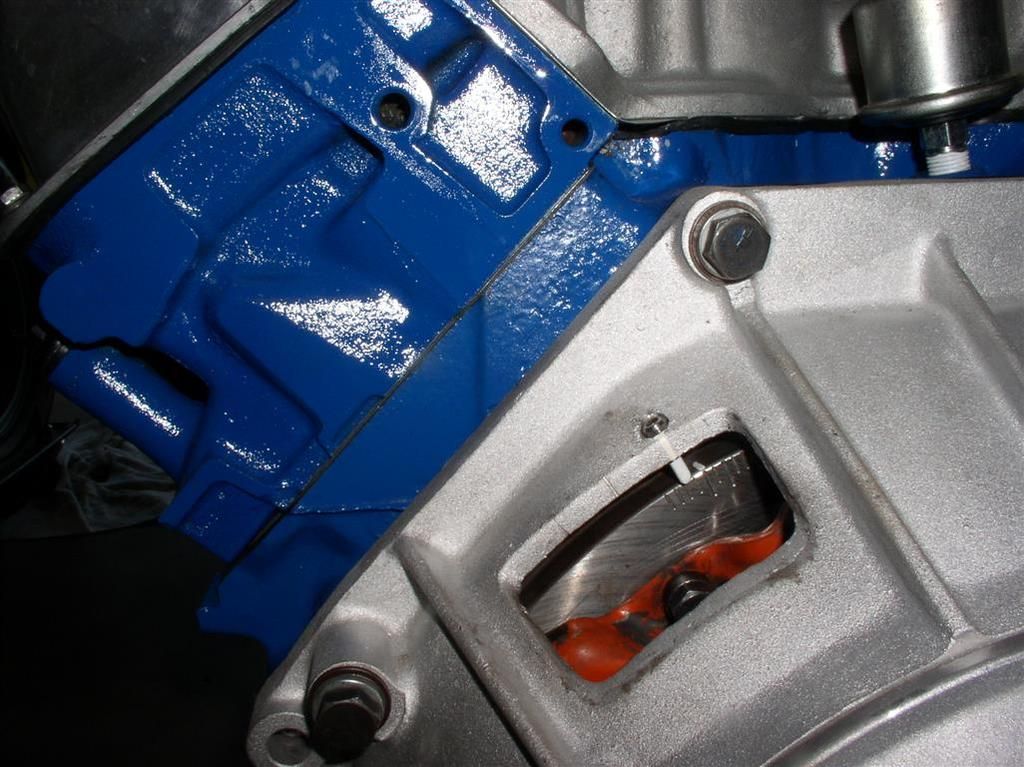
    My very cool timing pointer (another W-Wade-Co upgrade - inspired by a recent thread)


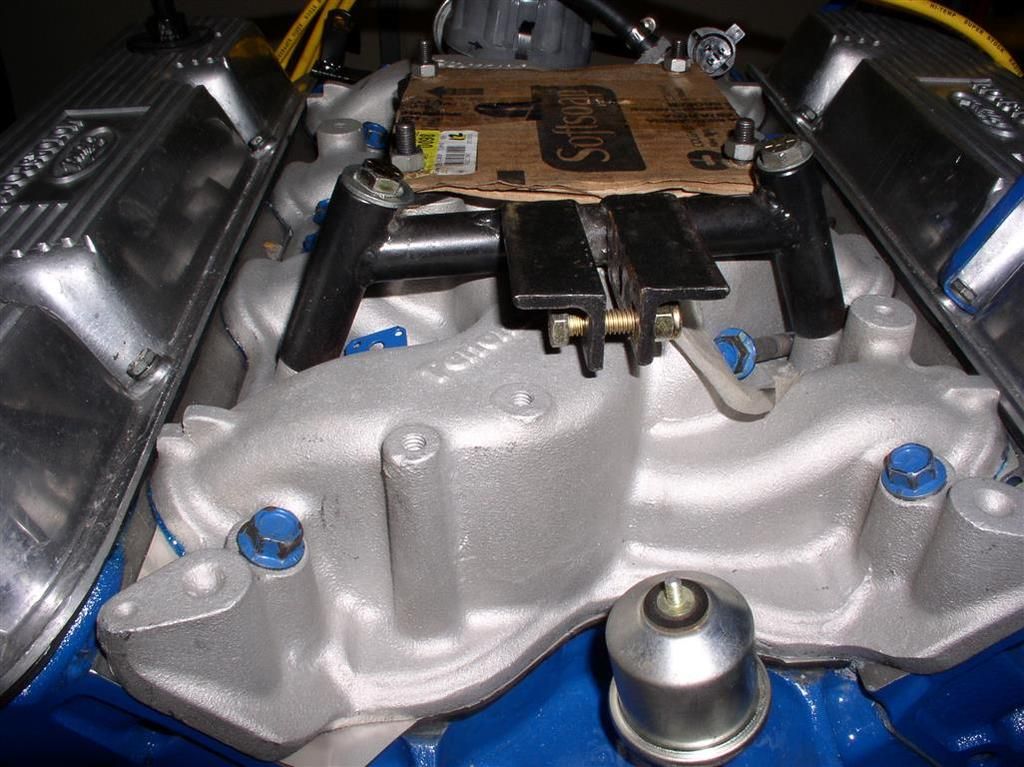
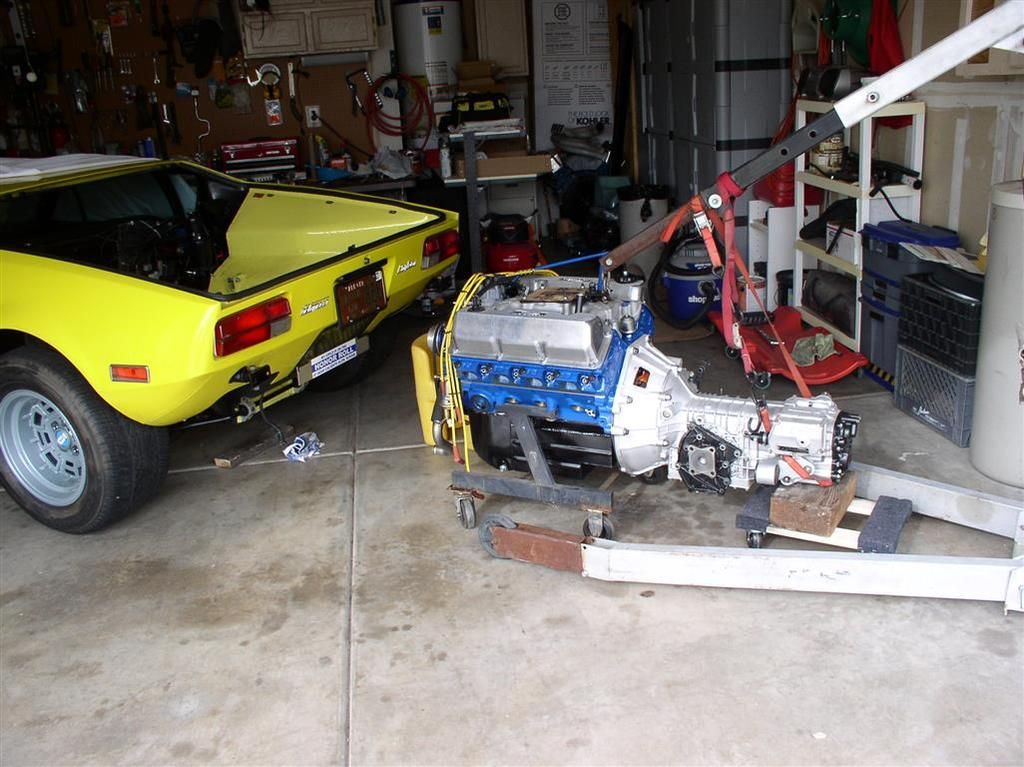
    Now this is cool - another W-Wade-Co innovation... A perfectly balanced Pantera engine and transaxle lifting fixture. It works great.

    Rear and Top Views...


    I believe it will work on all 351Cs for sure.

    The only difference would be the height of the manifold, and that would only require longer or shorter bolts.

    If the manifold is MUCH taller there would be interference, but for a stock manifold, or a Edelbrock Performer like mine, no problem-o.

    I can ask if they are still in production.

    Rocky
    Spent 4 hours on that stupid hose that goes from the water pump inlet to the lower (driver's side) cooling tube. What a job - no access.

    Tips:

  • Cut hose exactly to length - mine was 4.5"
  • Hot water (to help stretch hose over the water pump inlet - it's bigger than the stainless tube)
  • Hose Lube
  • Release Emergency Brake
  • Remove everything close by (fuel pump, vacuum hose to brake booster).

    PS.. Pardon my whining... At least it's done! That one is the hardest (I hope).

    This picture gives you (sort of) an idea of how tight the access is.... it's a lot harder to get your hands in there than it looks!
  • Attachments

    Images (1)
    • 02-10-2016_Reassembly_(4)_(Medium)
    Last edited by rocky
    YEAH! Small hands. Reminds me of the time I convinced the wife to reach through the quarter window space and put her thumb over #1 cylinder while I was preparing to turn the engine with the ratchet and explaining to her to let me know "when the air blows your thumb off". The last I saw her she was slamming the door from the garage to the utility room. Guess I should have been more (or less) descriptive. First and last time assist!
    quote:
    Originally posted by Rocky:
    ...Hot water (to help stretch hose over the water pump inlet - it's bigger than the stainless tube)

    ...Manual Heater Cutoff for Track Events
    .


    Is there any reason the stainless tube could not be made the same size as the pump inlet and a larger diamater hose used?

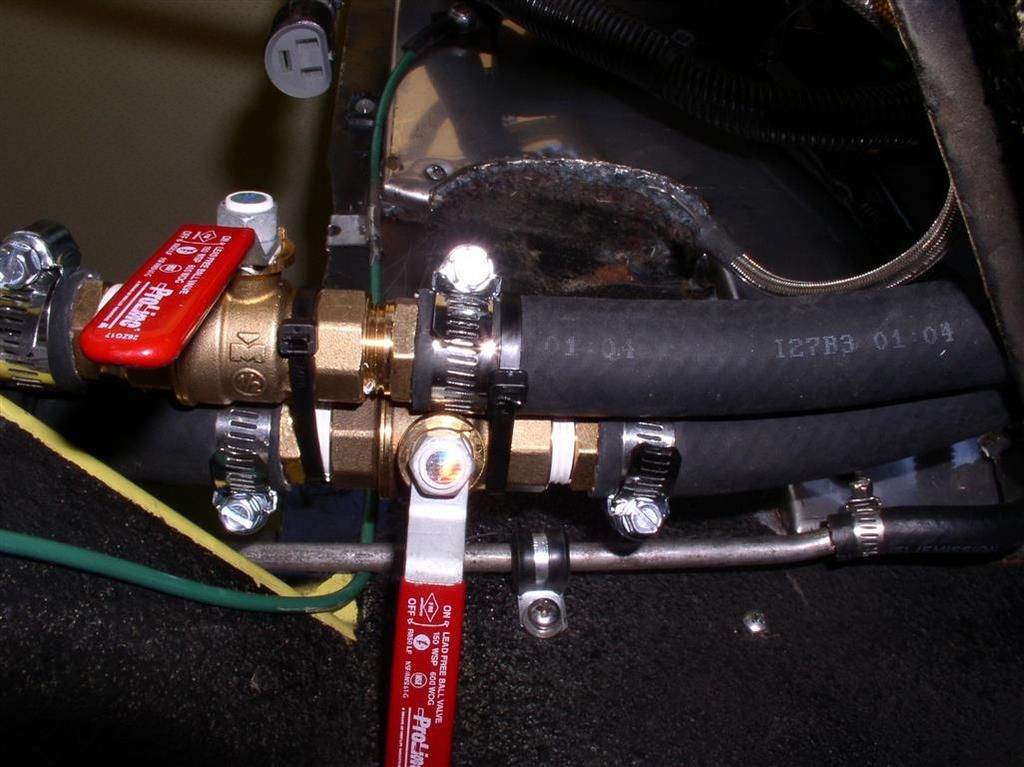
    are you still using the remote heater control valve? if so, is it before the new shutoffs so that it recircs when "off" even when shutoffs are closed?
    That's how my valves and shut-offs are configured.

    I was told that the recirc system wouldn't pass muster at a track event even though it would keep 90% + of the hot coolant out of the cockpit (my estimate).

    Rocky

    On hose sizing - a person could do that, but I never even considered changing the stainless tube.... That looks like it would be a lot of (relatively precise, skilled) work. I never thought the hose install would be as hard as it was.

    I knew the hose would go on..... But it was tough to do.
    Last edited by rocky
    Making Progress.....

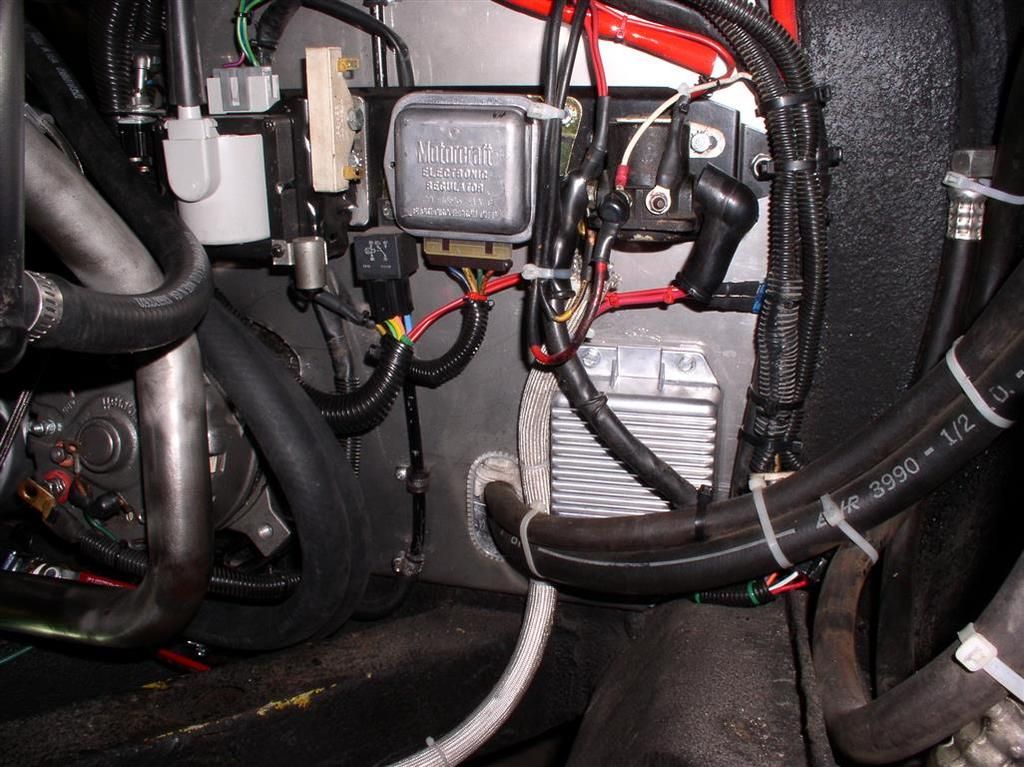
    Bay Wiring Complete:


    Flaming River Shifter U-Joints


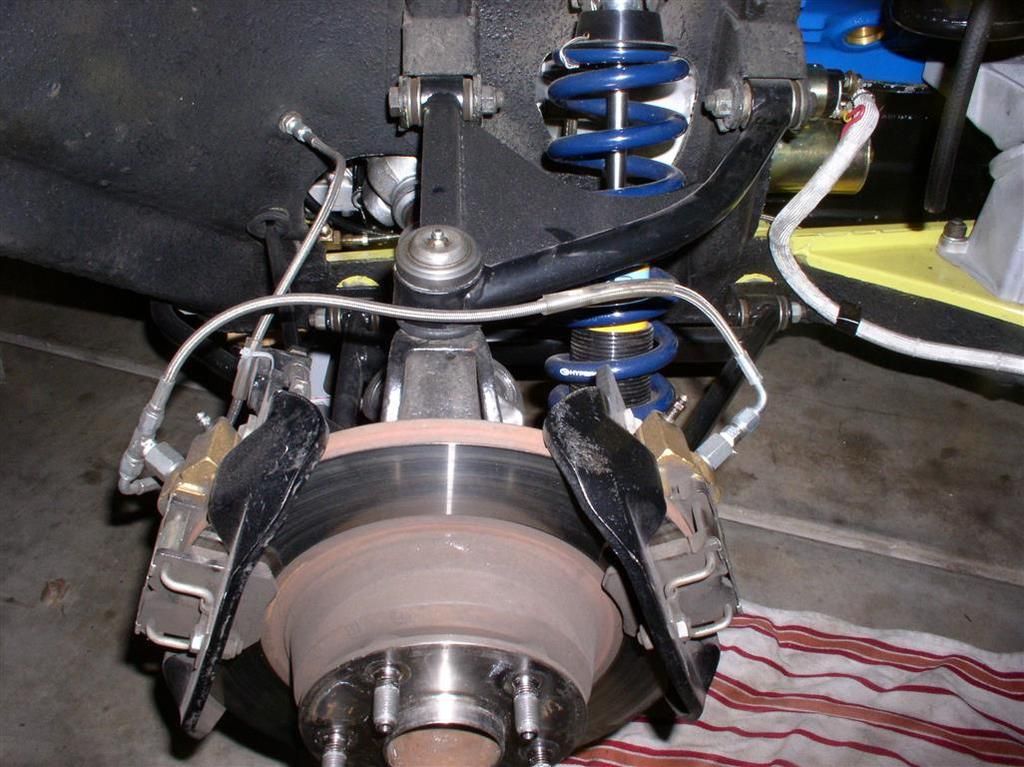
    My Dual Stock Rear Calipers (Old School)

    OK, Haters can hate, but I can lock up my rears if I want - I prevent this with proper settings on my proportioning valve.

    I know I can get a lighter weight rear brakes setup, but I've got bigger fish to fry in the near term, plus this gives me an E-brake without a lot of screwing around.


    Note the Remote Heater Valve (See POCA Jan 2016 Newsletter for fabrication instructions)


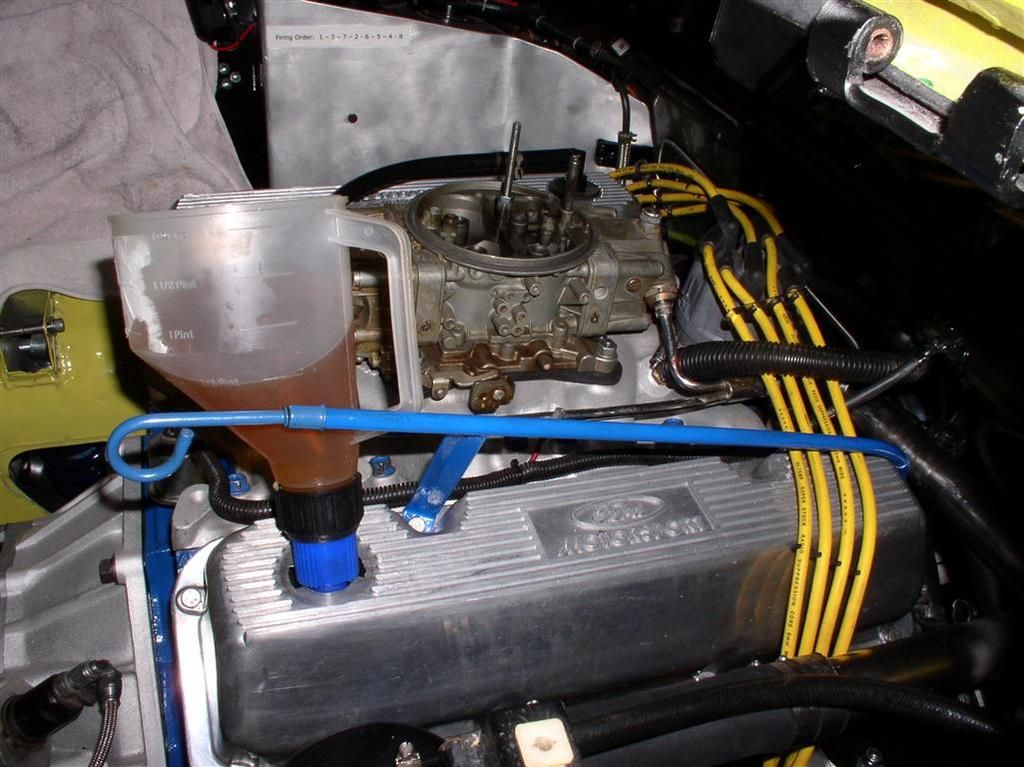
    Carb, Oil& Dizzy...

    Almost ready to start!

    quote:
    Now exactly where am I going to get another rear set of calipers?


    I'll bet all the vendors selling brake kits have a big pile of stock rear caliper sets. Guys that do them in the shop (Quella, Wilkensen, Byers) probably would love to get rid of them.


    quote:
    What struts are those, Aldens?


    Those are the Koni K30s and Hyperco springs. I got the set from Pantera Performance Center (Quella). It was completely set up - bolted right in.

    quote:
    All you are going to do is start a run on Pantera rear calipers with this one.


    What's old is new again. I believe this may have been one of the early brake upgrade mods popularized in the day. The availability of lightweight calipers made this trick go the way of the dinosaur.


    Rocky
    Last edited by rocky
    JagCat -

    So initially, when my ignition was set up, I reviewed George's Duraspark schematic, and saw that he uses the "official" Duraspark Coil (an oil-filled type), and an associated ballast resistor.

    I set up my system initially with the ballast resistor but I decided to use the TFI (solid state) coil.

    What I found was that at high RPMs, with the TFI coil, and ballast resistor, I would get an unexpected miss. It really disconcerting. I thought it was bad "lots of things" (wires, dist. cap, Duraspark module). What was funny was it would occur starting at high RPM, last for a while (until I stopped the car) and then start up and run fine, until the next time I got to high RPM.
    I finally figured out that by removing the ballast resistor from of the circuit with the TFI coil, I solved the high RPM misfire problem. It seems to me it affects the charging current needed on the e-coils.
    I just left the resistor in there, because I mounted it so nicely on that panel. The coil is bypassed by just shorting the two leads together, and tucking it into one of those harness sleeves.

    Rocky

    Rocky
    As it turns out, a couple of vendors REBUILD stock calipers for people that want their Pantera stock-looking (none are actually stock. of course). I know of one vendor that cannot keep stock rebuilt calipers on the shelf. So as you say Rocky- quadruple stock rear calipers are heavy but simple and it works. You can mod the design later.
    I had no problems just motoring around town with the TFI coil and ballast resistor. I Think the solid-state coil has numerous advantages, that's why I went with it.

    George and I had a (respectful) discussion about the Duraspark II wiring diagram and my associated modifications. George, rightly so, stated that if you monkey around with the proven design then "you pays your money and you takes your chances". I have to agree with him there.

    regards

    Rocky
    quote:
    Originally posted by Rocky:
    Just a standard Duraspark (Ford Motorcraft) with the electronic pickup.

    It's the same one that interfaces with the electronics box.

    It was used on later model Ford cars and trucks (1975-1982 equipped with 351M, 400 or 460 V8).

    Rocky

    Check this thread, and search for Duraspark II


    That is a small cap with what kind of spark plug terminals male or female?? Grey? That is Motorcraft brand?
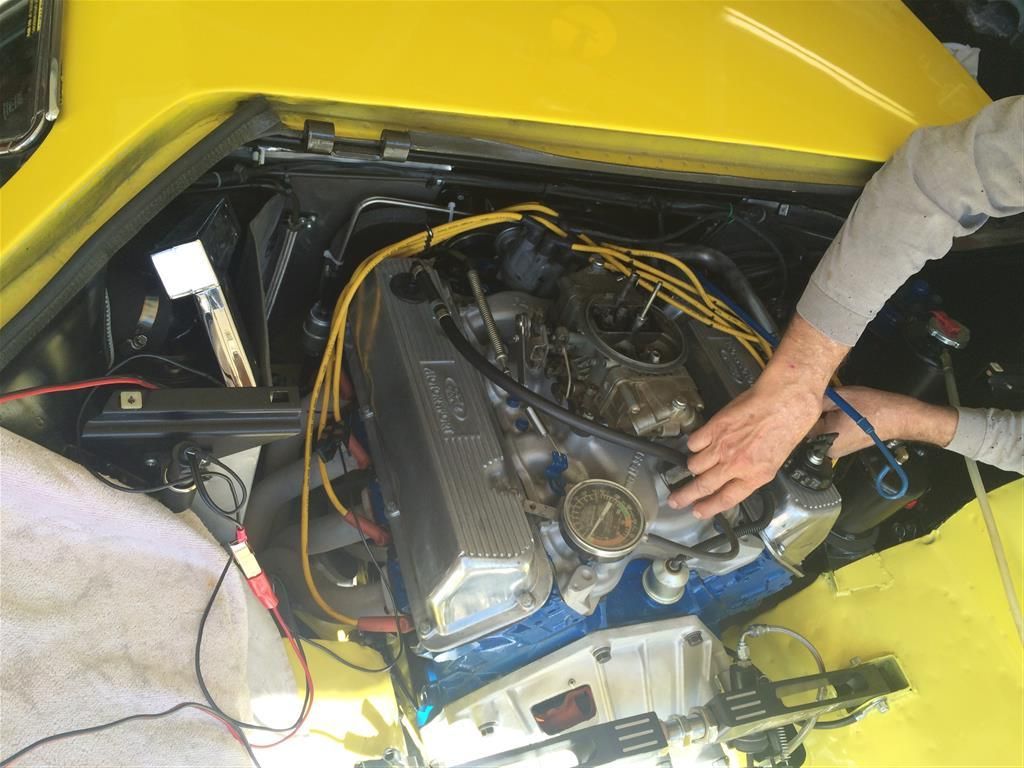
    It's Alive, Take II!

    We fired it up tonight, it ran for a short while, but (like a moron), I had neglected to charge the battery!

    Anyway - fired right up, and idled smoothly. An excellent sign.

    More work tomorrow, I'll probably drive it!

    WHOO HOO!

    Rocky

    PS> Look at this cool accoutrement - a 351C "Pre-Oiler"... Just plug it into the distributor cavity, and twist it with your drill motor... VIOLA! Oil Pressure prior to start-up!

    Attachments

    Images (1)
    • Start-Up_02-19-2016_(5)_(Medium)
    Mission Accomplished!

    Still work to do, but..........

    New engine installed, runs and drives!

    ZF Rebuild Completed, no issues with:
  • 2nd Gear Syncro Cone Replacement
  • Taller 5th Gear

    Taurus Window Motor Conversion

    Remote Heater Valve Mods and Manual Heater Shutoff

    Reduced Bulkhead Cover

    ATO Fuse Box Install

    Battery Cut-Off Switch / New Battery

    Inset rear bumper

    Powder coated rear bumper and engine screens


    It's great to have a Pantera again!

    Rocky
  • Last edited by rocky
    Oh come on David - from what I read, you had two Panteras, and the second only took you 14 years to get it right (and IMHO - your white car was SUPER!)


    A little more progress...

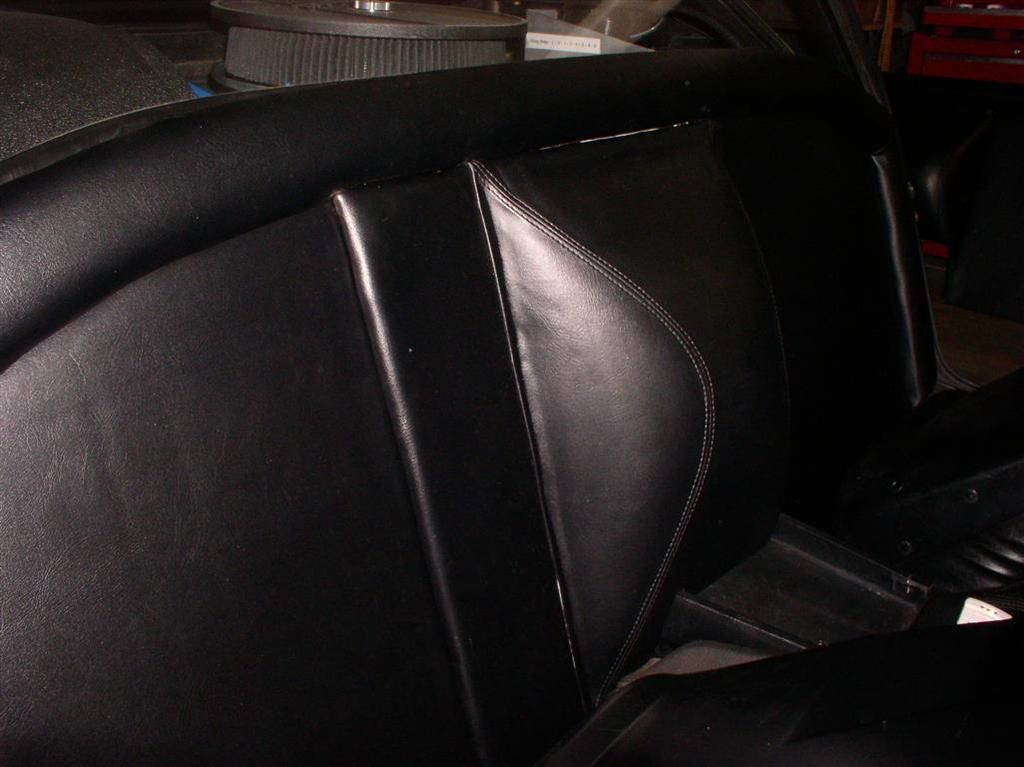
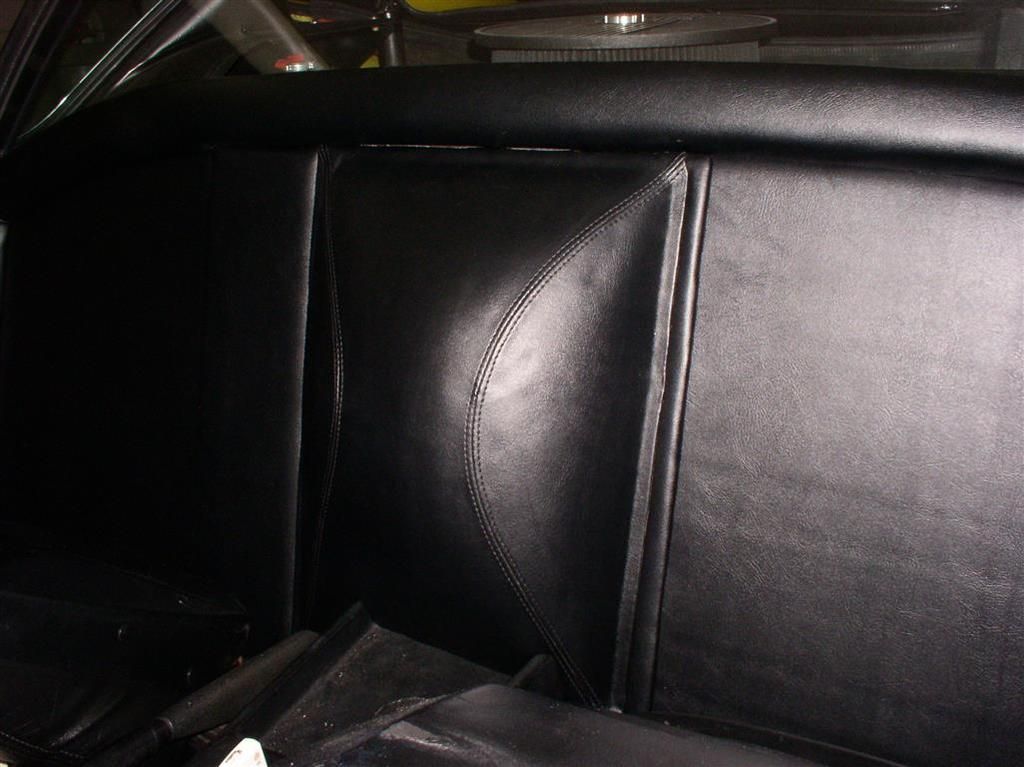
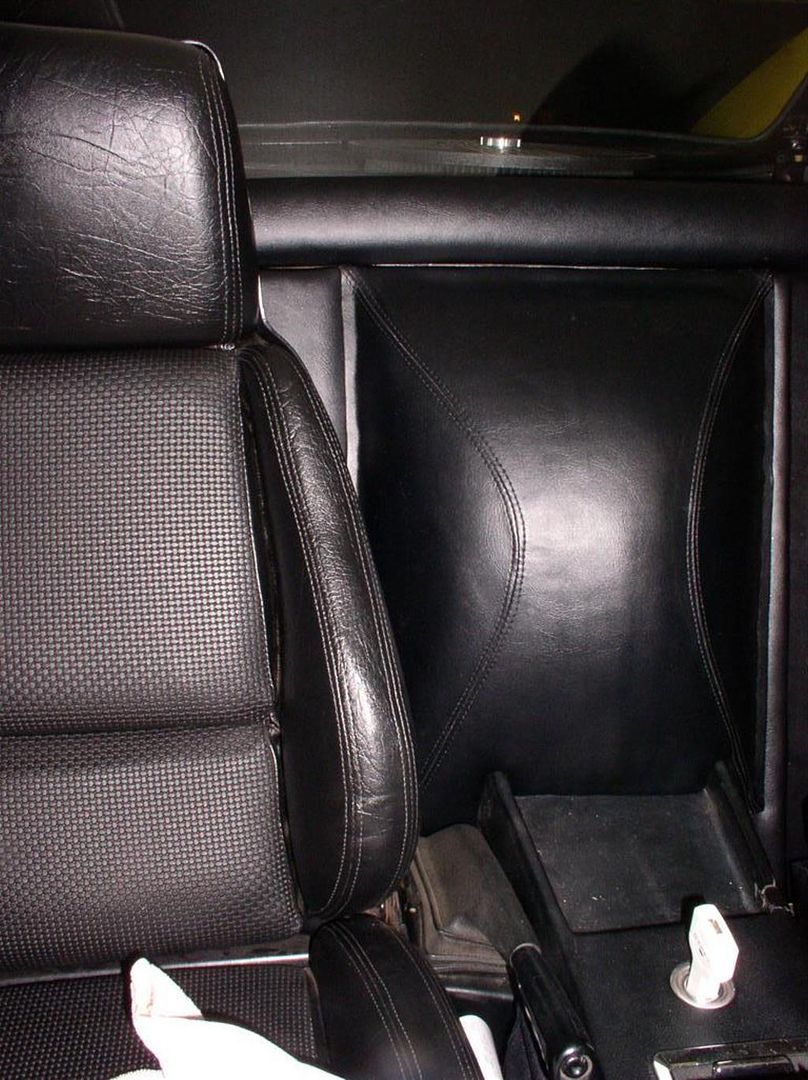
    I completed the reduced bulkhead recover work!

    Results:

  • "New" Bulkhead Upholstery
  • "Quick Access" to Engine Cover
  • Mrs. Rocky gets three extra inches (legroom!)

    I'm thrilled with the results. Very nice fit.


  • Last edited by rocky
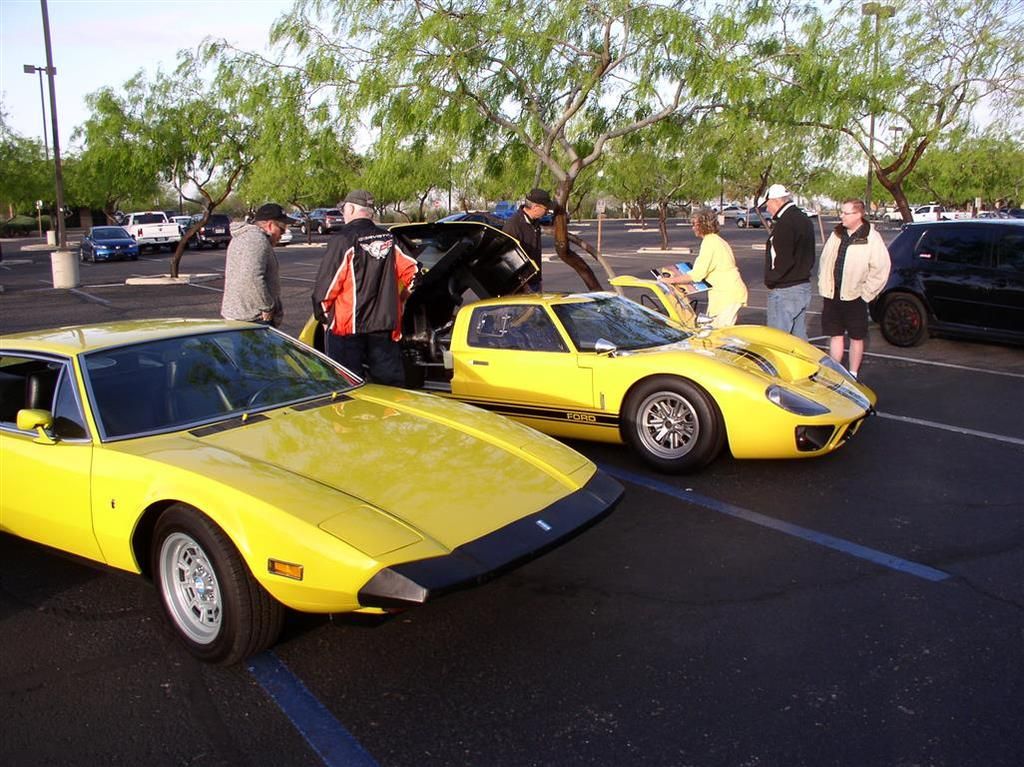
    I updated the slideshow a couple posts up with pictures of Jim Click's Vintage Racers from "Fords on 4th" - a Tucson area car show held 03-13-2016.

    JT - The girl who is selling the Superformance GT-40 is looking for ~130K

    I've got the spec sheets - if you are interested - I can scan them and get them to you.

    Rocky
    Last edited by rocky
    Thanks, Jag -

    If you look at page 24, you can (sort of) see how I cut the hump off the big panel.

    I was able to do the upholstery on the big panel myself, but the removable "bubble part", with the curved seam was too much for me. That part cost me $150.

    I did use the two vertical metal "attachment strips" (with nuts) on the edges of the bubble to hold the material down. Don't throw those away!

    Rocky
    Jag, cutting the firewall bubble loose is something racers did in the '70s. The Gr-3s came that way, I'm told as running a factory 4-point roll cage meant the panel could never be removed unless the cage was first removed. Its quite simple: the leatherette upholstery is done separately on the bubble and the main panel. By unbolting the two metal strips and pulling on the bubble-upholstery, it comes off.

    To cut the thin fiberglas, use a fine- tooth wood saw. Leave about 1" across the top. When the bubble is cut free, trim it until there's about a 1/2" clearance all around, and re-glue the removed upholstery back onto the cutaway bubble. Stretch & wrap the main upholstery as far as possible around the main fiberglas panel and touch up visible cut edges with semigloss black paint (or even a Magic Marker) so when the two panels are back together, the cuts are invisible. Two strips of velcro will hold the cut-free fiberglas bubble to the underlying steel access panel.

    This has been the subject of several illustrated articles in the POCA Newsletter during the past 10 yrs, all done at home. It is also the first step in self-constructing a flat-firewall Pantera.
    So just to keep the team up to date....

    Fixed my 700 CFM Carb Issues...

    Several other minor corrections applied... like wiping off the rear cross bar, and adding an additional hold down screw to my radiator cover panel. Oh, I also cleaned my windows yesterday.

    Once these cars are set up, they seem to run pretty well.

    Just got back from a run to Mount Lemmon with the Cobras. It was fun.

    Only one minor issue - one of the Cobras hit a rock, it kicked up, and whacked into the Tranny, and put a big hole into it. The Cobra pulled in to the parking lot STREAMING tranny fluid.

    I just learned the T56 (I think) Trannies use ATF...

    Attachments

    Images (1)
    • P1010001_(Medium)
    Chuck, GM started switching their std trannys to ATF (a 0-wt hydraulic oil, not a load-bearing lubricant) over 2 decades ago. I found it full to the brim in an '82 Z-28 4-speed that seized 2nd gear to the mainshaft at an event, even though the gear was submerged in ATF. Most of us suspect the switch was done to gain about 1 mpg in their gov't D.O.T. CAFE rating; too bad about your warranty claims.

    Most savvy car owners immediately switched their boxes back to 80 wt gear lube with zero problems from the 'thicker' lube. A few of my autocross friends lost gearboxes in new Corvettes from lack of proper lubrication of the transmission gears.
    So I'll help you, if you help me!

    Here's a picture of a really slick little petcock that I got from Ace for $9.99. I am using it as a radiator drain - it threads right into the 1/4" NPT threads in the drivers side front of the radiator.

    (I am not so sure about it's classification as a Valvula Recta, though!)

    Anyway - It has a solid attachment point for a short piece of hose so your antifreeze doesn't pour all over everything.

    It is 100x better than the crappy petcock on the right in which the little "wing nut/hose bib" came loose on me.....

    It looks like it will work great.

    Attachments

    Images (1)
    • P1010002_(Medium)
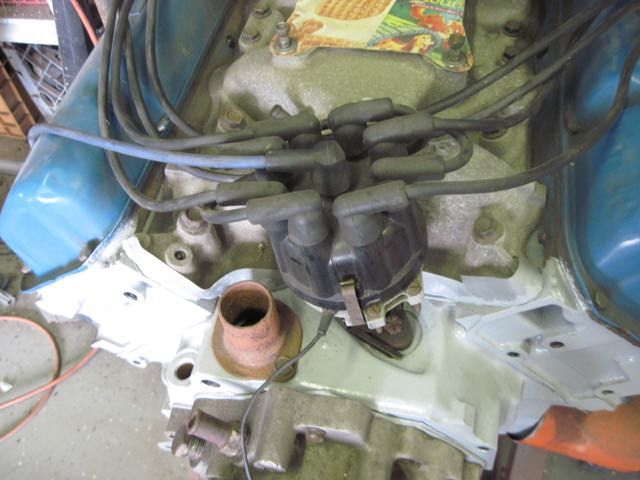
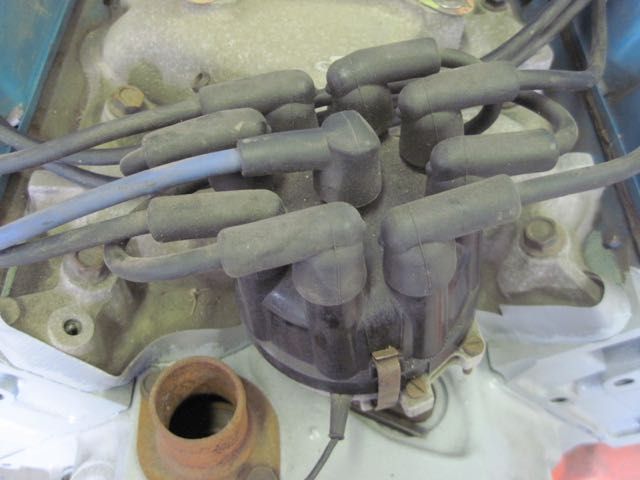
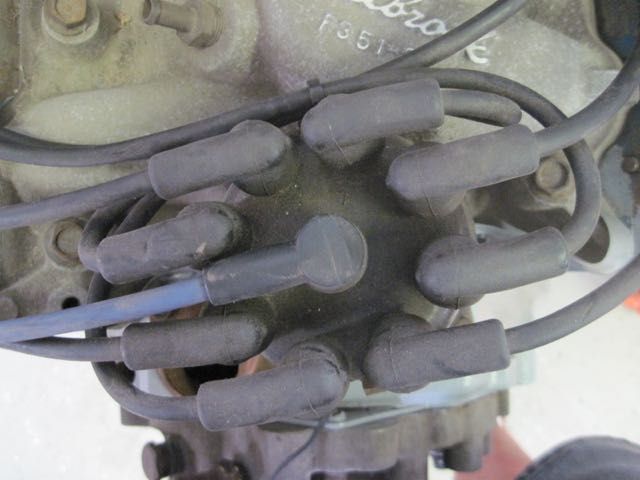
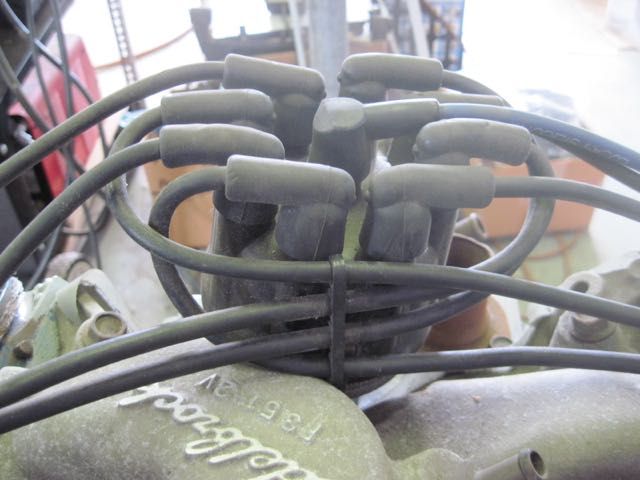
    Rocky, when I loom up a set of custom wires, I imagine the distributor cap as 2 halves, split along a front to back line. This would be where your cap clips are in your photo. Route 4 wires to the left and 4 wires to the right. Take the wires (2 from each side) that have to cross over to the opposite bank, and route them behind the cap. I'll see if I can take a pic.

    Can't help you with the pump fitting though.
    Rocky, here are some pics. I kind of mocked this up on the engine stand; took me a bit to find the box with the dizzy in it.


    Rick's post reminded me of something; you can put the dizzy in any way you want by just re-assigning which post is #1. The order doesn't change, just the starting point. Doesn't matter if you have vacuum advance or not.

    Think of it this way. The body of the dizzy will only fit in certain ways. It is limited by obstructions, the vacuum can, access to the cap clips, and so on. The cap is keyed to the body, and only fits one way. But the dizzy shaft, rotor, reluctor (or points cam) can fit in many ways. I don't remember how many teeth are on the gear, but it will go in that many ways. I don't know if this will really help with looming the wires. I would think it would cross just as many as it would un-cross, but maybe so. I'd have to play with it and see.

    Also, don't get carried away with looming the wires really snug; you can make the cap really difficult to get off.
    Last edited by ufo-low
    Thanks, Steve -

    Your setup looks good, as does your motor!

    Not sure how I missed this for so long.

    I like the idea on moving #1... I need to think that through, but it looks like a cleaner setup....

    Thanks, all for the ideas!

    Here's my latest mod, - Stainless bungs TIG'ed up on the bottom of my cooling tubes. With my new petcock in the radiator, and Steve's "old racer's trick" (petcocks in the block), I won't make a huge mess draining down the coolant....

    Attachments

    Images (1)
    • P1010020_(Small)
    I know I haven't posted in a while... My car is "done" (Ha-ha-ha!)

    Anyway - here's a shot of my new bumper getting prepped for paint. It will match my original black "faux" Cougar Sport Mirrors that are also getting shot by Rick P. at Duval Body and Paint.

    I am sure the ensemble will look very cool.

    Rocky

    Attachments

    Images (1)
    • IMG_2392_(Small)
    Last edited by rocky
    The old bumper was wiggly on top, and had had a couple of "hits" on it. The PO had tried to have it refinished, but it didn't stand the "test of time".

    I just pulled the glass out of the mirrors, and will re-install in the newly painted shell.

    On the faux Cougar Sport mirrors, underneath the mirror body, there are two vertical phillips screws. Remove them, and the mirror and adjusting ball slide out.

    Easy!


    Rocky
    Last edited by rocky
    Rocky,
    Did the glass bumper fit properly?
    I have one and when I test fitted it a couple of years ago the fit wasn't very good. Bad enough that I wouldn't put it on the car. Put the original back on and the glass one is on the shelf waiting it's turn on the to do list.

    I was just curious if the body shop had to modify yours at all before they painted it?

    Thanks,

    Doug M
    Rocky/Joe

    All the sport mirrors use the same glass (Mustang, Mustang II, Pinto, Cougar, Torino, Montego, Ranchero, others?). Standard replacement glass for the right hand mirror is easy to find. If you need make & part number let me know.

    In my sport mirror equipped Mustangs, and my Pantera, I used 3" round "stick-on" convex mirrors to improve rear vision. I would like to find convex replacement glass for the sport mirrors, I'm sure it once existed ... the sport mirrors were used in so many applications. A convex replacement would look better and perform better than a simple 3" round stick-on mirror. Several years ago I spent perhaps an hour looking for convex replacements to no avail ... but I haven't pursued that issue further. I keep busy.

    The other dream is to replace the remote adjustable mirror assembly for the left hand mirror with a standard mirror from the right hand side. I haven't put any time into assessing the possibility of doing that either.

    If you guys have info on either subject ... please share it.
    Got my mirrors and bumper back today - all the parts look great, thanks to the Duval Body and Paint Team (Thanks, Rick P.)!

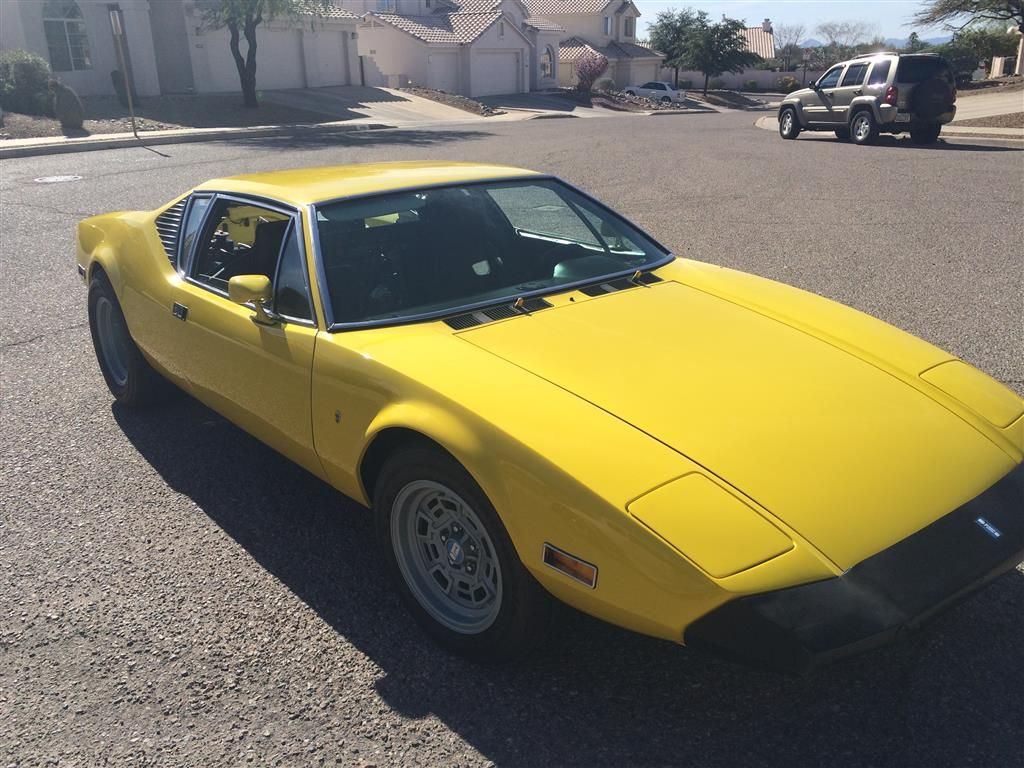
    I reassembled the mirrors and got them mounted up. It's hard to get a good picture of a black mirror on a bright yellow background!

    Anyway - take a look.

    The bumper is disappointing - the finish is great, but - in the same vein as Doug M, the fit on the bumper is bad - it is too narrow, and none of the studs line up with the holes in the body.

    I surely should have test fit it before proceeding to paint - in fact I should have test fit it the day I received it.

    Makes you wonder... Used bumper advertised as a Hall Pantera bumper (never finished / never mounted). It's impossible for me to know the backstory. Disappointing.

    Rocky

    Working on a back-up plan with the bumper. Will keep the forum posted on progress.

    Attachments

    Images (1)
    • P2030012_(Small)
    I am quite sure that those fiberglass bumpers are manufactured and supplied by Kirk Evans.

    I am using one. It IS from Hall Pantera.

    I would not say that it fits poorly at all. It just fits differently then the original crash bumper does.

    I can't say either that the mounting hole locations were any kind of a problem.

    It is SO MUCH better of a part then the original, it took me five minutes to decide that I love it.

    Of course we don't have that intense heat, sun and all those rattle snakes hiding in the sand traps on the golf course, so maybe that's the difference.

    I get sun burned on a cloudy day. I know. Strange. That's life here in NY. Strange is normal. You don't want to really know what we think is strange here. You would not come out of your room and you would be hiding under the bed all the time.

    I'm not worried. I've got big guns too with PLENTY of ammo. They don't fit in the Pantera though? The car is too small. What amendment is that again? Big Grin
    Pictures from ESTuned Dyno Day.

    I ran my car on the dyno here in Tucson. Everyone wanted to see the Pantera!

    It was a whole new crowd of people, lots of young kids.

    It was a fun time. I didn't put down the massive horsepower (I am running my basically stock, original motor with 100K miles on it), but it was close enough to the advertised numbers to satisfy me... but I need to get my "new motor" back together!

    Click Here for The Video of My Pull

    Attachments

    Images (1)
    • IMG_2598_(Small)
    Last edited by rocky
    I think so, but the logo pocket is in the center. So you have to either cut it in two places, or you have to do the minor fiberglass/bondo/filler work to fill the sides of the hole.

    It's just beyond my skill level to chop that thing in half, and then put the pieces back together to make it look right.

    Rocky
    quote:
    Originally posted by PanteraDoug:

    I am quite sure that those fiberglass bumpers are manufactured and supplied by Kirk Evans.

    I am using one. It IS from Hall Pantera.


    Doug,

    I do not supply any fiberglass to Hall Pantera or any other vender but Ron McCall. I do supply Pantera Performance but have not sold them bumpers for years.

    My bumper is distinctive---it is widened to fit the car and has hard line corners rather that radiuses. The important issues is it fits the car.

    Here is one just finished with recessed daytime driving lights mounted. You can see the front outer hard line corners in this picture. The customer did let me knew the one side of the car was crashed and the work was poorly done so they did have some minor fitting but it was not do to the bumper's construction.

    Attachments

    Images (1)
    • Lights_off
    Last edited by George P
    Another shot with the lights on. I am building some new mirrors that you can actually see what's behind you, that fit the car properly and will be easy to install. The last attempt to fix the BMW replacement mirrors worked but is way to labor intense to build and finish the new mounts. I will post something on a mirror thread later.

    I've worked very hard making sure each part fits the car so if someone thinks they have an AmeriSport part that does not fit, please contact me direct. If it is mine, I'll figure out what the problem is and if it is not mine, I'll do my best to talk you through a procedure that will make the part work.

    Attachments

    Images (1)
    • Lights_on
    quote:
    Originally posted by Kirk Evans: Took the Big Cat up to the top of Mount Lemmon today.

    The trees started falling over, and dropping their pine needles as I drove by looking for a parking spot!Big Grin


    I did that drive a couple times with a buddy stationed at Davis Monthan AFB. It was 112F in Tucson and 65F when we parked the car to start hiking. You could feel the temp drop by the minute as we circled and switched back up the road.

    Best,
    Kelly
    quote:
    Originally posted by Husker:
    Kirk,
    Are those lights LED? Look fantastic. I'd like someone to something similar to my metal bumpers except incorporate the turn signals.


    Jon Hass makes them. It's a nice set up.

    https://www.youtube.com/watch?v=ZXDMgswNPps

    Daytime driving LEDs plus turn signals. I think you need to make a separate key on wiring change if you want the "driving lights only" to come on.
    This was my "spare motor" and had been sitting in my garage for a while.

    Apparently I had not sealed up the Thermostat opening when I pulled this motor and this guy got in.

    He couldn't have gotten in through a radiator top-off, so he had to be in there since the motor was installed in ~ June of 2016.

    Unbelievable.

    Rocky

    Attachments

    Images (1)
    • IMG_7290_(Small)

    Add Reply

    Post
    ×
    ×
    ×
    ×
    Link copied to your clipboard.
    ×