[QUOTE]Originally posted by Aus Ford:
Hi all, this i my first post, my name is lyle and i'm from Sydney Australia. I don't have a Pantera but my car does have a 351c and this is what attracted me to this forum.
I've often wondered about this "equal length" primaries business with extractors. I know there is a sonic issue with pressure waves moving at the speed of sound and equal lengths are thought to be beneficial with this concern but i wonder if most engines would ever be used at the consistently high rpms to really justify it.
I was thinking that for most engines what you really need rather than equal length or equal volume, as mentioned earlier in this thread, is in fact equal flow.
Looking at a set of extractors with equal flow in mind you would actually not have equal length primaries anyway.
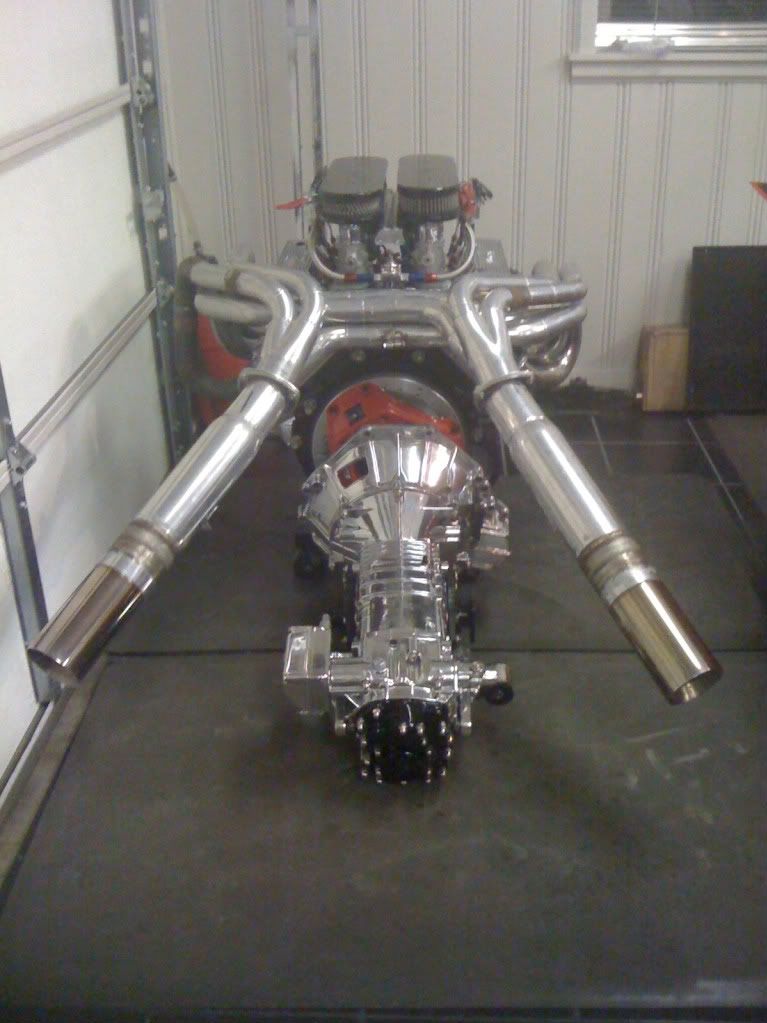
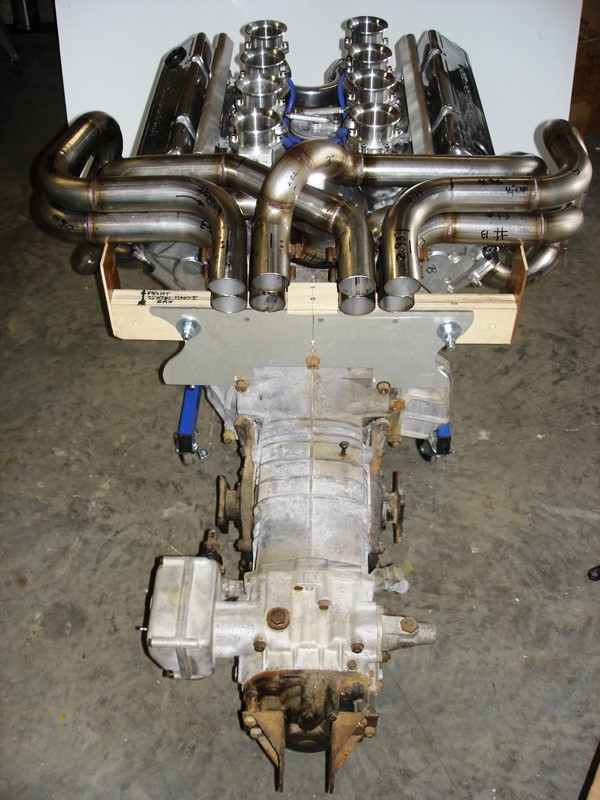
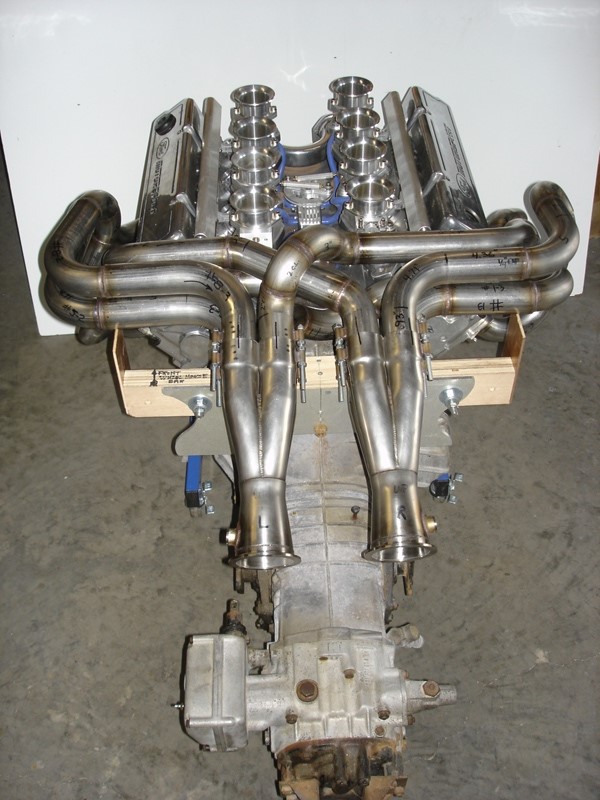
Imagine the pipes from the front cylinders of the engine, they tend to be long and straight with only slight bends, the pipes from the rear cylinders are bent and contorted in every which way like a angry sidewinder just to squeeze in enough tube length so they are as long as the front tubes.
But a bend in a piece of tube creates friction as gas flows through it. So 12 inches of tube with a 90 degree bend in it
may act as if it is 24 inches of straight tube.
This means those rear pipes with a bunch of wild bends in them to get them the same length as the long front pipes in fact could be much shorter and have less radical bends in them. A kind of balance between bend degrees and tube length would need to be found. Ideally rather than check the pipes volume the pipes need putting on a flow bench.
I guess you can theorize for ever over this sort of thing but the bottom line is you've got to have some pipes that will fit into your car. The theoretically perfect pipes are useless if they won't go into your engine bay.

[IMG:left][url=http://s1252.photobucket.com/user/Aero_9000/media/shed002s.jpg.html][/QUOTE
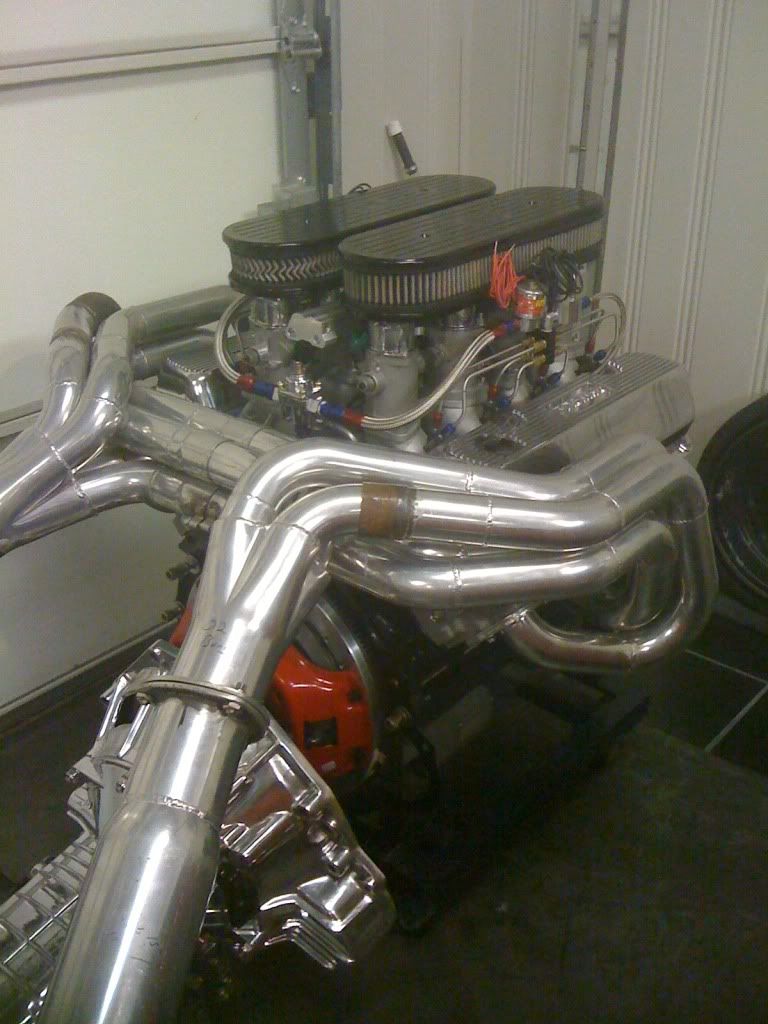
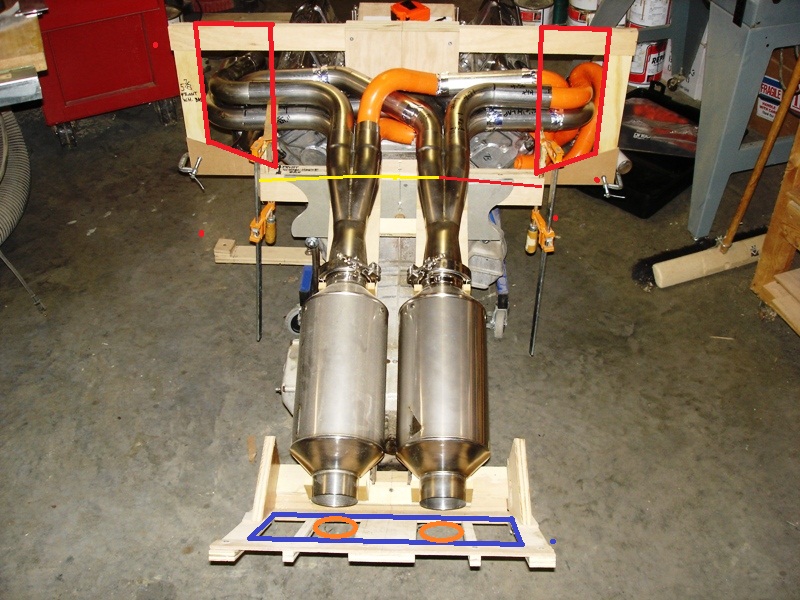
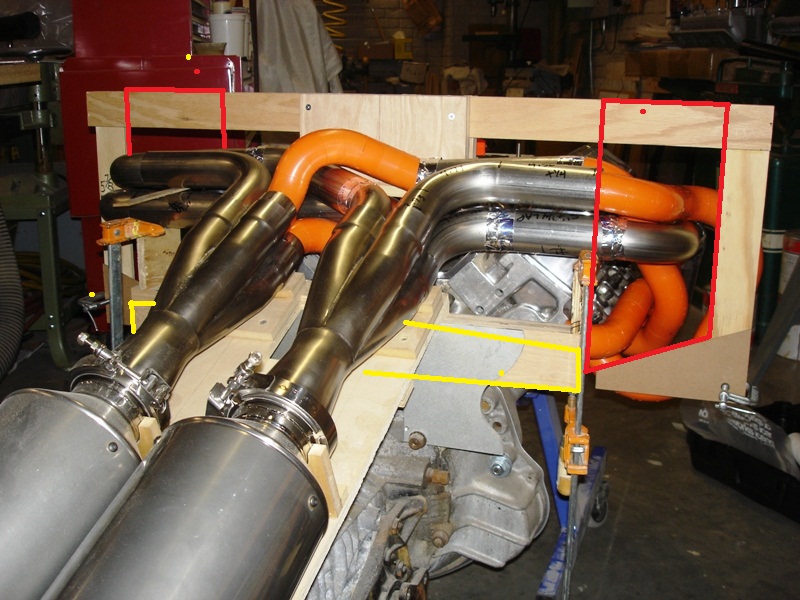
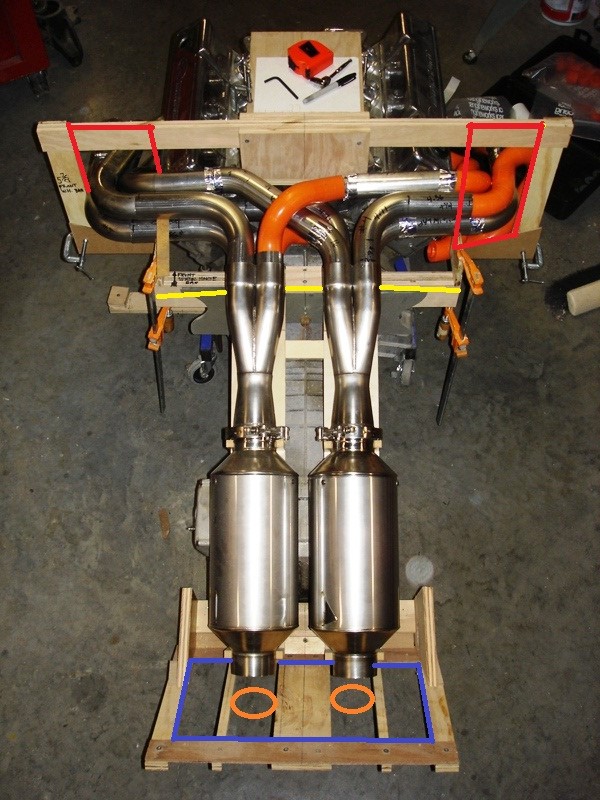
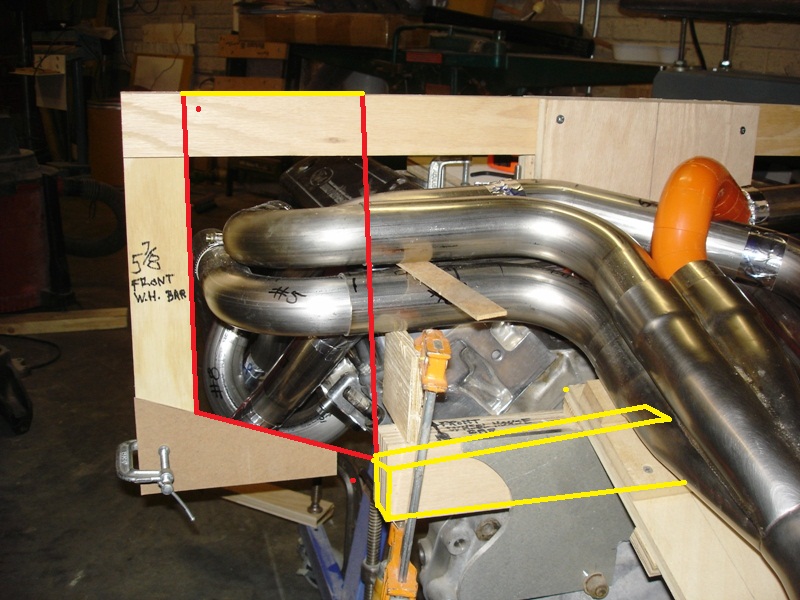
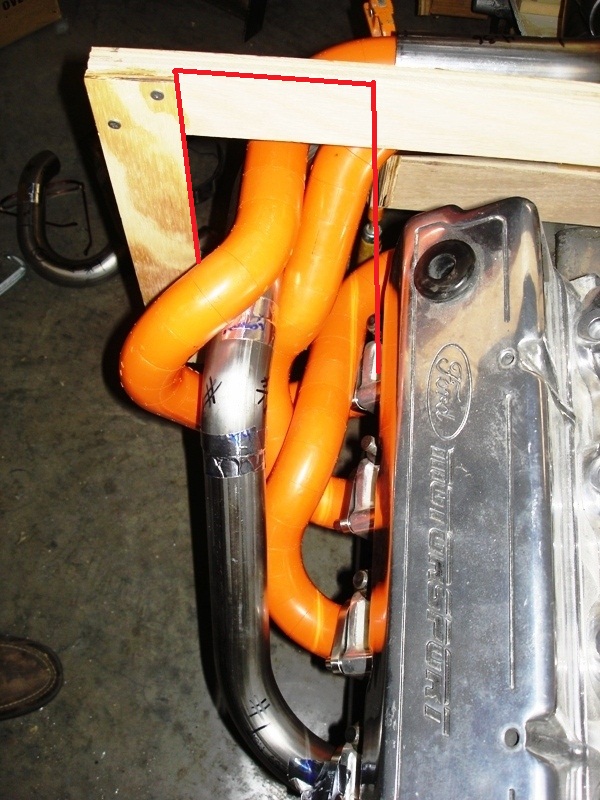
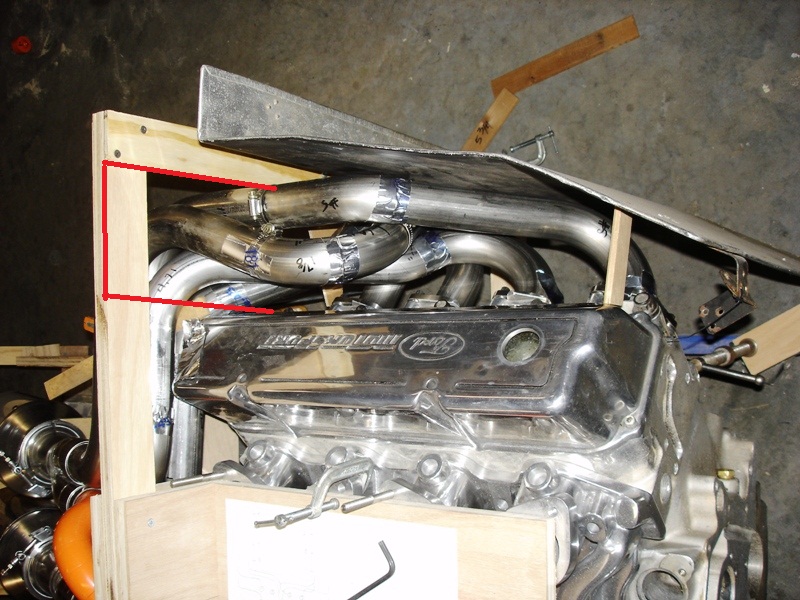
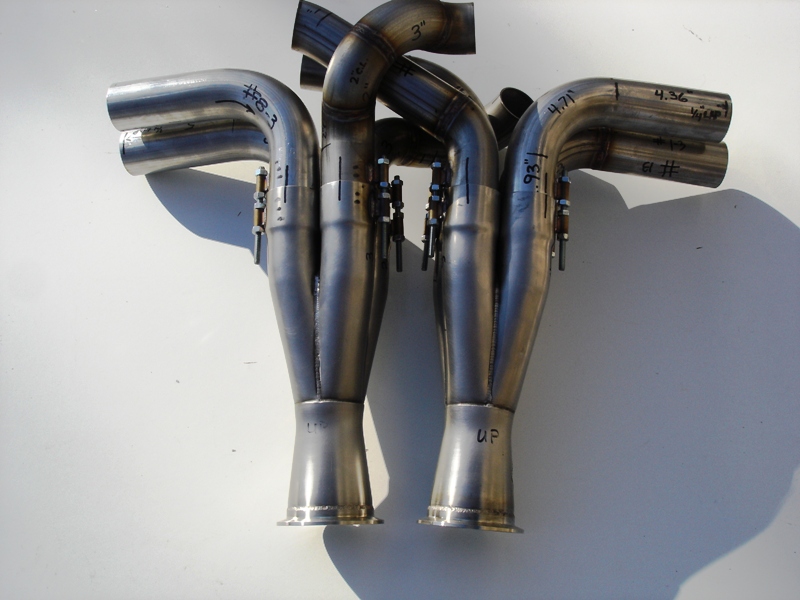
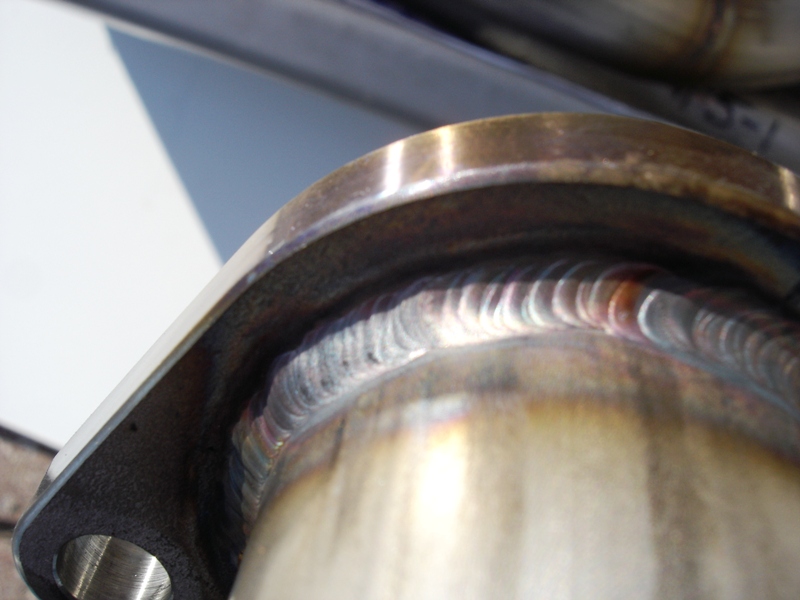
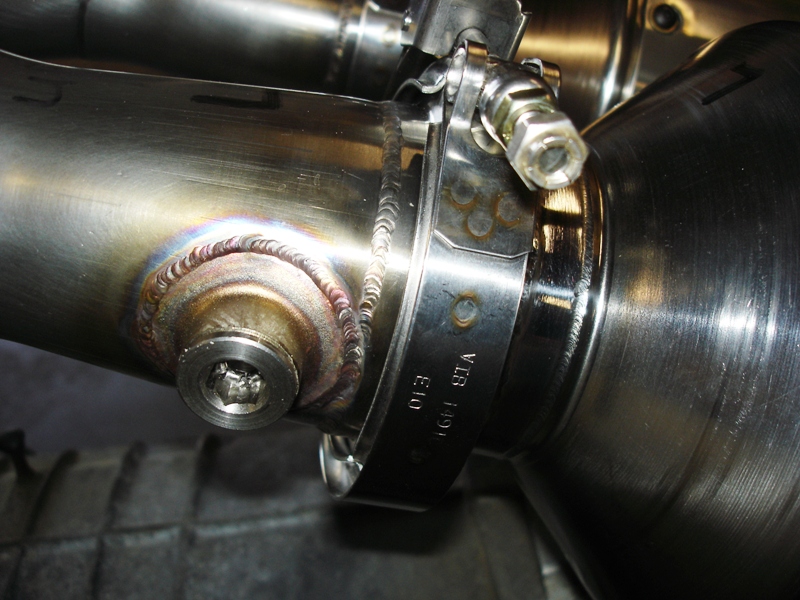
One thing I know is that the direction of the first section of tube is important.
If you notice that the first turn on Kellys pipes is up rather then down, this was shown on dyno tests to increase the flow of the exhaust ports.
On the iron 4v heads to accomplish this you really need to do something like was done on modifying the exhaust ports on the Pro Stock engines.
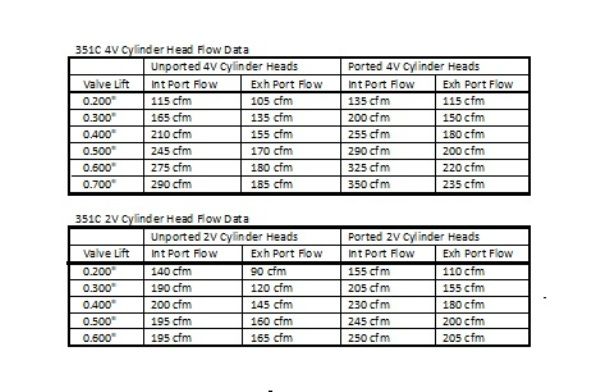
This is one area where the "high port" Cleveland heads is superior to the original Ford iron head exhaust port configuration which turns them down. The 2v ports simply can't be made to flow equal to the 4v ports in any configuration.
The 2v iron head is worse then the iron 4v in that respect.
That's one reason why the 3v heads, 2v intakes with 4v exhausts are popular.
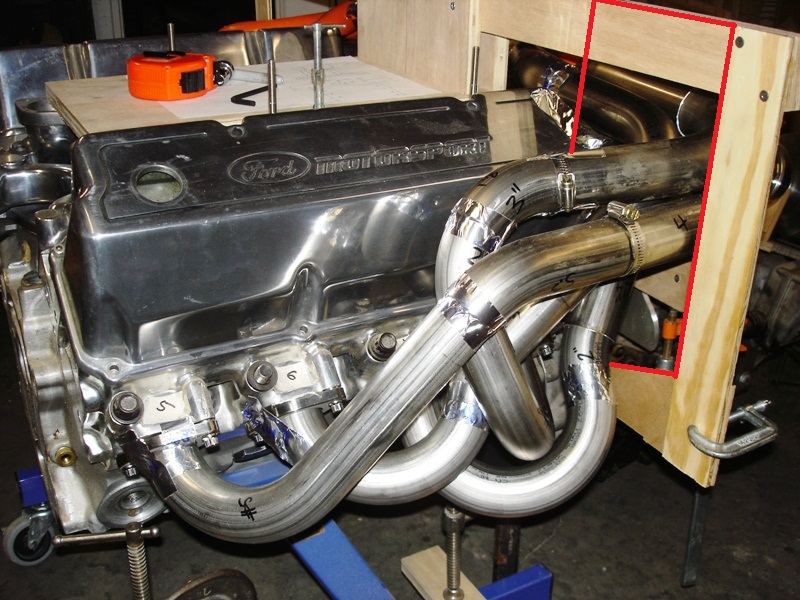
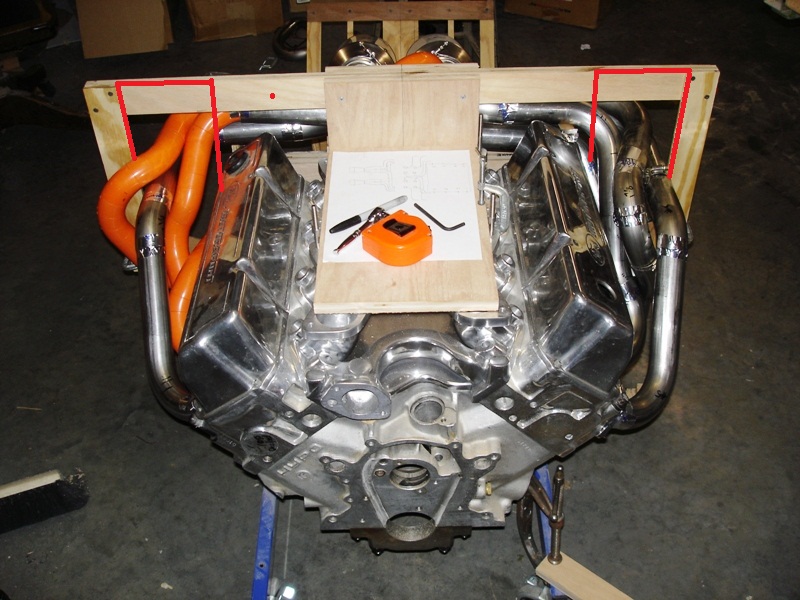
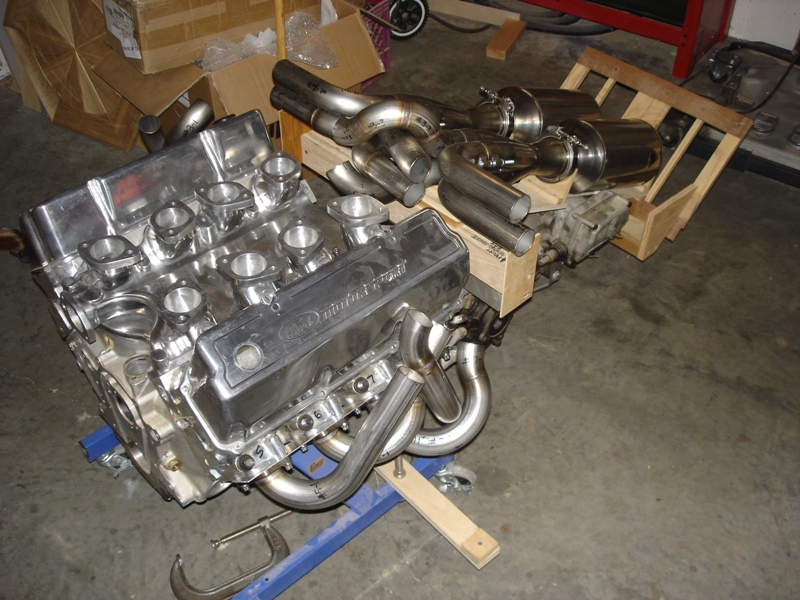
In the Pantera the 180 degree header configuration compliments that flow increase potential by running up and over.
This is also an area where the Windsor port heads can't compete with the Cleveland heads.
So there are two advantages going on here, the first turn up of the exhaust, and the direction of flow up of the exhaust in the aluminum high port head.
When I first put the A3 heads on my engine, it was thought by the engine builder that it was simply about a 30hp advantage over the iron head?
If you notice, there are quite a few C3 head engines that are running around the streets with dynoed engines in the 700hp range vs. the 550hp range of the iron heads?
The head configuration and exhaust combinations are allowing for more then that 30hp initial difference.
Ron McCall just built one (the white Gp4 car) for a customer that shows around 750hp
The size of the tube, and the length of the primaries becomes a tuning device to put the maximum power at one particular rpm or in one power range.
A car with a conventional configuration of exhaust piping, turning down, is going to be at a hp disadvantage.
I suppose you could say that the identical engine in a different chassis then the Pantera is not going to make the same power because of the exhaust limitations of it vs. the exhaust configuration advantages of the Pantera.
I think that was shown years ago when Ford was running the 289 in the Cobra and in the GT40 and the GT40 made 100hp more because of the exhaust configurations available.
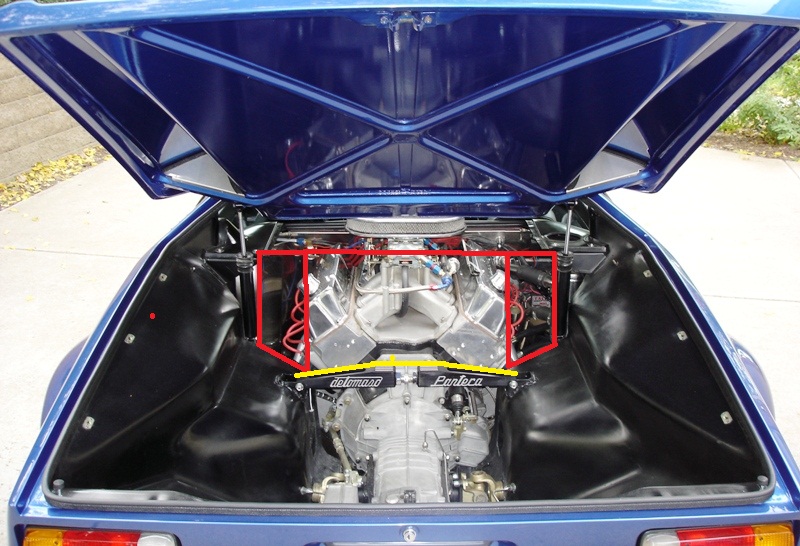
The original exhaust configuration of the Pantera of the headers "under" the chassis is because of the desire for the car to have a real rear trunk.
In the case of the original Pantera exhaust, it made less power then in a car like a Mustang because of the size limitations on building a set of headers long enough to have a set of working collectors.
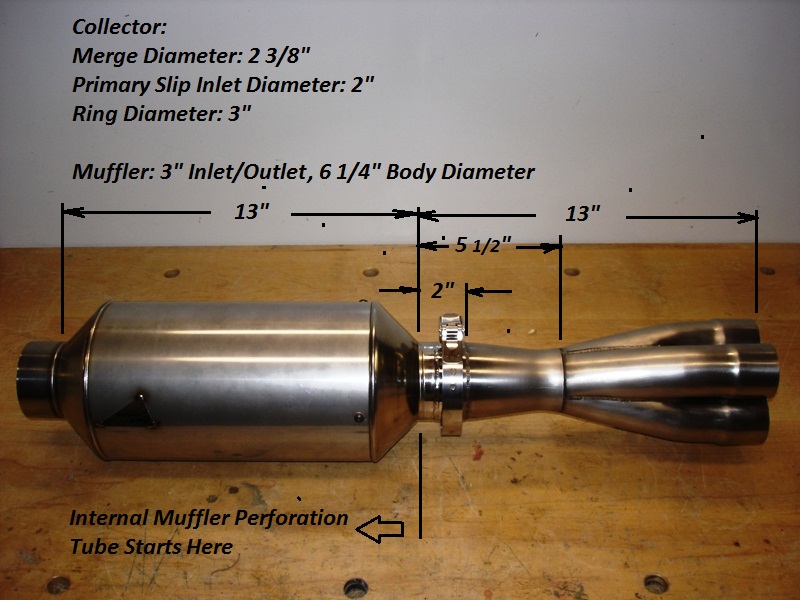
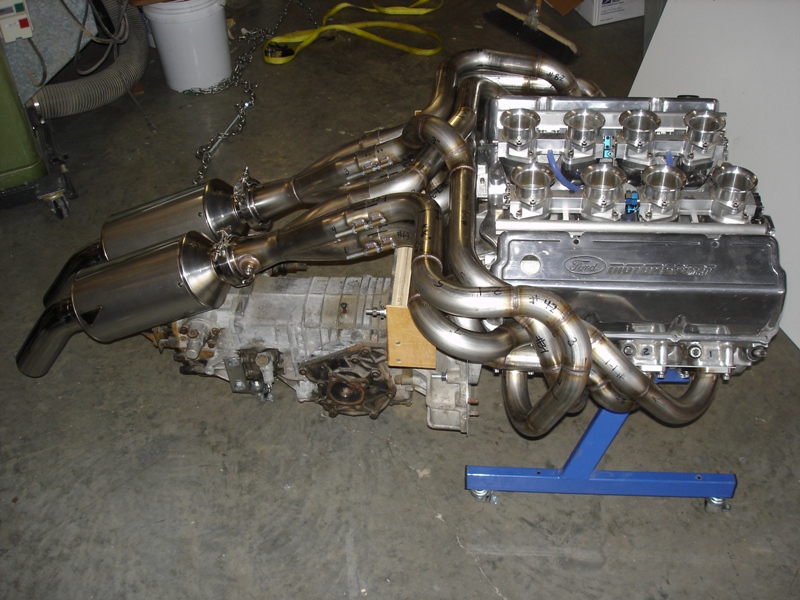
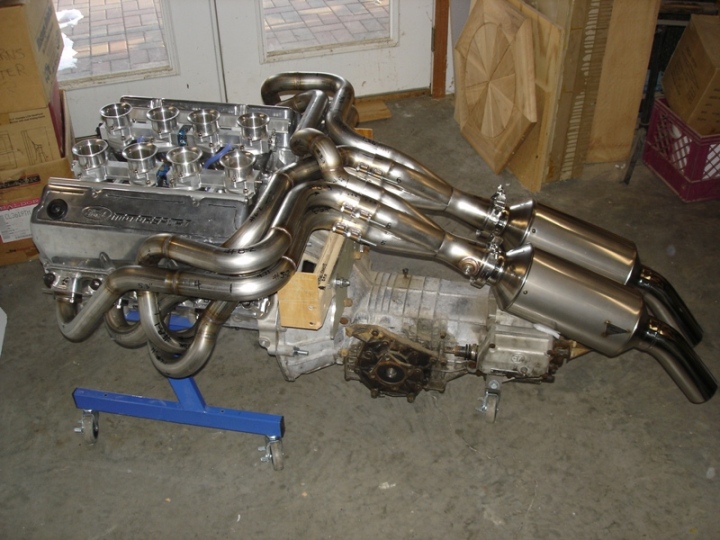
There you have to go back and use the original Ford racing recommendations of a 2" primary tube, 36" long primaries, with a 3-1/2" collector 6 to 9" long (tunable) for maximum power.
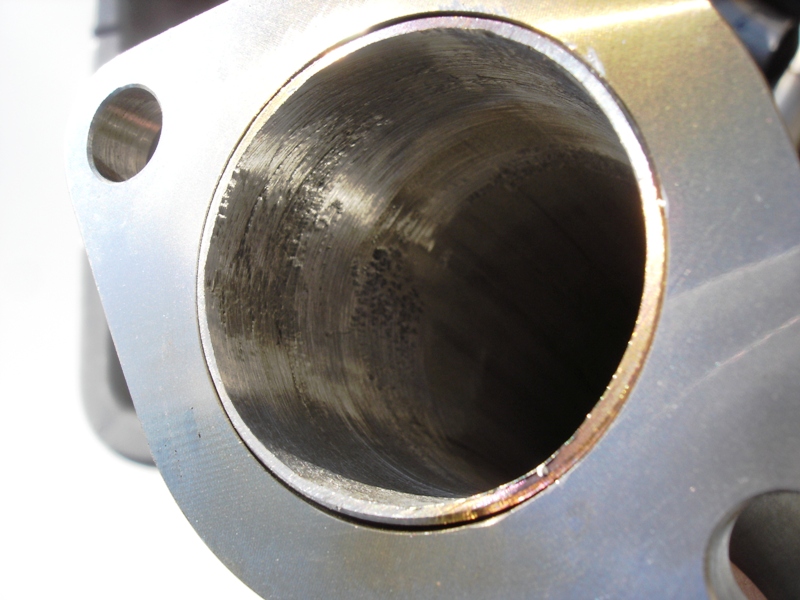
The inside diameter of the exhaust primary should be about equal to the outside diameter of the exhaust valve, which is where the 2" primary tube size came from.
That may help compensate for "frictional losses" within the header? I doubt that these 180 headers are suffering much at all?
I have never seen a set of "under" car headers in a Pantera built close to those dimensions. They just won't fit with any kind of a muffler system?
Sure the harmonics are involved in this. You can always hear the difference in the harmonics of the exhausts on the race track. The cars that have noticeable more power have a higher pitched sound to the exhausts.
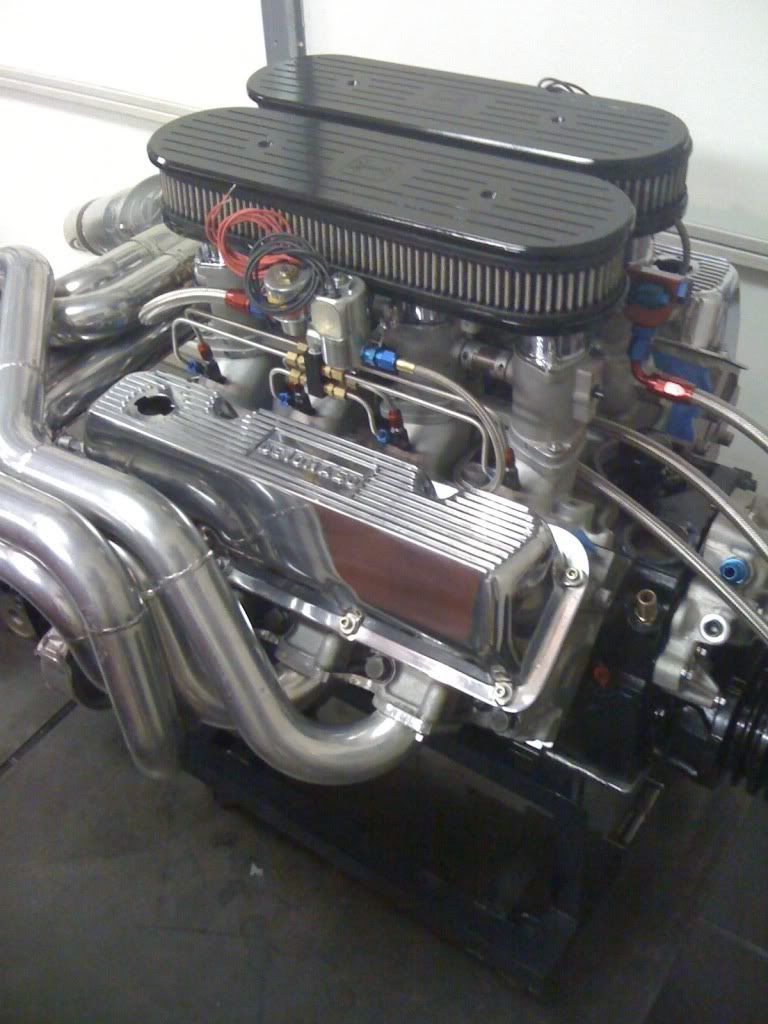
I think of it as similar to a trombone where the musician operates the slide to achieve the different notes. As a header builder, you are looking for a certain note.
Kelly's headers are a close attempt at maximizing all of these considerations and will no doubt play a mesmerizing concerto.


")
")
: 8MA670 /CORVETTE")


