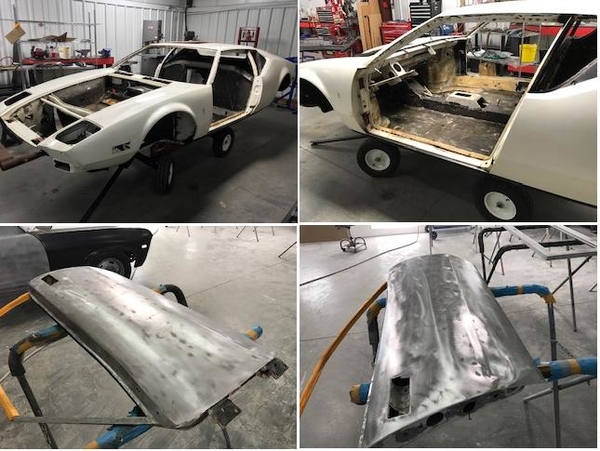
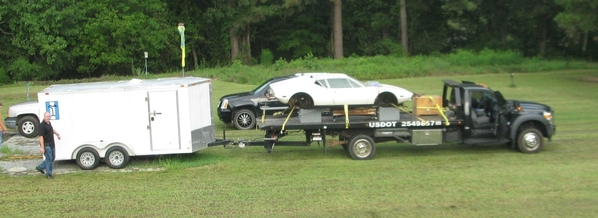
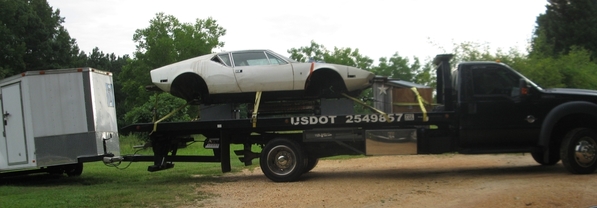
After 35 plus years, the shell of 5177 was rolled from its shed and is on its way to GunnerZ along with a trailer of parts.
The Owner and a couple employees drove 4 hours early this morning and loaded 5177 for the return trip to the shop.


Replies sorted oldest to newest
Another rescue begins. Well done
Congrats! That's a big step!
Looks cool with that DT trailer!
Rocky
Hope you'll share progress reports!
Awesome!
That's great news!
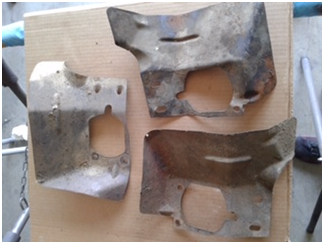
They don’t look like pantera parts. Maybe they’re from his tractor.
They might be left over from your Spitfire, or your TR-6.... I haven't seen anything like them.
Rocky
as for those 3 pieces, I am wondering if the tech doing the inventory threw them in as a test ![]()
Just knowing it is no longer under my shed feels better.
What color are you thinking of painting it?
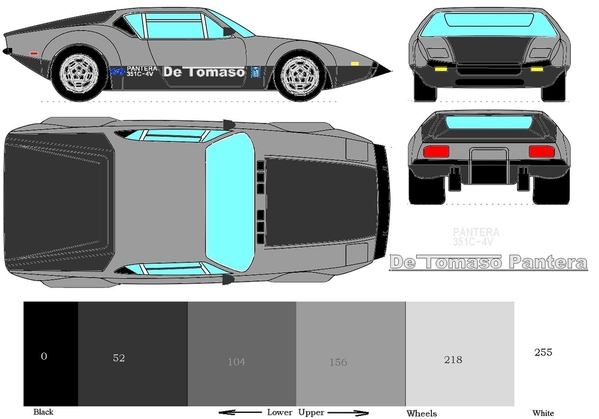
I want a driver. the paint selected for ease of repair in the the future, hopefully from Ford colors.
those colors are to be in the GT Scheme of "Shades of Grey"! the upper being near silver and the lower a near black. with a decal in the lower section.
As far as the build, It will be near original with the exception of modern AC!
The builder and I disagree on one item so far. I requested use original harness and modify it for the changes I want. Where he suggested and wants to use a modern harness.
Comments requested as to whether or not.
another disecion is whether to go back with L bumpers or fill in the body holes and go with the polish stainless I purchased. While I think the look is better, the ideal that they are just bolt on trim is concerning. the Builder wants to see what he can do to make them functionaly as bumpers.
Again, comments requested
I am sure there were be lots more request for comments as the work progresses

Great to see they jumped right in with the stripping. New wiring is great, but costly as it is time consuming. Maybe, if he will commit to a price for that part of the job, it could help you decide. I cannot imagine making the body fit bumpers Functional in any way, but they look a lot better than the 74 bulk. These bumper are the Amerisport .

I am seeking ideals on what items need, or could be done to the body when it is on the rotisserie.
That's great that the shop you chose is making such good progress. At this pace there is no doubt your car will be finished before mine.
My first thought is to address all drain holes and add the drain holes others with more P-car knowledge have suggested in previous posts. Next I would inspect the undercarriage for any hidden rust pockets and its integrity. Make sure that all tabs, brackets and anything else is there and the way you want it. It's easy to overlook the detail and later have to do some grinding and welding after paint.
I would have a serious discussion with your body shop professional about hidden areas and rust proofing or paint or whatever is appropriate to keep you car from rusting later on. It really is sad to see a beautifully painted car have rust poke through in a year or two after the "restoration".
Another thing to check for is damage. It's not unusual for low sports cars to have undercarriage damage from running over something. Perfect on top, dented on the bottom.
I'm only about half hour from your body shop. I would be happy to meet you there during one of your visits to meet and chat a bit.
thanks Mike, that is what I am looking for.
just to mention, I didn't chose this shop, the Owner heard of my situation from his family member that does some grounds work for me. So that is why a shop not that familair with Panteras is doing my car.
I sure wish I could met you there, but I doubt if I will even go to the shop. I have just emailed the Owner about his policy on visitors, so I need to here back form Him first, but having someone checkup on the car would be GREAT!
Here is the initial list I gave Him about what I wanted. while I think it is just an outline for farther discussions, he said that was more than most the car owners give him
That is quite a list.
Hi JFB -
(Not having read your list - yet...)
My suggestions might be:
1. Reinforce all Jack Points, especially the one at the back of the car (the box beam that terminates the frame). There is a standard size rectangular bar that fits right in there, see one of the early pages of my 5357 thread.
- JFFR reinforced his forward jack points, and tied these into a stiffening system of his own design to provide a stiffer frame, without the wacky stiffening kit that takes up the room in the luggage compartments.
2. Seam weld the car, at least in areas that supply structural stiffness. This can be a big project, but your car is in the state where it can be done.
3. Improve / strengthen suspension mounting points - like "Push1267" did on his Group 4 car over there in Denmark.
4. Check the areas of the car in front of the engine compartment bulkhead on either side. There is a big hole where debris can get in on either side of the engine bay front bulkhead, and the debris lays right agains a single thickness body panel.
5. Drop the battery below the front trunk onto the steering rack - you fabricate a tray and a door for it.
Rocky
thanks,
here is Push's post
https://pantera.infopop.cc/top...ilding-a-gr4-replica
I'll be studing that one for a WHILE, there is a LOT of info there. Given "I" will not be driving hard, need to weight cost to have it done versus benifit
Nothing to report nor new photo's to share. the biggest activity (as far as I know) has been the transfer of funds to cover man-hours for paint removal and some body work!
the recent communication was asking about frame modes for jack plates. I wrote the following notes and emailed to shop.
...That's quite a Plan! I Think You Covered Everything. Gonna take Awhile. Good-Luck with it! It Will Be Fun!
To add a little Note...on the '74 Pantera, the Factory Fuel Gauge, Already has a RED Light Built Into the Face. It Comes ON at Aprox. 30 Miles of Fuel, Left. 'About' 2 Gallons, by My Experience.
MJ
thanks MJ for reviewing my INITIAL plan. My agreement with Billy (paint shop owner) is that nothing is really a MUST, so I listen a lot to what He suggest.
As for the details of the dash/instrument panel, I've had some new thoughts, but holding off in providing to him until he gets there in the rebuild. instead of trying to add warning lamps near the guage, maybe put them between the tach and speedo, where the original "brake" warning lamps were. Not sure about keeping brake warning anyway
I am thinking of moving the wiper switches to under the window switches in the center panel. Deleting the "courtesy lamp" and "manual radiator fan" switches. I would also expect the HVAC fan switch will be part of the modern controls that will be on the passenger side of the center section
While it's on a rotisserie, now is the time to address strengthening the chassis. The following are good to do even for a street driven car, otherwise you will experience cracking in your new paint at all the usual locations - base of the front A-pillers adjacent to the windshield, y-area curve at the top of the rear quarter decklid opening, and outside lower corners at the tail lights...
Seam-weld the entire car. Once stripped, you'll see in the engine bay that all the panels are merely spot welded together. Many have found when restoring their cars that a number or the spot welds have let go over the years, further contributing to body flex and cracking. Welding these seams will significantly strengthen the entire chassis/structure of the car.
Also, weld in 18 gauge doublers at the key locations where the body tends to crack...
More info on this thread: https://pantera.infopop.cc/top...783#1598208420462783
I've been told that Dennis Qualla in Colorado sells the aforementioned body doublers. Other vendors may have them as well.
Regardless of whether you intend to drive the car hard or not, simply going in and out of driveways subjects the car to substantial body twist/flex and will lead to cracking. These mods help prevent that.
Anyway, keep the pics and updates coming!
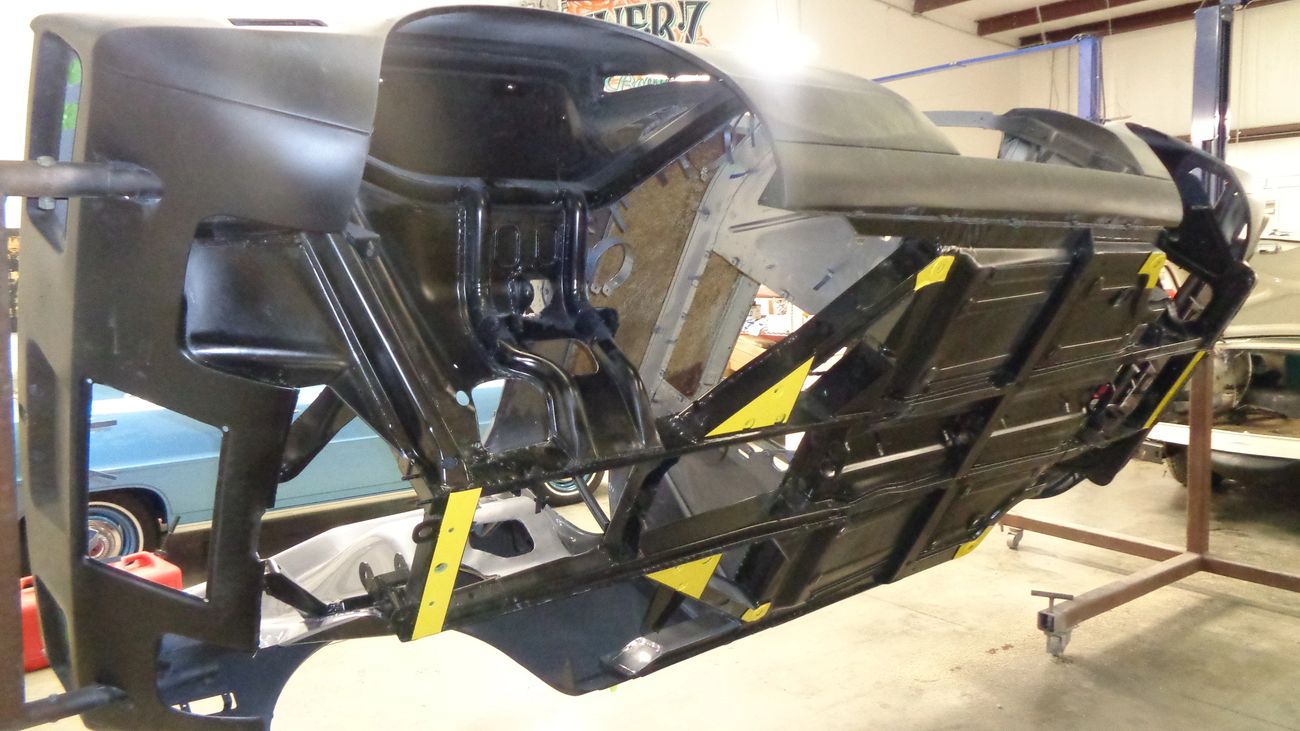
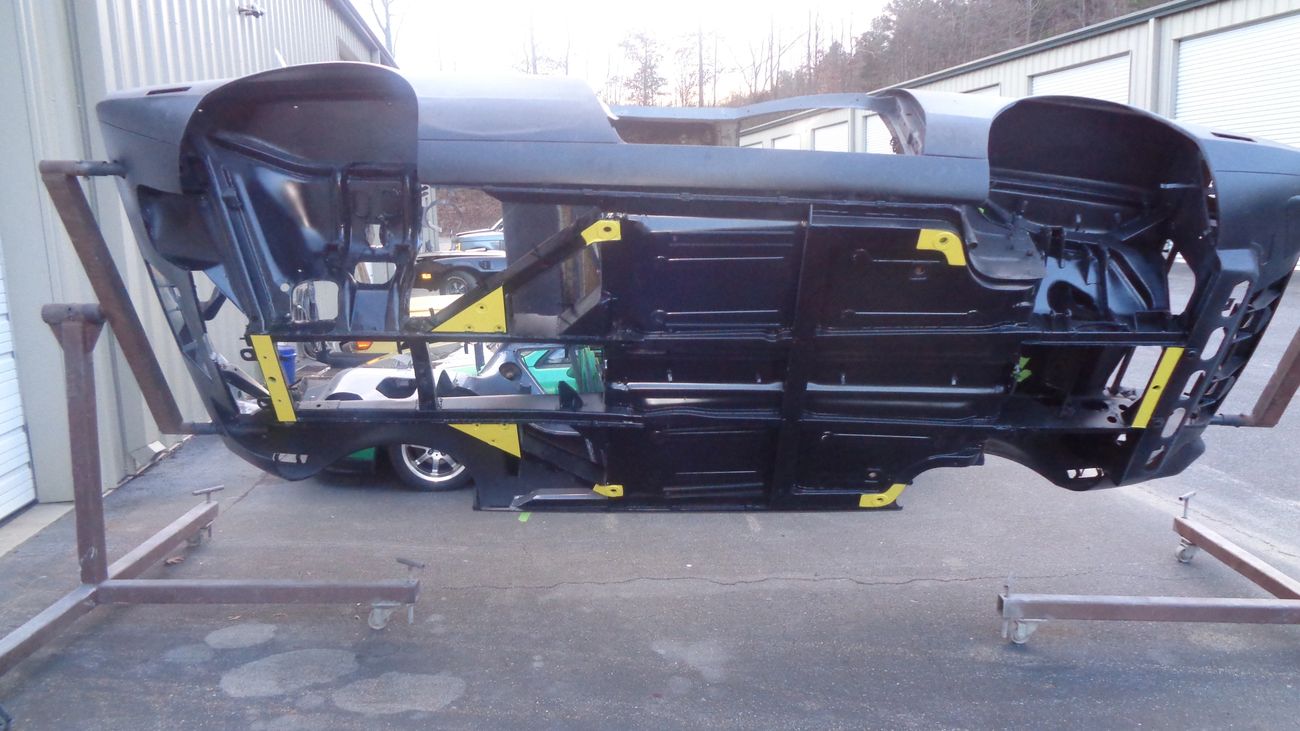
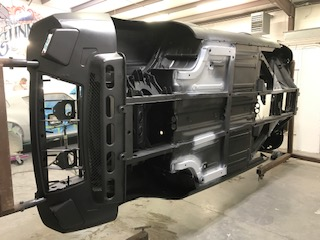
update
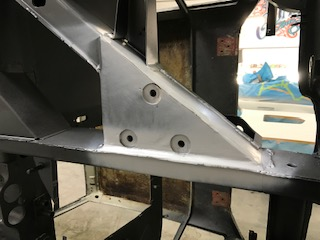
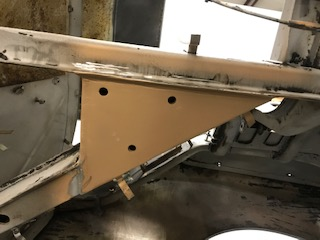
the seams have been stitch welded and the "jacking plates" installed
a floor jack plate across the rear cross member (will be drilled in the center for the tire jack peg)
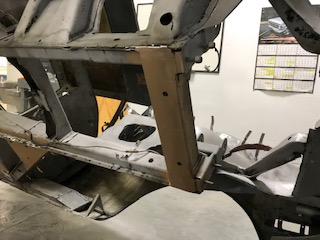
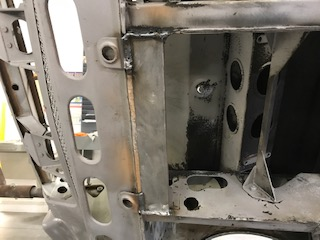
Not sure about the rear post jack arm position under the motor mounts
the center frame tire jack position
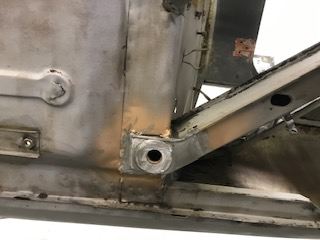
the front frame tire and post jack arm position
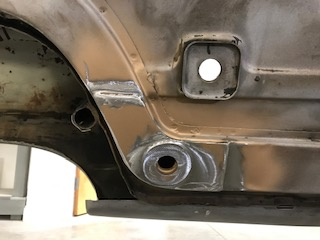
and added a front frame floor jack position (also will be drilled for tire jack plug)


That looks good, Joe -
I use that front jack point a lot - I use a 2x4 that fits precisely in there, I would love to have a permanent jack point like you've now got.
I don't know if I'd waste (much) time drilling the front or rear to accept the hand crank jack - If you're at home, you use your floor jack, and on the road, you pull out your AAA card!
Rocky
So the body was good, without rust?
What's next?
Looking good JFB, I agree with Garth 100% on the extra plates on the tail lamp outer edges and tops of the roof B pillars. Mine all cracked back after a few years.
So any pictures of the reinforcements around tail light corners? I'd like to see how they are located.
transsami posted:So any pictures of the reinforcements around tail light corners? I'd like to see how they are located.
Me Too! or even a marked up photo on exactly where they go
Here are a few other links on the subject...
https://pantera.infopop.cc/topic/body-supports
https://pantera.infopop.cc/topic/body-reinforcements
Also, you may want to reach out to Mike Drew for some pics...
Thank you for the links.
What I'm looking for is that where are those supposed to be welded. I don't see any possible way to do it from the inside. So are they welded on the outside and just bondoed over?
-Sami
Love it. Cat on the rotisserie for Christmas.
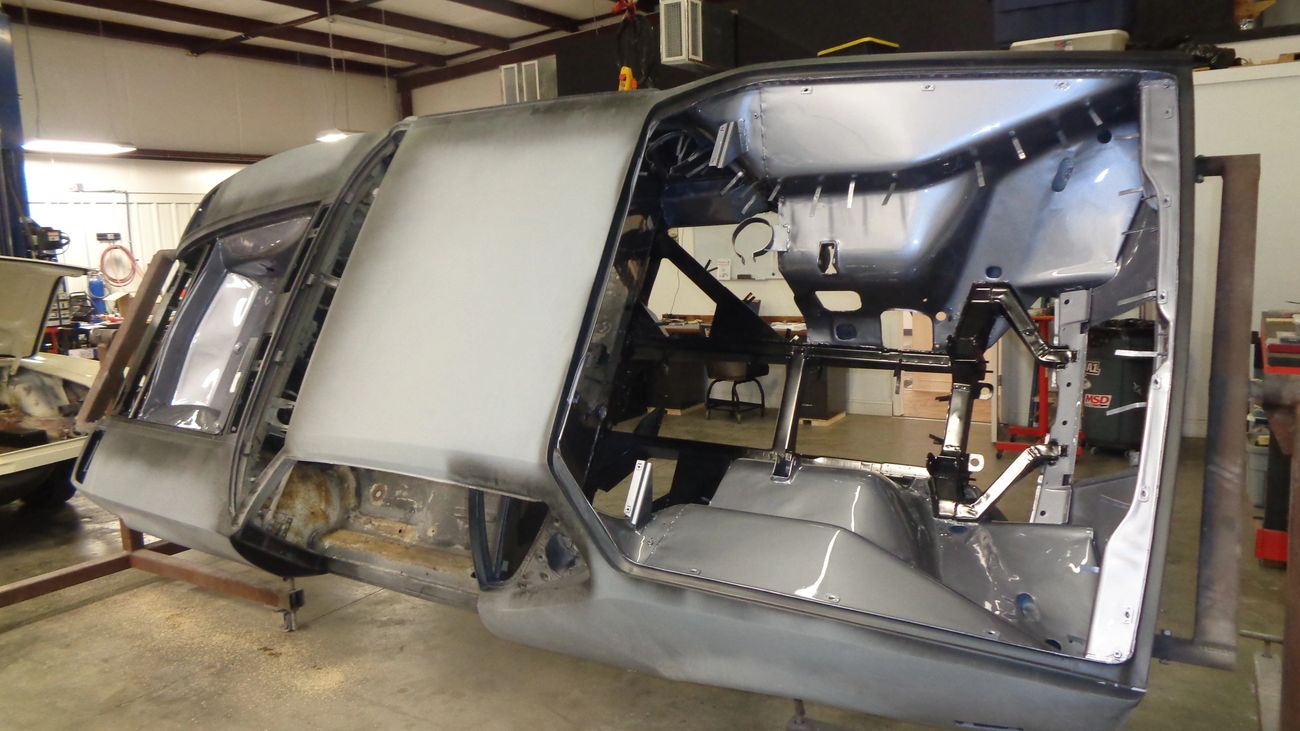
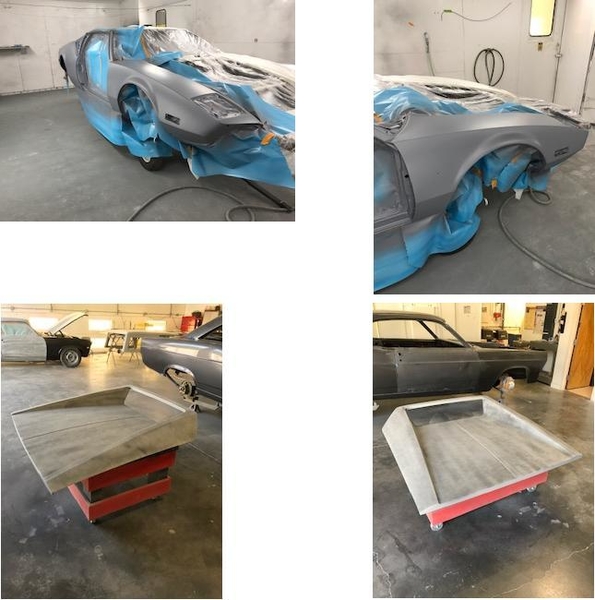
after Holidays and shop vacation, we had an update call today.
Big thing was chosen paint. Shop had mailed me several painted "shell" based upon color I tried to describe. We both decided on a silver called "Forged Silver Metalic" and a near black called "Phantom Grey Metalic"
My engine builder seems like he will be a hold up.
an upcoming item we discussed was some changes to the dash layout I would like. that is mainly put the wiper/washer in the center console, use the right side center console for "vintage air" control and add idiot lamps for oil pressure and coolant temperture. I don't see a need for brake warning.


some update pics